General

Principal Software Engineer @ Just Eat Takeaway. iOS Infrastructure Engineer. Based in London.
How to Implement a Decentralised CLI Tool Manager
- CLI manager
- tool
- executable
- manager
- swift
- cli
A design to implement a simple, generic and decentralised manager for CLI tools from the perspective of a Swift dev.
SPONSORED Based on this article, I've published Luca! A lightweight decentralised tool manager for macOS to manage project-specific tool environments. 👶 Check it out: luca.tools Overview It's common for iOS teams to rely on various CLI tools such as SwiftLint, Tuist, and Fastlane. These tools are often installed in different ways. The most common way is to use Homebrew, which is known to lack version pinning and, as Pedro puts it: Homebrew is not able to install and activate multiple versions of the same tool I also fundamentally dislike the tap system for installing dependencies from third-party repositories. Although I don't have concrete data, I feel that most development teams profoundly dislike Homebrew when used beyond the simple installation of individual tools from the command line and the brew taps system is cumbersome and bizarre enough to often discourage developers from using it. Alternatives to manage sets of CLI tools that got traction in the past couple of years are Mint and Mise. As Pedro again says in his article about Mise: The first and most core feature of Mise is the ability to install and activate dev tools. Note that we say "activate" because, unlike Homebrew, Mise differentiates between installing a tool and making a specific version of it available. While beyond the scope of this article, I recommend a great article about installing Swift executables from source with Mise by Natan Rolnik. In this article I describe a CLI tool manager very similar to what I've implemented for my team. I'll simply call it "ToolManager". The tool is designed to: Support installing any external CLI tool distributed in zip archives Support activating specific versions per project Be decentralised (requiring no registry) I believe the decentralisation is an interesting aspect and makes the tool reusable in any development environment. Also, differently from the design of mise and mint, ToolManager doesn't build from source and rather relies on pre-built executables. In the age of GenAI, it's more important than ever to develop critical thinking and learn how to solve problems. For this reason, I won't show the implementation of ToolManager, as it's more important to understand how it's meant to work. The code you'll see in this article supports the overarching design, not the nitty-gritty details of how ToolManager's commands are implemented. If, by the end of the article, you understand how the system should work and are interested in implementing it (perhaps using GenAI), you should be able to convert the design to code fairly easily—hopefully, without losing the joy of coding. I myself am considering implementing ToolManager as an open source project later, as I believe it might be very helpful to many teams, just as its incarnation was (and continues to be) for the platform team at JET. There doesn't seem to be an existing tool with the design described in this article. A different title could have reasonably placed this article in "The easiest X" "series" (1, 2, 3, 4), if I may say so. Design The point here is to learn what implementing a tool manager entails. I'll therefore describe the MVP of ToolManager, leaving out details that would make the design too straightforward to implement. The tool itself is a CLI and it's reasonably implemented in Swift using ArgumentParser like all modern Swift CLI tools are. In its simplest form, ToolManager exposes 3 commands: install: download and installs the tools defined in a spec file (Toolfile.yml) at ~/.toolManager/tools optionally validating the checksum creates symlinks to the installed versions at $(PWD)/.toolManager/active uninstall: clears the entire or partial content of ~/.toolManager/tools clears the content of $(PWD)/.toolManager/active version: returns the version of the tool The install commands allows to specify the location of the spec file using the --spec flag, which defaults to Toolfile.yml in the current directory. The installation of ToolManager should be done in the most raw way, i.e. via a remote script. It'd be quite laughable to rely on Brew, wouldn't it? This practice is commonly used by a variety of tools, for example originally by Tuist (before the introduction of Mise) and... you guessed it... by Brew. We'll see below a basic script to achieve so that you could host on something lik AWS S3 with the desired public permissions. The installation command would be: curl -Ls 'https://my-bucket.s3.eu-west-1.amazonaws.com/install_toolmanager.sh' | bash The version of ToolManager must be defined in the .toolmanager-version file in order for the installation script of the repo to work: echo "1.2.0" > .toolmanager-version ToolManager manages versions of CLI tools but it's not in the business of managing its own versions. Back in the day, Tuist used to use tuistenv to solve this problem. I simply avoid it and have single version of ToolManager available at /usr/local/bin/ that the installation script overrides with the version defined for the project. The version command is used by the script to decide if a download is needed. There will be only one version of ToolManager in the system at a given time, and that's absolutely OK. At this point, it's time to show an example of installation script: #!/bin/bash set -euo pipefail # Fail fast if essential commands are missing. command -v curl >/dev/null || { echo "curl not found, please install it."; exit 1; } command -v unzip >/dev/null || { echo "unzip not found, please install it."; exit 1; } readonly EXEC_NAME="ToolManager" readonly INSTALL_DIR="/usr/local/bin" readonly EXEC_PATH="$INSTALL_DIR/$EXEC_NAME" readonly HOOK_DIR="$HOME/.toolManager" readonly REQUIRED_VERSION=$(cat .toolmanager-version) # Exit if the version file is missing or empty. if [[ -z "$REQUIRED_VERSION" ]]; then echo "Error: .toolmanager-version not found or is empty." >&2 exit 1 fi # Exit if the tool is already installed and up to date. if [[ -f "$EXEC_PATH" ]] && [[ "$($EXEC_PATH version)" == "$REQUIRED_VERSION" ]]; then echo "$EXEC_NAME version $REQUIRED_VERSION is already installed." exit 0 fi # Determine OS and the corresponding zip filename. case "$(uname -s)" in Darwin) ZIP_FILENAME="$EXEC_NAME-macOS.zip" ;; Linux) ZIP_FILENAME="$EXEC_NAME-Linux.zip" ;; *) echo "Unsupported OS: $(uname -s)" >&2; exit 1 ;; esac # Download and install in a temporary directory. TMP_DIR=$(mktemp -d) trap 'rm -rf "$TMP_DIR"' EXIT # Ensure cleanup on script exit. echo "Downloading $EXEC_NAME ($REQUIRED_VERSION)..." DOWNLOAD_URL="https://github.com/MyOrg/$EXEC_NAME/releases/download/$REQUIRED_VERSION/$ZIP_FILENAME" curl -LSsf --output "$TMP_DIR/$ZIP_FILENAME" "$DOWNLOAD_URL" unzip -o -qq "$TMP_DIR/$ZIP_FILENAME" -d "$TMP_DIR" # Use sudo only when the install directory is not writable. SUDO_CMD="" if [[ ! -w "$INSTALL_DIR" ]]; then SUDO_CMD="sudo" fi echo "Installing $EXEC_NAME to $INSTALL_DIR..." $SUDO_CMD mkdir -p "$INSTALL_DIR" $SUDO_CMD mv "$TMP_DIR/$EXEC_NAME" "$EXEC_PATH" $SUDO_CMD chmod +x "$EXEC_PATH" # Download and source the shell hook to complete installation. echo "Installing shell hook..." mkdir -p "$HOOK_DIR" curl -LSsf --output "$HOOK_DIR/shell_hook.sh" "https://my-bucket.s3.eu-west-1.amazonaws.com/shell_hook.sh" # shellcheck source=/dev/null source "$HOOK_DIR/shell_hook.sh" echo "Installation complete." You might have noticed that: the required version of ToolManager (defined in .toolmanager-version) is downloaded from the release from the corresponding GitHub repository if missing locally. The ToolManager repo should have a GHA workflow in place to build, archive and upload the version. a shell_hook script is downloaded and run to insert the following line in the shell profile: [[ -s "$HOME/.toolManager/shell_hook.sh" ]] && source "$HOME/.toolManager/shell_hook.sh". This allows switching location in the terminal and loading the active tools for the current project. Showing an example of shell_hook.sh is in order: #!/bin/bash # Overrides 'cd' to update PATH when entering a directory with a local tool setup. # Add the project-specific bin directory to PATH if it exists. update_tool_path() { local tool_bin_dir="$PWD/.toolManager/active" if [[ -d "$tool_bin_dir" ]]; then export PATH="$tool_bin_dir:$PATH" fi } # Redefine 'cd' to trigger the path update after changing directories. cd() { builtin cd "$@" || return update_tool_path } # --- Installation Logic --- # The following function only runs when this script is sourced by an installer. install_hook() { local rc_file case "${SHELL##*/}" in bash) rc_file="$HOME/.bashrc" ;; zsh) rc_file="$HOME/.zshrc" ;; *) echo "Unsupported shell for hook installation: $SHELL" >&2 return 1 ;; esac # The line to add to the shell's startup file. local hook_line="[[ -s \"$HOME/.toolManager/shell_hook.sh\" ]] && source \"$HOME/.toolManager/shell_hook.sh\"" # Add the hook if it's not already present. if ! grep -Fxq "$hook_line" "$rc_file" &>/dev/null; then printf "\n%s\n" "$hook_line" >> "$rc_file" echo "Shell hook installed in $rc_file. Restart your shell to apply changes." fi } # This check ensures 'install_hook' only runs when sourced, not when executed. if [[ "${BASH_SOURCE[0]}" != "$0" ]]; then install_hook fi Now that we have a working installation of ToolManager, let define our Toolfile.yml in our project folder: --- tools: - name: PackageGenerator binaryPath: PackageGenerator version: 3.3.0 zipUrl: https://github.com/justeattakeaway/PackageGenerator/releases/download/3.3.0/PackageGenerator-macOS.zip - name: SwiftLint binaryPath: swiftlint version: 0.57.0 zipUrl: https://github.com/realm/SwiftLint/releases/download/0.58.2/portable_swiftlint.zip - name: ToggleGen binaryPath: ToggleGen version: 1.0.0 zipUrl: https://github.com/TogglesPlatform/ToggleGen/releases/download/1.0.0/ToggleGen-macOS-universal-binary.zip - name: Tuist binaryPath: tuist version: 4.48.0 zipUrl: https://github.com/tuist/tuist/releases/download/4.54.3/tuist.zip - name: Sourcery binaryPath: bin/sourcery version: 2.2.5 zipUrl: https://github.com/krzysztofzablocki/Sourcery/releases/download/2.2.5/sourcery-2.2.5.zip The install command of ToolManager loads the Toolfile at the root of the repo and for each defined dependency, performs the following: checks if the version of the dependency already exists on the machine if it doesn’t exist, downloads it, unzips it, and places the binary at ~/.toolManager/tools/ (e.g. ~/.toolManager/tools/PackageGenerator/3.3.0/PackageGenerator) creates a symlink to the binary in the project directory from .toolManager/active (e.g. .toolManager/active/PackageGenerator) After running ToolManager install (or ToolManager install --spec=Toolfile.yml), ToolManager should produce the following structure ~ tree ~/.toolManager/tools -L 2 ├── PackageGenerator │ └── 3.3.0 ├── Sourcery │ └── 2.2.5 ├── SwiftLint │ └── 0.57.0 ├── ToggleGen │ └── 1.0.0 └── Tuist └── 4.48.0 and from the project folder ls -la .toolManager/active <redacted> PackageGenerator -> /Users/alberto/.toolManager/tools/PackageGenerator/3.3.0/PackageGenerator <redacted> Sourcery -> /Users/alberto/.toolManager/tools/Sourcery/2.2.5/Sourcery <redacted> SwiftLint -> /Users/alberto/.toolManager/tools/SwiftLint/0.57.0/SwiftLint <redacted> ToggleGen -> /Users/alberto/.toolManager/tools/ToggleGen/1.0.0/ToggleGen <redacted> Tuist -> /Users/alberto/.toolManager/tools/Tuist/4.48.0/Tuist Bumping the versions of some tools in the Toolfile, for example SwiftLint and Tuist, and re-running the install command, should result in the following: ~ tree ~/.toolManager/tools -L 2 ├── PackageGenerator │ └── 3.3.0 ├── Sourcery │ └── 2.2.5 ├── SwiftLint │ ├── 0.57.0 │ └── 0.58.2 ├── ToggleGen │ └── 1.0.0 └── Tuist ├── 4.48.0 └── 4.54.3 ls -la .toolManager/active <redacted> PackageGenerator -> /Users/alberto/.toolManager/tools/PackageGenerator/3.3.0/PackageGenerator <redacted> Sourcery -> /Users/alberto/.toolManager/tools/Sourcery/2.2.5/Sourcery <redacted> SwiftLint -> /Users/alberto/.toolManager/tools/SwiftLint/0.58.2/SwiftLint <redacted> ToggleGen -> /Users/alberto/.toolManager/tools/ToggleGen/1.0.0/ToggleGen <redacted> Tuist -> /Users/alberto/.toolManager/tools/Tuist/4.54.3/Tuist CI Setup On CI, the setup is quite simple. It involves 2 steps: install ToolManager install the tools The commands can be wrapped in GitHub composite actions: name: Install ToolManager runs: using: composite steps: - name: Install ToolManager shell: bash run: curl -Ls 'https://my-bucket.s3.eu-west-1.amazonaws.com/install_toolmanager.sh' | bash name: Install tools inputs: spec: description: The name of the ToolManager spec file required: false default: Toolfile.yml runs: using: composite steps: - name: Install tools shell: bash run: | ToolManager install --spec=${{ inputs.spec }} echo "$PWD/.toolManager/active" >> $GITHUB_PATH simply used in workflows: - name: Install ToolManager uses: ./.github/actions/install-toolmanager - name: Install tools uses: ./.github/actions/install-tools with: spec: Toolfile.yml CLI tools conformance ToolManager can install tools that are made available in zip files, without the need of implementing any particular spec. Depending on the CLI tool, the executable can be at the root of the zip archive or in a subfolder. Sourcery for example places the executable in the bin folder. - name: Sourcery binaryPath: bin/sourcery version: 2.2.5 zipUrl: https://github.com/krzysztofzablocki/Sourcery/releases/download/2.2.5/sourcery-2.2.5.zip GitHub releases are great to host releases as zip files and that's all we need. Ideally, one should decorate the repositories with appropriate release workflows. Following is a simple example that builds a macOS binary. It could be extended to also create a Linux binary. name: Publish Release on: push: tags: - '*' env: CLI_NAME: my-awesome-cli-tool permissions: contents: write jobs: build-and-archive: name: Build and Archive macOS Binary runs-on: macos-latest steps: - name: Checkout repository uses: actions/checkout@v4 - name: Setup Xcode uses: maxim-lobanov/setup-xcode@v1 with: xcode-version: '16.4' - name: Build universal binary run: swift build -c release --arch arm64 --arch x86_64 - name: Archive the binary run: | cd .build/apple/Products/Release/ zip -r "${{ env.CLI_NAME }}-macOS.zip" "${{ env.CLI_NAME }}" - name: Upload artifact for release uses: actions/upload-artifact@v4 with: name: cli-artifact path: .build/apple/Products/Release/${{ env.CLI_NAME }}-macOS.zip create-release: name: Create GitHub Release needs: [build-and-archive] runs-on: ubuntu-latest steps: - name: Download CLI artifact uses: actions/download-artifact@v4 with: name: cli-artifact - name: Create Release and Upload Asset uses: softprops/action-gh-release@v2 with: files: "${{ env.CLI_NAME }}-macOS.zip" A note on version pinning Dependency management systems tend to use a lock file (like Package.resolved in Swift Package manager, Podfile.lock in the old days of CocoaPods, yarn.lock/package-lock.json in JavaScript, etc.). The benefits of using a lock file are mainly 2: Reproducibility It locks the exact versions (including transitive dependencies) so that every team member, CI server, or production environment installs the same versions. Faster installs Dependency managers can skip version resolution if a lock file is present, using it directly to fetch the exact versions, improving speed. We can remove the need for lock files if we pin the versions in the spec (the file defining the tools). If version range operators like the CocoaPods' optimistic operator ~> and the SPM's .upToNextMajor and similar one didn't exist, usages of lock files would lose its utility. While useful, lock files are generally annoying and can create that odd feeling of seeing unexpected updates in pull requests made by others. ToolManager doesn't use a lock file; instead, it requires teams to pin their tools' versions, which I strongly believe is a good practice. This approach comes at the cost of teams having to keep an eye out for patch releases and not leaving updates to the machine, which risks pulling in dependencies that don't respect Semantic Versioning (SemVer). Support for different architectures This design allows to support different architectures. Some CI workflows might only need a Linux runner to reduce the burden on precious macOS instances. Both macOS and Linux can be supported with individual Toolfile that can be specified when running the install command. # on macOS ToolManager install --spec=Toolfile_macOS # on Linux ToolManager install --spec=Toolfile_Linux Conclusion The design described in this article powers the solution implemented at JET and has served our teams successfully since October 2023. JET has always preferred to implement in-house solutions where possible and sensible, and I can say that moving away from Homebrew was a blessing. With this design, the work usually done by a package manager and a central spec repository is shifted to individual components that are only required to publish releases in zip archives, ideally via a release workflow. By decentralising and requiring version pinning, we made ToolManager a simple yet powerful system for managing the installation of CLI tools.

How to setup a Swift Package Registry in Artifactory
- swift
- registry
- artifactory
- package
A quick guide to setting up a Swift Package Registry with Artifactory to speed up builds and streamline dependency management.
Introduction It's very difficult to have GenAI not hallucinate when in comes to Swift Package Registry. No surprise there: the feature is definitely niche, has not been vastly adopted and there's a lack of examples online. As Dave put it, Swift Package Registries had an even rockier start compared to SPM. I've recently implemented a Swift Package Registry on Artifactory for my team and I thought of summarising my experience here since it's still fresh in my head. While some details are left out, the happy path should be covered. I hope with this article to help you all indirectly by providing more material to the LLMs overlords. Problem The main problem that led us to look into Swift Package Registry is due to SPM deep-cloning entire Git repositories for each dependency, which became time-consuming. Our CI jobs took a few minutes just to pull all the Swift packages. For dependencies with very large repositories, such as SendbirdUIKit (which is more than 2GB), one could rely on pre-compiled XCFrameworks as a workaround. Airbnb provides a workaround via the SPM-specific repo for Lottie. A Swift Registry allows to serve dependencies as zip artifacts containing only the required revision, avoiding the deep clone of the git repositories. What is a Swift Package Registry? A Swift Package Registry is a server that stores and vends Swift packages by implementing SE-0292 and the corresponding specification. Instead of relying on Git repositories to source our dependencies, we can use a registry to download them as versioned archives (zip files). swift-package-manager/Documentation/PackageRegistry/PackageRegistryUsage.md at main · swiftlang/swift-package-manager The Package Manager for the Swift Programming Language - swiftlang/swift-package-manager GitHubswiftlang The primary advantages of using a Swift Package Registry are: Reduced CI/CD Pipeline Times: by fetching lightweight zip archives from the registry rather than cloning the entire repositories from GitHub. Improved Developer Machine Performance: the same time savings on CI are reflected on the developers' machines during dependency resolution. Availability: by hosting a registry, teams are no longer dependent on the availability of external source control systems like GitHub, but rather on internal ones (for example, self-hosted Artifactory). Security: injecting vulnerabilities in popular open-source projects is known as a supply chain attack and has become increasingly popular in recent years. A registry allows to adopt a process to trust the sources published on it. Platforms Apple has accepted the Swift Registry specification and implemented support to interact with registries within SPM but has left the implementation of actual registries to third-party platforms. Apple is not in the business of providing a Swift Registry. The main platform having adopted Swift Registries is Artifactory. Artifactory, Your Swift Package Repository JFrog now offers the first and only Swift binary package repository, enabling developers to use JFrog Artifactory for resolving Swift dependencies instead of enterprise source control (Git) systems. JFroggiannit although AWS CodeArtifact, Cloudsmith and Tuist provide support too: New – Add Your Swift Packages to AWS CodeArtifact | Amazon Web Services Starting today, Swift developers who write code for Apple platforms (iOS, iPadOS, macOS, tvOS, watchOS, or visionOS) or for Swift applications running on the server side can use AWS CodeArtifact to securely store and retrieve their package dependencies. CodeArtifact integrates with standard developer tools such as Xcode, xcodebuild, and the Swift Package Manager (the swift […] Amazon Web ServicesSébastien Stormacq Private, secure, hosted Swift registry Cloudsmith offers secure, private Swift registries as a service, with cloud native performance. Book a demo today. Cloudsmith Announcing Tuist Registry We’re thrilled to announce the launch of the Tuist Registry – a new feature that optimizes the resolution of Swift packages in your projects. TuistMarek Fořt The benefits are usually appealing to teams with large apps, hence it's reasonable to believe that only big companies have looked into adopting a registry successfully. Artifactory Setup Let's assume a JFrog Artifactory to host our Swift Package Registry exists at https://packages.acme.com. Artifactory support local, remote, and virtual repositories but a realistic setup consists of only local and virtual repositories. Source: Artifactory Local Repositories are meant to be used for publishing dependencies from CI pipelines. Virtual Repositories are instead meant to be used for resolving (pulling) dependencies on both CI and the developers' machines. Remote repositories are not really relevant in a typical Swift Registry setup. Following the documentation at https://jfrog.com/help/r/jfrog-artifactory-documentation/set-up-a-swift-registry, let's create 2 repositories with the following names: local repository: swift-local virtual repository: swift-virtual Local Setup To pull dependencies from the Swift Package Registry, we need to configure the local environment. 1. Set the Registry URL First, we need to inform SPM about the existence of the registry. We can do this on a per-project basis or globally for the user account. From a package's root directory, run the following command. This will create a .swiftpm/configuration/registries.json file within your project folder. swift package-registry set "https://packages.acme.com/artifactory/api/swift/swift-virtual" The resulting registries.json file will look like this: { "authentication": {}, "registries": { "[default]": { "supportsAvailability": false, "url": "https://packages.acme.com/artifactory/api/swift/swift-virtual" } }, "version": 1 } To set the registry for all your projects, use the --global flag. swift package-registry set --global "https://packages.acme.com/artifactory/api/swift/swift-virtual" This will create the configuration file at ~/.swiftpm/configuration/registries.json. Xcode projects don't support project-level registries nor (in my experience) support scopes other than the default one (i.e. avoid using the --scope flag). 2. Authentication To pull packages, authenticating with Artifactory is usually required. It's reasonable though that your company allows all artifacts from Artifactory to be read without authentication as long as one is connected to the company VPN. In cases where authentication is required, SPM uses a .netrc file in the home directory to find credentials for remote servers. This file is a standard way to handle login information for various network protocols. Using a token generated from the Artifactory dashboard, the line to add to the .netrc file would be: machine packages.acme.com login <your_artifactory_username> password <your_artifactory_token> Alternatively, it's possible to log in using the swift package-registry login command. This command securely stores your token in the system's keychain. swift package-registry login "https://packages.acme.com/artifactory/api/swift/swift-virtual" \ --token <token> # or swift package-registry login "https://packages.acme.com/artifactory/api/swift/swift-virtual" \ --username <username> \ --password <token_treated_as_password> CI/CD Setup On CI, the setup is slightly different as the goals are: to resolve dependencies in CI/CD jobs to publish new package versions in CD jobs for both internal and external dependencies The steps described for the local setup are valid for the resolution on CI too. The interesting part here is how publishing is done. I will assume the usage of GitHub Actions. 1. Retrieving the Artifactory Token The JFrog CLI can be used via the setup-jfrog-cli action to authenticate using the most appropriate method. You might want to wrap the action in a custom composable one exporting the token as the output of a step: TOKEN=$(jf config export) echo "::add-mask::$TOKEN" echo "artifactory-token=$TOKEN">> "$GITHUB_OUTPUT" 2. Logging into the Registry The CI job must log in to the local repository (swift-local) to gain push permissions. The token retrieved in the previous step is used for this purpose. swift package-registry login \ "https://packages.acme.com/artifactory/api/swift/swift-local" \ --token ${{ steps.get-token.outputs.artifactory-token }} 3. Publishing Packages Swift Registry requires archives created with the swift package archive-source command from the dependency folder. E.g. swift package archive-source -o "Alamofire-5.10.2.zip" We could avoid creating the archive and instead download it directly from GitHub releases. curl -L -o Alamofire-5.10.1.zip \ https://github.com/Alamofire/Alamofire/archive/refs/tags/5.10.1.zip Uploading the archive can then be done by using the JFrog CLI that needs customization via the setup-jfrog-cli action. If going down this route, the upload command would be: jf rt upload Alamofire-5.10.1.zip \ https://packages.acme.com/artifactory/api/swift/swift-local/acme/Alamofire/Alamofire-5.10.1.zip There is a specific structure to respect: <REPOSITORY>/<SCOPE>/<NAME>/<NAME>-<VERSION>.zip which is the last part of the above URL: swift-local/acme/Alamofire/Alamofire-5.10.1.zip Too bad that using the steps above causes a downstream problem with SPM not being able to resolve the dependencies in the registry. I tried extensively and couldn't find the reason why SPM wouldn't be happy with how the packages were published. I might have missed something but eventually I necessarily had to switch to use the publish command. Using the swift package-registry publish command instead, doesn't present this issue hence it's the solution adopted in this workflow. swift package-registry publish acme.Alamofire 5.10.1 \ --url https://packages.acme.com/artifactory/api/swift/swift-local \ --scratch-directory $(mktemp -d) To verify the upload and indexing succeeded, check that the uploaded *.zip artifact is available and that the .swift exists (indication that the indexing has occurred). If the specific structure is not respected, the .swift folder wouldn't be generated. Consuming Packages from the Registry Packages The easiest and only documented way to consume a package from a registry is via a Package. In the Package.swift file, declare dependencies using the .package(id:from:) syntax to declare a registry-based dependency. The id is a combination of the scope and the package name. ... dependencies: [ .package(id: "acme.Alamofire", from: "5.10.1"), ], targets: [ .target( name: "MyApp", dependencies: [ .product(name: "Alamofire", package: "acme.Alamofire"), ] ), ... ] ) Run swift package resolve or simply build the Package in Xcode to pull the dependencies. You might bump into transitive dependencies (i.e. dependencies listed in the Package.swift files of the packages published on the registry) pointing to GitHub. In this case, it'd be great to instruct SPM to use the corresponding versions on the registry. The --replace-scm-with-registry flag is designed to work for the entire dependency graph, including transitive dependencies. The cornerstone of associating a registry-hosted package with its GitHub origin is the package-metadata.json file. This file allows to provide essential metadata about the packages at the time of publishing (the --metadata-path flag of the publish command defaults to package-metadata.json). Crucially, it includes a field to specify the source control repository URLs. When swift package resolve --replace-scm-with-registry is executed, SPM queries the configured registry. The registry then uses the information from the package-metadata.json to map the package identity to its corresponding GitHub URL, enabling a smooth and transparent resolution process. The metadata file must conform to the JSON schema defined in SE-0391. It is recommended to include all URL variations (e.g., SSH, HTTPS) for the same repository. E.g. { "repositoryURLs": [ "https://github.com/Alamofire/Alamofire", "https://github.com/Alamofire/Alamofire.git", "git@github.com:Alamofire/Alamofire.git" ] } Printing the dependencies should confirm the source of the dependencies: swift package show-dependencies --replace-scm-with-registry When loading a package with Xcode, the flag can be enabled via an environment variable in the scheme IDEPackageDependencySCMToRegistryTransformation=useRegistryIdentityAndSources Too bad that for packages, the schemes won't load until SPM completes the resolution hence running the following from the terminal would address the issue: defaults write com.apple.dt.Xcode IDEPackageDependencySCMToRegistryTransformation useRegistryIdentityAndSources that can be unset with: defaults delete com.apple.dt.Xcode IDEPackageDependencySCMToRegistryTransformation Xcode It's likely that you'll want to use the registry from Xcode projects for direct dependencies. If using the Tuist registry, it seems you would be able to leverage a Package Collection to add dependencies from the registry from the Xcode UI. Note that until Xcode 26 Beta 1, it's not possible to add registry dependencies directly in the Xcode UI, but if you use Tuist to generate your project (as you should), you can use the Package.registry (introduced with https://github.com/tuist/tuist/pull/7225). E.g. let project = Project( ... packages: [ .registry( identifier: "acme.Alamofire", requirement: .exact(Version(stringLiteral: "5.10.1")) ) ], ... ) If not using Tuist, you'd have to rely on setting IDEPackageDependencySCMToRegistryTransformation either as an environment variable in the scheme or globally via the terminal. You can also use xcodebuild to resolve dependencies using the correct flag: xcodebuild \ -resolvePackageDependencies \ -packageDependencySCMToRegistryTransformation useRegistryIdentityAndSources Conclusions We’ve found that using an in-house Swift registry drastically reduces dependency resolution time and size on disk by downloading only the required revision instead of the entire, potentially large, Git repository. This improvement benefits both CI pipelines and developers’ local environments. Additionally, registries help mitigate the risk of supply chain attacks. As of this writing, Swift registries are not widely adopted, which is reflected in the limited number of platforms that support them. It also shows various bugs I myself bumped into when using particular configurations. source: https://forums.swift.org/t/package-registry-support-in-xcode/73626/19 It's unclear whether adoption will grow and uncertain if Apple will ever address the issues reported by the community, but when a functioning setup is put in place, registries offer an efficient and secure alternative to using XCFrameworks in production builds and reduce both memory and time footprints.

Scalable Continuous Integration for iOS
- CI
- mobile
- iOS
- AWS
- macOS
How Just Eat Takeaway.com leverage AWS, Packer, Terraform and GitHub Actions to manage a CI stack of macOS runners.
Originally published on the Just Eat Takeaway Engineering Blog. How Just Eat Takeaway.com leverage AWS, Packer, Terraform and GitHub Actions to manage a CI stack of macOS runners. Problem At Just Eat Takeaway.com (JET), our journey through continuous integration (CI) reflects a landscape of innovation and adaptation. Historically, JET’s multiple iOS teams operated independently, each employing their distinct CI solutions. The original Just Eat iOS and Android teams had pioneered an in-house CI solution anchored in Jenkins. This setup, detailed in our 2021 article, served as the backbone of our CI practices up until 2020. It was during this period that the iOS team initiated a pivotal migration: moving from in-house Mac Pros and Mac Minis to AWS EC2 macOS instances. Fast forward to 2023, a significant transition occurred within our Continuous Delivery Engineering (CDE) Platform Engineering team. The decision to adopt GitHub Actions company-wide has marked the end of our reliance on Jenkins while other teams are in the process of migrating away from solutions such as CircleCI and GitLab CI. This transition represented a fundamental shift in our CI philosophy. By moving away from Jenkins, we eliminated the need to maintain an instance for the Jenkins server and the complexities of managing how agents connected to it. Our focus then shifted to transforming our Jenkins pipelines into GitHub Actions workflows. This transformation extended beyond mere tool adoption. Our primary goal was to ensure that our macOS instances were not only scalable but also configured in code. We therefore enhanced our global CI practices and set standards across the entire company. Desired state of CI As we embarked on our journey to refine and elevate our CI process, we envisioned a state-of-the-art CI system. Our goals were ambitious yet clear, focusing on scalability, automation, and efficiency. At the time of implementing the system, no other player in the industry seemed to have implemented the complete solution we envisioned. Below is a summary of our desired CI state: Instance setup in code: One primary objective was to enable the definition of the setup of the instances entirely in code. This includes specifying macOS version, Xcode version, Ruby version, and other crucial configurations. For this purpose, the HashiCorp tool Packer, emerged once again as an ideal solution, offering the flexibility and precision we required. IaC (Infrastructure as Code) for macOS instances: To define the infrastructure of our fleet of macOS instances, we leaned towards Terraform, another HashiCorp tool. Terraform provided us with the capability to not only deploy but also to scale and migrate our infrastructure seamlessly, crucially maintaining its state. Auto and Manual Scaling: We wanted the ability to dynamically create CI runners based on demand, ensuring that resources were optimally utilized and available when needed. To optimize resource utilization, especially during off-peak hours, we desired an autoscaling feature. Scaling down our CI runners on weekends when developer activity is minimal was critical to be cost-effective. Automated Connection to GitHub Actions: We aimed for the instances to automatically connect to GitHub Actions as runners upon deployment. This automation was crucial in eliminating manual interventions via SSH or VNC. Multi-Team Use: Our vision included CI runners that could be easily used by multiple teams across different time zones. This would not only maximize the utility of our infrastructure but also encourage reuse and standardization. Centralized Management via GitHub Actions: To further streamline our CI processes, we intended to run all tasks through GitHub Actions workflows. This approach would allow the teams to self-serve and alleviate the need for developers to use Docker or maintain local environments. Getting to the desired state was a journey that presented multiple challenges and constant adjustments to make sure we could migrate smoothly to a new system. Instance setup in code We implemented the desired configuration with Packer leveraging a number of Shell Provisioners and variables to configure the instance. Here are some of the configuration steps: Set user password (to allow remote desktop access) Resize the partition to use all the space available on the EBS volume Start the Apple Remote Desktop agent and enable remote desktop access Update Brew & Install Brew packages Install CloudWatch agent Install rbenv/Ruby/bundler Install Xcode versions Install GitHub Actions actions-runner Copy scripts to connect to GitHub Actions as a runner Copy daemon to start the GitHub Actions self-hosted runner as a service Set macos-init modules to perform provisioning of the first launch While the steps above are naturally configuration steps to perform when creating the AMI, the macos-init modules include steps to perform once the instance becomes available. The create_ami workflow accepts inputs that are eventually passed to Packer to generate the AMI. packer build \ --var ami_name_prefix=${{ env.AMI_NAME_PREFIX }} \ --var region=${{ env.REGION }} \ --var subnet_id=${{ env.SUBNET_ID }} \ --var vpc_id=${{ env.VPC_ID }} \ --var root_volume_size_gb=${{ env.ROOT_VOLUME_SIZE_GB }} \ --var macos_version=${{ inputs.macos-version}} \ --var ruby_version=${{ inputs.ruby-version }} \ --var xcode_versions='${{ steps.parse-xcode-versions.outputs.list }}' \ --var gha_version=${{ inputs.gha-version}} \ bare-metal-runner.pkr.hcl Different teams often use different versions of software, like Xcode. To accommodate this, we permit multiple versions to be installed on the same instance. The choice of which version to use is then determined within the GitHub Actions workflows. The seamless generation of AMIs has proven to be a significant enabler. For example, when Xcode 15.1 was released, we executed this workflow the same evening. In just over two hours, we had an AMI ready to deploy all the runners (it usually takes 70–100 minutes for a macOS AMI with 400GB of EBS volume to become ready after creation). This efficiency enabled our teams to use the new Xcode version just a few hours after its release. IaC (Infrastructure as Code) for macOS instances Initially, we used distinct Terraform modules for each instance to facilitate the deployment and decommissioning of each one. Given the high cost of EC2 Mac instances, we managed this process with caution, carefully balancing host usage while also being mindful of the 24-hour minimum allocation time. We ultimately ended up using Terraform to define a single infrastructure (i.e. a single Terraform module) defining resources such as: aws_key_pair, aws_instance, aws_ami aws_security_group, aws_security_group_rule aws_secretsmanager_secret aws_vpc, aws_subnet aws_cloudwatch_metric_alarm aws_sns_topic, aws_sns_topic_subscription aws_iam_role, aws_iam_policy, aws_iam_role_policy_attachment, aws_iam_instance_profile A crucial part was to use count in aws_instance, setting the value of a variable passed in from deploy_infra workflow. Terraform performs the necessary scaling upon changing the value. We have implemented a workflow to perform Terraform apply and destroy commands for the infrastructure. Only the AMI and the number of instances are required as inputs. terraform ${{ inputs.command }} \ --var ami_name=${{ inputs.ami-name }} \ --var fleet_size=${{ inputs.fleet-size }} \ --auto-approve Using the name of the AMI instead of the ID allows us to use the most recent one that was generated, useful in case of name clashes. variable "ami_name" { type = string } variable "fleet_size" { type = number } data "aws_ami" "bare_metal_gha_runner" { most_recent = true filter { name = "name" values = ["${var.ami_name}"] } ... } resource "aws_instance" "bare_metal" { count = var.fleet_size ami = data.aws_ami.bare_metal_gha_runner.id instance_type = "mac2.metal" tenancy = "host" key_name = aws_key_pair.bare_metal.key_name ... } Instead of maintaining multiple CI instances with varying software configurations, we concluded that it’s simpler and more efficient to have a single, standardised setup. While teams still have the option to create and deploy their unique setups, a smaller, unified system allows for easier support by a single global configuration. Auto and Manual Scaling The deploy_infra workflow allows us to scale on demand but it doesn’t release the underlying dedicated hosts which are the resources that are ultimately billed. The autoscaling solution provided by AWS is great for VMs but gets sensibly more complex when actioned on dedicated hosts. Auto Scaling groups on macOS instances would require a Custom Managed License, a Host Resource Group and, of course, a Launch Template. Using only AWS services appears to be a lot of work to pull things together and the result wouldn’t allow for automatic release of the dedicated hosts. AirBnb mention in their Flexible Continuous Integration for iOS article that an internal scaling service was implemented: An internal scaling service manages the desired capacity of each environment’s Auto Scaling group. Some articles explain how to set up Auto Scaling groups for mac instances (see 1 and 2) but after careful consideration, we agreed that implementing a simple scaling service via GitHub Actions (GHA) was the easiest and most maintainable solution. We implemented 2 GHA workflows to fully automate the weekend autoscaling: Upscaling workflow to n, triggered at a specific time at the beginning of the working week Downscaling workflow to 1, triggered at a specific time at the beginning of the weekend We retain the capability for manual scaling, which is essential for situations where we need to scale down, such as on bank holidays, or scale up, like on release cut days, when activity typically exceeds the usual levels. Additionally, we have implemented a workflow that runs multiple times a day and tries to release all available hosts without an instance attached. This step lifts us from the burden of having to remember to release the hosts. Dedicated hosts take up to 110 minutes to move from the Pending to the Available state due to the scrubbing workflow performed by AWS. Manual scaling can be executed between the times the autoscaling workflows are triggered and they must be resilient to unexpected statuses of the infrastructure, which thankfully Terraform takes care of. Both down and upscaling are covered in the following flowchart: The autoscaling values are defined as configuration variables in the repo settings: It usually takes ~8 minutes for an EC2 mac2.metal instance to become reachable after creation, meaning that we can redeploy the entire infrastructure very quickly. Automated Connection to GitHub Actions We provide some user data when deploying the instances. resource "aws_instance" "bare_metal" { ami = data.aws_ami.bare_metal_gha_runner.id count = var.fleet_size ... user_data = <<EOF { "github_enterprise": "<GHE_ENTERPRISE_NAME>", "github_pat_secret_manager_arn": ${data.aws_secretsmanager_secret_version.ghe_pat.arn}, "github_url": "<GHE_ENTERPRISE_URL>", "runner_group": "CI-MobileTeams", "runner_name": "bare-metal-runner-${count.index + 1}" } EOF The user data is stored in a specific folder by macos-init and we implement a module to copy the content to ~/actions-runner-config.json. ### Group 10 ### [[Module]] Name = "Create actions-runner-config.json from userdata" PriorityGroup = 10 RunPerInstance = true FatalOnError = false [Module.Command] Cmd = ["/bin/zsh", "-c", 'instanceId="$(curl http://169.254.169.254/latest/meta-data/instance-id)"; if [[ ! -z $instanceId ]]; then cp /usr/local/aws/ec2-macos-init/instances/$instanceId/userdata ~/actions-runner-config.json; fi'] RunAsUser = "ec2-user" which is in turn used by the configure_runner.sh script to configure the GitHub Actions runner. #!/bin/bash GITHUB_ENTERPRISE=$(cat $HOME/actions-runner-config.json | jq -r .github_enterprise) GITHUB_PAT_SECRET_MANAGER_ARN=$(cat $HOME/actions-runner-config.json | jq -r .github_pat_secret_manager_arn) GITHUB_PAT=$(aws secretsmanager get-secret-value --secret-id $GITHUB_PAT_SECRET_MANAGER_ARN | jq -r .SecretString) GITHUB_URL=$(cat $HOME/actions-runner-config.json | jq -r .github_url) RUNNER_GROUP=$(cat $HOME/actions-runner-config.json | jq -r .runner_group) RUNNER_NAME=$(cat $HOME/actions-runner-config.json | jq -r .runner_name) RUNNER_JOIN_TOKEN=` curl -L \ -X POST \ -H "Accept: application/vnd.github+json" \ -H "Authorization: Bearer $GITHUB_PAT"\ $GITHUB_URL/api/v3/enterprises/$GITHUB_ENTERPRISE/actions/runners/registration-token | jq -r '.token'` MACOS_VERSION=`sw_vers -productVersion` XCODE_VERSIONS=`find /Applications -type d -name "Xcode-*" -maxdepth 1 \ -exec basename {} \; \ | tr '\n' ',' \ | sed 's/,$/\n/' \ | sed 's/.app//g'` $HOME/actions-runner/config.sh \ --unattended \ --url $GITHUB_URL/enterprises/$GITHUB_ENTERPRISE \ --token $RUNNER_JOIN_TOKEN \ --runnergroup $RUNNER_GROUP \ --labels ec2,bare-metal,$RUNNER_NAME,macOS-$MACOS_VERSION,$XCODE_VERSIONS \ --name $RUNNER_NAME \ --replace The above script is run by a macos-init module. ### Group 11 ### [[Module]] Name = "Configure the GHA runner" PriorityGroup = 11 RunPerInstance = true FatalOnError = false [Module.Command] Cmd = ["/bin/zsh", "-c", "/Users/ec2-user/configure_runner.sh"] RunAsUser = "ec2-user" The GitHub documentation states that it’s possible to create a customized service starting from a provided template. It took some research and various attempts to find the right configuration that allows the connection without having to log in in the UI (over VNC) which would represent a blocker for a complete automation of the deployment. We believe that the single person who managed to get this right is Sébastien Stormacq who provided the correct solution. The connection to GHA can be completed with 2 more modules that install the runner as a service and load the custom daemon. ### Group 12 ### [[Module]] Name = "Run the self-hosted runner application as a service" PriorityGroup = 12 RunPerInstance = true FatalOnError = false [Module.Command] Cmd = ["/bin/zsh", "-c", "cd /Users/ec2-user/actions-runner && ./svc.sh install"] RunAsUser = "ec2-user" ### Group 13 ### [[Module]] Name = "Launch actions runner daemon" PriorityGroup = 13 RunPerInstance = true FatalOnError = false [Module.Command] Cmd = ["sudo", "/bin/launchctl", "load", "/Library/LaunchDaemons/com.justeattakeaway.actions-runner-service.plist"] RunAsUser = "ec2-user" Using a daemon instead of an agent (see Creating Launch Daemons and Agents), doesn’t require us to set up any auto-login which on macOS is a bit of a tricky procedure and is best avoided also for security reasons. The following is the content of the daemon for completeness. <?xml version="1.0" encoding="UTF-8"?> <!DOCTYPE plist PUBLIC "-//Apple//DTD PLIST 1.0//EN" "http://www.apple.com/DTDs/PropertyList-1.0.dtd"> <plist version="1.0"> <dict> <key>Label</key> <string>com.justeattakeaway.actions-runner-service</string> <key>ProgramArguments</key> <array> <string>/Users/ec2-user/actions-runner/runsvc.sh</string> </array> <key>UserName</key> <string>ec2-user</string> <key>GroupName</key> <string>staff</string> <key>WorkingDirectory</key> <string>/Users/ec2-user/actions-runner</string> <key>RunAtLoad</key> <true/> <key>StandardOutPath</key> <string>/Users/ec2-user/Library/Logs/com.justeattakeaway.actions-runner-service/stdout.log</string> <key>StandardErrorPath</key> <string>/Users/ec2-user/Library/Logs/com.justeattakeaway.actions-runner-service/stderr.log</string> <key>EnvironmentVariables</key> <dict> <key>ACTIONS_RUNNER_SVC</key> <string>1</string> </dict> <key>ProcessType</key> <string>Interactive</string> <key>SessionCreate</key> <true/> </dict> </plist> Not long after the deployment, all the steps above are executed and we can appreciate the runners appearing as connected. Multi-Team Use We start the downscaling at 11:59 PM on Fridays and start the upscaling at 6:00 AM on Mondays. These times have been chosen in a way that guarantees a level of service to teams in the UK, the Netherlands (GMT+1) and Canada (Winnipeg is on GMT-6) accounting for BST (British Summer Time) and DST (Daylight Saving Time) too. Times are defined in UTC in the GHA workflow triggers and the local time of the runner is not taken into account. Since the instances are used to build multiple projects and tools owned by different teams, one problem we faced was that instances could get compromised if workflows included unsafe steps (e.g. modifications to global configurations). GitHub Actions has a documentation page about Hardening self-hosted runners specifically stating: Self-hosted runners for GitHub do not have guarantees around running in ephemeral clean virtual machines, and can be persistently compromised by untrusted code in a workflow. We try to combat such potential problems by educating people on how to craft workflows and rely on the quick redeployment of the stack should the instances break. We also run scripts before and after each job to ensure that instances can be reused as much as possible. This includes actions like deleting the simulators’ content, derived data, caches and archives. Centralized Management via GitHub Actions The macOS runners stack is defined in a dedicated macOS-runners repository. We implemented GHA workflows to cover the use cases that allow teams to self-serve: create macOS AMI deploy CI downscale for the weekend* upscale for the working week* release unused hosts* * run without inputs and on a scheduled trigger The runners running the jobs in this repo are small t2.micro Linux instances and come with the AWSCLI installed. An IAM instance role with the correct policies is used to make sure that aws ec2 commands allocate-hosts, describe-hosts and release-hosts could execute and we used jq to parse the API responses. A note on VM runners In this article, we discussed how we’ve used bare metal instances as runners. We have spent a considerable amount of time investigating how we could leverage the Virtualization framework provided by Apple to create virtual machines via Tart. If you’ve grasped the complexity of crafting a CI system of runners on bare metal instances, you can understand that introducing VMs makes the setup sensibly more convoluted which would be best discussed in a separate article. While a setup with Tart VMs has been implemented, we realised that it’s not performant enough to be put to use. Using VMs, the number of runners would double but we preferred to have native performance as the slowdown is over 40% compared to bare metal. Moreover, when it comes to running heavy UI test suites like ours, tests became too flaky. Testing the VMs, we also realised that the standard values of Throughput and IOPS on the EBS volume didn’t seem to be enough and caused disk congestion resulting in an unacceptable slowdown in performance. Here is a quick summary of the setup and the challenges we have faced. Virtual runners require 2 images: one for the VMs (tart) and one for the host (AMI). We use Packer to create VM images (Vanilla, Base, IDE, Tools) with the software required based on the templates provided by Tart and we store the OCI-compliant images on ECR. We create these images on CI with dedicated workflows similar to the one described earlier for bare metal but, in this case, macOS runners (instead of Linux) are required as publishing to ECR is done with tart which runs on macOS. Extra policies are required on the instance role to allow the runner to push to ECR (using temporary_iam_instance_profile_policy_document in Packer’s Amazon EBS). Apple set a limit to the number of VMs that can be run on an instance to 2, which would allow to double the size of the fleet of runners. Creating AMIs hosting 2 VMs is done with Packer and steps include cloning the image from ECR and configuring macos-init modules to run daemons to run the VMs via Tart. Deploying a virtual CI infrastructure is identical to what has already been described for bare metal. Connecting to and interfacing with the VMs happens from within the host. Opening SSH and especially VNC sessions from within the bare metal instances can be very confusing. The version of macOS on the host and the one on the VMs could differ. The version used on the host must be provided with an AMI by AWS, while the version used on the VMs is provided by Apple in IPSW files (see ipsw.me). The GHA runners run on the VMs meaning that the host won’t require Xcode installed nor any other software used by the workflows. VMs don’t allow for provisioning meaning we have to share configurations with the VMs via shared folders on the host with the — dir flag which causes extra setup complexity. VMs can’t easily run the GHA runner as a service. The svc script requires the runner to be configured first, an operation that cannot be done during the provisioning of the host. We therefore need to implement an agent ourselves to configure and connect the runner in a single script. To have UI access (a-la VNC) to the VMs, it’s first required to stop the VMs and then run them without the --no-graphics flag. At the time of writing, copy-pasting won’t work even if using the --vnc or --vnc-experimental flags. Tartelet is a macOS app on top of Tart that allows to manage multiple GitHub Actions runners in ephemeral environments on a single host machine. We didn’t consider it to avoid relying on too much third-party software and because it doesn’t have yet GitHub Enterprise support. Worth noting that the Tart team worked on an orchestration solution named Orchard that seems to be in its initial stage. Conclusion In 2023 we have revamped and globalised our approach to CI. We have migrated from Jenkins to GitHub Actions as the CI/CD solution of choice for the whole group and have profoundly optimised and improved our pipelines introducing a greater level of job parallelisation. We have implemented a brand new scalable setup for bare metal macOS runners leveraging the HashiCorp tools Packer and Terraform. We have also implemented a setup based on Tart virtual machines. We have increased the size of our iOS team over the past few years, now including more than 40 developers, and still managed to be successful with only 5 bare metal instances on average, which is a clear statement of how performant and optimised our setup is. We have extended the capabilities of our Internal Developer Platform with a globalised approach to provide macOS runners; we feel that this setup will stand the test of time and serve well various teams across JET for years to come.

The idea of a Fastlane replacement
Prelude
Fastlane is widely used by iOS teams all around the world. It became the standard de facto to automate common tasks such as building apps, running tests, and uploading builds to App Store Connect. Fastlane has been recently moved under the Mobile Native Foundation which is amazing as Google
Prelude Fastlane is widely used by iOS teams all around the world. It became the standard de facto to automate common tasks such as building apps, running tests, and uploading builds to App Store Connect. Fastlane has been recently moved under the Mobile Native Foundation which is amazing as Google wasn't actively maintaining the project. At Just Eat Takeaway, we have implemented an extensive number of custom lanes to perform domain-specific tasks and used them from our CI. The major problem with Fastlane is that it's written in Ruby. When it was born, using Ruby was a sound choice but iOS developers are not necessarily familiar with such language which represents a barrier to contributing and writing lanes. While Fastlane.swift, a version of Fastlane in Swift, has been in beta for years, it's not a rewrite in Swift but rather a "solution on top" meaning that developers and CI systems still have to rely on Ruby, install related software (rbenv or rvm) and most likely maintain a Gemfile. The average iOS dev knows well that Ruby environments are a pain to deal with and have caused an infinite number of headaches. In recent years, Apple has introduced technologies that would enable a replacement of Fastlane using Swift: Swift Package Manager (SPM) Swift Argument Parser (SAP) Being myself a big fan of CLI tools written in Swift, I soon started maturing the idea of a Fastlane rewrite in Swift in early 2022. I circulated the idea with friends and colleagues for months and the sentiment was clear: it's time for a fresh simil-Fastlane tool written in Swift. Journey Towards the end of 2022, I was determined to start this project. I teamed up with 2 iOS devs (not working at Just Eat Takeaway) and we started working on a design. I was keen on calling this project "Swiftlane" but the preference seemed to be for the name "Interstellar" which was eventually shortened into "Stellar". Fastlane has the concept of Actions and I instinctively thought that in Swift-land, they could take the form of SPM packages. This would make Stellar a modular system with pluggable components. For example, consider the Scan action in Fastlane. It could be a package that solely solves the same problem around testing. My goal was not to implement the plethora of existing Fastlane actions but rather to create a system that allows plugging in any package building on macOS. A sound design of such system was crucial. The Stellar ecosystem I had in mind was composed of 4 parts: Actions Actions are the basic building blocks of the ecosystem. They are packages that define a library product. An action can do anything, from taking care of build tasks to integrating with GitHub. Actions are independent packages that have no knowledge of the Stellar system, which treats them as pluggable components to create higher abstractions. Ideally, actions should expose an executable product (the CLI tool) using SAP calling into the action code. This is not required by Stellar but it’s advisable as a best practice. Official Actions would be hosted in the Stellar organisation on GitHub. Custom Actions could be created using Stellar. Tasks Tasks are specific to a project and implemented by the project developers. They are SAP ParsableCommand or AsyncParsableCommand which use actions to construct complex logic specific to the needs of the project. Executor Executor is a command line tool in the form of a package generated by Stellar. It’s the entry point to the user-defined tasks. Invoking tasks on the Executor is like invoking lanes in Fastlane. Both developers and CI would interface with the Executor (masked as Stellar) to perform all operations. E.g. stellar setup_environment --developer-mode stellar run_unit_tests module=OrderHistory stellar setup_demo_app module=OrderHistory stellar run_ui_tests module=OrderHistory device="iPhone 15 Pro" Stellar CLI Stellar CLI is a command line tool that takes care of the heavy lifting of dealing with the Executor and the Tasks. It allows the integration of Stellar in a project and it should expose the following main commands: init: initialise the project by creating an Exectutor package in the .stellar folder build: builds the Executor generating a binary that is shared with the team members and used by CI create-action: scaffolding to create a new action in the form of a package create-task: scaffolding to create a new task in the form of a package edit: opens the Executor package for editing, similar to tuist edit This design was presented to a restricted group of devs at Just Eat Takeaway and it didn't take long to get an agreement on it. It was clear that once Stellar was completed, we would have integrated it in the codebase. Wider design I believe that a combination of CLI tools can create complex, templateable and customizable stacks to support the creation and growth of iOS codebases. Based on the experience developed at JET working on a large modular project with lots of packages, helper tools and optimised CI pipelines, I wanted Stellar to be eventually part of a set of tools taking the name “Stellar Tools” that could enable the creation and the management of large codebases. Something like the following: Tuist: generates projects and workspaces programmatically PackageGenerator: generates packages using a DSL Stacker: creates a modular iOS project based on a DSL Stellar: automate tasks Workflows: generates GitHub Actions workflows that use Stellar From my old notes: Current state After a few months of development within this team (made of devs not working at Just Eat Takeaway), I realised things were not moving in the direction I desired and I decided it was not beneficial to continue the collaboration with the team. We stopped working on Stellar mainly due to different levels of commitment from each of us and focus on the wrong tasks signalling a lack of project management from my end. For example, a considerable amount of time and effort went into the implementation of a version management system (vastly inspired by the one used in Tuist) that was not part of the scope of the Stellar project. The experience left me bitter and demotivated, learning that sometimes projects are best started alone. We made the repo public on GitHub aware that it was far from being production-ready but in my opinion, it's no doubt a nice, inspiring, MVP. GitHub - StellarTools/Stellar Contribute to StellarTools/Stellar development by creating an account on GitHub. GitHubStellarTools GitHub - StellarTools/ActionDSL Contribute to StellarTools/ActionDSL development by creating an account on GitHub. GitHubStellarTools The intent was then to progress on my own or with my colleagues at JET. As things evolved in 2023, we embarked on big projects that continued to evolve the platform such as a massive migration to GitHub Actions. To this day, we still plan to remove Fastlane as our vision is to rely on external dependencies as little as possible but there is no plan to use Stellar as-is. I suspect that, for the infrastructure team at JET, things will evolve in a way that sees more CLI tools being implemented and more GitHub actions using them.

CloudWatch dashboards and alarms on Mac instances
CloudWatch is great for observing and monitoring resources and applications on AWS, on premises, and on other clouds.
While it's trivial to have the agent running on Linux, it's a bit more involved for mac instances (which are commonly used as CI workers). The support was
CloudWatch is great for observing and monitoring resources and applications on AWS, on premises, and on other clouds. While it's trivial to have the agent running on Linux, it's a bit more involved for mac instances (which are commonly used as CI workers). The support was announced in January 2021 for mac1.metal (Intel/x86_64) and I bumped into some challenges on mac2.metal (M1/ARM64) that the team at AWS helped me solve (see this issue on the GitHub repo). I couldn't find other articles nor precise documentation from AWS which is why I'm writing this article to walk you through a common CloudWatch setup. The given code samples are for the HashiCorp tools Packer and Terraform and focus on mac2.metal instances. I'll cover the following steps: install the CloudWatch agent on mac2.metal instances configure the CloudWatch agent create a CloudWatch dashboard setup CloudWatch alarms setup IAM permissions Install the CloudWatch agent The CloudWatch agent can be installed by downloading the pkg file listed on this page and running the installer. You probably want to bake the agent into your AMI, so here is the Packer code for mac2.metal (ARM): # Install wget via brew provisioner "shell" { inline = [ "source ~/.zshrc", "brew install wget" ] } # Install CloudWatch agent provisioner "shell" { inline = [ "source ~/.zshrc", "wget https://s3.amazonaws.com/amazoncloudwatch-agent/darwin/arm64/latest/amazon-cloudwatch-agent.pkg", "sudo installer -pkg ./amazon-cloudwatch-agent.pkg -target /" ] } For the agent to work, you'll need collectd (https://collectd.org/) to be installed on the machine, which is usually done via brew. Brew installs it at /opt/homebrew/sbin/. This is also a step you want to perform when creating your AMI. # Install collectd via brew provisioner "shell" { inline = [ "source ~/.zshrc", "brew install collectd" ] } Configure the CloudWatch agent In order to run, the agent needs a configuration which can be created using the wizard. This page defines the metric sets that are available. Running the wizard with the command below will allow you to generate a basic json configuration which you can modify later. sudo /opt/aws/amazon-cloudwatch-agent/bin/amazon-cloudwatch-agent-config-wizard The following is a working configuration for Mac instances so you can skip the process. { "agent": { "metrics_collection_interval": 60, "run_as_user": "root" }, "metrics": { "aggregation_dimensions": [ [ "InstanceId" ] ], "append_dimensions": { "AutoScalingGroupName": "${aws:AutoScalingGroupName}", "ImageId": "${aws:ImageId}", "InstanceId": "${aws:InstanceId}", "InstanceType": "${aws:InstanceType}" }, "metrics_collected": { "collectd": { "collectd_typesdb": [ "/opt/homebrew/opt/collectd/share/collectd/types.db" ], "metrics_aggregation_interval": 60 }, "cpu": { "measurement": [ "cpu_usage_idle", "cpu_usage_iowait", "cpu_usage_user", "cpu_usage_system" ], "metrics_collection_interval": 60, "resources": [ "*" ], "totalcpu": false }, "disk": { "measurement": [ "used_percent", "inodes_free" ], "metrics_collection_interval": 60, "resources": [ "*" ] }, "diskio": { "measurement": [ "io_time", "write_bytes", "read_bytes", "writes", "reads" ], "metrics_collection_interval": 60, "resources": [ "*" ] }, "mem": { "measurement": [ "mem_used_percent" ], "metrics_collection_interval": 60 }, "netstat": { "measurement": [ "tcp_established", "tcp_time_wait" ], "metrics_collection_interval": 60 }, "statsd": { "metrics_aggregation_interval": 60, "metrics_collection_interval": 10, "service_address": ":8125" }, "swap": { "measurement": [ "swap_used_percent" ], "metrics_collection_interval": 60 } } } } I have enhanced the output of the wizard with some reasonable metrics to collect. The configuration created by the wizard is almost working but it's lacking a fundamental config to make it work out-of-the-box: the collectd_typesdb value. Linux and Mac differ when it comes to the location of collectd and types.db, and the agent defaults to the Linux path even if it was built for Mac, causing the following error when trying to run the agent: ======== Error Log ======== 2023-07-23T04:57:28Z E! [telegraf] Error running agent: Error loading config file /opt/aws/amazon-cloudwatch-agent/etc/amazon-cloudwatch-agent.toml: error parsing socket_listener, open /usr/share/collectd/types.db: no such file or directory Moreover, the /usr/share/ folder is not writable unless you disable SIP (System Integrity Protection) which cannot be done on EC2 mac instances nor is something you want to do for security reasons. The final configuration is something you want to save in System Manager Parameter Store using the ssm_parameter resource in Terraform: resource "aws_ssm_parameter" "cw_agent_config_darwin" { name = "/cloudwatch-agent/config/darwin" description = "CloudWatch agent config for mac instances" type = "String" value = file("./cw-agent-config-darwin.json") } and use it when running the agent in a provisioning step: resource "null_resource" "run_cloudwatch_agent" { depends_on = [ aws_instance.mac_instance ] connection { type = "ssh" agent = false host = aws_instance.mac_instance.private_ip user = "ec2-user" private_key = tls_private_key.mac_instance.private_key_pem timeout = "30m" } # Run CloudWatch agent provisioner "remote-exec" { inline = [ "sudo /opt/aws/amazon-cloudwatch-agent/bin/amazon-cloudwatch-agent-ctl -a fetch-config -m ec2 -s -c ssm:${aws_ssm_parameter.cw_agent_config_darwin.name}" ] } } Create a CloudWatch dashboard Once the instances are deployed and running, they will send events to CloudWatch and we can create a dashboard to visualise them. You can create a dashboard manually in the console and once you are happy with it, you can just copy the source code, store it in a file and feed it to Terraform. Here is mine that could probably work for you too if you tag your instances with the Type set to macOS: { "widgets": [ { "height": 15, "width": 24, "y": 0, "x": 0, "type": "explorer", "properties": { "metrics": [ { "metricName": "cpu_usage_user", "resourceType": "AWS::EC2::Instance", "stat": "Average" }, { "metricName": "cpu_usage_system", "resourceType": "AWS::EC2::Instance", "stat": "Average" }, { "metricName": "disk_used_percent", "resourceType": "AWS::EC2::Instance", "stat": "Average" }, { "metricName": "diskio_read_bytes", "resourceType": "AWS::EC2::Instance", "stat": "Average" }, { "metricName": "diskio_write_bytes", "resourceType": "AWS::EC2::Instance", "stat": "Average" } ], "aggregateBy": { "key": "", "func": "" }, "labels": [ { "key": "Type", "value": "macOS" } ], "widgetOptions": { "legend": { "position": "bottom" }, "view": "timeSeries", "stacked": false, "rowsPerPage": 50, "widgetsPerRow": 1 }, "period": 60, "splitBy": "", "region": "eu-west-1" } } ] } You can then use the cloudwatch_dashboard resource in Terraform: resource "aws_cloudwatch_dashboard" "mac_instances" { dashboard_name = "mac-instances" dashboard_body = file("./cw-dashboard-mac-instances.json") } It will show something like this: Setup CloudWatch alarms Once the dashboard is up, you should set up alarms so that you are notified of any anomalies, rather than actively monitoring the dashboard for them. What works for me is having alarms triggered via email when the used disk space is going above a certain level (say 80%). We can use the cloudwatch_metric_alarm resource. resource "aws_cloudwatch_metric_alarm" "disk_usage" { alarm_name = "mac-${aws_instance.mac_instance.id}-disk-usage" comparison_operator = "GreaterThanThreshold" evaluation_periods = 30 metric_name = "disk_used_percent" namespace = "CWAgent" period = 120 statistic = "Average" threshold = 80 alarm_actions = [aws_sns_topic.disk_usage.arn] dimensions = { InstanceId = aws_instance.mac_instance.id } } We can then create an SNS topic and subscribe all interested parties to it. This will allow us to broadcast to all subscribers when the alarm is triggered. For this, we can use the sns_topic and sns_topic_subscription resources. resource "aws_sns_topic" "disk_usage" { name = "CW_Alarm_disk_usage_mac_${aws_instance.mac_instance.id}" } resource "aws_sns_topic_subscription" "disk_usage" { for_each = toset(var.alarm_subscriber_emails) topic_arn = aws_sns_topic.disk_usage.arn protocol = "email" endpoint = each.value } variable "alarm_subscriber_emails" { type = list(string) } If you are deploying your infrastructure via GitHub Actions, you can set your subscribers as a workflow input or as an environment variable. Here is how you should pass a list of strings via a variable in Terraform: name: Deploy Mac instance env: ALARM_SUBSCRIBERS: '["user1@example.com","user2@example.com"]' AMI: ... jobs: deploy: ... steps: - name: Terraform apply run: | terraform apply \ --var ami=${{ env.AMI }} \ --var alarm_subscriber_emails='${{ env.ALARM_SUBSCRIBERS }}' \ --auto-approve Setup IAM permissions The instance that performs the deployment requires permissions for CloudWatch, System Manager, and SNS. The following is a policy that is enough to perform both terraform apply and terraform destroy. Please consider restricting to specific resources. { "Version": "2012-10-17", "Statement": [ { "Sid": "CloudWatchDashboardsPermissions", "Effect": "Allow", "Action": [ "cloudwatch:DeleteDashboards", "cloudwatch:GetDashboard", "cloudwatch:ListDashboards", "cloudwatch:PutDashboard" ], "Resource": "*" }, { "Sid": "CloudWatchAlertsPermissions", "Effect": "Allow", "Action": [ "cloudwatch:DescribeAlarms", "cloudwatch:DescribeAlarmsForMetric", "cloudwatch:DescribeAlarmHistory", "cloudwatch:DeleteAlarms", "cloudwatch:DisableAlarmActions", "cloudwatch:EnableAlarmActions", "cloudwatch:ListTagsForResource", "cloudwatch:PutMetricAlarm", "cloudwatch:PutCompositeAlarm", "cloudwatch:SetAlarmState" ], "Resource": "*" }, { "Sid": "SystemsManagerPermissions", "Effect": "Allow", "Action": [ "ssm:GetParameter", "ssm:GetParameters", "ssm:ListTagsForResource", "ssm:DeleteParameter", "ssm:DescribeParameters", "ssm:PutParameter" ], "Resource": "*" }, { "Sid": "SNSPermissions", "Effect": "Allow", "Action": [ "sns:CreateTopic", "sns:DeleteTopic", "sns:GetTopicAttributes", "sns:GetSubscriptionAttributes", "sns:ListSubscriptions", "sns:ListSubscriptionsByTopic", "sns:ListTopics", "sns:SetSubscriptionAttributes", "sns:SetTopicAttributes", "sns:Subscribe", "sns:Unsubscribe" ], "Resource": "*" } ] } On the other hand, to send logs to CloudWatch, the Mac instances require permissions given by the CloudWatchAgentServerPolicy: resource "aws_iam_role_policy_attachment" "mac_instance_iam_role_cw_policy_attachment" { role = aws_iam_role.mac_instance_iam_role.name policy_arn = "arn:aws:iam::aws:policy/CloudWatchAgentServerPolicy" } Conclusion You have now defined your CloudWatch dashboard and alarms using "Infrastructure as Code" via Packer and Terraform. I've covered the common use case of instances running out of space on disk which is useful to catch before CI starts becoming unresponsive slowing your team down.
Easy connection to AWS Mac instances with EC2macConnector
Overview
Amazon Web Services (AWS) provides EC2 Mac instances commonly used as CI workers. Configuring them can be either a manual or an automated process, depending on the DevOps and Platform Engineering experience in your company. No matter what process you adopt, it is sometimes useful to log into the
Overview Amazon Web Services (AWS) provides EC2 Mac instances commonly used as CI workers. Configuring them can be either a manual or an automated process, depending on the DevOps and Platform Engineering experience in your company. No matter what process you adopt, it is sometimes useful to log into the instances to investigate problems. EC2macConnector is a CLI tool written in Swift that simplifies the process of connecting over SSH and VNC for DevOps engineers, removing the need of updating private keys and maintaining the list of IPs that change across deployment cycles. Connecting to EC2 Mac instances without EC2macConnector AWS documentation describes the steps needed to allow connecting via VNC: Start the Apple Remote Desktop agent and enable remote desktop access on the instance Set the password for the ec2-user user on the instance to allow connecting over VNC Start an SSH session Connect over VNC Assuming steps 1 and 2 and done, steps 3 and 4 are usually manual and repetitive: the private keys and IPs usually change across deployments which could happen frequently, even daily. Here is how to start an SSH session in the terminal binding a port locally: ssh ec2-user@<instance_IP> \ -L <local_port>:localhost:5900 \ -i <path_to_privae_key> \ To connect over VNC you can type the following in Finder → Go → Connect to Server (⌘ + K) and click Connect: vnc://ec2-user@localhost:<local_port> or you could create a .vncloc file with the following content and simply open it: <?xml version="1.0" encoding="UTF-8"?> <!DOCTYPE plist PUBLIC "-//Apple//DTD PLIST 1.0//EN" "<http://www.apple.com/DTDs/PropertyList-1.0.dtd>"> <plist version="1.0"> <dict> <key>URL</key> <string>vnc://ec2-user@localhost:<local_port></string> </dict> </plist> If you are a system administrator, you might consider EC2 Instance Connect, but sadly, in my experience, it's not a working option for EC2 Mac instances even though I couldn't find evidence confirming or denying this statement. Administrators could also consider using Apple Remote Desktop which comes with a price tag of $/£79.99. Connecting to EC2 Mac instances with EC2macConnector EC2macConnector is a simple and free tool that works in 2 steps: the configure command fetches the private keys and the IP addresses of the running EC2 Mac instances in a given region, and creates files using the said information to connect over SSH and VNC: ec2macConnector configure \ --region <aws_region> \ --secrets-prefix <mac_metal_private_keys_prefix> Read below or the README for more information on the secrets prefix value. the connect command connects to the instances via SSH or VNC. ec2macConnector connect --region <aws_region> <fleet_index> ec2macConnector connect --region <aws_region> <fleet_index> --vnc 💡 Connecting over VNC requires an SSH session to be established first. As with any tool written using ArgumentParser, use the --help flag to get more information. Requirements There are some requirements to respect for the tool to work: Permissions EC2macConnector requires AWS credentials either set as environment variables (AWS_ACCESS_KEY_ID and AWS_SECRET_ACCESS_KEY) or configured in ~/.aws/credentials via the AWS CLI. Environment variables take precedence. The user must be granted the following permissions: ec2:DescribeInstances secretsmanager:ListSecrets secretsmanager:GetSecretValue EC2 instances The EC2 Mac instances must have the EC2macConnector:FleetIndex tag set to the index of the instance in the fleet. Indexes should start at 1. Instances that don't have the said tag will be ignored. Secrets and key pairs formats EC2macConnector assumes that the private key for each instance key pair is stored in SecretsManagers. The name of the key pair could and should be different from the secret ID. For example, the instance key pair should include an incremental number also part of the corresponding secret ID. Consider that the number of Mac instances in an AWS account is limited and it's convenient to refer to them using an index starting at 1. It's good practice for the secret ID to also include a nonce as secrets with the same name cannot be recreated before the deletion period has elapsed, allowing frequent provisioning-decommissioning cycles. For the above reasons, EC2macConnector assumes the following formats are used: instance key pairs: <keypair_prefix>_<index_of_instance_in_fleet> e.g. mac_instance_key_pair_5 secret IDs: <secrets_prefix>_<index_of_instance_in_fleet>_<nonce> e.g. private_key_mac_metal_5_dx9Wna73B EC2macConnector Under the hood The configure command: downloads the private keys in the ~/.ssh folder creates scripts to connect over SSH in ~/.ec2macConnector/<region>/scripts creates vncloc files to connect over VNC in ~/.ec2macConnector/<region>/vnclocs ➜ .ec2macConnector tree ~/.ssh /Users/alberto/.ssh ├── mac_metal_1_i-08e4ffd8e9xxxxxxx ├── mac_metal_2_i-07bfff1f52xxxxxxx ├── mac_metal_3_i-020d680610xxxxxxx ├── mac_metal_4_i-08516ac980xxxxxxx ├── mac_metal_5_i-032bedaabexxxxxxx ├── config ├── known_hosts └── ... The connect command: runs the scripts (opens new shells in Terminal and connects to the instances over SSH) opens the vncloc files ➜ .ec2macConnector tree ~/.ec2macConnector /Users/alberto/.ec2macConnector └── us-east-1 ├── scripts │ ├── connect_1.sh │ ├── connect_2.sh │ ├── connect_3.sh │ ├── connect_4.sh │ └── connect_5.sh └── vnclocs ├── connect_1.vncloc ├── connect_2.vncloc ├── connect_3.vncloc ├── connect_4.vncloc └── connect_5.vncloc

Toggles: the easiest feature flagging in Swift
I previously wrote about JustTweak here. It's the feature flagging mechanism we've been using at Just Eat Takeaway.com to power the iOS consumer apps since 2017. It's proved to be very stable and powerful and it has evolved over time. Friends have heard
I previously wrote about JustTweak here. It's the feature flagging mechanism we've been using at Just Eat Takeaway.com to power the iOS consumer apps since 2017. It's proved to be very stable and powerful and it has evolved over time. Friends have heard me promoting it vehemently and some have integrated it with success and appreciation. I don't think I've promoted it in the community enough (it definitely deserved more) but marketing has never been my thing. Anyway, JustTweak grew old and some changes were debatable and not to my taste. I have then decided to use the knowledge of years of working on the feature flagging matter to give this project a new life by rewriting it from scratch as a personal project. And here it is: Toggles. I never tweeted about this side project of mine 😜 It's like JustTweak (feature flagging), but sensibly better. https://t.co/bdGWuUyQEU #Swift #iOS #macOS — Alberto De Bortoli (@albertodebo) March 23, 2023 Think of JustTweak, but better. A lot better. Frankly, I couldn't have written it better. Here are the main highlights: brand new code, obsessively optimized and kept as short and simple as possible extreme performances fully tested fully documented performant UI debug view in SwiftUI standard providers provided demo app provided ability to listen for value changes (using Combine) simpler APIs ToggleGen CLI, to allow code generation ToggleCipher CLI, to allow encoding/decoding of secrets JustTweakMigrator CLI, to allow a smooth transition from JustTweak Read all about it on the repo's README and on the DocC page. It's on Swift Package Index too. Toggles – Swift Package Index Toggles by TogglesPlatform on the Swift Package Index – Toggles is an elegant and powerful solution to feature flagging for Apple platforms. Learn more There are plans (or at least the desire!) to write a backend with Andrea Scuderi. That'd be really nice! @albertodebo This wasn't planned! It looks like we need to build the backend for #Toggles with #Breeze! pic.twitter.com/OxNovRl70L — andreascuderi (@andreascuderi13) March 26, 2023

The Continuous Integration system used by the mobile teams
- iOS
- Continuous Integration
- Jenkins
- DevOps
In this article, we’ll discuss the way our mobile teams have evolved the Continuous Integration (CI) stack over the recent years.
Originally published on the Just Eat Takeaway Engineering Blog. Overview In this article, we’ll discuss the way our mobile teams have evolved the Continuous Integration (CI) stack over the recent years. We don’t have DevOps engineers in our team and, until recently, we had adopted a singular approach in which CI belongs to the whole team and everyone should be able to maintain it. This has proven to be difficult and extremely time-consuming. The Just Eat side of our newly merged entity has a dedicated team providing continuous integration and deployment tools to their teams but they are heavily backend-centric and there has been little interest in implementing solutions tailored for mobile teams. As is often the case in tech companies, there is a missing link between mobile and DevOps teams. The iOS team is the author and first consumer of the solution described but, as you can see, we have ported the same stack to Android as well. We will mainly focus on the iOS implementation in this article, with references to Android as appropriate. 2016–2020 Historically speaking, the iOS UK app was running on Bitrise because it was decided not to invest time in implementing a CI solution, while the Bristol team was using a Jenkins version installed by a different team. This required manual configuration with custom scripts and it had custom in-house hardware. These are two quite different approaches indeed and, at this stage, things were not great but somehow good enough. It’s fair to say we were still young on the DevOps front. When we merged the teams, it was clear that we wanted to unify the CI solution and the obvious choice for a company of our size was to not use a third-party service, bringing us to invest more and more in Jenkins. Only one team member had good knowledge of Jenkins but the rest of the team showed little interest in learning how to configure and maintain it, causing the stack to eventually become a dumping ground of poorly configured jobs. It was during this time that we introduced Fastlane (making the common tasks portable), migrated the UK app from Bitrise to Jenkins, started running the UI tests on Pull Requests, and other small yet sensible improvements. 2020–2021 Starting in mid-2020 the iOS team has significantly revamped its CI stack and given it new life. The main goals we wanted to achieve (and did by early 2021) were: Revisit the pipelines Clear Jenkins configuration and deployment strategy Make use of AWS Mac instances Reduce the pool size of our mac hardware Share our knowledge across teams better Since the start of the pandemic, we have implemented the pipelines in code (bidding farewell to custom bash scripts), we moved to a monorepo which was a massive step ahead and began using SonarQube even more aggressively. We added Slack reporting and PR Assigner, an internal tool implemented by Andrea Antonioni. We also automated the common release tasks such as cutting and completing a release and uploading the dSYMS to Firebase. We surely invested a lot in optimizing various aspects such as running the UI tests in parallel, making use of shallow repo cloning, We also moved to not checking in the pods within the repo. This, eventually, allowed us to reduce the number of agents for easier infrastructure maintenance. Automating the infrastructure deployment of Jenkins was a fundamental shift compared to the previous setup and we have introduced AWS Mac instances replacing part of the fleet of our in-house hardware. CI system setup Let’s take a look at our stack. Before we start, we’d like to thank Isham Araia for having provided a proof of concept for the configuration and deployment of Jenkins. He talked about it at https://ish-ar.io/jenkins-at-scale/ and it represented a fundamental starting point, saving us several days of researching. Triggering flow Starting from the left, we have our repositories (plural, as some shared dependencies don’t live in the monorepo). The repositories contain the pipelines in the form of Jenkinsfiles and they call into Fastlane lanes. Pretty much every action is a lane, from running the tests to archiving for the App Store to creating the release branches. Changes are raised through pull requests that trigger Jenkins. There are other ways to trigger Jenkins: by user interaction (for things such as completing a release or archiving and uploading the app to App Store Connect) and cron triggers (for things such as building the nightly build, running the tests on the develop branch every 12 hours, or uploading the PACT contract to the broker). Once Jenkins has received the information, it will then schedule the jobs to one of the agents in our pool, which is now made up of 5 agents, 2 in the cloud and 3 in-house mac pros. Reporting flow Now that we’ve talked about the first part of the flow, let’s talk about the flow of information coming back at us. Every PR triggers PR Assigner, a tool that works out a list of reviewers to assign to pull requests and notifies engineers via dedicated Slack channels. The pipelines post on Slack, providing info about all the jobs that are being executed so we can read the history without having to log into Jenkins. We have in place the standard notification flow from Jenkins to GitHub to set the status checks and Jenkins also notifies SonarQube to verify that any change meets the quality standards (namely code coverage percentage and coding rules). We also have a smart lambda named SonarQubeStatusProcessor that reports to GitHub, written by Alan Nichols. This is due to a current limitation of SonarQube, which only allows reporting the status of one SQ project to one GitHub repo. Since we have a monorepo structure we had to come up with this neat customization to report the SQ status for all the modules that have changed as part of the PR. Configuration Let’s see what the new interesting parts of Jenkins are. Other than Jenkins itself and several plugins, it’s important to point out JCasC and Job DSL. JCasC stands for Jenkins Configuration as Code, and it allows you to configure Jenkins via a yaml file. The point here is that nobody should ever touch the Jenkins settings directly from the configuration page, in the same way, one ideally shouldn’t apply configuration changes manually in any dashboard. The CasC file is where we define the Slack integration, the user roles, SSO configuration, the number of agents and so on. We could also define the jobs in CasC but we go a step further than that. We use the Job DSL plugin that allows you to configure the jobs in groovy and in much more detail. One job we configure in the CasC file though is the seed job. This is a simple freestyle job that will go pick the jobs defined with Job DSL and create them in Jenkins. Deployment Let’s now discuss how we can get a configured Jenkins instance on EC2. In other words, how do we deploy Jenkins? We use a combination of tools that are bread and butter for DevOps people. The commands on the left spawn a Docker container that calls into the tools on the right. We start with Packer which allows us to create the AMI (Amazon Machine Image) together with Ansible, allowing us to configure an environment easily (much more easily than Chef or Puppet). Running the create-image command the script will: 1. Create a temporary EC2 instance 2. Connect to the instance and execute an ansible playbook Our playbook encompasses a number of steps, here’s a summary: install the Jenkins version for the given Linux distribution install Nginx copy the SSL cert over configure nginx w/ SSL termination and reverse proxy install the plugins for Jenkins Once the playbook is executed, Packer will export an AMI in EC2 with all of this in it and destroy the instance that was used. With the AMI ready, we can now proceed to deploy our Jenkins. For the actual deployment, we use Terraform which allows us to define our infrastructure in code. The deploy command runs Terraform under the hood to set up the infrastructure, here’s a summary of the task: create an IAM Role + IAM Policy configure security groups create the VPC and subnet to use with a specific CIDER block and the subnet create any private key pair to connect over SSH deploy the instance using a static private IP (it has to be static otherwise the A record in Route53 would break) copy the JCasC configuration file over so that when Jenkins starts it picks that up to configure itself The destroy command runs a “terraform destroy” and destroys everything that was created with the deploy command. Deploy and destroy balance each other out. Now that we have Jenkins up and running, we need to give it some credentials so our pipelines are able to work properly. A neat way of doing this is by having the secrets (SSH keys, Firebase tokens, App Store Connect API Key and so forth) in AWS Secrets Manager which is based on KMS and use a Jenkins plugin to allow Jenkins to access them. It’s important to note that developers don’t have to install Packer, Ansible, Terraform or even the AWS CLI locally because the commands run a Docker container that does the real work with all the tools installed. As a result, the only thing one should have installed is really Docker. CI agents Enough said about Jenkins, it’s time to talk about the agents.As you probably already know, in order to run tests, compile and archive iOS apps we need Xcode, which is only available on macOS, so Linux or Windows instances are not going to cut it. We experimented with the recently introduced AWS Mac instances and they are great, ready out-of-the-box with minimal configuration on our end. What we were hoping to get to with this recent work was the ability to leverage the Jenkins Cloud agents. That would have been awesome because it would have allowed us to: let Jenkins manage the agent instances scale the agent pool according to the load on CI Sadly we couldn't go that far. Limitations are: the bootstrapping of a mac1.metal takes around 15 minutes reusing the dedicated host after having stopped an instance can take up to 3 hours — during that time we just pay for a host that is not usable When you stop or terminate a Mac instance, Amazon EC2 performs a scrubbing workflow on the underlying Dedicated Host to erase the internal SSD, to clear the persistent NVRAM variables, and if needed, to update the bridgeOS software on the underlying Mac mini. This ensures that Mac instances provide the same security and data privacy as other EC2 Nitro instances. It also enables you to run the latest macOS AMIs without manually updating the bridgeOS software. During the scrubbing workflow, the Dedicated Host temporarily enters the pending state. If the bridgeOS software does not need to be updated, the scrubbing workflow takes up to 50 minutes to complete. If the bridgeOS software needs to be updated, the scrubbing workflow can take up to 3 hours to complete. Source: https://docs.aws.amazon.com/AWSEC2/latest/UserGuide/ec2-mac-instances.html In other words: scaling mac instances is not an option and leaving the instances up 24/7 seems to be the easiest option. This is especially valid if your team is distributed and jobs could potentially run over the weekend as well, saving you the hassle of implementing downscaling ahead of the weekend. There are some pricing and instance allocation considerations to make. Note that On-Demand Mac1 Dedicated Hosts have a minimum host allocation and billing duration of 24 hours. “You can purchase Savings Plans to lower your spend on Dedicated Hosts. Savings Plans is a flexible pricing model that provides savings of up to 72% on your AWS compute usage. This pricing model offers lower prices on Amazon EC2 instances usage, regardless of instance family, size, OS, tenancy or AWS Region.” Source: https://aws.amazon.com/ec2/dedicated-hosts/pricing/ The On-Demand rate is $1.207 per hour. I’d like to stress that no CI solution comes for free. I’ve often heard developers indicating that Travis and similar products are cheaper. The truth is that the comparison is not even remotely reasonable: virtual boxes are incredibly slow compared to native Apple hardware and take ridiculous bootstrapping times. Even the smallest projects suffer terribly. One might ask if it’s at least possible to use the same configuration process we used for the Jenkins instance (with Packer and Ansible) but sadly we hit additional limitations: Apple requires 2FA for downloading Xcode via xcode-version Apple requires 2FA for signing into Xcode The above pretty much causes the configuration flow to fall apart making it impossible to configure an instance via Ansible. Cloud agents for Android It was a different story for Android, in which we could easily configure the agent instance with Ansible and therefore leverage the Cloud configuration to allow automatic agent provisioning. This configuration is defined via CasC as everything else. To better control EC2 usage and costs, a few settings come in handy: minimum number of instances (up at all times) minimum number of spare instances (created to accommodate future jobs) instance cap: the maximum number of instances that can be provisioned at the same time idle termination time: how long agents should be kept alive after they have completed the job All of the above allow for proper scaling and a lot less maintenance compared to the iOS setup. A simple setup with 0 instances up at all times allows saving costs overnight and given that in our case the bootstrapping takes only 2 minutes, we can rely on the idle time setting. Conclusions Setting up an in-house CI is never a straightforward process and it requires several weeks of dedicated work. After years of waiting, Apple has announced Xcode Cloud which we believe will drastically change the landscape of continuous integration on iOS. The solution will most likely cause havoc for companies such as Bitrise and CircleCI and it’s reasonable to assume the pricing will be competitive compared to AWS, maybe running on custom hardware that only Apple is able to produce. A shift this big will take time to occur, so we foresee our solution to stay in use for quite some time. We hope to have inspired you on how a possible setup for mobile teams could be and informed you on what are the pros & cons of using EC2 mac instances.

iOS Monorepo & CI Pipelines
- iOS
- Monorepo
- Continuous Integration
- Jenkins
- Cocoapods
We have presented our modular iOS architecture in a previous article and I gave a talk at Swift Heroes 2020 about it. In this article, we’ll analyse the challenges we faced to have the modular architecture integrated with our CI pipelines and the reasoning behind migrating to a monorepo.
Originally published on the Just Eat Takeaway Engineering Blog. We have presented our modular iOS architecture in a previous article and I gave a talk at Swift Heroes 2020 about it. In this article, we’ll analyse the challenges we faced to have the modular architecture integrated with our CI pipelines and the reasoning behind migrating to a monorepo. The Problem Having several modules in separate repositories brings forward 2 main problems: Each module is versioned independently from the consuming app Each change involves at least 2 pull requests: 1 for the module and 1 for the integration in the app While the above was acceptable in a world where we had 2 different codebases, it soon became unnecessarily convoluted after we migrated to a new, global codebase. New module versions are implemented with the ultimate goal of being adopted by the only global codebase in use, making us realise we could simplify the change process. The monorepo approach has been discussed at length by the community for a few years now. Many talking points have come out of these conversations, even leading to an interesting story as told by Uber. In short, it entails putting all the code owned by the team in a single repository, precisely solving the 2 problems stated above. Monorepo structure The main advantage of a monorepo is a streamlined PR process that doesn’t require us to raise multiple PRs, de facto reducing the number of pull requests to one. It also simplifies the versioning, allowing module and app code (ultimately shipped together) to be aligned using the same versioning. The first step towards a monorepo was to move the content of the repositories of the modules to the main app repo (we’ll call it “monorepo” from now on). Since we rely on CocoaPods, the modules would be consumed as development pods. Here’s a brief summary of the steps used to migrate a module to the monorepo: Inform the relevant teams about the upcoming migration Make sure there are no open PRs in the module repo Make the repository read-only and archive it Copy the module to the Modules folder of the monorepo (it’s possible to merge 2 repositories to keep the history but we felt we wanted to keep the process simple, the old history is still available in the old repo anyway) Delete the module .git folder (or it would cause a git submodule) Remove Gemfile and Gemfile.lock fastlane folder, .gitignore file, sonar-project.properties, .swiftlint.yml so to use those in the monorepo Update the monorepo’s CODEOWNERS file with the module codeowners Remove the .github folder Modify the app Podfile to point to the module as a dev pod and install it Make sure all the modules’ demo apps in the monorepo refer to the new module as a dev pod (if they depend on it at all). The same applies to the module under migration. Delete the CI jobs related to the module Leave the podspecs in the private Specs repo (might be needed to build old versions of the app) The above assumes that CI is configured in a way that preserves the same integration steps upon a module change. We’ll discuss them later in this article. Not all the modules could be migrated to the monorepo, due to the fact the second-level dependencies need to live in separate repositories in order to be referenced in the podspec of a development pod. If not done correctly, CocoaPods will not be able to install them. We considered moving these dependencies to the monorepo whilst maintaining separate versioning, however, the main problem with this approach is that the version tags might conflict with the ones of the app. Even though CocoaPods supports tags that don’t respect semantic versioning (for example prepending the tag with the name of the module), violating it just didn’t feel right. EDIT: we’ve learned that it’s possible to move such dependencies to the monorepo. This is done not by defining :path=> in the podspecs but instead by doing so in the Podfile of the main app, which is all Cocoapods needs to work out the location of the dependency on disk. Swift Package Manager considerations We investigated the possibility of migrating from CocoaPods to Apple’s Swift Package Manager. Unfortunately, when it comes to handling the equivalent of development pods, Swift Package Manager really falls down for us. It turns out that Swift Package Manager only supports one package per repo, which is frustrating because the process of working with editable packages is surprisingly powerful and transparent. Version pinning rules While development pods don’t need to be versioned, other modules still need to. This is either because of their open-source nature or because they are second-level dependencies (referenced in other modules’ podspecs). Here’s a revised overview of the current modular architecture in 2021. We categorised our pods to better clarify what rules should apply when it comes to version pinning both in the Podfiles and in the podspecs. Open-Source pods Our open-source repositories on github.com/justeat are only used by the app. Examples: JustTweak, AutomationTools, Shock Pinning in other modules’ podspec: NOT APPLICABLE open-source pods don’t appear in any podspec, those that do are called ‘open-source shared’ Pinning in other modules’ Podfile (demo apps): PIN (e.g. AutomationTools in Orders demo app’s Podfile) Pinning in main app’s Podfile: PIN (e.g. AutomationTools) Open-Source shared pods The Just Eat pods we put open-source on github.com/justeat and are used by modules and apps. Examples: JustTrack, JustLog, ScrollingStackViewController, ErrorUtilities Pinning in other modules’ podspec: PIN w/ optimistic operator (e.g. JustTrack in Orders) Pinning in other modules’ Podfile (demo apps): PIN (e.g. JustTrack in Orders demo app’s Podfile) Pinning in main app’s Podfile: DON’T LIST latest compatible version is picked by CocoaPods (e.g. JustTrack). LIST & PIN if the pod is explicitly used in the app too, so we don’t magically inherit it. Internal Domain pods Domain modules (yellow). Examples: Orders, SERP, etc. Pinning in other modules’ podspec: NOT APPLICABLE domain pods don’t appear in other pods’ podspecs (domain modules don’t depend on other domain modules) Pinning in other modules’ Podfile (demo apps): PIN only if the pod is used in the app code, rarely the case (e.g. Account in Orders demo app’s Podfile) Pinning in main app’s Podfile: PIN (e.g. Orders) Internal Core pods Core modules (blue) minus those open-source. Examples: APIClient, AssetProvider Pinning in other modules’ podspec: NOT APPLICABLE core pods don’t appear in other pods’ podspecs (core modules are only used in the app(s)) Pinning in other modules’ Podfile (demo apps): PIN only if pod is used in the app code (e.g. APIClient in Orders demo app’s Podfile) Pinning in main app’s Podfile: PIN (e.g. NavigationEngine) Internal shared pods Shared modules (green) minus those open-source. Examples: JustUI, JustAnalytics Pinning in other modules’ podspec: DON’T PIN (e.g. JustUI in Orders podspec) Pinning in other modules’ Podfile (demo apps): PIN (e.g. JustUI in Orders demo app’s Podfile) Pinning in main app’s Podfile: PIN (e.g. JustUI) External shared pods Any non-Just Eat pod used by any internal or open-source pod. Examples: Usabilla, SDWebImage Pinning in other modules’ podspec: PIN (e.g. Usabilla in Orders) Pinning in other modules’ Podfile (demo apps): DON’T LIST because the version is forced by the podspec. LIST & PIN if the pod is explicitly used in the app too, so we don’t magically inherit it. Pinning is irrelevant but good practice. Pinning in main app’s Podfile: DON’T LIST because the version is forced by the podspec(s). LIST & PIN if the pod is explicitly used in the app too, so we don’t magically inherit it. Pinning is irrelevant but good practice. External pods Any non-Just Eat pod used by the app only. Examples: Instabug, GoogleAnalytics Pinning in other modules’ podspec: NOT APPLICABLE external pods don’t appear in any podspec, those that do are called ‘external shared’ Pinning in other modules’ Podfile (demo apps): PIN only if the pod is used in the app code, rarely the case (e.g. Promis) Pinning in main app’s Podfile: PIN (e.g. Adjust) Pinning is a good solution because it guarantees that we always build the same software regardless of new released versions of dependencies. It’s also true that pinning every dependency all the time makes the dependency graph hard to keep updated. This is why we decided to allow some flexibility in some cases. Following is some more reasoning. Open-source For “open-source shared” pods, we are optimistic enough (pun intended) to tolerate the usage of the optimistic operator ~> in podspecs of other pods (i.e Orders using JustTrack) so that when a new patch version is released, the consuming pod gets it for free upon running pod update. We have control over our code and, by respecting semantic versioning, we guarantee the consuming pod to always build. In case of new minor or major versions, we would have to update the podspecs of the consuming pods, which is appropriate. Also, we do need to list any “open-source shared” pod in the main app’s Podfile only if directly used by the app code. External We don’t have control over the “external” and “external shared” pods, therefore we always pin the version in the appropriate place. New patch versions might not respect semantic versioning for real and we don’t want to pull in new code unintentionally. As a rule of thumb, we prefer injecting external pods instead of creating a dependency in the podspec. Internal Internal shared pods could change frequently (not as much as domain modules). For this reason, we’ve decided to relax a constraint we had and not to pin the version in the podspec. This might cause the consuming pod to break when a new version of an “internal shared” pod is released and we run pod update. This is a compromise we can tolerate. The alternative would be to pin the version causing too much work to update the podspec of the domain modules. Continuous Integration changes With modules in separate repositories, the CI was quite simply replicating the same steps for each module: install pods run unit tests run UI tests generated code coverage submit code coverage to SonarQube Moving the modules to the monorepo meant creating smart CI pipelines that would run the same steps upon modules’ changes. If a pull request is to change only app code, there is no need to run any step for the modules, just the usual steps for the app: If instead, a pull request applies changes to one or more modules, we want the pipeline to first run the steps for the modules, and then the steps for the app: Even if there are no changes in the app code, module changes could likely impact the app behaviour, so it’s important to always run the app tests. We have achieved the above setup through constructing our Jenkins pipelines dynamically. The solution should scale when new modules are added to the monorepo and for this reason, it’s important that all modules: respect the same project setup (generated by CocoaPods w/ the pod lib create command) use the same naming conventions for the test schemes (UnitTests/ContractTests/UITests) make use of Apple Test Plans are in the same location ( ./Modules/ folder). Following is an excerpt of the code that constructs the modules’ stages from the Jenkinsfile used for pull request jobs. scripts = load "./Jenkins/scripts/scripts.groovy" def modifiedModules = scripts.modifiedModulesFromReferenceBranch(env.CHANGE_TARGET) def modulesThatNeedUpdating = scripts.modulesThatNeedUpdating(env.CHANGE_TARGET) def modulesToRun = (modulesThatNeedUpdating + modifiedModules).unique() sh "echo \"List of modules modified on this branch: ${modifiedModules}\"" sh "echo \"List of modules that need updating: ${modulesThatNeedUpdating}\"" sh "echo \"Pipeline will run the following modules: ${modulesToRun}\"" for (int i = 0; i < modulesToRun.size(); ++i) { def moduleName = modulesToRun[i] stage('Run pod install') { sh "bundle exec fastlane pod_install module:${moduleName}" } def schemes = scripts.testSchemesForModule(moduleName) schemes.each { scheme -> switch (scheme) { case "UnitTests": stage("${moduleName} Unit Tests") { sh "bundle exec fastlane module_unittests \ module_name:${moduleName} \ device:'${env.IPHONE_DEVICE}'" } stage("Generate ${moduleName} code coverage") { sh "bundle exec fastlane generate_sonarqube_coverage_xml" } stage("Submit ${moduleName} code coverage to SonarQube") { sh "bundle exec fastlane sonar_scanner_pull_request \ component_type:'module' \ source_branch:${env.BRANCH_NAME} \ target_branch:${env.CHANGE_TARGET} \ pull_id:${env.CHANGE_ID} \ project_key:'ios-${moduleName}' \ project_name:'iOS ${moduleName}' \ sources_path:'./Modules/${moduleName}/${moduleName}'" } break; case "ContractTests": stage('Install pact mock service') { sh "bundle exec fastlane install_pact_mock_service" } stage("${moduleName} Contract Tests") { sh "bundle exec fastlane module_contracttests \ module_name:${moduleName} \ device:'${env.IPHONE_DEVICE}'" } break; case "UITests": stage("${moduleName} UI Tests") { sh "bundle exec fastlane module_uitests \ module_name:${moduleName} \ number_of_simulators:${env.NUMBER_OF_SIMULATORS} \ device:'${env.IPHONE_DEVICE}'" } break; default: break; } } } and here are the helper functions to make it all work: def modifiedModulesFromReferenceBranch(String referenceBranch) { def script = "git diff --name-only remotes/origin/${referenceBranch}" def filesChanged = sh script: script, returnStdout: true Set modulesChanged = [] filesChanged.tokenize("\n").each { def components = it.split('/') if (components.size() > 1 && components[0] == 'Modules') { def module = components[1] modulesChanged.add(module) } } return modulesChanged } def modulesThatNeedUpdating(String referenceBranch) { def modifiedModules = modifiedModulesFromReferenceBranch(referenceBranch) def allModules = allMonorepoModules() def modulesThatNeedUpdating = [] for (module in allModules) { def podfileLockPath = "Modules/${module}/Example/Podfile.lock" def dependencies = podfileDependencies(podfileLockPath) def dependenciesIntersection = dependencies.intersect(modifiedModules) as TreeSet Boolean moduleNeedsUpdating = (dependenciesIntersection.size() > 0) if (moduleNeedsUpdating == true && modifiedModules.contains(module) == false) { modulesThatNeedUpdating.add(module) } } return modulesThatNeedUpdating } def podfileDependencies(String podfileLockPath) { def dependencies = [] def fileContent = readFile(file: podfileLockPath) fileContent.tokenize("\n").each { line -> def lineComponents = line.split('\\(') if (lineComponents.length > 1) { def dependencyLineSubComponents = lineComponents[0].split('-') if (dependencyLineSubComponents.length > 1) { def moduleName = dependencyLineSubComponents[1].trim() dependencies.add(moduleName) } } } return dependencies } def allMonorepoModules() { def modulesList = sh script: "ls Modules", returnStdout: true return modulesList.tokenize("\n").collect { it.trim() } } def testSchemesForModule(String moduleName) { def script = "xcodebuild -project ./Modules/${moduleName}/Example/${moduleName}.xcodeproj -list" def projectEntitites = sh script: script, returnStdout: true def schemesPart = projectEntitites.split('Schemes:')[1] def schemesPartLines = schemesPart.split(/\n/) def trimmedLined = schemesPartLines.collect { it.trim() } def filteredLines = trimmedLined.findAll { !it.allWhitespace } def allowedSchemes = ['UnitTests', 'ContractTests', 'UITests'] def testSchemes = filteredLines.findAll { allowedSchemes.contains(it) } return testSchemes } You might have noticed the modulesThatNeedUpdating method in the code above. Each module comes with a demo app using the dependencies listed in its Podfile and it’s possible that other monorepo modules are listed there as development pods. This not only means that we have to run the steps for the main app, but also the steps for every module consuming modules that show changes. For example, the Orders demo app uses APIClient, meaning that pull requests with changes in APIClient will generate pipelines including the Orders steps. Pipeline parallelization Something we initially thought was sensible to consider is the parallelisation of the pipelines across different nodes. We use parallelisation for the release pipelines and learned that, while it seems to be a fundamental requirement at first, it soon became apparent not to be so desirable nor truly fundamental for the pull requests pipeline. We’ll discuss our CI setup in a separate article, but suffice to say that we have aggressively optimized it and managed to reduce the agent pool from 10 to 5, still maintaining a good level of service. Parallelisation sensibly complicates the Jenkinsfiles and their maintainability, spreads the cost of checking out the repository across nodes and makes the logs harder to read. The main benefit would come from running the app UI tests on different nodes. In the WWDC session 413, Apple recommends generating the .xctestrun file using the build-for-testing option in xcodebuild and distribute it across the other nodes. Since our app is quite large, such file is also large and transferring it has its costs, both in time and bandwidth usage. All things considered, we decided to keep the majority of our pipelines serial. EDIT: In 2022 we have parallelised our PR pipeline in 4 branches: Validation steps (linting, Fastlane lanes tests, etc.) App unit tests App UI tests (short enough that there's no need to share .xctestrun across nodes) Modified modules unit tests Modified modules UI tests Conclusions We have used the setup described in this article since mid-2020 and we are very satisfied with it. We discussed the pipeline used for the pull requests which is the most relevant one when it comes to embracing a monorepo structure. We have a few more pipelines for various use cases, such as verifying changes in release branches, keeping the code coverage metrics up-to-date with jobs running of triggers, archiving the app for internal usage and for App Store. We hope to have given you some useful insights on how to structure a monorepo and its CI pipelines, especially if you have a structure similar to ours.

The algorithm powering iHarmony
- music
- chords
- scales
- iOS
- swift
- App Store
Problem
I wrote the first version of iHarmony in 2008. It was the very first iOS app I gave birth to, combining my passion for music and programming. I remember buying an iPhone and my first Mac with the precise purpose of jumping on the apps train at a time
Problem I wrote the first version of iHarmony in 2008. It was the very first iOS app I gave birth to, combining my passion for music and programming. I remember buying an iPhone and my first Mac with the precise purpose of jumping on the apps train at a time when it wasn't clear if the apps were there to stay or were just a temporary hype. But I did it, dropped my beloved Ubuntu to join a whole new galaxy. iHarmony was also one of the first 2000 apps on the App Store. Up until the recent rewrite, iHarmony was powered by a manually crafted database containing scales, chords, and harmonization I inputted. What-a-shame! I guess it made sense, I wanted to learn iOS and not to focus on implementing some core logic independent from the platform. Clearly a much better and less error-prone way to go would be to implement an algorithm to generate all the entries based on some DSL/spec. It took me almost 12 years to decide to tackle the problem and I've recently realized that writing the algorithm I wanted was harder than I thought. Also thought was a good idea give SwiftUI a try since the UI of iHarmony is extremely simple but... nope. Since someone on the Internet expressed interest 😉, I wrote this article to explain how I solved the problem of modeling music theory concepts in a way that allows the generation of any sort of scales, chords, and harmonization. I only show the code needed to get a grasp of the overall structure. I know there are other solutions ready to be used on GitHub but, while I don't particularly like any of them, the point of rewriting iHarmony from scratch was to challenge myself, not to reuse code someone else wrote. Surprisingly to me, getting to the solution described here took me 3 rewrites and 2 weeks. Solution The first fundamental building blocks to model are surely the musical notes, which are made up of a natural note and an accidental. enum NaturalNote: String { case C, D, E, F, G, A, B } enum Accidental: String { case flatFlatFlat = "bbb" case flatFlat = "bb" case flat = "b" case natural = "" case sharp = "#" case sharpSharp = "##" case sharpSharpSharp = "###" func applyAccidental(_ accidental: Accidental) throws -> Accidental {...} } struct Note: Hashable, Equatable { let naturalNote: NaturalNote let accidental: Accidental ... static let Dff = Note(naturalNote: .D, accidental: .flatFlat) static let Df = Note(naturalNote: .D, accidental: .flat) static let D = Note(naturalNote: .D, accidental: .natural) static let Ds = Note(naturalNote: .D, accidental: .sharp) static let Dss = Note(naturalNote: .D, accidental: .sharpSharp) ... func noteByApplyingAccidental(_ accidental: Accidental) throws -> Note {...} } Combinations of notes make up scales and chords and they are... many. What's fixed instead in music theory, and therefore can be hard-coded, are the keys (both major and minor) such as: C major: C, D, E, F, G, A, B A minor: A, B, C, D, E, F, G D major: D, E, F#, G, A, B, C# We'll get back to the keys later, but we can surely implement the note sequence for each musical key. typealias NoteSequence = [Note] extension NoteSequence { static let C = [Note.C, Note.D, Note.E, Note.F, Note.G, Note.A, Note.B] static let A_min = [Note.A, Note.B, Note.C, Note.D, Note.E, Note.F, Note.G] static let G = [Note.G, Note.A, Note.B, Note.C, Note.D, Note.E, Note.Fs] static let E_min = [Note.E, Note.Fs, Note.G, Note.A, Note.B, Note.C, Note.D] ... } Next stop: intervals. They are a bit more interesting as not every degree has the same types. Let's split into 2 sets: 2nd, 3rd, 6th and 7th degrees can be minor, major, diminished and augmented 1st (and 8th), 4th and 5th degrees can be perfect, diminished and augmented. We need to use different kinds of "diminished" and "augmented" for the 2 sets as later on we'll have to calculate the accidentals needed to turn an interval into another. Some examples: to get from 2nd augmented to 2nd diminished, we need a triple flat accidental (e.g. in C major scale, from D♯ to D♭♭ there are 3 semitones) to get from 5th augmented to 5th diminished, we need a double flat accidental (e.g. in C major scale, from G♯ to G♭there are 2 semitones) We proceed to hard-code the allowed intervals in music, leaving out the invalid ones (e.g. Interval(degree: ._2, type: .augmented)) enum Degree: Int, CaseIterable { case _1, _2, _3, _4, _5, _6, _7, _8 } enum IntervalType: Int, RawRepresentable { case perfect case minor case major case diminished case augmented case minorMajorDiminished case minorMajorAugmented } struct Interval: Hashable, Equatable { let degree: Degree let type: IntervalType static let _1dim = Interval(degree: ._1, type: .diminished) static let _1 = Interval(degree: ._1, type: .perfect) static let _1aug = Interval(degree: ._1, type: .augmented) static let _2dim = Interval(degree: ._2, type: .minorMajorDiminished) static let _2min = Interval(degree: ._2, type: .minor) static let _2maj = Interval(degree: ._2, type: .major) static let _2aug = Interval(degree: ._2, type: .minorMajorAugmented) ... static let _4dim = Interval(degree: ._4, type: .diminished) static let _4 = Interval(degree: ._4, type: .perfect) static let _4aug = Interval(degree: ._4, type: .augmented) ... static let _7dim = Interval(degree: ._7, type: .minorMajorDiminished) static let _7min = Interval(degree: ._7, type: .minor) static let _7maj = Interval(degree: ._7, type: .major) static let _7aug = Interval(degree: ._7, type: .minorMajorAugmented) } Now it's time to model the keys (we touched on them above already). What's important is to define the intervals for all of them (major and minor ones). enum Key { // natural case C, A_min // sharp case G, E_min case D, B_min case A, Fs_min case E, Cs_min case B, Gs_min case Fs, Ds_min case Cs, As_min // flat case F, D_min case Bf, G_min case Ef, C_min case Af, F_min case Df, Bf_min case Gf, Ef_min case Cf, Af_min ... enum KeyType { case naturalMajor case naturalMinor case flatMajor case flatMinor case sharpMajor case sharpMinor } var type: KeyType { switch self { case .C: return .naturalMajor case .A_min: return .naturalMinor case .G, .D, .A, .E, .B, .Fs, .Cs: return .sharpMajor case .E_min, .B_min, .Fs_min, .Cs_min, .Gs_min, .Ds_min, .As_min: return .sharpMinor case .F, .Bf, .Ef, .Af, .Df, .Gf, .Cf: return .flatMajor case .D_min, .G_min, .C_min, .F_min, .Bf_min, .Ef_min, .Af_min: return .flatMinor } } var intervals: [Interval] { switch type { case .naturalMajor, .flatMajor, .sharpMajor: return [ ._1, ._2maj, ._3maj, ._4, ._5, ._6maj, ._7maj ] case .naturalMinor, .flatMinor, .sharpMinor: return [ ._1, ._2maj, ._3min, ._4, ._5, ._6min, ._7min ] } } var notes: NoteSequence { switch self { case .C: return .C case .A_min: return .A_min ... } } At this point we have all the fundamental building blocks and we can proceed with the implementation of the algorithm. The idea is to have a function that given a key a root interval a list of intervals it works out the list of notes. In terms of inputs, it seems the above is all we need to correctly work out scales, chords, and - by extension - also harmonizations. Mind that the root interval doesn't have to be part of the list of intervals, that is simply the interval to start from based on the given key. Giving a note as a starting point is not good enough since some scales simply don't exist for some notes (e.g. G♯ major scale doesn't exist in the major key, and G♭minor scale doesn't exist in any minor key). Before progressing to the implementation, please consider the following unit tests that should make sense to you: func test_noteSequence_C_1() { let key: Key = .C let noteSequence = try! engine.noteSequence(customKey: key.associatedCustomKey, intervals: [._1, ._2maj, ._3maj, ._4, ._5, ._6maj, ._7maj]) let expectedValue: NoteSequence = [.C, .D, .E, .F, .G, .A, .B] XCTAssertEqual(noteSequence, expectedValue) } func test_noteSequence_withRoot_C_3maj_majorScaleIntervals() { let key = Key.C let noteSequence = try! engine.noteSequence(customKey: key.associatedCustomKey, rootInterval: ._3maj, intervals: [._1, ._2maj, ._3maj, ._4, ._5, ._6maj, ._7maj]) let expectedValue: NoteSequence = [.E, .Fs, .Gs, .A, .B, .Cs, .Ds] XCTAssertEqual(noteSequence, expectedValue) } func test_noteSequence_withRoot_Gsmin_3maj_alteredScaleIntervals() { let key = Key.Gs_min let noteSequence = try! engine.noteSequence(customKey: key.associatedCustomKey, rootInterval: ._3maj, intervals: [._1aug, ._2maj, ._3dim, ._4dim, ._5aug, ._6dim, ._7dim]) let expectedValue: NoteSequence = [.Bs, .Cs, .Df, .Ef, .Fss, .Gf, .Af] XCTAssertEqual(noteSequence, expectedValue) } and here is the implementation. Let's consider a simple case, so it's easier to follow: key = C major root interval = 3maj interval = major scale interval (1, 2maj, 3min, 4, 5, 6maj, 7min) if you music theory allowed you to understand the above unit tests, you would expect the output to be: E, F♯, G, A, B, C♯, D (which is a Dorian scale). Steps: we start by shifting the notes of the C key to position the 3rd degree (based on the 3maj) as the first element of the array, getting the note sequence E, F, G, A, B, C, D; here's the first interesting bit: we then get the list of intervals by calculating the number of semitones from the root to any other note in the sequence and working out the corresponding Interval: 1_perfect, 2_minor, 3_minor, 4_perfect, 5_perfect, 6_minor, 7_minor; we now have all we need to create a CustomKey which is pretty much a Key (with notes and intervals) but instead of being an enum with pre-defined values, is a struct; here's the second tricky part: return the notes by mapping the input intervals. Applying to each note in the custom key the accidental needed to match the desired interval. In our case, the only 2 intervals to 'adjust' are the 2nd and the 6th intervals, both minor in the custom key but major in the list of intervals. So we have to apply a sharp accidental to 'correct' them. 👀 I've used force unwraps in these examples for simplicity, the code might already look complex by itself. class CoreEngine { func noteSequence(customKey: CustomKey, rootInterval: Interval = ._1, intervals: [Interval]) throws -> NoteSequence { // 1. let noteSequence = customKey.shiftedNotes(by: rootInterval.degree) let firstNoteInShiftedSequence = noteSequence.first! // 2. let adjustedIntervals = try noteSequence.enumerated().map { try interval(from: firstNoteInShiftedSequence, to: $1, targetDegree: Degree(rawValue: $0)!) } // 3. let customKey = CustomKey(notes: noteSequence, intervals: adjustedIntervals) // 4. return try intervals.map { let referenceInterval = customKey.firstIntervalWithDegree($0.degree)! let note = customKey.notes[$0.degree.rawValue] let accidental = try referenceInterval.type.accidental(to: $0.type) return try note.noteByApplyingAccidental(accidental) } } } It's worth showing the implementation of the methods used above: private func numberOfSemitones(from sourceNote: Note, to targetNote: Note) -> Int { let notesGroupedBySameTone: [[Note]] = [ [.C, .Bs, .Dff], [.Cs, .Df, .Bss], [.D, .Eff, .Css], [.Ds, .Ef, .Fff], [.E, .Dss, .Ff], [.F, .Es, .Gff], [.Fs, .Ess, .Gf], [.G, .Fss, .Aff], [.Gs, .Af], [.A, .Gss, .Bff], [.As, .Bf, .Cff], [.B, .Cf, .Ass] ] let startIndex = notesGroupedBySameTone.firstIndex { $0.contains(sourceNote)}! let endIndex = notesGroupedBySameTone.firstIndex { $0.contains(targetNote)}! return endIndex >= startIndex ? endIndex - startIndex : (notesGroupedBySameTone.count - startIndex) + endIndex } private func interval(from sourceNote: Note, to targetNote: Note, targetDegree: Degree) throws -> Interval { let semitones = numberOfSemitones(from: sourceNote, to: targetNote) let targetType: IntervalType = try { switch targetDegree { case ._1, ._8: return .perfect ... case ._4: switch semitones { case 4: return .diminished case 5: return .perfect case 6: return .augmented default: throw CustomError.invalidConfiguration ... case ._7: switch semitones { case 9: return .minorMajorDiminished case 10: return .minor case 11: return .major case 0: return .minorMajorAugmented default: throw CustomError.invalidConfiguration } } }() return Interval(degree: targetDegree, type: targetType) } the Note's noteByApplyingAccidental method: func noteByApplyingAccidental(_ accidental: Accidental) throws -> Note { let newAccidental = try self.accidental.apply(accidental) return Note(naturalNote: naturalNote, accidental: newAccidental) } and the Accidental's apply method: func apply(_ accidental: Accidental) throws -> Accidental { switch (self, accidental) { ... case (.flat, .flatFlatFlat): throw CustomError.invalidApplicationOfAccidental case (.flat, .flatFlat): return .flatFlatFlat case (.flat, .flat): return .flatFlat case (.flat, .natural): return .flat case (.flat, .sharp): return .natural case (.flat, .sharpSharp): return .sharp case (.flat, .sharpSharpSharp): return .sharpSharp case (.natural, .flatFlatFlat): return .flatFlatFlat case (.natural, .flatFlat): return .flatFlat case (.natural, .flat): return .flat case (.natural, .natural): return .natural case (.natural, .sharp): return .sharp case (.natural, .sharpSharp): return .sharpSharp case (.natural, .sharpSharpSharp): return .sharpSharpSharp ... } With the above engine ready (and 💯﹪ unit tested!), we can now proceed to use it to work out what we ultimately need (scales, chords, and harmonizations). extension CoreEngine { func scale(note: Note, scaleIdentifier: Identifier) throws -> NoteSequence {...} func chord(note: Note, chordIdentifier: Identifier) throws -> NoteSequence {...} func harmonization(key: Key, harmonizationIdentifier: Identifier) throws -> NoteSequence {...} func chordSignatures(note: Note, scaleHarmonizationIdentifier: Identifier) throws -> [ChordSignature] {...} func harmonizations(note: Note, scaleHarmonizationIdentifier: Identifier) throws -> [NoteSequence] {...} } Conclusions There's more to it but with this post I only wanted to outline the overall idea. The default database is available on GitHub at albertodebortoli/iHarmonyDB. The format used is JSON and the community can now easily suggest additions. Here is how the definition of a scale looks: "scale_dorian": { "group": "group_scales_majorModes", "isMode": true, "degreeRelativeToMain": 2, "inclination": "minor", "intervals": [ "1", "2maj", "3min", "4", "5", "6maj", "7min" ] } and a chord: "chord_diminished": { "group": "group_chords_diminished", "abbreviation": "dim", "intervals": [ "1", "3min", "5dim" ] } and a harmonization: "scaleHarmonization_harmonicMajorScale4Tones": { "group": "group_harmonization_harmonic_major", "inclination": "major", "harmonizations": [ "harmonization_1_major7plus", "harmonization_2maj_minor7dim5", "harmonization_3maj_minor7", "harmonization_4_minor7plus", "harmonization_5_major7", "harmonization_6min_major7plus5sharp", "harmonization_7maj_diminished7" ] } Have to say, I'm pretty satisfied with how extensible this turned out to be. Thanks for reading 🎶
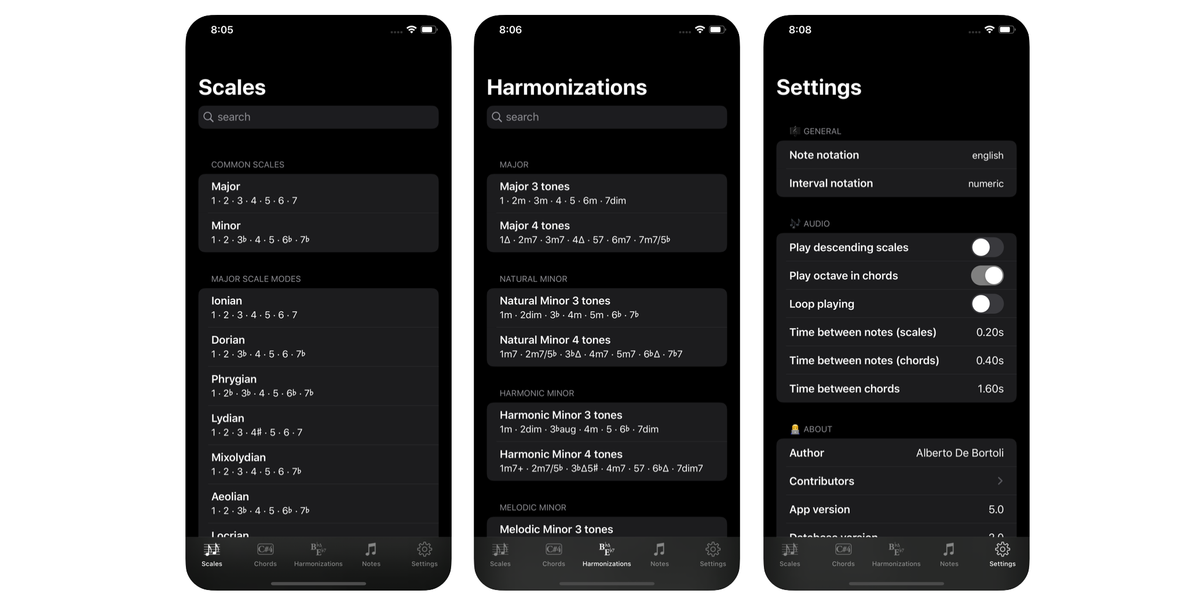
The iOS internationalization basics I keep forgetting
- iOS
- formatting
- date
- currency
- timezone
- locale
- language
Localizations, locales, timezones, date and currency formatting... it's shocking how easy is to forget how they work and how to use them correctly. In this article, I try to summarize the bare minimum one needs to know to add internationalization support to an iOS app.
In this article, I try to summarize the bare minimum one needs to know to add internationalization support to an iOS app. Localizations, locales, timezones, date and currency formatting... it's shocking how easy is to forget how they work and how to use them correctly. After years more than 10 years into iOS development, I decided to write down a few notes on the matter, with the hope that they will come handy again in the future, hopefully not only to me. TL;DR From Apple docs: Date: a specific point in time, independent of any calendar or time zone; TimeZone: information about standard time conventions associated with a specific geopolitical region; Locale: information about linguistic, cultural, and technological conventions for use in formatting data for presentation. Rule of thumb: All DateFormatters should use the locale and the timezone of the device; All NumberFormatter, in particular those with numberStyle set to .currency (for the sake of this article) should use a specific locale so that prices are not shown in the wrong currency. General notes on formatters Let's start by stating the obvious. Since iOS 10, Foundation (finally) provides ISO8601DateFormatter, which, alongside with DateFormatter and NumberFormatter, inherits from Formatter. Formatter locale property timeZone property ISO8601DateFormatter ❌ ✅ DateFormatter ✅ ✅ NumberFormatter ✅ ❌ In an app that only consumes data from an API, the main purpose of ISO8601DateFormatter is to convert strings to dates (String -> Date) more than the inverse. DateFormatter is then used to format dates (Date -> String) to ultimately show the values in the UI. NumberFormatter instead, converts numbers (prices in the vast majority of the cases) to strings (NSNumber/Decimal -> String). Formatting dates 🕗 🕝 🕟 It seems the following 4 are amongst the most common ISO 8601 formats, including the optional UTC offset. A: 2019-10-02T16:53:42 B: 2019-10-02T16:53:42Z C: 2019-10-02T16:53:42-02:00 D: 2019-10-02T16:53:42.974Z In this article I'll stick to these formats. The 'Z' at the end of an ISO8601 date indicates that it is in UTC, not a local time zone. Locales Converting strings to dates (String -> Date) is done using ISO8601DateFormatter objects set up with various formatOptions. Once we have a Date object, we can deal with the formatting for the presentation. Here, the locale is important and things can get a bit tricky. Locales have nothing to do with timezones, locales are for applying a format using a language/region. Locale identifiers are in the form of <language_identifier>_<region_identifier> (e.g. en_GB). We should use the user's locale when formatting dates (Date -> String). Consider a British user moving to Italy, the apps should keep showing a UI localized in English, and the same applies to the dates that should be formatted using the en_GB locale. Using the it_IT locale would show "2 ott 2019, 17:53" instead of the correct "2 Oct 2019 at 17:53". Locale.current, shows the locale set (overridden) in the iOS simulator and setting the language and regions in the scheme's options comes handy for debugging. Some might think that it's acceptable to use Locale.preferredLanguages.first and create a Locale from it with let preferredLanguageLocale = Locale(identifier: Locale.preferredLanguages.first!) and set it on the formatters. I think that doing so is not great since we would display dates using the Italian format but we won't necessarily be using the Italian language for the other UI elements as the app might not have the IT localization, causing an inconsistent experience. In short: don't use preferredLanguages, best to use Locale.current. Apple strongly suggests using en_US_POSIX pretty much everywhere (1, 2). From Apple docs: [...] if you're working with fixed-format dates, you should first set the locale of the date formatter to something appropriate for your fixed format. In most cases the best locale to choose is "en_US_POSIX", a locale that's specifically designed to yield US English results regardless of both user and system preferences. "en_US_POSIX" is also invariant in time (if the US, at some point in the future, changes the way it formats dates, "en_US" will change to reflect the new behaviour, but "en_US_POSIX" will not), and between machines ("en_US_POSIX" works the same on iOS as it does on OS X, and as it it does on other platforms). Once you've set "en_US_POSIX" as the locale of the date formatter, you can then set the date format string and the date formatter will behave consistently for all users. I couldn't find a really valid reason for doing so and quite frankly using the device locale seems more appropriate for converting dates to strings. Here is the string representation for the same date using different locales: en_US_POSIX: May 2, 2019 at 3:53 PM en_GB: 2 May 2019 at 15:53 it_IT: 2 mag 2019, 15:53 The above should be enough to show that en_US_POSIX is not what we want to use in this case, but it has more to do with maintaining a standard for communication across machines. From this article: "[...] Unless you specifically need month and/or weekday names to appear in the user's language, you should always use the special locale of en_US_POSIX. This will ensure your fixed format is actually fully honored and no user settings override your format. This also ensures month and weekday names appear in English. Without using this special locale, you may get 24-hour format even if you specify 12-hour (or visa-versa). And dates sent to a server almost always need to be in English." Timezones Stating the obvious one more time: Greenwich Mean Time (GMT) is a time zone while Coordinated Universal Time (UTC) is a time standard. There is no time difference between them. Timezones are fundamental to show the correct date/time in the final text shown to the user. The timezone value is taken from macOS and the iOS simulator inherits it, meaning that printing TimeZone.current, shows the timezone set in the macOS preferences (e.g. Europe/Berlin). Show me some code Note that in the following example, we use GMT (Greenwich Mean Time) and CET (Central European Time), which is GMT+1. Mind that it's best to reuse formatters since the creation is expensive. class CustomDateFormatter { private let dateFormatter: DateFormatter = { let dateFormatter = DateFormatter() dateFormatter.dateStyle = .medium dateFormatter.timeStyle = .short return dateFormatter }() private let locale: Locale private let timeZone: TimeZone init(locale: Locale = .current, timeZone: TimeZone = .current) { self.locale = locale self.timeZone = timeZone } func string(from date: Date) -> String { dateFormatter.locale = locale dateFormatter.timeZone = timeZone return dateFormatter.string(from: date) } } let stringA = "2019-11-02T16:53:42" let stringB = "2019-11-02T16:53:42Z" let stringC = "2019-11-02T16:53:42-02:00" let stringD = "2019-11-02T16:53:42.974Z" // The ISO8601DateFormatter's extension (redacted) // internally uses multiple formatters, each one set up with different // options (.withInternetDateTime, .withFractionalSeconds, withFullDate, .withTime, .withColonSeparatorInTime) // to be able to parse all the formats. // timeZone property is set to GMT. let dateA = ISO8601DateFormatter.date(from: stringA)! let dateB = ISO8601DateFormatter.date(from: stringB)! let dateC = ISO8601DateFormatter.date(from: stringC)! let dateD = ISO8601DateFormatter.date(from: stringD)! var dateFormatter = CustomDateFormatter(locale: Locale(identifier: "en_GB"), timeZone: TimeZone(identifier: "GMT")!) dateFormatter.string(from: dateA) // 2 Nov 2019 at 16:53 dateFormatter.string(from: dateB) // 2 Nov 2019 at 16:53 dateFormatter.string(from: dateC) // 2 Nov 2019 at 18:53 dateFormatter.string(from: dateD) // 2 Nov 2019 at 16:53 dateFormatter = CustomDateFormatter(locale: Locale(identifier: "it_IT"), timeZone: TimeZone(identifier: "CET")!) dateFormatter.string(from: dateA) // 2 nov 2019, 17:53 dateFormatter.string(from: dateB) // 2 nov 2019, 17:53 dateFormatter.string(from: dateC) // 2 nov 2019, 19:53 dateFormatter.string(from: dateD) // 2 nov 2019, 17:53 Using the CET timezone also for ISO8601DateFormatter, the final string produced for dateA would respectively be "15:53" when formatted with GMT and "16:53" when formatted with CET. As long as the string passed to ISO8601DateFormatter is in UTC, it's irrelevant to set the timezone on the formatter. Apple suggests to set the timeZone property to UTC with TimeZone(secondsFromGMT: 0), but this is irrelevant if the string representing the date already includes the timezone. If your server returns a string representing a date that is not in UTC, it's probably because of one of the following 2 reasons: it's not meant to be in UTC (questionable design decision indeed) and therefore the timezone of the device should be used instead; the backend developers implemented it wrong and they should add the 'Z 'at the end of the string if what they intended is to have the date in UTC. In short: All DateFormatters should have timezone and locale set to .current and avoid handling non-UTC string if possible. Formatting currencies € $ ¥ £ The currency symbol and the formatting of a number should be defined via a Locale, and they shouldn't be set/changed on the NumberFormatter. Don't use the user's locale (Locale.current) because it could be set to a region not supported by the app. Let's consider the example of a user's locale to be en_US, and the app to be available only for the Italian market. We must set a locale Locale(identifier: "it_IT") on the formatter, so that: prices will be shown only in Euro (not American Dollar) the format used will be the one of the country language (for Italy, "12,34 €", not any other variation such as "€12.34") class CurrencyFormatter { private let locale: Locale init(locale: Locale = .current) { self.locale = locale } func string(from decimal: Decimal, overriddenCurrencySymbol: String? = nil) -> String { let formatter = NumberFormatter() formatter.numberStyle = .currency if let currencySymbol = overriddenCurrencySymbol { // no point in doing this on a NumberFormatter ❌ formatter.currencySymbol = currencySymbol } formatter.locale = locale return formatter.string(from: decimal as NSNumber)! } } let itCurrencyFormatter = CurrencyFormatter(locale: Locale(identifier: "it_IT")) let usCurrencyFormatter = CurrencyFormatter(locale: Locale(identifier: "en_US")) let price1 = itCurrencyFormatter.string(from: 12.34) // "12,34 €" ✅ let price2 = usCurrencyFormatter.string(from: 12.34) // "$12.34" ✅ let price3 = itCurrencyFormatter.string(from: 12.34, overriddenCurrencySymbol: "₿") // "12,34 ₿" ❌ let price4 = usCurrencyFormatter.string(from: 12.34, overriddenCurrencySymbol: "₿") // "₿ 12.34" ❌ In short: All NumberFormatters should have the locale set to the one of the country targeted and no currencySymbol property overridden (it's inherited from the locale). Languages 🇬🇧 🇮🇹 🇳🇱 Stating the obvious one more time, but there are very rare occasions that justify forcing the language in the app: func setLanguage(_ language: String) { let userDefaults = UserDefaults.standard userDefaults.set([language], forKey: "AppleLanguages") } The above circumvents the Apple localization mechanism and needs an app restart, so don't do it and localize the app by the book: add localizations in Project -> Localizations; create a Localizable.strings file and tap the localize button in the inspector; always use NSLocalizedString() in code. Let's consider this content of Localizable.strings (English): "kHello" = "Hello"; "kFormatting" = "Some formatting 1. %@ 2. %d."; and this for another language (e.g. Italian) Localizable.strings (Italian): "kHello" = "Ciao"; "kFormatting" = "Esempio di formattazione 1) %@ 2) %d."; Simple localization Here's the trivial example: let localizedString = NSLocalizedString("kHello", comment: "") If Locale.current.languageCode is it, the value would be 'Ciao', and 'Hello' otherwise. Formatted localization For formatted strings, use the following: let stringWithFormats = NSLocalizedString("kFormatting", comment: "") String.localizedStringWithFormat(stringWithFormats, "some value", 3) As before, if Locale.current.languageCode is it, value would be 'Esempio di formattazione 1) some value 2) 3.', and 'Some formatting 1) some value 2) 3.' otherwise. Plurals localization For plurals, create a Localizable.stringsdict file and tap the localize button in the inspector. Localizable.strings and Localizable.stringsdict are independent, so there are no cross-references (something that often tricked me). Here is a sample content: <dict> <key>kPlurality</key> <dict> <key>NSStringLocalizedFormatKey</key> <string>Interpolated string: %@, interpolated number: %d, interpolated variable: %#@COUNT@.</string> <key>COUNT</key> <dict> <key>NSStringFormatSpecTypeKey</key> <string>NSStringPluralRuleType</string> <key>NSStringFormatValueTypeKey</key> <string>d</string> <key>zero</key> <string>nothing</string> <key>one</key> <string>%d object</string> <key>two</key> <string></string> <key>few</key> <string></string> <key>many</key> <string></string> <key>other</key> <string>%d objects</string> </dict> </dict> </dict> Localizable.stringsdict undergo the same localization mechanism of its companion Localizable.strings. It's mandatory to only implement 'other', but an honest minimum includes 'zero', 'one', and 'other'. Given the above content, the following code should be self-explanatory: let localizedHello = NSLocalizedString("kHello", comment: "") // from Localizable.strings let stringWithPlurals = NSLocalizedString("kPlurality", comment: "") // from Localizable.stringsdict String.localizedStringWithFormat(stringWithPlurals, localizedHello, 42, 1) With the en language, the value would be 'Interpolated string: Hello, interpolated number: 42, interpolated variable: 1 object.'. Use the scheme's option to run with a specific Application Language (it will change the current locale language and therefore also the output of the DateFormatters). If the language we've set or the device language are not supported by the app, the system falls back to en. References https://en.wikipedia.org/wiki/ISO_8601 https://nsdateformatter.com/ https://foragoodstrftime.com/ https://epochconverter.com/ So... that's all folks. 🌍

Modular iOS Architecture @ Just Eat
- iOS
- Just Eat
- architecture
- modulrization
- Cocoapods
The journey towards a modular architecture taken by the Just Eat iOS team.
The journey we took to restructure our mobile apps towards a modular architecture. Originally published on the Just Eat Engineering Blog. Overview Modular mobile architectures have been a hot topic over the past 2 years, counting a plethora of articles and conference talks. Almost every big company promoted and discussed modularization publicly as a way to scale big projects. At Just Eat, we jumped on the modular architecture train probably before it was mainstream and, as we'll discuss in this article, the root motivation was quite peculiar in the industry. Over the years (2016-2019), we've completely revamped our iOS products from the ground up and learned a lot during this exciting and challenging journey. There is so much to say about the way we structured our iOS stack that it would probably deserve a series of articles, some of which have previously been posted. Here we summarize the high-level iOS architecture we crafted, covering the main aspects in a way concise enough for the reader to get a grasp of them and hopefully learn some valuable tips. Modular Architecture Lots of information can be found online on modular architectures. In short: A modular architecture is a software design technique that emphasizes separating the functionality of a program into independent, interchangeable modules, such that each one contains everything necessary to execute only one aspect of the desired functionality. Note that modular design applies to the code you own. A project with several third-party dependencies but no sensible separation for the code written by your team is not considered modular. A modular design is more about the principle rather than the specific technology. One could achieve it in a variety of ways and with different tools. Here are some key points and examples that should inform the decision of the ifs and the hows of implementing modularization: Business reasons The company requires that parts of the codebase are reused and shared across projects, products, and teams; The company requires multiple products to be unified into a single one. Tech reasons The codebase has grown to a state where things become harder and harder to maintain and to iterate over; Development is slowed down due to multiple developers working on the same monolithic codebase; Besides reusing code, you need to port functionalities across projects/products. Multiple teams The company structured teams following strategic models (e.g. Spotify model) and functional teams only work on a subset of the final product; Ownership of small independent modules distributed across teams enables faster iterations; The much smaller cognitive overhead of working on a smaller part of the whole product can vastly simplify the overall development. Pre-existing knowledge Members of the team might already be familiar with specific solutions (Carthage, CocoaPods, Swift Package Manager, manual frameworks setup within Xcode). In the case of a specific familiarity with a system, it's recommended to start with it since all solutions come with pros and cons and there's not a clear winner at the time of writing. Modularizing code (if done sensibly) is almost always a good thing: it enforces separation of concerns, keeps complexity under control, allows faster development, etc. It has to be said that it's not necessarily what one needs for small projects and its benefits become tangible only after a certain complexity threshold is crossed. Journey to a new architecture In 2014, Just Eat was a completely different environment from today and back then the business decided to split the tech department into separate departments: one for UK and one for the other countries. While this was done with the best intentions to allow faster evolution in the main market (UK), it quickly created a hard division between teams, services, and people. In less than 6 months, the UK and International APIs and consumer clients deeply diverged introducing country-specific logic and behaviors. By mid-2016 the intent of "merging back" into a single global platform was internally announced and at that time it almost felt like a company acquisition. This is when we learned the importance of integrating people before technology. The teams didn’t know each other very well and became reasonably territorial on their codebase. It didn’t help that the teams span multiple cities. It's understandable that getting to an agreement on how going back to a single, global, and unified platform took months. The options we considered spanned from rewriting the product from scratch to picking one of the two existing ones and make it global. A complete rewrite would have eventually turned out to be a big-bang release with the risk of regressions being too high; not something sensible or safe to pursue. Picking one codebase over the other would have necessarily let down one of the two teams and caused the re-implementation of some missing features present in the other codebase. At that time, the UK project was in a better shape and new features were developed for the UK market first. The international project was a bit behind due to the extra complexity of supporting multiple countries and features being too market-specific. During that time, the company was also undergoing massive growth and with multiple functional teams having been created internally, there was an increasing need to move towards modularization. Therefore, we decided to gradually and strategically modularize parts of the mobile products and onboard them onto the other codebase in a controlled and safe way. In doing so, we took the opportunity to deeply refactor and, in the vast majority of the cases, rewrite parts in their entirety enabling new designs, better tests, higher code coverage, and - holistically - a fully Swift codebase. We knew that the best way to refactor and clean up the code was by following a bottom-up approach. We started with the foundations to solve small and well-defined problems - such as logging, tracking, theming - enabling the team to learn to think modular. We later moved to isolating big chunks of code into functional modules to be able to onboard them into the companion codebase and ship them on a phased rollout. We soon realized we needed a solid engine to handle run-time configurations and remote feature flagging to allow switching ON and OFF features as well as entire modules. As discussed in a previous article, we developed JustTweak to achieve this goal. At the end of the journey, the UK and the International projects would look very similar, sharing a number of customizable modules, and differing only in the orchestration layer in the apps. The Just Eat iOS apps are far bigger and more complex than they might look at first glance. Generically speaking, merging different codebases takes orders of magnitude longer than separating them, and for us, it was a process that took over 3 years, being possible thanks to unparalleled efforts of engineers brought to work together. Over this time, the whole team learned a lot, from the basics of developing code in isolation to how to scale a complex system. Holistic Design 🤘 The following diagram outlines the modular architecture in its entirety as it is at the time of writing this article (December 2019). We can appreciate a fair number of modules clustered by type and the different consumer apps. Modular iOS architecture - holistic design Whenever possible, we took the opportunity to abstract some modules having them in a state that allows open-sourcing the code. All of our open-source modules are licensed under Apache 2 and can be found at github.com/justeat. Apps Due to the history of Just Eat described above, we build different apps per country per brand from different codebases All the modularization work we did bottom-up brought us to a place where the apps differ only in the layer orchestrating the modules. With all the consumer-facing features been moved to the domain modules, there is very little code left in the apps. Domain Modules Domain modules contain features specific to an area of the product. As the diagram above shows, the sum of all those parts makes up the Just Eat apps. These modules are constantly modified and improved by our teams and updating the consumer apps to use newer versions is an explicit action. We don't particularly care about backward compatibility here since we are the sole consumers and it's common to break the public interface quite often if necessary. It might seem at first that domain modules should depend on some Core modules (e.g. APIClient) but doing so would complicate the dependency tree as we'll discuss further in the "Dependency Management" section of this article. Instead, we inject core modules' services, simply making them conformant to protocols defined in the domain module. In this way, we maintain a good abstraction and avoid tangling the dependency graph. Core & Shared modules The Core and Shared modules represent the foundations of our stack, things like: custom UI framework theming engine logging, tracking, and analytics libraries test utilities client for all the Just Eat APIs feature flagging and experimentation engine and so forth. These modules - which are sometimes also made open-source - should not change frequently due to their nature. Here backward compatibility is important and we deprecate old APIs when introducing new ones. Both apps and domain modules can have shared modules as dependencies, while core modules can only be used by the apps. Updating the backbone of a system requires the propagation of the changes up in the stack (with its maintenance costs) and for this reason, we try to keep the number of shared modules very limited. Structure of a module As we touched on in previous articles, one of our fundamental principles is "always strive to find solutions to problems that are scalable and hide complexity as much as possible". We are almost obsessed with making things as simple as they can be. When building a module, our root principle is: Every module should be well tested, maintainable, readable, easily pluggable, and reasonably documented. The order of the adjectives implies some sort of priority. First of all, the code must be unit tested, and in the case of domain modules, UI tests are required too. Without reasonable code coverage, no code is shipped to production. This is the first step to code maintainability, where maintainable code is intended as "code that is easy to modify or extend". Readability is down to reasonable design, naming convention, coding standards, formatting, and all that jazz. Every module exposes a Facade that is very succinct, usually no more than 200 lines long. This entry point is what makes a module easily pluggable. In our module blueprint, the bare minimum is a combination of a facade class, injected dependencies, and one or more configuration objects driving the behavior of the module (leveraging the underlying feature flagging system powered by JustTweak discussed in a previous article). The facade should be all a developer needs to know in order to consume a module without having to look at implementation details. Just to give you an idea, here is an excerpt from the generated public interface of the Account module (not including the protocols): public typealias PasswordManagementService = ForgottenPasswordServiceProtocol & ResetPasswordServiceProtocol public typealias AuthenticationService = LoginServiceProtocol & SignUpServiceProtocol & PasswordManagementService & RecaptchaServiceProtocol public typealias UserAccountService = AccountInfoServiceProtocol & ChangePasswordServiceProtocol & ForgottenPasswordServiceProtocol & AccountCreditServiceProtocol public class AccountModule { public init(settings: Settings, authenticationService: AuthenticationService, userAccountService: UserAccountService, socialLoginServices: [SocialLoginService], userInfoProvider: UserInfoProvider) public func startLogin(on viewController: UIViewController) -> FlowCoordinator public func startResetPassword(on viewController: UIViewController, token: Token) -> FlowCoordinator public func startAccountInfo(on navigationController: UINavigationController) -> FlowCoordinator public func startAccountCredit(on navigationController: UINavigationController) -> FlowCoordinator public func loginUsingSharedWebCredentials(handler: @escaping (LoginResult) -> Void) } Domain module public interface example (Account module) We believe code should be self-descriptive and we tend to put comments only on code that really deserves some explanation, very much embracing John Ousterhout's approach described in A Philosophy of Software Design. Documentation is mainly relegated to the README file and we treat every module as if it was an open-source project: the first thing consumers would look at is the README file, and so we make it as descriptive as possible. Overall design We generate all our modules using CocoaPods via $ pod lib create which creates the project with a standard template generating the Podfile, podspec, and demo app in a breeze. The podspec could specify additional dependencies (both third-party and Core modules) that the demo app's Podfile could specify core modules dependencies alongside the module itself which is treated as a development pod as per standard setup. The backbone of the module, which is the framework itself, encompasses both business logic and UI meaning that both source and asset files are part of it. In this way, the demo apps are very much lightweight and only showcase module features that are implemented in the framework. The following diagram should summarize it all. Design of a module with Podfile and podspec examples Demo Apps Every module comes with a demo app we give particular care to. Demo apps are treated as first-class citizens and the stakeholders are both engineers and product managers. They massively help to showcase the module features - especially those under development - vastly simplify collaboration across Engineering, Product, and Design, and force a good mock-based test-first approach. Following is a SpringBoard page showing our demo apps, very useful to individually showcase all the functionalities implemented over time, some of which might not surface in the final product to all users. Some features are behind experiments, some still in development, while others might have been retired but still present in the modules. Every demo app has a main menu to: access the features force a specific language toggle configuration flags via JustTweak customize mock data We show the example of the Account module demo app on the right. Domain modules demo apps Internal design It's worth noting that our root principle mentioned above does not include any reference to the internal architecture of a module and this is intentional. It's common for iOS teams in the industry to debate on which architecture to adopt across the entire codebase but the truth is that such debate aims to find an answer to a non-existing problem. With an increasing number of modules and engineers, it's fundamentally impossible to align on a single paradigm shared and agreed upon by everyone. Betting on a single architectural design would ultimately let down some engineers who would complain down the road that a different design would have played out better. We decided to stick with the following rule of thumb: Developers are free to use the architectural design they feel would work better for a given problem. This approach brought us to have a variety of different designs - spanning from simple old-school MVC, to a more evolved VIPER - and we constantly learn from each other's code. What's important at the end of the day is that techniques such as inversion of control, dependency injection, and more generally the SOLID principles, are used appropriately to embrace our root principle. Dependency Management We rely heavily on CocoaPods since we adopted it in the early days as it felt like the best and most mature choice at the time we started modularizing our codebase. We think this still holds at the time of writing this article but we can envision a shift to SPM (Swift Package Manager) in 1-2 years time. With a growing number of modules, comes the responsibility of managing the dependencies between them. No panacea can cure dependency hell, but one should adopt some tricks to keep the complexity of the stack under reasonable control. Here's a summary of what worked for us: Always respect semantic versioning; Keep the dependency graph as shallow as possible. From our apps to the leaves of the graph there are no more than 2 levels; Use a minimal amount of shared dependencies. Be aware that every extra level with shared modules brings in higher complexity; Reduce the number of third-party libraries to the bare minimum. Code that's not written and owned by your team is not under your control; Never make modules within a group (domain, core, shared) depend on other modules of the same group; Automate the publishing of new versions. When a pull request gets merged into the master branch, it must also contain a version change in the podspec. Our continuous integration system will automatically validate the podspec, publish it to our private spec repository, and in just a matter of minutes the new version becomes available; Fix the version for dependencies in the Podfile. Whether it is a consumer app or a demo app, we want both our modules and third-party libraries not to be updated unintentionally. It's acceptable to use the optimistic operator for third-party libraries to allow automatic updates of new patch versions; Fix the version for third-party libraries in the modules' podspec. This guarantees that modules' behavior won't change in the event of changes in external libraries. Failing to do so would allow defining different versions in the app's Podfile, potentially causing the module to not function correctly or even to not compile; Do not fix the version for shared modules in the modules' podspec. In this way, we let the apps define the version in the Podfile, which is particularly useful for modules that change often, avoiding the hassle of updating the version of the shared modules in every podspec referencing it. If a new version of a shared module is not backward compatible with the module consuming it, the failure would be reported by the continuous integration system as soon as a new pull request gets raised. A note on the Monorepo approach When it comes to dependency management it would be unfair not to mention the opinable monorepo approach. Monorepos have been discussed quite a lot by the community to pose a remedy to dependency management (de facto ignoring it), some engineers praise them, others are quite contrary. Facebook, Google, and Uber are just some of the big companies known to have adopted this technique, but in hindsight, it's still unclear if it was the best decision for them. In our opinion, monorepos can sometimes be a good choice. For example, in our case, a great benefit a monorepo would give us is the ability to prepare a single pull request for both implementing a code change in a module and integrating it into the apps. This will have an even greater impact when all the Just Eat consumer apps are globalized into a single codebase. Onwards and upwards Modularizing the iOS product has been a long journey and the learnings were immense. All in all, it took more than 3 years, from May 2016 to October 2019, always balancing tech and product improvements. Our natural next step is unifying the apps into a single global project, migrating the international countries over to the UK project to ultimately reach the utopian state of having a single global app. All the modules have been implemented in a fairly abstract way and following a white labeling approach, allowing us to extend support to new countries and onboard acquired companies in the easiest possible way.

Lessons learned from handling JWT on mobile
- iOS
- Authorization
- JWT
- Token
- mobile
Implementing Authorization on mobile can be tricky. Here are some recommendations to avoid common issues.
Originally published on the Just Eat Engineering Blog.
OverviewModern mobile apps are more complicated than they used to be back in the early days and developers have to face a variety of interesting problems.
Implementing Authorization on mobile can be tricky. Here are some recommendations to avoid common issues. Originally published on the Just Eat Engineering Blog. Overview Modern mobile apps are more complicated than they used to be back in the early days and developers have to face a variety of interesting problems. While we've put in our two cents on some of them in previous articles, this one is about authorization and what we have learned by handling JWT on mobile at Just Eat. When it comes to authorization, it's standard practice to rely on OAuth 2.0 and the companion JWT (JSON Web Token). We found this important topic was rarely discussed online while much attention was given to new proposed implementations of network stacks, maybe using recent language features or frameworks such as Combine. We'll illustrate the problems we faced at Just Eat for JWT parsing, usage, and (most importantly) refreshing. You should be able to learn a few things on how to make your app more stable by reducing the chance of unauthorized requests allowing your users to virtually always stay logged in. What is JWT JWT stands for JSON Web Token and is an open industry standard used to represent claims transferred between two parties. A signed JWT is known as a JWS (JSON Web Signature). In fact, a JWT has either to be JWS or JWE (JSON Web Encryption). RFC 7515, RFC 7516, and RFC 7519 describe the various fields and claims in detail. What is relevant for mobile developers is the following: JWT is composed of 3 parts dot-separated: Header, Payload, Signature. The Payload is the only relevant part. The Header identifies which algorithm is used to generate the signature. There are reasons for not verifying the signature client-side making the Signature part irrelevant too. JWT has an expiration date. Expired tokens should be renewed/refreshed. JWT can contain any number of extra information specific to your service. It's common practice to store JWTs in the app keychain. Here is a valid and very short token example, courtesy of jwt.io/ which we recommend using to easily decode tokens for debugging purposes. It shows 3 fragments (base64 encoded) concatenated with a dot. eyJhbGciOiJIUzI1NiIsInR5cCI6IkpXVCJ9.eyJzdWIiOiIxMjM0NTY3ODkwIiwibmFtZSI6IkpvaG4gRG9lIiwiaWF0IjoxNTE2MjM5MDIyLCJleHAiOjE1Nzc3NTA0MDB9.7hgBhNK_ZpiteB3GtLh07KJ486Vfe3WAdS-XoDksJCQ The only field relevant to this document is exp (Expiration Time), part of Payload (the second fragment). This claim identifies the time after which the JWT must not be accepted. In order to accept a JWT, it's required that the current date/time must be before the expiration time listed in the exp claim. It's accepted practice for implementers to consider for some small leeway, usually no more than a few minutes, to account for clock skew. N.B. Some API calls might demand the user is logged in (user-authenticated calls), and others don't (non-user-authenticated calls). JWT can be used in both cases, marking a distinction between Client JWT and User JWT we will refer to later on. The token refresh problem By far the most significant problem we had in the past was the renewal of the token. This seems to be something taken for granted by the mobile community, but in reality, we found it to be quite a fragile part of the authentication flow. If not done right, it can easily cause your customers to end up being logged out, with the consequent frustration we all have experienced as app users. The Just Eat app makes multiple API calls at startup: it fetches the order history to check for in-flight orders, fetches the most up-to-date consumer details, etc. If the token is expired when the user runs the app, a nasty race condition could cause the same refresh token to be used twice, causing the server to respond with a 401 and subsequently logging the user out on the app. This can also happen during normal execution when multiple API calls are performed very close to each other and the token expires prior to those. It gets trickier if the client and the server clocks are sensibly off sync: while the client might believe to be in possession of a valid token, it has already expired. The following diagram should clarify the scenario. Common misbehavior I couldn't find a company (regardless of size) or indie developer who had implemented a reasonable token refresh mechanism. The common approach seems to be: to refresh the token whenever an API call fails with 401 Unauthorized. This is not only causing an extra call that could be avoided by locally checking if the token has expired, but it also opens the door for the race condition illustrated above. Avoid race conditions when refreshing the token 🚦 We'll explain the solution with some technical details and code snippets but what what's more important is that the reader understands the root problem we are solving and why it should be given the proper attention. The more we thought about it, we more we convinced ourselves that the best way to shield ourselves from race conditions is by using threading primitives when scheduling async requests to fetch a valid token. This means that all the calls would be regulated via a filter that would hold off subsequent calls to fire until a valid token is retrieved, either from local storage or, if a refresh is needed, from the remote OAuth server. We'll show examples for iOS, so we've chosen dispatch queues and semaphores (using GCD); fancier and more abstract ways of implementing the solution might exist - in particular by leveraging modern FRP techniques - but ultimately the same primitives are used. For simplicity, let's assume that only user-authenticated API requests need to provide a JWT, commonly put in the Authorization header: Authorization: Bearer <jwt-token> The code below implements the "Get valid JWT" box from the following flowchart. The logic within this section is the one that must be implemented in mutual exclusion, in our solution, by using the combination of a serial queue and a semaphore. Here is just the minimum amount of code (Swift) needed to explain the solution. typealias Token = String typealias AuthorizationValue = String struct UserAuthenticationInfo { let bearerToken: Token // the JWT let refreshToken: Token let expiryDate: Date // computed on creation from 'exp' claim var isValid: Bool { return expiryDate.compare(Date()) == .orderedDescending } } protocol TokenRefreshing { func refreshAccessToken(_ refreshToken: Token, completion: @escaping (Result<UserAuthenticationInfo, Error>) -> Void) } protocol AuthenticationInfoStorage { var userAuthenticationInfo: UserAuthenticationInfo? func persistUserAuthenticationInfo(_ authenticationInfo: UserAuthenticationInfo?) func wipeUserAuthenticationInfo() } class AuthorizationValueProvider { private let authenticationInfoStore: AuthenticationInfoStorage private let tokenRefreshAPI: TokenRefreshing private let queue = DispatchQueue(label: <#label#>, qos: .userInteractive) private let semaphore = DispatchSemaphore(value: 1) init(tokenRefreshAPI: TokenRefreshing, authenticationInfoStore: AuthenticationInfoStorage) { self.tokenRefreshAPI = tokenRefreshAPI self.authenticationInfoStore = authenticationInfoStore } func getValidUserAuthorization(completion: @escaping (Result<AuthorizationValue, Error>) -> Void) { queue.async { self.getValidUserAuthorizationInMutualExclusion(completion: completion) } } } Before performing any user-authenticated request, the network client asks an AuthorizationValueProvider instance to provide a valid user Authorization value (the JWT). It does so via the async method getValidUserAuthorization which uses a serial queue to handle the requests. The chunky part is the getValidUserAuthorizationInMutualExclusion. private func getValidUserAuthorizationInMutualExclusion(completion: @escaping (Result<AuthorizationValue, Error>) -> Void) { semaphore.wait() guard let authenticationInfo = authenticationInfoStore.userAuthenticationInfo else { semaphore.signal() let error = // forge an error for 'missing authorization' completion(.failure(error)) return } if authenticationInfo.isValid { semaphore.signal() completion(.success(authenticationInfo.bearerToken)) return } tokenRefreshAPI.refreshAccessToken(authenticationInfo.refreshToken) { result in switch result { case .success(let authenticationInfo): self.authenticationInfoStore.persistUserAuthenticationInfo(authenticationInfo) self.semaphore.signal() completion(.success(authenticationInfo.bearerToken)) case .failure(let error) where error.isClientError: self.authenticationInfoStore.wipeUserAuthenticationInfo() self.semaphore.signal() completion(.failure(error)) case .failure(let error): self.semaphore.signal() completion(.failure(error)) } } } The method could fire off an async call to refresh the token, and this makes the usage of the semaphore crucial. Without it, the next request to AuthorizationValueProvider would be popped from the queue and executed before the remote refresh completes. The semaphore is initialised with a value of 1, meaning that only one thread can access the critical section at a given time. We make sure to call wait at the beginning of the execution and to call signal only when we have a result and therefore ready to leave the critical section. If the token found in the local store is still valid, we simply return it, otherwise, it's time to request a new one. In the latter case, if all goes well, we persist the token locally and allow the next request to access the method, in the case of an error, we should be careful and wipe the token only if the error is a legit client error (2xx range). This includes also the usage of a refresh token that is not valid anymore, which could happen, for instance, if the user resets the password on another platform/device. It's critical to not delete the token from the local store in the case of any other error, such as 5xx or the common Foundation's NSURLErrorNotConnectedToInternet (-1009), or else the user would unexpectedly be logged out. It's also important to note that the same AuthorizationValueProvider instance must be used by all the calls: using different ones would mean using different queues making the entire solution ineffective. It seemed clear that the network client we developed in-house had to embrace JWT refresh logic at its core so that all the API calls, even new ones that will be added in the future would make use of the same authentication flow. General recommendations Here are a couple more (minor) suggestions we thought are worth sharing since they might save you implementation time or influence the design of your solution. Correctly parse the Payload Another problem - even though quite trivial and that doesn't seem to be discussed much - is the parsing of the JWT, that can fail in some cases. In our case, this was related to the base64 encoding function and "adjusting" the base64 payload to be parsed correctly. In some implementations of base64, the padding character is not needed for decoding, since the number of missing bytes can be calculated but in Foundation's implementation it is mandatory. This caused us some head-scratching and this StackOverflow answer helped us. The solution is - more officially - stated in RFC 7515 - Appendix C and here is the corresponding Swift code: func base64String(_ input: String) -> String { var base64 = input .replacingOccurrences(of: "-", with: "+") .replacingOccurrences(of: "_", with: "/") switch base64.count % 4 { case 2: base64 = base64.appending("==") case 3: base64 = base64.appending("=") default: break } return base64 } The majority of the developers rely on external libraries to ease the parsing of the token, but as we often do, we have implemented our solution from scratch, without relying on a third-party library. Nonetheless, we feel JSONWebToken by Kyle Fuller is a very good one and it seems to implement JWT faithfully to the RFC, clearly including the necessary base64 decode function. Handle multiple JWT for multiple app states As previously stated, when using JWT as an authentication method for non-user- authenticated calls, we need to cater for at least 3 states, shown in the following enum: enum AuthenticationStatus { case notAuthenticated case clientAuthenticated case userAuthenticated } On a fresh install, we can expect to be in the .notAuthenticated state, but as soon as the first API call is ready to be performed, a valid Client JWT has to be fetched and stored locally (at this stage, other authentication mechanisms are used, most likely Basic Auth), moving to the .clientAuthenticated state. Once the user completes the login or signup procedure, a User JWT is retrieved and stored locally (but separately to the Client JWT), entering the .userAuthenticated, so that in the case of a logout we are left with a (hopefully still valid) Client JWT. In this scenario, almost all transitions are possible: A couple of recommendations here: if the user is logged in is important to use the User JWT also for the non-user-authenticated calls as the server may personalise the response (e.g. the list of restaurants in the Just Eat app) store both Client and User JWT, so that if the user logs out, the app is left with the Client JWT ready to be used to perform non-user-authenticated requests, saving an unnecessary call to fetch a new token Conclusion In this article, we've shared some learnings from handling JWT on mobile that are not commonly discussed within the community. As a good practice, it's always best to hide complexity and implementation details. Baking the refresh logic described above within your API client is a great way to avoid developers having to deal with complex logic to provide authorization, and enables all the API calls to undergo the same authentication mechanism. Consumers of an API client, should not have the ability to gather the JWT as it’s not their concern to use it or to fiddle with it. We hope this article helps to raise awareness on how to better handle the usage of JWT on mobile applications, in particular making sure we always do our best to avoid accidental logouts to provide a better user experience.
A Smart Feature Flagging System for iOS
- iOS
- feature flags
- Optimizely
- Just Eat
At Just Eat we have experimentation and feature flagging at our heart and we've developed a component, named JustTweak, to make things easier on iOS.
How the iOS team at Just Eat built a scalable open-source solution to handle local and remote flags. Originally published on the Just Eat Engineering Blog. Overview At Just Eat we have experimentation at our heart, and it is very much dependent on feature flagging/toggling. If we may be so bold, here's an analogy: feature flagging is to experimentation as machine learning is to AI, you cannot have the second without the first one. We've developed an in-house component, named JustTweak, to handle feature flags and experiments on iOS without the hassle. We open-sourced JustTweak on github.com in 2017 and we have been evolving it ever since; in particular, with support for major experimentation platforms such as Optimizely and Firebase Remote Config. JustTweak has been instrumental in evolving the consumer Just Eat app in a fast and controlled manner, as well as to support a large number of integrations and migrations happening under the hood. In this article, we describe the feature flagging architecture and engine, with code samples and integration suggestions. What is feature flagging Feature flagging, in its original form, is a software development technique that provides an alternative to maintaining multiple source-code branches, so that a feature can be tested even before it is completed and ready for release. Feature flags are used in code to show/hide or enable/disable specific features at runtime. The technique also allows developers to release a version of a product that has unfinished features, that can be hidden from the user. Feature toggles also allow shorter software integration cycles and small incremental versions of software to be delivered without the cost of constant branching and merging - needless to say, this is crucial to have on iOS due to the App Store review process not allowing continuous delivery. A boolean flag in code is used to drive what code branch will run, but the concept can easily be extended to non-boolean flags, making them more of configuration flags that drive behavior. As an example, at Just Eat we have been gradually rewriting the whole application over time, swapping and customizing entire modules via configuration flags, allowing gradual switches from old to new features in a way transparent to the user. Throughout this article, the term 'tweaks' is used to refer to feature/configuration flags. A tweak can have a value of different raw types, namely Bool, String, Int, Float, and Double. Boolean tweaks can be used to drive features, like so: let isFeatureXEnabled: Bool = ... if isFeatureXEnabled { // show feature X } else { // don't show feature X } Other types of tweaks are instead useful to customise a given feature. Here is an example of configuring the environment using tweaks: let publicApiHost: String = ... let publicApiPort: Int? = ... let endpoint = Endpoint(scheme: "https", host: publicApiHost, port: publicApiPort, path: "/restaurant/:id/menu") // perform a request using the above endpoint object Problem The crucial part to get right is how and from where the flag values (isFeatureXEnabled, publicApiHost, and publicApiPort in the examples above) are fetched. Every major feature flagging/experimentation platform in the market provides its own way to fetch the values, and sometimes the APIs to do so significantly differ (e.g. Firebase Remote Config Vs Optimizely). Aware of the fact that it’s increasingly difficult to build any kind of non-trivial app without leveraging external dependencies, it's important to bear in mind that external dependencies pose a great threat to the long term stability and viability of any application. Following are some issues related to third-party experimentation solutions: third-party SDKs are not under your control using third-party SDKs in a modular architected app would easily cause dependency hell third-party SDKs are easily abused and various areas of your code will become entangled with them your company might decide to move to a different solution in the future and such switch comes with costs depending on the adopted solution, you might end up tying your app more and more to the platform-specific features that don't find correspondence elsewhere it is very hard to support multiple feature flag providers For the above reasons, it is best to hide third-party SDKs behind some sort of a layer and to implement an orchestration mechanism to allow fetching of flag values from different providers. We'll describe how we've achieved this in JustTweak. A note on the approach When designing software solutions, a clear trait was identified over time in the iOS team, which boils down to the kind of mindset and principle been used: Always strive to find solutions to problems that are scalable and hide complexity as much as possible. One word you would often hear if you were to work in the iOS team is 'Facade', which is a design pattern that serves as a front-facing interface masking more complex underlying or structural code. Facades are all over the place in our code: we try to keep components' interfaces as simple as possible so that other engineers could utilize them with minimal effort without necessarily knowing the implementation details. Furthermore, the more succinct an interface is, the rarer the possibility of misusages would be. We have some open source components embracing this approach, such as JustPersist, JustLog, and JustTrack. JustTweak makes no exception and the code to integrate it successfully in a project is minimal. Sticking to the above principle, the idea behind JustTweak is to have a single entry point to gather flag values, hiding the implementation details regarding which source the flag values are gathered from. JustTweak to the rescue JustTweak provides a simple facade interface interacting with multiple configurations that are queried respecting a certain priority. Configurations wrap specific sources of tweaks, that are then used to drive decisions or configurations in the client code. You can find JustTweak on CocoaPods and it's on version 5.0.0 at the time of writing. We plan to add support for Carthage and Swift Package Manager in the future. A demo app is also available for you to try it out. With JustTweak you can achieve the following: use a JSON local configuration providing default tweak values use a number of remote configuration providers, such as Firebase and Optmizely, to run A/B tests and feature flagging enable, disable, and customize features locally at runtime provide a dedicated UI for customization (this comes particularly handy for features that are under development to showcase the progress to stakeholders) Here is a screenshot of the TweakViewController taken from the demo app. Tweak values changed via this screen are immediately available to your code at runtime. Stack setup The facade class previously mentioned is represented by the TweakManager. There should only be a single instance of the manager, ideally configured at startup, passed around via dependency injection, and kept alive for the whole lifespan of the app. Following is an example of the kind of stack implemented as a static let. static let tweakManager: TweakManager = { // mutable configuration (to override tweaks from other configurations) let userDefaultsConfiguration = UserDefaultsConfiguration(userDefaults: .standard) // remote configurations (optional) let optimizelyConfiguration = OptimizelyConfiguration() let firebaseConfiguration = FirebaseConfiguration() // local JSON configuration (default tweaks) let jsonFileURL = Bundle.main.url(forResource: "Tweaks", withExtension: "json")! let localConfiguration = LocalConfiguration(jsonURL: jsonFileURL) // priority is defined by the order in the configurations array // (from highest to lowest) let configurations: [Configuration] = [userDefaultsConfiguration, optimizelyConfiguration, firebaseConfiguration, localConfiguration] return TweakManager(configurations: configurations) }() ``` JustTweak comes with three configurations out-of-the-box: UserDefaultsConfiguration which is mutable and uses UserDefaults as a key/value store LocalConfiguration which is read-only and uses a JSON configuration file that is meant to be the default configuration EphemeralConfiguration which is simply an instance of NSMutableDictionary Besides, JustTweak defines Configuration and MutableConfiguration protocols you can implement to create your own configurations to fit your needs. In the example project, you can find a few example configurations which you can use as a starting point. You can have any source of flags via wrapping it in a concrete implementation of the above protocols. Since the protocol methods are synchronous, you'll have to make sure that the underlying source has been initialised as soon as possible at startup. All the experimentation platforms provide mechanisms to do so, for example here is how Optimizely does it. The order of the objects in the configurations array defines the configurations' priority. The MutableConfiguration with the highest priority, such as UserDefaultsConfiguration in the example above, will be used to reflect the changes made in the UI (TweakViewController). The LocalConfiguration should have the lowest priority as it provides the default values from a local JSON file. It's also the one used by the TweakViewController to populate the UI. When fetching a tweak, the engine will inspect the chain of configurations in order and pick the tweak from the first configuration having it. The following diagram outlines a possible setup where values present in Optimizely override others in the subsequent configurations. Eventually, if no override is found, the local configuration would return the default tweak baked in the app. Structuring the stack this way brings various advantages: the same engine is used to customise the app for development, production, and test runs consumers only interface with the facade and can ignore the implementation details new code put behind flags can be shipped with confidence since we rely on a tested engine ability to remotely override tweaks de facto allowing to greatly customise the app without the need for a new release TweakManager gets populated with the tweaks listed in the JSON file used as backing store of the LocalConfiguration instance. It is therefore important to list every supported tweak in there so that development builds of the app can allow tweaking the values. Here is an excerpt from the file used in the TweakViewController screenshot above. { "ui_customization": { "display_red_view": { "Title": "Display Red View", "Description": "shows a red view in the main view controller", "Group": "UI Customization", "Value": false }, ... "red_view_alpha_component": { "Title": "Red View Alpha Component", "Description": "defines the alpha level of the red view", "Group": "UI Customization", "Value": 1.0 }, "label_text": { "Title": "Label Text", "Description": "the title of the main label", "Group": "UI Customization", "Value": "Test value" } }, "general": { "greet_on_app_did_become_active": { "Title": "Greet on app launch", "Description": "shows an alert on applicationDidBecomeActive", "Group": "General", "Value": false }, ... } } Testing considerations We've seen that the described architecture allows customization via configurations. We've shown in the above diagram that JustTweak can come handy when used in conjunction with our AutomationTools framework too, which is open-source. An Ephemeral configuration would define the app environment at run-time greatly simplifying the implementation of UI tests, which is well-known to be a tedious activity. Usage The two main features of JustTweak can be accessed from the TweakManager. Checking if a feature is enabled // check for a feature to be enabled let isFeatureXEnabled = tweakManager.isFeatureEnabled("feature_X") if isFeatureXEnabled { // show feature X } else { // hide feature X } Getting and setting the value of a flag for a given feature/variable. JustTweak will return the value from the configuration with the highest priority that provides it, or nil if none of the configurations have that feature/variable. // check for a tweak value let tweak = tweakManager.tweakWith(feature: <#feature_key#>, variable: <#variable_key#>") if let tweak = tweak { // tweak was found in some configuration, use tweak.value } else { // tweak was not found in any configuration } The Configuration and MutableConfiguration protocols define the following methods: func tweakWith(feature: String, variable: String) -> Tweak? func set(_ value: TweakValue, feature: String, variable: String) func deleteValue(feature: String, variable: String) You might wonder why is there a distinction between feature and variable. The reason is that we want to support the Optimizely lingo for features and related variables and therefore the design of JustTweak has to necessarily reflect that. Other experimentation platforms (such as Firebase) have a single parameter key, but we had to harmonise for the most flexible platform we support. Property Wrappers With SE-0258, Swift 5.1 introduces Property Wrappers. If you haven't read about them, we suggest you watch the WWDC 2019 "Modern Swift API Design talk where Property Wrappers are explained starting at 23:11. In short, a property wrapper is a generic data structure that encapsulates read/write access to a property while adding some extra behavior to augment its semantics. Common examples are @AtomicWrite and @UserDefault but more creative usages are up for grabs and we couldn't help but think of how handy it would be to have property wrappers for feature flags, and so we implemented them. @TweakProperty and @OptionalTweakProperty are available to mark properties representing feature flags. Here are a couple of examples, making the code so much nicer than before. @TweakProperty(fallbackValue: <#default_value#>, feature: <#feature_key#>, variable: <#variable_key#>, tweakManager: tweakManager) var isFeatureXEnabled: Bool @TweakProperty(fallbackValue: <#default_value#>, feature: <#feature_key#>, variable: <#variable_key#>, tweakManager: tweakManager) var publicApiHost: String @OptionalTweakProperty(fallbackValue: <#default_value_or_nil#>, feature: <#feature_key#>, variable: <#variable_key#>, tweakManager: tweakManager) var publicApiPort: Int? Mind that by using these property wrappers, a static instance of TweakManager must be available. Update a configuration at runtime JustTweak comes with a ViewController that allows the user to edit the tweaks while running the app. That is achieved by using the MutableConfiguration with the highest priority from the configurations array. This is de facto a debug menu, useful for development and internal builds but not to include in release builds. #if DEBUG func presentTweakViewController() { let tweakViewController = TweakViewController(style: .grouped, tweakManager: tweakManager) // either present it modally or push it on a UINavigationController } #endif Additionally, when a value is modified in any MutableConfiguration, a notification is fired to give the clients the opportunity to react and reflect changes in the UI. override func viewDidLoad() { super.viewDidLoad() NotificationCenter.defaultCenter().addObserver(self, selector: #selector(updateUI), name: TweakConfigurationDidChangeNotification, object: nil) } @objc func updateUI() { // update the UI accordingly } A note on modular architecture It's reasonable to assume that any non-trivial application approaching 2020 is composed of a number of modules and our Just Eat iOS app surely is too. With more than 30 modules developed in-house, it's crucial to find a way to inject flags into the modules but also to avoid every module to depend on an external library such as JustTweak. One way to achieve this would be: define one or more protocols in the module with the set of properties desired structure the modules to allow dependency injection of objects conforming to the above protocol implement logic in the module to consume the injected objects For instance, you could have a class wrapping the manager like so: protocol ModuleASettings { var isFeatureXEnabled: Bool { get } } protocol ModuleBSettings { var publicApiHost: String { get } var publicApiPort: Int? { get } } import JustTweak public class AppConfiguration: ModuleASettings, ModuleBSettings { static let tweakManager: TweakManager = { ... } @TweakProperty(...) var isFeatureXEnabled: Bool @TweakProperty(...) var publicApiHost: String @OptionalTweakProperty(...) var publicApiPort: Int? } Future evolution With recent versions of Swift and especially with 5.1, developers have a large set of powerful new tools, such as generics, associated types, opaque types, type erasure, etc. With Combine and SwiftUI entering the scene, developers are also starting adopting new paradigms to write code. Sensible paths to evolve JustTweak could be to have the Tweak object be generic on TweakValue have TweakManager be an ObservableObject which will enable publishing of events via Combine, and use @EnvironmentObject to ease the dependency injection in the SwiftUI view hierarchy. While such changes will need time to be introduced since our contribution to JustTweak is in-line with the evolution of the Just Eat app (and therefore a gradual adoption of SwiftUI), we can't wait to see them implemented. If you desire to contribute, we are more than happy to receive pull requests. Conclusion In this article, we illustrated how JustTweak can be of great help in adding flexible support to feature flagging. Integrations with external providers/experimentation platforms such as Optimizely, allow remote override of flags without the need of building a new version of the app, while the UI provided by the framework allows local overrides in development builds. We've shown how to integrate JustTweak in a project, how to setup a reasonable stack with a number of configurations and we’ve given you some guidance on how to leverage it when writing UI tests. We believe JustTweak to be a great tool with no similar open source alternatives nor proprietary ones and we hope developers will adopt it more and more.
Deep Linking at Scale on iOS
- deep links
- deep linking
- universal links
- iOS
- navigation
- flow controllers
- state machine
- futures
- promises
- Just Eat
How the iOS team at Just Eat built a scalable architecture to support navigation and deep linking.
Originally published on the Just Eat Engineering Blog.
In this article, we propose an architecture to implement a scalable solution to Deep Linking on iOS using an underlying Flow Controller-based architecture, all powered
How the iOS team at Just Eat built a scalable architecture to support navigation and deep linking. Originally published on the Just Eat Engineering Blog. In this article, we propose an architecture to implement a scalable solution to Deep Linking on iOS using an underlying Flow Controller-based architecture, all powered by a state machine and the Futures & Promises paradigm to keep the code more readable. At Just Eat, we use a dedicated component named NavigationEngine that is domain-specific to the Just Eat apps and their use cases. A demo project named NavigationEngineDemo that includes the NavigationEngine architecture (stripped out of many details not necessary to showcase the solution) is available on GitHub. Overview Deep linking is one of the most underestimated problems to solve on mobile. A naïve explanation would say that given some sort of input, mobile apps can load a specific screen, but it only has practical meaning when combined with Universal Links on iOS and App Links on Android. In such cases, the input is a URL that would load a web page on the companion website. Let's use an example from Just Eat: opening the URL https://www.just-eat.co.uk/area/ec4m-london on a web browser would load the list of restaurants in the UK London area for the postcode EC4M. Deep linking to the mobile apps using the same URL should give a similar experience to the user. In reality, the problem is more complex than what it seems at first glance; non-tech people - and sometimes even developers - find it hard to grasp. Loading a web page in a browser is fundamentally different from implementing dedicated logic on mobile to show a UIViewController (iOS) or Activity (Android) to the user and populate it with information that will most likely be gathered from an API call. The logic to perform deep linking starts with parsing the URL, understanding the intent, constructing the user journey, performing the navigation to the target screen passing the info all the way down, and ultimately loading any required data asynchronously from a remote API. On top of all this, it also has to consider the state of the app: the user might have previously left the app in a particular state and dedicated logic would be needed to deep link from the existing to the target screen. A scenario to consider is when the user is not logged in and therefore some sections of the app may not be available. Deep linking can actually be triggered from a variety of sources: Safari web browser any app that allows tapping on a link (iMessage, Notes, etc.) any app that explicitly tries to open the app using custom URL schemes the app itself (to perform jumps between sections) TodayExtension Shortcut items (Home Screen Quick Actions) Spotlight items It should be evident that implementing a comprehensive and scalable solution that fully addresses deep linking is far from being trivial. It shouldn't be an after-thought but rather be baked into the app architecture from the initial app design. It should also be quite glaring what the main problem that needs to be solved first is: the app Navigation. Navigation itself is not a problem with a single solution (if it was, the solution would be provided by Apple/Google and developers would simply stick to it). A number of solutions were proposed over the years trying to make it simpler and generic to some degree - Router, Compass, XCoordinator to name just a few open-source components. I proposed the concept of Flow Controllers in my article Flow Controllers on iOS for a better navigation control back in 2014 when the community had already (I believe) started shifting towards similar approaches. Articles such as Improve your iOS Architecture with FlowControllers (by Krzysztof Zabłocki), A Better MVC, Part 2: Fixing Encapsulation (by Dave DeLong), Flow Coordinators in iOS (by Dennis Walsh), and even as recently as 2019, Navigation with Flow Controllers (by Majid Jabrayilov) was published. To me, all the proposals share one main common denominator: flow controllers/coordinator and their API are necessarily domain-specific. Consider the following methods taken from one of the articles mentioned above referring to specific use cases: func showLoginViewController() { ... } func showSignupViewController() { ... } func showPasswordViewController() { ... } With the support of colleagues and friends, I tried proposing a generic and abstract solution but ultimately hit a wall. Attempts were proposed using enums to list the supported transitions (as XCoordinator shows in its README for instance) or relying on meta-programming dark magic in Objective-C (which is definitely the sign of a terrible design), neither of which satisfied me in terms of reusability and abstraction. I ultimately realized that it's perfectly normal for such problem to be domain-specific and that we don't necessarily have to find abstract solutions to all problems. Terminology For clarity on some of the terminology used in this article. Deep Linking: the ability to reach specific screens (via a flow) in the app either via a Deep Link or a Universal Link. Deep Link: URI with custom scheme (e.g. just-eat://just-eat.co.uk/login, just-eat-dk://just-eat.co.uk/settings) containing the information to perform deep linking in the app. When it comes to deep links, the host is irrelevant but it's good to keep it as part of the URL since it makes it easier to construct the URL using URLComponents and it keeps things more 'standard'. Universal Link: URI with http/https scheme (e.g. https://just-eat.co.uk/login) containing the information to perform deep linking in the app. Intent: the abstract intent of reaching a specific area of the app. E.g. goToOrderDetails(OrderId). State machine transition: transitions in the state machine allow navigating to a specific area in the app (state) from another one. If the app is in a state where the deep linking to a specific screen should not be allowed, the underlying state machine should not have the corresponding transition. Solution NavigationEngine is the iOS module (pod) used by the teams at Just Eat, that holds the isolated logic for navigation and deep linking. As mentioned above, the magic sauce includes the usage of: FlowControllers to handle the transitions between ViewControllers in a clear and pre-defined way. Stateful state machines to allow transitions according to the current application state. More information on FSM (Finite State Machine) here and on the library at The easiest State Machine in Swift. Promis to keep the code readable using Futures & Promises to help avoiding the Pyramid of doom. Sticking to such a paradigm is also a key aspect for the whole design since every API in the stack is async. More info on the library at The easiest Promises in Swift. a pretty heavy amount of 🧠 NavigationEngine maintains separation of concerns between URL Parsing, Navigation, and Deep Linking. Readers can inspect the code in the NavigationEngineDemo project that also includes unit tests with virtually 100% code coverage. Following is an overview of the class diagram of the entire architecture stack. Architecture class diagram While the navigation is powered by a FlowController-based architecture, the deep linking logic is powered by NavigationIntentHandler and NavigationTransitioner (on top of the navigation stack). Note the single entry point named DeepLinkingFacade exposes the following API to cover the various input/sources we mentioned earlier: public func handleURL(_ url: URL) -> Future<Bool> public func openDeepLink(_ deepLink: DeepLink) -> Future<Bool> public func openShortcutItem(_ item: UIApplicationShortcutItem) -> Future<Bool> public func openSpotlightItem(_ userActivity: NSUserActivityProtocol) -> Future<Bool> Here are the sequence diagrams for each one. Refer to the demo project to inspect the code. Navigation As mentioned earlier, the important concept to grasp is that there is simply no single solution to Navigation. I've noticed that such a topic quickly raises discussions and each engineer has different, sometimes strong opinions. It's more important to agree on a working solution that satisfies the given requirements rather than forcing personal preferences. Our NavigationEngine relies on the following navigation rules (based on Flow Controllers): FlowControllers wire up the domain-specific logic for the navigation ViewControllers don't allocate FlowControllers Only FlowControllers, AppDelegate and similar top-level objects can allocate ViewControllers FlowControllers are owned (retained) by the creators FlowControllers can have children FlowControllers and create a parent-child chain and can, therefore, be in a 1-to-many relationship FlowControllers in parent-child relationships communicate via delegation ViewControllers have weak references to FlowControllers ViewControllers are in a 1-to-1 relationship with FlowControllers All the FlowController domain-specific API must be future-based with Future<Bool> as return type Deep linking navigation should occur with no more than one animation (i.e. for long journeys, only the last step should be animated) Deep linking navigation that pops a stack should occur without animation In the demo project, there are a number of *FlowControllerProtocols, each corresponding to a different section/domain of the hosting app. Examples such as RestaurantsFlowControllerProtocol and OrdersFlowControllerProtocol are taken from the Just Eat app and each one has domain specific APIs, e.g: func goToSearchAnimated(postcode: Postcode?, cuisine: Cuisine?, animated: Bool) -> Future<Bool> func goToOrder(orderId: OrderId, animated: Bool) -> Future<Bool> func goToRestaurant(restaurantId: RestaurantId) -> Future<Bool> func goToCheckout(animated: Bool) -> Future<Bool> Note that each one: accepts the animated parameter returns Future<Bool> so that flow sequence can be combined Flow controllers should be combined sensibly to represent the app UI structure. In the case of Just Eat we have a RootFlowController as the root-level flow controller orchestrating the children. A FlowControllerProvider, used by the NavigationTransitioner, is instead the single entry point to access the entire tree of flow controllers. NavigationTransitioner provides an API such as: func goToLogin(animated: Bool) -> Future<Bool> func goFromHomeToSearch(postcode: Postcode?, cuisine: Cuisine?, animated: Bool) -> Future<Bool> This is responsible to keep the underlying state machine and what the app actually shows in sync. Note the goFromHomeToSearch method being verbose on purpose; it takes care of the specific transition from a given state (home). One level up in the stack, NavigationIntentHandler is responsible for combining the actions available from the NavigationTransitioner starting from a given NavigationIntent and creating a complete deep linking journey. It also takes into account the current state of the app. For example, showing the history of the orders should be allowed only if the user is logged in, but it would also be advisable to prompt the user to log in in case he/she is not, and then resume the original action. Allowing so provides a superior user experience rather than simply aborting the flow (it's what websites achieve by using the referring URL). Here is the implementation of the .goToOrderHistory intent in the NavigationIntentHandler: case .goToOrderHistory: switch userStatusProvider.userStatus { case .loggedIn: return navigationTransitioner.goToRoot(animated: false).thenWithResult { _ -> Future<Bool> in self.navigationTransitioner.goToOrderHistory(animated: true) } case .loggedOut: return navigationTransitioner.requestUserToLogin().then { future in switch future.state { case .result: return self.handleIntent(intent) // go recursive default: return Future<Bool>.futureWithResolution(of: future) } } } Since in the design we make the entire API future-based, we can potentially interrupt the deep linking flow to prompt the user for details or simply gather missing information from a remote API. This is crucial and allows us to construct complex flows. By design, all journeys start by resetting the state of the app by calling goToRoot. This vastly reduces the number of possible transitions to take care of as we will describe in more detail in the next section dedicated to the underlying state machine. State Machine As you might have realized by now, the proposed architecture makes use of an underlying Finite State Machine to keep track of the state of the app during a deep linking journey. Here is a simplified version of the state machine configurations used in the Just Eat iOS apps. In the picture, the red arrows are transitions that are available for logged in users only, the blue ones are for logged out users only, while the black ones can always be performed. Note that every state should allow going back to the .allPoppedToRoot state so that, regardless of what the current state of the app is, we can always reset the state and perform a deep linking action starting afresh. This drastically simplifies the graph, avoiding unnecessary transitions such as the one shown in the next picture. Notice that intents (NavigationIntent) are different from transitions (NavigationEngine.StateMachine.EventType). An intent contains the information to perform a deep linking journey, while the event type is the transition from one FSM state to another (or the same). NavigationTransitioner is the class that performs the transitions and applies the companion navigation changes. A navigation step is performed only if the corresponding transition is allowed and completed successfully. If a transition is not allowed, the flow is interrupted, reporting an error in the future. You can showcase a failure in the demo app by trying to follow the Login Universal Link (https://just-eat.co.uk/login) after having faked the login when following the Order History Universal Link (https://just-eat.co.uk/orders). Usage NavigationEngineDemo includes the whole stack that readers can use in client projects. Here are the steps for a generic integration of the code. Add the NavigationEngine stack (NavigationEngineDemo/NavigationEngine folder) to the client project. This can be done by either creating a dedicated pod as we do at Just Eat or by directly including the code. Include Promis and Stateful as dependencies in your Podfile (assuming the usage of Cocoapods). Modify according to your needs, implement classes for all the *FlowControllerProtocols, and connect them to the ViewControllers of the client. This step can be quite tedious depending on the status of your app and we suggest trying to mimic what has been done in the demo app. Add CFBundleTypeRole and CFBundleURLSchemes to the main target Info.plist file to support Deep Links. E.g. <key>CFBundleURLTypes</key> <array> <dict> <key>CFBundleTypeRole</key> <string>Editor</string> <key>CFBundleURLSchemes</key> <array> <string>je-internal</string> <string>justeat</string> <string>just-eat</string> <string>just-eat-uk</string> </array> </dict> </array> Add the applinks (in the Capabilities -> Associated Domains section of the main target) you'd like to support. This will allow iOS to register the app for Universal Links on the given domains looking for the apple-app-site-association file at the root of those domains once the app is installed. E.g. Implement concrete classes for DeepLinkingSettingsProtocol and UserStatusProviding according to your needs. Again, see the examples in the demo project. The internalDeepLinkSchemes property in DeepLinkSettingsProtocol should contain the same values previously added to CFBundleURLSchemes, while the universalLinkHosts should contain the same applinks: values defined in Capabilities -> Associated Domains. Setup the NavigationEngine stack in the AppDelegate's applicationDidFinishLaunching. To some degree, it should be something similar to the following: var window: UIWindow? var rootFlowController: RootFlowController! var deepLinkingFacade: DeepLinkingFacade! var userStatusProvider = UserStatusProvider() let deepLinkingSettings = DeepLinkingSettings() func applicationDidFinishLaunching(_ application: UIApplication) { // Init UI Stack let window = UIWindow(frame: UIScreen.main.bounds) let tabBarController = TabBarController.instantiate() // Root Flow Controller rootFlowController = RootFlowController(with: tabBarController) tabBarController.flowController = rootFlowController // Deep Linking core let flowControllerProvider = FlowControllerProvider(rootFlowController: rootFlowController) deepLinkingFacade = DeepLinkingFacade(flowControllerProvider: flowControllerProvider, navigationTransitionerDataSource: self, settings: deepLinkingSettings, userStatusProvider: userStatusProvider) // Complete UI Stack window.rootViewController = tabBarController window.makeKeyAndVisible() self.window = window } Modify NavigationTransitionerDataSource according to your needs and implement its methods. You might want to have a separate component and not using the AppDelegate. extension AppDelegate: NavigationTransitionerDataSource { func navigationTransitionerDidRequestUserToLogin() -> Future<Bool> { <#async logic#> } ... } Implement the entry points for handling incoming URLs/inputs in the AppDelegate: func application(_ app: UIApplication, open url: URL, options: [UIApplication.OpenURLOptionsKey : Any] = [:]) -> Bool { // from internal deep links & TodayExtension deepLinkingFacade.openDeeplink(url).finally { future in <#...#> } return true } func application(_ application: UIApplication, continue userActivity: NSUserActivity, restorationHandler: @escaping ([UIUserActivityRestoring]?) -> Void) -> Bool { switch userActivity.activityType { // from Safari case NSUserActivityTypeBrowsingWeb: if let webpageURL = userActivity.webpageURL { self.deepLinkingFacade.handleURL(webpageURL).finally { future in <#...#> } return true } return false // from Spotlight case CSSearchableItemActionType: self.deepLinkingFacade.openSpotlightItem(userActivity).finally { future in let originalInput = userActivity.userInfo![CSSearchableItemActivityIdentifier] as! String <#...#> } return true default: return false } } func application(_ application: UIApplication, performActionFor shortcutItem: UIApplicationShortcutItem, completionHandler: @escaping (Bool) -> Void) { // from shortcut items (Home Screen Quick Actions) deepLinkingFacade.openShortcutItem(shortcutItem).finally { future in let originalInput = shortcutItem.type <#...#> completionHandler(future.hasResult()) } } N.B. Since a number of tasks are usually performed at startup (both from cold and warm starts), it's suggested to schedule them using operation queues. The deep linking task should be one of the last tasks in the queue to make sure that dependencies are previously set up. Here is the great Advanced NSOperations talk by Dave DeLong from WWDC15. The UniversalLinkConverter class should be modified to match the paths in the apple-app-site-association, which should be reachable at the root of the website (the associated domain). It should be noted that if the app is opened instead of the browser, it would be because the Universal Link can be handled; and redirecting the user back to the web would be a fundamental mistake that should be solved by correctly defining the supported paths in the apple-app-site-association file. To perform internal app navigation via deep linking, the DeeplinkFactory class should be used to create DeepLink objects that can be fed into either handleURL(_ url: URL) or openDeepLink(_ deepLink: DeepLink). In-app testing The module exposes a DeepLinkingTesterViewController that can be used to easily test deep linking within an app. Simply define a JSON file containing the Universal Links and Deep Links to test: { "universal_links": [ "https://just-eat.co.uk/", "https://just-eat.co.uk/home", "https://just-eat.co.uk/login", ... ], "deep_links": [ "JUSTEAT://irrelev.ant/home", "justeat://irrelev.ant/login", "just-eat://irrelev.ant/resetPassword?resetToken=xyz", ... ] } Then feed it to the view controller as shown below. Alternatively, use a storyboard reference as shown in the demo app. let deepLinkingTesterViewController = DeepLinkingTesterViewController.instantiate() deepLinkingTesterViewController.delegate = self let path = Bundle.main.path(forResource: "deeplinking_test_list", ofType: "json")! deepLinkingTesterViewController.loadTestLinks(atPath: path) and implement the DeepLinkingTesterViewControllerDelegate extension AppDelegate: DeepLinkingTesterViewControllerDelegate { func deepLinkingTesterViewController(_ deepLinkingTesterViewController: DeepLinkingTesterViewController, didSelect url: URL) { self.deepLinkingFacade.handleURL(universalLink).finally { future in self.handleFuture(future, originalInput: universalLink.absoluteString) } } } Conclusion The solution proposed in this article has proven to be highly scalable and customizable. We shipped it in the Just Eat iOS apps in March 2019 and our teams are gradually increasing the number of Universal Links supported as you can see from our apple-app-site-association. Before implementing and adopting NavigationEngine, supporting new kinds of links was a real hassle. Thanks to this architecture, it is now easy for each team in the company to support new deep link journeys. The declarative approach in defining the API, states, transitions, and intents forces a single way to extend the code which enables a coherent approach throughout the codebase.
Performant, sleek and elegant.
Swift 6 suitable notification observers in iOS
- iOS
- Swift
The author discusses challenges managing side projects, specifically updating SignalPath to Swift 6. They encountered errors related to multiple notification observations but resolved them by shifting to publishers, avoiding sendable closure issues. Although the new approach risks background thread notifications, the compiler is satisfied with the adjustments made to the code.
I have a couple of side projects going on, although it is always a challenge to find time of them. One of them, SignalPath, is what I created back in 2015. Currently, I have been spending some time to bump the Swift version to 6 which brought a quite a list of errors. In many places I had code what dealt with observing multiple notifications, but of course Swift 6 was not happy about it. This file contains hidden or bidirectional Unicode text that may be interpreted or compiled differently than what appears below. To review, open the file in an editor that reveals hidden Unicode characters. Learn more about bidirectional Unicode characters Show hidden characters let handler: (Notification) -> Void = { [weak self] notification in self?.keyboardInfo = Info(notification: notification) } let names: [Notification.Name] = [ UIResponder.keyboardWillShowNotification, UIResponder.keyboardWillHideNotification, UIResponder.keyboardWillChangeFrameNotification ] observers = names.map({ name -> NSObjectProtocol in return NotificationCenter.default.addObserver(forName: name, object: nil, queue: .main, using: handler) // Converting non-sendable function value to '@Sendable (Notification) -> Void' may introduce data races }) view raw Observer.swift hosted with ❤ by GitHub After moving all of the notification observing to publishers instead, I can ignore the whole sendable closure problem all together. This file contains hidden or bidirectional Unicode text that may be interpreted or compiled differently than what appears below. To review, open the file in an editor that reveals hidden Unicode characters. Learn more about bidirectional Unicode characters Show hidden characters Publishers.Merge3( NotificationCenter.default.publisher(for: UIResponder.keyboardWillShowNotification), NotificationCenter.default.publisher(for: UIResponder.keyboardWillHideNotification), NotificationCenter.default.publisher(for: UIResponder.keyboardWillChangeFrameNotification) ) .map(Info.init) .assignWeakly(to: \.keyboardInfo, on: self) .store(in: ¬ificationCancellables) view raw Observer.swift hosted with ❤ by GitHub Great, compiler is happy again although this code could cause trouble if any of the notifications are posted from a background thread. But since this is not a case here, I went for skipping .receive(on: DispatchQueue.main). Assign weakly is a custom operator and the implementation looks like this: This file contains hidden or bidirectional Unicode text that may be interpreted or compiled differently than what appears below. To review, open the file in an editor that reveals hidden Unicode characters. Learn more about bidirectional Unicode characters Show hidden characters public extension Publisher where Self.Failure == Never { func assignWeakly<Root>(to keyPath: ReferenceWritableKeyPath<Root, Self.Output>, on object: Root) -> AnyCancellable where Root: AnyObject { return sink { [weak object] value in object?[keyPath: keyPath] = value } } } view raw Combine+Weak.swift hosted with ❤ by GitHub If this was helpful, please let me know on Mastodon@toomasvahter or Twitter @toomasvahter. Feel free to subscribe to RSS feed. Thank you for reading. Support me on Patreon Donate with Paypal Buy me a coffee

AnyClass protocol and Objective-C methods
- iOS
- Swift
- AnyClass
AnyClass is a protocol all classes conform to and it comes with a feature I was not aware of. But first, how to I ended up with using AnyClass. While working on code using CoreData, I needed a way to enumerate all the CoreData entities and call a static function on them. If that function […]
AnyClass is a protocol all classes conform to and it comes with a feature I was not aware of. But first, how to I ended up with using AnyClass. While working on code using CoreData, I needed a way to enumerate all the CoreData entities and call a static function on them. If that function is defined, it runs an entity specific update. Let’s call the function static func resetState(). It is easy to get the list of entity names of the model and then turn them into AnyClass instances using the NSClassFromString() function. This file contains hidden or bidirectional Unicode text that may be interpreted or compiled differently than what appears below. To review, open the file in an editor that reveals hidden Unicode characters. Learn more about bidirectional Unicode characters Show hidden characters let entityClasses = managedObjectModel.entities .compactMap(\.name) .compactMap { NSClassFromString($0) } view raw AnyClass.swift hosted with ❤ by GitHub At this point I had an array of AnyClass instances where some of them implemented the resetState function, some didn’t. While browsing the AnyClass documentation, I saw this: You can use the AnyClass protocol as the concrete type for an instance of any class. When you do, all known @objcclass methods and properties are available as implicitly unwrapped optional methods and properties, respectively. Never heard about it, probably because I have never really needed to interact with AnyClass in such way. Therefore, If I create an @objc static function then I can call it by unwrapping it with ?. Without unwrapping it safely, it would crash because Department type does not implement the function. This file contains hidden or bidirectional Unicode text that may be interpreted or compiled differently than what appears below. To review, open the file in an editor that reveals hidden Unicode characters. Learn more about bidirectional Unicode characters Show hidden characters class Department: NSManagedObject { } class Employee: NSManagedObject { @objc static func resetState() { print("Resetting Employee") } } // This triggers Employee.resetState and prints the message to the console for entityClass in entityClasses { entityClass.resetState?() } view raw AnyClass.swift hosted with ❤ by GitHub It has been awhile since I wrote any Objective-C code, but its features leaking into Swift helped me out here. Reminds me of days filled with respondsToSelector and performSelector. If this was helpful, please let me know on Mastodon@toomasvahter or Twitter @toomasvahter. Feel free to subscribe to RSS feed. Thank you for reading. Support me on Patreon Donate with Paypal Buy me a coffee
AnyView is everywhere in Xcode 16
- iOS
- Xcode
- Swift
Xcode 16 introduces a new execution engine for Previews, enhancing project configuration support and improving performance by up to 30%. However, it wraps SwiftUI views in AnyView for debug builds, which can hinder optimization. Users can override this behavior with a custom build setting to maintain performance in debugging.
Loved to see this entry in Xcode 16’s release notes: Xcode 16 brings a new execution engine for Previews that supports a larger range of projects and configurations. Now with shared build products between Build and Run and Previews, switching between the two is instant. Performance between edits in the source code is also improved for many projects, with increases up to 30%. It has been difficult at times to use SwiftUI previews when they sometimes just stop working with error messages leaving scratch head. Turns out, it comes with a hidden cost of Xcode 16 wrapping views with AnyView in debug builds which takes away performance. If you don’t know it only affects debug builds, one could end up on journey of trying to improve the performance for debug builds and making things worse for release builds. Not sure if this was ever mentioned in any of the WWDC videos, but feels like this kind of change should have been highlighted. As of Xcode 16, every SwiftUI view is wrapped in an AnyView _in debug builds only_. This speeds switching between previews, simulator, and device, but subverts some List optimizations. Add this custom build setting to the project to override the new behavior: `SWIFT_ENABLE_OPAQUE_TYPE_ERASURE=NO` Wrapping in Equatable is likely to make performance worse as it introduces an extra view in the hierarchy for every row. Curt Clifton on Mastodon Fortunately, one can turn off this if this becomes an issue in debug builds. If this was helpful, please let me know on Mastodon@toomasvahter or Twitter @toomasvahter. Feel free to subscribe to RSS feed. Thank you for reading. Support me on Patreon Donate with Paypal Buy me a coffee
Sorting arrays in Swift: multi-criteria
- Foundation
- iOS
- Swift
- localizedCaseInsensitiveCompare
- sort
- sorted(by:)
Swift’s foundation library provides a sorted(by:) function for sorting arrays. The areInIncreasingOrder closure needs to return true if the closure’s arguments are increasing, false otherwise. How to use the closure for sorting by multiple criteria? Let’s take a look at an example of sorting an array of Player structs. As said before, the closure should […]
Swift’s foundation library provides a sorted(by:) function for sorting arrays. The areInIncreasingOrder closure needs to return true if the closure’s arguments are increasing, false otherwise. How to use the closure for sorting by multiple criteria? Let’s take a look at an example of sorting an array of Player structs. Sort by score in descending order Sort by name in ascending order Sort by id in ascending order This file contains hidden or bidirectional Unicode text that may be interpreted or compiled differently than what appears below. To review, open the file in an editor that reveals hidden Unicode characters. Learn more about bidirectional Unicode characters Show hidden characters struct Player { let id: Int let name: String let score: Int } extension Player: CustomDebugStringConvertible { var debugDescription: String { "id=\(id) name=\(name) score=\(score)" } } let players: [Player] = [ Player(id: 0, name: "April", score: 7), Player(id: 1, name: "Nora", score: 8), Player(id: 2, name: "Joe", score: 5), Player(id: 3, name: "Lisa", score: 4), Player(id: 4, name: "Michelle", score: 6), Player(id: 5, name: "Joe", score: 5), Player(id: 6, name: "John", score: 7) ] view raw Sort.swift hosted with ❤ by GitHub As said before, the closure should return true if the left element should be ordered before the right element. If they happen to be equal, we should use the next sorting criteria. For comparing strings, we’ll go for case-insensitive sorting using Foundation’s built-in localizedCaseInsensitiveCompare. This file contains hidden or bidirectional Unicode text that may be interpreted or compiled differently than what appears below. To review, open the file in an editor that reveals hidden Unicode characters. Learn more about bidirectional Unicode characters Show hidden characters let sorted = players.sorted { lhs, rhs in if lhs.score == rhs.score { let nameOrdering = lhs.name.localizedCaseInsensitiveCompare(rhs.name) if nameOrdering == .orderedSame { return lhs.id < rhs.id } else { return nameOrdering == .orderedAscending } } else { return lhs.score > rhs.score } } print(sorted.map(\.debugDescription).joined(separator: "\n")) // id=1 name=Nora score=8 // id=0 name=April score=7 // id=6 name=John score=7 // id=4 name=Michelle score=6 // id=2 name=Joe score=5 // id=5 name=Joe score=5 // id=3 name=Lisa score=4 view raw Sort.swift hosted with ❤ by GitHub If this was helpful, please let me know on Mastodon@toomasvahter or Twitter @toomasvahter. Feel free to subscribe to RSS feed. Thank you for reading. Support me on Patreon Donate with Paypal Buy me a coffee
How to keep Date’s microseconds precision in Swift
- Foundation
- iOS
- Swift
- ISO8601DateFormatter
DateFormatter is used for converting string representation of date and time to a Date type and visa-versa. Something to be aware of is that the conversion loses microseconds precision. This is extremely important if we use these Date values for sorting and therefore ending up with incorrect order. Let’s consider an iOS app which uses […]
DateFormatter is used for converting string representation of date and time to a Date type and visa-versa. Something to be aware of is that the conversion loses microseconds precision. This is extremely important if we use these Date values for sorting and therefore ending up with incorrect order. Let’s consider an iOS app which uses API for fetching a list of items and each of the item contains a timestamp used for sorting the list. Often, these timestamps have the ISO8601 format like 2024-09-21T10:32:32.113123Z. Foundation framework has a dedicated formatter for parsing these strings: ISO8601DateFormatter. It is simple to use: This file contains hidden or bidirectional Unicode text that may be interpreted or compiled differently than what appears below. To review, open the file in an editor that reveals hidden Unicode characters. Learn more about bidirectional Unicode characters Show hidden characters let formatter = ISO8601DateFormatter() formatter.formatOptions = [.withInternetDateTime, .withFractionalSeconds] let date = formatter.date(from: "2024-09-21T10:32:32.113123Z") print(date?.timeIntervalSince1970) // 1726914752.113 view raw ISO8601.swift hosted with ❤ by GitHub Great, but there is on caveat, it ignores microseconds. Fortunately this can be fixed by manually parsing microseconds and adding the missing precision to the converted Date value. Here is an example, how to do this using an extension. This file contains hidden or bidirectional Unicode text that may be interpreted or compiled differently than what appears below. To review, open the file in an editor that reveals hidden Unicode characters. Learn more about bidirectional Unicode characters Show hidden characters extension ISO8601DateFormatter { func microsecondsDate(from dateString: String) -> Date? { guard let millisecondsDate = date(from: dateString) else { return nil } guard let fractionIndex = dateString.lastIndex(of: ".") else { return millisecondsDate } guard let tzIndex = dateString.lastIndex(of: "Z") else { return millisecondsDate } guard let startIndex = dateString.index(fractionIndex, offsetBy: 4, limitedBy: tzIndex) else { return millisecondsDate } // Pad the missing zeros at the end and cut off nanoseconds let microsecondsString = dateString[startIndex..<tzIndex].padding(toLength: 3, withPad: "0", startingAt: 0) guard let microseconds = TimeInterval(microsecondsString) else { return millisecondsDate } return Date(timeIntervalSince1970: millisecondsDate.timeIntervalSince1970 + microseconds / 1_000_000.0) } } view raw ISO8601.swift hosted with ❤ by GitHub That this code does is first converting the string using the original date(from:) method, followed by manually extracting digits for microseconds by handling cases where there are less than 3 digits or event there are nanoseconds present. Lastly a new Date value is created with the microseconds precision. Here are examples of the output (note that float’s precision comes into play). This file contains hidden or bidirectional Unicode text that may be interpreted or compiled differently than what appears below. To review, open the file in an editor that reveals hidden Unicode characters. Learn more about bidirectional Unicode characters Show hidden characters let dateStrings = [ "2024-09-21T10:32:32.113Z", "2024-09-21T10:32:32.1131Z", "2024-09-21T10:32:32.11312Z", "2024-09-21T10:32:32.113123Z", "2024-09-21T10:32:32.1131234Z", "2024-09-21T10:32:32.11312345Z", "2024-09-21T10:32:32.113123456Z" ] let dates = dateStrings.compactMap(formatter.microsecondsDate(from:)) for (string, date) in zip(dateStrings, dates) { print(string, "->", date.timeIntervalSince1970) } /* 2024-09-21T10:32:32.113Z -> 1726914752.113 2024-09-21T10:32:32.1131Z -> 1726914752.1130998 2024-09-21T10:32:32.11312Z -> 1726914752.1131198 2024-09-21T10:32:32.113123Z -> 1726914752.113123 2024-09-21T10:32:32.1131234Z -> 1726914752.113123 2024-09-21T10:32:32.11312345Z -> 1726914752.113123 2024-09-21T10:32:32.113123456Z -> 1726914752.113123 */ view raw ISO8601.swift hosted with ❤ by GitHub If this was helpful, please let me know on Mastodon@toomasvahter or Twitter @toomasvahter. Feel free to subscribe to RSS feed. Thank you for reading. Support me on Patreon Donate with Paypal Buy me a coffee
Wrapping async-await with a completion handler in Swift
- Swift
- async
- iOS
It is not often when we need to wrap an async function with a completion handler. Typically, the reverse is what happens. This need can happen in codebases where the public interface can’t change just right now, but internally it is moving towards async-await functions. Let’s jump in and see how to wrap an async […]
It is not often when we need to wrap an async function with a completion handler. Typically, the reverse is what happens. This need can happen in codebases where the public interface can’t change just right now, but internally it is moving towards async-await functions. Let’s jump in and see how to wrap an async function, an async throwing function and an async throwing function what returns a value. To illustrate how to use it, we’ll see an example of how a PhotoEffectApplier type has a public interface consisting of completion handler based functions and how it internally uses PhotoProcessor type what only has async functions. The end result looks like this: This file contains hidden or bidirectional Unicode text that may be interpreted or compiled differently than what appears below. To review, open the file in an editor that reveals hidden Unicode characters. Learn more about bidirectional Unicode characters Show hidden characters struct PhotoProcessor { func process(_ photo: Photo) async throws -> Photo { // … return Photo(name: UUID().uuidString) } func setConfiguration(_ configuration: Configuration) async throws { // … } func cancel() async { // … } } public final class PhotoEffectApplier { private let processor = PhotoProcessor() public func apply(effect: PhotoEffect, to photo: Photo, completion: @escaping (Result<Photo, Error>) -> Void) { Task(operation: { try await self.processor.process(photo) }, completion: completion) } public func setConfiguration(_ configuration: Configuration, completion: @escaping (Error?) -> Void) { Task(operation: { try await self.processor.setConfiguration(configuration) }, completion: completion) } public func cancel(completion: @escaping (Error?) -> Void) { Task(operation: { await self.processor.cancel() }, completion: completion) } } view raw PhotoEffectApplier.swift hosted with ❤ by GitHub In this example, we have all the interested function types covered: async, async throwing and async throwing with a return type. Great, but let’s have a look at these Task initializers what make this happen. The core idea is to create a Task, run an operation, and then make a completion handler callback. Since most of the time we need to run the completion on the main thread, then we have a queue argument with the default queue set to the main thread. This file contains hidden or bidirectional Unicode text that may be interpreted or compiled differently than what appears below. To review, open the file in an editor that reveals hidden Unicode characters. Learn more about bidirectional Unicode characters Show hidden characters extension Task { @discardableResult init<T>( priority: TaskPriority? = nil, operation: @escaping () async throws -> T, queue: DispatchQueue = .main, completion: @escaping (Result<T, Failure>) -> Void ) where Success == Void, Failure == any Error { self.init(priority: priority) { do { let value = try await operation() queue.async { completion(.success(value)) } } catch { queue.async { completion(.failure(error)) } } } } } view raw AsyncThrowsValue.swift hosted with ❤ by GitHub This file contains hidden or bidirectional Unicode text that may be interpreted or compiled differently than what appears below. To review, open the file in an editor that reveals hidden Unicode characters. Learn more about bidirectional Unicode characters Show hidden characters extension Task { @discardableResult init( priority: TaskPriority? = nil, operation: @escaping () async throws -> Void, queue: DispatchQueue = .main, completion: @escaping (Error?) -> Void ) where Success == Void, Failure == any Error { self.init(priority: priority) { do { try await operation() queue.async { completion(nil) } } catch { queue.async { completion(error) } } } } } view raw AsyncThrows.swift hosted with ❤ by GitHub This file contains hidden or bidirectional Unicode text that may be interpreted or compiled differently than what appears below. To review, open the file in an editor that reveals hidden Unicode characters. Learn more about bidirectional Unicode characters Show hidden characters extension Task { @discardableResult init( priority: TaskPriority? = nil, operation: @escaping () async -> Void, queue: DispatchQueue = .main, completion: @escaping () -> Void ) where Success == Void, Failure == Never { self.init(priority: priority) { await operation() queue.async { completion() } } } } view raw Async.swift hosted with ❤ by GitHub If this was helpful, please let me know on Mastodon@toomasvahter or Twitter @toomasvahter. Feel free to subscribe to RSS feed. Thank you for reading. Support me on Patreon Donate with Paypal Buy me a coffee
Dark Augmented Code theme for Xcode
- Swift
- Xcode
After a couple of years, I tend to get tired of looking at the same colour scheme in Xcode. Then I spend quite a bit of time looking for a new theme and then coming back with empty hands. Material default has served me for a while, but it never felt like a perfect colour […]
After a couple of years, I tend to get tired of looking at the same colour scheme in Xcode. Then I spend quite a bit of time looking for a new theme and then coming back with empty hands. Material default has served me for a while, but it never felt like a perfect colour scheme for me. Therefore, I decided to take on a road of creating a new colour scheme on my own which is going to be named as “Augmented Code (Dark)”. It is available for Xcode and iTerm 2. Download it from here: GitHub If this was helpful, please let me know on Mastodon@toomasvahter or Twitter @toomasvahter. Feel free to subscribe to RSS feed. Thank you for reading. Support me on Patreon Donate with Paypal Buy me a coffee


Cancellable withObservationTracking in Swift
- iOS
- Swift
- SwiftUI
- observation
- withObservationTracking
Observation framework came out along with iOS 17 in 2023. Using this framework, we can make objects observable very easily. Please refer to @Observable macro in SwiftUI for quick recap if needed. It also has a function withObservationTracking(_:onChange:) what can be used for cases where we would want to manually get a callback when a tracked […]
Observation framework came out along with iOS 17 in 2023. Using this framework, we can make objects observable very easily. Please refer to @Observable macro in SwiftUI for quick recap if needed. It also has a function withObservationTracking(_:onChange:) what can be used for cases where we would want to manually get a callback when a tracked property is about to change. This function works as a one shot function and the onChange closure is called only once. Note that it is called before the value has actually changed. If we want to get the changed value, we would need to read the value on the next run loop cycle. It would be much more useful if we could use this function in a way where we could have an observation token and as long as it is set, the observation is active. Here is the function with cancellation support. This file contains hidden or bidirectional Unicode text that may be interpreted or compiled differently than what appears below. To review, open the file in an editor that reveals hidden Unicode characters. Learn more about bidirectional Unicode characters Show hidden characters func withObservationTracking( _ apply: @escaping () -> Void, token: @escaping () -> String?, willChange: (@Sendable () -> Void)? = nil, didChange: @escaping @Sendable () -> Void ) { withObservationTracking(apply) { guard token() != nil else { return } willChange?() RunLoop.current.perform { didChange() withObservationTracking( apply, token: token, willChange: willChange, didChange: didChange ) } } } view raw Observation.swift hosted with ❤ by GitHub The apply closure drives which values are being tracked, and this is passed into the existing withObservationTracking(_:onChange:) function. The token closure controls if the change should be handled and if we need to continue tracking. Will and did change are closures called before and after the value has changed. Here is a simple example where we have a view which controls if the observation should be active or not. Changing the value in the view model only triggers the print lines when observation token is set. This file contains hidden or bidirectional Unicode text that may be interpreted or compiled differently than what appears below. To review, open the file in an editor that reveals hidden Unicode characters. Learn more about bidirectional Unicode characters Show hidden characters struct ContentView: View { @State private var viewModel = ViewModel() @State private var observationToken: String? var body: some View { VStack { Text(viewModel.title) Button("Add") { viewModel.add() } Button("Start Observing") { guard observationToken == nil else { return } observationToken = UUID().uuidString observeAndPrint() } Button("Stop Observing") { observationToken = nil } } .padding() } func observeAndPrint() { withObservationTracking({ _ = viewModel.title }, token: { observationToken }, willChange: { [weak viewModel] in guard let viewModel else { return } print("will change \(viewModel.title)") }, didChange: { [weak viewModel] in guard let viewModel else { return } print("did change \(viewModel.title)") }) } } @Observable final class ViewModel { var counter = 0 func add() { counter += 1 } var title: String { "Number of items: \(counter)" } } view raw ContentView.swift hosted with ❤ by GitHub If this was helpful, please let me know on Mastodon@toomasvahter or Twitter @toomasvahter. Feel free to subscribe to RSS feed. Thank you for reading. Support me on Patreon Donate with Paypal Buy me a coffee
Referencing itself in a struct in Swift
- Foundation
- iOS
- Swift
It took a long time, I mean years, but it finally happened. I stumbled on a struct which had a property of the same type. At first, it is kind of interesting that the replies property compiles fine, although it is a collection of the same type. I guess it is so because array’s storage […]
It took a long time, I mean years, but it finally happened. I stumbled on a struct which had a property of the same type. This file contains hidden or bidirectional Unicode text that may be interpreted or compiled differently than what appears below. To review, open the file in an editor that reveals hidden Unicode characters. Learn more about bidirectional Unicode characters Show hidden characters struct Message { let id: Int // This is OK: let replies: [Message] // This is not OK // Value type 'Message' cannot have a stored property that recursively contains it let parent: Message? } view raw Struct.swift hosted with ❤ by GitHub At first, it is kind of interesting that the replies property compiles fine, although it is a collection of the same type. I guess it is so because array’s storage type is a reference type. The simplest workaround is to use a closure for capturing the actual value. This file contains hidden or bidirectional Unicode text that may be interpreted or compiled differently than what appears below. To review, open the file in an editor that reveals hidden Unicode characters. Learn more about bidirectional Unicode characters Show hidden characters struct Message { let id: Int let replies: [Message] private let parentClosure: () -> Message? var parent: Message? { parentClosure() } } view raw Struct2.swift hosted with ❤ by GitHub Or we could go for using a boxed wrapper type. This file contains hidden or bidirectional Unicode text that may be interpreted or compiled differently than what appears below. To review, open the file in an editor that reveals hidden Unicode characters. Learn more about bidirectional Unicode characters Show hidden characters struct Message { let id: Int let replies: [Message] private let parentBoxed: Boxed<Message>? var parent: Message? { parentBoxed?.value} } class Boxed<T> { let value: T init(value: T) { self.value = value } } view raw Struct3.swift hosted with ❤ by GitHub Or if we prefer property wrappers, using that instead. This file contains hidden or bidirectional Unicode text that may be interpreted or compiled differently than what appears below. To review, open the file in an editor that reveals hidden Unicode characters. Learn more about bidirectional Unicode characters Show hidden characters struct Message { let id: Int let replies: [Message] @Boxed var parent: Message? } @propertyWrapper class Boxed<Value> { var value: Value init(wrappedValue: Value) { value = wrappedValue } var wrappedValue: Value { get { value } set { value = newValue } } } view raw Struct4.swift hosted with ❤ by GitHub Then there are also options like changing the struct into class instead, but that is something to consider. Or finally, creating a All in all, it is fascinating how something simple like this actually has a pretty complex background. If this was helpful, please let me know on Mastodon@toomasvahter or Twitter @toomasvahter. Feel free to subscribe to RSS feed. Thank you for reading. Support me on Patreon Donate with Paypal Buy me a coffee
ScrollView phase changes on iOS 18
- Swift
- SwiftUI
- iOS
- onScrollPhaseChange
- ScrollGeometry
- ScrollPhase
- ScrollPhaseChangeContext
- ScrollView
In addition to scroll related view modifiers covered in the previous blog post, there is another one for detecting scroll view phases aka the state of the scrolling. The new view modifier is called onScrollPhaseChange(_:) and has three arguments in the change closure: old phase, new phase and a context. ScrollPhase is an enum with […]
In addition to scroll related view modifiers covered in the previous blog post, there is another one for detecting scroll view phases aka the state of the scrolling. The new view modifier is called onScrollPhaseChange(_:) and has three arguments in the change closure: old phase, new phase and a context. ScrollPhase is an enum with the following values: animating – animating the content offset decelerating – user interaction stopped and scroll velocity is decelerating idle – no scrolling interacting – user is interacting tracking – potential user initiated scroll event is going to happen The enum has a convenience property of isScrolling which is true when the phase is not idle. ScrollPhaseChangeContext captures additional information about the scroll state, and it is the third argument of the closure. The type gives access to the current ScrollGeometry and the velocity of the scroll view. Here is an example of a scroll view which has the new view modifier attached. This file contains hidden or bidirectional Unicode text that may be interpreted or compiled differently than what appears below. To review, open the file in an editor that reveals hidden Unicode characters. Learn more about bidirectional Unicode characters Show hidden characters struct ContentView: View { @State private var scrollState: ( phase: ScrollPhase, context: ScrollPhaseChangeContext )? let data = (0..<100).map({ "Item \($0)" }) var body: some View { NavigationStack { ScrollView { ForEach(data, id: \.self) { item in Text(item) .frame(maxWidth: .infinity) .padding() .background { RoundedRectangle(cornerRadius: 8) .fill(Color.cyan) } .padding(.horizontal, 8) } } .onScrollPhaseChange { oldPhase, newPhase, context in scrollState = (newPhase, context) } Divider() VStack { Text(scrollStateDescription) } .font(.footnote.monospaced()) .padding() } } private var scrollStateDescription: String { guard let scrollState else { return "" } let velocity: String = { guard let velocity = scrollState.context.velocity else { return "none" } return "\(velocity)" }() let geometry = scrollState.context.geometry return """ State at the scroll phase change Scrolling=\(scrollState.phase.isScrolling) Phase=\(scrollState.phase) Velocity \(velocity) Content offset \(geometry.contentOffset) Visible rect \(geometry.visibleRect.integral) """ } } view raw ScrollPhase.swift hosted with ❤ by GitHub If this was helpful, please let me know on Mastodon@toomasvahter or Twitter @toomasvahter. Feel free to subscribe to RSS feed. Thank you for reading. Support me on Patreon Donate with Paypal Buy me a coffee
Recent content on Benoit Pasquier
From Engineer to Manager: A Year of Growth and Transformation
It feels like it was yesterday when I became an engineering manager but it has been almost a year. I want to take this time to reflect on the challenges and learnings from this journey.
Things to know before becoming an Engineering Manager
The journey from individual contributor to engineering manager isn’t always straightforward. Today, I’ll share what it means to become an engineering manager from my point of view, and a few important points to be aware of before making this transition.
Transitioning to an Engineering Manager role
It’s been a while since I haven’t posted anything on my website, it’s because there have been a few changes in 2022 that kept me away from writing. It’s time to resume it.
Security Application Static Analysis applied to iOS and Gitlab CI
Security is a big topic in software engineering but how does it apply to mobile development? We care about user experience or mobile performance, security issues are rarely prioritized. This week, I’ll share how to integrate security tools into your CI pipeline to stay aware of your codebase health.
Being more efficient as a mobile engineer
I was reading this week about “10x engineer” and what it means in the tech industry. If the title can be questionable, I wanted to reflect on its definition and what it can mean in mobile engineering.
When to remove your iOS app from the App Store
For most mobile engineers, the end game is to release our own apps. For the few projects that make it to the App Store, it can be pretty hard to keep them alive over time. Eventually, the question comes up: should I remove my app from the App Store? Today, I’ll share about the thought process that makes me sunset one.
Weak self, a story about memory management and closure in Swift
Memory management is a big topic in Swift and iOS development. If there are plenty of tutorials explaining when to use weak self with closure, here is a short story when memory leaks can still happen with it.
Setting up Auto Layout constraints programmatically in Swift
In iOS development, content alignment and spacing is something that can take a lot of our time. Today, let’s explore how to set constraint with UIKit, update them and resolve constraint conflicts.
Ten years of blogging, one article at a time
Most of people don’t know but I’ve been blogging for some time now. Actually, tomorrow will be ten years. Today is a good time to take a walk on memory lane.
Deep linking and URL scheme in iOS
Opening an app from an URL is such a powerful iOS feature. Its drives users to your app, and can create shortcuts to specific features. This week, we’ll dive into deep linking on iOS and how to create an URL scheme for your app.
Tips and tweaks to integrate Github Action to your iOS project
I’ve been exploring more and more tooling around iOS ecosystem. One tool I really enjoy using those days is Github Action as a continuous integration for my projects. Today we’ll dive into tips and tweaks to make the most of it.
Flutter and fastlane, how to setup an iOS continuous delivery solution
When it comes to iOS development, everybody have their own favorite language and framework: Swift, Objective-C, SwiftUI, React-Native, Flutter and so on. Unlike most of my previous post, today we’re going to leverage some iOS tooling for cross platforms technology: fastlane and Flutter.
Currency TextField in SwiftUI
Between banking and crypto apps, it’s quite often we interact with currency inputs on daily basis. If creating a localized UITextField can already be tricky in UIKit, I was wondering how hard it would be to do a similar one in SwiftUI. Let’s see today how to create a localized currency TextField in SwiftUI.
Open Source checklist for your next Swift library
Like many developers, I use open source tools on daily basis. Recently, I’ve got the chance to create one for other teammates and try to think about what I should consider before launching it. Today I share this checklist.
Unit testing UIView action and gesture in Swift
A big part of the developer journey is make sure our code behaves as expected. It’s best practice to setup tests that allow us to test quickly and often that nothing is broken. If unit testing is common practice to check the business logic, we can also extend it to cover some specific UI behaviors. Let’s how to unit test views and gesture in UIKit.
Dependency injection and Generics to create a modular app in Swift
When we talk about modular app, we rarely mention how complex it can be over time and get out of hand. In most cases, importing frameworks into one another is a reasonable solution but we can do more. Let’s explore how with dependency inversion in Swift and how to create order into our components.
Things I wish I knew in my early coding career
For the past few years, I had the opportunity to mentor new joiners through different roles. In some aspects, I could see myself in them the same way I started years back: eager to prove themselves, jumping on the code and hacking around.
I tried to think about what I learnt the hard way since my first role in the tech industry and how could I help them learn the easy way.
Create a web browser with WebKit and SwiftUI
Recently, I’ve been more and more curious about web experience through mobile apps. Most of web browser apps look alike, I was wondering how could I recreate one with WebKit and SwiftUI. Let’s dive in.
Migrating an iOS app to SwiftUI - Database with Realm
To move an existing iOS app codebase to SwiftUI can quickly become a challenge if we don’t scope the difficulties ahead. After covering the navigation and design layer last week, it’s time to dive deeper into the logic and handle the code migration for a database and the user preferences.
Migrating an iOS app to SwiftUI - Navigation & Storyboards
If SwiftUI is great for many things, migrating completely an existing app codebase to it can be really tricky. In a series of blog posts, I’ll share how to migrate an iOS app written in Swift with UIKit to SwiftUI. Today, let’s start with the navigation and the UI components with storyboards.
Creating a webcam utility app for macOS in SwiftUI
Did you ever have to share your screen and camera together? I recently did and it was that easy. How hard could it be to create our own? Today, we’ll code our own webcam utility app for macOS in SwiftUI.
Migrating MVVM architecture from RxSwift to Combine
It’s been almost two years that Combine has been introduced to the Apple developer community. As many developer, you want to migrate your codebase to it. You don’t want to be left behind but you’re not sure where to start, maybe not sure if you want to jump to SwiftUI either. Nothing to worry, let’s see step by step how to migrate an iOS sample app using UIKit and RxSwift to Combine.
How to display date and time in SwiftUI
Displaying dates or times is a very common requirement for many apps, often using a specific date formatter. Let’s see what SwiftUI brings to the table to make it easier for developers.
Create a dynamic onboarding UI in Swift
When creating new features, it’s really important to think about how our users will use it. Most of the time, the UI is straightforward enough. However, sometimes, you will want to give some guidance, to highlight a button or a switch, with a message attached. Today, we’ll create a reusable and adaptable overlay in Swift to help onboard mobile users for any of your features.
Goodbye 2020 - A year in perspective
Close to the end of the year, I tend to list what I’ve accomplished but also what didn’t go so well, to help me see what can I do better next year. With couple days early, it’s time to look back at 2020.
How to pass data between views using Coordinator pattern in Swift
A question that comes back often when using Coordinator pattern in iOS development is how to pass data between views. Today I’ll share different approaches for a same solution, regardless if you are using MVVM, MVC or other architectural design pattern.
Automating App Store localized screenshots with XCTest and Xcode Test Plan
One reason I like so much working on native mobile apps is to deliver the user experience based on their region and location. Although, for every update, it can be painful for developers to recapture screenshots foreach available language. Today, I’ll share how to automate this with UI tests and Xcode tools.
Playing Video with AVPlayer in SwiftUI
I’ve been experiencing more and more with SwiftUI and I really wanted to see what we can do with video content. Today I’ll share my findings, showing how to play video using AVFoundation in SwiftUI, including some mistakes to avoid.
With Catalyst and SwiftUI multi-platform, should you create a macOS version of your app?
With Mac Catalyst and SwiftUI support for macOS, Apple has been pushing new tools to the community for the past couple years to create new services on Mac computers. Does it mean you should do too? Here are couple things to consider first.
Create a watchOS app in SwiftUI
Designing a watchOS app in Swift always felt to be quite tricky. I could spend hours tweaking redoing layout and constraints. With SwiftUI supporting watchOS, I wanted to have a new try at it, releasing a standalone app for Apple Watch.
As software engineer, how to face the impostor syndrome?
Shortly stepping back from coding for a week and reading about the community, I realized it how easy it is to be crushed by anxiety: I see so many great things happening every day, things I want to be part of, but at the same time getting anxiety to be good enough. This is my thoughts of how to face the impostor syndrome.
Advanced testing tips in Xcode
In the last couple years, Apple has made some good efforts to improve their testing tools. Today, I’ll walk you through some tips to make sure your test suite run at their best capacity.
Atomic properties and Thread-safe data structure in Swift
A recurring challenge in programming is accessing a shared resource concurrently. How to make sure the code doesn’t behave differently when multiple thread or operations tries to access the same property. In short, how to protect from a race condition?
Deploying your Swift code on AWS Lambda
About a month ago, it became possible to run Swift code on AWS Lambda. I was really interesting to try and see how easy it would be to deploy small Swift functions as serverless application. Let’s see how.
Introduction to MVVM pattern in Objective-C
Even though the iOS ecosystem is growing further every day from Objective-C, some companies still heavily rely on it. A week away for another wave of innovation from WWDC 2020, I thought it would be interesting to dive back into Objective-C starting with a MVVM pattern implementation.
100 day challenge of data structure and algorithm in Swift
Since January, I’ve been slowing down blogging for couple reasons: I started doubting about myself and the quality of my content but I also wanted to focus more on some fundamentals I felt I was missing. So I committed to a “100 day challenge” coding challenge, focused on data structure and algorithm in Swift.
Data Structure - Implementing a Tree in Swift
Following up previous articles about common data structure in Swift, this week it’s time to cover the Tree, a very important concept that we use everyday in iOS development. Let’s dive in.
Using Key-Value Observing in Swift to debug your app
Recently, I was looking into a bug where the UITabBar was inconsistently disappearing on specific pages. I tried different approaches but I couldn’t get where it got displayed and hidden. That’s where I thought about KVO.
Data Structure - Coding a Stack in Swift
After covering last week how to code a Queue in Swift, it sounds natural to move on to the Stack, another really handy data structure which also find his place in iOS development. Let’s see why.
Data Structure - How to implement a Queue in Swift
Recently revisiting computer science fundamentals, I was interested to see how specific data structure applies to iOS development, starting this week one of most common data structure: the queue.
Should I quit blogging?
When I started this blog in 2012, it was at first to share solution to technical problem I encountered on my daily work, to give back to the community. Over the years, I extended the content to other projects and ideas I had. Nowadays, I get more and more feedbacks on it, sometimes good, sometimes bad, either way something always good to learn from.
Start your A/B testing journey with SwiftUI
Last year, I shared a solution to tackle A/B testing on iOS in swift. Now that we have SwiftUI, I want to see if there is a better way to implement A/B testing. Starting from the same idea, I’ll share different implementations to find the best one.
How to make your iOS app smarter with sentiment analysis
For quite some time now, I’ve been developing an interest to data analysis to find new ways to improve mobile app. I’ve recently found some time to experiment neural language processing for a very specific usecase related to my daily work, sentiment analysis of customer reviews on fashion items.
Localization with SwiftUI, how to preview your localized content
With SwiftUI being recently introduced, I was curious if we could take advantage of SwiftUI preview to speed up testing localization and make sure your app looks great for any language.
SwiftUI - What has changed in your MVVM pattern implementation
Introduced in 2019, Apple made UI implementation much simpler with With SwiftUI its UI declarative framework. After some time experiencing with it, I’m wondering today if MVVM is still the best pattern to use with. Let’s see what has changed, implementing MVVM with SwiftUI.
Data Structure and Algorithm applied to iOS
When asked about data structure and algorithm for an iOS development role, there is always this idea that it’s not a knowledge needed. Swift got already native data structure, right? Isn’t the rest only UI components? That’s definitely not true. Let’s step back and discuss about data structure and algorithm applied to iOS development.
How to integrate Redux in your MVVM architecture
For last couple years, I’ve been experimenting different architectures to understand pros and cons of each one of them. Redux architecture is definitely one that peek my curiosity. In this new post, I’ll share my finding pairing Redux with MVVM, another pattern I’m familiar with and more importantly why you probably shouldn’t pair them.
Software engineer, it's okay to not have a side project
There is a believe that any software developer must contribute or have a side project to work on. Even if it’s great to have, I think there is something bigger at stake doing that.
How to build a modular architecture in iOS
Over time, any code base grows along with the project evolves and matures. It creates two main constraints for developers: how to have a code well organized while keeping a build time as low as possible. Let’s see how a modular architecture can fix that.
Analytics - How to avoid common mistakes in iOS
I have been interested in analytics tools for a while, especially when it’s applied to mobile development. Over the time, I saw many code mistakes when implementing an analytical solution. Some of them can be easily avoided when developer got the right insights, let’s see how.
Apps and Projects
Over the time, I spent quite some time building different apps and projects. Here is the list of the one that became something. Lighthouse is a webapp written in Swift to test universal link configuration. Driiing, a running companion app to signal runners coming to pedestrians. Appy, an iOS app that takes helps you quit your bad habit. Square is an resizing tool for app icons written in Rust. Japan Direct, an itinerary app for iOS to visit Japan like a local.
Events and Talks
I recently tried to be more active in the iOS community. Becoming speaker and talks to events is my next challenged. Here is the list of talks I’ve made so far. My very first one was recently at iOS meetup Singapore in July 2019, talking about scalability of an iOS app along with your team. You can read more about this whole new journey here. I also got chance to be part of iOS Conf SG 2021, an online version of the very popular international event iOS Conf SG.
Code Coverage in Xcode - How to avoid a vanity metric for your iOS app
Since Xcode 7, iOS developers can generate a code coverage for their app: a report showing which area of their app is covered by unit tests. However, this is isn’t always accurate, let’s see why you should not base your code health only on code coverage.
Appy, an iOS app to help you quit your bad habits
It has been a while since I wanted to create something helpful to others, not than just another random app. Then I found out there were not so many great sobriety apps, so I launched one. Here is Appy, to help you quit your bad habits.
How to integrate Sign In with Apple in your iOS app
With iOS13, Apple is introducing “Sign In with Apple”, an authentication system that allows user create an account for your app based on their Apple ID. Let’s see how to integrate it in your app and be ready for iOS13 launch.
How to avoid common mistakes for your first iOS talk
I have been a bit more quite for the past couple weeks to take a break of my weekly routine of blogging. It’s not because I was lazy, but I wanted to take time to digest WWDC. At the same time I had other running projects, one was my first talk at an iOS meetup. Here is couple tips I would have love to hear earlier.
First steps in functional reactive programming in Swift with Apple Combine framework
One debate over the past year in the iOS ecosystem was the around functional reactive framework like RxSwift or ReactiveCocoa. This year at WWDC2019, Apple took position on it and released their own functional reactive programming framework, here is Combine.
iOS Code Review - Health check of your Swift code
I have been recently asked to review an iOS application to see how healthy was the code base, if it follows the best practices and how easy it would be to add new features to it. If I review some code on daily basis for small pull requests, analyzing one whole app at once is quite different exercise. Here is some guidelines to help doing that analysis.
How to implement Coordinator pattern with RxSwift
After weeks experimenting different patterns and code structures, I wanted to go further in functional reactive programming and see how to take advantage of it while following Coordinator pattern. This post describes how integrate RxSwift with Coordinator pattern and which mistakes to avoid.
ReSwift - Introduction to Redux architecture in Swift
If you are not familiar with it, Redux a Javascript open source library designed to manage web application states. It helps a lot to make sure your app always behaves as expected and makes your code easier to test. ReSwift is the same concept but in Swift. Let’s see how.
Tools and tips to scale your iOS project along with your team
We often talk about scalability of iOS app but not much about the project itself or the team. How to prepare your project to move from 2 developers to 6? How about 10 or 20 more? In that research, I’ve listed different tools to prepare your team and project to scale.
RxSwift & MVVM - Advanced concepts of UITableView with RxDataSources
For the past months, I keep going further in RxSwift usage. I really like the idea of forwarding events through different layers but the user interface stays sometimes a challenge. Today, I’ll describe how to use RxDataSources to keep things as easy as possible.
How to use Vapor Server to write stronger UI tests in Swift
Even if I usually stay focus on the customer facing side of mobile development, I like the idea of writing backend api with all the security that Swift includes. Starting small, why not using Swift Server for our UI Tests to mock content and be at the closest of the real app.
How to bootstrap your iOS app to iterate faster
I love developing new iOS apps and create new products. However, regardless of the project, it often need a team to mix the required skills: design, coding, marketing. Although, this less and less true, so let’s see how to bootstrap your iOS app.
RxSwift & MVVM - How to use RxTests to test your ViewModel
Not that long ago, I wrote how to pair RxSwift with MVVM architecture in an iOS project. Even if I refactored my code to be reactive, I omitted to mention the unit tests. Today I’ll show step by step how to use RxTest to unit test your code.
Down the rabbit hole of iOS design patterns
For years now, the whole iOS community has written content about the best way to improve or replace the Apple MVC we all started with, myself included. MVC, MVVM, MVP, VIPER? Regardless the type of snake you have chosen, it’s time to reflect on that journey.
Coordinator & MVVM - Clean Navigation and Back Button in Swift
After introducing how to implement Coordinator pattern with an MVVM structure, it feels natural for me to go further and cover some of the blank spots of Coordinator and how to fix along the way.
Reversi - An elegant A/B testing framework for iOS in Swift.
Couple weeks ago, I heard somebody talking about A/B testing in iOS and how “mobile native A/B testing is hard to implement”. It didn’t sound right to me. So I build a tiny framework for that in Swift. Here is Reversi.
Dos and Don’ts for creating an onboarding journey on iOS
I was recently searching for onboarding journey in iOS, that succession of screens displayed at the first launch of a freshly installed mobile app. But regardless how beautiful the design can be, why so many people are tempted to skip it. I listed things to consider while creating an onboarding journey for your iOS app.
Introduction to Coordinator pattern in Swift
After some times creating different iOS apps following an MVVM pattern, I’m often not sure how to implement the navigation. If the View handles the rendering and user’s interactions and the ViewModel the service or business logic, where does the navigation sit? That’s where Coordinator pattern takes place.
How to create a customer focused mobile app
Last year, I launched with a friend Japan Direct, an itinerary app for Japan travellers. Even if the first version came up quite quickly, I kept iterate but always staying focus on customer feedback first. Almost a year later, it’s good time for synthesis, see what worked and how we created a customer focused app.
Adaptive Layout and UICollectionView in Swift
Apple introduced in iOS8 trait variations that let developers create more adaptive design for their mobile apps, reducing code complexity and avoiding duplicated code between devices. But how to take advantage of variations for UICollectionView?
This post will cover how to setup variations via Interface Builder as well but also programatically, using AutoLayout and UITraitVariation with a UICollectionView to create a unique adaptive design.
RxSwift & MVVM - An alternative structure for your ViewModel
For last couple weeks, I’ve worked a lot about how to integrate RxSwift into an iOS project but I wasn’t fully satisfied with the view model. After reading many documentation and trying on my side, I’ve finally found a structure I’m happy with.
Create a machine learning model to classify Fashion images in Swift
Since WWDC18, Apple made it way easier to developers to create model for machine learning to integrate iOS apps. I have tried myself in the past different models, one for face detection and create another with Tensorflow to fashion classification during a hackathon. Today I’ll share with you how I create a model dedicated to fashion brands.
How to integrate RxSwift in your MVVM architecture
It took me quite some time to get into Reactive Programming and its variant adapted for iOS development with RxSwift and RxCocoa. However, being fan of MVVM architecture and using an observer design pattern with it, it was natural for me to revisit my approach and use RxSwift instead. Thats what I’m going to cover in this post.
Design pattern in Swift - Delegation
The delegation pattern is one of the most common design pattern in iOS. You probably use it on daily basis without noticing, every time you create a UITableView or UICollectionView and implementing their delegates. Let’s see how it works and how to implement it in Swift.
UI testing - How to inspect your iOS app with Calabash and Appium
Part of the journey in software development is testability. Regarding mobile development, testability for your iOS app goes through UI testing. Let’s see different way to inspect any UI elements and prepare your iOS app for UI automation testing.
Don't forget what you've accomplished this year
While wishing a happy new year around me, people helped me realised how many good things happened to me this year. Funny enough, while listing my goals for 2019, I found the matching list for 2018 and here is what really happened.
Develop your creativity with ephemeral iOS apps
From my first year studying computer science, I’ve always wanted to do more on my free time and create simple projects that could be useful for others. I won’t lie, I wish I was able to monetize them but regardless the outcome, learning was always part of the journey.
Design pattern in Swift - Observers
During this year, I have blogged quite a bit about code architecture in Swift and I’ve realized that I didn’t explain much about which design pattern to use with it. In a series of coming posts, I will cover different design patterns, starting now with observer.
Build a visual search app with TensorFlow in less than 24 hours
For a while now, I really wanted to work on a machine learning project, especially since Apple let you import trained model in your iOS app now. Last September, I took part of a 24h hackathon for an e-commerce business, that was my chance to test it. The idea was simple: a visual search app, listing similar products based on a picture.
Always keep your skills sharp
It has been couple months since my last post and despite the idea, a lot of things kept me busy far from blogging. Looking back, it all articulates around the same idea: why it’s important to always keep your skills sharp.
How to detect if your iOS app hits product market fit
Couple months ago, I’ve built an app and released it on the App Store. Since published, I really wanted to see how it lives and understand how to make it grow. Ideally, I wanted to know if there is a product / market fit. In the article, I describe each steps and ideas that helped my app grow and what I learnt from it.
The best way to encode and decode JSON in Swift4
Most of mobile apps interact at some point with remote services, fetching data from an api, submitting a form… Let’s see how to use Codable in Swift to easily encode objects and decode JSON in couple lines of codes.
Why choosing XCUITest framework over Appium for UI automation testing
I recently went for a Swift conference and UI automation testing was one of the subject. I already mentioned it with Appium in the past but I think it’s time to go back to it and explain why today I still prefer using Apple’s testing framework instead.
Why and how to add home screen shortcut for your iOS app
I recently implemented 3D touch for an app and I was very interested about home screen quick actions. If it can be a good way to improve user experience, it doesn’t mean your app always needs it. In this article, I explain how to add home screen shortcut for your app in Swift but mostly why can justify implementing it.
What I learn from six years of blogging
I recently realised that my first blog post was 6 years ago. It’s a good occasion for me to do a little retrospective and share what I learnt from blogging over the years.
Error handling in MVVM architecture in Swift
If you care about user experience, error handling is a big part you have to cover. We can design how an mobile app looks like when it works, but what happen when something goes wrong. Should we display an alert to the user? Can the error stay silent? And mostly how to implement it the best way with your current design pattern? Let’s see our options while following MVVM pattern.
From the idea of an iOS app to App Store in 10 hours
The best way to learn and become more creative as a developer is to focus on a side project. A really good friend coming back from Japan came to me with an idea when I needed that side project. This is how we created Japan Direct, from the idea to the App Store in almost no time.
How to optimise your UICollectionView implementation in Swift
For the last couple weeks, I tried to step back on my development to analyse what is time consuming in mobile development. I realised that most of new views are based on same approach, reimplementing an similar structure around a UICollectionView or UITableView.
What if I can have a more generic approach where I can focus only on what matters, the user experience. That’s what I tried to explore in this article.
Support universal links in your iOS app
Last couple weeks, I have traveled with only my iPhone with me and I realised how many apps I daily used still relying on their websites. Even with the right iOS app installed, I had to browse on Safari app to get specific details. That is why it’s so important to support universal links in iOS. Let me show you how.
Make the most of enumerations in Swift
Enumerations have changed a lot between Objective-C and Swift. We can easily forget how useful and powerful it can. I wanted to get back to it through simple examples to make the most of it.
How to integrate Firebase in your iOS app
Firebase is a set of tools introduced by Google to build better mobile apps. I worked with this many times and even if it’s straight forward to integrate, here are couple advices of implementation to make the most of it.
From lean programming to growth marketing
I recently followed a growth marketing course, introducing mindset and methodology to make a company grow. I learnt a lot from it and since, I try to apply this knowledge on a daily basis. After more reflection on it, a lot of ideas looked very similar to software development job, this is the part I would like to share.
Introduction to Protocol-Oriented Programming in Swift
When I started coding years ago, it was all about object oriented programming. With Swift, a new approach came up, making the code even easier to reuse and to test, Protocol-Oriented Programming.
Why you should abstract any iOS third party libraries
If you have an iOS app, you might have integrated external libraries and tools to help you getting your product ready faster. However your iOS architecture and swift code shouldn’t depend on those libraries.
Optimise Xcode build to speed Fastlane
The best part of continuous integration is the ability to automatically run tests and build apps, ready to be deployed. However, automatic build doesn’t mean smart or optimised build. Here are some tips I collected along the way to speed up delivery process.
Unit Testing your MVVM architecture in Swift
To be sure new code won’t break old one already implemented, it’s best practice to write unit tests. When it comes to app architectures, it can be a challenge to write those tests. Following an MVVM pattern, how to unit test a view and its viewModel? That’s what I would like to cover here using dependency injection.
How to implement MVVM pattern in Swift from scratch
Creating a new app often raise the question of what architecture to choose, which pattern would fit best. In this post, I show how to implement an MVVM pattern around a sample app in Swift.
Kronos, an iOS app to make runners love numbers
In 2017, I managed to run about 750 miles (1200 km), it’s 250 miles more than the year before. I know it because Strava tracked it for me. I’m such a fan of their product than using it becomes part of my routine and my training. Although, during that journey, I always missed numbers that talked to me. That is how I created Kronos.
Starting your year the right way
Starting a new year is always exciting. Most of us have new resolutions and a bucket list we want to accomplish for 2018 but it’s quite often that as soon something go wrong, the whole list goes wrong. Here is some advices to keep track on it.
Do you need a Today extension for your iOS app?
For the last couple months, I observed Today extensions of some of iOS apps I daily use to see when those widgets are useful and how to justify developing one. Here are my conclusions.
Face detection in iOS with Core ML and Vision in Swift
With iOS11, Apple introduced the ability to integrate machine learning into mobile apps with Core ML. As promising as it sounds, it also has some limitations, let’s discover it around a face detection sample app.
Making five years in three
I always thought a good way to stay motivated and look forward is to have goal you can accomplish in a short term, about 3 to 12 months maximum. It’s at least the way I dealt with my life after being graduated.
How to use Javascript with WKWebView in Swift
Embedding web into native apps is a frequent approach to quickly add content into a mobile app. It can be for a contact form but also for more complex content to bootstrap a missing native feature. But you can go further and build a two bridge between Web and Mobile using JavaScript and Swift.
Using Charles as SSL Proxy on iOS
Most of apps use HTTPS request to access data, and because of SSL encryption, it can be tough to debug it from iOS apps that are already on the App Store. Charles is the perfect tool to help you inspect your HTTPS requests.
Create your private CocoaPod library
Libraries and external dependencies have always been a good way to avoid developers recreate something already existing. It’s also a good way to help each other and leaving something reusable. CocoaPods is the most used tool to manage dependencies around Xcode projects. Let’s see how to create your own private pod.
How to be what you want to be
Starting 2017, I decided that this year would be mine. It doesn’t mean everything would be given, but I would stay open to new opportunities and stay actor of my life, be what I want to be. Half way, here is time for reflection.
Build your Android app with Bitbucket Pipeline and HockeyApp
Configuring a continuous integration can be tricky for mobile apps. Let’s see how quick it is to build an Android app with Bitbucket Pipeline and deliver it with App Center app (ex HockeyApp).
How to migrate from WordPress to a static website with Hugo and AWS
Recently, I got a reminder that my domain name and shared host would eventually expire this summer. I always had a WordPress for my website and thought it was time to move on for something easier to maintain. Here is how I managed to migrate my WordPress blog to a static website with Hugo on AWS.
10 weeks training with running mobile apps
This year, I finally signed up for a marathon and the way I use running apps and their services have clearly changed. Giving the best user experience around those services is essential to make the app useful. Here is my feedback as a mobile developer during my last 10 weeks training.
French Election 2017, don't get fooled by surveys
Technology has never been as important as today in politics. Everything is related to numeric data. If we only analyze news around US elections in 2016, it was mostly about email hacks, fake news in daily news feed, or online surveys. Concerned about French elections 2017, I wanted to be a bit more active and do something related the last one: to online surveys.
Six months of Android development
In my current role at Qudini, I started as an iOS developer. My main task was to create and improve our mobile products for iOS devices based on what was already done on Android. However I wanted to be more efficient in my job and I thought it could be by impacting more users through Android development. Once our iOS apps were at the same level as the Android one, I push the idea that it would be better I start doing Android too. Here is my feedback after 6 months developing on Android.
Feature flag your mobile app with Apptimize
Recently, I got the chance to integrate feature flags into a mobile app I work on. The idea of feature flag is simple, it lets you enable and manage features in your mobile app remotely without requiring a new release. Let see the benefice of it and how integrate a feature flag solution like Apptimize’s one.
Xcode script automation for SauceLabs
Couple months ago, I’ve tried to set a mobile testing environment with Appium and one of the best tools to execute these tests was SauceLabs, a cloud platform dedicated for testing. SauceLabs is pretty easy to use but here is couple tricks to make even easier.
Mobile continuous delivery with bitrise
Continuous integration and continuous delivery is something I wanted to do a while ago, specially since Apple accelerated its approval process to publish new apps on its mobile store. It can now takes less than a day to have an update available for your mobile users: continuous integration and continuous delivery makes more sense than ever on mobile apps.
How can a developer do marketing?
Working as a mobile developer, I created multiple apps during last couple years for companies I worked for, and eventually for personal projects. At the beginning, I though the goal for any developer was the release itself: shipping code and moving on, but I quickly found out that it was more frustrating than everything to stop here. That’s how I started thinking about what should be the next step and if a developer can actually do marketing and how.
Growth Hacking applied to your LinkedIn profile to get a new job
I recently finished Growth Hacking Marketing by Ryan Holiday and learn a lot of things about it. Some of them remembered me the way I found my job in London and how I tweaked my LinkedIn profile to fit the targeted audience.
How to create an iOS app for Sens'it tracker in Swift
Sens’it is small tracker developed by Sigfox and given for free during events to let people test the Sigfox low frequency IoT network. Let’s see how to create an iOS app in Swift based on Sens’it api.
How to keep your privacy in mobile apps
Couple years ago, I worked on a mobile app linked to video and audio recording. I quickly see that, once the user agreed for permissions, it can be easy to track personal data without user noticed it. Let see how limit mobile app permissions to maintain user privacy.
Appium, when automation testing can be randomly wrong
Appium is an UI automation testing framework, helping developers to automatically test their app. This tool can be really powerful but my experience with it let me think it’s not enough accurate to be used everyday and at its full potential.
UI Automation testing on iOS9
During WWDC2015, Apple announced big stuff, but they also released awesome features for developers. One of them was dedicated to UI Testing. Working around UI Automation test, I’ve just discovered last Xcode 7 and how life is going to be easier with their last feature for that.
How to work with native iOS and javascript callbacks in Objective-C
Recently I worked on a small iOS mobile project around Javascript. I wanted to load web content from iOS with Javascript inside and get callbacks from Javascript into iOS, to save native data and transmit it to an other controller if needed. The second part was also to call Javascript methods from iOS part.
AmbiMac, an app creating your own ambilight
Philips created few years ago Ambilight, a TV with a dynamic lights on it back. With two friends, we wanted to design an app with a similar function based on connected light bulb during an hackathon. Here is what we have done in 24h hours of code, let’s meet AmbiMac.
Introduction to sleep analysis with HealthKit with Swift
HealthKit is a powerful tool if you want to create an iOS mobile app based on health data. However, it’s not only for body measurements, fitness or nutrition; it’s also sleep analysis. In this HealthKit tutorial, I will show you how to read and write some sleep data and save them in Health app.
UPDATE - April 2020: Originally written for Swift 1.0, then 2.0, I’ve updated this post for latest Swift 5.1 version and Xcode 11.3.
Dynamic url rewriting in CodeIgniter
I work with CodeIgniter almost exclusively on API, but sometimes it can help on short-lived websites. Rewrite url is a good thing to know if you want to optimize SEO for your key pages of a website. That’s what I want to show you and how it’s easy to set it up.
Le métier de développeur dans les objets connectés
Pour la fin de mes études, j’ai choisi de rédiger mon mémoire sur les objets connectés et plus précisément sur le développement de services numériques autour de ces objets. Ce travail de fond m’a permis de prendre du recul sur mon travail mais c’était aussi l’occasion de trouver une définition de ce qu’est un développeur d’objet connecté.
Majordhome, le projet né durant un startup weekend
En Octobre dernier, j’avais travaillé sur le cocktailMaker, un objet connecté facilitant la création de cocktails. Voulant pousser le concept un peu plus loin, je me suis inscrit au startup weekend de Novembre organisé à l’EM Lyon pour découvrir les aspects marketing et business qui me manque aujourd’hui. Retour sur ces 54h de travail acharné.
Les difficultés autour des objets connectés
Ces temps ci, il y a beaucoup de bruits autour des objets connectés. Tous les jours, on découvre de nouveaux articles sur des objets connectés annoncés sur le marché ou financés sur des plateformes de “crowdfunding”. On a bien moins d’informations sur toutes les difficultés liées autour de ces projets innovants. Voici mes conclusions sur les recherches que j’ai faites à ce sujet.
CocktailMaker, l'objet connecté 100% hackathon
L’année dernière à cette même période, j’ai participé au Fhacktory, ce hackathon nouvelle génération né à Lyon, avec une application mobile dédiée à la chute libre. Cette année, j’ai pu à nouveau monter sur le podium de cet évènement en développement un objet connecté, le CocktailMaker. Retour sur ce week-end 100% hack.
Comment Jawbone s'adapte à l'Internet des Choses
Sur la place des objets connectés, Jawbone est rapidement devenu un pilier du “quantified-self” (auto-mesure) avec ses bracelets UP et UP24. Je vous propose un décryptage des leurs dernières évolutions afin de rester à la pointe du “wearable”.
Moto360 ou Withings Activité
De plus en plus de montres connectées font leur apparition, mais d’après moi, la plupart passe à côté de l’essentiel: la montre reste l’un des seuls accessoires masculin, il faut donc la rendre élégante en respectant sa forme historique. C’est pourquoi, je m’intéresse dans cet article principalement aux montres “habillées” et en attendant la sortie de celle d’Apple, je vous propose un comparatif entre la montre connectée de Motorola et celle de Withings, fraichement annoncée.
Mes premiers pas vers le Lean Startup
Ne voulant pas me limiter à mon background technique, j’essaie de plus en plus de développer des notions d’entrepreneuriat dans l’idée d’être plus utile dans mon analyse technique et de continuer la reflexion autour de différents développement d’applications dans une start-up. L’idée est de ne pas se limiter au développement demandé, mais d’essayer d’appréhender toute la chaine de réflexion, à savoir du besoin de clients jusqu’à l’utilisation d’un nouveau service/produit développé et de voir comment celui-ci est utilisé et ce qu’il faut améliorer.
Pour cela, et avec les conseils avisés d’un ami , Maxime Salomon, j’ai commencé à lire The Lean Startup de Eric Ries. Ce livre aborde de nombreux sujets autour de l’entrepreneuriat, du marketing ainsi que de développement de produit à proprement parlé. L’idée est de proposer un cycle itératif de développement pouvant permettre de mesurer rapidement différents paramètres pour faire évoluer un produit en fonction de nouvelles données.
Etant d’un formation plus scientifique, j’ai ce besoin de mettre en pratique ce dont il est question pour mieux comprendre la solution proposée, j’ai aussi un besoin de me documenter sur les différents termes employés pour ne pas passer à côté du sujet, c’est pourquoi je prends mon temps pour lire ce livre, mais je vous propose mon retour d’expérience sur mes premiers acquis et comment j’essaie de les mettre en pratique.
UP24 - Découverte du bracelet connecté de Jawbone
Nous découvrons chaque jour de plus en plus d’objets connectés, ils se divisent en plusieurs catégories comme la santé, la musique, la lumière, etc. Une bonne partie se retrouve aussi dans le tracking d’activité comme le bracelet Jawbone UP. Etant intéressé de connaitre les performances de ces objets connectés dit “wearable”, je vous propose mon retour d’experience sur le bracelet UP24 ainsi que les services proposés autour.
Introduction à Soundcloud
Soundcloud est une des plus grosses plateformes de musique indépendante, c’est plus de 200 millions d’utilisateurs pour ce réseau sociale basé sur le partage musicale. Certains artistes ne publient leurs musiques que sur cette plateforme. C’est aussi la place pour des novices qui veulent essayer leurs titres et se faire connaitre. Vous pouvez aussi y retrouver des discours, des podcasts et tout autres types de contenu audio.
Dans cette optique de toujours avoir de la bonne musique, Soundcloud est disponible sur toutes les plateformes (web et mobile) et l’écoute est gratuite. Pour une utilisation encore plus variée de leur service, SoundCloud propose une API ainsi que de nombreux SDK (Javascript, Ruby, Python, PHP, Cocoa et Java). Nous allons voir ensemble comment intégrer SoundCloud dans une application mobile iPhone.
Comment réussir son premier entretien
Passer un entretien pour un poste est toujours un peu stressant. Suivant comment ce stress est géré, la personne peut donner une image de quelqu’un qui n’est pas sûre de soi par ses gestes (tremblement, bafouillement, se frotter les mains) ou par ses mots (ne pas finir ses phrases, phrases à rallonge trop complexe, etc). Difficile dans ces cas là de donner la meilleure image de soi pour montrer qu’on est travailleur, motivé et prêt à l’emploi.
Je vous propose par mon retour d’experience quelques conseils simples.
Spotify et ses outils d'intégration
Après avoir travaillé avec les technologies Deezer, nous allons voir quels outils sont proposés par Spotify pour une intégration web ou mobile. Spotify proposant une écoute gratuite sur son client ordinateur et depuis peu sur mobile (parsemé de publicité), il se démarque de Deezer qui nécessite d’avoir un compte Premium pour une utilisation sur smartphone. L’intégration pour les développeurs est aussi différente, mais à quelle mesure? C’est ce que nous allons voir.
Hackathon: ma maison connectėe
Les objets connectės sont de plus en plus présents chez nous. On y retrouve des produits comme des ampoules, des enceintes audio ainsi que des prises intelligentes. On y retrouve aussi des produits plus innovants comme le pèse personne de Withings, la balle de Sphero, la lampe connectée “holî” ou encore le capteur pour plante de Parrot.
C’est dans cette optique là que l’entreprise Direct Energie a organisée un hackathon autour des objets connectés pour présenter différentes solutions autour de la maîtrise d’énergie et des objets intelligents.
C’est en tant que support technique sur le produit “holî” et son SDK que j’y ai participé, afin d’aider les développeurs à se familiariser avec l’outil. Ayant fait un hackathon du côté développeur, c’est un nouveau retour d’expérience cette fois ci du côté partenaire.
SpriteKit, un framework iOS7 pour jeu video
Au jour d’aujourd’hui, les jeux vidéos sont de plus en plus présent. Avec l’univers du smartphone, il est de plus en plus facile d’embarquer des jeux vidéos avec nous et ce partout.
Plusieurs jeux ont eu un tel succès qu’il reste difficile d’ignorer cet utilisation de nos téléphones en tant que console. A n’en citer que quelques-uns: DoodleJump, AngryBird ou encore le fameux CandyCrush.
Depuis la sortie d’iOS7, Apple a rajouté un framework de jeu vidéo 2D directement dans son SDK: SpriteKit. Nous allons voir ensemble comment l’utiliser.
Fhacktory, un hackathon nouvelle génération
Un hackathon est l’équivalent d’un marathon sur le domaine du développement informatique. Bien connu sous le système de “Startup Weekend”, ce principe a été adapté dans l’informatique au développement de projet en un temps donné. Le but est de monter en un weekend une équipe qui évoluera autour d’une idée et proposera une solution à un problème. J’ai récemment participé à l’un d’entre eux, le Fhactory: un hackathon se définissant “100% hack, 0% bullshit” et voici mon retour d’expérience.
À la découverte des outils de Deezer
Deezer étant l’une des plus grosse plateforme d’écoute et de partage de musique, il est intéressant de voir comment se servir des différents outils qu’il nous met à disposition à savoir son API de recherche de morceau et ses différents SDK pour une intégration web ou mobile.
Nous allons voir ensemble, comment les utiliser, à quelles fins et quelles en sont les limites. Pour le SDK, je ne m’intéresserai qu’à celui pour iOS.
iJump, une application iPhone pour les parachutistes
En lançant le portail web de météo Weather, mon idée était d’en faire un support pour une version mobile. En effet l’intérêt pour des données météorologiques est de rester nomade et suivre son utilisateur. En intégrant différentes notions associées à la chute libre et avec l’aide de la Fédération Française de Parachutisme, voici iJump: l’application mobile pour les parachutistes.
La formation au développement mobile
Il y a maintenant 6 mois, j’ai commencé une formation afin de devenir enseignant sur les languages Cocoa et Objective-C.
Cette formation a compris plusieurs étapes, chacune finissant par un examen afin de passer à la suivante:
- Une partie pédagogique au cours de laquelle nous sommes évalués sur notre capacité à communiquer un message, à faire comprendre une technologie, à la gestion de notre temps de parole ainsi qu’à la tenue une classe.
- Une partie technique où l’évaluation se portait exclusivement sur la connaissance des technologies auxquelles je m’étais proposé. Pour ma part, cela m’a permis de revoir les fondements de Cocoa ainsi que de l’historique la société NeXT.
Voici mes différents retours sur ma première experience de formateur.
Sencha Touch: framework HTML5 pour application mobile
Introduction:
Sencha est un framework HTML5 pour créer des application mobiles multiplateformes. L’intérêt de celui-ci est de faire, à partir d’un projet HTML et de code JSON, une même application mobile sur plusieurs plateformes, un gain de temps incroyable si le code s’y tient. Nous allons voir les premiers pas d’une application à partir de Sencha.
MVVM Light sous Windows Phone 8 SDK
Le nouveau système d’exploitation Windows 8 va de paire avec la mise à jour de son système sur mobile: Windows Phone 8.
Voici une petite introduction à MVVM Light Toolkit, un jeu de composant se basant sur une structure Model-View-ViewModel sur les frameworks XAML/C#, pouvant être utilisé pour un développement sur Windows Phone 8.
Réalisation: Weather, un portail météo pour la chute libre
Contexte:
Ayant récemment été initié à la chute libre, cette discipline est largement dépendante de la météo.
Malheureusement, trouver la météo en temps en “temps réel” suivant son centre de saut n’est pas chose aisé. Même à 10km de son centre de saut, la différence météorologique peut être significative quant à la pratique du parachutisme.
C’est pourquoi j’ai décidé de developper un portail web permettant de consulter le dernier relevé météo de n’importe quel centre de saut en France, datant de moins de 12h.
Intégration de DataMapper dans CodeIgniter
Introduction:
Un ORM (Object-relational mapping) est utilisé dans la programmation orienté objet afin de créer virtuellement un modèle en se basant sur une base de donnée. Cela évite de devoir écrire les requêtes dans la base de donnée soit même, un vrai gain de temps.
Réalisation: iDevWeb - Mise à jour
Librairie Restkit et synchronisation de données
Introduction
La synchronisation de données en ligne est une pratique courante afin d’avoir un contenu mis à jour à chaque utilisation (applications d’informations, de news et autres).
Trouver un moyen simple d’embarquer ces données avant une synchronisation en ligne est intéressant, permettant une utilisation de l’application même si les données ne sont pas à jour.
Travaillant en Objective-C sur des applications mobiles pour iphone/ipad, nous allons voir comment utiliser Restkit à ces fins.
Quel-camping.fr
Après avoir fini ma première année d’étude en informatique, j’ai eu l’idée de réaliser un site internet pour une première experience professionnelle à mon compte.
Des idées à l’étude:
Après quelques idées ainsi que des conseils avisés d’un jeune entrepreneur, j’ai décidé de choisir la branche du tourisme et plus précisément le domaine de l’hotellerie de plein air.
En effet, ce domaine est peu exploité sur internet alors que le nombre de réservation de séjour en camping continuait d’augmenter.
Réalisation: iDevWeb - Gestion de projets web
Quand on est développeur web, il arrive qu’on travaille sur plusieurs projets en même temps et qu’on conserve d’anciens projets sans les supprimer.
En utilisant MAMP sous MAC OS X, il faut accéder à l’url exacte du dossier pour pouvoir accéder au site web, il n’existe pas par défaut une page qui indexe les dossiers contenus dans le dossier de développement.
C’est là que j’ai eu l’idée de développer un petit portail en php qui listerait les dossiers contenus dans mon dossier de développement, cela éviterait de devoir se rappeler du nom du projet ainsi que du chemin exacte pour y accéder.
Réécriture d'urls avec htaccess sous CodeIgniter
Le principe de réécriture d’urls permet de “transformer” les urls pour référencer plus simplement des pages clés d’un site internet. Pour cela on utilise le fichier htaccess, un fichier caché situé à la racine du dossier de l’application.
Nous allons voir comment est géré par défaut les urls dans le framework CodeIgniter et comment les modifier pour éviter de perdre le référencement déjà acquis sur un site web.
CodeIgniter et son modèle MVC
CodeIgniter est un framework php open source basé sur une architecture MVC.
Rappel:
L’architecture MVC (Modèle – Vue – Controller) permet d’organiser plus simplement une application.
- Modèle : type de données, objet
- Vue: interface avec l’utilisateur
- Contrôleur: traitement des données, gestion des évènements.
Un framework est un kit qui permet de créer la base d’une application plus rapidement et avec une structure plus solide.
Présentation:
CodeIgniter a pour avantage d’être libre mais surtout d’être plus léger comparé aux autres frameworks php connus. Il possède un “guide utilisateur” (en ligne sur le site officiel et localement dans le dossier téléchargé) plus que complet qui propose de nombreux exemples d’applications. La mise en place est intuitive et aucune configuration n’est nécessaire pour une utilisation simple.

Tips, Tricks, and Techniques on using Cascading Style Sheets.
Getting Creative With Small Screens
- Articles
- rwd
- UI/IX Design
On mobile, people can lose their sense of context and can’t easily tell where a section begins or ends. Good small-screen design can help orient them using a variety of techniques.
Getting Creative With Small Screens originally published on CSS-Tricks, which is part of the DigitalOcean family. You should get the newsletter.
Over the past few months, I’ve explored how we can get creative using well-supported CSS properties. Each article is intended to nudge web design away from uniformity, toward designs that are more distinctive and memorable. One bit of feedback from Phillip Bagleg deserves a follow up: Andy’s guides are all very interesting, but mostly impractical in real life. Very little guidance on how magazine style design, works when thrown into a responsive environment. Fair point well made, Phillip. So, let’s bust the myth that editorial-style web design is impractical on small screens. My brief: Patty Meltt is an up-and-coming country music sensation, and she needed a website to launch her new album and tour. She wanted it to be distinctive-looking and memorable, so she called Stuff & Nonsense. Patty’s not real, but the challenges of designing and developing sites like hers are. The problem with endless columns On mobile, people can lose their sense of context and can’t easily tell where a section begins or ends. Good small-screen design can help orient them using a variety of techniques. When screen space is tight, most designers collapse their layouts into a single long column. That’s fine for readability, but it can negatively impact the user experience when hierarchy disappears; rhythm becomes monotonous, and content scrolls endlessly until it blurs. Then, nothing stands out, and pages turn from being designed experiences into content feeds. Like a magazine, layout delivers visual cues in a desktop environment, letting people know where they are and suggesting where to go next. This rhythm and structure can be as much a part of visual storytelling as colour and typography. But those cues frequently disappear on small screens. Since we can’t rely on complex columns, how can we design visual cues that help readers feel oriented within the content flow and stay engaged? One answer is to stop thinking in terms of one long column of content altogether. Instead, treat each section as a distinct composition, a designed moment that guides readers through the story. Designing moments instead of columns Even within a narrow column, you can add variety and reduce monotony by thinking of content as a series of meaningfully designed moments, each with distinctive behaviours and styles. We might use alternative compositions and sizes, arrange elements using different patterns, or use horizontal and vertical scrolling to create experiences and tell stories, even when space is limited. And fortunately, we have the tools we need to do that at our disposal: @media and @container queries CSS Grid and Flexbox Scroll Snap Orientation media features Logical properties These moments might move horizontally, breaking the monotony of vertical scrolling, giving a section its own rhythm, and keeping related content together. Make use of horizontal scrolling My desktop design for Patty’s discography includes her album covers arranged in a modular grid. Layouts like these are easy to achieve using my modular grid generator. But that arrangement isn’t necessarily going to work for small screens, where a practical solution is to transform the modular grid into a horizontal scrolling element. Scrolling horizontally is a familiar behaviour and a way to give grouped content its own stage, the way a magazine spread might. I started by defining the modular grid’s parent — in this case, the imaginatively named modular-wrap — as a container: .modular-wrap { container-type: inline-size; width: 100%; } Then, I added grid styles to create the modular layout: .modular { display: grid; gap: 1.5rem; grid-template-columns: repeat(3, 1fr); grid-template-rows: repeat(2, 1fr); overflow-x: visible; width: 100%; } It would be tempting to collapse those grid modules on small screens into a single column, but that would simply stack one album on top of another. Collapsing grid modules on small screens into a single column So instead, I used a container query to arrange the album covers horizontally and enable someone to scroll across them: @container (max-width: 30rem) { #example-1 .modular { display: grid; gap: 1.5rem; grid-auto-columns: minmax(70%, 1fr); grid-auto-flow: column; grid-template-columns: none; grid-template-rows: 1fr; overflow-x: auto; -webkit-overflow-scrolling: touch; } } Album covers are arranged horizontally rather than vertically. See this example in my lab. Now, Patty’s album covers are arranged horizontally rather than vertically, which forms a cohesive component while preventing people from losing their place within the overall flow of content. Push elements off-canvas Last time, I explained how to use shape-outside and create the illusion of text flowing around both sides of an image. You’ll often see this effect in magazines, but hardly ever online. The illusion of text flowing around both sides of an image Desktop displays have plenty of space available, but what about smaller ones? Well, I could remove shape-outside altogether, but if I did, I’d also lose much of this design’s personality and its effect on visual storytelling. Instead, I can retain shape-outside and place it inside a horizontally scrolling component where some of its content is off-canvas and outside the viewport. My content is split between two divisions: the first with half the image floating right, and the second with the other half floating left. The two images join to create the illusion of a single image at the centre of the design: <div class="content"> <div> <img src="img-left.webp" alt=""> <p><!-- ... --></p> </div> <div> <img src="img-right.webp" alt=""> <p><!-- ... --></p> </div> </div> I knew this implementation would require a container query because I needed a parent element whose width determines when the layout should switch from static to scrolling. So, I added a section outside that content so that I could reference its width for determining when its contents should change: <section> <div class="content"> <!-- ... --> </div> </section> section { container-type: inline-size; overflow-x: auto; position: relative; width: 100%; } My technique involves spreading content across two equal-width divisions, and these grid column properties will apply to every screen size: .content { display: grid; gap: 0; grid-template-columns: 1fr 1fr; width: 100%; } Then, when the section’s width is below 48rem, I altered the width of my two columns: @container (max-width: 48rem) { .content { grid-template-columns: 85vw 85vw; } } Setting the width of each column to 85% — a little under viewport width — makes some of the right-hand column’s content visible, which hints that there’s more to see and encourages someone to scroll across to look at it. Some of the right-hand column’s content is visible. See this example in my lab. The same principle works at a larger scale, too. Instead of making small adjustments, we can turn an entire section into a miniature magazine spread that scrolls like a story in print. Build scrollable mini-spreads When designing for a responsive environment, there’s no reason to lose the expressiveness of a magazine-inspired layout. Instead of flattening everything into one long column, sections can behave like self-contained mini magazine spreads. Sections can behave like self-contained mini magazine spreads. My final shape-outside example flowed text between two photomontages. Parts of those images escaped their containers, creating depth and a layout with a distinctly editorial feel. My content contained the two images and several paragraphs: <div class="content"> <img src="left.webp" alt=""> <img src="right.webp" alt=""> <p><!-- ... --></p> <p><!-- ... --></p> <p><!-- ... --></p> </div> Two images float either left or right, each with shape-outside applied so text flows between them: .content img:nth-of-type(1) { float: left; width: 45%; shape-outside: url("left.webp"); } .spread-wrap .content img:nth-of-type(2) { float: right; width: 35%; shape-outside: url("right.webp"); } That behaves beautifully at large screen sizes, but on smaller ones it feels cramped. To preserve the design’s essence, I used a container query to transform its layout into something different altogether. First, I needed another parent element whose width would determine when the layout should change. So, I added a section outside so that I could reference its width and gave it a little padding and a border to help differentiate it from nearby content: <section> <div class="content"> <!-- ... --> </div> </section> section { border: 1px solid var(--border-stroke-color); box-sizing: border-box; container-type: inline-size; overflow-x: auto; padding: 1.5rem; width: 100%; } When the section’s width is below 48rem, I introduced a horizontal Flexbox layout: @container (max-width: 48rem) { .content { align-items: center; display: flex; flex-wrap: nowrap; gap: 1.5rem; scroll-snap-type: x mandatory; -webkit-overflow-scrolling: touch; } } And because this layout depends on a container query, I used container query units (cqi) for the width of my flexible columns: .content > * { flex: 0 0 85cqi; min-width: 85cqi; scroll-snap-align: start; } On small screens, the layout flows from image to paragraphs to image. See this example in my lab. Now, on small screens, the layout flows from image to paragraphs to image, with each element snapping into place as someone swipes sideways. This approach rearranges elements and, in doing so, slows someone’s reading speed by making each swipe an intentional action. To prevent my images from distorting when flexed, I applied auto-height combined with object-fit: .content img { display: block; flex-shrink: 0; float: none; height: auto; max-width: 100%; object-fit: contain; } Before calling on the Flexbox order property to place the second image at the end of my small screen sequence: .content img:nth-of-type(2) { order: 100; } Mini-spreads like this add movement and rhythm, but orientation offers another way to shift perspective without scrolling. A simple rotation can become a cue for an entirely new composition. Make orientation-responsive layouts When someone rotates their phone, that shift in orientation can become a cue for a new layout. Instead of stretching a single-column design wider, we can recompose it entirely, making a landscape orientation feel like a fresh new spread. Turning a phone sideways is an opportunity to recompose a layout. Turning a phone sideways is an opportunity to recompose a layout, not just reflow it. When Patty’s fans rotate their phones to landscape, I don’t want the same stacked layout to simply stretch wider. Instead, I want to use that additional width to provide a different experience. This could be as easy as adding extra columns to a composition in a media query that’s applied when the device’s orientation is detected in landscape: @media (orientation: landscape) { .content { display: grid; grid-template-columns: 1fr 1fr; } } For the long-form content on Patty Meltt’s biography page, text flows around a polygon clip-path placed over a large faux background image. This image is inline, floated, and has its width set to 100%: <div class="content"> <img src="patty.webp" alt=""> <!-- ... --> </div> .content > img { float: left; width: 100%; max-width: 100%; } Then, I added shape-outside using the polygon coordinates and added a shape-margin: .content > img { shape-outside: polygon(...); shape-margin: 1.5rem; } I only want the text to flow around the polygon and for the image to appear in the background when a device is held in landscape, so I wrapped that rule in a query which detects the screen orientation: @media (orientation: landscape) { .content > img { float: left; width: 100%; max-width: 100%; shape-outside: polygon(...); shape-margin: 1.5rem; } } See this example in my lab. Those properties won’t apply when the viewport is in portrait mode. Design stories that adapt, not layouts that collapse Small screens don’t make design more difficult; they make it more deliberate, requiring designers to consider how to preserve a design’s personality when space is limited. Phillip was right to ask how editorial-style design can work in a responsive environment. It does, but not by shrinking a print layout. It works when we think differently about how content flexes, shifts, and scrolls, and when a design responds not just to a device, but to how someone holds it. The goal isn’t to mimic miniature magazines on mobile, but to capture their energy, rhythm, and sense of discovery that print does so well. Design is storytelling, and just because there’s less space to tell one, it shouldn’t mean it should make any less impact. Getting Creative With Small Screens originally published on CSS-Tricks, which is part of the DigitalOcean family. You should get the newsletter.
Pure CSS Tabs With Details, Grid, and Subgrid
- Articles
- grid
- html elements
- layout
- subgrid
Can we use the <details> element as the foundation for a tabbed interface? Why yes, we can!
Pure CSS Tabs With Details, Grid, and Subgrid originally published on CSS-Tricks, which is part of the DigitalOcean family. You should get the newsletter.
Making a tab interface with CSS is a never-ending topic in the world of modern web development. Are they possible? If yes, could they be accessible? I wrote how to build them the first time nine long years ago, and how to integrate accessible practices into them. Although my solution then could possibly still be applied today, I’ve landed on a more modern approach to CSS tabs using the <details> element in combination with CSS Grid and Subgrid. First, the HTML Let’s start by setting up the HTML structure. We will need a set of <details> elements inside a parent wrapper that we’ll call .grid. Each <details> will be an .item as you might imagine each one being a tab in the interface. <div class="grid"> <!-- First tab: set to open --> <details class="item" name="alpha" open> <summary class="subitem">First item</summary> <div><!-- etc. --></div> </details> <details class="item" name="alpha"> <summary class="subitem">Second item</summary> <div><!-- etc. --></div> </details> <details class="item" name="alpha"> <summary class="subitem">Third item</summary> <div><!-- etc. --></div> </details> </div> These don’t look like true tabs yet! But it’s the right structure we want before we get into CSS, where we’ll put CSS Grid and Subgrid to work. Next, the CSS Let’s set up the grid for our wrapper element using — you guessed it — CSS Grid. Basically what we’re making is a three-column grid, one column for each tab (or .item), with a bit of spacing between them. We’ll also set up two rows in the .grid, one that’s sized to the content and one that maintains its proportion with the available space. The first row will hold our tabs and the second row is reserved for the displaying the active tab panel. .grid { display: grid; grid-template-columns: repeat(3, minmax(200px, 1fr)); grid-template-rows: auto 1fr; column-gap: 1rem; } Now we’re looking a little more tab-like: Next, we need to set up the subgrid for our tab elements. We want subgrid because it allows us to use the existing .grid lines without nesting an entirely new grid with new lines. Everything aligns nicely this way. So, we’ll set each tab — the <details> elements — up as a grid and set their columns and rows to inherit the main .grid‘s lines with subgrid. details { display: grid; grid-template-columns: subgrid; grid-template-rows: subgrid; } Additionally, we want each tab element to fill the entire .grid, so we set it up so that the <details> element takes up the entire available space horizontally and vertically using the grid-column and grid-row properties: details { display: grid; grid-template-columns: subgrid; grid-template-rows: subgrid; grid-column: 1 / -1; grid-row: 1 / span 3; } It looks a little wonky at first because the three tabs are stacked right on top of each other, but they cover the entire .grid which is exactly what we want. Next, we will place the tab panel content in the second row of the subgrid and stretch it across all three columns. We’re using ::details-content (good support, but not yet in WebKit at the time of writing) to target the panel content, which is nice because that means we don’t need to set up another wrapper in the markup simply for that purpose. details::details-content { grid-row: 2; /* position in the second row */ grid-column: 1 / -1; /* cover all three columns */ padding: 1rem; border-bottom: 2px solid dodgerblue; } The thing about a tabbed interface is that we only want to show one open tab panel at a time. Thankfully, we can select the [open] state of the <details> elements and hide the ::details-content of any tab that is :not([open])by using enabling selectors: details:not([open])::details-content { display: none; } We still have overlapping tabs, but the only tab panel we’re displaying is currently open, which cleans things up quite a bit: Turning <details> into tabs Now on to the fun stuff! Right now, all of our tabs are visually stacked. We want to spread those out and distribute them evenly along the .grid‘s top row. Each <details> element contains a <summary> providing both the tab label and button that toggles each one open and closed. Let’s place the <summary> element in the first subgrid row and add apply light styling when a <details> tab is in an [open] state: summary { grid-row: 1; /* First subgrid row */ display: grid; padding: 1rem; /* Some breathing room */ border-bottom: 2px solid dodgerblue; cursor: pointer; /* Update the cursor when hovered */ } /* Style the <summary> element when <details> is [open] */ details[open] summary { font-weight: bold; } Our tabs are still stacked, but how we have some light styles applied when a tab is open: We’re almost there! The last thing is to position the <summary> elements in the subgrid’s columns so they are no longer blocking each other. We’ll use the :nth-of-type pseudo to select each one individually by their order in the HTML: /* First item in first column */ details:nth-of-type(1) summary { grid-column: 1 / span 1; } /* Second item in second column */ details:nth-of-type(2) summary { grid-column: 2 / span 1; } /* Third item in third column */ details:nth-of-type(3) summary { grid-column: 3 / span 1; } Check that out! The tabs are evenly distributed along the subgrid’s top row: Unfortunately, we can’t use loops in CSS (yet!), but we can use variables to keep our styles DRY: summary { grid-column: var(--n) / span 1; } Now we need to set the --n variable for each <details> element. I like to inline the variables directly in HTML and use them as hooks for styling: <div class="grid"> <details class="item" name="alpha" open style="--n: 1"> <summary class="subitem">First item</summary> <div><!-- etc. --></div> </details> <details class="item" name="alpha" style="--n: 2"> <summary class="subitem">Second item</summary> <div><!-- etc. --></div> </details> <details class="item" name="alpha" style="--n: 3"> <summary class="subitem">Third item</summary> <div><!-- etc. --></div> </details> </div> Again, because loops aren’t a thing in CSS at the moment, I tend to reach for a templating language, specifically Liquid, to get some looping action. This way, there’s no need to explicitly write the HTML for each tab: {% for item in itemList %} <div class="grid"> <details class="item" name="alpha" style="--n: {{ forloop.index }}" {% if forloop.first %}open{% endif %}> <!-- etc. --> </details> </div> {% endfor %} You can roll with a different templating language, of course. There are plenty out there if you like keeping things concise! Final touches OK, I lied. There’s one more thing we ought to do. Right now, you can click only on the last <summary> element because all of the <details> pieces are stacked on top of each other in a way where the last one is on top of the stack. You might have already guessed it: we need to put our <summary> elements on top by setting z-index. summary { z-index: 1; } Here’s the full working demo: Accessibility The <details> element includes built-in accessibility features, such as keyboard navigation and screen reader support, for both expanded and collapsed states. I’m sure we could make it even better, but it might be a topic for another article. I’d love some feedback in the comments to help cover as many bases as possible. Update: Nathan Knowler chimed in with some excellent points over on Mastodon. Adrian Roselli buzzed in with additional context in the comments as well. It’s 2025, and we can create tabs with HTML and CSS only without any hacks. I don’t know about you, but this developer is happy today, even if we still need a little patience for browsers to fully support these features. Pure CSS Tabs With Details, Grid, and Subgrid originally published on CSS-Tricks, which is part of the DigitalOcean family. You should get the newsletter.
CSS Animations That Leverage the Parent-Child Relationship
- Articles
- animation
When we change an element’s intrinsic sizing, its children are affected, too. This is something we can use to our advantage.
CSS Animations That Leverage the Parent-Child Relationship originally published on CSS-Tricks, which is part of the DigitalOcean family. You should get the newsletter.
Modern CSS has great ways to position and move a group of elements relative to each other, such as anchor positioning. That said, there are instances where it may be better to take up the old ways for a little animation, saving time and effort. We’ve always been able to affect an element’s structure, like resizing and rotating it. And when we change an element’s intrinsic sizing, its children are affected, too. This is something we can use to our advantage. Let’s say a few circles need to move towards and across one another. Something like this: Our markup might be as simple as a <main> element that contains four child .circle elements: <main> <div class="circle"></div> <div class="circle"></div> <div class="circle"></div> <div class="circle"></div> </main> As far as rotating things, there are two options. We can (1) animate the <main> parent container, or (2) animate each .circle individually. Tackling that first option is probably best because animating each .circle requires defining and setting several animations rather than a single animation. Before we do that, we ought to make sure that each .circle is contained in the <main> element and then absolutely position each one inside of it: main { contain: layout; } .circle { position: absolute; &:nth-of-type(1){ background-color: rgb(0, 76, 255); } &:nth-of-type(2){ background-color: rgb(255, 60, 0); right: 0; } &:nth-of-type(3){ background-color: rgb(0, 128, 111); bottom: 0; } &:nth-of-type(4){ background-color: rgb(255, 238, 0); right: 0; bottom: 0; } } If we rotate the <main> element that contains the circles, then we might create a specific .animate class just for the rotation: /* Applied on <main> (the parent element) */ .animate { width: 0; transform: rotate(90deg); transition: width 1s, transform 1.3s; } …and then set it on the <main> element with JavaScript when the button is clicked: const MAIN = document.querySelector("main"); function play() { MAIN.className = ""; MAIN.offsetWidth; MAIN.className = "animate"; } It looks like we’re animating four circles, but what we’re really doing is rotating the parent container and changing its width, which rotates and squishes all the circles in it as well: Each .circle is fixed to a respective corner of the <main> parent with absolute positioning. When the animation is triggered in the parent element — i.e. <main> gets the .animate class when the button is clicked — the <main> width shrinks and it rotates 90deg. That shrinking pulls each .circle closer to the <main> element’s center, and the rotation causes the circles to switch places while passing through one another. This approach makes for an easier animation to craft and manage for simple effects. You can even layer on the animations for each individual element for more variations, such as two squares that cross each other during the animation. /* Applied on <main> (the parent element) */ .animate { transform: skewY(30deg) rotateY(180deg); transition: 1s transform .2s; .square { transform: skewY(30deg); transition: inherit; } } See that? The parent <main> element makes a 30deg skew and flip along the Y-axis, while the two child .square elements counter that distortion with the same skew. The result is that you see the child squares flip positions while moving away from each other. If we want the squares to form a separation without the flip, here’s a way to do that: /* Applied on <main> (the parent element) */ .animate { transform: skewY(30deg); transition: 1s transform .2s; .square { transform: skewY(-30deg); transition: inherit; } } This time, the <main> element is skewed 30deg, while the .square children cancel that with a -30deg skew. Setting skew() on a parent element helps rearrange the children beyond what typical rectangular geometry allows. Any change in the parent can be complemented, countered, or cancelled by the children depending on what effect you’re looking for. Here’s an example where scaling is involved. Notice how the <main> element’s skewY() is negated by its children and scale()s at a different value to offset it a bit. /* Applied on <main> (the parent element) */ .animate { transform: rotate(-180deg) scale(.5) skewY(45deg) ; transition: .6s .2s; transition-property: transform, border-radius; .squares { transform: skewY(-45deg) scaleX(1.5); border-radius: 10px; transition: inherit; } } The parent element (<main>) rotates counter-clockwise (rotate(-180deg)), scales down (scale(.5)), and skews vertically (skewY(45deg)). The two children (.square) cancel the parent’s distortion by using the negative value of the parent’s skew angle (skewY(-45deg)), and scale up horizontally (scaleX(1.5)) to change from a square to a horizontal bar shape. There are a lot of these combinations you can come up with. I’ve made a few more below where, instead of triggering the animation with a JavaScript interaction, I’ve used a <details> element that triggers the animation when it is in an [open] state once the <summary> element is clicked. And each <summary> contains an .icon child demonstrating a different animation when the <details> toggles between open and closed. Click on a <details> to toggle it open and closed to see the animations in action. That’s all I wanted to share — it’s easy to forget that we get some affordances for writing efficient animations if we consider how transforming a parent element intrinsically affects the size, position, and orientation. That way, for example, there’s no need to write complex animations for each individual child element, but rather leverage what the parent can do, then adjust the behavior at the child level, as needed. CSS Animations That Leverage the Parent-Child Relationship originally published on CSS-Tricks, which is part of the DigitalOcean family. You should get the newsletter.
An Introduction to JavaScript Expressions
- Articles
- JavaScript
A thorough but approachable lesson on JavaScript expressions excerpted JavaScript For Everyone, a complete online course offered by our friends at Piccalilli.
An Introduction to JavaScript Expressions originally published on CSS-Tricks, which is part of the DigitalOcean family. You should get the newsletter.
Editor’s note: Mat Marquis and Andy Bell have released JavaScript for Everyone, an online course offered exclusively at Piccalilli. This post is an excerpt from the course taken specifically from a chapter all about JavaScript expressions. We’re publishing it here because we believe in this material and want to encourage folks like yourself to sign up for the course. So, please enjoy this break from our regular broadcasting to get a small taste of what you can expect from enrolling in the full JavaScript for Everyone course. Hey, I’m Mat, but “Wilto” works too — I’m here to teach you JavaScript. Well, not here-here; technically, I’m over at JavaScript for Everyone to teach you JavaScript. What we have here is a lesson from the JavaScript for Everyone module on lexical grammar and analysis — the process of parsing the characters that make up a script file and converting it into a sequence of discrete “input elements” (lexical tokens, line ending characters, comments, and whitespace), and how the JavaScript engine interprets those input elements. An expression is code that, when evaluated, resolves to a value. 2 + 2 is a timeless example. 2 + 2 // result: 4 As mental models go, you could do worse than “anywhere in a script that a value is expected you can use an expression, no matter how simple or complex that expression may be:” function numberChecker( checkedNumber ) { if( typeof checkedNumber === "number" ) { console.log( "Yep, that's a number." ); } } numberChecker( 3 ); // result: Yep, that's a number. numberChecker( 10 + 20 ); // result: Yep, that's a number. numberChecker( Math.floor( Math.random() * 20 ) / Math.floor( Math.random() * 10 ) ); // result: Yep, that's a number. Granted, JavaScript doesn’t tend to leave much room for absolute statements. The exceptions are rare, but it isn’t the case absolutely, positively, one hundred percent of the time: console.log( -2**1 ); // result: Uncaught SyntaxError: Unary operator used immediately before exponentiation expression. Parenthesis must be used to disambiguate operator precedence Still, I’m willing to throw myself upon the sword of “um, actually” on this one. That way of looking at the relationship between expressions and their resulting values is heart-and-soul of the language stuff, and it’ll get you far. Primary Expressions There’s sort of a plot twist, here: while the above example reads to our human eyes as an example of a number, then an expression, then a complex expression, it turns out to be expressions all the way down. 3 is itself an expression — a primary expression. In the same way the first rule of Tautology Club is Tautology Club’s first rule, the number literal 3 is itself an expression that resolves in a very predictable value (psst, it’s three). console.log( 3 ); // result: 3 Alright, so maybe that one didn’t necessarily need the illustrative snippet of code, but the point is: the additive expression 2 + 2 is, in fact, the primary expression 2 plus the primary expression 2. Granted, the “it is what it is” nature of a primary expression is such that you won’t have much (any?) occasion to point at your display and declare “that is a primary expression,” but it does afford a little insight into how JavaScript “thinks” about values: a variable is also a primary expression, and you can mentally substitute an expression for the value it results in — in this case, the value that variable references. That’s not the only purpose of an expression (which we’ll get into in a bit) but it’s a useful shorthand for understanding expressions at their most basic level. There’s a specific kind of primary expression that you’ll end up using a lot: the grouping operator. You may remember it from the math classes I just barely passed in high school: console.log( 2 + 2 * 3 ); // result: 8 console.log( ( 2 + 2 ) * 3 ); // result: 12 The grouping operator (singular, I know, it kills me too) is a matched pair of parentheses used to evaluate a portion of an expression as a single unit. You can use it to override the mathematical order of operations, as seen above, but that’s not likely to be your most common use case—more often than not you’ll use grouping operators to more finely control conditional logic and improve readability: const minValue = 0; const maxValue = 100; const theValue = 50; if( ( theValue > minValue ) && ( theValue < maxValue ) ) { // If ( the value of `theValue` is greater than that of `minValue` ) AND less than `maxValue`): console.log( "Within range." ); } // result: Within range. Personally, I make a point of almost never excusing my dear Aunt Sally. Even when I’m working with math specifically, I frequently use parentheses just for the sake of being able to scan things quickly: console.log( 2 + ( 2 * 3 ) ); // result: 8 This use is relatively rare, but the grouping operator can also be used to remove ambiguity in situations where you might need to specify that a given syntax is intended to be interpreted as an expression. One of them is, well, right there in your developer console. The syntax used to initialize an object — a matched pair of curly braces — is the same as the syntax used to group statements into a block statement. Within the global scope, a pair of curly braces will be interpreted as a block statement containing a syntax that makes no sense given that context, not an object literal. That’s why punching an object literal into your developer console will result in an error: { "theValue" : true } // result: `Uncaught SyntaxError: unexpected token: ':' It’s very unlikely you’ll ever run into this specific issue in your day-to-day JavaScript work, seeing as there’s usually a clear division between contexts where an expression or a statement are expected: { const theObject = { "theValue" : true }; } You won’t often be creating an object literal without intending to do something with it, which means it will always be in the context where an expression is expected. It is the reason you’ll see standalone object literals wrapped in a a grouping operator throughout this course — a syntax that explicitly says “expect an expression here”: ({ "value" : true }); However, that’s not to say you’ll never need a grouping operator for disambiguation purposes. Again, not to get ahead of ourselves, but an Independently-Invoked Function Expression (IIFE), an anonymous function expression used to manage scope, relies on a grouping operator to ensure the function keyword is treated as a function expression rather than a declaration: (function(){ // ... })(); Expressions With Side Effects Expressions always give us back a value, in no uncertain terms. There are also expressions with side effects — expressions that result in a value and do something. For example, assigning a value to an identifier is an assignment expression. If you paste this snippet into your developer console, you’ll notice it prints 3: theIdentifier = 3; // result: 3 The resulting value of the expression theIdentifier = 3 is the primary expression 3; classic expression stuff. That’s not what’s useful about this expression, though — the useful part is that this expression makes JavaScript aware of theIdentifier and its value (in a way we probably shouldn’t, but that’s a topic for another lesson). That variable binding is an expression and it results in a value, but that’s not really why we’re using it. Likewise, a function call is an expression; it gets evaluated and results in a value: function theFunction() { return 3; }; console.log( theFunction() + theFunction() ); // result: 6 We’ll get into it more once we’re in the weeds on functions themselves, but the result of calling a function that returns an expression is — you guessed it — functionally identical to working with the value that results from that expression. So far as JavaScript is concerned, a call to theFunction effectively is the simple expression 3, with the side effect of executing any code contained within the function body: function theFunction() { console.log( "Called." ); return 3; }; console.log( theFunction() + theFunction() ); /* Result: Called. Called. 6 */ Here theFunction is evaluated twice, each time calling console.log then resulting in the simple expression 3 . Those resulting values are added together, and the result of that arithmetic expression is logged as 6. Granted, a function call may not always result in an explicit value. I haven’t been including them in our interactive snippets here, but that’s the reason you’ll see two things in the output when you call console.log in your developer console: the logged string and undefined. JavaScript’s built-in console.log method doesn’t return a value. When the function is called it performs its work — the logging itself. Then, because it doesn’t have a meaningful value to return, it results in undefined. There’s nothing to do with that value, but your developer console informs you of the result of that evaluation before discarding it. Comma Operator Speaking of throwing results away, this brings us to a uniquely weird syntax: the comma operator. A comma operator evaluates its left operand, discards the resulting value, then evaluates and results in the value of the right operand. Based only on what you’ve learned so far in this lesson, if your first reaction is “I don’t know why I’d want an expression to do that,” odds are you’re reading it right. Let’s look at it in the context of an arithmetic expression: console.log( ( 1, 5 + 20 ) ); // result: 25 The primary expression 1 is evaluated and the resulting value is discarded, then the additive expression 5 + 20 is evaluated, and that’s resulting value. Five plus twenty, with a few extra characters thrown in for style points and a 1 cast into the void, perhaps intended to serve as a threat to the other numbers. And hey, notice the extra pair of parentheses there? Another example of a grouping operator used for disambiguation purposes. Without it, that comma would be interpreted as separating arguments to the console.log method — 1 and 5 + 20 — both of which would be logged to the console: console.log( 1, 5 + 20 ); // result: 1 25 Now, including a value in an expression in a way where it could never be used for anything would be a pretty wild choice, granted. That’s why I bring up the comma operator in the context of expressions with side effects: both sides of the , operator are evaluated, even if the immediately resulting value is discarded. Take a look at this validateResult function, which does something fairly common, mechanically speaking; depending on the value passed to it as an argument, it executes one of two functions, and ultimately returns one of two values. For the sake of simplicity, we’re just checking to see if the value being evaluated is strictly true — if so, call the whenValid function and return the string value "Nice!". If not, call the whenInvalid function and return the string "Sorry, no good.": function validateResult( theValue ) { function whenValid() { console.log( "Valid result." ); }; function whenInvalid() { console.warn( "Invalid result." ); }; if( theValue === true ) { whenValid(); return "Nice!"; } else { whenInvalid(); return "Sorry, no good."; } }; const resultMessage = validateResult( true ); // result: Valid result. console.log( resultMessage ); // result: "Nice!" Nothing wrong with this. The whenValid / whenInvalid functions are called when the validateResult function is called, and the resultMessage constant is initialized with the returned string value. We’re touching on a lot of future lessons here already, so don’t sweat the details too much. Some room for optimizations, of course — there almost always is. I’m not a fan of having multiple instances of return, which in a sufficiently large and potentially-tangled codebase can lead to increased “wait, where is that coming from” frustrations. Let’s sort that out first: function validateResult( theValue ) { function whenValid() { console.log( "Valid result." ); }; function whenInvalid() { console.warn( "Invalid result." ); }; if( theValue === true ) { whenValid(); } else { whenInvalid(); } return theValue === true ? "Nice!" : "Sorry, no good."; }; const resultMessage = validateResult( true ); // result: Valid result. resultMessage; // result: "Nice!" That’s a little better, but we’re still repeating ourselves with two separate checks for theValue. If our conditional logic were to be changed someday, it wouldn’t be ideal that we have to do it in two places. The first — the if/else — exists only to call one function or the other. We now know function calls to be expressions, and what we want from those expressions are their side effects, not their resulting values (which, absent a explicit return value, would just be undefined anyway). Because we need them evaluated and don’t care if their resulting values are discarded, we can use comma operators (and grouping operators) to sit them alongside the two simple expressions — the strings that make up the result messaging — that we do want values from: function validateResult( theValue ) { function whenValid() { console.log( "Valid result." ); }; function whenInvalid() { console.warn( "Invalid result." ); }; return theValue === true ? ( whenValid(), "Nice!" ) : ( whenInvalid(), "Sorry, no good." ); }; const resultMessage = validateResult( true ); // result: Valid result. resultMessage; // result: "Nice!" Lean and mean thanks to clever use of comma operators. Granted, there’s a case to be made that this is a little too clever, in that it could make this code a little more difficult to understand at a glance for anyone that might have to maintain this code after you (or, if you have a memory like mine, for your near-future self). The siren song of “I could do it with less characters” has driven more than one JavaScript developer toward the rocks of, uh, slightly more difficult maintainability. I’m in no position to talk, though. I chewed through my ropes years ago. Between this lesson on expressions and the lesson on statements that follows it, well, that would be the whole ballgame — the entirety of JavaScript summed up, in a manner of speaking — were it not for a not-so-secret third thing. Did you know that most declarations are neither statement nor expression, despite seeming very much like statements? Variable declarations performed with let or const, function declarations, class declarations — none of these are statements: if( true ) let theVariable; // Result: Uncaught SyntaxError: lexical declarations can't appear in single-statement context if is a statement that expects a statement, but what it encounters here is one of the non-statement declarations, resulting in a syntax error. Granted, you might never run into this specific example at all if you — like me — are the sort to always follow an if with a block statement, even if you’re only expecting a single statement. I did say “one of the non-statement declarations,” though. There is, in fact, a single exception to this rule — a variable declaration using var is a statement: if( true ) var theVariable; That’s just a hint at the kind of weirdness you’ll find buried deep in the JavaScript machinery. 5 is an expression, sure. 0.1 * 0.1 is 0.010000000000000002, yes, absolutely. Numeric values used to access elements in an array are implicitly coerced to strings? Well, sure — they’re objects, and their indexes are their keys, and keys are strings (or Symbols). What happens if you use call() to give this a string literal value? There’s only one way to find out — two ways to find out, if you factor in strict mode. That’s where JavaScript for Everyone is designed take you: inside JavaScript’s head. My goal is to teach you the deep magic — the how and the why of JavaScript. If you’re new to the language, you’ll walk away from this course with a foundational understanding of the language worth hundreds of hours of trial-and-error. If you’re a junior JavaScript developer, you’ll finish this course with a depth of knowledge to rival any senior. I hope to see you there. JavaScript for Everyone is now available and the launch price runs until midnight, October 28. Save £60 off the full price of £249 (~$289) and get it for £189 (~$220)! Get the Course An Introduction to JavaScript Expressions originally published on CSS-Tricks, which is part of the DigitalOcean family. You should get the newsletter.
Building a Honeypot Field That Works
- Articles
- forms
- security
- web components
Honeypots are fields that developers use to prevent spam submissions. They still work in 2025. But you got to set a couple of tricks in place so spambots can’t detect your honeypot field.
Building a Honeypot Field That Works originally published on CSS-Tricks, which is part of the DigitalOcean family. You should get the newsletter.
Honeypots are fields that developers use to prevent spam submissions. They still work in 2025. So you don’t need reCAPTCHA or other annoying mechanisms. But you got to set a couple of tricks in place so spambots can’t detect your honeypot field. Use This I’ve created a Honeypot component that does everything I mention below. So you can simply import and use them like this: <script> import { Honeypot } from '@splendidlabz/svelte' </script> <Honeypot name="honeypot-name" /> Or, if you use Astro, you can do this: --- import { Honeypot } from '@splendidlabz/svelte' --- <Honeypot name="honeypot-name" /> But since you’re reading this, I’m sure you kinda want to know what’s the necessary steps. Preventing Bots From Detecting Honeypots Here are two things that you must not do: Do not use <input type=hidden>. Do not hide the honeypot with inline CSS. Bots today are already smart enough to know that these are traps — and they will skip them. Here’s what you need to do instead: Use a text field. Hide the field with CSS that is not inline. A simple example that would work is this: <input class="honeypot" type="text" name="honeypot" /> <style> .honeypot { display: none; } </style> For now, placing the <style> tag near the honeypot seems to work. But you might not want to do that in the future (more below). Unnecessary Enhancements You may have seen these other enhancements being used in various honeypot articles out there: aria-hidden to prevent screen readers from using the field autocomplete=off and tabindex="-1" to prevent the field from being selected <input ... aria-hidden autocomplete="off" tabindex="-1" /> These aren’t necessary because display: none itself already does the things these properties are supposed to do. Future-Proof Enhancements Bots get smarter everyday, so I won’t discount the possibility that they can catch what we’ve created above. So, here are a few things we can do today to future-proof a honeypot: Use a legit-sounding name attribute values like website or mobile instead of obvious honeypot names like spam or honeypot. Use legit-sounding CSS class names like .form-helper instead of obvious ones like .honeypot. Put the CSS in another file so they’re further away and harder to link between the CSS and honeypot field. The basic idea is to trick spam bot to enter into this “legit” field. <input class="form-helper" ... name="occupation" /> <!-- Put this into your CSS file, not directly in the HTML --> <style> .form-helper { display: none; } </style> There’s a very high chance that bots won’t be able to differentiate the honeypot field from other legit fields. Even More Enhancements The following enhancements need to happen on the <form> instead of a honeypot field. The basic idea is to detect if the entry is potentially made by a human. There are many ways of doing that — and all of them require JavaScript: Detect a mousemove event somewhere. Detect a keyboard event somewhere. Ensure the the form doesn’t get filled up super duper quickly (‘cuz people don’t work that fast). Now, the simplest way of using these (I always advocate for the simplest way I know), is to use the Form component I’ve created in Splendid Labz: <script> import { Form, Honeypot } from '@splendidlabz/svelte' </script> <Form> <Honeypot name="honeypot" /> </Form> If you use Astro, you need to enable JavaScript with a client directive: --- import { Form, Honeypot } from '@splendidlabz/svelte' --- <Form client:idle> <Honeypot name="honeypot" /> </Form> If you use vanilla JavaScript or other frameworks, you can use the preventSpam utility that does the triple checks for you: import { preventSpam } from '@splendidlabz/utils/dom' let form = document.querySelector('form') form = preventSpam(form, { honeypotField: 'honeypot' }) form.addEventListener('submit', event => { event.preventDefault() if (form.containsSpam()) return else form.submit() }) And, if you don’t wanna use any of the above, the idea is to use JavaScript to detect if the user performed any sort of interaction on the page: export function preventSpam( form, { honeypotField = 'honeypot', honeypotDuration = 2000 } = {} ) { const startTime = Date.now() let hasInteraction = false // Check for user interaction function checkForInteraction() { hasInteraction = true } // Listen for a couple of events to check interaction const events = ['keydown', 'mousemove', 'touchstart', 'click'] events.forEach(event => { form.addEventListener(event, checkForInteraction, { once: true }) }) // Check for spam via all the available methods form.containsSpam = function () { const fillTime = Date.now() - startTime const isTooFast = fillTime < honeypotDuration const honeypotInput = form.querySelector(`[name="${honeypotField}"]`) const hasHoneypotValue = honeypotInput?.value?.trim() const noInteraction = !hasInteraction // Clean up event listeners after use events.forEach(event => form.removeEventListener(event, checkForInteraction) ) return isTooFast || !!hasHoneypotValue || noInteraction } } Better Forms I’m putting together a solution that will make HTML form elements much easier to use. It includes the standard elements you know, but with easy-to-use syntax and are highly accessible. Stuff like: Form Honeypot Text input Textarea Radios Checkboxes Switches Button groups etc. Here’s a landing page if you’re interested in this. I’d be happy to share something with you as soon as I can. Wrapping Up There are a couple of tricks that make honeypots work today. The best way, likely, is to trick spam bots into thinking your honeypot is a real field. If you don’t want to trick bots, you can use other bot-detection mechanisms that we’ve defined above. Hope you have learned a lot and manage to get something useful from this! Building a Honeypot Field That Works originally published on CSS-Tricks, which is part of the DigitalOcean family. You should get the newsletter.
Sequential linear() Animation With N Elements
- Articles
- animation
- CSS functions
Let’s suppose you have N elements with the same animation that should animate sequentially. Modern CSS makes this easy and it works for any number of items!
Sequential linear() Animation With N Elements originally published on CSS-Tricks, which is part of the DigitalOcean family. You should get the newsletter.
Let’s suppose you have N elements with the same animation that should animate sequentially. The first one, then the second one, and so on until we reach the last one, then we loop back to the beginning. I am sure you know what I am talking about, and you also know that it’s tricky to get such an effect. You need to define complex keyframes, calculate delays, make it work for a specific number of items, etc. Tell you what: with modern CSS, we can easily achieve this using a few lines of code, and it works for any number of items! The following demo is currently limited to Chrome and Edge, but will work in other browsers as the sibling-index() and sibling-count() functions gain broader support. You can track Firefox support in Ticket #1953973 and WebKit’s position in Issue #471. In the above demo, the elements are animated sequentially and the keyframes are as simple as a single to frame changing an element’s background color and scale: @keyframes x { to { background: #F8CA00; scale: .8; } } You can add or remove as many items as you want and everything will keep running smoothly. Cool, right? That effect is made possible with this strange and complex-looking code: .container > * { --_s: calc(100%*(sibling-index() - 1)/sibling-count()); --_e: calc(100%*(sibling-index())/sibling-count()); animation: x calc(var(--d)*sibling-count()) infinite linear(0, 0 var(--_s), 1, 0 var(--_e), 0); } It’s a bit scary and unreadable, but I will dissect it with you to understand the logic behind it. The CSS linear() function When working with animations, we can define timing functions (also called easing functions). We can use predefined keyword values — such as linear, ease, ease-in, etc. — or steps() to define discrete animations. There’s also cubic-bezier(). But we have a newer, more powerful function we can add to that list: linear(). From the specification: A linear easing function is an easing function that interpolates linearly between its control points. Each control point is a pair of numbers, associating an input progress value to an output progress value. animation-timing-function: linear creates a linear interpolation between two points — the start and end of the animation — while the linear() function allows us to define as many points as we want and have a “linear” interpolation between two consecutive points. It’s a bit confusing at first glance, but once we start working with it, things becomes clearer. Let’s start with the first value, which is nothing but an equivalent of the linear value. linear(0 0%, 1 100%) We have two points, and each point is defined with two values (the “output” progress and “input” progress). The “output” progress is the animation (i.e., what is defined within the keyframes) and the “input” progress is the time. Let’s consider the following code: .box { animation: move 2s linear(0 0%, 1 100%); } @keyframes move { 0% {translate: 0px } 100% {translate: 80px} } In this case, we want 0 of the animation (translate: 0px) at t=0% (in other words, 0% of 2s, so 0s) and 1 of the animation (translate: 80px) at t=100% (which is 100% of 2s, so 2s). Between these points, we do a linear interpolation. Instead of percentages, we can use numbers, which means that the following is also valid: linear(0 0, 1 1) But I recommend you stick to the percentage notation to avoid getting confused with the first value which is a number as well. The 0% and 100% are implicit, so we can remove them and simply use the following: linear(0, 1) Let’s add a third point: linear(0, 1, 0) As you can see, I am not defining any “input” progress (the percentage values that represent the time) because they are not mandatory; however, introducing them is the first thing to do to understand what the function is doing. The first value is always at 0% and the last value is always at 100%. linear(0 0%, 1, 0 100%) The value will be 50% for the middle point. When a control point is missing its “input” progress, we take the mid-value between two adjacent points. If you are familiar with gradients, you will notice the same logic applies to color stops. linear(0 0%, 1 50%, 0 100%) Easier to read, right? Can you explain what it does? Take a few minutes to think about it before continuing. Got it? I am sure you did! It breaks down like this: We start with translate: 0px at t=0s (0% of 2s). Then we move to translate: 80px at t=1s (50% of 2s). Then we get back to translate: 0px at t=2s (100% of 2s). Most of the timing functions allow us to only move forward, but with linear() we can move in both directions as many times as we want. That’s what makes this function so powerful. With a “simple” keyframes you can have a “complex” animation. I could have used the following keyframes to do the same thing: @keyframes move { 0%, 100% { translate: 0px } 50% { translate: 80px } } However, I won’t be able to update the percentage values on the fly if I want a different animation. There is no way to control keyframes using CSS so I need to define new keyframes each time I need a new animation. But with linear(), I only need one keyframes. In the demo below, all the elements are using the same keyframes and yet have completely different animations! Add a delay with linear() Now that we know more about linear(), let’s move to the main trick of our effect. Don’t forget that the idea is to create a sequential animation with a certain number (N) of elements. Each element needs to animate, then “wait” until all the others are done with their animation to start again. That waiting time can be seen as a delay. The intuitive way to do this is the following: @keyframes move { 0%, 50% { translate: 0px } 100% { translate: 80px } } We specify the same value at 0% and 50%; hence nothing will happen between 0% and 50%. We have our delay, but as I said previously, we won’t be able to control those percentages using CSS. Instead, we can express the same thing using linear(): linear(0 0%, 0 50%, 1 100%) The first two control points have the same “output” progress. The first one is at 0% of the time, and the second one at 50% of the time, so nothing will “visually” happen in the first half of the animation. We created a delay without having to update the keyframes! @keyframes move { 0% { translate: 0px } 100% { translate: 80px } } Let’s add another point to get back to the initial state: linear(0 0%, 0 50%, 1 75%, 0 100%) Or simply: linear(0, 0 50%, 1, 0) Cool, right? We’re able to create a complex animation with a simple set of keyframes. Not only that, but we can easily adjust the configuration by tweaking the linear() function. This is what we will do for each element to get our sequential animation! The full animation Let’s get back to our first animation and use the previous linear() value we did before. We will start with two elements. Nothing surprising yet. Both elements have the exact same animation, so they animate the same way at the same time. Now, let’s update the linear() function for the first element to have the opposite effect: an animation in the first half, then a delay in the second half. linear(0, 1, 0 50%, 0) This literally inverts the previous value: Tada! We have established a sequential animation with two elements! Are you starting to see the idea? The goal is to do the same with any number (N) of elements. Of course, we are not going to assign a different linear() value for each element — we will do it programmatically. First, let’s draw a figure to understand what we did for two elements. When one element is waiting, the other one is animating. We can identify two ranges. Let’s imagine the same with three elements. This time, we need three ranges. Each element animates in one range and waits in two ranges. Do you see the pattern? For N elements, we need N ranges, and the linear() function will have the following syntax: linear(0, 0 S, 1, 0 E, 0) The start and the end are equal to 0, which is the initial state of the animation, then we have an animation between S and E. An element will wait from 0% to S, animate from S to E, then wait again from E to 100%. The animation time equals to 100%/N, which means E - S = 100%/N. The first element starts its animation at the first range (0 * 100%/N), the second element at the second range (1 * 100%/N), the third element at the third range (2 * 100%/N), and so on. S is equal to: S = (i - 1) * 100%/N …where i is the index of the element. Now, you may ask, how do we get the value of N and i? The answer is as simple as using the sibling-count()and sibling-index() functions! Again, these are currently supported in Chromium browsers, but we can expect them to roll out in other browsers down the road. S = calc(100%*(sibling-index() - 1)/sibling-count()) And: E = S + 100%/N E = calc(100%*sibling-index()/sibling-count()) We write all this with some good CSS and we are done! .box { --d: .5s; /* animation duration */ --_s: calc(100%*(sibling-index() - 1)/sibling-count()); --_e: calc(100%*(sibling-index())/sibling-count()); animation: x calc(var(--d)*sibling-count()) infinite linear(0, 0 var(--_s), 1, 0 var(--_e), 0); } @keyframes x { to { background: #F8CA00; scale: .8; } } I used a variable (--d) to control the duration, but it’s not mandatory. I wanted to be able to control the amount of time each element takes to animate. That’s why I multiply it later by N. Now all that’s left is to define your animation. Add as many elements as you want, and watch the result. No more complex keyframes and magic values! Note: For unknown reasons (probably a bug) you need to register the variables with @property. More variations We can extend the basic idea to create more variations. For example, instead of having to wait for an element to completely end its animation, the next one can already start its own. This time, I am defining N + 1 ranges, and each element animates in two ranges. The first element will animate in the first and second range, while the second element will animate in the second and third range; hence an overlap of both animations in the second range, etc. I will not spend too much time explaining this case because it’s one example among many we create, so I let you dissect the code as a small exercise. And here is another one for you to study as well. Conclusion The linear() function was mainly introduced to create complex easing such as bounce and elastic, but combined with other modern features, it unlocks a lot of possibilities. Through this article, we got a small overview of its potential. I said “small” because we can go further and create even more complex animations, so stay tuned for more articles to come! Sequential linear() Animation With N Elements originally published on CSS-Tricks, which is part of the DigitalOcean family. You should get the newsletter.
Masonry: Watching a CSS Feature Evolve
- Articles
- browser
- csswg
- grid
- masonry
- specifications
What can CSS Masonry discussions teach us about the development of new CSS features? What is the CSSWG’s role? What influence do browsers have? What can learn from the way past features evolved?
Masonry: Watching a CSS Feature Evolve originally published on CSS-Tricks, which is part of the DigitalOcean family. You should get the newsletter.
You’ve probably heard the buzz about CSS Masonry. You might even be current on the ongoing debate about how it should be built, with two big proposals on the table, one from the Chrome team and one from the WebKit team. The two competing proposals are interesting in their own right. Chrome posted about its implementation a while back, and WebKit followed it up with a detailed post stating their position (which evolved out of a third proposal from the Technical Architecture Group). We’ll rehash some of that in this post, but even more interesting to me is that this entire process is an excellent illustration of how the CSS Working Group (CSSWG), browsers, and developers coalesce around standards for CSS features. There are tons of considerations that go into a feature, like technical implementations and backwards compatibility. But it can be a bit political, too. That’s really what I want to do here: look at the CSS Masonry discussions and what they can teach us about the development of new CSS features. What is the CSSWG’s role? What influence do browsers have? What can learn from the way past features evolved? Masonry Recap A masonry layout is different than, say Flexbox and Grid, stacking unevenly-sized items along a single track that automatically wraps into multiple rows or columns, depending on the direction. It’s called the “Pinterest layout” for the obvious reason that it’s the hallmark of Pinterest’s feed. Pinterest’s masonry layout We could go deeper here, but talking specifically about CSS Masonry isn’t the point. When Masonry entered CSS Working Group discussions, the first prototype actually came from Firefox back in 2019, based on an early draft that integrated masonry behavior directly into Grid. The Chrome team followed later with a new display: masonry value, treating it as a distinct layout model. They argued that masonry is a different enough layout from Flexbox and Grid to deserve its own display value. Grid’s defaults don’t line up with how masonry works, so why force developers to learn a bunch of extra Grid syntax? Chrome pushed ahead with this idea and prototyped it in Chrome 140: .container { display: masonry; grid-template-columns: repeat(auto-fit, minmax(160px, 1fr)); gap: 10px; } Meanwhile, the WebKit team has proposed that masonry should be a subset of Grid, rather than its own display type. They endorsed a newer direction based on a recommendation by the W3C Technical Architecture Group (TAG) built around a concept called Item Flow that unifies flex-flow and grid-auto-flow into a single set of properties. Instead of writing display: masonry, you’d stick with display: grid and use a new item-flow shorthand to collapse rows or columns into a masonry-style layout: .container { display: grid; grid-template-columns: repeat(auto-fill, minmax(14rem, 1fr)); item-flow: row collapse; gap: 1rem; } The debate here really comes down to mental models and how you think about masonry. WebKit sees it as a natural extension of Grid, not a brand-new system. Their thinking is that developers shouldn’t need to learn an entirely new model when most of it already exists in Grid. With item-flow, you’re not telling the browser “this is a whole new layout system,” you’re more or less adjusting the way elements flow in a particular context. How CSS Features Evolve This sort of horse-trading isn’t new. Both Flexbox and Grid went through years of competing drafts before becoming the specs we use today. Flexbox, in particular, had a rocky rollout in the early 2010s. Those who were in the trenches at the time likely remember multiple conflicting syntaxes floating around at once. The initial release had missing gaps and browsers implemented the features differently, leading to all kinds of things, like proprietary properties, experimental releases, and different naming conventions that made the learning curve rather steep, and even Frankenstein-like usage in some cases to get the most browser support. In other words, Flexbox (nor Grid, for that matter) did not enjoyed a seamless release, but we’ve gotten to a place where the browsers implementations are interoperable with one another. That’s a big deal for developers like us who often juggle inconsistent support for various features. Heck, Rob O’Leary recently published the rabbit hole he traveled trying to use text-wrap: pretty in his work, and that’s considered “Baseline” support that is “widely available.” But I digress. It’s worth noting that Flexbox faced unique challenges early on, and masonry has benefitted from those lessons learned. I reached out to CSSWG member Tab Atkins-Bittner for a little context since they were heavily involved in editing the Flexbox specification. “Flexbox was the first of the modern layout algorithms; we made a lot of mistakes and missteps while writing it, because we were trying to figure out how a modern layout model should work.” In other words, Flexbox was sort of a canary in the coal mine as the CSSWG considered what a modern CSS layout syntax should accomplish. This greatly benefited the work put into defining CSS Grid because a lot of the foundation for things like tracks, intrinsic sizing, and proportions were already tackled. Atkins-Bittner goes on further to explain that the Grid specification process also forced the CSSWG to rethink several of Flexbox’s design choices in the process. “We found a lot of decisions that made sense on their own in Flexbox needed to be changed if we wanted them to apply more generally.” This also explains why Flexbox underwent several revisions following its initial release. It also highlights another key point: CSS features are always evolving. Early debate and iteration are essential because they reduce the need for big breaking changes. Still, some of the Flexbox mistakes (which do happen) became widely adopted. Browsers had widely implemented their approaches and the specification caught up to it while trying to establish a consistent language that helps both user agents and developers implemented and use the features, respectively. All this to say: Masonry is in a much better spot than Flexbox was at its inception. It benefits from the 15+ years that the CSSWG, browsers, and developers contributed to Flexbox and Grid over that time. The discussions are now less about fixing under-specified details and more about high-level design choices. Hence, novel ideas born from Masonry that combine the features of Flexbox and Grid into the new Item Flow proposal. It’s messy. And weird. But it’s how things get done. The CSSWG’s Role Getting to this point requires process. And in CSS, that process runs through the Working Group. The CSS Working Group (CSSWG) runs on consensus: members debate in the open, weigh pros and cons, and push browsers towards common ground. Miriam Suzanne, an invited expert with the CSSWG (and CSS-Tricks alumni), describes the process like this: “The group runs on a consensus model, so everyone has to eventually come to an agreement — or at least agree not to block the most popular path forward.” But consensus only applies to the specifications. Browsers still decide when and how to those features are shipped, as Suzanne continues: “Browsers make their own decisions about how strictly they follow a spec, and sometimes release features that haven’t been fully specified. That can lead to situations where the group decides to change a spec years later to match what browsers actually implemented.” So, while the CSSWG facilitates discussions around features, it can’t actually stop browsers from shipping those features, let alone how they’re implemented. It’s a consensus-driven system, but consensus is only about publishing a specification. In practice, momentum can shift if one vendor is the first to ship or prototype a feature. In most cases, though, the specification adoption process results in a stronger proposal overall. By the time features ship, the idea is that they’ve already been thoroughly debated, which in theory, reduces the need for significant revisions later that could lead to breaking changes. Backwards compatibility is always at the forefront of CSSWG discussions. Developer feedback also plays an important role, though there isn’t a single standardized way that it is solicited, collected, or used. For the CSSWG, the csswg-drafts GitHub repo is the primary source of feedback and discussion, while browsers also run their own surveys and gather input through various other channels such as Chrome’s technical discussion groups and Webkit’s mailing lists. The Bigger Picture Browsers are in the business of shaping new features. It’s also in their best interest for a number of reasons. Proposing new ideas gives them a seat at the table. Prototyping new features gets developers excited and helps further refine edge cases. Implementing new features (particularly first) gives them a competitive edge in the consumer market. All that said, prototyping features ahead of consensus is a bit of a tightrope walk. And that’s where Masonry comes back into the bigger picture. Chrome shipped a prototype of the feature that leans heavily into the first proposal for a new display: masonry value. Other browsers have yet to ship competing prototypes, but have openly discussed their positions, as WebKit did in subsequent blog posts. At first glance, that might suggest that Chrome is taking a heavy-handed approach to tip the scales in its favorable direction. But there’s a lot to like about prototyping features because it’s proof in the pudding for real-world uses by allowing developers early access to experiment. Atkins-Bittner explains it nicely: “Prototyping before consensus is an important part of building consensus. You get early implementation feedback, you get more eyes on the problem (the implementing engineers rather than just the spec authors).” This kind of “soft” commit moves conversations forward while leaving room to change course, if needed, based on real-world use. But there’s obviously a tension here as well. Browsers may be custodians of web standards and features, but they’re still employed by massive companies that are selling a product at the end of the day. It’s easy to get cynical. And political. In theory, though, allowing browsers to voluntarily adopt features gives everyone choice: browsers compete in the market based on what they implement, developers gain new features that push the web further, and everyone gets to choose the browser that best fits their browsing needs. If one company controls access to a huge share of users, however, those choices feel less accessible. Standards often get shaped just as much by market power as by technical merit. Where We’re At At the end of the day, standards get shaped by a mix of politics, technical trade-offs, and developer feedback. Consensus is messy, and it’s rarely about one side “winning.” With masonry, it might look like Google got its way, but in reality the outcome reflects input from both proposals, plus ideas from the wider community. As of this writing: Masonry will be a new display type, but must include the word “grid” in the name. The exact keyword is still being debated. The CSSWG has resolved to proceed with the proposed **item-flow** approach. Grid will be used for layout templates and explicitly placing items in them. Some details, like a possible shorthand syntax and track listing defaults, are still being discussed. Further reading This is a big topic, one that goes much deeper and further than we’ve gone here. While working on this article, a few others popped up that are very much worth your time to see the spectrum of ideas and opinions about the CSS standards process: Alex Russell’s post about the standards adoption process in browsers. Rob O’Leary’s article about struggling with text-wrap: pretty, explaining that “Baseline” doesn’t always mean consistent support in practice. David Bushell’s piece about the WHATWG. It isn’t about the CSSWG specifically, but covers similar discussions on browser politics and standards consensus. Masonry: Watching a CSS Feature Evolve originally published on CSS-Tricks, which is part of the DigitalOcean family. You should get the newsletter.
We Completely Missed width/height: stretch
- Articles
- box model
- css properties
- layout
The TL;DR is that stretch does the same thing as declaring 100%, but ignores padding when looking at the available space.
We Completely Missed width/height: stretch originally published on CSS-Tricks, which is part of the DigitalOcean family. You should get the newsletter.
The stretch keyword, which you can use with width and height (as well as min-width, max-width, min-height, and max-height, of course), was shipped in Chromium web browsers back in June 2025. But the value is actually a unification of the non-standard -webkit-fill-available and -moz-available values, the latter of which has been available to use in Firefox since 2008. The issue was that, before the @supports at-rule, there was no nice way to implement the right value for the right web browser, and I suppose we just forgot about it after that until, whoops, one day I see Dave Rupert casually put it out there on Bluesky a month ago: Layout pro Miriam Suzanne recorded an explainer shortly thereafter. It’s worth giving this value a closer look. What does stretch do? The quick answer is that stretch does the same thing as declaring 100%, but ignores padding when looking at the available space. In short, if you’ve ever wanted 100% to actually mean 100% (when using padding), stretch is what you’re looking for: div { padding: 3rem 50vw 3rem 1rem; width: 100%; /* 100% + 50vw + 1rem, causing overflow */ width: stretch; /* 100% including padding, no overflow */ } The more technical answer is that the stretch value sets the width or height of the element’s margin box (rather than the box determined by box-sizing) to match the width/height of its containing block. Note: It’s never a bad idea to revisit the CSS Box Model for a refresher on different box sizings. And on that note — yes — we can achieve the same result by declaring box-sizing: border-box, something that many of us do, as a CSS reset in fact. *, ::before, ::after { box-sizing: border-box; } I suppose that it’s because of this solution that we forgot all about the non-standard values and didn’t pay any attention to stretch when it shipped, but I actually rather like stretch and don’t touch box-sizing at all now. Yay stretch, nay box-sizing There isn’t an especially compelling reason to switch to stretch, but there are several small ones. Firstly, the Universal selector (*) doesn’t apply to pseudo-elements, which is why the CSS reset typically includes ::before and ::after, and not only are there way more pseudo-elements than we might think, but the rise in declarative HTML components means that we’ll be seeing more of them. Do you really want to maintain something like the following? *, ::after, ::backdrop, ::before, ::column, ::checkmark, ::cue (and ::cue()), ::details-content, ::file-selector-button, ::first-letter, ::first-line, ::grammar-error, ::highlight(), ::marker, ::part(), ::picker(), ::picker-icon, ::placeholder, ::scroll-button(), ::scroll-marker, ::scroll-marker-group, ::selection, ::slotted(), ::spelling-error, ::target-text, ::view-transition, ::view-transition-image-pair(), ::view-transition-group(), ::view-transition-new(), ::view-transition-old() { box-sizing: border-box; } Okay, I’m being dramatic. Or maybe I’m not? I don’t know. I’ve actually used quite a few of these and having to maintain a list like this sounds dreadful, although I’ve certainly seen crazier CSS resets. Besides, you might want 100% to exclude padding, and if you’re a fussy coder like me you won’t enjoy un-resetting CSS resets. Animating to and from stretch Opinions aside, there’s one thing that box-sizing certainly isn’t and that’s animatable. If you didn’t catch it the first time, we do transition to and from 100% and stretch: Because stretch is a keyword though, you’ll need to interpolate its size, and you can only do that by declaring interpolate-size: allow-keywords (on the :root if you want to activate interpolation globally): :root { /* Activate interpolation */ interpolate-size: allow-keywords; } div { width: 100%; transition: 300ms; &:hover { width: stretch; } } The calc-size() function wouldn’t be useful here due to the web browser support of stretch and the fact that calc-size() doesn’t support its non-standard alternatives. In the future though, you’ll be able to use width: calc-size(stretch, size) in the example above to interpolate just that specific width. Web browser support Web browser support is limited to Chromium browsers for now: Opera 122+ Chrome and Edge 138+ (140+ on Android) Luckily though, because we have those non-standard values, we can use the @supports at-rule to implement the right value for the right browser. The best way to do that (and strip away the @supports logic later) is to save the right value as a custom property: :root { /* Firefox */ @supports (width: -moz-available) { --stretch: -moz-available; } /* Safari */ @supports (width: -webkit-fill-available) { --stretch: -webkit-fill-available; } /* Chromium */ @supports (width: stretch) { --stretch: stretch; } } div { width: var(--stretch); } Then later, once stretch is widely supported, switch to: div { width: stretch; } In a nutshell While this might not exactly win Feature of the Year awards (I haven’t heard a whisper about it), quality-of-life improvements like this are some of my favorite features. If you’d rather use box-sizing: border-box, that’s totally fine — it works really well. Either way, more ways to write and organize code is never a bad thing, especially if certain ways don’t align with your mental model. Plus, using a brand new feature in production is just too tempting to resist. Irrational, but tempting and satisfying! We Completely Missed width/height: stretch originally published on CSS-Tricks, which is part of the DigitalOcean family. You should get the newsletter.
The thing about contrast-color
- Links
- color
- CSS functions
One of our favorites, Andy Clarke, on the one thing keeping the CSS contrast-color() function from true glory:
For my website design, I chose a dark blue background colour (
#212E45) and light text (#d3d5da). This
…
The thing about contrast-color originally published on CSS-Tricks, which is part of the DigitalOcean family. You should get the newsletter.
One of our favorites, Andy Clarke, on the one thing keeping the CSS contrast-color() function from true glory: For my website design, I chose a dark blue background colour (#212E45) and light text (#d3d5da). This colour is off-white to soften the contrast between background and foreground colours, while maintaining a decent level for accessibility considerations. But here’s the thing. The contrast-color() function chooses either white for dark backgrounds or black for light ones. At least to my eyes, that contrast is too high and makes reading less comfortable, at least for me. Word. White and black are two very safe colors to create contrast with another color value. But the amount of contrast between a solid white/black and any other color, while offering the most contrast, may not be the best contrast ratio overall. This was true when added a dark color scheme to my personal website. The contrast between the background color, a dark blue (hsl(238.2 53.1% 12.5%), and solid white (#fff) was too jarring for me. To tone that down, I’d want something a little less opaque than what, say hsl(100 100% 100% / .8), or 20% lighter than white. Can’t do that with contrast-color(), though. That’s why I reach for light-dark() instead: body { color: light-dark(hsl(238.2 53.1% 12.5%), hsl(100 100% 100% / .8)); } Will contrast-color() support more than a black/white duo in the future? The spec says yes: Future versions of this specification are expected to introduce more control over both the contrast algorithm(s) used, the use cases, as well as the returned color. I’m sure it’s one of those things that ‘s easier said than done, as the “right” amount of contrast is more nuanced than simply saying it’s a ratio of 4.5:1. There are user preferences to take into account, too. And then it gets into weeds of work being done on WCAG 3.0, which Danny does a nice job summarizing in a recent article detailing the shortcomings of contrast-color(). The thing about contrast-color originally published on CSS-Tricks, which is part of the DigitalOcean family. You should get the newsletter.
Getting Creative With shape-outside
- Articles
- css shapes
- images
- UI/IX Design
There are so many creative opportunities for using shape-outside that I’m surprised I see it used so rarely. So, how can you use it to add personality to a design? Here’s how I do it.
Getting Creative With shape-outside originally published on CSS-Tricks, which is part of the DigitalOcean family. You should get the newsletter.
Last time, I asked, “Why do so many long-form articles feel visually flat?” I explained that: “Images in long-form content can (and often should) do more than illustrate. They can shape how people navigate, engage with, and interpret what they’re reading. They help set the pace, influence how readers feel, and add character that words alone can’t always convey.” Then, I touched on the expressive possibilities of CSS Shapes and how, by using shape-outside, you can wrap text around an image’s alpha channel to add energy to a design and keep it feeling lively. There are so many creative opportunities for using shape-outside that I’m surprised I see it used so rarely. So, how can you use it to add personality to a design? Here’s how I do it. Patty Meltt is an up-and-coming country music sensation. My brief: Patty Meltt is an up-and-coming country music sensation, and she needed a website to launch her new album and tour. She wanted it to be distinctive-looking and memorable, so she called Stuff & Nonsense. Patty’s not real, but the challenges of designing and developing sites like hers are. Most shape-outside guides start with circles and polygons. That’s useful, but it answers only the how. Designers need the why — otherwise it’s just another CSS property. Whatever shape its subject takes, every image sits inside a box. By default, text flows above or below that box. If I float an image left or right, the text wraps around the rectangle, regardless of what’s inside. That’s the limitation shape-outside overcomes. shape-outside lets you break free from those boxes by enabling layouts that can respond to the contours of an image. That shift from images in boxes to letting the image content define the composition is what makes using shape-outside so interesting. Solid blocks of text around straight-edged images can feel static. But text that bends around a guitar or curves around a portrait creates movement, which can make a story more compelling and engaging. CSS shape-outside enables text to flow around any custom shape, including an image’s alpha channel (i.e., the transparent areas): img { float: left; width: 300px; shape-outside: url('patty.webp'); shape-image-threshold: .5; shape-margin: 1rem; } First, a quick recap. For text to flow around elements, they need to float either left or right and have their width defined. The shape-outside URL selects an image with an alpha channel, such as a PNG or WebP. The shape-image-threshold property sets the alpha channel threshold for creating a shape. Finally, there’s the shape-margin property which — believe it or not — creates a margin around the shape. Interactive examples from this article are available in my lab. Multiple image shapes When I’m adding images to a long-form article, I ask myself, “How can they help shape someone’s experience?” Flowing text around images can slow people down a little, making their experience more immersive. Visually, it brings text and image into a closer relationship, making them feel part of a shared composition rather than isolated elements. Columns without shape-outside applied to them Patty’s life story — from singing in honky-tonks to headlining stadiums — contains two sections: one about her, the other about her music. I added a tall vertical image of Patty to her biography and two smaller album covers to the music column: <section id="patty"> <div> <img src="patty.webp" alt=""> [...] </div> <div> <img src="album-1.webp" alt=""> [...] <img src="album-2.webp" alt=""> [...] </div> </section> A simple grid then creates the two columns: #patty { display: grid; grid-template-columns: 2fr 1fr; gap: 5rem; } I like to make my designs as flexible as I can, so instead of specifying image widths and margins in static pixels, I opted for percentages on those column widths so their actual size is relative to whatever the size of the container happens to be: #patty > *:nth-child(1) img { float: left; width: 50%; shape-outside: url("patty.webp"); shape-margin: 2%; } #patty > *:nth-child(2) img:nth-of-type(1) { float: left; width: 45%; shape-outside: url("album-1.webp"); shape-margin: 2%; } #patty > *:nth-child(2) img:nth-of-type(2) { float: right; width: 45%; shape-outside: url("album-2.webp"); shape-margin: 2%; } Columns with shape-outside applied to them. See this example in my lab. Text now flows around Patty’s tall image without clipping paths or polygons — just the natural silhouette of her image shaping the text. Building rotations into images. When an image is rotated using a CSS transform, ideally, browsers would reflow text around its rotated alpha channel. Sadly, they don’t, so it’s often necessary to build that rotation into the image. shape-outside with a faux-centred image For text to flow around elements, they need to be floated either to the left or right. Placing an image in the centre of the text would make Patty’s biography design more striking. But there’s no center value for floats, so how might this be possible? Patty’s image set between two text columns. See this example in my lab. Patty’s bio content is split across two symmetrical columns: #dolly { display: grid; grid-template-columns: 1fr 1fr; } To create the illusion of text flowing around both sides of her image, I first split it into two parts: one for the left and the other for the right, both of which are half, or 50%, of the original width. Splitting the image into two pieces. Then I placed one image in the left column, the other in the right: <section id="dolly"> <div> <img src="patty-left.webp" alt=""> [...] </div> <div> <img src="patty-right.webp" alt=""> [...] </div> </section> To give the illusion that text flows around both sides of a single image, I floated the left column’s half to the right: #dolly > *:nth-child(1) img { float: right; width: 40%; shape-outside: url("patty-left.webp"); shape-margin: 2%; } …and the right column’s half to the left, so that both halves of Patty’s image combine right in the middle: #dolly > *:nth-child(2) img { float: left; width: 40%; shape-outside: url("patty-right.webp"); shape-margin: 2%; } Faux-centred image. See this example in my lab. Faux background image So far, my designs for Patty’s biography have included a cut-out portrait with a clearly defined alpha channel. But, I often need to make a design that feels looser and more natural. Faux background image. See this example in my lab. Ordinarily, I would place a picture as a background-image, but for this design, I wanted the content to flow loosely around Patty and her guitar. Large featured image So, I inserted Patty’s picture as an inline image, floated it, and set its width to 100%; <section id="kenny"> <img src="patty.webp" alt=""> [...] </section> #kenny > img { float: left; width: 100%; max-width: 100%; } There are two methods I might use to flow text around Patty and her guitar. First, I might edit the image, removing non-essential parts to create a soft-edged alpha channel. Then, I could use the shape-image-threshold property to control which parts of the alpha channel form the contours for text wrapping: #kenny > img { shape-outside: url("patty.webp"); shape-image-threshold: 2; } Edited image with a soft-edged alpha channel However, this method is destructive, since much of the texture behind Patty is removed. Instead, I created a polygon clip-path and applied that as the shape-outside, around which text flows while preserving all the detail of my original image: #kenny > img { float: left; width: 100%; max-width: 100%; shape-outside: polygon(…); shape-margin: 20px; } Original image with a non-destructive clip-path. I have little time for writing polygon path points by hand, so I rely on Bennett Feely’s CSS clip-path maker. I add my image URL, draw a custom polygon shape, then copy the clip-path values to my shape-outside property. Bennett Feely’s CSS clip path maker. Text between shapes Patty Meltt likes to push the boundaries of country music, and I wanted to do the same with my design of her biography. I planned to flow text between two photomontages, where elements overlap and parts of the images spill out of their containers to create depth. Text between shapes. See this example in my lab. So, I made two montages with irregularly shaped alpha channels. Irregularly shaped alpha channels I placed both images above the content: <section id="johnny"> <img src="patty-1.webp" alt=""> <img src="patty-2.webp" alt=""> […] </section> …and used those same image URLs as values for shape-outside: #johnny img:nth-of-type(1) { float: left; width: 45%; shape-outside: url("patty-1.webp"); shape-margin: 2%; } #johnny img:nth-of-type(2) { float: right; width: 35%; shape-outside: url("img/patty-2.webp"); shape-margin: 2%; } Content now flows like a river in a country song, between the two image montages, filling the design with energy and movement. Conclusion Too often, images in long-form content end up boxed in and isolated, as if they were dropped into the page as an afterthought. CSS Shapes — and especially shape-outside — give us a chance to treat images and text as part of the same composition. This matters because design isn’t just about making things usable; it’s about shaping how people feel. Wrapping text around the curve of a guitar or the edge of a portrait slows readers down, invites them to linger, and makes their experience more immersive. It brings rhythm and personality to layouts that might otherwise feel flat. So, next time you reach for a rectangle, pause and think about how shape-outside can help turn an ordinary page into something memorable. Getting Creative With shape-outside originally published on CSS-Tricks, which is part of the DigitalOcean family. You should get the newsletter.
Same Idea, Different Paint Brush
- Articles
- inspiration
Naturally, everything looks like code when I'm staring at a blank canvas. That's whether the canvas is paper, a screen, some Figma artboard, or what have you.
Same Idea, Different Paint Brush originally published on CSS-Tricks, which is part of the DigitalOcean family. You should get the newsletter.
There’s the idiom that says everything looks like a nail when all you have is a hammer. I also like the one about worms in horseradish seeing the world as horseradish. That’s what it felt like for me as I worked on music for an album of covers I released yesterday. I was raised by my mother, a former high school art teacher (and a gifted artist in her own right), who exposed me to a lot of different tools and materials for painting and drawing. I’m convinced that’s what pointed me in the direction of web development, even though we’re talking years before the internet of AOL and 56K dial-up modems. And just as there’s art and craft to producing a creative 2D visual on paper with wet paint on a brush, there’s a level of art and craft to designing user interfaces that are written in code. You might even say there’s a poetry to code, just as there’s code to writing poetry. I’ve been painting with code for 20 years. HTML, CSS, JavaScript, and friends are my medium, and I’ve created a bunch of works since then. I know my mom made a bunch of artistic works in her 25+ years teaching and studying art. In a sense, we’re both artists using a different brush to produce works in different mediums. Naturally, everything looks like code when I’m staring at a blank canvas. That’s whether the canvas is paper, a screen, some Figma artboard, or what have you. Code is my horseradish and I’ve been marinating in this horseradish ocean for quite a while. This is what’s challenging to me about performing and producing an album of music. The work is done in a different medium. The brush is no longer code (though it can be) but sounds, be them vibrations that come from a physical instrument or digital waves that come from a programmed beat or sample. There are parallels between painting with code and painting with sound, and it is mostly a matter of approach. The concepts, tasks, and challenges are the same, but the brush and canvas are totally different. What’s in your stack? Sound is no different than the web when it comes to choosing the right tools to do the work. Just as you need a stack of technical tools to produce a website or app, you will need technical tools to capture and produce sounds, and the decision affects how that work happens. For example, my development environment might include an editor app for writing code, a virtual server to see my work locally, GitHub for version control and collaboration, some build process that compiles and deploys my code, and a host that serves the final product to everyone on the web to see. Making music? I have recording software, microphones, gobs of guitars, and an audio interface that connects them together so that the physical sounds I make are captured and converted to digital sound waves. And, of course, I need a distributor to serve the music to be heard by others just as a host would serve code to be rendered as webpages. Can your website’s technical stack be as simple as writing HTML in a plain text editor and manually uploading the file to a hosting service via FTP? Of course! Your album’s technical stack can just as easily be a boombox with a built in mic and recording. Be as indie or punk as you want! Either way, you’ve gotta establish a working environment to do the work, and that environment requires you to make decisions that affect the way you work, be it code, music, or painting for that matter. Personalize your process and make it joyful. It’s the “Recording Experience” (EX) to what we think of as Developer Experience (DX). What’re you painting on? If you’re painting, it could be paper. But what kind of paper? Is college-rule cool or do you need something more substantial with heavier card stock? You’re going to want something that supports the type of paint you’re using, whether it’s oil, water, acrylic… or lead? That wouldn’t be good. On the web, you’re most often painting on a screen that measures its space in pixel units. Screens are different than paper because they’re not limited by physical constraints. Sure, the hardware may pose a constraint as far as how large a certain screen can be. But the scene itself is limitless where we can scroll to any portion of it that is not in the current frame. But please, avoid AJAX-based infinite scrolling patterns in your work for everyone’s sake. I’m also painting music on a screen that’s as infinite as the canvas of a webpage. My recording software simply shows me a timeline and I paint sound on top of time, often layering multiple sounds at the same point in time — sound pictures, if you will. That’s simply one way to look at it. In some apps, it’s possible to view the canvas as movements that hold buckets of sound samples. Same thing with code. Authoring code is as likely to happen in a code editor you type into as it is to happen with a point-and-click setup in a visual interface that doesn’t require touching any code at all (Dreamweaver, anyone?). Heck, the kids are even “vibe” coding now without any awareness of how the code actually comes together. Or maybe you’re super low-fi and like to sketch your code before sitting behind a keyboard. How’re people using it? Web developers be like all obsessed with how their work looks on whatever device someone is using. I know you know what I’m talking about because you not only resize browsers to check responsiveness but probably also have tried opening your site (and others!) on a slew of different devices. ⚠️ Auto-playing media It’s no different with sound. I’ve listened to each song I’ve recorded countless times because the way they sound varies from speaker to speaker. There’s one song in particular that I nearly scrapped because I struggled to get it sounding good on my AirPods Max headphones that are bass-ier than your typical speaker. I couldn’t handle the striking difference between that and a different output source that might be more widely used, like car speakers. Will anyone actually listen to that song on a pair of AirPods Max headphones? Probably not. Then again, I don’t know if anyone is viewing my sites on some screen built into their fridge or washing machine, but you don’t see me rushing out to test that. I certainly do try to look at the sites I make on as many devices as possible to make sure nothing is completely busted. You can’t control what device someone uses to look at a website. You can’t control what speakers someone uses to listen to music. There’s a level of user experience and quality assurance that both fields share. There’s a whole other layer about accessibility and inclusive design that fits here as well. There is one big difference: The cringe of listening to your own voice. I never feel personally attached to the websites I make, but listening to my sounds takes a certain level of vulnerability and humility that I have to cope with. The creative process I mentioned it earlier, but I think the way music is created shares a lot of overlap with how websites are generally built. For example, a song rarely (if ever) comes fully formed. Most accounts I read of musicians discussing their creative process talk about the “magic” of a melody in which it pretty much falls in the writer’s lap. It often starts as the germ of an idea and it might take minutes, days, weeks, months, or even years to develop it into a comprehensive piece of work. I keep my phone’s Voice Memos app at the ready so that I’m able to quickly “sketch” ideas that strike me in the moment. It might simply be something I hum into the phone. It could be strumming a few chords on the guitar that sound really nice together. Whatever it is, I like to think of those recordings as little low-fidelity sketches, not totally unlike sketching website layouts and content blocks with paper and pencil. I’m partial to sketching websites on paper and pencil before jumping straight into code. It’s go time! And, of course, there’s what you do when it’s time to release your work. I’m waist-deep in this part of the music and I can most definitely say that shipping an album has as many moving parts, if not more, than deploying a website. But they both require a lot of steps and dependencies that complicate the process. It’s no exaggeration that I’m more confused and lost about music publishing and distribution than I ever felt learning about publishing and deploying websites. It’s perfectly understandable that someone might get lost when hosting a website. There’s so many ways to go about it, and the “right” way is shrouded in the cloak of “it depends” based on what you’re trying to accomplish. Well, same goes for music, apparently. I’ve signed up for a professional rights organization that establishes me as the owner of the recordings, very similar to how I need to register myself as the owner of a particular web domain. On top of that, I’ve enlisted the help of a distributor to make the songs available for anyone to hear and it is exactly the same concept as needing a host to distribute your website over the wire. I just wish I could programmatically push changes to my music catalog. Uploading and configuring the content for an album release reminds me so much of manually uploading hosted files with FTP. Nothing wrong with that, of course, but it’s certainly an opportunity to improve the developer recording experience. So, what? I guess what triggered this post is the realization that I’ve been in a self-made rut. Not a bad one, mind you, but more like being run by an automated script programmed to run efficiently in one direction. Working on a music project forced me into a new context where my development environment and paint brush of code are way less effective than what I need to get the job done. It’s sort of like breaking out of the grid. My layout has been pretty fixed for some time and I’m drawing new grid tracks that open my imagination up to a whole new way of work that’s been right in front of me the entire time, but drowned in my horseradish ocean. There’s so much we can learn from other disciplines, be it music, painting, engineering, architecture, working on cars… turns out front-end development is like a lot of other things. So, what’s your horseradish and what helps you look past it? Same Idea, Different Paint Brush originally published on CSS-Tricks, which is part of the DigitalOcean family. You should get the newsletter.
Touring New CSS Features in Safari 26
- Articles
- browser
- news
- safari
Safari 26 adds:75 new features, 3 deprecations, and 171 other improvements. Here's all the CSS goodness you'll want to know about.
Touring New CSS Features in Safari 26 originally published on CSS-Tricks, which is part of the DigitalOcean family. You should get the newsletter.
A couple of days ago, the Apple team released Safari 26.0! Is it a big deal? I mean, browsers release new versions all the time, where they sprinkle in a couple or few new features. They are, of course, all useful, but there aren’t usually a lot of “big leaps” between versions. Safari 26 is different, though. It introduces a lot of new stuff. To be precise, it adds: 75 new features, 3 deprecations, and 171 other improvements. I’d officially call that a big deal. The WebKit blog post does an amazing job breaking down each of the new (not only CSS) features. But again, there are so many that the new stuff coming to CSS deserves its own spotlight. So, today I want to check (and also try) what I think are the most interesting features coming to Safari. If you are like me and don‘t have macOS to test Safari, you can use Playwright instead. What’s new (to Safari)? Safari 26 introduces several features you may already know from prior Chrome releases. And… I can’t blame Safari for seemingly lagging behind because Chrome is shipping new CSS at a scarily fast pace. I appreciate that browsers stagger releases so they can refine things against each other. Remember when Chrome initially shipped position-area as inset-area? We got better naming between the two implementations. I think what you’ll find (as I did) that many of these overlapping features are part of the bigger effort towards Interop 2025, something WebKit is committed to. So, let’s look specifically at what’s new in Safari 26… at least that’s new to Safari. Anchor positioning Anchor positioning is one of my favorite features (I wrote the guide on it!), so I am so glad it’s arrived in Safari. We are now one step closer to widely available support which means we’re that much closer to using anchor positioning in our production work. With CSS Anchor Positioning, we can attach an absolutely-positioned element (that we may call a “target”) to another element (that we may call an “anchor”). This makes creating things like tooltips, modals, and pop-ups trivial in CSS, although it can be used for a variety of layouts. Using anchor positioning, we can attach any two elements, like these, together. It doesn’t even matter where they are in the markup. <div class="anchor">anchor</div> <div class="target">target</div> Heads up: Even though the source order does not matter for positioning, it does for accessibility, so it’s a good idea to establish a relationship between the anchor and target using ARIA attributes for better experiences that rely on assistive tech. We register the .anchor element using the anchor-name property, which takes a dashed ident. We then use that ident to attach the .target to the .anchor using the position-anchor property. .anchor { anchor-name: --my-anchor; /* the ident */ } .target { position: absolute; position-anchor: --my-anchor; /* attached! */ } This positions the .target at the center of the .anchor — again, no matter the source order! If we want to position it somewhere else, the simplest way is using the position-area property. With position-area, we can define a region around the .anchor and place the .target in it. Think of it like drawing a grid of squares that are mapped to the .anchor‘s center, top, right, bottom and left. For example, if we wish to place the target at the anchor’s top-right corner, we can write… .target { /* ... */ position-area: top right; } This is just a taste since anchor positioning is a world unto itself. I’d encourage you to read our full guide on it. Scroll-driven animations Scroll-driven animations link CSS animations (created from @keyframes) to an element’s scroll position. So instead of running an animation for a given time, the animation will depend on where the user scrolls. We can link an animation to two types of scroll-driven events: Linking the animation to a scrollable container using the scroll() function. Linking the animation to an element’s position on the viewport using the view() function. Both of these functions are used inside the animation-timeline, which links the animation progress to the type of timeline we’re using, be it scroll or view. What’s the difference? With scroll(), the animation runs as the user scrolls the page. The simplest example is one of those reading bars that you might see grow as you read down the page. First, we define our everyday animation and add it to the bar element: @keyframes grow { from { transform: scaleX(0); } to { transform: scaleX(1); } } .progress { transform-origin: left center; animation: grow linear; } Note: I am setting transform-origin to left so it the animation progresses from the left instead of expanding from the center. Then, instead of giving the animation a duration, we can plug it into the scroll position like this: .progress { /* ... */ animation-timeline: scroll(); } Assuming you’re using Safari 26 or the latest version of Chrome, the bar grows in width from left to right as you scroll down the viewport. The view() function is similar, but it bases the animation on the element’s position when it is in view of the viewport. That way, an animation can start or stop at specific points on the page. Here’s an example making images “pop” up as they enter view. @keyframes popup { from { opacity: 0; transform: translateY(100px); } to { opacity: 1; transform: translateY(0px); } } img { animation: popup linear; } Then, to make the animation progress as the element enters the viewport, we plug the animation-timeline to view(). img { animation: popup linear; animation-timeline: view(); } If we leave like this, though, the animation ends just as the element leaves the screen. The user doesn’t see the whole thing! What we want is for the animation to end when the user is in the middle of the viewport so the full timeline runs in view. This is where we can reach for the animation-range property. It lets us set the animation’s start and end points relative to the viewport. In this specific example, let’s say I want the animation to start when the element enters the screen (i.e., the 0% mark) and finishes a little bit before it reaches the direct center of the viewport (we’ll say 40%): img { animation: popup linear; animation-timeline: view(); animation-range: 0% 40%; } Once again, scroll-driven animations go way beyond these two basic examples. For a quick intro to all there is to them, I recommend Geoff’s notes. I feel safer using scroll-drive animations in my production work because it’s more of a progressive enhancement that won’t break an experience even if it is not supported by the browser. Even so, someone may prefer reduced (or no) animation at all, meaning we’d better progressively enhance it anyway with prefers-reduced-motion. The progress() function This is another feature we got in Chrome that has made its way to Safari 26. Funny enough, I missed it in Chrome when it released a few months ago, so it makes me twice as happy to see such a handy feature baked into two major browsers. The progress() function tells you how much a value has progressed in a range between a starting point and an ending point: progress(<value>, <start>, <end>) If the <value> is less than the <start>, the result is 0. If the <value> reaches the <end>, the result is 1. Anything in between returns a decimal between 0 and 1. Technically, this is something we can already do in a calc()-ulation: calc((value - start) / (end - start)) But there’s a key difference! With progress(), we can calculate values from mixed data types (like adding px to rem), which isn’t currently possible with calc(). For example, we can get the progress value formatted in viewport units from a numeric range formatted in pixels: progress(100vw, 400px, 1000px); …and it will return 0 when the viewport is 400px, and as the screen grows to 1000px, it progresses to 1. This means it can typecast different units into a number, and as a consequence, we can transition properties like opacity (which takes a number or percentage) based on the viewport (which is a distance length). There’s another workaround that accomplishes this using tan() and atan2() functions. I have used that approach before to create smooth viewport transitions. But progress() greatly simplifies the work, making it much more maintainable. Case in point: We can orchestrate multiple animations as the screen size changes. This next demo takes one of the demos I made for the article about tan() and atan2(), but swaps that out with progress(). Works like a charm! That’s a pretty wild example. Something more practical might be reducing an image’s opacity as the screen shrinks: img { opacity: clamp(0.25, progress(100vw, 400px, 1000px), 1); } Go ahead and resize the demo to update the image’s opacity, assuming you’re looking at it in Safari 26 or the latest version of Chrome. I’ve clamp()-ed the progress() between 0.25 and 1. But, by default, progress() already clamps the <value> between 0 and 1. According to the WebKit release notes, the current implementation isn’t clamped by default, but upon testing, it does seem to be. So, if you’re wondering why I’m clamping something that’s supposedly clamped already, that’s why. An unclamped version may come in the future, though. Self-alignment in absolute positioning And, hey, check this out! We can align-self and justify-self content inside absolutely-positioned elements. This isn’t as big a deal as the other features we’ve looked at, but it does have a handy use case. For example, I sometimes want to place an absolutely-positioned element directly in the center of the viewport, but inset-related properties (i.e., top, right, bottom, left, etc.) are relative to the element’s top-left corner. That means we don’t get perfectly centered with something like this as we’d expect: .absolutely-positioned { position: absolute; top: 50%; left: 50%; } From here, we could translate the element by half to get things perfectly centered. But now we have the center keyword supported by align-self and justify-self, meaning fewer moving pieces in the code: .absolutely-positioned { position: absolute; justify-self: center; } Weirdly enough, I noticed that align-self: center doesn’t seem to center the element relative to the viewport, but instead relative to itself. I found out that can use the anchor-center value to center the element relative to its default anchor, which is the viewport in this specific example: .absolutely-positioned { position: absolute; align-self: anchor-center; justify-self: center; } And, of course, place-self is a shorthand for the align-self and justify-self properties, so we could combine those for brevity: .absolutely-positioned { position: absolute; place-self: anchor-center center; } What’s new (for the web)? Safari 26 isn’t just about keeping up with Chrome. There’s a lot of exciting new stuff in here that we’re getting our hands on for the first time, or that is refined from other browser implementations. Let’s look at those features. The constrast-color() function The constrast-color() isn’t new by any means. It’s actually been in Safari Technology Preview since 2021 where it was originally called color-contrast(). In Safari 26, we get the updated naming as well as some polish. Given a certain color value, contrast-color() returns either white or black, whichever produces a sharper contrast with that color. So, if we were to provide coral as the color value for a background, we can let the browser decide whether the text color is more contrasted with the background as either white or black: h1 { --bg-color: coral; background-color: var(--bg-color); color: contrast-color(var(--bg-color)); } Our own Daniel Schwarz recently explored the contrast-color() function and found it’s actually not that great at determining the best contrast between colors: Undoubtedly, the number one shortcoming is that contrast-color() only resolves to either black or white. If you don’t want black or white, well… that sucks. It sucks because there are cases where neither white nor black produces enough contrast with the provided color to meet WCAG color contrast guidelines. There is an intent to extend contrast-color() so it can return additional color values, but there still would be concerns about how exactly contrast-color() arrives at the “best” color, since we would still need to take into consideration the font’s width, size, and even family. Always check the actual contrast! So, while it’s great to finally have constrat-color(), I do hope we see improvements added in the future. Pretty text wrapping Safari 26 also introduces text-wrap: pretty, which is pretty (get it?) straightforward: it makes paragraphs wrap in a prettier way. You may remember that Chrome shipped this back in 2023. But take notice that there is a pretty (OK, that’s the last time) big difference between the implementations. Chrome only avoids typographic orphans (short last lines). Safari does more to prettify the way text wraps: Prevents short lines. Avoids single words at the end of the paragraph. Improves rag. Keeps each line relatively the same length. Reduces hyphenation. When enabled, hyphenation improves rag but also breaks words apart. In general, hyphenation should be kept to a minimum. The WebKit blog gets into much greater detail if you’re curious about what considerations they put into it. Safari takes additional actions to ensure “pretty” text wrapping, including the overall ragging along the text. This is just the beginning! I think these are all the CSS features coming to Safari that you should look out for, but I don’t want you to think they are the only features in the release. As I mentioned at the top, we’re talking about 75 new Web Platform features, including HDR Images, support for SVG favicons, logical property support for overflow properties, margin trimming, and much, much more. It’s worth perusing the full release notes. Touring New CSS Features in Safari 26 originally published on CSS-Tricks, which is part of the DigitalOcean family. You should get the newsletter.
Recreating Gmail’s Google Gemini Animation
- Articles
- animation
John Rhea challenged himself to recreate the fancy button using the new CSS shape() function sprinkled with animation to get things pretty close.
Recreating Gmail’s Google Gemini Animation originally published on CSS-Tricks, which is part of the DigitalOcean family. You should get the newsletter.
I always see this Google Gemini button up in the corner in Gmail. When you hover over it, it does this cool animation where the little four-pointed star spins and the outer shape morphs between a couple different shapes that are also spinning. I challenged myself to recreate the button using the new CSS shape() function sprinkled with animation to get things pretty close. Let me walk you through it. Drawing the Shapes Breaking it down, we need five shapes in total: Four-pointed star Flower-ish thing (yes, that’s the technical term) Cylinder-ish thing (also the correct technical term) Rounded hexagon Circle I drew these shapes in a graphics editing program (I like Affinity Designer, but any app that lets you draw vector shapes should work), outputted them in SVG, and then used a tool, like Temani Afif’s generator, to translate the SVG paths the program generated to the CSS shape() syntax. Now, before I exported the shapes from Affinity Designer, I made sure the flower, hexagon, circle, and cylinder all had the same number of anchor points. If they don’t have the same number, then the shapes will jump from one to the next and won’t do any morphing. So, let’s use a consistent number of anchor points in each shape — even the circle — and we can watch these shapes morph into each other. I set twelve anchor points on each shape because that was the highest amount used (the hexagon had two points near each curved corner). Something related (and possibly hard to solve, depending on your graphics program) is that some of my shapes were wildly contorted when animating between shapes. For example, many shapes became smaller and began spinning before morphing into the next shape, while others were much more seamless. I eventually figured out that the interpolation was matching each shape’s starting point and continued matching points as it followed the shape. The result is that the matched points move between shapes, so if the starting point for one shape is on opposite side of the starting point of the second shape, a lot of movement is necessary to transition from one shape’s starting point to the next shape’s starting point. Luckily, the circle was the only shape that gave me trouble, so I was able to spin it (with some trial and error) until its starting point more closely matched the other starting points. Another issue I ran into was that the cylinder-ish shape had two individual straight lines in shape() with line commands rather than using the curve command. This prevented the animation from morphing into the next shape. It immediately snapped to the next image without animating the transition, skipping ahead to the next shape (both when going into the cylinder and coming out of it). I went back into Affinity Designer and ever-so-slightly added curvature to the two lines, and then it morphed perfectly. I initially thought this was a shape() quirk, but the same thing happened when I attempted the animation with the path() function, suggesting it’s more an interpolation limitation than it is a shape() limitation. Once I finished adding my shape() values, I defined a CSS variable for each shape. This makes the later uses of each shape() more readable, not to mention easier to maintain. With twelve lines per shape the code is stinkin’ long (technical term) so we’ve put it behind an accordion menu. View Shape Code :root { --hexagon: shape( evenodd from 6.47% 67.001%, curve by 0% -34.002% with -1.1735% -7.7% / -1.1735% -26.302%, curve by 7.0415% -12.1965% with 0.7075% -4.641% / 3.3765% -9.2635%, curve by 29.447% -17.001% with 6.0815% -4.8665% / 22.192% -14.1675%, curve by 14.083% 0% with 4.3725% -1.708% / 9.7105% -1.708%, curve by 29.447% 17.001% with 7.255% 2.8335% / 23.3655% 12.1345%, curve by 7.0415% 12.1965% with 3.665% 2.933% / 6.334% 7.5555%, curve by 0% 34.002% with 1.1735% 7.7% / 1.1735% 26.302%, curve by -7.0415% 12.1965% with -0.7075% 4.641% / -3.3765% 9.2635%, curve by -29.447% 17.001% with -6.0815% 4.8665% / -22.192% 14.1675%, curve by -14.083% 0% with -4.3725% 1.708% / -9.7105% 1.708%, curve by -29.447% -17.001% with -7.255% -2.8335% / -23.3655% -12.1345%, curve by -7.0415% -12.1965% with -3.665% -2.933% / -6.334% -7.5555%, close ); --flower: shape( evenodd from 17.9665% 82.0335%, curve by -12.349% -32.0335% with -13.239% -5.129% / -18.021% -15.402%, curve by -0.0275% -22.203% with -3.1825% -9.331% / -3.074% -16.6605%, curve by 12.3765% -9.8305% with 2.3835% -4.3365% / 6.565% -7.579%, curve by 32.0335% -12.349% with 5.129% -13.239% / 15.402% -18.021%, curve by 20.4535% -0.8665% with 8.3805% -2.858% / 15.1465% -3.062%, curve by 11.58% 13.2155% with 5.225% 2.161% / 9.0355% 6.6475%, curve by 12.349% 32.0335% with 13.239% 5.129% / 18.021% 15.402%, curve by 0.5715% 21.1275% with 2.9805% 8.7395% / 3.0745% 15.723%, curve by -12.9205% 10.906% with -2.26% 4.88% / -6.638% 8.472%, curve by -32.0335% 12.349% with -5.129% 13.239% / -15.402% 18.021%, curve by -21.1215% 0.5745% with -8.736% 2.9795% / -15.718% 3.0745%, curve by -10.912% -12.9235% with -4.883% -2.2595% / -8.477% -6.6385%, close ); --cylinder: shape( evenodd from 10.5845% 59.7305%, curve by 0% -19.461% with -0.113% -1.7525% / -0.11% -18.14%, curve by 10.098% -26.213% with 0.837% -10.0375% / 3.821% -19.2625%, curve by 29.3175% -13.0215% with 7.2175% -7.992% / 17.682% -13.0215%, curve by 19.5845% 5.185% with 7.1265% 0% / 13.8135% 1.887%, curve by 9.8595% 7.9775% with 3.7065% 2.1185% / 7.035% 4.8195%, curve by 9.9715% 26.072% with 6.2015% 6.933% / 9.4345% 16.082%, curve by 0% 19.461% with 0.074% 1.384% / 0.0745% 17.7715%, curve by -13.0065% 29.1155% with -0.511% 11.5345% / -5.021% 21.933%, curve by -26.409% 10.119% with -6.991% 6.288% / -16.254% 10.119%, curve by -20.945% -5.9995% with -7.6935% 0% / -14.8755% -2.199%, curve by -8.713% -7.404% with -3.255% -2.0385% / -6.1905% -4.537%, curve by -9.7575% -25.831% with -6.074% -6.9035% / -9.1205% -15.963%, close ); --star: shape( evenodd from 50% 24.787%, curve by 7.143% 18.016% with 0% 0% / 2.9725% 13.814%, curve by 17.882% 7.197% with 4.171% 4.2025% / 17.882% 7.197%, curve by -17.882% 8.6765% with 0% 0% / -13.711% 4.474%, curve by -7.143% 16.5365% with -4.1705% 4.202% / -7.143% 16.5365%, curve by -8.6115% -16.5365% with 0% 0% / -4.441% -12.3345%, curve by -16.4135% -8.6765% with -4.171% -4.2025% / -16.4135% -8.6765%, curve by 16.4135% -7.197% with 0% 0% / 12.2425% -2.9945%, curve by 8.6115% -18.016% with 4.1705% -4.202% / 8.6115% -18.016%, close ); --circle: shape( evenodd from 13.482% 79.505%, curve by -7.1945% -12.47% with -1.4985% -1.8575% / -6.328% -10.225%, curve by 0.0985% -33.8965% with -4.1645% -10.7945% / -4.1685% -23.0235%, curve by 6.9955% -12.101% with 1.72% -4.3825% / 4.0845% -8.458%, curve by 30.125% -17.119% with 7.339% -9.1825% / 18.4775% -15.5135%, curve by 13.4165% 0.095% with 4.432% -0.6105% / 8.9505% -0.5855%, curve by 29.364% 16.9% with 11.6215% 1.77% / 22.102% 7.9015%, curve by 7.176% 12.4145% with 3.002% 3.7195% / 5.453% 7.968%, curve by -0.0475% 33.8925% with 4.168% 10.756% / 4.2305% 22.942%, curve by -7.1135% 12.2825% with -1.74% 4.4535% / -4.1455% 8.592%, curve by -29.404% 16.9075% with -7.202% 8.954% / -18.019% 15.137%, curve by -14.19% -0.018% with -4.6635% 0.7255% / -9.4575% 0.7205%, curve by -29.226% -16.8875% with -11.573% -1.8065% / -21.9955% -7.9235%, close ); } If all that looks like gobbledygook to you, it largely does to me too (and I wrote the shape() Almanac entry). As I said above, I converted them from stuff I drew to shape()s with a tool. If you can recognize the shapes from the custom property names, then you’ll have all you need to know to keep following along. Breaking Down the Animation After staring at the Gmail animation for longer than I would like to admit, I was able to recognize six distinct phases: First, on hover: The four-pointed star spins to the right and changes color. The fancy blue shape spreads out from underneath the star shape. The fancy blue shape morphs into another shape while spinning. The purplish color is wiped across the fancy blue shape. Then, after hover: The fancy blue shape contracts (basically the reverse of Phase 2). The four-pointed star spins left and returns to its initial color (basically the reverse of Phase 1). That’s the run sheet we’re working with! We’ll write the CSS for all that in a bit, but first I’d like to set up the HTML structure that we’re hooking into. The HTML I’ve always wanted to be one of those front-enders who make jaw-dropping art out of CSS, like illustrating the Sistine chapel ceiling with a single div (cue someone commenting with a CodePen doing just that). But, alas, I decided I needed two divs to accomplish this challenge, and I thank you for looking past my shame. To those of you who turned up your nose and stopped reading after that admission: I can safely call you a Flooplegerp and you’ll never know it. (To those of you still with me, I don’t actually know what a Flooplegerp is. But I’m sure it’s bad.) Because the animation needs to spread out the blue shape from underneath the star shape, they need to be two separate shapes. And we can’t shrink or clip the main element to do this because that would obscure the star. So, yeah, that’s why I’m reaching for a second div: to handle the fancy shape and how it needs to move and interact with the star shape. <div id="geminianimation"> <div></div> </div> The Basic CSS Styling Each shape is essentially defined with the same box with the same dimensions and margin spacing. #geminianimation { width: 200px; aspect-ratio: 1/1; margin: 50px auto; position: relative; } We can clip the box to a particular shape using a pseudo-element. For example, let’s clip a star shape using the CSS variable (--star) we defined for it and set a background color on it: #geminianimation { width: 200px; aspect-ratio: 1; margin: 50px auto; position: relative; &::before { content: ""; clip-path: var(--star); width: 100%; height: 100%; position: absolute; background-color: #494949; } } We can hook into the container’s child div and use it to establish the animation’s starting shape, which is the flower (clipped with our --flower variable): #geminianimation div { width: 100%; height: 100%; clip-path: var(--flower); background: linear-gradient(135deg, #217bfe, #078efb, #ac87eb, #217bfe); } What we get is a star shape stacked right on top of a flower shape. We’re almost done with our initial CSS, but in order to recreate the animated color wipes, we need a much larger surface that allows us to “change” colors by moving the background gradient’s position. Let’s move the gradient so that it is declared on a pseudo element instead of the child div, and size it up by 400% to give us additional breathing room. #geminianimation div { width: 100%; height: 100%; clip-path: var(--flower); &::after { content: ""; background: linear-gradient(135deg, #217bfe, #078efb, #ac87eb, #217bfe); width: 400%; height: 400%; position: absolute; } } Now we can clearly see how the shapes are positioned relative to each other: Animating Phases 1 and 6 Now, I’ll admit, in my own hubris, I’ve turned up my very own schnoz at the humble transition property because my thinking is typically, Transitions are great for getting started in animation and for quick things, but real animations are done with CSS keyframes. (Perhaps I, too, am a Flooplegerp.) But now I see the error of my ways. I can write a set of keyframes that rotate the star 180 degrees, turn its color white(ish), and have it stay that way for as long as the element is hovered. What I can’t do is animate the star back to what it was when the element is un-hovered. I can, however, do that with the transition property. To do this, we add transition: 1s ease-in-out; on the ::before, adding the new background color and rotating things on :hover over the #geminianimation container. This accounts for the first and sixth phases of the animation we outlined earlier. #geminianimation { &::before { /* Existing styles */ transition: 1s ease-in-out; } &:hover { &::before { transform: rotate(180deg); background-color: #FAFBFE; } } } Animating Phases 2 and 5 We can do something similar for the second and fifth phases of the animation since they are mirror reflections of each other. Remember, in these phases, we’re spreading and contracting the fancy blue shape. We can start by shrinking the inner div’s scale to zero initially, then expand it back to its original size (scale: 1) on :hover (again using transitions): #geminianimation { div { scale: 0; transition: 1s ease-in-out; } &:hover { div { scale: 1; } } Animating Phase 3 Now, we very well could tackle this with a transition like we did the last two sets, but we probably should not do it… that is, unless you want to weep bitter tears and curse the day you first heard of CSS… not that I know from personal experience or anything… ha ha… ha. CSS keyframes are a better fit here because there are multiple states to animate between that would require defining and orchestrating several different transitions. Keyframes are more adept at tackling multi-step animations. What we’re basically doing is animating between different shapes that we’ve already defined as CSS variables that clip the shapes. The browser will handle interpolating between the shapes, so all we need is to tell CSS which shape we want clipped at each phase (or “section”) of this set of keyframes: @keyframes shapeshift { 0% { clip-path: var(--circle); } 25% { clip-path: var(--flower); } 50% { clip-path: var(--cylinder); } 75% { clip-path: var(--hexagon); } 100% { clip-path: var(--circle); } } Yes, we could combine the first and last keyframes (0% and 100%) into a single step, but we’ll need them separated in a second because we also want to animate the rotation at the same time. We’ll set the initial rotation to 0turn and the final rotation 1turn so that it can keep spinning smoothly as long as the animation is continuing: @keyframes shapeshift { 0% { clip-path: var(--circle); rotate: 0turn; } 25% { clip-path: var(--flower); } 50% { clip-path: var(--cylinder); } 75% { clip-path: var(--hexagon); } 100% { clip-path: var(--circle); rotate: 1turn; } } Note: Yes, turn is indeed a CSS unit, albeit one that often goes overlooked. We want the animation to be smooth as it interpolates between shapes. So, I’m setting the animation’s timing function with ease-in-out. Unfortunately, this will also slow down the rotation as it starts and ends. However, because we’re both beginning and ending with the circle shape, the fact that the rotation slows coming out of 0% and slows again as it heads into 100% is not noticeable — a circle looks like a circle no matter its rotation. If we were ending with a different shape, the easing would be visible and I would use two separate sets of keyframes — one for the shape-shift and one for the rotation — and call them both on the #geminianimation child div . #geminianimation:hover { div { animation: shapeshift 5s ease-in-out infinite forwards; } } Animating Phase 4 That said, we still do need one more set of keyframes, specifically for changing the shape’s color. Remember how we set a linear gradient on the parent container’s ::after pseudo, then we also increased the pseudo’s width and height? Here’s that bit of code again: #geminianimation div { width: 100%; height: 100%; clip-path: var(--flower); &::after { content: ""; background: linear-gradient(135deg, #217bfe, #078efb, #ac87eb, #217bfe); width: 400%; height: 400%; position: absolute; } } The gradient is that large because we’re only showing part of it at a time. And that means we can translate the gradient’s position to move the gradient at certain keyframes. 400% can be nicely divided into quarters, so we can move the gradient by, say, three-quarters of its size. Since its parent, the #geminianimation div, is already spinning, we don’t need any fancy movements to make it feel like the color is coming from different directions. We just translate it linearly and the spin adds some variability to what direction the color wipe comes from. @keyframes gradientMove { 0% { translate: 0 0; } 100% { translate: -75% -75%; } } One final refinement Instead of using the flower as the default shape, let’s change it to circle. This smooths things out when the hover interaction causes the animation to stop and return to its initial position. And there you have it: Wrapping up We did it! Is this exactly how Google accomplished the same thing? Probably not. In all honesty, I never inspected the animation code because I wanted to approach it from a clean slate and figure out how I would do it purely in CSS. That’s the fun thing about a challenge like this: there are different ways to accomplish the same thing (or something similar), and your way of doing it is likely to be different than mine. It’s fun to see a variety of approaches. Which leads me to ask: How would you have approached the Gemini button animation? What considerations would you take into account that maybe I haven’t? Recreating Gmail’s Google Gemini Animation originally published on CSS-Tricks, which is part of the DigitalOcean family. You should get the newsletter.
CSS Typed Arithmetic
- Articles
- animation
- CSS functions
- math
Starting in Chrome 140, we'll be able to calculate numeric values with mixed data types. Sounds small, but Amit demonstrates how big a deal this is, calling it Computational CSS.
CSS Typed Arithmetic originally published on CSS-Tricks, which is part of the DigitalOcean family. You should get the newsletter.
CSS typed arithmetic is genuinely exciting! It opens the door to new kinds of layout composition and animation logic we could only hack before. The first time I published something that leaned on typed arithmetic was in this animation: But before we dive into what is happening in there, let’s pause and get clear on what typed arithmetic actually is and why it matters for CSS. Browser Support: The CSS feature discussed in this article, typed arithmetic, is on the cutting edge. As of the time of writing, browser support is very limited and experimental. To ensure all readers can understand the concepts, the examples throughout this article are accompanied by videos and images, demonstrating the results for those whose browsers do not yet support this functionality. Please check resources like MDN or Can I Use for the latest support status. The Types If you really want to get what a “type” is in CSS, think about TypeScript. Now forget about TypeScript. This is a CSS article, where semantics actually matter. In CSS, a type describes the unit space a value lives in, and is called a data-type. Every CSS value belongs to a specific type, and each CSS property and function only accepts the data type (or types) it expects. Properties like opacity or scale use a plain <number> with no units. width, height, other box metrics, and many additional properties use <length> units like px, rem, cm, etc. Functions like rotate() or conic-gradient() use an <angle> with deg, rad, or turn. animation and transition use <time> for their duration in seconds (s) or milliseconds (ms). Note: You can identify CSS data types in the specs, on MDN, and other official references by their angle brackets: <data-type>. There are many more data types like <percentage>, <frequency>, and <resolution>, but the types mentioned above cover most of our daily use cases and are all we will need for our discussion today. The mathematical concept remains the same for (almost) all types. I say “almost” all types for one reason: not every data type is calculable. For instance, types like <color>, <string>, or <image> cannot be used in mathematical operations. An expression like "foo" * red would be meaningless. So, when we discuss mathematics in general, and typed arithmetic in particular, it is crucial to use types that are inherently calculable, like <length>, <angle>, or <number>. The Rules of Typed Arithmetic Even when we use calculable data types, there are still limitations and important rules to keep in mind when performing mathematical operations on them. Addition and Subtraction Sadly, a mix-and-match approach doesn’t really work here. Expressions like calc(3em + 45deg) or calc(6s - 3px) will not produce a logical result. When adding or subtracting, you must stick to the same data type. Of course, you can add and subtract different units within the same type, like calc(4em + 20px) or calc(300deg - 1rad). Multiplication With multiplication, you can only multiply by a plain <number> type. For example: calc(3px * 7), calc(10deg * 6), or calc(40ms * 4). The result will always adopt the type and unit of the first value, with the new value being the product of the multiplication. But why can you only multiply by a number? If we tried something like calc(10px * 10px) and assumed it followed “regular” math, we would expect a result of 100px². However, there are no squared pixels in CSS, and certainly no square degrees (though that could be interesting…). Because such a result is invalid, CSS only permits multiplying typed values by unitless numbers. Division Here, too, mixing and matching incompatible types is not allowed, and you can divide by a number just as you can multiply a number. But what happens when you divide a type by the same type? Hint: this is where things get interesting. Again, if we were thinking in terms of regular math, we would expect the units to cancel each other out, leaving only the calculated value. For example, 90x / 6x = 15. In CSS, however, this isn’t the case. Sorry, it wasn’t the case. Previously, an expression like calc(70px / 10px) would have been invalid. But starting with Safari 18.2 and Chrome 140 (and hopefully soon in all other browsers), this expression now returns a valid number, which winds up being 7 in this case. This is the major change that typed arithmetic enables. Is that all?! That little division? Is that the big thing I called “genuinely exciting”? Yes! Because this one little feature opens the door to a world of creative possibilities. Case in point: we can convert values from one data type to another and mathematically condition values of one type based on another, just like in the swirl example I demoed at the top. So, to understand what is happening there, let’s look at a more simplified swirl: I have a container<div> with 36 <i> elements in the markup that are arranged in a spiral with CSS. Each element has an angle relative to the center point, rotate(var(--angle)), and a distance from that center point, translateX(var(--distance)). The angle calculation is quite direct. I take the index of each <i> element using sibling-index() and multiply it by 10deg. So, the first element with an index of 1 will be rotated by 10 degrees (1 * 10deg), the second by 20 degrees (2 * 10deg), the third by 30 degrees (3 * 10deg), and so on. i { --angle: calc(sibling-index() * 10deg); } As for the distance, I want it to be directly proportional to the angle. I first use typed arithmetic to divide the angle by 360 degrees: var(--angle) / 360deg. This returns the angle’s value, but as a unitless number, which I can then use anywhere. In this case, I can multiply it by a <length> value (e.g. 180px) that determines the element’s distance from the center point. i { --angle: calc(sibling-index() * 10deg); --distance: calc(var(--angle) / 360deg * 180px); } This way, the ratio between the angle and the distance remains constant. Even if we set the angle of each element differently, or to a new value, the elements will still align on the same spiral. The Importance of the Divisor’s Unit It’s important to clarify that when using typed arithmetic this way, you get a unitless number, but its value is relative to the unit of the divisor. In our simplified spiral, we divided the angle by 360deg. The resulting unitless number, therefore, represents the value in degrees. If we had divided by 1turn instead, the result would be completely different — even though 1turn is equivalent to 360deg, the resulting unitless number would represent the value in turns. A clearer example can be seen with <length> values. Let’s say we are working with a screen width of 1080px. If we divide the screen width (100vw) by 1px, we get the number of pixels that fit into the screen width, which is, of course, 1080. calc(100vw / 1px) /* 1080 */ However, if we divide that same width by 1em (and assume a font size of 16px), we get the number of em units that fit across the screen. calc(100vw / 1em) /* 67.5 */ The resulting number is unitless in both cases, but its meaning is entirely dependent on the unit of the value we divided by. From Length to Angle Of course, this conversion doesn’t have to be from a type <angle> to a type <length>. Here is an example that calculates an element’s angle based on the screen width (100vw), creating a new and unusual kind of responsiveness. And get this: There are no media queries in here! it’s all happening in a single line of CSS doing the calculations. To determine the angle, I first define the width range I want to work within. clamp(300px, 100vw, 700px) gives me a closed range of 400px, from 300px to 700px. I then subtract 700px from this range, which gives me a new range, from -400px to 0px. Using typed arithmetic, I then divide this range by 400px, which gives me a normalized, unitless number between -1 and 0. And finally, I convert this number into an <angle> by multiplying it by -90deg. Here’s what that looks like in CSS when we put it all together: p { rotate: calc(((clamp(300px, 100vw, 700px) - 700px) / 400px) * -90deg); } From Length to Opacity Of course, the resulting unitless number can be used as-is in any property that accepts a <number> data type, such as opacity. What if I want to determine the font’s opacity based on its size, making smaller fonts more opaque and therefore clearer? Is it possible? Absolutely. In this example, I am setting a different font-size value for each <p> element using a --font-size custom property. and since the range of this variable is from 0.8rem to 2rem, I first subtract 0.8rem from it to create a new range of 0 to 1.2rem. I could divide this range by 1.2rem to get a normalized, unitless value between 0 and 1. However, because I don’t want the text to become fully transparent, I divide it by twice that amount (2.4rem). This gives me a result between 0 and 0.5, which I then subtract from the maximum opacity of 1. p { font-size: var(--font-size, 1rem); opacity: calc(1 - (var(--font-size, 1rem) - 0.8rem) / 2.4rem); } Notice that I am displaying the font size in pixel units even though the size is defined in rem units. I simply use typed arithmetic to divide the font size by 1px, which gives me the size in pixels as a unitless value. I then inject this value into the content of the the paragraph’s ::after pseudo-element. p::after { counter-reset: px calc(var(--font-size, 1rem) / 1px); content: counter(px) 'px'; } Dynamic Width Colors Of course, the real beauty of using native CSS math functions, compared to other approaches, is that everything happens dynamically at runtime. Here, for example, is a small demo where I color the element’s background relative to its rendered width. p { --hue: calc(100cqi / 1px); background-color: hsl(var(--hue, 0) 75% 25%); } You can drag the bottom-right corner of the element to see how the color changes in real-time. Here’s something neat about this demo: because the element’s default width is 50% of the screen width and the color is directly proportional to that width, it’s possible that the element will initially appear in completely different colors on different devices with different screens. Again, this is all happening without any media queries or JavaScript. An Extreme Example: Chaining Conversions OK, so we’ve established that typed arithmetic is cool and opens up new and exciting possibilities. Before we put a bow on this, I wanted to pit this concept against a more extreme example. I tried to imagine what would happen if we took a <length> type, converted it to a <number> type, then to an <angle> type, back to a <number> type, and, from there, back to a <length> type. Phew! I couldn’t find a real-world use case for such a chain, but I did wonder what would happen if we were to animate an element’s width and use that width to determine the height of something else. All the calculations might not be necessary (maybe?), but I think I found something that looks pretty cool. In this demo, the animation is on the solid line along the bottom. The vertical position of the ball, i.e. its height, relative to the line, is proportional to the line’s width. So, as the line expands and contracts, so does the path of the bouncing ball. To create the parabolic arc that the ball moves along, I take the element’s width (100cqi) and, using typed arithmetic, divide it by 300px to get a unitless number between 0 and 1. I multiply that by 180deg to get an angle that I use in a sin() function (Juan Diego has a great article on this), which returns another unitless number between 0 and 1, but with a parabolic distribution of values. Finally, I multiply this number by -200px, which outputs the ball’s vertical position relative to the line. .ball { --translateY: calc(sin(calc(100cqi / 300px) * 180deg) * -200px) ; translate: -50% var(--translateY, 0); } And again, because the ball’s position is relative to the line’s width, the ball’s position will remain on the same arc, no matter how we define that width. Wrapping Up: The Dawn of Computational CSS The ability to divide one typed value by another to produce a unitless number might seem like no big deal; more like a minor footnote in the grand history of CSS. But as we’ve seen, this single feature is a quiet revolution. It dismantles the long-standing walls between different CSS data types, transforming them from isolated silos into a connected, interoperable system. We’ve moved beyond simple calculations, and entered the era of true Computational CSS. This isn’t just about finding new ways to style a button or animate a loading spinner. It represents a fundamental shift in our mental model. We are no longer merely declaring static styles, but rather defining dynamic, mathematical relationships between properties. The width of an element can now intrinsically know about its color, an angle can dictate a distance, and a font’s size can determine its own visibility. This is CSS becoming self-aware, capable of creating complex behaviors and responsive designs that adapt with a precision and elegance that previously required JavaScript. So, the next time you find yourself reaching for JavaScript to bridge a gap between two CSS properties, pause for a moment. Ask yourself if there’s a mathematical relationship you can define instead. You might be surprised at how far you can go with just a few lines of CSS. The Future is Calculable The examples in this article are just the first steps into a much larger world. What happens when we start mixing these techniques with scroll-driven animations, view transitions, and other modern CSS features? The potential for creating intricate data visualizations, generative art, and truly fluid user interfaces, all natively in CSS, is immense. We are being handed a new set of creative tools, and the instruction manual is still being written. CSS Typed Arithmetic originally published on CSS-Tricks, which is part of the DigitalOcean family. You should get the newsletter.
On inclusive personas and inclusive user research
- Notes
- accessibility
- UI/IX Design
A set of notes taken from Eric Bailey's article about the use of inclusive personas and user research.
On inclusive personas and inclusive user research originally published on CSS-Tricks, which is part of the DigitalOcean family. You should get the newsletter.
I’m inclined to take a few notes on Eric Bailey’s grand post about the use of inclusive personas in user research. As someone who has been in roles that have both used and created user personas, there’s so much in here What’s the big deal, right? We’re often taught and encouraged to think about users early in the design process. It’s user’ centric design, so let’s personify 3-4 of the people we think represent our target audiences so our work is aligned with their objectives and needs. My master’s program was big on that and went deep into different approaches, strategies, and templates for documenting that research. And, yes, it is research. The idea, in theory, is that by understanding the motivations and needs of specific users (gosh, isn’t “users” an awkward term?), we can “design backwards” so that the end goal is aligned to actions that get them there. Eric sees holes in that process, particularly when it comes to research centered around inclusiveness. Why is that? Very good reasons that I’m compiling here so I can reference it later. There’s a lot to take in, so you’d do yourself a solid by reading Eric’s post in full. Your takeaways may be different than mine. Traditional vs. Inclusive user research First off, I love how Eric distinguishes what we typically refer to as the general type of user personas, like the ones I made to generalize an audience, from inclusive user personas that are based on individual experiences. Inclusive user research practices are different than a lot of traditional user research. While there is some high-level overlap in approach, know the majority of inclusive user research is more focused on the individual experience and less about more general trends of behavior. So, right off the bat we have to reframe what we’re talking about. There’s blanket personas that are placeholders for abstracting what we think we know about specific groups of people versus individual people that represent specific experiences that impact usability and access to content. A primary goal in inclusive user research is often to identify concrete barriers that prevent someone from accessing the content they want or need. While the techniques people use are varied, these barriers represent insurmountable obstacles that stymie a whole host of navigation techniques and approaches. If you’re looking for patterns, trends, and customer insights, know that what you want is regular user testing. Here, know that the same motivating factors you’re looking to uncover also exist for disabled people. This is because they’re also, you know, people. Assistive technology is not exclusive to disabilities It’s so easy to assume that using assistive tools automatically means accommodating a disability or impairment, but that’s not always the case. Choice points from Eric: First is that assistive technology is a means, and not an end. Some disabled people use more than one form of assistive technology, both concurrently and switching them in and out as needed. Some disabled people don’t use assistive technology at all. Not everyone who uses assistive technology has also mastered it. Disproportionate attention placed on one kind of assistive technology at the expense of others. It’s entirely possible to have a solution that is technically compliant, yet unintuitive or near-impossible to use in the actual. I like to keep in mind that assistive technologies are for everyone. I often think about examples in the physical world where everyone benefits from an accessibility enhancement, such as cutting curbs in sidewalks (great for skateboarders!), taking elevators (you don’t have to climb stairs in some cases), and using TV subtitles (I often have to keep the volume low for sleeping kids). That’s the inclusive part of this. Everyone benefits rather than a specific subset of people. Different personas, different priorities What happens when inclusive research is documented separately from general user research? Another folly of inclusive personas is that they’re decoupled from regular personas. This means they’re easily dismissible as considerations. […] Disability is diversity, and the plain and honest truth is that diversity is missing from your personas if disability conditions are not present in at least some of them. This, in turn, means your personas are misrepresentative of the people in the abstract you claim to serve. In practice, that means: […] we also want to hold space for things that need direct accessibility support and remediation when this consideration of accessibility fails to happen. It’s all about approach. An example of how to consider your approach is when adding drag and drop support to an experience. […] [W]e want to identify if drag and drop is even needed to achieve the outcome the organization needs. Thinking of a slick new feature that will impress your users? Great! Let’s make sure it doesn’t step on the toes of other experiences in the process, because that’s antithetical to inclusiveness. I recognize this temptation in my own work, particularly if I land on a novel UI pattern that excites me. The excitement and tickle I get from a “clever” idea gives me a blind side to evaluating the overall effectiveness of it. Radical participatory design Gosh dang, why didn’t my schoolwork ever cover this! I had to spend a little time reading the Cambridge University Press article explaining radical participatopry design (RPD) that Eric linked up. Therefore, we introduce the term RPD to differentiate and represent a type of PD that is participatory to the root or core: full inclusion as equal and full members of the research and design team. Unlike other uses of the term PD, RPD is not merely interaction, a method, a way of doing a method, nor a methodology. It is a meta-methodology, or a way of doing a methodology. Ah, a method for methodology! We’re talking about not only including community members into the internal design process, but make them equal stakeholders as well. They get the power to make decisions, something the article’s author describes as a form of decolonization. Or, as Eric nicely describes it: Existing power structures are flattened and more evenly distributed with this approach. Bonus points for surfacing the model minority theory: The term “model minority” describes a minority group that society regards as high-performing and successful, especially when compared to other groups. The narrative paints Asian American children as high-achieving prodigies, with fathers who practice medicine, science, or law and fierce mothers who force them to work harder than their classmates and hold them to standards of perfection. It introduces exclusiveness in the quest to pursue inclusiveness — a stereotype within a stereotype. Thinking bigger Eric caps things off with a great compilation of actionable takeaways for avoiding the pitfalls of inclusive user personas: Letting go of control leads to better outcomes. Member checking: letting participants review, comment on, and correct the content you’ve created based on their input. Take time to scrutinize the functions of our roles and how our organizations compel us to undertake them in order to be successful within them. Organizations can turn inwards and consider the artifacts their existing design and research processes produce. They can then identify opportunities for participants to provide additional clarity and corrections along the way. On inclusive personas and inclusive user research originally published on CSS-Tricks, which is part of the DigitalOcean family. You should get the newsletter.
Price updates for apps, In-App Purchases, and subscriptions
The App Store is designed to make it easy to sell your digital goods and services globally, with support for 44 currencies across 175 storefronts.
From time to time, we may need to adjust prices or your proceeds due to changes in tax regulations or foreign exchange rates. These adjustments are made using publicly available exchange rate information from financial data providers to help make sure prices for apps and In-App Purchases stay consistent across all storefronts.
Price updates
Beginning November 17:
Pricing for apps and In-App Purchases will be updated for Poland, Switzerland, and Türkiye if you haven’t selected one of these storefronts as the base storefront for your app or In‑App Purchase.¹
If you’ve selected Poland, Switzerland, or Türkiye as the base storefront for your app or In-App Purchase, prices won’t change. On other storefronts, prices will be updated to maintain equalization with your chosen base price.
Prices won’t change in any region if your In‑App Purchase is an auto‑renewable subscription. Prices also won’t change on the storefronts where you manually manage prices instead of using the automated equalized prices.
The Pricing and Availability section of Apps has been updated in App Store Connect to display these upcoming price changes. As always, you can change the prices of your apps, In‑App Purchases, and auto‑renewable subscriptions at any time.
Learn more about managing your prices
View or edit upcoming price changes
Edit your app’s base country or region
Pricing and availability start times by country or region
Set a price for an In-App Purchase
¹ Excludes auto-renewable subscriptions.
Enhancements to help you submit and market your apps and games
As part of our ongoing commitment to helping developers succeed on the App Store, we’re introducing new options for submitting content and updates while your app is in review, double the number of custom product pages, and offer codes for all In-App Purchase types.
Submit additional items to App ReviewNow you can send additional items to App Review independent of an existing submission, giving you greater flexibility when submitting your apps and games. For example, you can now submit:
- One or more In-App Events in a separate submission if you have an app version under review.
- An app version to address a critical bug that’s separate from any existing custom product pages under review.
- One or more Game Center features — including achievements, leaderboards, challenges, and more — in a submission that’s separate from an app version under review.
Custom product pages let you highlight different content and features within your app or game using unique screenshots, app previews, and promotional text. To provide you with even more flexibility, you can now create and publish up to 70 custom pages at a given time. Additionally, you can now assign keywords to each custom product page so they’re more discoverable on the App Store. Custom product pages with keywords assigned to them can appear in search results for those selected keywords instead of your default product page.
Learn more about custom product pages
Offer codes expand to all In-App Purchase typesOffer codes now support all In-App Purchase types, including consumable, non-consumable, and non-renewing subscriptions, in addition to expanded support for auto-renewable subscriptions. With offer codes, you can present people with a limited-time offer for a free or discounted In-App Purchase. This allows you to share the value of your In-App Purchases and encourage engagement and purchases within your apps and games. This expanded support includes the ability to create offer codes for:
- Consumable, non-consumable, and non-renewing subscriptions.
- Auto-renewable subscriptions that don’t auto-renew once the promotional period ends.
Schedule 1 and the Paid Applications Agreement (Schedules 2 and 3) will be updated to indicate that offer codes are available for all In-App Purchase types.¹
Promo codes for In-App Purchases
Offer codes build on the functionality of promo codes and provide improved configuration and customer eligibility options. As a result, starting March 26, 2026, you’ll no longer be able to create promo codes for In-App Purchases in App Store Connect. Any existing promo codes for In-App Purchases you’ve created can be redeemed until they expire. You can continue to use promo codes in order to provide people with a free download of your app.
Learn about creating offer codes
Learn about offer codes for auto-renewable subscriptions
¹ Translations of the updated agreement will be available on the Apple Developer website within one month.
New requirement for apps using Sign in with Apple for account creation
Starting January 1, 2026, developers based in the Republic of Korea must provide a server‑to‑server notification endpoint when registering a new Services ID, or updating an existing Services ID, to associate their website with an app using Sign in with Apple.
As a reminder, registering a notification endpoint allows Apple to send you important updates about the people who use your app and their account status, including:
- Changes in email forwarding preferences.
- Account deletions in your app.
- Permanent Apple Account deletions.
To learn more about server-to-server notifications, see WWDC20 session 10173: Get the most out of Sign in with Apple.
When you receive these notifications, you should immediately update any data associated with the account change in the app, as well as any necessary server infrastructure, to give people more control of the personal data they’ve shared. For more information, see Processing changes for Sign in with Apple accounts.
Before submitting a new app to the App Store, or updating an existing app configuration to register a new Services ID or modify an existing Services ID, please read the guidance below.
Account change guidanceAccount changes are directly related to privacy and control for the user and their personal data, and confirming account changes should be straightforward and transparent.
For account email forwarding changes:
- Ensure any displayed user data affected by the account change matches the change event in the notification payload. Typically, this data is displayed in the app’s account settings or user profile.
- If people need to visit a website to finish changing or verifying their email address, include a link directly to the page on your website where they can complete the process.
- Keep users informed. If the email forwarding change affects other services you offer, let them know. If your app supports In-App Purchases, help people understand how billing, order tracking, and cancellations will be handled with the new email address.
For account deletions:
Note: Always follow applicable legal requirements for storing and retaining user account information and for handling account changes and deletions. This includes complying with local laws where your apps are available. If you have questions regarding your legal obligations, check with your legal counsel.
ResourcesUpdated Apple Developer Program License Agreement now available
The Apple Developer Program License Agreement has been revised to support updated policies and to provide clarification. Please review the changes below and sign in to your account to accept the updated terms.
- Section 3.3.1(B): Updated requirements related to interpreted code
- Definitions, Section 3.3.3(F): Specified requirements for use of the Location Push Service Extension
- Section 3.3.8(A), Attachment 4: Added links to terms for Xcode Cloud and CloudKit related to Regulation (EU) 2023/2854 (EU Data Act)
- Section 3.3.9(D): Updated terms regarding the entity that distributes the Tap to Pay APIs
- Schedule 1, Exhibit C: Updated Section 1 definition for Promo Codes
- Schedule 2, Section 3.13: Updated references to Offer Codes
- Schedule 2, Section 3.13(b): Updated availability terms for Offer Codes
Translations of the updated agreement will be available on the Apple Developer website within one month.
New requirements for apps available in Texas
Beginning January 1, 2026, a new state law in Texas — SB2420 — introduces age assurance requirements for app marketplaces and developers. While we share the goal of strengthening kids’ online safety, we are concerned that SB2420 impacts the privacy of users by requiring the collection of sensitive, personally identifiable information to download any app, even if a user simply wants to check the weather or sports scores. Apple will continue to provide parents and developers with industry-leading tools that help enhance child safety while safeguarding privacy within the constraints of the law.
Once this law goes into effect, users located in Texas who create a new Apple Account will be required to confirm whether they are 18 years or older. All new Apple Accounts for users under the age of 18 will be required to join a Family Sharing group, and parents or guardians will need to provide consent for all App Store downloads, app purchases, and transactions using Apple's In-App Purchase system by the minor. This will also impact developers, who will need to adopt new capabilities and modify behavior within their apps to meet their obligations under the law. Similar requirements will come into effect later next year in Utah and Louisiana.
Today we’re sharing details about updates that we’re making and the tools we’ll provide to help developers meet these new requirements.
To assist developers in meeting their obligations in a privacy-preserving way, we’ll introduce capabilities to help them obtain users’ age categories and manage significant changes as required by Texas state law. The Declared Age Range API is available to implement now, and will be updated in the coming months to provide the required age categories for new account users in Texas. And new APIs launching later this year will enable developers, when they determine a significant change is made to their app, to invoke a system experience to allow the user to request that parental consent be re-obtained. Additionally, parents will be able to revoke consent for a minor continuing to use an app. More details, including additional technical documentation, will be released later this fall.
We know protecting kids from online threats requires constant vigilance and effort. That’s why we will continue to create industry-leading features to help developers provide age-appropriate experiences and safeguard privacy in their apps and games, and empower parents with a comprehensive set of tools to help keep their kids safe online.
Hello Developer: October 2025
This month: Watch a new code-along video to discover how to use the Foundation Models framework to access the on-device LLM that powers Apple Intelligence.
Plus, dive into new games offerings, explore new App Store Connect features, and find out how the air-quality app Paku is helping its users breathe easy.
Upcoming Currency Change in Bulgaria
Beginning January 1, 2026, Bulgaria will adopt the euro (EUR) as its official currency, replacing the Bulgarian lev (BGN). As a result, the currency for App Store purchases and subscriptions in Bulgaria will change from BGN to EUR on this date. Your proceeds from sales in Bulgaria will also change to euros.
If you’ve selected the lev as the currency for your bank in App Store Connect, it will automatically change to the euro on December 1, 2025. If you’ve selected a different currency for your bank account, you’ll continue to be paid in that currency. The statutory fixed conversion rate is 1.95583 BGN = 1 EUR as established on July 8, 2025, by the Council of the European Union in connection with the introduction of the euro as the official currency in the Republic of Bulgaria.
- Auto-renewing subscriptions, manually priced apps and In‑App Purchases, or apps and In‑App Purchases with Bulgaria as the base storefront: Pricing on the Bulgaria storefront will be updated to a euro price based on the statutory conversion rate and rounded down to a supported euro price point. If you’ve chosen Bulgaria as the base storefront for your app or In‑App Purchases, pricing in other storefronts may be updated to maintain equalization with the new euro price.
- Other apps or In‑App Purchases: Pricing on the Bulgaria storefront will be converted to the euro using the standard equalization for euro markets where App Store sales are subject to value‑added tax (VAT).
You can change the prices of your apps, In‑App Purchases, and auto‑renewable subscriptions at any time.
Auto‑renewable subscriptions won’t be interrupted. Subscription prices will be automatically updated for each current, preserved, and future scheduled price to euros. Customers with auto‑renewable subscriptions will receive an email informing them of the currency change.
Per the Euro Act, you’ll need to communicate both the lev and euro prices for In‑App Purchases to customers within your app for the duration of the transitional period from now until the end of the transition period on August 8, 2026. This messaging should appear anywhere prices are displayed.
Your Sales and Trends reports and monthly financial reports will also be updated. For Sales and Trends, euros will be indicated for transactions after the currency change. For monthly financial reports, earnings from sales that occurred before the currency change will be in the BG report, and earnings from sales after the currency change will be in the EU report.
All refunds issued after January 1, 2026, will be refunded in euros, regardless of the date of purchase.
Get ready with the latest beta releases
The beta versions of iOS 26.1, iPadOS 26.1, macOS 26.1, tvOS 26.1, visionOS 26.1, and watchOS 26.1 are now available. Get your apps ready by confirming they work as expected on these releases. And to take advantage of the advancements in the latest SDKs, make sure to build and test with Xcode 26.0.1.
App Store submissions now open for the latest OS releases
iOS 26, iPadOS 26, macOS Tahoe 26, tvOS 26, visionOS 26, and watchOS 26 will soon be available to customers worldwide — which means you can now submit apps and games that take advantage of Apple’s broadest design update ever.
Build your apps and games using the Xcode 26 Release Candidate and latest SDKs, test with TestFlight, and submit for review to the App Store. By taking advantage of the new design and Liquid Glass, the Foundation Models framework, the new Apple Games app, and more, you can deliver even more unique experiences on Apple platforms.
Starting April 2026, apps and games uploaded to App Store Connect need to meet the following minimum requirements.
- iOS and iPadOS apps must be built with the iOS 26 & iPadOS 26 SDK or later
- tvOS apps must be built with the tvOS 26 SDK or later
- visionOS apps must be built with the visionOS 26 SDK or later
- watchOS apps must be built with the watchOS 26 SDK or later
Hello Developer: September 2025
Be ready for the new design. Whether you’re a longtime pro or a hobbyist, get inspired and make your apps and games look their best by exploring videos, downloads, and docs.
Plus, sign up for one-on-one appointments to dive into machine learning and AI, and meet the team behind the wholesome open-world game Hello Kitty Island Adventure.
Awe dropping.
Join us for a special Apple Event on September 9 at 10 a.m. PT.
Watch on apple.com, Apple TV, or YouTube Live.
Tax and Price Updates for Apps, In-App Purchases, and Subscriptions
The App Store is designed to make it easy to sell your digital goods and services globally, with support for 44 currencies across 175 storefronts.
From time to time, we need to adjust prices or your proceeds due to changes in tax regulations or foreign exchange rates. These adjustments are made using publicly available exchange rate information from financial data providers to help make sure prices for apps and In-App Purchases stay consistent across all storefronts.
Tax and price updates
As of August 21:
Your proceeds from the sale of eligible apps and In‑App Purchases have been modified in:
- Brazil: Imposto sobre Operações Financeiras (IOF) of 3.5%
- Canada: Digital services tax (DST) no longer applicable
- Estonia: Value‑added tax (VAT) rate increase from 22% to 24%
- Romania:
- VAT rate increase from 19% to 21%
- Reduced VAT rate increase from 5% to 11% for news, magazines, books, and audiobooks
- The Philippines: VAT introduction of 12% for developers based outside of the Philippines
- Vietnam:
- Organizations based outside of Vietnam: VAT rate increase from 5% to 10%.
- Individual developers based outside of Vietnam: Personal income tax (PIT) introduction of 5%, replacing the corporate income tax (CIT). Reduced VAT rate of 0% for news, magazines, and books no longer applies and all content will be taxed at the standard rate.
- Organizations based in Vietnam: Apple will no longer remit foreign contractor tax (FCT) on sales to end customers. FCT of 5% introduced on Apple’s commission.
- Individual developers based in Vietnam: Personal income tax (PIT) introduction of 2%, replacing the corporate income tax (CIT). FCT of 5% introduced on Apple’s commission. Reduced VAT rate of 0% for news, magazines, and books no longer applies and all content will be taxed at the standard rate.
Exhibit B and C of the Paid Applications Agreement will be updated to indicate that Apple collects and remits applicable taxes in the Philippines, and the relevant tax changes in Vietnam.¹
Beginning September 8:
Pricing for apps and In-App Purchases will be updated for the Philippines and Vietnam if you haven’t selected one of these storefronts as the base storefront for your app or In‑App Purchase.² These updates also consider VAT introductions and changes listed in the tax updates section above.
If you’ve selected the Philippines or Vietnam as the base storefront for your app or In-App Purchase, prices won’t change. On other storefronts, prices will be updated to maintain equalization with your chosen base price.
Prices won’t change in any region if your In‑App Purchase is an auto‑renewable subscription. Prices also won’t change on the storefronts where you manually manage prices instead of using the automated equalized prices.
The Pricing and Availability section of Apps has been updated in App Store Connect to display these upcoming price changes. As always, you can change the prices of your apps, In‑App Purchases, and auto‑renewable subscriptions at any time.
Learn more about managing your prices
View or edit upcoming price changes
Edit your app’s base country or region
Pricing and availability start times by country or region
Set a price for an In-App Purchase
Learn more about your proceeds
¹ Translations of the updated agreement will be available on the Apple Developer website within one month.
² Excludes auto-renewable subscriptions.
Hello Developer: August 2025
Sign up for new Apple developer workshops all over the world. Plus, download Apple UI design kits for Figma and Sketch, meet the Italy-based team behind Sunlitt, and more.
Updated age ratings in App Store Connect
The App Store is designed to be a safe and trusted place for all ages, including children. The age rating system for apps and games has been updated in order to provide people with more granular age ratings. We’ve also introduced new age rating questions to help identify sensitive content in your app and added the ability to set a higher rating to reflect your app’s minimum age requirement. Ratings for all apps and games on the App Store have been automatically updated to align with this new system and will be reflected on Apple devices running beta versions of iOS 26, iPadOS 26, macOS Tahoe 26, tvOS 26, visionOS 26, and watchOS 26.
The updated age rating system adds 13+, 16+, and 18+ to the existing 4+ and 9+ ratings. Age ratings are assigned to each country or region and may vary based on region-specific suitability standards.
We’ve introduced a new set of required questions to the ratings questionnaire for all apps. These new questions cover:
- In-app controls.
- Capabilities.
- Medical or wellness topics.
- Violent themes in your app or game.
Your answers to these questions will help Apple better calculate a rating and help you deliver an age-appropriate experience.
If your app has a policy requiring a higher minimum user age than the rating assigned by Apple, you can set a higher age rating after you respond to the age ratings questions. You can view the age rating for each of your apps under the updated system and respond to the new questions for each app in the App Information section in App Store Connect.
As a reminder, you must consider how all app features, including AI assistants and chatbot functionality, impact the frequency of sensitive content appearing within your app to make sure it receives the appropriate rating. All apps are subject to the App Review Guidelines, such as the safety guidelines regarding objectionable content or user generated content, and must abide by all applicable local laws and regulations, like the Children’s Online Privacy Protection Act (“COPPA”), and the European Union’s General Data Protection Regulation (“GDPR”).
Please provide responses to the updated age rating questions for each of your apps by January 31, 2026, to avoid an interruption when submitting your app updates in App Store Connect.
New 64-bit requirement for watchOS apps
Beginning April 2026, watchOS apps uploaded to App Store Connect must also include 64-bit support and be built with the watchOS 26 SDK. To enable 64-bit support in your project, we recommend using the default Xcode build setting of “Standard architectures” to build a single binary with 64-bit code.
You can test ARM64 compatibility for your apps in the Xcode Simulator, and on Apple Watch Series 9 or 10, or Apple Watch Ultra 2 running watchOS 26 beta.
iOS and iPadOS 26 design kits are here
Apple Ul design kits for Figma and Sketch are now available for iOS and iPadOS 26.
Updates for apps in the European Union
The European Commission has required Apple to make a series of additional changes under the Digital Markets Act:
Communication and promotion of offers
- Today, we’re introducing updated terms that let developers with apps in the European Union storefronts of the App Store communicate and promote offers for purchase of digital goods or services available at a destination of their choice. The destination can be a website, alternative app marketplace, or another app, and can be accessed outside the app or within the app via a web view or native experience.
- App Store apps that communicate and promote offers for digital goods or services will be subject to new business terms for those transactions — an initial acquisition fee, store services fee, and for apps on the StoreKit External Purchase Link Entitlement (EU) Addendum, the Core Technology Commission (CTC). The CTC reflects value Apple provides developers through ongoing investments in the tools, technologies, and services that enable them to build and share innovative apps with users.
- Music streaming apps on the App Store in the European Economic Area (EEA) wanting to use the Music Streaming Services Entitlement (EEA) can use these options.
Update to Business Terms for Apps in the European Union
- By January 1, 2026, Apple plans to move to a single business model in the EU for all developers. Under this single business model, Apple will transition from the Core Technology Fee (CTF) to the CTC on digital goods or services. The CTC will apply to digital goods or services sold by apps distributed from the App Store, Web Distribution, and/or alternative marketplaces.
- Apps currently under the Alternative Terms Addendum for Apps in the EU continue to be subject only to the CTF until the transition to the CTC is fully implemented next year. At that time, qualifying transactions will be subject to the CTC, and the CTF will no longer apply. Additional details regarding this transition will be provided at a later date.
User Experience Update
- Beginning with iOS 18.6 and iPadOS 18.6, iOS and iPadOS will provide an updated user experience in the EU for installing alternative marketplaces or apps from a developer’s website. Additionally, later this year, we will provide an API which will allow developers to initiate the download of alternatively distributed apps they publish from within their app.
To learn more, view Communication and promotion of offers on the App Store in the EU. To read the full terms, view the Alternative Terms Addendum for Apps in the EU or the StoreKit External Purchase Link Entitlement Addendum for EU Apps. You can also request a 30-minute online appointment to ask questions and provide feedback about these changes.
Today @ WWDC25: Day 5
The European Commission has required Apple to make a series of additional changes under the Digital Markets Act:
Communication and promotion of offers
- Today, we’re introducing updated terms that let developers with apps in the European Union storefronts of the App Store communicate and promote offers for purchase of digital goods or services available at a destination of their choice. The destination can be a website, alternative app marketplace, or another app, and can be accessed outside the app or within the app via a web view or native experience.
- App Store apps that communicate and promote offers for digital goods or services will be subject to new business terms for those transactions — an initial acquisition fee, store services fee, and for apps on the StoreKit External Purchase Link Entitlement (EU) Addendum, the Core Technology Commission (CTC). The CTC reflects value Apple provides developers through ongoing investments in the tools, technologies, and services that enable them to build and share innovative apps with users.
- Music streaming apps on the App Store in the European Economic Area (EEA) wanting to use the Music Streaming Services Entitlement (EEA) can use these options.
Update to Business Terms for Apps in the European Union
- By January 1, 2026, Apple plans to move to a single business model in the EU for all developers. Under this single business model, Apple will transition from the Core Technology Fee (CTF) to the CTC on digital goods or services. The CTC will apply to digital goods or services sold by apps distributed from the App Store, Web Distribution, and/or alternative marketplaces.
- Apps currently under the Alternative Terms Addendum for Apps in the EU continue to be subject only to the CTF until the transition to the CTC is fully implemented next year. At that time, qualifying transactions will be subject to the CTC, and the CTF will no longer apply. Additional details regarding this transition will be provided at a later date.
User Experience Update
- Beginning with iOS 18.6 and iPadOS 18.6, iOS and iPadOS will provide an updated user experience in the EU for installing alternative marketplaces or apps from a developer’s website. Additionally, later this year, we will provide an API which will allow developers to initiate the download of alternatively distributed apps they publish from within their app.
To learn more, view Communication and promotion of offers on the App Store in the EU. To read the full terms, view the Alternative Terms Addendum for Apps in the EU or the StoreKit External Purchase Link Entitlement Addendum for EU Apps. You can also request a 30-minute online appointment to ask questions and provide feedback about these changes.
Today @ WWDC25: Day 4
The European Commission has required Apple to make a series of additional changes under the Digital Markets Act:
Communication and promotion of offers
- Today, we’re introducing updated terms that let developers with apps in the European Union storefronts of the App Store communicate and promote offers for purchase of digital goods or services available at a destination of their choice. The destination can be a website, alternative app marketplace, or another app, and can be accessed outside the app or within the app via a web view or native experience.
- App Store apps that communicate and promote offers for digital goods or services will be subject to new business terms for those transactions — an initial acquisition fee, store services fee, and for apps on the StoreKit External Purchase Link Entitlement (EU) Addendum, the Core Technology Commission (CTC). The CTC reflects value Apple provides developers through ongoing investments in the tools, technologies, and services that enable them to build and share innovative apps with users.
- Music streaming apps on the App Store in the European Economic Area (EEA) wanting to use the Music Streaming Services Entitlement (EEA) can use these options.
Update to Business Terms for Apps in the European Union
- By January 1, 2026, Apple plans to move to a single business model in the EU for all developers. Under this single business model, Apple will transition from the Core Technology Fee (CTF) to the CTC on digital goods or services. The CTC will apply to digital goods or services sold by apps distributed from the App Store, Web Distribution, and/or alternative marketplaces.
- Apps currently under the Alternative Terms Addendum for Apps in the EU continue to be subject only to the CTF until the transition to the CTC is fully implemented next year. At that time, qualifying transactions will be subject to the CTC, and the CTF will no longer apply. Additional details regarding this transition will be provided at a later date.
User Experience Update
- Beginning with iOS 18.6 and iPadOS 18.6, iOS and iPadOS will provide an updated user experience in the EU for installing alternative marketplaces or apps from a developer’s website. Additionally, later this year, we will provide an API which will allow developers to initiate the download of alternatively distributed apps they publish from within their app.
To learn more, view Communication and promotion of offers on the App Store in the EU. To read the full terms, view the Alternative Terms Addendum for Apps in the EU or the StoreKit External Purchase Link Entitlement Addendum for EU Apps. You can also request a 30-minute online appointment to ask questions and provide feedback about these changes.
Today @ WWDC25: Day 3
The European Commission has required Apple to make a series of additional changes under the Digital Markets Act:
Communication and promotion of offers
- Today, we’re introducing updated terms that let developers with apps in the European Union storefronts of the App Store communicate and promote offers for purchase of digital goods or services available at a destination of their choice. The destination can be a website, alternative app marketplace, or another app, and can be accessed outside the app or within the app via a web view or native experience.
- App Store apps that communicate and promote offers for digital goods or services will be subject to new business terms for those transactions — an initial acquisition fee, store services fee, and for apps on the StoreKit External Purchase Link Entitlement (EU) Addendum, the Core Technology Commission (CTC). The CTC reflects value Apple provides developers through ongoing investments in the tools, technologies, and services that enable them to build and share innovative apps with users.
- Music streaming apps on the App Store in the European Economic Area (EEA) wanting to use the Music Streaming Services Entitlement (EEA) can use these options.
Update to Business Terms for Apps in the European Union
- By January 1, 2026, Apple plans to move to a single business model in the EU for all developers. Under this single business model, Apple will transition from the Core Technology Fee (CTF) to the CTC on digital goods or services. The CTC will apply to digital goods or services sold by apps distributed from the App Store, Web Distribution, and/or alternative marketplaces.
- Apps currently under the Alternative Terms Addendum for Apps in the EU continue to be subject only to the CTF until the transition to the CTC is fully implemented next year. At that time, qualifying transactions will be subject to the CTC, and the CTF will no longer apply. Additional details regarding this transition will be provided at a later date.
User Experience Update
- Beginning with iOS 18.6 and iPadOS 18.6, iOS and iPadOS will provide an updated user experience in the EU for installing alternative marketplaces or apps from a developer’s website. Additionally, later this year, we will provide an API which will allow developers to initiate the download of alternatively distributed apps they publish from within their app.
To learn more, view Communication and promotion of offers on the App Store in the EU. To read the full terms, view the Alternative Terms Addendum for Apps in the EU or the StoreKit External Purchase Link Entitlement Addendum for EU Apps. You can also request a 30-minute online appointment to ask questions and provide feedback about these changes.
Today @ WWDC25: Day 2
Welcome to Day 2 at WWDC25! Watch the Platforms State of the Union recap, then dive into all the updates to Swift, SwiftUI, and Xcode through group labs and video sessions.
WWDC25 Platforms State of the Union Recap Watch nowToday’s group labs
Developer Tools group lab View now Swift group lab View now Metal & game technologies group lab View now Camera & Photos frameworks group lab View nowFind out what’s new for Apple developers
Discover the latest advancements on all Apple platforms. With incredible new features in iOS, iPadOS, macOS, tvOS, visionOS, and watchOS, and major enhancements across languages, frameworks, tools, and services, you can create even more unique experiences in your apps and games.
Updated agreements and guidelines now available
The Apple Developer Program License Agreement and App Review Guidelines have been revised to support new features and updated policies, and to provide clarification. Please review the changes below.
Apple Developer Program License Agreement
- Section 3.3.3(D): Updated language on requirements for data and privacy.
- Section 3.3.3(N): Updated requirements for use of the ID Verifier APIs.
- Definitions, 3.3.3(P): Specified requirements for use of the Declared Age Range API.
- Definitions, 3.3.7(G): Specified requirements for use of the Wi-Fi Aware framework.
- Definitions, 3.3.7(H): Specified requirements for use of the TelephonyMessagingKit APIs.
- Definitions, 3.3.7(I): Specified requirements for use of the Default Dialer APIs.
- Definition, Section 3.3.8(H), Attachment 11: Specified requirements for use of EnergyKit.
- Definitions, 3.3.8(I): Specified requirements for use of the Foundation Models framework.
- Definitions, Attachment 4: Specified requirements for use of the iCloud Extended Share APIs.
- Section 6.4: Removed language on Bitcode submissions as it is no longer applicable, and replaced it with terms regarding iOS app widgets on CarPlay.
- Section 7.4(B): Updated and clarified requirements for TestFlight related to digital purchases and tester invitations.
- Section 7.7: Updated language on customization of icons and widgets.
- Section 7.8: Specified terms related to the Apple Games app.
- Attachment 6: Updated terms regarding the entity that distributes the map in China.
App Review Guidelines
- 3.1.2(a), bullet 2: This language has been deleted (“You may offer a single subscription that is shared across your own apps and services”).
- 3.1.2(a), bullet 5: This language has been relocated to Guideline 3.2.2(x).
- 3.2.1(viii): Clarified that financial apps must have necessary licensing and permissions in the locations where developers make them available.
- 3.2.2(x): This new guideline contains the language relocated from Guideline 3.1.2(a), bullet 5, and permits developers to otherwise incentivize users to take specific actions within app.
Please sign in to your account to accept the updated Apple Developer Program License Agreement.
Translations of the guidelines will be available on Apple Developer website within one month.
Today @ WWDC25: Day 1
WWDC25 is here! Watch a quick welcome video to help you get started, then dive into sessions and sign up for tomorrow’s group labs.
Welcome to WWDC25 Watch nowTuesday’s group labs
Developer Tools group lab View now Swift group lab View now Metal & game technologies group lab View now Camera & Photos frameworks group lab View nowIntroducing the 2025 Apple Design Award winners and finalists
An artistic puzzler with a wildlife twist. A translation app powered by machine learning and stickers. And a card game that’s been on quite a run. Say hello to the wildly inventive crop of 2025 Apple Design Award honorees.
Hello Developer: June 2025
WWDC25 is just days away! Here’s everything you need to get ready — and a big announcement to start things off. Say hello to the wildly inventive crop of 2025 Apple Design Award winners and finalists.
Sleek peek.
WWDC25 is almost here! Find out how to tune in to the Keynote and Platforms State of the Union on Monday, June 9.
Tax and Price updates for Apps, In-App Purchases, and Subscriptions
The App Store is designed to make it easy to sell your digital goods and services globally, with support for 44 currencies across 175 storefronts.
From time to time, we may need to adjust prices or your proceeds due to changes in tax regulations or foreign exchange rates. These adjustments are made using publicly available exchange rate information from financial data providers to help make sure prices for apps and In-App Purchases stay consistent across all storefronts.
Tax and price updates
As of May 16:
Your proceeds from the sale of eligible apps and In‑App Purchases have been modified in Brazil to account for the Contribuições de Intervenção no Domínio Econômico (CIDE) tax introduction of 10% for developers based outside of Brazil.
Beginning June 2:
Pricing for apps and In-App Purchases will be updated for Brazil and Kazakhstan if you haven’t selected one of these storefronts as the base storefront for your app or In‑App Purchase.¹ The updates in Brazil also consider the 10% CIDE tax introduction.
If you’ve selected Brazil or Kazakhstan as the base storefront for your app or In-App Purchase, prices won’t change. On other storefronts, prices will be updated to maintain equalization with your chosen base price.
Prices won’t change in any region if your In‑App Purchase is an auto‑renewable subscription. Prices also won’t change on the storefronts where you manually manage prices instead of using the automated equalized prices.
The Pricing and Availability section of Apps has been updated in App Store Connect to display these upcoming price changes. As always, you can change the prices of your apps, In‑App Purchases, and auto‑renewable subscriptions at any time.
Additional upcoming changes
Beginning August 4:
All auto-renewable subscription price increases in Austria, Germany, and Poland will require customers to consent to the new price for their subscription to continue renewing.
- Price increases scheduled with a start date on or after August 4: All customers must consent to the new price. If a subscriber doesn’t agree to the new price or takes no action, Apple will continue to request consent approximately weekly through email, push notifications, and in-app messaging until their subscription expires at the end of their current billing cycle.
- Price increases scheduled with a start date before August 4: Current notice criteria will remain in effect, even if the renewal occurs after August 4 (for annual subscriptions, renewal could be as late as August 2026). See criteria, noting that consent may apply to customers depending on the size or velocity of your price increases.
To help ensure a smooth transition, we recommend avoiding scheduling price increases with a start date between August 2 and August 4.
Learn more about managing your prices
View or edit upcoming price changes
Edit your app’s base country or region
Pricing and availability start times by country or region
Set a price for an In-App Purchase
Learn more about your proceeds
¹ Excludes auto-renewable subscriptions.
Hello Developer: May 2025
In this edition: Join us to learn how to make your apps more accessible to everyone. Plus, check out our new and refreshed Pathways, and uncover the time-traveling secrets of the Apple Design Award-winning game The Wreck.
Random access memories: Inside the time-shifting narrative of The Wreck
The Wreck is filed under games, but it’s also been called a visual novel, an interactive experience, and a playable movie. Florent Maurin is OK with all of it. “I like to think we’re humbly participating in expanding the idea of what a video game can be,” he says.
Maurin is the co-writer, designer, and producer of The Wreck — and here we’ll let you decide what to call it. The Wreck tells the tale of Junon, a writer who’s abruptly called to a hospital to make a life-changing decision involving her mother. The story is anchored by the accident that lends the game its name, but the ensuing narrative is splintered, and begins to take shape only as players navigate through seemingly disconnected scenes that can be viewed multiple times from different perspectives. The Wreck is far from light. But its powerful story and unorthodox mechanics combine for a unique experience.
“We tried to make a game that’s a bit off the beaten path,” says Maurin, who’s also the president and CEO of The Pixel Hunt studio, “and hopefully it connects with people.”
ADA FACT SHEET
The Wreck- Winner: Social impact
- Team: The Pixel Hunt
- Available on: iPhone, iPad
- Team size: 4
Maurin is a former children’s journalist who worked at magazines and newspapers in his native France. After nearly 10 years in the field, he pivoted to video games, seeing them as a different way to share real stories about real people. “Reality is a source of inspiration in movies, novels, and comic books, but it’s almost completely absent in the gaming landscape,” he says. “We wanted to challenge that.”
Founded in 2014, The Pixel Hunt has released acclaimed titles like the App Store Award–winning historical adventure Inua and the text-message adventure Bury Me, My Love. It was near the end of the development process for the latter that Maurin and his daughter were involved in a serious car accident.
“It was honestly like a movie trope,” he says. “Time slowed down. Weird memories that had nothing to do with the moment flashed before my eyes. Later I read that the brain parses through old memories to find relevant knowledge for facing that kind of situation. It was so sudden and so intense, and I knew I wanted to make something of it. And what immediately came to mind was a game.”
Junon's interactions with the hospital staff drive the narrative in The Wreck.
But Maurin was too close to the source material; the accident had left a lasting impact, and he separated himself from the creative process. “I think I was trying to protect myself from the intensity of that feeling,” he says. “That’s when Alex, our art director, told me, ‘Look, this is your idea, and I don’t think it’ll bloom if you don’t really dig deep and own the creative direction.’ And he was right.”
That was art director Alexandre Grilletta, who helmed the development team alongside lead developer Horace Ribout, animator Peggy Lecouvey, sound designers Luis and Rafael Torres, and Maurin’s sister, Coralie, who served as a “second brain” during writing. (In a nice bit of serendipity, the game’s script was written in an open-source scripting language developed by Inkle, which used it for their own Apple Design Award-winning game, Overboard, in 2022.)
Junon's sister might not be an entirely welcome presence in The Wreck.
The story of The Wreck is split into two parts. The first — what the team calls the “last day” — follows Junon at the hospital while she faces her mother’s situation as well as revealing interactions with her sister and ex-husband. Maurin says the “last day” was pretty straightforward from a design standpoint. “We knew we wanted a cinematic look,” he says, “so we made it look like a storyboard with some stop-motion animation and framing. It was really nothing too fancy. The part that was way more challenging was the memories.”
Those “memories” — and the backstory they tell — employ a clever mechanism in which players view a scene as a movie and have the ability to fast-forward or rewind the scene. These memory scenes feel much different; they’re dreamlike and inventive, with swooping camera angles, shifting perspectives, and words that float in the air. “I saw that first in What Remains of Edith Finch,” says Maurin. “I thought it was an elegant way of suggesting the thing that triggers a character’s brain in that moment.”
Junon's thoughts are often conveyed in floating phrases that surround her in stressful moments.
Successive viewings of these memories can reveal new details or cast doubt on their legitimacy — something Maurin wrote from experience. “I’ll give you an example,” he says. “When my parents brought my baby sister home from the hospital, I remember the exact moment they arrived in the car. It’s incredibly vivid. But the weird part is: This memory is in the third person. I see myself tiptoeing to the window to watch them in the street — which is impossible! I rewrote my own memory for some reason, and only my brain knows why it works like that. But it feels so real.”
Throughout the development process, Maurin and team held close to the idea of a “moving and mature” story. In fact, early prototypes of The Wreck were more gamified — in one version, players grabbed floating items — but playtesters found the activity distracting. “It took them out of the story,” Maurin says. “It broke the immersion. And that was counterproductive to our goal.”
Items in The Wreck — like this tin of peppermints — often carry a larger meaning.
Maurin admits that approaching games with this mindset can be a challenge. “Some players are curious about our games and absolutely love them. Some people think, ‘These don’t fit the perception of what I think I enjoy.’ And maybe the games are for them, and maybe they’re not. But this is what we’ve been doing for 11 years. And I think we're getting better at it.”
Meet the 2024 Apple Design Award winners
Behind the Design is a series that explores design practices and philosophies from finalists and winners of the Apple Design Awards. In each story, we go behind the screens with the developers and designers of these award-winning apps and games to discover how they brought their remarkable creations to life.
Updated guidelines now available
The App Review Guidelines have been updated for compliance with a United States court decision regarding buttons, external links, and other calls to action in apps. These changes affect apps distributed on the United States storefront of the App Store, and are reflected in updates to Guidelines 3.1.1, 3.1.1(a), 3.1.3, and 3.1.3(a).
View the App Review Guidelines
Translations of the guidelines will be available on Apple Developer website within one month.
Hello Developer: April 2025
In this edition: Revisit foundational sessions, join us to dive into SwiftUI, and meet an Apple Design Award winner that defies description.
Rooms at the top: How this ADA-winning team built a title that defies description
Ask Jason Toff whether his Apple Design Award winner is a game or an app, and his answer is yes.
“There’s no one-sentence description for Rooms, and that can be a blessing,” laughs Toff, CEO and head designer of Things, Inc. “It’s not entirely a game, and it’s not entirely a tool. It’s more like a toy.”
It’s also a blank canvas, cozy game, coding teacher, and social network — but we’re getting ahead of ourselves. At its heart, Rooms is a collection of user-generated 3-D spaces that feels like the open-ended world of the early internet. Start with an empty room or existing template, then fill it with an array of voxel decorations, items, pets, and avatars to create whatever space you like: a college apartment, medieval castle chamber, floating fantasy realm, pirate ship, or a Weezer concert (really), to name just a few. The only limits are the room’s boundaries — and Rooms fans have even gotten around those. “Our 404 page is a room with no walls,” Toff says, “so people just started copying it to work around the constraint.”
ADA FACT SHEET
Rooms- Winner: Visuals and Graphics
- Team: Things, Inc.
- Available on: iOS, iPadOS
- Team size: 4
Download Rooms from the App Store
In fact, that community element is a strong point: This creative tapestry of quirky games, tranquil havens, and clever ideas has been conjured by real people, which makes Rooms a social network as well. What’s more, users can click on each item to reveal its underlying code, offering them more options for customization.
To create Rooms — which, incidentally, won the ADA for Visuals and Graphics in games — Toff and cofounders Nick Kruge and Bruno Oliveira threw themselves back into their childhoods. “I was obsessed with Legos as a kid,” says Toff, not unexpectedly. “I found myself wondering, ‘What’s the digital equivalent of that?’”
Rooms isn’t just about rooms; creators have plenty of ways to noodle on their ideas.
Drawing on that inspiration — as well as Toff’s experiences with Kid Pix on his dad’s 1989-era Mac — the Rooms team began envisioning something that, as Oliveira says, kept the floor low but the ceiling high. “We wanted anyone from 4-year-olds to their grandparents to be able to use Rooms,” he says, “and that meant making something free-form and creative.”
It also meant building something that gave a sense of approachability and creativity, which led them right to voxels. “Blocks have a charm, but they can also be kind of ugly,” Toff laughs. “Luckily, Bruno’s were cute and soft, so they felt approachable and familiar.” And from Oliveira’s side, blocks offered a practical value. “It’s much easier to do 3-D modeling with blocks,” says Oliveira. “You can just add or remove voxels whenever you want, which lowers the bar for everyone.”
We wanted anyone from 4-year-olds to their grandparents to be able to use Rooms, and that meant making something free-form and creative.
Jason Toff, CEO and head designer of Things, Inc.
Rooms launched in 2023 as a web-based app that included 1,000 voxel objects and allowed users to write their own code. It gained traction through both word of mouth and, more directly, a video that went viral in the cozy-gaming community. “All of a sudden, we had all these people coming,” says Oliveira, “and we realized we needed to prioritize the mobile app. Nick was like, ‘I think we can get feature parity with desktop on the iPhone screen,’ and we basically pulled a rabbit out of a hat.” Today, the vast majority of Rooms users are on mobile, where they spend the bulk of their time editing. “We were just shocked by how much time people were spending making rooms,” he says. “These weren’t quick five-minute projects. We did not anticipate that.”
Of course the Things, Inc. team rebuilt their own offices in Rooms.
All that building fed into a social aspect as well. Toff says most of the items in Rooms are now created, edited, and amplified by lots of different users. “Here’s a good example: We have a sway effect that makes things wave back and forth a little,” he says. “Someone realized that if they put some branches on a tree and added that effect, the tree immediately looked alive. Now everyone’s doing that. There’s a real additive effect to building in Rooms.” Today, the Rooms library contains more than 10,000 items.
There’s a lot of power under the hood, too. “Rooms uses a Lua scripting language that runs in a C++ context,” says Oliveira, “so it’s kind of Lua, encased in C++, encased in Unity, encased in iOS.” Every room, he says, is a new Unity instance. And adding native iOS elements — like sliders on the Explore page and a bottom navigation — gives what he calls the “design chef’s kiss.”
An early sketch of Rooms shows how the room design came together early in the process.
Like its community, the Rooms team is used to moving fast. “One day I said, ‘It would be cool if this had a D-pad and A/B buttons,” says Toff, “and about 10 hours later Bruno was like, ‘Here you go.’” On another lark, Toff mentioned that it would be fun to let users fly around their rooms, and Kruge and Oliveira promptly created a “camera mode” that’s come to be known internally as the “Jason-Cam.”
That’s satisfying to a team that simply set out to build a cutting-edge plaything. “We always had this metaphor that Rooms was a swimming pool with a shallow side and a deep side,” says Oliveira. “It should be fun for people dabbling in the shallow side. But it should also be amazing for people swimming in the deep end. If you just want to look at rooms, you can. But you can also dive all the way down and write complicated code. There’s something for everyone.”
Meet the 2024 Apple Design Award winners
Behind the Design is a series that explores design practices and philosophies from finalists and winners of the Apple Design Awards. In each story, we go behind the screens with the developers and designers of these award-winning apps and games to discover how they brought their remarkable creations to life.
WWDC25: June 9-13, 2025
Join the worldwide developer community online for a week of technology and creativity.
Be there for the reveal of the latest Apple tools, frameworks, and features. Learn to elevate your apps and games through video sessions hosted by Apple engineers and designers. Engage with Apple experts in labs and connect with the worldwide developer community. All online and at no cost.
Assassin’s Creed Shadows comes to Mac
It’s an ice-cold late winter’s morning in Canada, but the offices of Ubisoft Quebec are ablaze with excitement.
The Ubisoft team is preparing the release of Assassin’s Creed Shadows, the 14th main entry in the series and an evolution for the franchise in nearly every detail. It’s set in feudal 16th-century Japan, a rich and elegant period that’s been long sought-after by fans and Ubisoft team members alike. It introduces a pair of fierce protagonists: Yasuke, a powerful warrior of African origin, and Naoe, an agile Shinobi assassin, both brought to life with attention to historical accuracy. Its world feels alive with an ever-changing dynamism that’s apparent in everything from the shifting weather to the rotating seasons to the magical interplay of light and shadow.
And what’s more, it’s set to release on Mac the same day it arrives on PCs and consoles.
“It’s been a longtime dream to bring the game to Mac,” says Ubisoft executive producer Marc-Alexis Côté, who debuted the game on Mac during the WWDC24 Keynote. “It’s incredible that I can now open a MacBook Pro and get this level of immersion.” Shadows will also be coming later to iPad with M-series chips.
Naoe, one of the game’s two protagonists, is an agile assassin who’s at her best when striking from the shadows.
Today marks one of the first times that the gaming community will get its hands on Shadows, and to celebrate the occasion, the Ubisoft offices — a mix of cozy chalet-worthy reclaimed wood and wide-open windows that afford a view of snowy Quebec City rooftops — have been reskinned with an Assassin’s Creed theme, including a display that emphasizes the heft of Yasuke’s weapons, especially an imposing-looking 13-pound model of the character’s sword. (On this day, the display is hosted by associate game director Simon Lemay-Comtois, who appears quite capable of wielding it.)
Download Assassin's Creed Shadows from the Mac App Store
Côté calls Shadows his team’s “most ambitious” game. In crafting the game’s expansive world, Ubisoft’s development team took advantage of an array of advanced Mac technologies: Metal 3 (working in concert with Ubisoft’s next-generation Anvil engine), Apple silicon, and a mix of HDR support and real-time ray tracing on Macs with M3 and M4 that Côté says was “transformative” in creating the game’s immersion.
It’s been a longtime dream to bring the game to Mac.
Marc-Alexis Côté, Ubisoft executive producer
“Seeing those millions of lines of code work natively on a Mac was a feeling that’s hard to describe,” Côté says. “When you look at the game’s performance, the curve Apple is on with successive improvements to the M-series chips year after year, and the way the game looks on an HDR screen, you’re like, ‘Is this real?’”
Assassin’s Creed Shadows is a balance of the technical and creative. For the former, associate technical director Mathieu Belanger says the capabilities of Mac laid the groundwork for technical success. “The architecture of the hardware is so well done, thanks in part to the unified memory between the GPU and CPU. That made us think the future is bright for gaming on the platform. So many things about doing this on Mac were great right out of the box.”
Naoe’s counterpart, Yasuke, prefers the use of brute force.
On the creative side, Ubisoft creative director Jonathan Dumont focused on a different opportunity. “The important thing was: Does this feel right? Is it what we want to send to players? And the answer was yes.”
The creative team’s goal was nothing short of “making this world feel alive,” says Martin Bedard, a 20-year Ubisoft veteran who served as the game’s technology director (and is very good at playing as Naoe). “You’re put into a moment that really existed,” he says. “This story is your playground.”
There are also fluffy kittens. We’ll get to those.
The ever-changing seasons lend an incredible variety to the game’s environments.
And there’s tremendous power behind the beauty, because the game’s biomes, seasons, weather, and lighting are all dynamic creations. The sunset hour bathes the mountains in soft purple light; the sun’s rays float in through leaves and temple roofs. Pretty much every room has a candle in it, which means the light is always changing. “Look at the clouds here,” says Bedard, pointing at the screen. “That’s not a rendering. These are all fluid-based cloud simulations.”
“Japan feels like it’s 80 percent trees and mountains,” says Dumont. “If you’re building this world without the rain, and the winds, and the mountains, it doesn’t feel right.”
Wherever you are, wherever you go, everything is beautiful and alive.
Mathieu Belanger, associate technical director
And those winds? “We developed a lot of features that were barely possible before, and one of them was a full simulation of the wind, not just an animation,” says Belanger. “We even built a humidity simulation that gathers clouds together.” For the in-game seasons, Ubisoft developed an engine that depicted houses, markets, and temples, in ever-changing conditions. “This was all done along the way over the past four years,” he says.
To pursue historical accuracy, Dumont and the creative team visited Japan to study every detail, including big-picture details (like town maps) to very specific ones (like the varnish that would have been applied to 16th-century wood). It wasn’t always a slam dunk, says Côté: In one visit, their Japanese hosts recommended a revision to the light splashing against the mountains. “We want to get all those little details right,” he says. (A “full-immersion version,” entirely in Japanese with English subtitles, is available.)
To recreate the world of 16th-century Japan, the Ubisoft creative visited Japan to study every detail.
Ubisoft’s decision to split the protagonist into two distinct characters with different identities, skill sets, origin stories, and class backgrounds came early in the process. (“That was a fun day,” laughs Belanger.) Ubisoft team members emphasize that choosing between Naoe and Yasuke is a matter of personal preference — lethal subtlety vs. brute force. Players can switch between characters at any time, and, as you might suspect, the pair grows stronger together as the story goes on. Much of Naoe’s advantage comes from her ability to linger in the game’s shadows — not just behind big buildings, but wherever the scene creates a space for her to hide. “The masterclass is clearing out a board without being spotted once,” says Bedard.
(The Hideout is) peaceful. You can say, ‘I feel like putting some trees down, seeing what I collected, upgrading my buildings, and petting the cats.’
Jonathan Dumont, Ubisoft creative director
Which brings us to the Hideout, Naoe and Yasuke’s home base and a bucolic rural village that acts as a zen-infused respite from the ferocity of battle. “It’s a place that welcomes you back,” says Dumont. It’s eminently customizable, both from a game-progression standpoint but also in terms of aesthetics. Where the battle scenes are a frenzy of bruising combat or stealth attacks, the Hideout is a refuge for supplies, artwork, found objects, and even a furry menagerie of cats, dogs, deer, and other calming influences. “There are progressions, of course,” says Dumont, “but it’s peaceful. You can say, ‘I feel like putting some trees down, seeing what I collected, upgrading my buildings, and petting the cats.”
“The kittens were a P1 feature,” laughs associate game director Dany St-Laurent.
Yasuke prepares to face off against an opponent in what will likely be a fruitful battle.
Yet for all those big numbers, Dumont says the game boils down to something much simpler. “I just think the characters work super-well together,” he says. “It’s an open-world game, yes. But at its core, it features two characters you’ll like. And the game is really about following their journey, connecting with them, exploring their unique mysteries, and seeing how they flow together. And I think the way in which they join forces is one of the best moments in the franchise.”
And if the Ubisoft team has its way, there will be plenty more moments to come. “I think the game will scale for years to come on the Mac platform,” says Côté. “Games can be more and more immersive with each new hardware release. We’re trying to create something here where more people can come with day-one games on the Mac, because I think it’s a beautiful platform.”
Hello Developer: March 2025
In this edition: An incredible AAA game comes to Mac. Plus, the latest on International Women’s Day activities, WeChat, and more.
Apple Developer is now on WeChat
Check out the official Apple Developer WeChat account to find news, announcements, and upcoming activities for the developer community.
Get ready with the latest beta releases
The beta versions of iOS 18.4, iPadOS 18.4, macOS 15.4, tvOS 18.4, visionOS 2.4, and watchOS 11.4 are now available. Get your apps ready by confirming they work as expected on these releases. And to take advantage of the advancements in the latest SDKs, make sure to build and test with Xcode 16.3.
As previewed last year, iOS 18.4 and iPadOS 18.4 include support for default translation apps for all users worldwide, and default navigation apps for EU users.
Beginning April 24, 2025, apps uploaded to App Store Connect must be built with Xcode 16 or later using an SDK for iOS 18, iPadOS 18, tvOS 18, visionOS 2, or watchOS 11.
New requirement for apps on the App Store in the European Union
As of today, apps without trader status have been removed from the App Store in the European Union (EU) until trader status is provided and verified by Apple.
Account Holders or Admins in the Apple Developer Program will need to enter this status in App Store Connect to comply with the Digital Services Act.
New features for APNs token authentication are now available
You can now take advantage of upgraded security options when creating new token authentication keys for the Apple Push Notification service (APNs).
Team-scoped keys enable you to restrict your token authentication keys to either development or production environments, providing an additional layer of security and ensuring that keys are used only in their intended environments.
Topic-specific keys provide more granular control by enabling you to associate each key with a specific bundle ID, allowing for more streamlined and organized key management. This is particularly beneficial for large organizations that manage multiple apps across different teams.
Your existing keys will continue to work for all push topics and environments. At this time, you don’t have to update your keys unless you want to take advantage of the new capabilities.
For detailed instructions on how to secure your communications with APNs, read Establishing a token-based connection to APNs.
Upcoming changes to offers and trials for subscriptions in South Korea
Starting February 14, 2025, new regulatory requirements in South Korea will apply to all apps with offers and trials for auto-renewing subscriptions.
To comply, if you offer trials or offers for auto-renewing subscriptions to your app or game, additional consent must be obtained for your trial or offer after the initial transaction. The App Store will help to get consent by informing the affected subscribers with an email, push notification, and in-app price consent sheet, and asking your subscribers to agree to the new price.
This additional consent must be obtained from customers within 30 days from the payment or conversion date for:
- Free to paid trials
- Discounted subscription offers to standard-price subscriptions
Apps that do not offer a free trial or discounted offer before a subscription converts to the regular price are not affected.
Tax and price updates for apps, In-App Purchases, and subscriptions
The App Store is designed to make it easy to sell your digital goods and services globally, with support for 44 currencies across 175 storefronts.
From time to time, we may need to adjust prices or your proceeds due to changes in tax regulations or foreign exchange rates. These adjustments are made using publicly available exchange rate information from financial data providers to help make sure prices for apps and In-App Purchases stay consistent across all storefronts.
Tax and pricing updates for FebruaryAs of February 6:
Your proceeds from the sale of eligible apps and In‑App Purchases have been modified in:
- Azerbaijan: value-added tax (VAT) introduction of 18%
- Peru: VAT introduction of 18%
- Slovakia: Standard VAT rate increase from 20% to 23%
- Slovakia: Reduced VAT rate introduction of 5% for ebooks
- Estonia: Reduced VAT rate increase from 5% to 9% for news publications, magazines, and other periodicals
- Finland: Reduced VAT rate increase from 10% to 14% for ebooks
Exhibit B of the Paid Applications Agreement has been updated to indicate that Apple collects and remits applicable taxes in Azerbaijan and Peru.¹
As of February 24:
Pricing for apps and In-App Purchases will be updated for the Azerbaijan and Peru storefronts if you haven’t selected one of these as the base for your app or In‑App Purchase.² These updates also consider VAT introductions listed in the tax updates section above.
If you’ve selected the Azerbaijan or Peru storefront as the base for your app or In-App Purchase, prices won’t change. On other storefronts, prices will be updated to maintain equalization with your chosen base price.
Prices won’t change in any region if your In‑App Purchase is an auto‑renewable subscription. Prices also won’t change on the storefronts where you manually manage prices instead of using the automated equalized prices.
The Pricing and Availability section of Apps has been updated in App Store Connect to display these upcoming price changes. As always, you can change the prices of your apps, In‑App Purchases, and auto‑renewable subscriptions at any time.
Learn more about managing your prices
View or edit upcoming price changes
Edit your app’s base country or region
Pricing and availability start times by country or region
Set a price for an In-App Purchase
Beginning April 1:
As a result of last year’s change in Japan’s tax regulations, Apple (through iTunes K.K. in Japan) is now designated as a Specified Platform Operator by the Japan tax authority. All paid apps and In-App Purchases, (including game items, such as coins) sold by non-Japan-based developers on the App Store in Japan will be subject to the platform tax regime. Apple will collect and remit a 10% Japanese consumption tax (JCT) to the National Tax Agency JAPAN on such transactions at the time of purchase. Your proceeds will be adjusted accordingly.
Please note any prepaid payment instruments (such as coins) sold prior to April 1, 2025, will not be subject to platform taxation, and the relevant JCT compliance should continue to be managed by the developer.
For specific information on how the JCT affects in-game items, see Question 7 in the Tax Agency of Japan’s Q&A about Platform Taxation of Consumption Tax.
Learn more about your proceeds
¹ Translations of the updated agreement are available on the Apple Developer website today.
² Excludes auto-renewable subscriptions.
Game distribution on the App Store in Vietnam
The Vietnamese Ministry of Information and Communications (MIC) requires games to be licensed to remain available on the App Store in Vietnam. To learn more and apply for a game license, review the regulations.
Once you have obtained your license:
- Sign in to App Store Connect.
- Enter the license number and the associated URL in the description section of your game’s product page.
- Note that you only need to provide this information for the App Store localization displayed on the Vietnam storefront.
- Submit an update to App Review.
If you have questions on how to comply with these requirements, please contact the Authority of Broadcasting and Electronic Information (ABEI) under the Vietnamese Ministry of Information and Communications.
Hello Developer: February 2025
In this edition: The latest on developer activities, the Swift Student Challenge, the team behind Bears Gratitude, and more.
The good news bears: Inside the adorably unorthodox design of Bears Gratitude
Here’s the story of how a few little bears led their creators right to an Apple Design Award.
Bears Gratitude is a warm and welcoming title developed by the Australian husband-and-wife team of Isuru Wanasinghe and Nayomi Hettiarachchi.
Journaling apps just don’t get much cuter: Through prompts like “Today isn’t over yet,” “I’m literally a new me,” and “Compliment someone,” the Swift-built app and its simple hand-drawn mascots encourage people to get in the habit of celebrating accomplishments, fostering introspection, and building gratitude. “And gratitude doesn’t have to be about big moments like birthdays or anniversaries,” says Wanasinghe. “It can be as simple as having a hot cup of coffee in the morning.”
ADA FACT SHEET
Bears Gratitude- Winner: Delight and Fun
- Available on: iOS, iPadOS, macOS
- Team size: 2
Download Bears Gratitude from the App Store
Wanasinghe is a longtime programmer who’s run an afterschool tutoring center in Sydney, Australia, for nearly a decade. But the true spark for Bears Gratitude and its predecessor, Bears Countdown, came from Hettiarachchi, a Sri Lankan-born illustrator who concentrated on her drawing hobby during the Covid-19 lockdown.
Wanasinghe is more direct. “The art is the heart of everything we do,” he says.
Bears Gratitude was developed by the Australian husband-and-wife team of Isuru Wanasinghe and Nayomi Hettiarachchi.
In fact, the art is the whole reason the app exists. As the pandemic months and drawings stacked up, Hettiarachchi and Wanasinghe found themselves increasingly attached to her cartoon creations, enough that they began to consider how to share them with the world. The usual social media routes beckoned, but given Wanasinghe’s background, the idea of an app offered a stronger pull.
“In many cases, you get an idea, put together a design, and then do the actual development,” he says. “In our case, it’s the other way around. The art drives everything.”
The art is the heart of everything we do.
Isuru Wanasinghe, Bears Gratitude cofounder
With hundreds of drawings at their disposal, the couple began thinking about the kinds of apps that could host them. Their first release was Bears Countdown, which employed the drawings to help people look ahead to birthdays, vacations, and other marquee moments. Countdown was never intended to be a mass-market app; the pair didn’t even check its launch stats on App Store Connect. “We’d have been excited to have 100 people enjoy what Nayomi had drawn,” says Wanasinghe. “That’s where our heads were at.”
But Countdown caught on with a few influencers and become enough of a success that the pair began thinking of next steps. “We thought, well, we’ve given people a way to look forward,” says Wanasinghe. “What about reflecting on the day you just had?’”
Hettiarachchi’s art samples get a close inspection from one of her trusted associates.
Gratitude keeps the cuddly cast from Countdown, but otherwise the app is an entirely different beast. It was also designed in what Wanasinghe says was a deliberately unusual manner. “Our design approach was almost bizarrely linear,” says Wanasinghe. “We purposely didn’t map out the app. We designed it in the same order that users experience it.”
Other unorthodox decisions followed, including the absence of a sign-in screen. “We wanted people to go straight into the experience and start writing,” he says. The home-screen journaling prompts are presented via cards that users flip through by tapping left and right. “It’s definitely a nonstandard UX,” says Wanasinghe, “but we found over and over again that the first thing users did was flip through the cards.”
Our design approach was almost bizarrely linear. We purposely didn’t map out the app. We designed it in the same order that users experience it.
Isuru Wanasinghe, Bears Gratitude cofounder
Another twist: The app’s prompts are written in the voice of the user, which Wanasinghe says was done to emphasize the personal nature of the app. “We wrote the app as if we were the only ones using it, which made it more relatable,” he says.
Then there are the bears, which serve not only as a distinguishing hook in a busy field, but also as a design anchor for its creators. “We’re always thinking: ‘Instead of trying to set our app apart, how do we make it ours?’ We use apps all the time, and we know how they behave. But here we tried to detach ourselves from all that, think of it as a blank canvas, and ask, ‘What do we want this experience to be?’”
Early design sketches for Bears Gratitude show the collection of swipe-able prompt cards.
Bears Gratitude isn’t a mindfulness app — Wanasinghe is careful to clarify that neither he nor Hettiarachchi are therapists or mental health professionals. “All we know about are the trials and tribulations of life,” he says.
But those trials and tribulations have reached a greater world. “People have said, ‘This is just something I visit every day that brings me comfort,’” says Wanasinghe. “We’re so grateful this is the way we chose to share the art. We’re plugged into people’s lives in a meaningful way.”
Meet the 2024 Apple Design Award winners
Behind the Design is a series that explores design practices and philosophies from finalists and winners of the Apple Design Awards. In each story, we go behind the screens with the developers and designers of these award-winning apps and games to discover how they brought their remarkable creations to life.
Apply for the Swift Student Challenge now through February 23
Submissions for the Swift Student Challenge 2025 are now open through February 23. You have three more weeks to design, test, refine, and submit your app playground for consideration to be named one of 350 winners.
What to know:
- The Challenge is free to enter — you just need access to an iPad or Mac with Swift Playground or Xcode.
- The best app ideas are personal — let your passion shine through your work.
- No formal coding experience required — the Challenge is open to students of all levels.
- Your app playground doesn’t need to be intricate — it should be experienced within 3 minutes or less.
Where to start:
- Explore tools and tutorials to build an incredible app playground.
- Get inspired by last year’s Distinguished Winners, learn about their winning apps, and read about their experiences at Apple Park.
Introducing the Advanced Commerce API
The App Store facilitates billions of transactions annually to help developers grow their businesses and provide a world-class customer experience. To further support developers’ evolving business models — such as exceptionally large content catalogs, creator experiences, and subscriptions with optional add-ons — we’re introducing the Advanced Commerce API.
Developers can apply to use the Advanced Commerce API to support eligible App Store business models and more flexibly manage their In-App Purchases within their app. These purchases leverage the power of the trusted App Store commerce system, including end-to-end payment processing, tax support, customer service, and more, so developers can focus on providing great app experiences.
Apps without trader status will be removed from the App Store in the EU
Starting February 17, 2025: Due to the European Union’s Digital Services Act, apps without trader status will be removed from the App Store in the European Union until trader status is provided and verified, if necessary.
As a reminder, Account Holders or Admins in the Apple Developer Program need to enter trader status in App Store Connect for apps on the App Store in the European Union in order to comply with the Digital Services Act.
Reminder: Upcoming Changes to the App Store Receipt Signing Intermediate Certificate
As part of ongoing efforts to improve security and privacy on Apple platforms, the App Store receipt signing intermediate certificate is being updated to use the SHA-256 cryptographic algorithm. This certificate is used to sign App Store receipts, which are the proof of purchase for apps and In-App Purchases.
This update is being completed in multiple phases and some existing apps on the App Store may be impacted by the next update, depending on how they verify receipts.
Starting January 24, 2025, if your app performs on-device receipt validation and doesn’t support the SHA-256 algorithm, your app will fail to validate the receipt. If your app prevents customers from accessing the app or premium content when receipt validation fails, your customers may lose access to their content.
If your app performs on-device receipt validation, update your app to support certificates that use the SHA-256 algorithm; alternatively, use the AppTransaction and Transaction APIs to verify App Store transactions.
For more details, view TN3138: Handling App Store receipt signing certificate changes.
Algorithm changes to server connections for Apple Pay on the Web
Starting next month, Apple will change the supported algorithms that secure server connections for Apple Pay on the Web. In order to maintain uninterrupted service, you’ll need to ensure that your production servers support one or more of the designated six ciphers before February 4, 2025.
These algorithm changes will affect any secure connection you’ve established as part of your Apple Pay integration, including the following touchpoints:
- Requesting an Apple Pay payment session (Apple Pay on the Web only)
- Renewing your domain verification (Apple Pay on the Web only)
- Receiving and handling merchant token notifications for recurring, deferred, and automatic-reload transactions (Apple Pay on the Web and in app)
- Creating and updating Wallet Orders (Apple Pay on the Web and in app)
- Managing merchant onboarding via the Apple Pay Web Merchant Registration API (payment service provider (PSP) and e-commerce platforms only)
Hello Developer: January 2025
In the first edition of the new year: Bring SwiftUI to your app in Cupertino, get ready for the Swift Student Challenge, meet the team behind Oko, and more.
Walk this way: How Oko leverages AI to make street crossings more accessible
Oko is a testament to the power of simplicity.
The 2024 Apple Design Award winner for Inclusivity and 2024 App Store Award winner for Cultural Impact leverages Artificial Intelligence to help blind or low-vision people navigate pedestrian walkways by alerting them to the state of signals — “Walk,” “Don’t Walk,” and the like — through haptic, audio, and visual feedback. The app instantly affords more confidence to its users. Its bare-bones UI masks a powerful blend of visual and AI tools under the hood. And it’s an especially impressive achievement for a team that had no iOS or Swift development experience before launch.
“The biggest feedback we get is, ‘It’s so simple, there’s nothing complex about it,’ and that’s great to hear,” says Vincent Janssen, one of Oko’s three Belgium-based founders. “But we designed it that way because that’s what we knew how to do. It just happened to also be the right thing.”
ADA FACT SHEET
From left: Willem Van de Mierop, Michiel Janssen, and Vincent Janssen are the three cofounders of Oko. The app’s name means “eye.”
Oko- Winner: Inclusivity
- Team: AYES BV
- Available on: iPhone
- Team size: 6
- Previous accolades: 2024 App Store Award winner for Cultural Impact; App Store Editors’ Choice
Download Oko from the App Store
For Janssen and his cofounders, brother Michiel and longtime friend Willem Van de Mierop, Oko — the name translates to “eye” — was a passion project that came about during the pandemic. All three studied computer science with a concentration in AI, and had spent years working in their hometown of Antwerp. But by the beginning of 2021, the trio felt restless. “We all had full-time jobs,” says Janssen, “but the weekends were pretty boring.” Yet they knew their experience couldn’t compare to that of a longtime friend with low vision, who Janssen noticed was feeling more affected as the autumn and winter months went on.
“We really started to notice that he was feeling isolated more than others,” says Janssen. “Here in Belgium, we were allowed to go for walks, but you had to be alone or with your household. That meant he couldn’t go with a volunteer or guide. As AI engineers, that got us thinking, ‘Well, there are all these stories about autonomous vehicles. Could we come up with a similar system of images or videos that would help people find their way around public spaces?’”
I had maybe opened Xcode three times a few years before, but otherwise none of us had any iOS or Swift experience.
Vincent Janssen, Oko founder
The trio began building a prototype that consisted of a microcomputer, 3D-printed materials, and a small portable speaker borrowed from the Janssen brothers’ father. Today, Janssen calls it “hacky hardware,” something akin to a small computer with a camera. But it allowed the team and their friend — now their primary tester — to walk the idea around and poke at the technology’s potential. Could AI recognize the state of a pedestrian signal? How far away could it detect a Don’t Walk sign? How would it perform in rain or wind or snow? There was just one way to know. “We went out for long walks,” says Janssen.
And while the AI and hardware performed well in their road tests, issues arose around the hardware’s size and usability, and the team begin to realize that software offered a better solution. The fact that none of the three had the slightest experience building iOS apps was simply a hurdle to clear. “I had maybe opened Xcode three times a few years before,” says Janssen, “but otherwise none of us had any iOS or Swift experience.”
Oko helps people navigate pedestrian walkways through interactive maps and audio, visual, and haptic feedback.
So that summer, the team pivoted to software, quitting their full-time jobs and throwing themselves into learning Swift through tutorials, videos, and trusty web searches. The core idea crystallized quickly: Build a simple app that relied on Camera, the Maps SDK, and a powerful AI algorithm that could help people get around town. “Today, it’s a little more complex, but in the beginning the app basically opened up a camera feed and a Core ML model to process the images,” says Janssen, noting that the original model was brought over from Python. “Luckily, the tools made the conversion really smooth.” (Oko’s AI models run locally on device.)
With the software taking shape, more field testing was needed. The team reached out to accessibility-oriented organizations throughout Belgium, drafting a team of 100 or so testers to “codevelop the app,” says Janssen. Among the initial feedback: Though Oko was originally designed to be used in landscape mode, pretty much everyone preferred holding their phones in portrait mode. “I had the same experience, to be honest,” said Janssen, “but that meant we needed to redesign the whole thing.”
The Oko team navigates through prototypes at a review session in their hometown of Antwerp, Belgium.
Other changes included amending the audio feedback to more closely mimic existing real-world sounds, and addressing requests to add more visual feedback. The experience amounted to getting a real-world education about accessibility on the fly. “We found ourselves learning about VoiceOver and haptic feedback very quickly,” says Janssen.
Still, the project went remarkably fast — Oko launched on the App Store in December 2021, not even a year after the trio conceived of it. “It took a little while to do things, like make sure the UI wasn’t blocked, especially since we didn’t fully understand the code we wrote in Swift,” laughs Janssen, “but in the end, the app was doing what it needed to do.”
We found ourselves learning about VoiceOver and haptic feedback.
Vincent Janssen, Oko founder
The accessibility community took notice. And in the following months, the Oko team continued expanding its reach — Michiel Janssen and Van de Mierop traveled to the U.S. to meet with accessibility organizations and get firsthand experience with American street traffic and pedestrian patterns. But even as the app expanded, the team retained its focus on simplicity. In fact, Janssen says, they explored and eventually jettisoned some expansion ideas — including one designed to help people find and board public transportation — that made the app feel a little too complex.
Today, the Oko team numbers 6, including a fleet of developers who handle more advanced Swift matters. “About a year after we launched, we got feedback about extra features and speed improvements, and needed to find people who were better at Swift than we are,” laughs Janssen. At the same time, the original trio is now learning about business, marketing, and expansion.
At its core, Oko remains a sparkling example of a simple app that completes its task well. “It’s still a work in progress, and we’re learning every day,” says Janssen. In other words, there are many roads yet to cross.
Meet the 2024 Apple Design Award winners
Behind the Design is a series that explores design practices and philosophies from finalists and winners of the Apple Design Awards. In each story, we go behind the screens with the developers and designers of these award-winning apps and games to discover how they brought their remarkable creations to life.
Get ready with the latest beta releases
The beta versions of iOS 18.3, iPadOS 18.3, macOS 15.3, tvOS 18.3, visionOS 2.3, and watchOS 11.3 are now available. Get your apps ready by confirming they work as expected on these releases. And to take advantage of the advancements in the latest SDKs, make sure to build and test with Xcode 16.2.
App Store Award winners announced
Join us in celebrating the outstanding work of these developers from around the world.
Updated Apple Developer Program License Agreement now available
Attachment 2 of the Apple Developer Program License Agreement has been amended to specify requirements for use of the In-App Purchase API. Please review the changes and accept the updated terms in your account.
View the full terms and conditions
Translations of the updated agreement will be available on the Apple Developer website within one month.
Hello Developer: December 2024
Get your apps and games ready for the holidays
The busiest season on the App Store is almost here. Make sure your apps and games are up to date and ready.
App Review will continue to accept submissions throughout the holiday season. Please plan to submit time-sensitive submissions early, as we anticipate high volume and reviews may take longer to complete from December 20-26.
App Store Award finalists announced
Every year, the App Store Awards celebrate exceptional apps and games that improve people's lives while showcasing the highest levels of technical innovation, user experience, design, and positive cultural impact. This year, the App Store Editorial team is proud to recognize over 40 outstanding finalists. Winners will be announced in the coming weeks.
Price and tax updates for apps, In-App Purchases, and subscriptions
The App Store is designed to make it easy to sell your digital goods and services globally, with support for 44 currencies across 175 storefronts.
From time to time, we may need to adjust prices or your proceeds due to changes in tax regulations or foreign exchange rates. These adjustments are made using publicly available exchange rate information from financial data providers to help make sure prices for apps and In-App Purchases stay consistent across all storefronts.
Tax updates as of October:
Your proceeds from the sale of eligible apps and In‑App Purchases have been increased in:
- Nepal: Apple no longer remits Nepal value-added tax (VAT) for local developers and proceeds were increased accordingly.
- Kazakhstan: Apple no longer remits Kazakstan VAT for local developers and proceeds were increased accordingly.
- Madeira: Decrease of the Madeira VAT rate from 5% to 4% for news publications, magazines and other periodicals, books, and audiobooks.
Exhibit B of the Paid Applications Agreement has been updated to indicate that Apple will not remit VAT in Nepal and Kazakhstan for local developers.
Learn more about your proceeds
Price updates as of December 2:
- Pricing for apps and In-App Purchases will be updated for the Japan and Türkiye storefronts if you haven’t selected one of these as the base for your app or In‑App Purchases.
If you’ve selected the Japan or Türkiye storefront as the base for your app or In-App Purchase, prices won’t change. On other storefronts, prices will be updated to maintain equalization with your chosen base price.
Prices won’t change in any region if your In‑App Purchase is an auto‑renewable subscription and won’t change on the storefronts where you manually manage prices instead of using the automated equalized prices.
The Pricing and Availability section of Apps has been updated in App Store Connect to display these upcoming price changes. As always, you can change the prices of your apps, In‑App Purchases, and auto‑renewable subscriptions at any time.
Learn more about managing your prices
View or edit upcoming price changes
Edit your app’s base country or region
Enhancements to the App Store featuring process
Share your app or game’s upcoming content and enhancements for App Store featuring consideration with new Featuring Nominations in App Store Connect. Submit a nomination to tell our team about a new launch, in-app content, or added functionality. If you’re featured in select placements on the Today tab, you’ll also receive a notification via the App Store Connect app.
In addition, you can promote your app or game’s biggest moments — such as an app launch, new version, or select featuring placements on the App Store — with readymade marketing assets. Use the App Store Connect app to generate Apple-designed assets and share them to your social media channels. Include the provided link alongside your assets so people can easily download your app or game on the App Store.
New Broadcast Push Notification Metrics Now Available in the Push Notifications Console
The Push Notifications Console now includes metrics for broadcast push notifications sent in the Apple Push Notification service (APNs) production environment. The console’s interface provides an aggregated view of the broadcast push notifications that are successfully accepted by APNs, the number of devices that receive them, and a snapshot of the maximum number of devices subscribed to your channels.
Coding in the kitchen: How Devin Davies whipped up the tasty recipe app Crouton
Let’s get this out of the way: Yes, Devin Davies is an excellent cook. “I’m not, like, a professional or anything,” he says, in the way that people say they’re not good at something when they are.
But in addition to knowing his way around the kitchen, Davies is also a seasoned developer whose app Crouton, a Swift-built cooking aid, won him the 2024 Apple Design Award for Interaction.
Crouton is part recipe manager, part exceptionally organized kitchen assistant. For starters, the app collects recipes from wherever people find them — blogs, family cookbooks, scribbled scraps from the ’90s, wherever — and uses tasty ML models to import and organize them. “If you find something online, just hit the Share button to pull it into Crouton,” says the New Zealand-based developer. “If you find a recipe in an old book, just snap a picture to save it.”
And when it’s time to start cooking, Crouton reduces everything to the basics by displaying only the current step, ingredients, and measurements (including conversions). There’s no swiping around between apps to figure out how many fl oz are in a cup; no setting a timer in a different app. It’s all handled right in Crouton. “The key for me is: How quickly can I get you back to preparing the meal, rather than reading?” Davies says.
ADA FACT SHEET
Crouton- Winner: Interaction
- Available on: iPhone, iPad, Mac, Apple Vision Pro, Apple Watch
- Team size: 1
Download Crouton from the App Store
Crouton is the classic case of a developer whipping up something he needed. As the de facto chef in the house, Davies had previously done his meal planning in the Notes app, which worked until, as he laughs, “it got a little out of hand.”
At the time, Davies was in his salad days as an iOS developer, so he figured he could build something that would save him a little time. (It’s in his blood: Davies’s father is a developer too.) "Programming was never my strong suit,” he says, “but once I started building something that solved a problem, I started thinking of programming as a means to an end, and that helped.”
Davies’s full-time job was his meal ticket, but he started teaching himself Swift on the side. Swift, he says, clicked a lot faster than the other languages he’d tried, especially as someone who was still developing a taste for programming. “It still took me a while to get my head into it,” he says, “but I found pretty early on that Swift worked the way I wanted a language to work. You can point Crouton at some text, import that text, and do something with it. The amount of steps you don’t have to think about is astounding.”
I found pretty early on that Swift worked the way I wanted a language to work.
Devin Davies, Crouton
Coding with Swift offered plenty of baked-in benefits. Davies leaned on platform conventions to make navigating Crouton familiar and easy. Lists and collection views took advantage of Camera APIs. VisionKit powered text recognition; a separate model organized imported ingredients by category.
“I could separate out a roughly chopped onion from a regular onion and then add the quantity using a Core ML model,” he says. “It’s amazing how someone like me can build a model to detect ingredients when I really have zero understanding of how it works.”
Davies designed Crouton with simplicity in mind at all times. “I spent a lot of time figuring out what to leave out rather than bring in,” he says.
The app came together quickly: The first version was done in about six months, but Crouton simmered for a while before finding its audience. “My mom and I were the main active users for maybe a year,” Davies laughs. “But it’s really important to build something that you use yourself — especially when you’re an indie — so there’s motivation to carry on.”
Davies served up Crouton updates for a few years, and eventually the app gained more traction, culminating with its Apple Design Award for Interaction at WWDC24. That’s an appropriate category, Davies says, because he believes his approach to interaction is his app’s special sauce. “My skillset is figuring out how the pieces of an app fit together, and how you move through them from point A to B to C,” he says. “I spent a lot of time figuring out what to leave out rather than bring in.”
Crouton recipes can be imported from blogs, cookbook, scraps of paper, or anywhere else they might be found.
Davies hopes to use the coming months to explore spicing up Crouton with Apple Intelligence, Live Activities on Apple Watch, and translation APIs. (Though Crouton is his primary app, he’s also built an Apple Vision Pro app called Plate Smash, which is presumably very useful for cooking stress relief.)
But it’s important to him that any new features or upgrades pair nicely with the current Crouton. “I’m a big believer in starting out with core intentions and holding true to them,” he says. “I don’t think that the interface, over time, has to be completely different.”
My skillset is figuring out how the pieces of an app fit together, and how you move through them from point A to B to C.
Devin Davies, Crouton
Because it’s a kitchen assistant, Crouton is a very personal app. It’s in someone’s kitchen at mealtime, it’s helping people prepare means for their loved ones, it’s enabling them to expand their culinary reach. It makes a direct impact on a person’s day. That’s a lot of influence to have as an app developer — even when a recipe doesn’t quite pan out.
“Sometimes I’ll hear from people who discover a bug, or even a kind of misunderstanding, but they’re always very kind about it,” laughs Davies. “They’ll tell me, ‘Oh, I was baking a cake for my daughter’s birthday, and I put in way too much cream cheese and I ruined it. But, great app!’”
Meet the 2024 Apple Design Award winners
Behind the Design is a series that explores design practices and philosophies from finalists and winners of the Apple Design Awards. In each story, we go behind the screens with the developers and designers of these award-winning apps and games to discover how they brought their remarkable creations to life.
Hello Developer: November 2024
In this edition: The Swift Pathway, new developer activities around the world, and an interview with the creator of recipe app Crouton.
Upcoming changes to the App Store Receipt Signing Intermediate Certificate
As part of ongoing efforts to improve security and privacy on Apple platforms, the App Store receipt signing intermediate certificate is being updated to use the SHA-256 cryptographic algorithm. This certificate is used to sign App Store receipts, which are the proof of purchase for apps and In-App Purchases.
This update is being completed in multiple phases and some existing apps on the App Store may be impacted by the next update, depending on how they verify receipts.
Starting January 24, 2025, if your app performs on-device receipt validation and doesn't support a SHA-256 algorithm, your app will fail to validate the receipt. If your app prevents customers from accessing the app or premium content when receipt validation fails, your customers may lose access to their content.
If your app performs on-device receipt validation, update your app to support certificates that use the SHA-256 algorithm; alternatively, use the AppTransaction and Transaction APIs to verify App Store transactions.
For more details, view TN3138: Handling App Store receipt signing certificate change.
TestFlight enhancements to help you reach testers
Beta testing your apps, games, and App Clips is even better with new enhancements to TestFlight. Updates include:
- Redesigned invitations. TestFlight invitations now include your beta app description to better highlight new features and content your app or game offers to prospective testers. Apps and games with an approved version that’s ready for distribution can also include their screenshots and app category in their invite. We’ve also added a way for people to leave feedback if they didn’t join your beta, so you can understand why they didn’t participate.
- Tester enrollment criteria. You can choose to set criteria, such as device type and OS versions, to more easily enroll qualified testers via a public link to provide more relevant feedback on your invite.
- Public link metrics. Find out how successful your public link is at enrolling testers for your app with new metrics. Understand how many testers viewed your invite in the TestFlight app and chose to accept it. If you’ve set criteria for the public link, you can also view how many testers didn’t meet the criteria.
To get started with TestFlight, upload your build, add test information, and invite testers.
Get ready with the latest beta releases
The beta versions of iOS 18.2, iPadOS 18.2, and macOS 15.2 are now available. Get your apps ready by confirming they work as expected on these releases. And make sure to build and test with Xcode 16.2 beta to take advantage of the advancements in the latest SDKs.
As previewed earlier this year, changes to the browser choice screen, default apps, and app deletion for EU users, as well as support in Safari for exporting user data and for web browsers to import that data, are now available in the beta versions of iOS 18.2 and iPadOS 18.2.
These releases also include improvements to the Apps area in Settings first introduced in iOS 18 and iPadOS 18. All users worldwide will be able to manage their default apps via a Default Apps section at the top of the Apps area. New calling and messaging defaults are also now available for all users worldwide.
Following feedback from the European Commission and from developers, in these releases developers can develop and test EU-specific features, such as alternative browser engines, contactless apps, marketplace installations from web browsers, and marketplace apps, from anywhere in the world. Developers of apps that use alternative browser engines can now use WebKit in those same apps.
View details about the browser choice screen, how to make an app available for users to choose as a default, how to create a calling or messaging app that can be a default, and how to import user data from Safari.
Updated agreements now available
The Apple Developer Program License Agreement and its Schedules 1, 2, and 3 have been updated to support updated policies and upcoming features, and to provide clarification. Please review the changes below and accept the updated terms in your account.
Apple Developer Program License Agreement
- Definitions, Section 3.3.3(J): Specified requirements for use of App Intents.
- Definitions, Section 3.3.5(C): Clarified requirements for use of Sign in With Apple.
- Definitions, Section 3.3.8(G): Specified requirements for use of the Critical Messaging API.
- Definitions, Sections 3.3.9(C): Clarified requirements for use of the Apple Pay APIs; updated definition of “Apple” for use of the Apple Pay APIs.
- Attachment 2: Clarified requirements for use of the In-App Purchase API.
Schedules 1, 2, and 3
Apple Services Pte. Ltd. is now the Apple legal entity responsible for the marketing and End-User download of the Licensed and Custom Applications by End-Users located in the following regions:
- Bhutan
- Brunei
- Cambodia
- Fiji
- Korea
- Laos
- Macau
- Maldives
- Micronesia, Fed States of
- Mongolia
- Myanmar
- Nauru
- Nepal
- Papua New Guinea
- Palau
- Solomon Islands
- Sri Lanka
- Tonga
- Vanuatu
Paid Applications Agreement (Schedules 2 and 3)
Exhibit B: Indicated that Apple shall not collect and remit taxes for local developers in Nepal and Kazakhstan, and such developers shall be solely responsible for the collection and remittance of such taxes as may be required by local law.
Exhibit C:
- Section 6: Clarified that Apple will apply Korean VAT on the commissions payable by Korean developers to Apple to be deducted from remittance with respect to sales to Korean customers pursuant to local tax laws.
- Section 10: For Singaporean developers who have registered for Singapore GST and have provided their Singapore GST registration number to Apple, clarified that Apple will apply Singaporean GST on the commissions payable by Singaporean developers to Apple to be deducted from remittance with respect to sales to Singaporean customers pursuant to local tax laws.
View the full terms and conditions
Translations of the Apple Developer Program License Agreement will be available on the Apple Developer website within one month.
New requirement for app updates in the European Union
Starting today, in order to submit updates for apps on the App Store in the European Union (EU) Account Holders or Admins in the Apple Developer Program need to enter trader status in App Store Connect. If you’re a trader, you’ll need to provide your trader information before you can submit your app for review.
Starting February 17, 2025, apps without trader status will be removed from the App Store in the EU until trader status is provided and verified in order to comply with the Digital Services Act.
Apple Push Notification service server certificate update
The Certification Authority (CA) for Apple Push Notification service (APNs) is changing. APNs will update the server certificates in sandbox on January 20, 2025, and in production on February 24, 2025. All developers using APNs will need to update their application’s Trust Store to include the new server certificate: SHA-2 Root : USERTrust RSA Certification Authority certificate.
To ensure a smooth transition and avoid push notification delivery failures, please make sure that both old and new server certificates are included in the Trust Store before the cut-off date for each of your application servers that connect to sandbox and production.
At this time, you don’t need to update the APNs SSL provider certificates issued to you by Apple.
Hello Developer: October 2024
Get your app up to speed, meet the team behind Lies of P, explore new student resources, and more.
Masters of puppets: How ROUND8 Studio carved out a niche for Lies of P
Lies of P is closer to its surprising source material than you might think.
Based on Carlo Collodi’s 1883 novel The Adventures of Pinocchio, the Apple Design Award-winning game is a macabre reimagining of the story of a puppet who longs to be a real boy. Collodi’s story is still best known as a children’s fable. But it’s also preprogrammed with more than its share of darkness — which made it an appealing foundation for Lies of P director Jiwon Choi.
“When we were looking for stories to base the game on, we had a checklist of needs,” says Choi. “We wanted something dark. We wanted a story that was familiar but not entirely childish. And the deeper we dove into Pinocchio, the more we found that it checked off everything we were looking for.”
ADA FACT SHEET
Lies of P- Winner: Visuals and Graphics
- Team: ROUND8 Studio (developer), NEOWIZ (publisher)
- Available on: Mac
- Team size: 100
- Previous accolades: App Store 2023 Mac Game of the Year, App Store Editors’ Choice
Developed by the South Korea-based ROUND8 Studio and published by its parent company, NEOWIZ, Lies of P is a lavishly rendered dark fantasy adventure and a technical showpiece for Mac with Apple silicon. Yes, players control a humanoid puppet created by Geppetto. But instead of a little wooden boy with a penchant for little white lies, the game’s protagonist is a mechanical warrior with an array of massive swords and a mission to battle through the burned-out city of Krat to find his maker — who isn’t exactly the genial old woodcarver from the fable.
“The story is well-known, and so are the characters,” says Choi. “We knew that to create a lasting memory for gamers, we had to add our own twists.”
In the burned-out world of Lies of P, something this warm and beautiful can’t be good news.
Those twists abound. The puppet is accompanied by a digital lamp assistant named Gemini — pronounced “jim-i-nee,” of course. A major character is a play on the original’s kindly Blue Fairy. A game boss named Mad Donkey is a lot more irritable than the donkeys featured in Collodi’s story. And though nobody’s nose grows in Lies of P, characters have opportunities to lie in a way that directly affects the storyline — and potentially one of the game’s multiple endings.
We knew that to create a lasting memory for gamers, we had to add our own twists.
Jiwon Choi, Lies of P director
“If you play without knowing the original story, you might not catch all those twists,” says Choi. “But it goes the other way, too. We’ve heard from players who became curious about the original story, so they went back and found out about our twists that way.”
There’s nothing curious about the game’s success: In addition to winning a 2024 Apple Design Award for Visuals and Graphics, Lies of P was named the App Store’s 2023 Mac Game of the Year and has collected a bounty of accolades from the gaming community. Many of those call out the game’s visual beauty, a world of rich textures, detailed lighting, and visual customization options like MetalFX upscaling and volumetric fog effects that let you style the ruined city to your liking.
Many of Collodi’s original characters have been updated for Lies of P, including the Black Rabbit Brotherhood, who appear to be hopping mad.
For that city, the ROUND8 team added another twist by moving the story from its original Italian locale to the Belle Èpoque era of pre-WWI France. “Everyone expected Italy, and everyone expected steampunk,” says Choi, “but we wanted something that wasn’t quite as common in the gaming industry. We considered a few other locations, like the wild west, but the Belle Èpoque was the right mix of beauty and prosperity. We just made it darker and gloomier.”
We considered a few other locations, like the wild west, but the Belle Èpoque was the right mix of beauty and prosperity. We just made it darker and gloomier.
Jiwon Choi, Lies of P director
To create the game’s fierce (and oily) combat, Choi and the team took existing Soulslike elements and added their own touches, like customizable weapons that can be assembled from items lying around Krat. “We found that players will often find a weapon they like and use it until the ending,” says Choi. “We found that inefficient. But we also know that everyone has a different taste for weapons.”
The system, he says, gives players the freedom to choose their own combinations instead of pursuing a “best” pre-ordained weapon. And the strategy worked: Choi says players are often found online discussing the best combinations rather than the best weapons. “That was our intention when creating the system,” he says.
The game is set in the Belle Èpoque, an era known for its beauty and prosperity. “We just made it darker and gloomier,” says Choi.
Also intentional: The game’s approach to lying, another twist on the source material. “Lying in the game isn’t just about deceiving a counterpart,” says Choi. “Humans are the only species who can lie to one another, so lying is about exploring the core of this character.”
It’s also about the murky ethics of lying: Lies of P suggests that, at times, nothing is as human — or humane — as a well-intentioned falsehood.
“The puppet of Geppetto is not human,” says Choi. “But at the same time, the puppet acts like a human and occasionally exhibits human behavior, like getting emotional listening to music. The idea was: Lying is something a human might do. That’s why it’s part of the game.”
Every environment in Lies of P — including the Krat Festival, which has seen better days — is rich with desolate detail.
The Lies of P story might not be done just yet. Choi and team are working on downloadable content and a potential sequel — possibly starring another iconic character who’s briefly teased in the game’s ending. But in the meantime, the team is taking a moment to enjoy the fruits of their success. “At the beginning of development, I honestly doubted that we could even pull this off,” says Choi. “For me, the most surprising thing is that we achieved this. And that makes us think, ‘Well, maybe we could do better next time.’”
Meet the 2024 Apple Design Award winners
Behind the Design is a series that explores design practices and philosophies from finalists and winners of the Apple Design Awards. In each story, we go behind the screens with the developers and designers of these award-winning apps and games to discover how they brought their remarkable creations to life.
Announcing the Swift Student Challenge 2025
We’re thrilled to announce the Swift Student Challenge 2025. The Challenge provides the next generation of student developers the opportunity to showcase their creativity and coding skills by building app playgrounds with Swift.
Applications for the next Challenge will open in February 2025 for three weeks.
We’ll select 350 Swift Student Challenge winners whose submissions demonstrate excellence in innovation, creativity, social impact, or inclusivity. From this esteemed group, we’ll name 50 Distinguished Winners whose work is truly exceptional and invite them to join us at Apple in Cupertino for three incredible days where they’ll gain invaluable insights from Apple experts and engineers, connect with their peers, and enjoy a host of unforgettable experiences.
All Challenge winners will receive one year of membership in the Apple Developer Program, a special gift from Apple, and more.
To help you get ready, we’re launching new coding resources, including Swift Coding Clubs designed for students to develop skills for a future career, build community, and get ready for the Challenge.
Upcoming regional age ratings in Australia and France
Apple is committed to making the App Store a safe place for everyone — especially kids. Within the next few months, the following regional age ratings for Australia and France will be implemented in accordance with local laws. No action is needed on your part. Where required by local regulations, regional ratings will appear alongside Apple global age ratings.
Australia
Apps with any instances of simulated gambling will display an R18+ regional age rating in addition to the Apple global age rating on the App Store in Australia.
France
Apps with a 17+ Apple global age rating will also display an 18+ regional age rating on the App Store in France.
Update on iPadOS 18 apps distributed in the European Union
The App Review Guidelines have been revised to add iPadOS to Notarization.
Starting September 16:
- Users in the EU can download iPadOS apps on the App Store and through alternative distribution. As mentioned in May, if you have entered into the Alternative Terms Addendum for Apps in the EU, iPadOS first annual installs will begin to accrue and the lower App Store commission rate will apply.
- Alternative browser engines can be used in iPadOS apps.
- Historical App Install Reports in App Store Connect that can be used with our fee calculator will include iPadOS.
If you’ve entered into a previous version of the following agreements, be sure to sign the latest version, which supports iPadOS:
- Alternative Terms Addendum for Apps in the EU
- Web Browser Engine Entitlement Addendum for Apps in the EU
- Embedded Browser Engine Entitlement Addendum for Apps in the EU
Learn more about the update on apps distributed in the EU
Translations of the guidelines will be available on the Apple Developer website within one month.
Win-back offers for auto-renewable subscriptions now available
You can now configure win-back offers — a new type of offer for auto-renewable subscriptions — in App Store Connect. Win-back offers allow you to reach previous subscribers and encourage them to resubscribe to your app or game. For example, you can create a pay up front offer for a reduced subscription price of $9.99 for six months, with a standard renewal price of $39.99 per year. Based on your offer configuration, Apple displays these offers to eligible customers in various places, including:
- Across the App Store, including on your product page, as well as in personalized recommendations and editorial selections on the Today, Games, and Apps tabs.
- In your app or game.
- Via a direct link you share using your own marketing channels.
- In Subscription settings.
When creating win-back offers in App Store Connect, you’ll determine customer eligibility, select regional availability, and choose the discount type. Eligible customers will be able to discover win-back offers this fall.
App Store submissions now open for the latest OS releases
iOS 18, iPadOS 18, macOS Sequoia, tvOS 18, visionOS 2, and watchOS 11 will soon be available to customers worldwide. Build your apps and games using the Xcode 16 Release Candidate and latest SDKs, test them using TestFlight, and submit them for review to the App Store. You can now start deploying seamlessly to TestFlight and the App Store from Xcode Cloud. With exciting new features like watchOS Live Activities, app icon customization, and powerful updates to Swift, Siri, Controls, and Core ML, you can deliver even more unique experiences on Apple platforms.
And beginning next month, you’ll be able to bring the incredible new features of Apple Intelligence into your apps to help inspire the way users communicate, work, and express themselves.
Starting April 2025, apps uploaded to App Store Connect must be built with SDKs for iOS 18, iPadOS 18, tvOS 18, visionOS 2, or watchOS 11.
Hello Developer: September 2024
Get your apps ready by digging into these video sessions and resources.
Explore machine learning on Apple platforms Watch now Bring expression to your app with Genmoji Watch now Browse new resourcesLearn how to make actions available to Siri and Apple Intelligence.
Need a boost?Check out our curated guide to machine learning and AI.
FEATURED
Get ready for OS updatesDive into the latest updates with these developer sessions.
Level up your games Port advanced games to Apple platforms Watch now Design advanced games for Apple platforms Watch now Bring your vision to life Design great visionOS apps Watch now Design interactive experiences for visionOS Watch now Upgrade your iOS and iPadOS apps Extend your app’s controls across the system Watch now Elevate your tab and sidebar experience in iPadOS Watch nowBrowse Apple Developer on YouTube
Get expert guidanceCheck out curated guides to the latest features and technologies.
BEHIND THE DESIGN
Rytmos: A puzzle game with a global beatFind out how Floppy Club built an Apple Design Award winner that sounds as good as it looks.
Behind the Design: The rhythms of Rytmos View nowMEET WITH APPLE
Reserve your spot for upcoming developer activities- Envision the future: Create great apps for visionOS: Find out how to build visionOS apps for a variety of use cases. (October 2, Cupertino)
- Build faster and more efficient apps: Learn how to optimize your use of Apple frameworks, resolve performance issues, and reduce launch time. (October 23, Cupertino)
Want to get Hello Developer in your inbox? Make sure you’ve opted in to receive emails about developer news and events by updating your email preferences in your developer account.
Share your thoughtsWe’d love to hear from you. If you have suggestions for our activities or stories, please let us know.
Behind the Design: The rhythms of Rytmos
Rytmos is a game that sounds as good as it looks.
With its global rhythms, sci-fi visuals, and clever puzzles, the 2024 Apple Design Award winner for Interaction is both a challenge and an artistic achievement. To solve each level, players must create linear pathways on increasingly complex boards, dodging obstacles and triggering buttons along the way. It’s all set to a world-music backdrop; different levels feature genres as diverse as Ethiopian jazz, Hawaiian slack key guitar, and Gamelan from Indonesia, just to name a few.
And here’s the hook: Every time you clear a level, you add an instrument to an ever-growing song.
“The idea is that instead of reacting to the music, you’re creating it,” says Asger Strandby, cofounder of Floppy Club, the Denmark-based studio behind Rytmos. “We do a lot to make sure it doesn’t sound too wild. But the music in Rytmos is entirely generated by the way you solve the puzzles.”
ADA FACT SHEET
Rytmos- Winner: Interaction
- Team: Floppy Club
- Available on: iPhone, iPad
- Team size: 5
Download Rytmos from the App Store
The artful game is the result of a partnership that dates back decades. In addition to being developers, Strandby and Floppy Club cofounder Niels Böttcher are both musicians who hail from the town of Aarhus in Denmark. “It’s a small enough place that if you work in music, you probably know everyone in the community,” laughs Böttcher.
The music in Rytmos comes mostly from traveling and being curious.
Niels Böttcher, Floppy Club cofounder
The pair connected back in the early 2000s, bonding over music more than games. “For me, games were this magical thing that you could never really make yourself,” says Strandby. “I was a geeky kid, so I made music and eventually web pages on computers, but I never really thought I could make games until I was in my twenties.” Instead, Strandby formed bands like Analogik, which married a wild variety of crate-digging samples — swing music, Eastern European folk, Eurovision-worthy pop — with hip-hop beats. Strandby was the frontman, while Böttcher handled the behind-the-scenes work. “I was the manager in everything but name,” he says.
The band was a success: Analogik went on to release five studio albums and perform at Glastonbury, Roskilde, and other big European festivals. But when their music adventure ended, the pair moved back into separate tech jobs for several years — until the time came to join forces again. “We found ourselves brainstorming one day, thinking about, ‘Could we combine music and games in some way?’” says Böttcher. “There are fun similarities between the two in terms of structures and patterns. We thought, ‘Well, let’s give it a shot.’”
Puzzles in Rytmos — like the one set on the planet “Hateta” — come with a little history lesson about the music being played.
The duo launched work on a rhythm game that was powered by their histories and travels. “I’ve collected CDs and tapes from all over the world, so the genres in Rytmos are very carefully chosen,” says Böttcher. “We really love Ethiopian jazz music, so we included that. Gamelan music (traditional Indonesian ensemble music that’s heavy on percussion) is pretty wild, but incredible. And sometimes, you just hear an instrument and say, ‘Oh, that tabla has a really nice sound.’ So the music in Rytmos comes mostly from traveling and being curious.”
The game took shape early, but the mazes in its initial versions were much more intricate. To help bring them down to a more approachable level, the Floppy Club team brought on art director Niels Fyrst. “He was all about making things cleaner and clearer,” says Böttcher. “Once we saw what he was proposing — and how it made the game stronger — we realized, ‘OK, maybe we’re onto something.’”
Success in Rytmos isn't just that you're beating a level. It's that you're creating something.
Asger Strandby, Floppy Club cofounder
Still, even with a more manageable set of puzzles, a great deal of design complexity remained. Building Rytmos levels was like stacking a puzzle on a puzzle; the team not only had to build out the levels, but also create the music to match. To do so, Strandby and his brother, Bo, would sketch out a level and then send it over to Böttcher, who would sync it to music — a process that proved even more difficult than it seems.
“The sound is very dependent on the location of the obstacles in the puzzles,” says Strandby. “That’s what shapes the music that comes out of the game. So we’d test and test again to make sure the sound didn’t break the idea of the puzzle.”
Puzzles in Rytmos are all about getting from Point A to Point B — but things are never as simple as they seem.
The process, he says, was “quite difficult” to get right. “Usually with something like this, you create a loop, and then maybe add another loop, and then add layers on top of it,” says Böttcher. “In Rytmos, hitting an emitter triggers a tone, percussion sound, or chord. One tone hits another tone, and then another, and then another. In essence, you’re creating a pattern while playing the game.”
We’ve actually gone back to make some of the songs more imprecise, because we want them to sound human.
Niels Böttcher, Floppy Club cofounder
The unorthodox approach leaves room for creativity. “Two different people’s solutions can sound different,” says Strandby. And when players win a level, they unlock a “jam mode” where they can play and practice freely. "It’s just something to do with no rules after all the puzzling,” laughs Strandby.
Yet despite all the technical magic happening behind the scenes, the actual musical results had to have a human feel. “We’re dealing with genres that are analog and organic, so they couldn’t sound electronic at all,” says Böttcher. “We’ve actually gone back to make some of the songs more imprecise, because we want them to sound human.”
Best of all, the game is shot through with creativity and cleverness — even offscreen. Each letter in the Rytmos logo represents the solution to a puzzle. The company’s logo is a 3.5-inch floppy disk, a little nod to their first software love. (“That’s all I wished for every birthday,” laughs Böttcher.) And both Böttcher and Strandby hope that the game serves as an introduction to both sounds and people they might not be familiar with. "Learning about music is a great way to learn about a culture,” says Strandby.
But mostly, Rytmos is an inspirational experience that meets its lofty goal. “Success in Rytmos isn’t just that you’re beating a level,” says Strandby. “It’s that you’re creating something.”
Meet the 2024 Apple Design Award winners
Behind the Design is a series that explores design practices and philosophies from finalists and winners of the Apple Design Awards. In each story, we go behind the screens with the developers and designers of these award-winning apps and games to discover how they brought their remarkable creations to life.
Price and tax updates for apps, In-App Purchases, and subscriptions
The App Store is designed to make it easy to sell your digital goods and services globally, with support for 44 currencies across 175 storefronts.
From time to time, we may need to adjust prices or your proceeds due to changes in tax regulations or foreign exchange rates. These adjustments are made using publicly available exchange rate information from financial data providers to help make sure prices for apps and In-App Purchases stay consistent across all storefronts.
Price updatesOn September 16:
- Pricing for apps and In-App Purchases¹ will be updated for the Chile, Laos, and Senegal storefronts if you haven’t selected one of these as the base for your app or In‑App Purchase.¹ These updates also consider value‑added tax (VAT) introductions listed in the “Tax updates” section below.
If you’ve selected the Chile, Laos, or Senegal storefront as the base for your app or In-App Purchase, prices won’t change. On other storefronts, prices will be updated to maintain equalization with your chosen base price.
Prices won’t change in any region if your In‑App Purchase is an auto‑renewable subscription and won’t change on the storefronts where you manually manage prices instead of using the automated equalized prices.
The Pricing and Availability section of Apps has been updated in App Store Connect to display these upcoming price changes. As always, you can change the prices of your apps, In‑App Purchases, and auto‑renewable subscriptions at any time.
Learn more about managing your prices
View or edit upcoming price changes
Edit your app’s base country or region
Pricing and availability start times by region
Set a price for an In-App Purchase
Tax updatesAs of August 29:
Your proceeds from the sale of eligible apps and In‑App Purchases have been modified in:
- Laos: VAT introduction of 10%
- Senegal: VAT introduction of 18%
- India: Equalization levy of 2% no longer applicable
Exhibit B of the Paid Applications Agreement has been updated to indicate that Apple collects and remits applicable taxes in Laos and Senegal.
Beginning in September:
Your proceeds from the sale of eligible apps and In‑App Purchases will be modified in:
- Canada: Digital services tax introduction of 3%
- Finland: VAT increase from 24% to 25.5%
Learn more about your proceeds
1: Excludes auto-renewable subscriptions.
It’s Glowtime.
Join us for a special Apple Event on September 9 at 10 a.m. PT.
Watch on apple.com, Apple TV, or YouTube Live.
Upcoming changes to the browser choice screen, default apps, and app deletion for EU users
By the end of this year, we’ll make changes to the browser choice screen, default apps, and app deletion for iOS and iPadOS for users in the EU. These updates come from our ongoing and continuing dialogue with the European Commission about compliance with the Digital Market Act’s requirements in these areas.
Developers of browsers offered in the browser choice screen in the EU will have additional information about their browser shown to users who view the choice screen, and will get access to more data about the performance of the choice screen. The updated choice screen will be shown to all EU users who have Safari set as their default browser. For details about the changes coming to the browser choice screen, view About the browser choice screen in the EU.
For users in the EU, iOS 18 and iPadOS 18 will also include a new Default Apps section in Settings that lists defaults available to each user. In future software updates, users will get new default settings for dialing phone numbers, sending messages, translating text, navigation, managing passwords, keyboards, and call spam filters. To learn more, view Update on apps distributed in the European Union.
Additionally, the App Store, Messages, Photos, Camera, and Safari apps will now be deletable for users in the EU.
Upcoming requirements for app distribution in the European Union
As a reminder, Account Holders or Admins in the Apple Developer Program need to enter trader status in App Store Connect for apps on the App Store in the European Union (EU) in order to comply with the Digital Services Act.
Please note these new dates and requirements:
- October 16, 2024: Trader status will be required to submit app updates. If you’re a trader, you’ll need to provide your trader information before you can submit your app for review.
- February 17, 2025: Apps without trader status will be removed from the App Store in the EU until trader status is provided and verified.
Apple Entrepreneur Camp applications are now open
Apple Entrepreneur Camp supports underrepresented founders and developers, and encourages the pipeline and longevity of these entrepreneurs in technology. Attendees benefit from one-on-one code-level guidance, receive unprecedented access to Apple engineers and experts, and become part of the extended global network of Apple Entrepreneur Camp alumni.
Applications are now open for female,* Black, Hispanic/Latinx, and Indigenous founders and developers. And this year we’re thrilled to bring back our in-person programming at Apple in Cupertino. For those who can’t attend in person, we’re still offering our full program online. We welcome established entrepreneurs with app-driven businesses to learn more about eligibility requirements and apply today.
Apply by September 3, 2024.
* Apple believes that gender expression is a fundamental right. We welcome all women to apply to this program.
Updates to the StoreKit External Purchase Link Entitlement
In response to the announcement by the European Commission in June, we’re making the following changes to Apple’s Digital Markets Act compliance plan. We’re introducing updated terms that will apply this fall for developers with apps in the European Union storefronts of the App Store that use the StoreKit External Purchase Link Entitlement. Key changes include:
- Developers can communicate and promote offers for purchases available at a destination of their choice. The destination can be an alternative app marketplace, another app, or a website, and it can be accessed outside the app or via a web view that appears in the app.
- Developers may design and execute within their apps the communication and promotion of offers. This includes providing information about prices of subscriptions or any other offer available both within or outside the app, and providing explanations or instructions about how to subscribe to offers outside the application. These communications must provide accurate information regarding the digital goods or services available for purchase.
- Developers may choose to use an actionable link that can be tapped, clicked, or scanned, to take users to their destination.
- Developers can use any number of URLs, without declaring them in the app’s Info.plist.
- Links with parameters, redirects, and intermediate links to landing pages are permitted.
- Updated business terms for apps with the External Purchase Link Entitlement are being introduced to align with the changes to these capabilities.
Learn more by visiting Alternative payment options on the App Store in the European Union or request a 30-minute online consultation to ask questions and provide feedback about these changes.
Hello Developer: August 2024
Meet with Apple
Explore the latest developer activities — including sessions, consultations, and labs — all around the world.
BEHIND THE DESIGN
Creating the make-believe magic of Lost in PlayDiscover how the developers of this Apple Design Award-winning game conjured up an imaginative world of oversized frogs, mischievous gnomes, and occasional pizzas.
Behind the Design: Creating the make-believe magic of Lost in Play View now Get resourceful- Build local experiences with room tracking: Use room tracking in visionOS to provide custom interactions with physical spaces.
- Preview your app’s interface in Xcode: Iterate designs quickly and preview your apps’ displays across different Apple devices.
- Explore Apple Music Feed: Now available through the Apple Developer Program, Apple Music Feed provides bulk rich catalog metadata for developing experiences that link back to Apple Music.
- Updates to runtime protection in macOS Sequoia: Find out about updates to Gatekeeper.
- Evaluate your app’s performance: Find out what’s working — and what you can improve — with peer group benchmark metrics across app categories, business models, and download volumes.
SESSION OF THE MONTH
Extend your Xcode Cloud workflowsDiscover how Xcode Cloud can adapt to your development needs.
Extend your Xcode Cloud workflows Watch now Subscribe to Hello DeveloperWant to get Hello Developer in your inbox? Make sure you’ve opted in to receive emails about developer news and events by updating your email preferences in your developer account.
Share your thoughtsWe’d love to hear from you. If you have suggestions for our activities or stories, please let us know.
Behind the Design: Creating the make-believe magic of Lost in Play
Lost in Play is a game created by and for people who love to play make-believe.
The 2024 Apple Design Award (ADA) winner for Innovation is a point-and-click adventure that follows two young siblings, Toto and Gal, through a beautifully animated world of forbidden forests, dark caverns, friendly frogs, and mischievous gnomes. To advance through the game’s story, players complete fun mini-games and puzzles, all of which feel like a Saturday morning cartoon: Before the journey is out, the pair will fetch a sword from a stone, visit a goblin village, soar over the sea on an enormous bird, and navigate the real-world challenges of sibling rivalry. They will also order several pizzas.
ADA FACT SHEET
Lost in Play- Winner: Innovation
- Team: Happy Juice Games, Israel
- Available on: iPhone, iPad
- Team size: 7
- Previous accolades: iPad Game of the Year (2023)
Lost in Play is the brainchild of Happy Juice Games, a small Israel-based team whose three cofounders drew inspiration from their own childhoods — and their own families. “We’ve all watched our kids get totally immersed playing make-believe games,” says Happy Juice’s Yuval Markovich. “We wanted to recreate that feeling. And we came up with the idea of kids getting lost, partly in their imaginations, and partly in real life.”
The team was well-equipped for the job. Happy Juice cofounders Markovich, Oren Rubin, and Alon Simon, all have backgrounds in TV and film animation, and knew what they wanted a playful, funny adventure even before drawing their first sketch. “As adults, we can forget how to enjoy simple things like that,” says Simon, “so we set out to make a game about imagination, full of crazy creatures and colorful places.”
Toto meets a new friend in the belly of a whale in Lost in Play. At right is an early sketch of the scene.
For his part, Markovich didn’t just have a history in gaming; he taught himself English by playing text-based adventure games in the ‘80s. “You played those games by typing ‘go north’ or ‘look around,’ so every time I had to do something, I’d open the dictionary to figure out how to say it,” he laughs. “At some point I realized, ‘Oh wait, I know this language.’”
The story became a matter of, ‘OK, a goblin village sounds fun — how do we get there?’
Yuval Markovich, Happy Juice Games cofounder
But those games could be frustrating, as anyone who ever tried to “leave house” or “get ye flask” can attest. Lost in Play was conceived from day one to be light and navigable. “We wanted to keep it comic, funny, and easy,” says Rubin. “That’s what we had in mind from the very beginning.”
Toto must go out on a limb to solve the ravens' puzzle in this screenshot and early sketch.
Lost in Play may be a linear experience — it feels closer to playing a movie than a sandbox game — but it’s hardly simple. As befitting a playable dream, its story feels a little unmoored, like it’s being made up on the fly. That’s because the team started with art, characters, and environments, and then went back to add a hero’s journey to the elements.
“We knew we’d have a dream in the beginning that introduced a few characters. We knew we’d end up back at the house. And we knew we wanted one scene under the sea, and another in a maker space, and so on,” says Markovich. “The story became a matter of, ‘OK, a goblin village sounds fun — how do we get there?’”
Early concept sketches show the character design evolution of Toto and Gal.
Naturally, the team drew on their shared backgrounds in animation to shape the game all throughout its three-year development process — and not just in terms of art. Like a lot of cartoons, Lost in Play has no dialogue, both to increase accessibility and to enhance the story’s illusion. Characters speak in a silly gibberish. And there are little cartoon-inspired tricks throughout; for instance, the camera shakes when something is scary. “When you study animation, you also study script writing, cinematography, acting, and everything else,” Markovich says. “I think that’s why I like making games so much: They have everything.”
The best thing we hear is that it’s a game parents enjoy playing with their kids.
Oren Rubin, Happy Juice games cofounder
And in a clever acknowledgment of the realities of childhood, brief story beats return Toto and Gal to the real world to navigate practical issues like sibling rivalries. That’s on purpose: Simon says early versions of the game were maybe a little too cute. “Early on, we had the kids sleeping neatly in their beds,” says Simon. “But we decided that wasn’t realistic. We added a bit more of them picking on each other, and a conflict in the middle of the game.” Still, Markovich says that even the real-world interludes keep one foot in the imaginary world. “They may go through a park where an old lady is feeding pigeons, but then they walk left and there’s a goblin in a swamp,” he laughs.
Strange frogs distributing swords are the basis for one of Lost in Play's many inventive puzzles.
On the puzzle side, Lost in Play’s mini-games are designed to strike the right level of challenging. The team is especially proud of the game’s system of hints, which often present challenges in themselves. “We didn’t want people getting trapped like I did in those old adventure games,” laughs Markovich. “I loved those, but you could get stuck for months. And we didn’t want people going online to find answers either.” The answer: A hint system that doesn’t just hand over the answer but gives players a feeling of accomplishment, an incentive to go back for more.
It all adds up to a unique experience for players of all ages — and that’s by design too. “The best feedback we get is that it’s suitable for all audiences,” says Rubin, “and the best thing we hear is that it’s a game parents enjoy playing with their kids.”
Meet the 2024 Apple Design Award winners
Behind the Design is a series that explores design practices and philosophies from finalists and winners of the Apple Design Awards. In each story, we go behind the screens with the developers and designers of these award-winning apps and games to discover how they brought their remarkable creations to life.
Updates to runtime protection in macOS Sequoia
In macOS Sequoia, users will no longer be able to Control-click to override Gatekeeper when opening software that isn’t signed correctly or notarized. They’ll need to visit System Settings > Privacy & Security to review security information for software before allowing it to run.
If you distribute software outside of the Mac App Store, we recommend that you submit your software to be notarized. The Apple notary service automatically scans your Developer ID-signed software and performs security checks. When your software is ready for distribution, it’s assigned a ticket to let Gatekeeper know it’s been notarized so customers can run it with confidence.
Updated guidelines now available
The App Review Guidelines have been revised to support updated policies and upcoming features, and to provide clarification.
- Updated 4.7 to clarify that PC emulator apps can offer to download games.
- Added 4.7, 4.7.2, and 4.7.3 to Notarization.
View the App Review Guidelines
Get resources and support to prepare for App Review
Translations of the guidelines will be available on the Apple Developer website within one month.
Hello Developer: July 2024
Dive into all the new updates from WWDC24
Our doors are open. Join us to explore all the new sessions, documentation, and features through online and in-person activities held in 15 cities around the world.
Join us July 22–26 for online office hours to get one-on-one guidance about your app or game. And visit the forums where more engineers are ready to answer your questions.
WWDC24 highlights View nowBEHIND THE DESIGN
Positive vibrations: How Gentler Streak approaches fitness with “humanity”Find out why the team behind this Apple Design Award-winning lifestyle app believes success is about more than stats.
Behind the Design: How Gentler Streak approaches fitness with “humanity“ View nowGET RESOURCEFUL
New sample code- Grow your skills with the BOT-anist: Build a multiplatform app that uses windows, volumes, and animations to create a robot botanist’s greenhouse.
- Doing the things a particle can: Add a range of visual effects to a RealityKit view by attaching a particle emitter component to an entity.
- Chart a course for Destination Video: Leverage SwiftUI to build an immersive media experience.
- Design for games: Make your game feel at home on all Apple devices.
- Take control of controls: Provide quick access to a feature of your app from Control Center, the Lock Screen, or the Action button.
- Tint your icons: Create dark and tinted app icon variants for iOS and iPadOS.
SESSION OF THE MONTH
Say hello to the next generation of CarPlay design systemLearn how the system at the heart of CarPlay allows each automaker to express their vehicle’s character and brand.
Say hello to the next generation of CarPlay design system Watch now Subscribe to Hello DeveloperWant to get Hello Developer in your inbox? Make sure you’ve opted in to receive emails about developer news and events by updating your email preferences in your developer account.
Share your thoughtsWe’d love to hear from you. If you have suggestions for our activities or stories, please let us know.
Behind the Design: How Gentler Streak approaches fitness with “humanity“
Gentler Streak is a different kind of fitness tracker. In fact, to hear cofounder and CEO Katarina Lotrič tell it, it’s not really a fitness tracker at all.
“We think of it more as a lifestyle app,” says Lotrič, from the team’s home office in Kranj, Slovenia. “We want it to feel like a compass, a reminder to get moving, no matter what that means for you,” she says.
ADA FACT SHEET
The app’s “Go Gentler” page suggests optimal workouts for a user’s day.
Gentler Streak- Winner: Social Impact
- Team: Gentler Stories d.o.o., Slovenia
- Available on: iPhone, iPad, Apple Watch
- Team size: 8
- Previous accolades: Apple Watch App of the Year (2022), Apple Design Award finalist (Visuals and graphics, 2023)
Download Gentler Streak from the App Store
Learn more about Gentler Streak
Meet the 2024 Apple Design Award winners
That last part is key. True to its name, the Apple Design Award-winning Gentler Streak takes a friendlier approach to fitness. Instead of focusing on performance — on the bigger, faster, and stronger — Gentler Streak meets people where they are, presenting workout suggestions, statistics, and encouragement for all skill levels.
“A lot of mainstream fitness apps can seem to be about pushing all the time,” Lotrič says. “But for a lot of people, that isn’t the reality. Everyone has different demands and capabilities on different days. We thought, ‘Can we create a tool to help anyone know where they’re at on any given day, and guide them to a sustainably active lifestyle?’”
If a 15-minute walk is what your body can do at that moment, that’s great.
Katarina Lotrič, CEO and cofounder of Gentler Stories
To reach those goals, Lotrič and her Gentler Stories cofounders — UI/UX designer Andrej Mihelič, senior developer Luka Orešnik, and CTO and iOS developer Jasna Krmelj — created an app powered by an optimistic and encouraging vibe that considers physical fitness and mental well-being equally.
Fitness and workout data (collected from HealthKit) is presented in a colorful, approachable design. The app’s core functions are available for free; a subscription unlocks premium features. And an abstract mascot named Yorhart (sound it out) adds to the light touch. “Yorhart helps you establish a relationship with the app and with yourself, because it’s what your heart would be telling you,” Lotrič says.
Good news from Yorhart: This user’s needs and capabilities are being met perfectly.
It’s working: In addition to the 2024 Apple Design Award for Social Impact, Gentler Streak was named 2022 Apple Watch App of the Year. What’s more, it has an award-winning ancestor: Lotrič and Orešnik won an Apple Design Award in 2017 for Lake: Coloring Book for Adults.
The trio used the success of Lake to learn more about navigating the industry. But something else was happening during that time: The team, all athletes, began revisiting their own relationships with fitness. Lotrič suffered an injury that kept her from running for months and affected her mental health; she writes about her experiences in Gentler Streak’s editorial section. Mihelič had a different issue. “My problem wasn’t that I lacked motivation,” he says. “It was that I worked out too much. I needed something that let me know when it was enough.”
Statistics are just numbers. Without knowing how to interpret them, they are meaningless.
Katarina Lotrič, CEO and cofounder of Gentler Stories
As a way to reset, Mihelič put together an internal app, a simple utility that encouraged him to move but also allowed time for recuperation. “It wasn’t very gentle,” he laughs. “But the core idea was more or less the same. It guided but it didn’t push. And it wasn’t based on numbers; it was more explanatory.”
Over time, the group began using Mihelič’s app. “We saw right away that it was sticky,” says Lotrič. “I came back to it daily, and it was just this basic prototype. After a while, we realized, ‘Well, this works and is built, to an extent. Why don’t we see if there’s anything here?’”
Gentler Streak pulls workout information from HealthKit and presents it in simple, easy-to-understand charts.
That’s when Lotrič, Orešnik, and Krmelj split from Lake to create Gentler Stories with Mihelič. "I wanted in because I loved the idea behind the whole company,” Krmelj says. “It wasn’t just about the app. I really like the app. But I really believed in this idea about mental well-being.”
Early users believed it too: The team found that initial TestFlight audience members returned at a stronger rate than expected. “Our open and return rates were high enough that we kept thinking, “Are these numbers even real?’” laughs Lotrič. The team found that those early users responded strongly to the “gentler” side, the approachable repositioning of statistics.
“We weren’t primarily addressing the audience that most fitness apps seemed to target,” says Lotrič. “We focused on everyone else, the people who maybe didn’t feel like they belonged in a gym. Statistics are just numbers. Without knowing how to interpret them, they are meaningless. We wanted to change that and focus on the humanity.” By fall of 2021, Gentler Streak was ready for prime time.
Gentler Streak on Apple Watch brings encouragement closer than ever before.
Today’s version of the app follows the same strategy of Mihelič’s original prototype. Built largely in UIKit, its health data is smartly organized, the design is friendly and consistent, and features like its Monthly Summary view — which shows how you’re doing in relation to your history — focus less on comparison and more on progress, whatever that may mean. “If a 15-minute walk is what your body can do at that moment, that’s great,” Lotrič says. “That how we make people feel represented.”
The app’s social impact continues to grow. In the spring of 2024, Gentler Streak added support for Japanese, Korean, and traditional and simplified Chinese languages; previous updates added support for French, German, Italian, Spanish, and Brazilian Portuguese.
And those crucial features — fitness tracking, workout suggestions, metrics, and activity recaps — will remain available to everyone. “That goes with the Gentler Stories philosophy,” says Lotrič. “We’re bootstrapped, but at the same time we know that not everyone is in a position to support us. We still want to be a tool that helps people stay healthy not just for the first two weeks of the year or the summer, but all year long.”
Meet the 2024 Apple Design Award winners
Behind the Design is a series that explores design practices and philosophies from finalists and winners of the Apple Design Awards. In each story, we go behind the screens with the developers and designers of these award-winning apps and games to discover how they brought their remarkable creations to life.
Alternative payment options in the EU in visionOS 1.2
Alternative payment options are now supported starting in visionOS 1.2 for apps distributed on the App Store in the EU.
Changes for apps in the EU now available in iPadOS 18 beta 2
The changes for apps in the European Union (EU), currently available to iOS users in the 27 EU member countries, can now be tested in iPadOS 18 beta 2 with Xcode 16 beta 2.
Also, the Web Browser Engine Entitlement Addendum for Apps in the EU and Embedded Browser Engine Entitlement Addendum for Apps in the EU now include iPadOS. If you’ve already entered into either of these addendums, be sure to sign the updated terms.
Learn more about the recent changes:
The App Store on Apple Vision Pro expands to new markets
Apple Vision Pro will launch in China mainland, Hong Kong, Japan, and Singapore on June 28 and in Australia, Canada, France, Germany, and the United Kingdom on July 12. Your apps and games will be automatically available on the App Store in regions you’ve selected in App Store Connect.
If you’d like, you can:
- Manage the availability of your visionOS apps and compatible iPhone or iPad apps at any time.
- Request to have your app evaluated directly on Apple Vision Pro.
- Localize your product page metadata for local audiences.
You can also learn how to build native apps to fully take advantage of exciting visionOS features.
Upcoming regional age ratings in Australia and South Korea
Apple is committed to making sure that the App Store is a safe place for everyone — especially kids. Within the next few months, you’ll need to indicate in App Store Connect if your app includes loot boxes available for purchase. In addition, a regional age rating based on local laws will automatically appear on the product page of the apps listed below on the App Store in Australia and South Korea. No other action is needed. Regional age ratings appear in addition to Apple global age ratings.
Australia
A regional age rating is shown if Games is selected as the primary or secondary category in App Store Connect.
- 15+ regional age rating: Games with loot boxes available for purchase.
- 18+ regional age rating: Games with Frequent/Intense instances of Simulated Gambling indicated in App Store Connect.
South Korea
A regional age rating is shown if either Games or Entertainment is selected as the primary or secondary category in App Store Connect, or if the app has Frequent/Intense instances of Simulated Gambling in any category.
- KR-All regional age rating: Apps and games with an Apple global age rating of 4+ or 9+.
- KR-12 regional age rating: Apps and games with an Apple global age rating of 12+. Certain apps and games in this group may receive a KR-15 regional age rating from the South Korean Games Ratings and Administration Committee (GRAC). If this happens, App Review will reach out to impacted developers.
- Certain apps and games may receive a KR-19 regional age rating from the GRAC. Instead of a pictogram, text will indicate this rating.
WWDC24 resources and survey
Thank you to everyone who joined us for an amazing week. We hope you found value, connection, and fun. You can continue to:
- Watch sessions at any time.
- Check out session highlights.
- Read about newly announced technologies.
- Get sample code from sessions.
- Dive into new and updated documentation.
We’d love to know what you thought of this year’s conference. If you’d like to tell us about your experience, please complete the WWDC24 survey.
WWDC24 highlights
Browse the biggest moments from an incredible week of sessions.
Machine Learning & AI Explore machine learning on Apple platforms Watch now Bring expression to your app with Genmoji Watch now Get started with Writing Tools Watch now Bring your app to Siri Watch now Design App Intents for system experiences Watch now Swift What’s new in Swift Watch now Meet Swift Testing Watch now Migrate your app to Swift 6 Watch now Go small with Embedded Swift Watch now SwiftUI & UI Frameworks What’s new in SwiftUI Watch now SwiftUI essentials Watch now Enhance your UI animations and transitions Watch now Evolve your document launch experience Watch now Squeeze the most out of Apple Pencil Watch now Developer Tools What’s new in Xcode 16 Watch now Extend your Xcode Cloud workflows Watch now Spatial Computing Design great visionOS apps Watch now Design interactive experiences for visionOS Watch now Explore game input in visionOS Watch now Bring your iOS or iPadOS game to visionOS Watch now Create custom hover effects in visionOS Watch now Work with windows in SwiftUI Watch now Dive deep into volumes and immersive spaces Watch now Customize spatial Persona templates in SharePlay Watch now Design Design great visionOS apps Watch now Design interactive experiences for visionOS Watch now Design App Intents for system experiences Watch now Design Live Activities for Apple Watch Watch now Say hello to the next generation of CarPlay design system Watch now Add personality to your app through UX writing Watch now Graphics & Games Port advanced games to Apple platforms Watch now Design advanced games for Apple platforms Watch now Bring your iOS or iPadOS game to visionOS Watch now Meet TabletopKit for visionOS Watch now App Store Distribution and Marketing What’s new in StoreKit and In-App Purchase Watch now What’s new in App Store Connect Watch now Implement App Store Offers Watch now Privacy & Security Streamline sign-in with passkey upgrades and credential managers Watch now What’s new in privacy Watch now App and System Services Meet the Contact Access Button Watch now Use CloudKit Console to monitor and optimize database activity Watch now Extend your app’s controls across the system Watch now Safari & Web Optimize for the spatial web Watch now Build immersive web experiences with WebXR Watch now Accessibility & Inclusion Catch up on accessibility in SwiftUI Watch now Get started with Dynamic Type Watch now Build multilingual-ready apps Watch now Photos & Camera Build a great Lock Screen camera capture experience Watch now Build compelling spatial photo and video experiences Watch now Keep colors consistent across captures Watch now Use HDR for dynamic image experiences in your app Watch now Audio & Video Enhance the immersion of media viewing in custom environments Watch now Explore multiview video playback in visionOS Watch now Build compelling spatial photo and video experiences Watch now Business & Education Introducing enterprise APIs for visionOS Watch now What’s new in device management Watch now Health & Fitness Explore wellbeing APIs in HealthKit Watch now Build custom swimming workouts with WorkoutKit Watch now Get started with HealthKit in visionOS Watch nowToday @ WWDC24: Day 5
Revisit the biggest moments from WWDC24
Explore the highlights.
WWDC24 highlights View now Catch WWDC24 recaps around the worldJoin us for special in-person activities at Apple locations worldwide this summer.
Explore apps and games from the KeynoteCheck out all the incredible featured titles.
How’d we do?We’d love to know your thoughts about this year’s conference.
Today’s WWDC24 playlist: Power UpGet ready for one last day.
And that’s a wrap!Thanks for being part of another incredible WWDC. It’s been a fantastic week of celebrating, connecting, and exploring, and we appreciate the opportunity to share it all with you.
Today @ WWDC24: Day 4
Plan for platforms
Find out what’s new across Apple platforms.
Design great visionOS apps Watch now Bring your iOS or iPadOS game to visionOS Watch now Design App Intents for system experiences Watch now Explore all platforms sessions GuidesSessions, labs, documentation, and sample code — all in one place.
WWDC24 iOS & iPadOS guide View now WWDC24 Games guide View now WWDC24 visionOS guide View now WWDC24 watchOS guide View now Today’s WWDC24 playlist: Coffee ShopComfy acoustic sounds for quieter moments.
One more to goWhat a week! But we’re not done yet — we’ll be back tomorrow for a big Friday. #WWDC24
Today @ WWDC24: Day 3
All Swift, all day
Explore new Swift and SwiftUI sessions.
What’s new in Swift Watch now What’s new in SwiftUI Watch now Meet Swift Testing Watch now Explore all Swift sessions GuidesSessions, labs, documentation, and sample code — all in one place.
WWDC24 Swift guide View now WWDC24 Developer Tools guide View now WWDC24 SwiftUI & UI Frameworks guide View now Go further with SwiftConnect with Apple experts and the worldwide developer community.
- Request a consultation in the WWDC labs.
- Explore the Apple Developer Forums.
- Connect with developers all over the world.
Cutting-edge sounds from the global frontiers of jazz.
More to comeThanks for being a part of #WWDC24. We’ll be back tomorrow with even more.
Today @ WWDC24: Day 2
Watch the Platforms State of the Union 5-minute recap
Explore everything announced at WWDC24 >
Introducing Apple IntelligenceGet smarter.
Explore machine learning on Apple platforms Watch now Get started with Writing Tools Watch now Bring your app to Siri Watch now Explore all Machine Learning and AI sessions GuidesSessions, labs, documentation, and sample code — all in one place.
WWDC24 Machine Learning & AI guide View now WWDC24 Design guide View now Go further with Apple Intelligence- Request a consultation in the WWDC labs.
- Explore the Apple Developer Forums.
- Connect with developers all over the world.
Summer sounds to change your latitude.
More tomorrowThanks for being a part of this incredible week. We’ll catch you tomorrow for another big day of technology and creativity. #WWDC24
Find out what’s new and download beta releases
Discover the latest advancements across Apple platforms, including the all-new Apple Intelligence, that can help you create even more powerful, intuitive, and unique experiences.
To start exploring and building with the latest features, download beta versions of Xcode 16, iOS 18, iPadOS 18, macOS 15, tvOS 18, visionOS 2, and watchOS 11.
Explore new documentation and sample code from WWDC24
Browse new and updated documentation and sample code to learn about the latest technologies, frameworks, and APIs introduced at WWDC24.
WWDC24 Design guide
WWDC24 GUIDE Design
Discover how this year’s design announcements can help make your app shine on Apple platforms.
Whether you’re refining your design, building for visionOS, or starting from scratch, this year’s design sessions can take your app to the next level on Apple platforms. Find out what makes a great visionOS app, and learn how to design interactive experiences for the spatial canvas. Dive into creating advanced games for Apple devices, explore the latest SF Symbols, learn how to add personality to your app through writing, and much more.
Get the highlights
Download the design one-sheet.
DownloadVIDEOS
Explore the latest video sessions Design great visionOS apps Watch now Design advanced games for Apple platforms Watch now Create custom environments for your immersive apps in visionOS Watch now Explore game input in visionOS Watch now Design Live Activities for Apple Watch Watch now What’s new in SF Symbols 6 Watch now Design interactive experiences for visionOS Watch now Design App Intents for system experiences Watch now Build multilingual-ready apps Watch now Add personality to your app through UX writing Watch now Get started with Dynamic Type Watch now Create custom visual effects with SwiftUI Watch nowFORUMS
Find answers and get adviceAsk questions and get advice about design topics on the Apple Developer Forums.
COMMUNITY
Meet the communityExplore a selection of developer activities all over the world during and after WWDC.
RESOURCES
Explore the latest resources- Get the latest Apple Design Resources kits and templates.
- Explore the latest SF Symbols.
- Download the fonts you need to design interfaces for your apps on Apple platforms.
- Find out all that’s new in the HIG.
- Designing for games: Explore an all-new way to start creating games that feel comfortable and intuitive on Apple platforms.
- Tab bars: iPadOS apps now give people the option to switch between a tab bar or sidebar when navigating their app. Plus, items in the tab bar can now be customized.
- App icons: Learn how people can customize their Home Screens to show dark and tinted icons.
- Controls: Discover how people can quickly and easily perform actions from your app from Control Center, the Lock Screen, and the Action button.
- Widgets: Learn how to tint widgets when a person has customized their Home Screen to show dark and tinted icons.
- Windows: Learn how to use volumes in visionOS to display 2D or 3D content that people can view from any angle.
- Live Activities: Craft Live Activities that look and feel at home in the Smart Stack in watchOS.
- Immersive experiences: Explore the latest guidance on immersion, including design environments and virtual hands.
- Game controls: Learn how to design touch controls for games on iOS and iPadOS.
WWDC24 Swift guide
WWDC24 GUIDE Swift
Your guide to everything new in Swift, related tools, and supporting frameworks.
From expanded support across platforms and community resources, to an optional language mode with an emphasis on data-race safety, this year’s Swift updates meet you where you are. Explore this year’s video sessions to discover everything that’s new in Swift 6, find tools that support migrating to the new language mode at your own pace, learn about new frameworks that support developing with Swift, and much more.
Get the highlights
Download the Swift one-sheet.
DownloadVIDEOS
Explore the latest video sessions What’s new in Swift Watch now What’s new in SwiftData Watch now Migrate your app to Swift 6 Watch now Go small with Embedded Swift Watch now A Swift Tour: Explore Swift’s features and design Watch now Create a custom data store with SwiftData Watch now Explore the Swift on Server ecosystem Watch now Explore Swift performance Watch now Consume noncopyable types in Swift Watch now Track model changes with SwiftData history Watch nowFORUMS
Find answers and get adviceFind support from Apple experts and the developer community on the Apple Developer Forums, and check out the Swift Forums on swift.org.
Explore Swift on the Apple Developer Forums
COMMUNITY
Meet the communityExplore a selection of activities hosted by developer organizations during and after WWDC.
RESOURCES
Dive into Apple Developer documentation- Discover new and updated Swift documentation
- Explore the Swift Standard Library
- Learn how to migrate your code to Swift 6
- Reference the Swift programming language guide
- Read A Swift Tour: An overview of the features and syntax of Swift
- Explore the new Swift-dedicated GitHub organization
- Learn more about the Swift Package Manager (SwiftPM)
WWDC24 SwiftUI & UI Frameworks guide
WWDC24 GUIDE SwiftUI & UI Frameworks
Design and build your apps like never before.
With enhancements to live previews in Xcode, new customization options for animations and styling, and updates to interoperability with UIKit and AppKit views, SwiftUI is the best way to build apps for Apple platforms. Dive into the latest sessions to discover everything new in SwiftUI, UIKit, AppKit, and more. Make your app stand out with more options for custom visual effects and enhanced animations. And explore sessions that cover the essentials of building apps with SwiftUI.
Get the highlights
Download the SwiftUI one-sheet.
DownloadVIDEOS
Explore the latest video sessions What’s new in SwiftUI Watch now What’s new in AppKit Watch now What’s new in UIKit Watch now SwiftUI essentials Watch now What’s new in watchOS 11 Watch now Swift Charts: Vectorized and function plots Watch now Elevate your tab and sidebar experience in iPadOS Watch now Bring expression to your app with Genmoji Watch now Squeeze the most out of Apple Pencil Watch now Catch up on accessibility in SwiftUI Watch now Migrate your TVML app to SwiftUI Watch now Get started with Writing Tools Watch now Dive deep into volumes and immersive spaces Watch now Work with windows in SwiftUI Watch now Enhance your UI animations and transitions Watch now Evolve your document launch experience Watch now Build multilingual-ready apps Watch now Create custom hover effects in visionOS Watch now Tailor macOS windows with SwiftUI Watch now Demystify SwiftUI containers Watch now Support semantic search with Core Spotlight Watch now Create custom visual effects with SwiftUI Watch nowFORUMS
Find answers and get adviceConnect with Apple experts and other developers on the Apple Developer Forums.
View discussions about SwiftUI & UI frameworks
COMMUNITY
Meet the communityExplore a selection of activities hosted by developer organizations during and after WWDC.
RESOURCES
Dive into documentation- Level up the accessibility of your SwiftUI app.
- Interact with nearby points of interest.
- Build a document-based app with SwiftUI.
- Customize window styles and state-restoration behavior in macOS.
- Enhance your app’s content with tab navigation.
- Create visual effects with SwiftUI.
- Unify your app’s animations.
- Find all of this year’s SwiftUI, AppKit, and UIKit updates.
- Explore updates in the Human Interface Guidelines (HIG).
Today @ WWDC24: Day 1
It all starts here
Keynote
The exciting reveal of the latest Apple software and technologies. 10 a.m. PT.
Keynote Watch nowPlatforms State of the Union
The newest advancements on Apple platforms. 1 p.m. PT.
Platforms State of the Union Watch nowWhere to watch
- Apple Developer app and website
- Apple Developer YouTube channel
The full lineup of sessions arrives after the Keynote. And you can start exploring the first batch right after the Platforms State of the Union.
What to do at WWDC24The Keynote is only the beginning. Explore the first day of activities.
- Request your spot in the labs after the Keynote.
- Explore the Apple Developer Forums.
- Connect with developers all over the world.
The Apple Design Awards recognize unique achievements in app and game design — and provide a moment to step back and celebrate the innovations of the Apple developer community.
More to comeThanks for reading and get some rest! We’ll be back tomorrow for a very busy Day 2. #WWDC24
WWDC24 Developer Tools guide
WWDC24 GUIDE Developer Tools
Explore a wave of updates to developer tools that make building apps and games easier and more efficient than ever.
Watch the latest video sessions to explore a redesigned code completion experience in Xcode 16, and say hello to Swift Assist — a companion for all your coding tasks. Level up your code with the help of Swift Testing, the new, easy-to-learn framework that leverages Swift features to help enhance your testing experience. Dive deep into debugging, updates to Xcode Cloud, and more.
Get the highlights
Download the developer tools one-sheet.
DownloadVIDEOS
Explore the latest video sessions Meet Swift Testing Watch now What’s new in Xcode 16 Watch now Go further with Swift Testing Watch now Xcode essentials Watch now Run, Break, Inspect: Explore effective debugging in LLDB Watch now Break into the RealityKit debugger Watch now Demystify explicitly built modules Watch now Extend your Xcode Cloud workflows Watch now Analyze heap memory Watch nowFORUMS
Find answers and get adviceFind support from Apple experts and the developer community on the Apple Developer Forums.
Explore developer tools on the forums
COMMUNITY
Meet the communityExplore a selection of activities hosted by developer organizations during and after WWDC.
RESOURCES
Dive into documentationExpand your tool belt with new and updated articles and documentation.
- Explore updates in Xcode 16
- Discover Swift Testing
- Migrate a test from XCTest
- Define test functions
- Organize test functions with suite types
- Implement parameterized tests
- Enable and disable tests
- Limit the running time of tests
- Add tags to tests
- Add comments to tests
- Associate bugs with tests
- Interpret bug identifiers
WWDC24 iOS & iPadOS guide
WWDC24 GUIDE iOS & iPadOS
Your guide to all the new features and tools for building apps for iPhone and iPad.
Learn how to create more customized and intelligent apps that appear in more places across the system with the latest Apple technologies. And with Apple Intelligence, you can bring personal intelligence into your apps to deliver new capabilities — all with great performance and built-in privacy. Explore new video sessions about controls, Live Activities, App Intents, and more.
Get the highlights
Download the iOS & iPadOS one-sheet.
DownloadVIDEOS
Explore the latest video sessions Bring your app to Siri Watch now Discover RealityKit APIs for iOS, macOS, and visionOS Watch now Explore machine learning on Apple platforms Watch now Elevate your tab and sidebar experience in iPadOS Watch now Extend your app’s controls across the system Watch now Streamline sign-in with passkey upgrades and credential managers Watch now What’s new in App Intents Watch now Squeeze the most out of Apple Pencil Watch now Meet FinanceKit Watch now Bring your iOS or iPadOS game to visionOS Watch now Build a great Lock Screen camera capture experience Watch now Design App Intents for system experiences Watch now Bring your app’s core features to users with App Intents Watch now Broadcast updates to your Live Activities Watch now Unlock the power of places with MapKit Watch now Implement App Store Offers Watch now What’s new in Wallet and Apple Pay Watch now Meet the Contact Access Button Watch now What’s new in device management Watch nowFORUMS
Find answers and get adviceConnect with Apple experts and other developers on the Apple Developer Forums.
COMMUNITY
Meet the communityExplore a selection of activities hosted by developer organizations during and after WWDC.
RESOURCES
Get a head start with sample code Dive into documentation- Discover WidgetKit for controls.
- Find out how to set up broadcast push notifications, send channel management requests to APNs, and send broadcast push notification requests to APNs.
- Check out the new LockedCameraCapture, Media Accessibility, AccessorySetupKit, and Contact Provider frameworks.
- Explore object tracking with ARKit.
- Learn how to elevate your iPad app with the tab sidebar, as well as with a floating tab bar and integrated sidebar, using SwiftUI or UIkit.
WWDC24 Machine Learning & AI guide
WWDC24 GUIDE Machine Learning & AI
Bring personal intelligence to your apps.
Apple Intelligence brings powerful, intuitive, and integrated personal intelligence to Apple platforms — designed with privacy from the ground up. And enhancements to our machine learning frameworks let you run and train your machine learning and artificial intelligence models on Apple devices like never before.
Get the highlights
Download the Machine Learning & AI one-sheet.
DownloadVIDEOS
Explore the latest video sessionsGet the most out of Apple Intelligence by diving into sessions that cover updates to Siri integration and App Intents, and how to support Writing Tools and Genmoji in your app. And learn how to bring machine learning and AI directly into your apps using our machine learning frameworks.
Explore machine learning on Apple platforms Watch now Bring your app to Siri Watch now Bring your app’s core features to users with App Intents Watch now Bring your machine learning and AI models to Apple silicon Watch now Get started with Writing Tools Watch now Deploy machine learning and AI models on-device with Core ML Watch now Support real-time ML inference on the CPU Watch now Bring expression to your app with Genmoji Watch now What’s new in App Intents Watch now What’s new in Create ML Watch now Design App Intents for system experiences Watch now Discover Swift enhancements in the Vision framework Watch now Meet the Translation API Watch now Accelerate machine learning with Metal Watch now Train your machine learning and AI models on Apple GPUs Watch nowFORUMS
Find answers and get adviceConnect with Apple experts and other developers on the Apple Developer Forums.
Dive into Machine learning and AI on the forums
COMMUNITY
Meet the communityExplore a selection of activities hosted by developer organizations during and after WWDC.
RESOURCES
Dive into documentation- Build a search interface for your app.
- Bring Writing Tools to your app with
UITextViewfor UIKit andNSTextViewfor AppKit. - Add expression to your app with Genmoji using
NSAdaptiveImageGlyphin UIKit and AppKit. - Integrate machine learning models into your app using Core ML.
- Create your own machine learning models using Create ML.
- Discover all of the latest Core ML updates.
- Find out what’s new in the Vision framework.
WWDC24 Games guide
WWDC24 GUIDE Games
Create the next generation of games for millions of players worldwide.
Learn how to create cutting-edge gaming experiences across a unified gaming platform built with tightly integrated graphics software and a scalable hardware architecture. Explore new video sessions about gaming in visionOS, game input, the Game Porting Toolkit 2, and more.
Get the highlights
Download the games one-sheet.
DownloadVIDEOS
Explore the latest video sessions Render Metal with passthrough in visionOS Watch now Meet TabletopKit for visionOS Watch now Port advanced games to Apple platforms Watch now Design advanced games for Apple platforms Watch now Explore game input in visionOS Watch now Bring your iOS or iPadOS game to visionOS Watch now Accelerate machine learning with Metal Watch nowFORUMS
Find answers and get adviceConnect with Apple experts and other developers on the Apple Developer Forums.
COMMUNITY
Meet the communityExplore a selection of activities hosted by developer organizations during and after WWDC.
RESOURCES
Get a head start with sample code Dive into documentation- Check out updated design guidance for games.
- Easily bring your game to Apple platforms using the Game Porting Toolkit 2.
- Meet the new TabletopKit framework.
- Learn how to play sound from a location in a 3D scene.
- Learn how to manage your game window for Metal in macOS.
- Get details on adapting your game interface for smaller screens.
- Discover how to improve your game’s graphics performance and settings.
- Find out how to improve the player experience for games with large downloads.
- Explore adding touch controls to games that support game controllers.
WWDC24 watchOS guide
WWDC24 GUIDE watchOS
Your guide to all the new features and tools for building apps for Apple Watch.
Learn how to take advantage of the increased intelligence and capabilities of the Smart Stack. Explore new video sessions about relevancy cues, interactivity, Live Activities, and double tap.
Get the highlights
Download the watchOS one-sheet.
DownloadVIDEOS
Explore the latest video sessions What’s new in watchOS 11 Watch now Bring your Live Activity to Apple Watch Watch now What’s new in SwiftUI Watch now SwiftUI essentials Watch now Design Live Activities for Apple Watch Watch now Catch up on accessibility in SwiftUI Watch now Build custom swimming workouts with WorkoutKit Watch now Demystify SwiftUI containers Watch nowFORUMS
Find answers and get adviceConnect with Apple experts and other developers on the Apple Developer Forums.
View discussions about watchOS
COMMUNITY
Meet the communityExplore a selection of activities hosted by developer organizations during and after WWDC.
RESOURCES
Dive into documentation- Discover double tap.
- Learn how to use the latest technologies to build apps for Apple Watch.
- Get updated guidance on design for Apple Watch.
- Visit the Apple Watch site.
WWDC24 sessions schedule, lab requests, guides, and documentation now available
WWDC24 is here! Here’s how to make the most of your week:
- Watch daily sessions.
- Request one-on-one online lab appointments with Apple experts.
- Check out curated guides to the week’s biggest announcements.
- Dive into new and updated documentation.
WWDC24 visionOS guide
WWDC24 GUIDE visionOS
The infinite canvas is waiting for you.
In this year’s sessions, you’ll get an overview of great visionOS app design, explore object tracking, and discover new RealityKit APIs. You’ll also find out how to build compelling spatial photo and video experiences, explore enterprise APIs for visionOS, find out how to render Metal with passthrough, and much more.
Get the highlights
Download the visionOS one-sheet.
DownloadVIDEOS
Explore the latest video sessions Design great visionOS apps Watch now Explore object tracking for visionOS Watch now Compose interactive 3D content in Reality Composer Pro Watch now Discover RealityKit APIs for iOS, macOS, and visionOS Watch now Create enhanced spatial computing experiences with ARKit Watch now Enhance your spatial computing app with RealityKit audio Watch now Build compelling spatial photo and video experiences Watch now Meet TabletopKit for visionOS Watch now Render Metal with passthrough in visionOS Watch now Explore multiview video playback in visionOS Watch now Introducing enterprise APIs for visionOS Watch now Dive deep into volumes and immersive spaces Watch now Build a spatial drawing app with RealityKit Watch now Optimize for the spatial web Watch now Explore game input in visionOS Watch now Create custom environments for your immersive apps in visionOS Watch now Enhance the immersion of media viewing in custom environments Watch now Design interactive experiences for visionOS Watch now Create custom hover effects in visionOS Watch now Optimize your 3D assets for spatial computing Watch now Discover area mode for Object Capture Watch now Bring your iOS or iPadOS game to visionOS Watch now Build immersive web experiences with WebXR Watch now Get started with HealthKit in visionOS Watch now What’s new in Quick Look for visionOS Watch now What’s new in USD and MaterialX Watch now Customize spatial Persona templates in SharePlay Watch now Create enhanced spatial computing experiences with ARKit Watch now Break into the RealityKit debugger Watch now What’s new in SwiftUI Watch nowFORUMS
Find answers and get adviceConnect with Apple experts and other developers on the Apple Developer Forums.
View discussions about visionOS
COMMUNITY
Meet the communityExplore a selection of activities hosted by developer organizations during and after WWDC.
RESOURCES
Get a head start with sample code- BOT-anist: Discover how the RealityKit debugger lets you inspect the entity hierarchy of spatial apps, debug rogue transformation, detect bad behavior, and find missing entities.
- Destination Video: Leverage 3D video and Spatial Audio to deliver an immersive experience.
- Incorporating real-world surroundings in an immersive experience: Make your app’s content respond to the local shape of the world.
- Simulating particles in your visionOS app: Add a range of visual effects to a RealityKit view by attaching a particle emitter component to an entity.
- Simulating physics with collisions in your visionOS app: Create entities that behave and react like physical objects in a RealityKit view.
- Discover new visionOS content in the HIG.
- Creating your first visionOS app: Learn new tips for building a new visionOS app using SwiftUI and platform-specific features.
- Adding 3D content to your app: Explore the latest in adding depth and dimension to your visionOS app.
- Understanding RealityKit’s modular architecture: Learn how everything fits together in RealityKit.
- Designing RealityKit content with Reality Composer Pro: Discover updates that can help you quickly create RealityKit scenes for your visionOS app.
- Presenting windows and spaces: Find out how to open and close the scenes that make up your app’s interface.
Updated agreements and guidelines now available
The App Review Guidelines, Apple Developer Program License Agreement, and Apple Developer Agreement have been updated to support updated policies and upcoming features, and to provide clarification. Please review the changes below and accept the updated terms as needed.
App Review Guidelines- 2.1(a): Added to Notarization.
- 2.1(b): Added requirement to explain why configured in-app items cannot be found or reviewed in your app to your review notes.
- 2.5.8: We will no longer reject apps that simulate multi-app widget experiences.
- 4.6: This guideline has been removed.
- Sections 1, 6(B): Updated “Apple ID” to “Apple Account.”
- Section 16(A): Clarified export compliance requirements.
- Section 18: Updated terminology for government end users.
- Definitions, Section 2.1, 3.3.6(C), 3.3.10(A), 14.2(C), Attachment 9, Schedules 1-3: Updated “Apple ID” to “Apple Account.”
- Definitions: Clarified definition of Apple Maps Service.
- Definitions, Section 3.3.6(F): Specified requirements for using the Apple Music Feed API.
- Definitions, Section 3.3.8(F): Added terms for use of the Now Playing API.
- Section 3.2(h): Added terms for use of Apple Software and Services.
- Section 6.5: Added terms for use of TestFlight.
- Section 7.7: Added terms on customization of icons.
- Section 11.2(f), 14.8(A): Clarified export compliance requirements.
- Section 14.9: Updated terminology for government end users.
- Attachment 5, Section 3.1: Added terms for use of Wallet pass templates.
Please sign in to your account to review and accept the updated terms.
View all agreements and guidelines
Translations of the terms will be available on the Apple Developer website within one month.
Hello Developer: June 2024
With WWDC24 just days away, there’s a lot of ground to cover, so let’s get right to it.
WWDC24
Introducing the 2024 Apple Design Award winnersInnovation. Ingenuity. Inspiration.
WWDC24: Everything you need to knowFrom the Keynote to the last session drop, here are the details for an incredible week of sessions, labs, community activities, and more.
Download the Apple Developer app >
Subscribe to Apple Developer on YouTube >
Watch the KeynoteDon’t miss the exciting reveal of the latest Apple software and technologies at 10 a.m. PT on Monday, June 10.
Watch the Platforms State of the UnionHere’s your deep dive into the newest advancements on Apple platforms. Join us at 1 p.m. PT on Monday, June 10.
Get ready for sessionsLearn something new in video sessions posted to the Apple Developer app, website, and YouTube channel. The full schedule drops after the Keynote on Monday, June 10.
Prepare for labsHere’s everything you need to know to get ready for online labs.
Find answers on the forumsDiscuss the conference’s biggest moments on the Apple Developer Forums.
Get the most out of the forums >
Meet the communityExplore a selection of activities hosted by developer organizations during and after WWDC.
Explore community activities >
Say hello to the first WWDC24 playlistThe official WWDC24 playlists drop right after the Keynote. Until then, here’s a teaser playlist to get you excited for the week.
Coming up: One incredible weekHave a great weekend, and we’ll catch you on Monday. #WWDC24
Watch the WWDC24 Keynote
WWDC24
Tune in at 10 a.m. PT on June 10 to catch the exciting reveal of the latest Apple software and technologies.
Keynote Watch now Keynote (ASL) Watch nowWatch the WWDC24 Platforms State of the Union
WWDC24
Tune in at 1 p.m. PT on June 10 to dive deep into the newest advancements on Apple platforms.
Platforms State of the Union Watch now Platforms State of the Union (ASL) Watch nowPrice and tax updates for apps, In-App Purchases, and subscriptions
The App Store is designed to make it easy to sell your digital goods and services globally, with support for 44 currencies across 175 storefronts.
From time to time, we may need to adjust prices or your proceeds due to changes in tax regulations or foreign exchange rates. These adjustments are made using publicly available exchange rate information from financial data providers to help make sure prices for apps and In-App Purchases stay consistent across all storefronts.
Price updatesOn June 21, pricing for apps and In-App Purchases¹ will be updated for the Egypt, Ivory Coast, Nepal, Nigeria, Suriname, and Zambia storefronts if you haven’t selected one of these as the base for your app or In‑App Purchase.¹ These updates also consider the following value‑added tax (VAT) changes:
- Ivory Coast: VAT introduction of 18%
- Nepal: VAT introduction of 13% and digital services tax of 2%
- Suriname: VAT introduction of 10%
- Zambia: VAT introduction of 16%
Prices won’t change on the Egypt, Ivory Coast, Nepal, Nigeria, Suriname, or Zambia storefront if you’ve selected that storefront as the base for your app or In-App Purchase.¹ Prices on other storefronts will be updated to maintain equalization with your chosen base price.
Prices won’t change in any region if your In‑App Purchase is an auto‑renewable subscription and won’t change on the storefronts where you manually manage prices instead of using the automated equalized prices.
The Pricing and Availability section of Apps has been updated in App Store Connect to display these upcoming price changes. As always, you can change the prices of your apps, In‑App Purchases, and auto‑renewable subscriptions at any time.
Learn more about managing your pricesView or edit upcoming price changes
Edit your app’s base country or region
Pricing and availability start times by region
Set a price for an In-App Purchase
Tax updatesYour proceeds for sales of apps and In-App Purchases will change to reflect the new tax rates and updated prices. Exhibit B of the Paid Applications Agreement has been updated to indicate that Apple collects and remits applicable taxes in Ivory Coast, Nepal, Suriname, and Zambia.
As of today, June 6, your proceeds from the sale of eligible apps and In‑App Purchases have been modified in the following countries to reflect introductions of or changes in tax rates.
- France: Digital services tax no longer applicable
- Ivory Coast: VAT introduction of 18%
- Malaysia: Sales and Service Tax (SST) increased to 8% from 6%
- Nepal: VAT introduction of 13% and digital services tax introduction of 2%
- Norway: VAT increased to 20% from 0% for certain Norwegian news publications
- Suriname: VAT introduction of 10%
- Uganda: Digital services tax introduction of 5%
- Zambia: VAT introduction of 16%
The Fitness and Health category has a new attribute: “Content is primarily accessed through streaming”. If this is relevant to your apps or In-App Purchases that offer fitness video streaming, review and update your selections in the Pricing and Availability section of Apps in App Store Connect.
Learn about setting tax categories
1: Excludes auto-renewable subscriptions.
Introducing the 2024 Apple Design Award winners
Every year, the Apple Design Awards recognize innovation, ingenuity, and technical achievement in app and game design.
The incredible developers behind this year’s finalists have shown what can be possible on Apple platforms — and helped lay the foundation for what’s to come.
We’re thrilled to present the winners of the 2024 Apple Design Awards.
Action packed.
One week to go. Don’t miss the exciting reveal of the latest Apple software and technologies.
Keynote kicks off at 10 a.m. PT on June 10.
Join us for the Platforms State of the Union at 1 p.m. PT on June 10.
Introducing the 2024 Apple Design Award finalists
Every year, the Apple Design Awards recognize innovation, ingenuity, and technical achievement in app and game design.
But they’ve also become something more: A moment to step back and celebrate the Apple developer community in all its many forms.
Coming in swiftly.
Join the worldwide developer community for an incredible week of technology and creativity — all online and free. WWDC24 takes place from June 10-14.
Check out the new Apple Developer Forums
The Apple Developer Forums have been redesigned for WWDC24 to help developers connect with Apple experts, engineers, and each other to find answers and get advice.
Apple Developer Relations and Apple engineering are joining forces to field your questions and work to solve your technical issues. You’ll have access to an expanded knowledge base and enjoy quick response times — so you can get back to creating and enhancing your app or game. Plus, Apple Developer Program members now have priority access to expert advice on the forums.
Hello Developer: May 2024
It won’t be long now! WWDC24 takes place online from June 10 through 14, and we’re here to help you get ready for the biggest developer event of the year. In this edition:
- Explore Pathways, a brand-new way to learn about developing for Apple platforms.
- Meet three Distinguished Winners of this year’s Swift Student Challenge.
- Get great tips from the SharePlay team.
- Browse new developer activities about accessibility, machine learning, and more.
WWDC24
Introducing PathwaysIf you’re new to developing for Apple platforms, we’ve got an exciting announcement. Pathways are simple and easy-to-navigate collections of the videos, documentation, and resources you’ll need to start building great apps and games. Because Pathways are self-directed and can be followed at your own pace, they’re the perfect place to begin your journey.
Explore Pathways for Swift, SwiftUI, design, games, visionOS, App Store distribution, and getting started as an Apple developer.
Meet three Distinguished Winners of the Swift Student ChallengeElena Galluzzo, Dezmond Blair, and Jawaher Shaman all drew inspiration from their families to create their winning app playgrounds. Now, they share the hope that their apps can make an impact on others as well.
Meet Elena, Dezmond, and Jawaher >
MEET WITH APPLE EXPERTS
Check out the latest worldwide developer activities- Meet with App Review online to discuss the App Review Guidelines and explore best practices for a smooth review process. Sign up for May 14.
- Join us in Bengaluru for a special in-person activity to commemorate Global Accessibility Awareness Day. Sign up for May 15.
- Learn how Apple machine learning frameworks can help you create more intelligent apps and games in an online activity. Sign up for May 19.
Browse the full schedule of activities >
NEWS
Explore Apple Pencil ProBring even richer and more immersive interactions to your iPad app with new features, like squeeze gestures, haptic feedback, and barrel-roll angle tracking.
BEHIND THE DESIGN
The rise of Tide GuideHere’s the swell story of how fishing with his grandfather got Tucker MacDonald hooked into creating his tide-predicting app.
‘I taught myself’: Tucker MacDonald and the rise of Tide Guide View nowGROW YOUR BUSINESS
Explore simple, safe transactions with In-App PurchaseTake advantage of powerful global pricing tools, promotional features, analytics only available from Apple, built-in customer support, and fraud detection.
Q&A
Get shared insights from the SharePlay teamLearn about shared experiences, spatial Personas, that magic “shockwave” effect, and more.
Q&A with the SharePlay team View nowDOCUMENTATION
Browse new and updated docs- Explore the new framework for converting Pages, Numbers, and Keynote files to PDF, enabling you to show an inline preview in a web browser.
- Check out Writing ARM64 code for Apple platforms for an update on data-independent timing.
- Visit the HIG for new and enhanced guidance on virtual hands and interactive elements in visionOS, sheets in iPadOS, and more.
Want to get Hello Developer in your inbox? Make sure you’ve opted in to receive emails about developer news and events by updating your email preferences in your developer account.
Share your thoughtsWe’d love to hear from you. If you have suggestions for our activities or stories, please let us know.
Q&A with the SharePlay team
SharePlay is all about creating meaningful shared experiences in your app. By taking advantage of SharePlay, your app can provide a real-time connection that synchronizes everything from media playback to 3D models to collaborative tools across iPhone, iPad, Mac, Apple TV, and Apple Vision Pro. We caught up with the SharePlay team to ask about creating great SharePlay experiences, spatial Personas, that magic “shockwave” effect, and more.
How does a person start a SharePlay experience?Anyone can begin a group activity by starting a FaceTime call and then launching a SharePlay-supported app. When they do, a notification about the group activity will appear on all participants’ screens. From there, participants can join — and come and go — as they like. You can also start a group activity from your app, from the share sheet, or by adding a SharePlay button to your app.
How can I use SharePlay to keep media playback in sync?SharePlay supports coordinated media playback using AVKit. You can use the system coordinator to synchronize your own player across multiple participants. If you have an ad-supported app, you can synchronize both playback and ad breaks. SharePlay also provides the GroupSessionMessenger API, which lets participants communicate in near-real time.
What’s the difference between SharePlay and Shared with You? Can they work together?SharePlay allows people to share rich experiences with each other. Shared with You helps make app content that people are sharing in Messages available to your app. For example, if a group chat is discussing a funny meme video from your app, adopting Shared with You would allow your app to highlight that content in the app. And if your app supports SharePlay, you can surface that relevant content as an option for watching together.
Separately, Shared with You offers ways to initiate collaboration on shared, persisted content (such as documents) over Messages and FaceTime. You can choose to support SharePlay on that collaborative content, but if you do, consider the ephemerality of a SharePlay experience compared to the persistence of collaboration. For example, if your document is a presentation, you may wish to leverage Shared with You to get editors into the space while using SharePlay to launch an interactive presentation mode that just isn’t possible with screen sharing alone.
What’s the easiest way for people to share content?When your app lets your system know that your current view has shareable content on screen, people who bring their devices together can seamlessly share that content — much like NameDrop, which presents a brief “shockwave” animation when they do. This method supports the discrete actions of sharing documents, initiating SharePlay, and starting a collaboration. This can also connect your content to the system share sheet and help you expose shareable content to the Share menu in visionOS.
Can someone on iPhone join a SharePlay session with someone on Apple Vision Pro?Yes! SharePlay is supported across iOS, iPadOS, macOS, tvOS, and visionOS. That means people can watch a show together on Apple TV+ and keep their playback synchronized across all platforms. To support a similar playback situation in your app, watch Coordinate media playback in Safari with Group Activities. If you’re looking to maintain your app’s visual consistency across platforms, check out the Group Session Messenger and DrawTogether sample project. Remember: SharePlay keeps things synchronized, but your UI is up to you.
How do I get started adopting spatial Personas with SharePlay in visionOS?When you add Group Activities to your app, people can share in that activity over FaceTime while appearing windowed — essentially the same SharePlay experience they’d see on other platforms. In visionOS, you have the ability to create a shared spatial experience using spatial Personas in which participants are placed according to a template. For example:
Using spatial Personas, the environment is kept consistent and participants can see each others’ facial expressions in real time.
How do I maintain visual and spatial consistency with all participants in visionOS?FaceTime in visionOS provides a shared spatial context by placing spatial Personas in a consistent way around your app. This is what we refer to as “visual consistency.” You can use SharePlay to maintain the same content in your app for all participants.
Can both a window and a volume be shared at the same time in a SharePlay session?No. Only one window or volume can be associated with a SharePlay session, but you can help the system choose the proper window or volume.
How many people can participate in a group activity?SharePlay supports 33 total participants, including yourself. Group activities on visionOS involving spatial Personas support five participants at a time.
Do iOS and iPadOS apps that are compatible with visionOS also support SharePlay in visionOS?Yes. During a FaceTime call, your app will appear in a window, and participants in the FaceTime call will appear next to it.
Learn more about SharePlay Design spatial SharePlay experiences Watch now Build spatial SharePlay experiences Watch now Share files with SharePlay Watch now Add SharePlay to your app Watch now‘I taught myself’: Tucker MacDonald and the rise of Tide Guide
Lots of apps have great origin stories, but the tale of Tucker MacDonald and Tide Guide seems tailor-made for the Hollywood treatment. It begins in the dawn hours on Cape Cod, where a school-age MacDonald first learned to fish with his grandfather.
“Every day, he’d look in the paper for the tide tables,” says MacDonald. “Then he’d call me up and say, ‘Alright Tucker, we’ve got a good tide and good weather. Let’s be at the dock by 5:30 a.m.’”
Rhapsody in blue: Tide Guide delivers Washington weather data in a gorgeous design and color scheme.
That was MacDonald’s first introduction to tides — and the spark behind Tide Guide, which delivers comprehensive forecasts through top-notch data visualizations, an impressive array of widgets, an expanded iPad layout, and Live Activities that look especially great in, appropriately enough, the Dynamic Island. The SwiftUI-built app also offers beautiful Apple Watch complications and a UI that can be easily customized, depending how deep you want to dive into its data. It’s a remarkable blend of original design and framework standards, perfect for plotting optimal times for a boat launch, research project, or picnic on the beach.
Impressively, Tide Guide was named a 2023 Apple Design Award finalist — no mean feat for a solo developer who had zero previous app-building experience and started his career as a freelance filmmaker.
“I wanted to be a Hollywood director since I was in the fifth grade,” says MacDonald. Early in his filmmaking career, MacDonald found himself in need of a tool that could help him pre-visualize different camera and lens combinations — “like a director’s viewfinder app,” he says. And while he caught a few decent options on the market, MacDonald wanted an app with iOS design language that felt more at home on his iPhone. “So I dove in, watched videos, and taught myself how to make it,” he says.
My primary use cases were going fishing, heading to the beach, or trying to catch a sunset.
Tucker MacDonald, Tide Guide
Before too long, MacDonald drifted away from filmmaking and into development, taking a job as a UI designer for a social app. “The app ended up failing, but the job taught me how a designer works with an engineer,” he says. “I also learned a lot about design best practices, because I had been creating apps that used crazy elements, non-standard navigation, stuff like that.”
Tucker MacDonald grew up fishing with his grandfather in the waters off Cape Cod.
Armed with growing design knowledge, he started thinking about those mornings with his grandfather, and how he might create something that could speed up the crucial process of finding optimal fishing conditions. And it didn’t need to be rocket science. “My primary use cases were going fishing, heading to the beach, or trying to catch a sunset,” he says. “I just needed to show current conditions.”
I’d say my designs were way prettier than the code I wrote.
Tucker MacDonald, Tide Guide
In the following years, Tide Guide grew in parallel with MacDonald’s self-taught skill set. “There was a lot of trial and error, and I’d say my designs were way prettier than the code I wrote,” he laughs. “But I learned both coding and design by reading documentation and asking questions in the developer community.”
Today’s Tide Guide is quite the upgrade from that initial version. MacDonald continues to target anyone heading to the ocean but includes powerful metrics — like an hour-by-hour 10-day forecast, water temperatures, and swell height — that advanced users can seek out as needed. The app’s palette is even designed to match the color of the sky throughout the day. “The more time you spend with it, the more you can dig into different layers,” he says.
All the information you need for a day on the water, in one place.
People around the world have dug into those layers, including an Alaskan tour company operator who can only land in a remote area when the tide is right, and a nonprofit national rescue service in Scotland, whose members weighed in with a Siri shortcut-related workflow request that MacDonald promptly included. And as Tide Guide gets bigger, MacDonald’s knowledge of developing — and oceanography — continues to swell. “I’m just happy that my passion for crafting an incredible experience comes through,” he says, “because I really do have so much fun making it.”
Behind the Design is a series that explores design practices and philosophies from finalists and winners of the Apple Design Awards. In each story, we go behind the screens with the developers and designers of these award-winning apps and games to discover how they brought their remarkable creations to life.
What’s new for apps distributed in the European Union
Core Technology Fee (CTF)
The CTF is an element of the alternative business terms in the EU that reflects the value Apple provides developers through tools, technologies, and services that enable them to build and share innovative apps. We believe anyone with a good idea and the ingenuity to bring it to life should have the opportunity to offer their app to the world. Only developers who reach significant scale (more than one million first annual installs per year in the EU) pay the CTF. Nonprofit organizations, government entities, and educational institutions approved for a fee waiver don’t pay the CTF. Today, we’re introducing two additional conditions in which the CTF is not required:
- First, no CTF is required if a developer has no revenue whatsoever. This includes creating a free app without monetization that is not related to revenue of any kind (physical, digital, advertising, or otherwise). This condition is intended to give students, hobbyists, and other non-commercial developers an opportunity to create a popular app without paying the CTF.
- Second, small developers (less than €10 million in global annual business revenue*) that adopt the alternative business terms receive a 3-year free on-ramp to the CTF to help them create innovative apps and rapidly grow their business. Within this 3-year period, if a small developer that hasn’t previously exceeded one million first annual installs crosses the threshold for the first time, they won’t pay the CTF, even if they continue to exceed one million first annual installs during that time. If a small developer grows to earn global revenue between €10 million and €50 million within the 3-year on-ramp period, they’ll start to pay the CTF after one million first annual installs up to a cap of €1 million per year.
This week, the European Commission designated iPadOS a gatekeeper platform under the Digital Markets Act. Apple will bring our recent iOS changes for apps in the European Union (EU) to iPadOS later this fall, as required. Developers can choose to adopt the Alternative Terms Addendum for Apps in the EU that will include these additional capabilities and options on iPadOS, or stay on Apple’s existing terms.
Once these changes are publicly available to users in the EU, the CTF will also apply to iPadOS apps downloaded through the App Store, Web Distribution, and/or alternative marketplaces. Users who install the same app on both iOS and iPadOS within a 12-month period will only generate one first annual install for that app. To help developers estimate any potential impact on their app businesses under the Alternative Terms Addendum for Apps in the EU, we’ve updated the App Install reports in App Store Connect that can be used with our fee calculator.
For more details, visit Understanding the Core Technology Fee for iOS apps in the European Union. If you’ve already entered into the Alternative Terms Addendum for Apps in the EU, be sure to sign the updated terms.
Global business revenue takes into account revenue across all commercial activity, including from associated corporate entities. For additional details, read the Alternative Terms Addendum for Apps in the EU.
Reminder: Privacy requirement for app submissions starts May 1
The App Store was created to be a safe place for users to discover and get millions of apps all around the world. Over the years, we‘ve built many critical privacy and security features that help protect users and give them transparency and control — from Privacy Nutrition Labels to app tracking transparency, and so many more.
An essential requirement of maintaining user trust is that developers are responsible for all of the code in their apps, including code frameworks and libraries from other sources. That‘s why we’ve created privacy manifests and signature requirements for the most popular third-party SDKs, as well as required reasons for covered APIs.
Starting May 1, 2024, new or updated apps that have a newly added third-party SDK that‘s on the list of commonly used third-party SDKs will need all of the following to be submitted in App Store Connect:
- Required reasons for each listed API
- Privacy manifests
- Valid signatures when the SDK is added as a binary dependency
Apps won’t be accepted if they fail to meet the manifest and signature requirements. Apps also won’t be accepted if all of the following apply:
- They’re missing a reason for a listed API
- The code is part of a dynamic framework embedded via the Embed Frameworks build phase
- The framework is a newly added third-party SDK that’s on the list of commonly used third-party SDKs
In the future, these required reason requirements will expand to include the entire app binary. If you’re not using an API for an approved reason, please find an alternative. These changes are designed to help you better understand how third-party SDKs use data, secure software dependencies, and provide additional privacy protection for users.
This is a step forward for all apps and we encourage all SDKs to adopt this functionality to better support the apps that depend on them.
Q&A: Promoting your app or game with Apple Search Ads
Apple Search Ads helps you drive discovery of your app or game on the App Store. We caught up with the Apple Search Ads team to learn more about successfully using the service, including signing up for the free online Apple Search Ads Certification course.
How might my app or game benefit from promotion on the App Store?With Apple Search Ads, developers are seeing an increase in downloads, retention, return on ad spend, and more. Find out how the developers behind The Chefz, Tiket, and Petit BamBou have put the service into practice.
Where will my ad appear?You can reach people in the following places:
- The Today tab, where people start their App Store visit.
- The Search tab, before people search for something specific.
- Search results, at the top of the results list.
- Product pages, in the “You Might Also Like” section.
Online Apple Search Ads Certification training teaches proven best practices for driving stronger campaign performance. Certification training is designed for all skill levels, from marketing pros to those just starting out. To become certified, complete all of the Certification lessons (each takes between 10 and 20 minutes), then test your skills with a free exam. Once you’re certified, you can share your certificate with your professional network on platforms like LinkedIn.
Sign up here with your Apple ID.
Will my certification expire?Although your Apple Search Ads certification never expires, training is regularly updated. You can choose to be notified about these updates through email or web push notifications.
Can I highlight specific content or features in my ads?You can use the custom product pages you create in App Store Connect to tailor your ads for a specific audience, feature launch, seasonal promotion, and more. For instance, you can create an ad for the Today tab that leads people to a specific custom product page or create ad variations for different search queries. Certification includes a lesson on how to do so.
Can I advertise my app before launch?You can use Apple Search Ads to create ads for apps you’ve made available for pre-order. People can order your app before it’s released, and it’ll automatically download onto their devices on release day.
Apple Search Ads now available in Brazil and more Latin American markets
Drive discovery and downloads on the App Store with Apple Search Ads in 70 countries and regions, now including Brazil, Bolivia, Costa Rica, the Dominican Republic, El Salvador, Guatemala, Honduras, Panama, and Paraguay.
Visit the Apple Search Ads site and Q&A.
And explore best practices to improve your campaign performance with the free Apple Search Ads Certification course.
Let loose.
Watch the May 7 event at apple.com, on Apple TV, or on YouTube Live.
Check out our newest developer activities
Join us around the world to learn about growing your business, elevating your app design, and preparing for the App Review process. Here’s a sample of our new activities — and you can always browse the full schedule to find more.
- Expand your app to new markets: Learn how to bring your apps and games to Southeast Asia, Hong Kong, and Taiwan in new online sessions with App Store experts.
- Request a one-on-one App Review consultation: Meet online to discuss the App Review Guidelines and explore best practices for a smooth review process.
- Visit the Apple Vision Pro developer labs: Test, refine, and optimize your apps and games for the infinite canvas — with in-person help from Apple.
- Request a design or technology consultation: In this 30-minute online consultation, you’ll get expert advice tailored to your app or game.
Web Distribution now available in iOS 17.5 beta 2 and App Store Connect
Web Distribution lets authorized developers distribute their iOS apps to users in the European Union (EU) directly from a website owned by the developer. Apple will provide developers access to APIs that facilitate the distribution of their apps from the web, integrate with system functionality, and back up and restore users’ apps, once they meet certain requirements designed to help protect users and platform integrity. For details, visit Getting started with Web Distribution in the EU.
Get ready with the latest beta releases
The beta versions of iOS 17.5, iPadOS 17.5, macOS 14.5, tvOS 17.5, visionOS 1.2, and watchOS 10.5 are now available. Get your apps ready by confirming they work as expected on these releases. And to take advantage of the advancements in the latest SDKs, make sure to build and test with Xcode 15.3.
Updated App Review Guidelines now available
The App Review Guidelines have been revised to support updated policies, upcoming features, and to provide clarification. The following guidelines have been updated:
- 3.1.1(a): Updated to include Music Streaming Services Entitlements.
- 4.7: Added games from retro game console emulator apps to the list of permitted software, and clarifies that mini apps and mini games must be HTML5.
Hello Developer: April 2024
Welcome to Hello Developer — and the kickoff to WWDC season. In this edition:
- Discover what’s ahead at WWDC24 — and check out the new Apple Developer YouTube channel.
- Learn how the all-new Develop in Swift Tutorials can help jump-start a career in app development.
- Find out how Zach Gage and Jack Schlesinger rebooted the crossword puzzle with Knotwords.
WWDC24
The countdown is onWWDC season is officially here.
This year’s Worldwide Developers Conference takes place online from June 10 through 14, offering you the chance to explore the new tools, frameworks, and technologies that’ll help you create your best apps and games yet.
All week long, you can learn and refine new skills through video sessions, meet with Apple experts to advance your projects and ideas, and join the developer community for fun activities. It’s an innovative week of technology and creativity — all online at no cost.
And for the first time, WWDC video sessions will be available on YouTube, in addition to the Apple Developer app and website. Visit the new Apple Developer channel to subscribe and catch up on select sessions.
TUTORIALS
Check out the new Develop in Swift TutorialsKnow a student or aspiring developer looking to start their coding journey? Visit the all-new Develop in Swift Tutorials, designed to introduce Swift, SwiftUI, and spatial computing through the experience of building a project in Xcode.
BEHIND THE DESIGN
Gage and Schlesinger at the crossroadsLearn how acclaimed game designers Zach Gage and Jack Schlesinger reimagined the crossword with Knotwords.
Knotwords: Gage and Schlesinger at the crossroads View nowMEET WITH APPLE EXPERTS
Browse new developer activitiesCheck out this month’s sessions, labs, and consultations, held online and in person around the world.
NEWS AND DOCUMENTATION
Explore and create with new and updated docs- Check out two new sample code projects about creating and viewing stereo MV-HEVC movies: Converting side-by-side 3D video to multiview HEVC and Reading multiview 3D video files.
- Find out about creating distribution-signed code for macOS, and explore the details of packaging Mac software for distribution.
- Learn what’s new in the Human Interface Guidelines, including guidance on displaying virtual hands, organizing your spatial layouts, and using Activity rings in your app.
View the complete list of new resources.
Subscribe to Hello DeveloperWant to get Hello Developer in your inbox? Make sure you’ve opted in to receive emails about developer news and events by updating your email preferences in your developer account.
Share your thoughtsWe’d love to hear from you. If you have suggestions for our activities or stories, please let us know.
Knotwords: Gage and Schlesinger at the crossroads
Knotwords is a clever twist on crossword puzzles — so much so that one would expect creators Zach Gage and Jack Schlesinger to be longtime crossword masters who set out to build themselves a new challenge.
One would be totally wrong.
“Crosswords never hit with me,” says Gage, with a laugh. “I dragged myself kicking and screaming into this one.”
It’s not about ‘What random box of words will you get?’ but, ‘What are the decisions you’ll make as a player?’
Jack Schlesinger, Knotwords
In fact, Gage and Schlesinger created the Apple Design Award finalist Knotwords — and the Apple Arcade version, Knotwords+ — not to revolutionize the humble crossword but to learn it. “We know people like crosswords,” says Schlesinger, “so we wanted to figure out what we were missing.” And the process didn’t just result in a new game — it led them straight to the secret of word-game design success. “It’s not about ‘What random box of words will you get?’” says Schlesinger, “but, ‘What are the decisions you’ll make as a player?’”
Knotwords challenges players to complete a puzzle using only specific letters in specific parts of the board.
Gage and Schlesinger are longtime design partners; in addition to designing Knotwords and Good Sudoku with Gage, Schlesinger contributed to the 2020 reboot of SpellTower and the Apple Arcade title Card of Darkness. Neither came to game design through traditional avenues: Gage has a background in interactive art, while Schlesinger is the coding mastermind with a history in theater and, of all things, rock operas. (He’s responsible for the note-perfect soundtracks for many of the duo’s games.) And they’re as likely to talk about the philosophy behind a game as the development of it.
I had been under the mistaken impression that the magic of a simple game was in its simple rule set. The magic actually comes from having an amazing algorithmic puzzle constructor.
Zach Gage
“When you’re playing a crossword, you’re fully focused on the clues. You’re not focused on the grid at all,” explains Gage. “But when you’re building a crossword, you’re always thinking about the grid. I wondered if there was a way to ask players not to solve a crossword but recreate the grid instead,” he says.
Knotwords lets players use only specific letters in specific sections of the grid — a good idea, but one that initially proved elusive to refine and difficult to scale. “At first, the idea really wasn’t coming together,” says Gage, “so we took a break and built Good Sudoku.” Building their take on sudoku — another game with simple rules and extraordinary complexity — proved critical to restarting Knotwords. “I had been under the mistaken impression that the magic of a simple game was in its simple rule set,” Gage says. “The magic actually comes from having an amazing algorithmic puzzle constructor.”
An early — and very analog — prototype of Knotwords.
Problematically, they didn’t just have one of those just lying around. But they did have Schlesinger. “I said, ‘I will make you a generator for Knotwords in two hours,’” Schlesinger laughs. That was maybe a little ambitious. The first version took eight hours and was, by his own account, not great. However, it proved a valuable learning experience. “We learned that we needed to model a player. What would someone do here? What steps could they take? If they make a mistake, how long would it take them to correct it?” In short, the puzzle generation algorithm needed to take into account not just rules, but also player behavior.
The work provided the duo an answer for why people liked crosswords. It also did one better by addressing one of Gage’s longstanding game-design philosophies. “To me, the only thing that’s fun in a game is the process of getting better,” says Gage. “In every game I’ve made, the most important questions have been: What’s the journey that people are going through and how can we make that journey fun? And it turns out it's easy to discover that if I've never played a game before.”
Find Knotwords+ on Apple Arcade
Behind the Design is a series that explores design practices and philosophies from each of the winners and finalists of the Apple Design Awards. In each story, we go behind the screens with the developers and designers of these award-winning apps and games to discover how they brought their remarkable creations to life.
WWDC24: June 10-14
Join the worldwide developer community online for a week of technology and creativity.
Be there for the unveiling of the latest Apple platforms, technologies, and tools. Learn how to create and elevate your apps and games. Engage with Apple designers and engineers and connect with the worldwide developer community. All online and at no cost.
Provide your trader status in App Store Connect
To align with the Digital Services Act (DSA) in the European Union (EU), Account Holders and Admins in the Apple Developer Program can now enter their trader status in App Store Connect.
Submission requirementsYou’ll need to let us know whether or not you’re a trader to submit new apps to the App Store. If you’re a trader, you may be asked for documentation that verifies your trader contact information.
More options for apps distributed in the European Union
We’re providing more flexibility for developers who distribute apps in the European Union (EU), including introducing a new way to distribute apps directly from a developer’s website.
More flexibilityDevelopers who’ve agreed to the Alternative Terms Addendum for Apps in the EU have new options for their apps in the EU:
- Alternative app marketplaces. Marketplaces can choose to offer a catalog of apps solely from the developer of the marketplace.
- Linking out to purchase. When directing users to complete a transaction for digital goods or services on an external webpage, developers can choose how to design promotions, discounts, and other deals. The Apple-provided design templates, which are optimized for key purchase and promotional use cases, are now optional.
Web Distribution, available with a software update later this spring, will let authorized developers distribute their iOS apps to EU users directly from a website owned by the developer. Apple will provide authorized developers access to APIs that facilitate the distribution of their apps from the web, integrate with system functionality, back up and restore users’ apps, and more. For details, visit Getting ready for Web Distribution in the EU.
Uncovering the hidden joys of Finding Hannah
On its surface, Finding Hannah is a bright and playful hidden-object game — but dig a little deeper and you’ll find something much more.
The Hannah of Finding Hannah is a 38-year-old Berlin resident trying to navigate career, relationships (including with her best friend/ex, Emma), and the nagging feeling that something’s missing in her life. To help find answers, Hannah turns to her nurturing grandmother and free-spirited mother — whose own stories gradually come into focus and shape the game’s message as well.
“It’s really a story about three women from three generations looking for happiness,” says Franziska Zeiner, cofounder and co-CEO of the Fein Games studio. “For each one, times are changing. But the question is: Are they getting better?”
Locate hidden objects in this lively Berlin subway scene to move along the story of Finding Hannah.
To move the story along, players comb through a series of richly drawn scenes — a packed club, a bustling train, a pleasantly cluttered bookstore. Locating (and merging) hidden items unlocks new chapters, and the more you find, the more the time-hopping story unfolds. The remarkable mix of message and mechanic made the game a 2023 Apple Design Award finalist, as well as a Cultural Impact winner in the 2023 App Store Awards.
Fein Games is the brainchild of Zeiner and Lea Schönfelder, longtime friends from the same small town in Germany who both pursued careers in game design — despite not being all that into video games growing up. “I mean, at some point I played The Sims as a teenager,” laughs Zeiner, “but games were rare for us. When I eventually went to study game design, I felt like I didn’t really fit in, because my game literacy was pretty limited.”
The goal is to create for people who enjoy authentic female experiences in games.
Lea Schönfelder, cofounder and co-CEO of Fein Games
Cofounder and co-CEO Schönfelder also says she felt like an outsider, but soon found game design a surprisingly organic match for her background in illustration and animation. “In my early years, I saw a lot of people doing unconventional things with games and thought, ‘Wow, this is really powerful.’ And I knew I loved telling stories, maybe not in a linear form but a more systematic way.” Those early years included time with studios like Nerial and ustwo Games, where she worked on Monument Valley 2 and Assemble With Care.
Drawing on their years of experience — and maybe that shared unconventional background — the pair went out on their own to launch Fein Games in 2020. From day one, the studio was driven by more than financial success. “The goal is to create for people who enjoy authentic female experiences in games,” says Schönfelder. “But the product is only one side of the coin — there’s also the process of how you create, and we’ve been able to make inclusive games that maybe bring different perspectives to the world.”
Hannah and her free-spirited mother, Sigrid, share an uncomfortable conversation.
Finding Hannah was driven by those perspectives from day one. The story was always meant to be a time-hopping journey featuring women in Berlin, and though it isn’t autobiographical, bits and pieces do draw from their creators’ lives. “There’s a scene inspired by my grandmother, who was a nurse during the second world war and would tan with her friends on a hospital roof while the planes circled above,” says Schönfelder. The script was written by Berlin-based author Rebecca Harwick, who also served as lead writer on June’s Journey and writer on Switchcraft, The Elder Scrolls Online, and many others.
In the beginning, I felt like I wasn’t part of the group, and maybe even a little ashamed that I wasn’t as games-literate as my colleagues. But what I thought was a weakness was actually a strength.
Lea Schönfelder, cofounder and co-CEO of Fein Games
To design the art for the different eras, the team tried not to think like gamers. “The idea was to try to reach people who weren’t gamers yet, and we thought we’d most likely be able to do that if we found a style that hadn’t been seen in games before,” says Zeiner. To get there, they hired Elena Resko, a Russian-born artist based in Berlin who’d also never worked in games. “What you see is her style,” says Schönfelder. “She didn’t develop that for the game. I think that’s why it has such a deep level of polish, because Elena has been developing her style for probably a decade now.”
And the hidden-object and merge gameplay mechanic itself is an example of sticking with a proven success. “When creating games, you usually want to invent a new mechanic, right?” says Schönfelder. “But Finding Hannah is for a more casual audience. And it’s been proven that the hidden-object mechanic works. So we eventually said, ‘Well, maybe we don’t need to reinvent the wheel here,’” she laughs.
The scene in which Hannah’s grandmother sits with friends on the roof was inspired by Lea Schönfelder’s grandmother.
The result is a hidden-object game like none other, part puzzler, part historically flavored narrative, part meditation on the choices faced by women across generations. And it couldn’t have come from a team with any other background. “In the beginning, I felt like I wasn’t part of the group, and maybe even a little ashamed that I wasn’t as games-literate as my colleagues,” says Schönfelder. “But what I thought was a weakness was actually a strength. Players don’t always play your game like you intended. And I felt a very strong, very sympathetic connection to people, and wanted to make the experience as smooth and accessible as possible. And I think that shows.”
Learn more about Finding Hannah
Download Finding Hannah from the App Store
Behind the Design is a series that explores design practices and philosophies from finalists and winners of the Apple Design Awards. In each story, we go behind the screens with the developers and designers of these award-winning apps and games to discover how they brought their remarkable creations to life.
Q&A with the Mac notary service team
Security is at the core of every Apple platform. The Mac notary service team is part of Apple Security Engineering and Architecture, and in this Q&A, they share their tips on app distribution and account security to help Mac developers have a positive experience — and protect their users.
When should I submit my new app for notarization?Apps should be mostly complete at the time of notarization. There’s no need to notarize an app that isn’t functional yet.
How often should I submit my app for notarization?You should submit all versions you might want to distribute, including beta versions. That’s because we build a profile of your unique software to help distinguish your apps from other developers’ apps, as well as malware. As we release new signatures to block malware, this profile helps ensure that the software you’ve notarized is unaffected.
What happens if my app is selected for additional analysis?Some uploads to the notary service require additional evaluation. If your app falls into this category, rest assured that we’ve received your file and will complete the analysis, though it may take longer than usual. In addition, if you’ve made changes to your app while a prior upload has been delayed, it’s fine to upload a new build.
What should I do if my app is rejected?Keep in mind that empty apps or apps that might damage someone’s computer (by changing important system settings without the owner’s knowledge, for instance) may be rejected, even if they’re not malicious. If your app is rejected, first confirm that your app doesn’t contain malware. Then determine whether it should be distributed privately instead, such as within your enterprise via MDM.
What should I do if my business changes?Keep your developer account details — including your business name, contact info, address, and agreements — up to date. Drastic shifts in account activity or software you notarize can be signs that your account or certificate has been compromised. If we notice this type of activity, we may suspend your account while we investigate further.
I’m a contractor. What are some ways to make sure I’m developing responsibly?Be cautious if anyone asks you to:
- Sign, notarize, or distribute binaries that you didn’t develop.
- Develop software that appears to be a clone of existing software.
- Develop what looks like an internal enterprise application when your customer isn’t an employee of that company.
- Develop software in a high-risk category, like VPNs, system utilities, finance, or surveillance apps. These categories of software have privileged access to private data, increasing the risk to users.
Remember: It’s your responsibility to know your customer and the functionality of all software you build and/or sign.
What can I do to maintain control of my developer account?Since malware developers may try to gain access to legitimate accounts to hide their activity, be sure you have two-factor authentication enabled. Bad actors may also pose as consultants or employees and ask you to add them to your developer team. Luckily, there’s an easy solve: Don’t share access to your accounts.
Should I remove access for developers who are no longer on my team?Yes. And we can revoke Developer ID certificates for you if you suspect they may have been compromised.
Learn more about notarizationNotarizing macOS software before distribution
Hello Developer: March 2024
Welcome to Hello Developer. In this edition:
- Find out what you can do at the Apple Developer Centers in Bengaluru, Cupertino, Shanghai, and Singapore.
- Learn how the team behind Finding Hannah created a hidden-object game with a meaningful message.
- Get security tips from the Mac notary service team.
- Catch up on the latest news and documentation.
FEATURED
Step inside the Apple Developer CentersThe new Apple Developer Centers are open around the world — and we can’t wait for you to come by. With locations in Bengaluru, Cupertino, Shanghai, and now Singapore, Apple Developer Centers are the home bases for in-person sessions, labs, workshops, and consultations around the world.
Whether you’re looking to enhance your existing app or game, refine your design, or launch a new project, there’s something exciting for you at the Apple Developer Centers. Browse activities in Bengaluru, Cupertino, Shanghai, and Singapore.
BEHIND THE DESIGN
Uncover the hidden joys of Finding HannahOn its surface, Finding Hannah is a bright and playful hidden-object game — but dig a little deeper and you’ll find something more. “It’s really a story about three women from three generations looking for happiness,” says Franziska Zeiner, cofounder and co-CEO of the Fein Games studio. “For each one, times are changing. But the question is: Are they getting better?” Find out how Zeiner and her Berlin-based team created this compelling Apple Design Award finalist.
Uncovering the hidden joys of Finding Hannah View nowQ&A
Get answers from the Mac notary service teamSecurity is at the core of every Apple platform. The Mac notary service team is part of Apple Security Engineering and Architecture, and in this Q&A, they share their tips on app distribution and account security to help Mac developers have a positive experience — and protect their users.
Q&A with the Mac notary service team View nowVIDEOS
Improve your subscriber retention with App Store featuresIn this new video, App Store experts share their tips for minimizing churn and winning back subscribers.
Improve your subscriber retention with App Store features Watch nowGROW YOUR BUSINESS
Make the most of custom product pagesLearn how you can highlight different app capabilities and content through additional (and fully localizable) versions of your product page. With custom product pages, you can create up to 35 additional versions — and view their performance data in App Store Connect.
Plus, thanks to seamless integration with Apple Search Ads, you can use custom product pages to easily create tailored ad variations on the App Store. Read how apps like HelloFresh, Pillow, and Facetune used the feature to gain performance improvements, like higher tap-through and conversion rates.
DOCUMENTATION
Find the details you need in new and updated docs- Create complex materials and effects for 3D content with Shader Graph, a node-based material editor in Reality Composer Pro.
- Use SwiftData to add persistence to your app with minimal code and no external dependencies. Check out new documentation on classes, macros, and structures.
- Learn how to share configurations across Xcode Cloud workflows.
- Explore HIG updates about visionOS support, including new details on immersive experiences, the virtual keyboard, layout, color, and motion.
- New in Technotes: Learn how to identify and handle CloudKit throttles. Plus, find out how to recognize and resolve synchronization issues when working with NSPersistentCloudKitContainer, and how to explore details inside the container by capturing and analyzing a sysdiagnose.
View the full list of new resources
NEWS
Catch up on the latest updates- App Store Connect upload requirement: Starting April 29, 2024, uploaded apps must be built with Xcode 15 for iOS 17, iPadOS 17, tvOS 17, or watchOS 10.
- Updates to support app distribution changes in the European Union: Learn how we’re continuing to provide new ways to understand and utilize these changes.
- App Store Connect update: Learn about changes to app statuses and support for features related to alternative app distribution in the EU.
- App Store Connect API 3.3: Manage distribution keys, alternative distribution packages, and marketplace search for alternative app distribution in the EU.
Want to get Hello Developer in your inbox? Make sure you’ve opted in to receive emails about developer news and events by updating your email preferences in your developer account.
Share your thoughtsWe’d love to hear from you. If you have suggestions for our activities or stories, please let us know.
New App Store and iOS data analytics now available
We’re expanding the analytics available for your apps to help you get even more insight into your business and apps’ performance.
Over 50 new reports are now available through the App Store Connect API to help you analyze your apps’ App Store and iOS performance. These reports include hundreds of new metrics that can enable you to evaluate your performance and find opportunities for improvement. Reports are organized into the following categories:
- App Store Engagement — the number of users on the App Store interacting with a developer’s app or sharing it with others
- App Store Commerce — downloads, sales, pre-orders, and transactions made with the secure App Store In-App Purchase system
- App Usage — active devices, installs, app deletions, and more
- Frameworks Usage — an app’s interaction with OS capabilities, such as PhotoPicker and Widgets
- Performance — how your apps perform and how users interact with specific features
Additionally, new reports are also available through the CloudKit console with data about Apple Push Notifications and File Provider.
- Apple Push Notifications — notification states as they pass through the Apple Push Notification service (APNs)
- File Provider — usage, consistency, and error data
Updates to app distribution in the European Union
Over the past several weeks, we’ve communicated with thousands of developers to discuss DMA-related changes to iOS, Safari, and the App Store impacting apps in the European Union. As a result of the valuable feedback received, we’ve revised the Alternative Terms Addendum for Apps in the EU to update the following policies and provide developers more flexibility:
- Decisioning by membership: To make it easier for more developers to sign up for the new terms, we’ve removed the corporate entity requirement that the Addendum must be signed by each membership that controls, is controlled by, or is under control with another membership. This means an entity can now choose to sign up for the new terms at the developer account level.
- Switching back: To help reduce the risk of unexpected business changes under the new terms, such as reaching massive scale more quickly than anticipated, or if you simply change your mind, we’ve created a one-time option to terminate the Addendum under certain circumstances and switch back to Apple’s standard business terms for your EU apps. For details, view the Addendum.
- Alternative app marketplace requirements: To make it easier for developers who want to create alternative app marketplaces, we’ve added a new eligibility criteria that lets developers qualify without a stand-by letter of credit. For details, view the marketplace support page.
If you’ve already entered into the Addendum, you can sign the updated version here.
The latest OS Release Candidates are now available
You can now submit your apps and games built with Xcode 15.3 and all the latest SDKs for iOS 17.4, iPadOS 17.4, macOS 14.4, tvOS 17.4, visionOS 1.1, and watchOS 10.4.
Developers who have agreed to the Alternative Terms Addendum for Apps in the EU can now submit apps offering alternative payment options in the EU. They can also now measure the number of first annual installs their apps have accumulated.
If you’d like to discuss changes to iOS, Safari, and the App Store impacting apps in the EU to comply with the Digital Markets Act, request a 30-minute online consultation with an Apple team member.
Updated App Review Guidelines now available
The App Store Review Guidelines have been revised to support updated policies, upcoming features, and to provide clarification.
- The title of the document has been changed to App Review Guidelines.
- The Introduction section explains that in the European Union, developers can also distribute notarized iOS apps from alternative app marketplaces. This section provides links to further information about alternative app marketplaces and Notarization for iOS apps.
The following guidelines have been updated:
- 2.3.1: Added that a violation of this rule is grounds for an app being blocked from installing via alternative distribution.
- 2.3.10: Added that developers cannot include names, icons, or imagery of other mobile platforms or alternative app marketplaces in their apps or metadata, unless there is specific, approved interactive functionality.
- 3.1.3(b): Added a link to 3.1.1 to make clear that 3.1.1(a) applies, and multiplatform services apps can use the 3.1.1(a) entitlement.
- 4.8 Login Services: Updated to make clear that the login service cannot collect interactions with your app for advertising purposes without consent. It also adds that another login service is not required if your app is an alternative app marketplace, or an app distributed from an alternative app marketplace, that uses a marketplace-specific login for account, download, and commerce features.
- 5.1.1(viii): Added that apps that compile personal information from any source that is not directly from the user or without the user’s explicit consent, even public databases, are not permitted on alternative app marketplaces.
- 5.4 and 5.5: Updated to state that apps that do not comply with these guidelines will be blocked from installing via alternative distribution.
- Bug Fix Submissions: Added that bug fixes will not be delayed for apps that are already on alternative app marketplaces, except for those related to legal or safety issues.
View the App Review Guidelines
Translations of the guidelines will be available on the Apple Developer website within one month.
Privacy updates for App Store submissions
Developers are responsible for all code included in their apps. At WWDC23, we introduced new privacy manifests and signatures for commonly used third-party SDKs and announced that developers will need to declare approved reasons for using a set of APIs in their app’s privacy manifest. These changes help developers better understand how third-party SDKs use data, secure software dependencies, and provide additional privacy protection for users.
Starting March 13: If you upload a new or updated app to App Store Connect that uses an API requiring approved reasons, we’ll send you an email letting you know if you’re missing reasons in your app’s privacy manifest. This is in addition to the existing notification in App Store Connect.
Starting May 1: You’ll need to include approved reasons for the listed APIs used by your app’s code to upload a new or updated app to App Store Connect. If you’re not using an API for an allowed reason, please find an alternative. And if you add a new third-party SDK that’s on the list of commonly used third-party SDKs, these API, privacy manifest, and signature requirements will apply to that SDK. Make sure to use a version of the SDK that includes its privacy manifest and note that signatures are also required when the SDK is added as a binary dependency.
This functionality is a step forward for all apps and we encourage all SDKs to adopt it to better support the apps that depend on them.
App submissions now open for the latest OS releases
Submit in App Store Connect
iOS 17.4, iPadOS 17.4, macOS 14.4, tvOS 17.4, visionOS 1.1, and watchOS 10.4 will soon be available to customers worldwide. Build your apps and games using the Xcode 15.3 Release Candidate and latest SDKs, then test them using TestFlight. You can submit your iPhone and iPad apps today.
Apps in the European UnionDevelopers who’ve agreed to the Alternative Terms Addendum for Apps in the EU can set up marketplace distribution in the EU. Eligible developers can also submit marketplace apps and offer apps with alternative browser engines.
Once these platform versions are publicly available:
- First annual installs for the Core Technology Fee begin accruing and the new commission rates take effect for these developers.
- Apps offering alternative payment options in the EU will be accepted in App Store Connect. In the meantime, you can test in the sandbox environment.
If you’d like to discuss changes to iOS, Safari, and the App Store impacting apps in the EU to comply with the Digital Markets Act, request a 30-minute online consultation to meet with an Apple team member. In addition, if you’re interested in getting started with operating an alternative app marketplace on iOS in the EU, you can request to attend an in-person lab in Cork, Ireland.
Developer activities you’ll love
Apple developer activities are in full swing. Here’s a look at what’s happening:
- Join an online session to learn to minimize churn and win back subscribers hosted by App Store experts.
- Celebrate International Women’s Day with special in-person activities in Bengaluru, Cupertino, Shanghai, Singapore, Sydney, and Tokyo.
- Visit an Apple Vision Pro developer lab in Cupertino, London, Munich, Singapore, Sydney, or Tokyo to test and refine your apps for the infinite canvas.
- Meet with an Apple team member to discuss changes to iOS, Safari, and the App Store impacting apps in the European Union to comply with the Digital Markets Act.
And we’ll have lots more activities in store — online, in person, and in multiple languages — all year long.
Q&A with the Apple UX writing team
Writing is fundamental — especially in your apps and games, where the right words can have a profound impact on your experience. During WWDC23, the Apple UX writing team hosted a wide-ranging Q&A that covered everything from technical concepts to inspiring content to whether apps should have “character.” Here are some highlights from that conversation and resources to help you further explore writing for user interfaces.
Writing for interfaces Watch now My app has a lot of text. What’s the best way to make copy easier to read?Ask yourself: What am I trying to accomplish with my writing? Once you’ve answered that, you can start addressing the writing itself. First, break up your paragraphs into individual sentences. Then, go back and make each sentence as short and punchy as possible. To go even further, you can start each sentence the same way — like with a verb — or add section headers to break up the copy. Or, to put it another way:
Break up your paragraphs into individual sentences.
Make each sentence as short and punchy as possible.
Start each sentence the same way — like with a verb.
Keep other options in mind too. Sometimes it might be better to get your point across with a video or animation. You might also put a short answer first and expand on it elsewhere. That way, you’re helping people who are new to your app while offering a richer option for those who want to dive a little deeper.
What’s your advice for explaining technical concepts in simple terms?First, remember that not everyone will have your level of understanding. Sometimes we get so excited about technical details that we forget the folks who might be using an app for the first time.
Try explaining the concept to a friend or colleague first — or ask an engineer to give you a quick summary of a feature.
From there, break down your idea into smaller components and delete anything that isn’t absolutely necessary. Technical concepts can feel even more intimidating when delivered in a big block of text. Can you link to a support page? Do people need that information in this particular moment? Offering small bits of information is always a good first step.
How can I harness the “less is more” concept without leaving people confused?Clarity should always be the priority. The trick is to make something as long as it needs to be, but as short as it can be. Start by writing everything down — and then putting it away for a few days. When you come back to it, you’ll have a clearer perspective on what can be cut.
One more tip: Look for clusters of short words — those usually offer opportunities to tighten things up.
How should I think about writing my onboarding?Naturally, this will depend on your app or game — you’ll have to figure out what’s necessary and right for you. But typically, brevity is key when it comes to text — especially at the beginning, when people are just trying to get into the experience.
Consider providing a brief overview of high-level features so people know why they should use your app and what to expect while doing so. Also, think about how they got there. What text did they see before opening your app? What text appeared on the App Store? All of this contributes to the overall journey.
Human Interface Guidelines: Onboarding
Should UX writing have a personal tone? Or does that make localization too difficult?When establishing your voice and tone, you should absolutely consider adding elements of personality to get the elusive element of “character.” But you're right to consider how your strings will localize. Ideally, you’ll work with your localization partners for this. Focus on phrases that strike the tone you want without resorting to idioms. And remember that a little goes a long way.
How should I approach writing inclusively, particularly in conveying gender?This is an incredibly important part of designing for everyone. Consider whether specifying gender is necessary for the experience you’re creating. If gender is necessary, it’s helpful to provide a full set of options — as well as an option to decline the question. Many things can be written without alluding to gender at all and are thus more inclusive. You can also consider using glyphs. SF Symbols provides lots of inclusive options. And you can find more guidance about writing inclusively in the Human Interface Guidelines.
Human Interface Guidelines: Inclusion
What are some best practices for writing helpful notifications?First, keep in mind that notifications can feel inherently interruptive — and that people receive lots of them all day long. Before you write a notification at all, ask yourself these questions:
- Does the message need to be sent right now?
- Does the message save someone from opening your app?
- Does the message convey something you haven’t already explained?
If you answered yes to all of the above, learn more about notification best practices in the Human Interface Guidelines.
Human Interface Guidelines: Notifications
Can you offer guidance on writing for the TipKit framework?With TipKit — which displays tips that help people discover features in your app — concise writing is key. Use tips to highlight a brand-new feature in your app, help people discover a hidden feature, or demonstrate faster ways to accomplish a task. Keep your tips to just one idea, and be as clear as possible about the functionality or feature you’re highlighting.
What’s one suggestion you would give writers to improve their content?One way we find the perfect (or near-perfect) sentence is to show it to other people, including other writers, designers, and creative partners. If you don’t have that option, run your writing by someone else working on your app or even a customer. And you can always read out loud to yourself — it’s an invaluable way to make your writing sound conversational, and a great way to find and cut unnecessary words.
Hello Developer: February 2024
Welcome to the first Hello Developer of the spatial computing era. In this edition: Join us to celebrate International Women’s Day all over the world, find out how the Fantastical team brought their app to life on Apple Vision Pro, get UX writing advice straight from Apple experts, and catch up on the latest news and documentation.
FEATURED
Join us for International Women's Day celebrationsThis March, we’re honoring International Women’s Day with developer activities all over the world. Celebrate and elevate women in app development through a variety of sessions, panels, and performances.
FEATURED
“The best version we’ve ever made”: Fantastical comes to Apple Vision ProThe best-in-class calendar app Fantastical has 11 years of history, a shelf full of awards, and plenty of well-organized fans on iPad, iPhone, Mac, and Apple Watch. Yet Fantastical’s Michael Simmons says the app on Apple Vision Pro is “the best version we’ve ever made.” Find out what Simmons learned while building for visionOS — and what advice he’d give fellow developers bringing their apps to Apple Vision Pro.
“The best version we’ve ever made”: Fantastical comes to Apple Vision Pro View nowQ&A
Get advice from the Apple UX writing teamWriting is fundamental — especially in your apps and games, where the right words can have a profound impact on your app’s experience. During WWDC23, the Apple UX writing team hosted a wide-ranging Q&A that covered everything from technical concepts to inspiring content to whether apps should have “character.”
Q&A with the Apple UX writing team View nowNEWS
Download the Apple Developer app on visionOSApple Developer has come to Apple Vision Pro. Experience a whole new way to catch up on WWDC videos, browse news and features, and stay up to date on the latest Apple frameworks and technologies.
Download Apple Developer from the App Store
VIDEOS
Dive into Xcode Cloud, Apple Pay, and network selectionThis month’s new videos cover a lot of ground. Learn how to connect your source repository with Xcode Cloud, find out how to get started with Apple Pay on the Web, and discover how your app can automatically select the best network for an optimal experience.
Connect your project to Xcode Cloud Watch now Get started with Apple Pay on the Web Watch now Adapt to changing network conditions Watch nowBEHIND THE DESIGN
Rebooting an inventive puzzle game for visionOSBringing the mind-bending puzzler Blackbox to Apple Vision Pro presented Ryan McLeod with a challenge and an opportunity like nothing he'd experienced before. Find out how McLeod and team are making the Apple Design Award-winning game come to life on the infinite canvas. Then, catch up on our Apple Vision Pro developer interviews and Q&As with Apple experts.
Blackbox: Rebooting an inventive puzzle game for visionOS View now Apple Vision Pro developer stories and Q&As View nowMEET WITH APPLE EXPERTS
Sign up for developer activitiesThis month, you can learn to minimize churn and win back subscribers in an online session hosted by App Store experts, and meet with App Review to explore best practices for a smooth review process. You can also request to attend an in-person lab in Cork, Ireland, to help develop your alternative app marketplace on iOS in the European Union. View the full schedule of activities.
DOCUMENTATION
Explore and create with new and updated docs- Track specific points in world space: In this new sample app, you’ll learn to use world anchors along with an ARKit session’s WorldTrackingProvider to create coherence and continuity in a 3D world.
- Explore over 400 newly localized SF symbols: Download the latest version of SF Symbols to browse the updates.
- Preview your app's interface in Xcode: Iterate designs quickly and preview your displays across Apple devices.
- Set up or add a Border Router to your Thread network: Configure a Border Router as a bridge between the Thread and Wi-Fi or Ethernet networks in a home.
View the full list of new resources.
Discover what’s new in the Human Interface Guidelines.
NEWS
Catch up on the latest updates- Swift Student Challenge applications are open: Learn about past Challenge winners and get everything you need to create an awesome app playground.
- App Store Connect API 3.2: Manage your apps on the App Store for Apple Vision Pro and download new Sales and Trends install reports, including information about historical first annual installs.
- New StoreKit entitlement: If your app offers in-app purchases on the App Store for iPhone or iPad in the United States, you can include a link to your website to let people know of other ways to purchase your digital goods or services.
- New reports and sign-in options: You’ll soon be able to view over 50 new reports to help measure your apps’ performance. And you can take advantage of new flexibility when asking users to sign in to your app.
- App distribution in the European Union: We’re sharing some changes to iOS, Safari, and the App Store, impacting developers’ apps in the EU to comply with the Digital Markets Act.
- App Store Review Guideline update: Check out the latest changes to support updated policies and provide clarification.
Want to get Hello Developer in your inbox? Make sure you’ve opted in to receive emails about developer news and events by updating your email preferences in your developer account.
Share your thoughtsWe’d love to hear from you. If you have suggestions for our activities or stories, please let us know.
“The best version we’ve ever made”: Fantastical comes to Apple Vision Pro
The best-in-class calendar app Fantastical has more than a decade of history, a shelf full of awards, and plenty of well-organized fans on iPad, iPhone, Mac, and Apple Watch. Yet Michael Simmons, CEO and lead product designer for Flexibits, the company behind Fantastical, says the Apple Vision Pro app is “the best version we’ve ever made.” We asked Simmons about what he’s learned while building for visionOS, his experiences visiting the developer labs, and what advice he’d give fellow developers bringing their apps to Vision Pro.
What was your initial approach to bringing Fantastical from iPad to Apple Vision Pro?The first thing we did was look at the platform to see if a calendar app made sense. We thought: “Could we do something here that’s truly an improvement?” When the answer was yes, we moved on to, “OK, what are the possibilities?” And of course, visionOS gives you unlimited possibilities. You’re not confined to borders; you have the full canvas of the world to create on.
We wanted to take advantage of that infinite canvas. But we also needed to make sure Fantastical felt right at home in visionOS. People want to feel like there’s a human behind the design — especially in our case, where some customers have been with us for almost 13 years. There’s a legacy there, and an expectation that what you’ll see will feel connected to what we’ve done for more than a decade.
I play guitar, so to me it felt like learning an instrument.
Michael Simmons, CEO and lead product designer for Flexibits
In the end, it all felt truly seamless, so much so that once Fantastical was finished, we immediately said, “Well, let’s do [the company’s contacts app] Cardhop too!”
Was there a moment when you realized, “We’ve really got something here”?It happened as instantly as it could. I play guitar, so to me it felt like learning an instrument. One day it just clicks — the songs, the notes, the patterns — and feels like second nature. For me, it felt like those movies where a musical prodigy feels the music flowing out of them.
How did you approach designing for visionOS?We focused a lot on legibility of the fonts, buttons, and other screen elements. The opaque background didn’t play well with elements from other operating systems, for example, so we tweaked it. We stayed consistent with design language, used system-provided colors as much as possible, built using mainly UIKit, and used SwiftUI for ornaments and other fancy Vision Pro elements. It’s incredible how great the app looked without us needing to rewrite a bunch of code.
How long did the process take?It was five months from first experiencing the device to submitting a beautiful app. Essentially, that meant three months to ramp up — check out the UI, explore what was doable, and learn the tools and frameworks — and two more months to polish, refine, and test. That’s crazy fast! And once we had that domain knowledge, we were able to do Cardhop in two months. So I’d say if you have an iPad app and that knowledge, it takes just months to create a Apple Vision Pro version of your app.
What advice would you give to other developers looking to bring their iPhone or iPad apps to Apple Vision Pro?Make sure your app is appropriate for the platform. Look at the device — all of its abilities and possibilities — and think about how your app would feel with unlimited real estate. And if your app makes sense — and most apps do make sense — and you’re already developing for iPad, iPhone, or Mac, it’s a no-brainer to bring it to Apple Vision Pro.
Updates to support app distribution changes in the European Union
We recently announced changes to iOS, Safari, and the App Store impacting developers’ apps in the European Union (EU) to comply with the Digital Markets Act (DMA), supported by more than 600 new APIs, a wide range of developer tools, and related documentation.
And we’re continuing to provide new ways for developers to understand and utilize these changes, including:
- Online consultations to discuss alternative distribution on iOS, alternative payments on the App Store, linking out to purchase on their webpage, new business terms, and more.
- Labs to help develop alternative app marketplaces on iOS.
Developers who have agreed to the new business terms can now use new features in App Store Connect and the App Store Connect API to set up marketplace distribution and marketplace apps, and use TestFlight to beta test these features. TestFlight also supports apps using alternative browser engines, and alternative payments through payment service providers and linking out to a webpage.
And soon, you’ll be able to view expanded app analytics reports for the App Store and iOS.
App Store Connect upload requirement starts April 29
Apps uploaded to App Store Connect must be built with Xcode 15 for iOS 17, iPadOS 17, tvOS 17, or watchOS 10, starting April 29, 2024.
Apply for the Swift Student Challenge now through February 25
Every year, the Swift Student Challenge aims to inspire students to create amazing app playgrounds that can make life better for their communities — and beyond.
Have an app idea that’s close to your heart? Now’s your chance to make it happen. Build an app playground and submit by February 25.
All winners receive a year of complimentary membership in the Apple Developer Program and other exclusive awards. And for the first time ever, we’ll award a select group of Distinguished Winners a trip to Apple Park for an incredible in-person experience.
Request a consultation about the changes to apps distributed in the European Union
Meet with an Apple team member to discuss changes to iOS, Safari, and the App Store impacting apps in the European Union to comply with the Digital Markets Act. Topics include alternative distribution on iOS, alternative payments in the App Store, linking out to purchase on your webpage, new business terms, and more.
Request a 30-minute online consultation to ask questions and provide feedback about these changes.
In addition, if you’re interested in getting started with operating an alternative app marketplace on iOS in the European Union, you can request to attend an in-person lab in Cork, Ireland.
Blackbox: Rebooting an inventive puzzle game for visionOS
If you’ve ever played Blackbox, you know that Ryan McLeod builds games a little differently.
In the inventive iOS puzzler from McLeod’s studio, Shapes & Stories, players solve challenges not by tapping or swiping but by rotating the device, plugging in the USB cable, singing a little tune — pretty much everything except touching the screen.
“The idea was to get people in touch with the world outside their device,” says McLeod, while ambling along the canals of his Amsterdam home base.
I’m trying to figure out what makes Blackbox tick on iOS, and how to bring that to visionOS. That requires some creative following of my own rules — and breaking some of them.
Ryan McLeod
In fact, McLeod freed his puzzles from the confines of a device screen well before Apple Vision Pro was even announced — which made bringing the game to this new platform a fascinating challenge. On iOS and iPadOS, Blackbox plays off the familiarity of our devices. But how do you transpose that experience to a device people haven’t tried yet? And how do you break boundaries on a canvas that doesn’t have any? “I do love a good constraint,” says McLeod, “but it has been fun to explore the lifting of that restraint. I’m trying to figure out what makes Blackbox tick on iOS, and how to bring that to visionOS. That requires some creative following of my own rules — and breaking some of them.”
After a brief onboarding, the game becomes an all-new visionOS experience that takes advantage of the spatial canvas right from the first level selection. “I wanted something a little floaty and magical, but still grounded in reality,” he says. “I landed on the idea of bubbles. They’re like soap bubbles: They’re natural, they have this hyper-realistic gloss, and they move in a way you’re familiar with. The shader cleverly pulls the reflection of your world into them in this really believable, intriguing way.”
And the puzzles within those bubbles? “Unlike Blackbox on iOS, you’re not going to play this when you’re walking home from school or waiting in line,” McLeod says. “It had to be designed differently. No matter how exciting the background is, or how pretty the sound effects are, it’s not fun to just stare at something, even if it’s bobbing around really nicely.”
Ryan McLeod’s notebook shows pen sketches of what will become Blackbox on Apple Vision Pro.
Now, McLeod cautions that Blackbox is still very much a work in progress, and we’re certainly not here to offer any spoilers. But if you want to go in totally cold, it might be best to skip this next part.
In Blackbox, players interact with the space — and their own senses — to explore and solve challenges. One puzzle involves moving your body in a certain manner; another involves sound, silence, and a blob of molten gold floating like an alien in front of you. A second puzzle involves Morse code. And solving a third puzzle causes part of the scene to collapse into a portal. “Spatial Audio makes the whole thing kind of alarming but mesmerizing,” he says.
There's an advantage to not knowing expected or common patterns.
Ryan McLeod
It's safe to say Blackbox will continue evolving, especially since McLeod is essentially building this plane as he’s flying it — something he views as a positive. “There’s an advantage to not knowing expected or common patterns,” he says. “There’s just so much possibility.”
Apple Vision Pro developer stories and Q&As
Meet some of the incredible teams building for visionOS, and get answers from Apple experts on spatial design and creating great apps for Apple Vision Pro.
Developer stories “The best version we’ve ever made”: Fantastical comes to Apple Vision Pro View now Blackbox: Rebooting an inventive puzzle game for visionOS View now “The full impact of fruit destruction”: How Halfbrick cultivated Super Fruit Ninja on Apple Vision Pro View now Realizing their vision: How djay designed for visionOS View now JigSpace is in the driver’s seat View now PTC is uniting the makers View now Q&As Q&A: Spatial design for visionOS View now Q&A: Building apps for visionOS View nowPrice and tax updates for apps, in-app purchases, and subscriptions
The App Store is designed to make it easy to sell your digital goods and services globally, with support for 44 currencies across 175 storefronts.
From time to time, we may need to adjust prices or your proceeds due to changes in tax regulations or foreign exchange rates. These adjustments are made using publicly available exchange rate information from financial data providers to help ensure that prices for apps and in-app purchases remain consistent across all storefronts.
Price updatesOn February 13, pricing for apps and in-app purchases* will be updated for the Benin, Colombia, Tajikistan, and Türkiye storefronts. Also, these updates consider the following tax changes:
- Benin: value-added tax (VAT) introduction of 18%
- Tajikistan: VAT rate decrease from 15% to 14%
Prices will be updated on the Benin, Colombia, Tajikistan, and Türkiye storefronts if you haven’t selected one of these as the base for your app or in‑app purchase.*
Prices won’t change on the Benin, Colombia, Tajikistan, or Türkiye storefront if you’ve selected that storefront as the base for your app or in-app purchase.* Prices on other storefronts will be updated to maintain equalization with your chosen base price.
Prices won’t change in any region if your in‑app purchase is an auto‑renewable subscription and won’t change on the storefronts where you manually manage prices instead of using the automated equalized prices.
The Pricing and Availability section of My Apps has been updated in App Store Connect to display these upcoming price changes. As always, you can change the prices of your apps, in‑app purchases, and auto‑renewable subscriptions at any time.
Learn more about managing your pricesView or edit upcoming price changes
Edit your app’s base country or region
Pricing and availability start times by region
Set a price for an in-app purchase
Tax updatesYour proceeds for sales of apps and in-app purchases will change to reflect the new tax rates and updated prices. Exhibit B of the Paid Applications Agreement has been updated to indicate that Apple collects and remits applicable taxes in Benin.
On January 30, your proceeds from the sale of eligible apps and in‑app purchases were modified in the following countries to reflect introductions or changes in VAT rates.
- Benin: VAT introduction of 18%
- Czechia: VAT rate decreased from 10% to 0% for certain eBooks and audiobooks
- Czechia: VAT rate increased from 10% to 12% for certain eNewspapers and Magazines
- Estonia: VAT rate increased from 20% to 22%
- Ireland: VAT rate decreased from 9% to 0% for certain eBooks and audiobooks
- Luxembourg: VAT rate increased from 16% to 17%
- Singapore: GST rate increased from 8% to 9%
- Switzerland: VAT rate increased from 2.5% to 2.6% for certain eNewspapers, magazines, books and audiobooks
- Switzerland: VAT rate increased from 7.7% to 8.1% for all other apps and in-app purchases
- Tajikistan: VAT rate decreased from 15% to 14%
*Excludes auto-renewable subscriptions.
Get ready with the latest beta releases
The beta versions of iOS 17.4, iPadOS 17.4, macOS 14.4, tvOS 17.4, and watchOS 10.4 are now available. Get your apps ready by confirming they work as expected on these releases. And to take advantage of the advancements in the latest SDKs, make sure to build and test with Xcode 15.3 beta.
Apple introduces new options worldwide for streaming game services and apps that provide access to mini apps and games
New analytics reports coming in March for developers everywhere
Developers can also enable new sign-in options for their apps
Today, Apple is introducing new options for how apps globally can deliver in-app experiences to users, including streaming games and mini-programs. Developers can now submit a single app with the capability to stream all of the games offered in their catalog.
Apps will also be able to provide enhanced discovery opportunities for streaming games, mini-apps, mini-games, chatbots, and plug-ins that are found within their apps.
Additionally, mini-apps, mini-games, chatbots, and plug-ins will be able to incorporate Apple’s In-App Purchase system to offer their users paid digital content or services for the first time, such as a subscription for an individual chatbot.
Each experience made available in an app on the App Store will be required to adhere to all App Store Review Guidelines and its host app will need to maintain an age rating of the highest age-rated content included in the app.
The changes Apple is announcing reflect feedback from Apple’s developer community and is consistent with the App Store’s mission to provide a trusted place for users to find apps they love and developers everywhere with new capabilities to grow their businesses. Apps that host this content are responsible for ensuring all the software included in their app meets Apple’s high standards for user experience and safety.
New app analyticsApple provides developers with powerful dashboards and reports to help them measure their apps’ performance through App Analytics, Sales and Trends, and Payments and Financial Reports. Today, Apple is introducing new analytics for developers everywhere to help them get even more insight into their businesses and their apps’ performance, while maintaining Apple’s long-held commitment to ensure users are not identifiable at an individual level.
Over 50 new reports will be available through the App Store Connect API to help developers analyze their app performance and find opportunities for improvement with more metrics in areas like:
Engagement — with additional information on the number of users on the App Store interacting with a developer’s app or sharing it with others;
Commerce — with additional information on downloads, sales and proceeds, pre-orders, and transactions made with the App Store’s secure In-App Purchase system;
App usage — with additional information on crashes, active devices, installs, app deletions, and more.
Frameworks usage — with additional information on an app’s interaction with OS functionality such as PhotoPicker, Widgets, and CarPlay.
Additional information about report details and access will be available for developers in March.
Developers will have the ability to grant third-party access to their reports conveniently through the API.
More flexibility for sign in options in appsIn line with Apple’s mission to protect user privacy, Apple is updating its App Store Review Guideline for using Sign in with Apple. Sign in with Apple makes it easy for users to sign in to apps and websites using their Apple ID and was built from the ground up with privacy and security in mind. Starting today, developers that offer third-party or social login services within their app will have the option to offer Sign in with Apple, or they will now be able to offer an equivalent privacy-focused login service instead.
Update on apps distributed in the European Union
We’re sharing some changes to iOS, Safari, and the App Store, impacting developers’ apps in the European Union (EU) to comply with the Digital Markets Act (DMA). These changes create new options for developers who distribute apps in any of the 27 EU member states, and do not apply to apps distributed anywhere else in the world. These options include how developers can distribute apps on iOS, process payments, use web browser engines in iOS apps, request interoperability with iPhone and iOS hardware and software features, access data and analytics about their apps, and transfer App Store user data.
If you want nothing to change for you — from how the App Store works currently in the EU and in the rest of the world — no action is needed. You can continue to distribute your apps only on the App Store and use its private and secure In-App Purchase system.
Updated App Store Review Guidelines now available
The App Store Review Guidelines have been revised to support updated policies, upcoming features, and to provide clarification. We now also indicate which guidelines only apply to Notarization for iOS apps in the European Union.
The following guidelines have been divided into subsections for the purposes of Notarization for iOS apps in the EU:
- 2.3.1
- 2.5.16
- 4.1
- 4.3
- 4.6
- 5.1.4
- 5.2.4
The following guidelines have been deleted:
- 2.5.7
- 3.2.2(vi)
- 4.2.4
- 4.2.5
- 4.4.3
2.5.6: Added a link to an entitlement to use an alternative web browser engine in your app in the EU.
3.1.6: Moved to 4.9.
3.2.2(ii): Moved to 4.10.
4.7: Edited to set forth new requirements for mini apps, mini games, streaming games, chatbots, and plug-ins.
4.8: Edited to require an additional login service with certain privacy features if you use a third-party or social login service to set up or authenticate a user’s primary account.
4.9: The original version of this rule (Streaming games) has been deleted and replaced with the Apple Pay guideline.
5.1.2(i): Added that apps may not require users to enable system functionalities (e.g., push notifications, location services, tracking) in order to access functionality, content, use the app, or receive monetary or other compensation, including but not limited to gift cards and codes. A version of this rule was originally published as Guideline 3.2.2(vi).
After You Submit — Appeals: Edited to add an updated link for suggestions for changes to the Guidelines.
The term “auto-renewing subscriptions” was replaced with “auto-renewable subscriptions” throughout.
Translations of the guidelines will be available on the Apple Developer website within one month.
Swift Student Challenge applications open February 5
We’re so excited applications for the Swift Student Challenge 2024 will open on February 5.
Looking for some inspiration? Learn about past Challenge winners to gain insight into the motivations behind their apps.
Just getting started? Get tools, tips, and guidance on everything you need to create an awesome app playground.
“The full impact of fruit destruction”: How Halfbrick cultivated Super Fruit Ninja on Apple Vision Pro
Fruit Ninja has a juicy history that stretches back more than a decade, but Samantha Turner, lead gameplay programmer at the game’s Halfbrick Studios, says the Apple Vision Pro version — Super Fruit Ninja on Apple Arcade — is truly bananas. “When it first came out, Fruit Ninja kind of gave new life to the touchscreen,” she notes, “and I think we have the potential to do something very special here.”
What if players could squeeze juice out of an orange? What if they could rip apart a watermelon and cover the table and walls with juice?
Samantha Turner, lead gameplay programmer at Halfbrick Studios
Turner would know. She’s worked on the Fruit Ninja franchise for nearly a decade, which makes her especially well suited to help grow the game on a new platform. “We needed to understand how to bring those traditional 2D user interfaces into the 3D space,” she says. “We were full of ideas: What if players could squeeze juice out of an orange? What if they could rip apart a watermelon and cover the table and walls with juice?” She laughs, on a roll. “We were really playing with the environment.”
But they also needed to get people into that environment. “That’s where we came up with the flying menu,” she says, referring to the old-timey home screen that’ll feel familiar to Fruit Ninja fans, except for how it hovers in space. “We wanted a friendly and welcoming way to bring people into the immersive space,” explains Turner. “Before we landed on the menu, we were doing things like generating 3D text to put on virtual objects. But that didn’t give us the creative freedom we needed to set the theme for our world.”
To create Super Fruit Ninja, the Halfbrick team worked to bring “traditional 2D interfaces into the 3D space.”
That theme: The good citizens of Fruitasia have discovered a portal to our world — one that magically materializes in the room. “Sensei steps right through the portal,” says Turner, “and you can peek back into their world too.”
Next, Turner and Halfbrick set about creating a satisfying — and splashy — way for people to interact with their space. The main question: What’s the most logical way to launch fruit at people?
“We started with, OK, you have a couple meters square in front of you. What will the playspace look like? What if there’s a chair or a table in the way? How do we work around different scenarios for people in their office or living room or kitchen?” To find their answers, Halfbrick built RealityKit prototypes. “Just being able to see those really opened up the possibilities.” The answer? A set of cannons, arranged in a semicircle at the optimal distance for efficient slashing.
Instead of holding blades, you simply use your hands.
Samantha Turner, lead gameplay programmer at Halfbrick Studios
It also let them move onto the question of how players can carve up a bunch of airborne bananas in a 3D space. The team experimented with a variety of hand motions, but none felt as satisfying as the final result. “Instead of holding blades, you simply use your hands,” she says. “You become the weapon.”
And you’re a powerful weapon. Slice and dice pineapples and watermelons by jabbing with your hands. Send bombs away by pushing them to a far wall, where they harmlessly explode at a distance. Fire shuriken into floating fruit by brushing your palms in an outward direction — a motion Turner particularly likes. “It’s satisfying to see it up close, but when you see it happen far away, you get the full impact of fruit destruction,” she laughs. All were results of hand gesture explorations.
Truffles the pig awaits his reward in Super Fruit Ninja.
“We always knew hands would be the center of the experience,” she says. “We wanted players to be able to grab things and knock them away. And we can tailor the arc of the fruit to make sure it's a comfortable fruit-slicing experience — we’re actually using the vertical position of the device itself to make sure that we're not throwing fruit over your head or too low.”
The result is the most immersive — and possibly most entertaining — Fruit Ninja to date, not just for players but for the creators. “Honestly,” Turner says, “this version is one of my favorites.”
Realizing their vision: How djay designed for visionOS
Years ago, early in his professional DJ career, Algoriddim cofounder and CEO Karim Morsy found himself performing a set atop a castle tower on the Italian coast. Below him, a crowd danced in the ruins; before him streched a moonlit-drenched coastline and the Mediterranean Sea. “It was a pretty inspiring environment,” Morsy says, probably wildly underselling this.
Through their app djay, Morsy and Algoriddim have worked to recreate that live DJ experience for nearly 20 years. The best-in-class DJ app started life as boxed software for Mac; subsequent versions for iPad offered features like virtual turntables and beat matching. The app was a smashing success that won an Apple Design Award in both 2011 and 2016.
On Apple Vision Pro, djay transports people to a number of inventive immersive environments.
But Morsy says all that previous work was prologue to djay on the infinite canvas. “When we heard about Apple Vision Pro,” he says, “it felt like djay was this beast that wanted to be unleashed. Our vision — no pun intended — with Algoriddim was to make DJing accessible to everyone,” he says. Apple Vision Pro, he says, represents the realization of that dream. “The first time I experienced the device was really emotional. I wanted to be a DJ since I was a child. And suddenly here were these turntables, and the night sky, and the stars above me, and this light show in the desert. I felt like, ‘This is the culmination of everything. This is the feeling I’ve been wanting people to experience.’”
When we heard about Apple Vision Pro, it felt like djay was this beast that wanted to be unleashed.
Karim Morsy, Algoriddim cofounder and CEO
Getting to that culmination necessitated what Morsy calls “the wildest sprint of our lives.” With a 360-degree canvas to explore, the team rethought the entire process of how people interacted with djay. “We realized that with a decade of building DJ interfaces, we were taking a lot for granted,” he says. “So the first chunk of designing for Apple Vision Pro was going back to the drawing board and saying, ‘OK, maybe this made sense 10 years ago with a computer and mouse, but why do we need it now? Why should people have to push a button to match tempos — shouldn’t that be seamless?’ There was so much we could abstract away.”
Spin in a fully immersive environment, or bring your two turntables into the room with you.
They also thought about environments. djay offers a windowed view, a shared space that brings 3D turntables into your environment, and several forms of full immersion. The app first opens to the windowed view, which should feel familiar to anyone who’s spun on the iPad app: a simple UI of two decks. The volumetric view brings into your room not just turntables, but the app’s key moment: the floating 3D cube that serves as djay’s effects control pad.
But those immersive scenes are where Morsy feels people can truly experience reacting to and feeding off the environment. There’s an LED wall that reflects colors from the artwork of the currently playing song, a nighttime desert scene framed by an arena of lights, and a space lounge — complete with dancing robots — that offers a great view of planet Earth. The goal of those environments is to help create the “flow state” that’s sought by live DJs. “You want to get into a loop where the environment influences you and vice versa,” Morsy says.
From left: Algoriddim’s Karim Morsy, Frederik Seiffert, and Federico Tessmann work on updates to their app with the proper equipment.
In the end, this incredible use of technology serves a very simple purpose: interacting with the music you love. Morsy — a musician himself — points to a piano he keeps in his office. “That piano has had the same interface for hundreds of years,” he says. “That’s what we’re trying to reach, that sweet spot between complexity and ease of use. With djay on Vision Pro, it’s less about, ‘Let’s give people bells and whistles,’ and more, ‘Let’s let them have this experience.’”
Hello Developer: January 2024
Welcome to Hello Developer. In this Apple Vision Pro-themed edition: Find out how to submit your visionOS apps to the App Store, learn how the team behind djay approached designing for the infinite canvas, and get technical answers straight from Apple Vision Pro engineers. Plus, catch up on the latest news, documentation, and developer activities.
FEATURED
Submit your apps to the App Store for Apple Vision ProApple Vision Pro will have a brand-new App Store, where people can discover and download all the incredible apps available for visionOS. Whether you’ve created a new visionOS app or are making your existing iPad or iPhone app available on Apple Vision Pro, here’s everything you need to know to prepare and submit your app to the App Store.
BEHIND THE DESIGN
Realizing their vision: How djay designed for visionOSAlgoriddim CEO Karim Morsy says Apple Vision Pro represents “the culmination of everything” for his app, djay. In the latest edition of Behind the Design, find out how this incredible team approached designing for the infinite canvas.
Realizing their vision: How djay designed for visionOS View nowQ&A
Get answers from Apple Vision Pro engineersIn this Q&A, Apple Vision Pro engineers answer some of the most frequently asked questions from Apple Vision Pro developer labs all over the world.
Q&A: Building apps for visionOS View nowCOLLECTION
Reimagine your enterprise apps on Apple Vision ProDiscover the languages, tools, and frameworks you’ll need to build and test your apps for visionOS. Explore videos and resources that showcase productivity and collaboration, simulation and training, and guided work. And dive into workflows for creating or converting existing media, incorporating on-device and remote assets into your app, and much more.
Reimagine your enterprise apps on Apple Vision Pro View nowMEET WITH APPLE EXPERTS
Submit your request for developer labs and App Review consultationsJoin us this month in the Apple Vision Pro developer labs to get your apps ready for visionOS. With help from Apple, you’ll be able to test, refine, and finalize your apps and games. Plus, Apple Developer Program members can check out one-on-one App Review, design, and technology consultations, offered in English, Spanish, Brazilian Portuguese, and more.
DOCUMENTATION
Check out visionOS sample apps, SwiftUI tutorials, audio performance updates, and moreThese visionOS sample apps feature refreshed audio, visual, and timing elements, simplified collision boxes, and performance improvements.
-
Hello World: Use windows, volumes, and immersive spaces to teach people about the Earth.
-
Happy Beam: Leverage a Full Space to create a game using ARKit.
-
Diorama: Design scenes for your visionOS app using Reality Composer Pro.
-
Swift Splash: Use RealityKit to create an interactive ride in visionOS.
And these resources and updated tutorials cover iOS 17, accessibility, Live Activities, and audio performance.
-
SwiftUI Tutorials: Learn the latest best practices for iOS 17.
-
Accessibility Inspector: Review your app’s accessibility experience.
-
Starting and updating Live Activities with ActivityKit push notifications: Use push tokens to update and end Live Activities.
-
Analyzing audio performance with Instruments: Ensure a smooth and immersive audio experience using Audio System Trace.
View the full list of new resources.
Discover what’s new in the Human Interface Guidelines.
NEWS
Catch up on the latest updates-
Announcing contingent pricing: Give customers discounted pricing when they’re subscribed to a different subscription on the App Store.
-
Updated agreements and guidelines now available: Check out the latest changes that have been made to support updated policies and provide clarification.
Want to get Hello Developer in your inbox? Make sure you’ve opted in to receive emails about developer news and events by updating your email preferences in your developer account.
Share your thoughtsWe’d love to hear from you. If you have suggestions for our activities or stories, please let us know.
Q&A: Building apps for visionOS
Over the past few months, Apple experts have fielded questions about visionOS in Apple Vision Pro developer labs all over the world. Here are answers to some of the most frequent questions they’ve been asked, including insights on new concepts like entities, immersive spaces, collision shapes, and much more.
How can I interact with an entity using gestures?There are three important pieces to enabling gesture-based entity interaction:
- The entity must have an InputTargetComponent. Otherwise, it won’t receive gesture input at all.
- The entity must have a CollisionComponent. The shapes of the collision component define the regions that gestures can actually hit, so make sure the collision shapes are specified appropriately for interaction with your entity.
- The gesture that you’re using must be targeted to the entity you’re trying to interact with (or to any entity). For example:
private var tapGesture: some Gesture {
    TapGesture()
        .targetedToAnyEntity()
        .onEnded { gestureValue in

            let tappedEntity = gestureValue.entity

            print(tappedEntity.name)
        }
}
It’s also a good idea to give an interactive entity a HoverEffectComponent, which enables the system to trigger a standard highlight effect when the user looks at the entity.
Should I use a window group, an immersive space, or both?Consider the technical differences between windows, volumes, and immersive spaces when you decide which scene type to use for a particular feature in your app.
Here are some significant technical differences that you should factor into your decision:
- Windows and volumes from other apps the user has open are hidden when an immersive space is open.
- Windows and volumes clip content that exceeds their bounds.
- Users have full control over the placement of windows and volumes. Apps have full control over the placement of content in an immersive space.
- Volumes have a fixed size, windows are resizable.
- ARKit only delivers data to your app if it has an open immersive space.
Explore the Hello World sample code to familiarize yourself with the behaviors of each scene type in visionOS.
How can I visualize collision shapes in my scene?Use the Collision Shapes debug visualization in the Debug Visualizations menu, where you can find several other helpful debug visualizations as well. For information on debug visualizations, check out Diagnosing issues in the appearance of a running app.
Can I position SwiftUI views within an immersive space?Yes! You can position SwiftUI views in an immersive space with the offset(x:y:) and offset(z:) methods. It’s important to remember that these offsets are specified in points, not meters. You can utilize PhysicalMetric to convert meters to points.
What if I want to position my SwiftUI views relative to an entity in a reality view?Use the RealityView attachments API to create a SwiftUI view and make it accessible as a ViewAttachmentEntity. This entity can be positioned, oriented, and scaled just like any other entity.
RealityView { content, attachments in

    // Fetch the attachment entity using the unique identifier.
    let attachmentEntity = attachments.entity(for: "uniqueID")!

    // Add the attachment entity as RealityView content.
    content.add(attachmentEntity)

} attachments: {
    // Declare a view that attaches to an entity.
    Attachment(id: "uniqueID") {
        Text("My Attachment")
    }
}There’s no API available to position windows, but we’d love to know about your use case. Please file an enhancement request. For more information on this topic, check out Positioning and sizing windows.
Is there any way to know what the user is looking at?As noted in Adopting best practices for privacy and user preferences, the system handles camera and sensor inputs without passing the information to apps directly. There's no way to get precise eye movements or exact line of sight. Instead, create interface elements that people can interact with and let the system manage the interaction. If you have a use case that you can't get to work this way, and as long as it doesn't require explicit eye tracking, please file an enhancement request.
When are the onHover and onContinuousHover actions called on visionOS?The onHover and onContinuousHover actions are called when a finger is hovering over the view, or when the pointer from a connected trackpad is hovering over the view.
Can I show my own immersive environment textures in my app?If your app has an ImmersiveSpace open, you can create a large sphere with an UnlitMaterial and scale it to have inward-facing geometry:
struct ImmersiveView: View {
    var body: some View {
        RealityView { content in
            do {
                // Create the sphere mesh.
                let mesh = MeshResource.generateSphere(radius: 10)

                // Create an UnlitMaterial.
                var material = UnlitMaterial(applyPostProcessToneMap: false)

                // Give the UnlitMaterial your equirectangular color texture.
                let textureResource = try await TextureResource(named: "example")
                material.color = .init(tint: .white, texture: .init(textureResource))

                // Create the model.
                let entity = ModelEntity(mesh: mesh, materials: [material])
                // Scale the model so that it's mesh faces inward.
                entity.scale.x *= -1

                content.add(entity)
            } catch {
                // Handle the error.
            }
        }
    }
}AVFoundation provides APIs to write videos in MV-HEVC format. For a full example, download the sample code project Converting side-by-side 3D video to multiview HEV.
To convert your videos to MV-HEVC:
- Create an AVAsset for each of the left and right views.
- Use AVOutputSettingsAssistant to get output settings that work for MV-HEVC.
- Specify the horizontal disparity adjustment and field of view (this is asset specific). Here’s an example:
var compressionProperties = outputSettings[AVVideoCompressionPropertiesKey] as! [String: Any]

        // Specifies the parallax plane.
        compressionProperties[kVTCompressionPropertyKey_HorizontalDisparityAdjustment as String] = horizontalDisparityAdjustment

        // Specifies the horizontal FOV (90 degrees is chosen in this case.)
compressionProperties[kCMFormatDescriptionExtension_HorizontalFieldOfView as String] = horizontalFOV- Create an AVAssetWriterInputTaggedPixelBufferGroupAdaptor as the input for your AVAssetWriter.
- Create an AVAssetReader for each of the left and right video tracks.
- Read the left and right tracks, then append matching samples to the tagged pixel buffer group adaptor:
// Create a tagged buffer for each stereoView.
                        let taggedBuffers: [CMTaggedBuffer] = [
                            .init(tags: [.videoLayerID(0), .stereoView(.leftEye)], pixelBuffer: leftSample.imageBuffer!),
                            .init(tags: [.videoLayerID(1), .stereoView(.rightEye)], pixelBuffer: rightSample.imageBuffer!)
                        ]

                        // Append the tagged buffers to the asset writer input adaptor.
                        let didAppend = adaptor.appendTaggedBuffers(taggedBuffers,
withPresentationTime: leftSample.presentationTimeStamp)You can light your scene in RealityKit on visionOS by:
- Using a system-provided automatic lighting environment that updates based on real-world surroundings.
- Providing your own image-based lighting via an ImageBasedLightComponent. To see an example, create a new visionOS app, select RealityKit as the Immersive Space Renderer, and select Full as the Immersive Space.
You can create materials with custom shading in Reality Composer Pro using the Shader Graph. A material created this way is accessible to your app as a ShaderGraphMaterial, so that you can dynamically change inputs to the shader in your code.
For a detailed introduction to the Shader Graph, watch Explore materials in Reality Composer Pro.
How can I position entities relative to the position of the device?In an ImmersiveSpace, you can get the full transform of the device using the queryDeviceAnchor(atTimestamp:) method.
Learn more about building apps for visionOS Q&A: Spatial design for visionOS View now Spotlight on: Developing for visionOS View now Spotlight on: Developer tools for visionOS View nowSample code contained herein is provided under the Apple Sample Code License.
Submit your apps to the App Store for Apple Vision Pro
Apple Vision Pro will have a brand-new App Store, where people can discover and download incredible apps for visionOS. Whether you’ve created a new visionOS app or are making your existing iPad or iPhone app available on Apple Vision Pro, here’s everything you need to know to prepare and submit your app to the App Store.
Updated Apple Developer Program License Agreement now available
The Apple Developer Program License Agreement has been revised to support updated policies and provide clarification. The revisions include:
-
Definitions, Section 3.3.3(N): Updated "Tap to Present ID" to "ID Verifier"
-
Definitions, Section 14.10: Updated terms regarding governing law and venue
-
Section 3.3: Reorganized and categorized provisions for clarity
-
Section 3.3.3(B): Clarified language on privacy and third-party SDKs
-
Section 6.7: Updated terms regarding analytics
-
Section 12: Clarified warranty disclaimer language
-
Attachment 1: Updated terms for use of Apple Push Notification Service and Local Notifications
-
Attachment 9: Updated terms for Xcode Cloud compute hours included with Apple Developer Program membership
Announcing contingent pricing for subscriptions
Contingent pricing for subscriptions on the App Store — a new feature that helps you attract and retain subscribers — lets you give customers a discounted subscription price as long as they’re actively subscribed to a different subscription. It can be used for subscriptions from one developer or two different developers. We’re currently piloting this feature and will be onboarding more developers in the coming months. If you’re interested in implementing contingent pricing in your app, you can start planning today and sign up to get notified when more details are available in January.
Get ready with the latest beta releases
The beta versions of iOS 17.3, iPadOS 17.3, macOS 14.3, tvOS 17.3, and watchOS 10.3 are now available. Get your apps ready by confirming they work as expected on these releases. And to take advantage of the advancements in the latest SDKs, make sure to build and test with Xcode 15.2 beta.
Hello Developer: December 2023
Welcome to Hello Developer. In this edition: Check out new videos on Game Center and the Journaling Suggestions API, get visionOS guidance straight from the spatial design team, meet three App Store Award winners, peek inside the time capsule that is Ancient Board Game Collection, and more.
VIDEOS
Manage Game Center with the App Store Connect APIIn this new video, discover how you can use the App Store Connect API to automate your Game Center configurations outside of App Store Connect on the web.
Manage Game Center with the App Store Connect API Watch nowAnd find out how the new Journaling Suggestions API can help people reflect on the small moments and big events in their lives through your app — all while protecting their privacy.
Discover the Journaling Suggestions API Watch nowQ&A
Get your spatial design questions answeredWhat’s the best way to make a great first impression in visionOS? What’s a “key moment”? And what are some easy methods for making spatial computing visual design look polished? Get answers to these questions and more.
Q&A: Spatial design for visionOS View nowFEATURED
Celebrate the winners of the 2023 App Store AwardsEvery year, the App Store celebrates exceptional apps that improve people’s lives while showcasing the highest levels of technical innovation, user experience, design, and positive cultural impact. Find out how the winning teams behind Finding Hannah, Photomator, and Unpacking approached their incredible work this year.
“We’re trying to drive change": Meet three App Store Award-winning teams View nowMissed the big announcement? Check out the full list of 2023 winners.
NEWS
Xcode Cloud now included with membershipStarting January 2024, all Apple Developer Program memberships will include 25 compute hours per month on Xcode Cloud as a standard, with no additional cost. Learn more.
BEHIND THE DESIGN
Travel back in time with Ancient Board Game CollectionKlemens Strasser’s Ancient Board Game Collection blends the new and the very, very old. Its games date back centuries: Hnefatafl is said to be nearly 1,700 years old, while the Italian game Latrunculi is closer to 2,000. “I found a book on ancient board games by an Oxford professor and it threw me right down a rabbit hole,” Strasser says. Find out how the Austria-based developer and a team of international artists gave these ancient games new life.
With Ancient Board Game Collection, Klemens Strasser goes back in time View nowDOCUMENTATION
Get creative with 3D immersion, games, SwiftUI, and moreThis month’s new sample code, tutorials, and documentation cover everything from games to passing control between apps to addressing reasons for common crashes. Here are a few highlights:
-
Game Center matchmaking essentials, rules, and testing: Learn how to create custom matchmaking rules for better matches between players and test the rules before applying them.
-
Incorporating real-world surroundings in an immersive experience: This sample code project helps you use scene reconstruction in ARKit to give your app an idea of the shape of the person’s surroundings and to bring your app experience into their world.
-
Creating a macOS app: Find out how to bring your SwiftUI app to macOS, including adding new views tailored to macOS and modifying others to work better across platforms.
-
Creating a watchOS app: Find out how to bring your SwiftUI app to watchOS, including customizing SwiftUI views to display the detail and list views on watchOS.
View the full list of new resources.
View what’s new in the Human Interface Guidelines.
NEWS
Catch up on the latest updates-
App Store holiday schedule: We’ll remain open throughout the holiday season and look forward to accepting your submissions. However, reviews may take a bit longer to complete from December 22 to 27.
-
Sandbox improvements: Now you can change a test account’s storefront, adjust subscription renewal rates, clear purchase history, simulate interrupted purchase flows directly on iPhone or iPad, and test Family Sharing.
-
New software releases: Build your apps using the latest developer tools and test them on this week’s OS releases. Download Xcode 15.1 RC, and the RC versions of iOS 17.2, iPadOS 17.2, macOS 14.2, tvOS 17.2, and watchOS 10.2.
Want to get Hello Developer in your inbox? Make sure you’ve opted in to receive emails about developer news and events by updating your email preferences in your developer account.
Share your thoughtsWe’d love to hear from you. If you have suggestions for our activities or stories, please let us know.
Q&A: Spatial design for visionOS
Spatial computing offers unique opportunities and challenges when designing apps and games. At WWDC23, the Apple design team hosted a wide-ranging Q&A to help developers explore designing for visionOS. Here are some highlights from that conversation, including insights on the spectrum of immersion, key moments, and sound design.
What’s the best way to make a great first impression on this platform?While it depends on your app, of course, starting in a window is a great way to introduce people to your app and let them control the amount of immersion. We generally recommend not placing people into a fully immersive experience right away — it’s better to make sure they’re oriented in your app before transporting them somewhere else.
What should I consider when bringing an existing iPadOS or iOS app to visionOS?Think about a key moment where your app would really shine spatially. For example, in the Photos app for visionOS, opening a panoramic photo makes the image wrap around your field of view. Ask yourself what that potential key moment — an experience that isn’t bound by a screen — is for your app.
From a more tactical perspective, consider how your UI will need to be optimized for visionOS. To learn more, check out “Design for spatial user interfaces”.
Design for spatial user interfaces Watch now Can you say a bit more about what you mean by a “key moment”?A key moment is a feature or interaction that takes advantage of the unique capabilities of visionOS. (Think of it as a spatial or immersive highlight in your app.) For instance, if you’re creating a writing app, your key moment might be a focus mode in which you immerse someone more fully in an environment or a Spatial Audio soundscape to get them in the creative zone. That’s just not possible on a screen-based device.
I often use a grid system when designing for iOS and macOS. Does that still apply here?Definitely! The grid can be very useful for designing windows, and point sizes translate directly between platforms. Things can get more complex when you’re designing elements in 3D, like having nearby controls for a faraway element. To learn more, check out “Principles of spatial design.”
Principles of spatial design Watch now What’s the best way to test Apple Vision Pro experiences without the device?You can use the visionOS simulator in Xcode to recreate system gestures, like pinch, drag, tap, and zoom.
What’s the easiest way to make my spatial computing design look polished?As a starting point, we recommend using the system-provided UI components. Think about hover shapes, how every element appears by default, and how they change when people look directly at them. When building custom components or larger elements like 3D objects, you'll also need to customize your hover effects.
What interaction or ergonomic design considerations should I keep in mind when designing for visionOS?Comfort should guide experiences. We recommend keeping your main content in the field of view, so people don't need to move their neck and body too much. The more centered the content is in the field of view, the more comfortable it is for the eyes. It's also important to consider how you use input. Make sure you support system gestures in your app so people have the option to interact with content indirectly (using their eyes to focus an element and hand gestures, like a pinch, to select). For more on design considerations, check out “Design considerations for vision and motion.”
Design considerations for vision and motion Watch now Are there design philosophies for fully immersive experiences? Should the content wrap behind the person’s head, above them, and below them?Content can be placed anywhere, but we recommend providing only the amount of immersion needed. Apps can create great immersive experiences without taking over people's entire surroundings. To learn more, check out the Human Interface Guidelines.
Human Interface Guidelines: Immersive experiences
Are there guidelines for creating an environment for a fully immersive experience?First, your environment should have a ground plane under the feet that aligns with the real world. As you design the specifics of your environment, focus on key details that will create immersion. For example, you don't need to render all the details of a real theater to convey the feeling of being in one. You can also use subtle motion to help bring an environment to life, like the gentle movement of clouds in the Mount Hood environment.
What else should I consider when designing for spatial computing?Sound design comes to mind. When designing for other Apple platforms, you may not have placed as much emphasis on creating audio for your interfaces because people often mute sounds on their devices (or it's just not desirable for your current experience). With Apple Vision Pro, sound is crucial to creating a compelling experience.
People are adept at understanding their surroundings through sound, and you can use sound in your visionOS app or game to help people better understand and interact with elements around them. When someone presses a button, for example, an audio cue helps them recognize and confirm their actions. You can position sound spatially in visionOS so that audio comes directly from the item a person interacts with, and the system can use their surroundings to give it the appropriate reverberation and texture. You can even create spatial soundscapes for scenes to make them feel more lifelike and immersive.
For more on designing sound for visionOS, check out “Explore immersive sound design.”
Explore immersive sound design Watch now Learn moreFor even more on designing for visionOS, check out more videos, the Human Interface Guidelines, and the Apple Developer website.
Develop your first immersive app Watch now Get started with building apps for spatial computing Watch now Build great games for spatial computing Watch now“We’re trying to drive change": Meet three App Store Award-winning teams
Every year, the App Store Awards celebrate exceptional apps that improve people’s lives while showcasing the highest levels of technical innovation, user experience, design, and positive cultural impact.
This year’s winners were drawn from a list of 40 finalists that included everything from flight trackers to retro games to workout planners to meditative puzzles. In addition to exhibiting an incredible variety of approaches, styles, and techniques, these winners shared a thoughtful grasp and mastery of Apple tools and technologies.
Meet the winners and finalists of the 2023 App Store Awards
For the team behind the hidden-object game Finding Hannah, their win for Cultural Impact is especially meaningful. “We’re trying to drive change on the design level by bringing more personal stories to a mainstream audience,” says Franziska Zeiner, cofounder and managing director of the Fein Games studio, from her Berlin office. “Finding Hannah is a story that crosses three generations, and each faces the question: How truly free are we as women?”
Finding Hannah’s story is driven by quiet, meaningful interactions between the main character, her mother, and her grandmother.
The Hannah of Finding Hannah is a 39-year-old Berlin resident trying to navigate a career, relationships (including with her best friend/ex, Emma), and the meaning of true happiness. Players complete a series of found-object puzzles that move along the backstory of Hannah’s mother and grandmother to add a more personal touch to the game.
We’re trying to drive change on the design level by bringing more personal stories to a mainstream audience.
Franziska Zeiner, Fein Games co-founder and managing director
To design the art for the game’s different time periods, the team tried a different approach. “We wanted an art style that was something you’d see more on social media than in games,” says Zeiner. “The idea was to try to reach people who weren’t gamers yet, and we thought we’d most likely be able to do that if we found a style that hadn’t been seen in games before. And I do think that added a new perspective, and maybe helped us stand out a little bit.”
Learn more about Finding Hannah
Download Finding Hannah from the App Store
Pixelmator, the team behind Mac App of the Year winner Photomator, is no stranger to awards consideration, having received multiple Apple Design Awards in addition to their 2023 App Store Award. The latter is especially meaningful for the Lithuania-based team. “We’re still a Mac-first company,” says Simonas Bastys, lead developer of the Pixelmator team. “For what we do, Mac adds so many benefits to the user experience.”
Photomator’s Smart Deband feature is just one of its many powerful features on Mac.
To start adding Photomator to their portfolio of Mac apps back in 2020, Bastys and his team of engineers decided against porting over their UIKit and AppKit code. Instead, they set out to build Photomator specifically for Mac with SwiftUI. “We had a lot of experience with AppKit,” Bastys says, “but we chose to transition to SwiftUI to align with cutting-edge, future-proof technologies.”
The team zeroed in on maximizing performance, assuming that people would need to navigate and manipulate large libraries. They also integrated a wealth of powerful editing tools, such as repairing, debanding, batch editing, and much more. Deciding what to work on — and what to prioritize — is a constant source of discussion. “We work on a lot of ideas in parallel,” Bastys says, “and what we prioritize comes up very naturally, based on what’s ready for shipment and what new technology might be coming.” This year, that meant a focus on HDR.
We had a lot of experience with AppKit, but we wanted to create with native Mac technologies.
Simonas Bastys, lead developer of the Pixelmator team
How does Bastys and the Pixelmator team keep growing after so long? “This is the most exciting field in computer science to me,” says Bastys. “There’s so much to learn. I’m only now starting to even understand the depth of human vision and computer image processing. It’s a continuous challenge. But I see endless possibilities to make Photomator better for creators.”
Download Photomator from the Mac App Store
To create the Cultural Impact winner Unpacking, the Australian duo of creative director Wren Brier and technical director Tim Dawson drew on more than a decade of development experience. Their game — part zen puzzle, part life story — follows a woman through the chapters of her life as she moves from childhood bedroom to first apartment and beyond. Players solve puzzles by placing objects around each new dwelling while learning more about her history with each new level — something Brier says is akin to a detective story.
“You have this series of places, and you’re opening these hints, and you’re piecing together who this person is,” she says from the pair’s home in Brisbane.
Brier and Dawson are partners who got the idea for Unpacking from — where else? — one of their own early moves. “There was something gamelike about the idea of finishing one box to unlock the one underneath,” Brier says. “You’re completing tasks, placing items together on shelves and in drawers. Tim and I started to brainstorm the game right away.”
Unpacking has no visible characters and no dialogue. Its emotionally rich story is told entirely through objects in boxes.
While the idea was technically interesting, says Dawson, the pair was especially drawn to the idea of unpacking as a storytelling vehicle. “This is a really weird example,” laughs Dawson, “but there’s a spatula in the game. That’s a pretty normal household item. But what does it look like? Is it cheap plastic, something that maybe this person got quickly? Is it damaged, like they’ve been holding onto it for a while? Is it one of those fancy brands with a rubberized handle? All of that starts painting a picture. It becomes this really intimate way of knowing a character.”
There was something game-like about the idea of finishing one box to unlock the one underneath.
Wren Brier, Unpacking creative director
Those kinds of discussions — spatula-based and otherwise — led to a game that includes novel uses of technology, like the haptic feedback you get when you shake a piggy bank or board game. But its diverse, inclusive story is the reason behind its App Store Award nod for Cultural Impact. Brier and Dawson say players of all ages and backgrounds have shared their love of the game, drawn by the universal experience of moving yourself, your belongings, and your life into a new home. “One guy even sent us a picture of his bouldering shoes and told us they were identical to the ones in the game,” laughs Brier. “He said, ‘I have never felt so seen.’”
With Ancient Board Game Collection, Klemens Strasser goes back in time
Klemens Strasser will be the first to tell you that prior to launching his Ancient Board Game Collection, he wasn’t especially skilled at Hnefatafl. “Everybody knows chess and everybody knows backgammon,” says the indie developer from his home office in Austria, “but, yeah, I didn’t really know that one.”
Today, Strasser runs what may well be the hottest Hnefatafl game in town. The Apple Design Award finalist for Inclusivity Ancient Board Game Collection comprises nine games that reach back not years or decades but centuries — Hnefatafl (or Viking chess) is said to be nearly 1,700 years old, while the Italian game Latrunculi is closer to 2,000. And while games like Konane, Gomoku, and Five Field Kono might not be household names, Strasser’s collection gives them fresh life through splashy visuals, a Renaissance faire soundtrack, efficient onboarding, and even a bit of history.
At roughly 1,700 years old, Hnefatafl is one of the more ancient titles in Klemens Strasser’s Ancient Board Game Collection.
Strasser is a veteran of Flexibits (Fantastical, Cardhop) and the developer behind such titles as Letter Rooms, Subwords and Elementary Minute (for which he won a student Apple Design Award in 2015). But while he was familiar with Nine Men’s Morris — a game popular in Austria he’d play with his grandma — he wasn’t exactly well versed in third-century Viking pastimes until a colleague brought Hnefatafl to his attention three years ago. “It was so different than the traditional symmetric board games I knew,” he says. “I really fell in love with it.”
Less appealing were mobile versions of Hnefatafl, which Strasser found lacking. “The digital versions of many board games have a certain design,” he says. “It’s usually pretty skeuomorphic, with a lot of wood and felt and stuff like that. That just didn’t make me happy. And I thought, ‘Well, if I can’t find one I like, I’ll build it.’”
I found a book on ancient board games by an Oxford professor and it threw me right down a rabbit hole.
Klemens Strasser
Using SpriteKit, Strasser began mocking up an iOS Hnefatafl prototype in his downtime. A programmer by trade — “I’m not very good at drawing stuff,” he demurs — Strasser took pains to keep his side project as simple as possible. “I always start with minimalistic designs for my games and apps, but these are games you play with some stones and maybe a piece of paper,” he laughs. “I figured I could build that myself.”
His Hnefatafl explorations came surprisingly fast — enough so that he started wondering what other long-lost games might be out there. “I found a book on ancient board games by an Oxford professor and it threw me right down a rabbit hole,” Strasser laughs. “I kept saying, ‘Oh, that’s an interesting game, and that’s also an interesting game, and that’s another interesting game.’” Before he knew it, his simple Hnefatafl mockup had become a buffet of games. “And I still have a list of like 20 games I’d still like to digitize,” he says.
Italian designer Carmine Acierno brought a mosaic-inspired design to Nine Men’s Morris.
For the initial designs of his first few games, Strasser tried to maintain the simple style of his Hnefatafl prototype. “But I realized that I couldn’t really represent the culture and history behind each game in that way,” he says, “so I hired people who live where the games are from.”
That’s where Ancient Board Game Collection really took off. Strasser began reaching out to artists from each ancient game’s home region — and the responses came fast. Out went the minimalist version of Ancient Board Game Collection, in came a richer take, powered by a variety of cultures and design styles. For Hnefatafl, Strasser made a fortuitous connection with Swedish designer Albina Lind. “I sent her a few images of like Vikings and runestones, and in two hours she came up with a design that was better than anything I could have imagined,” he says. “If I hadn’t run into her, I might not have finished the project. But it was so perfect that I had to continue.”
Stockholm-based artist Albina Lind leapt right into designing Hnefatafl. “I instantly thought, ‘Well, this is my cup of tea,’” she says.
Lind was a wise choice. The Stockholm-based freelance artist had nearly a decade of experience designing games, including her own Norse-themed adventure, Dragonberg. “I instantly thought, ‘Well, this is my cup of tea,’” Lind says. Her first concept was relatively realistic, all dark wood and stone textures, before she settled on a more relaxed, animation-inspired style. “Sometimes going unreal, going cartoony, is even more work than being realistic,” she says with a laugh. Lind went on to design two additional ancient games: Dablot, the exact origins of which aren’t known but it which first turned up in 1892, and Halatafl, a 14th century game of Scandinavian origin.
Work arrived from around the globe. Italian designer Carmine Acierno contributed a mosaic-inspired version of Nine Men’s Morris; Honolulu-based designer Anna Fujishige brought a traditional Hawaiian flavor to Konane. And while the approach succeeded in preserving more of each game’s authentic heritage, it did mean iterating with numerous people over numerous emails. One example: Tokyo-based designer Yosuke Ando pitched changing Strasser’s initial designs for the Japanese game Gomoku altogether. “Klemens approached me initially with the idea of the game design to be inspired by ukiyo-e (paintings) and musha-e (woodblocks prints of warriors),” Ando says. “Eventually, we decided to focus on samurai warrior armor from musha-e, deconstructing it, and simplifying these elements into the game UI.”
Honolulu-based designer Anna Fujishige brought a traditional Hawaiian flavor to Konane (at left), while the Tokyo designer Yosuke Ando’s ideas for Gomoku were inspired by samurai warrior armor.
While the design process continued, Strasser worked on an onboarding strategy — times nine. As you might suspect, it can be tricky to explain the rules and subtleties of 500-year-old games from lost civilizations, and Strasser’s initial approach — walkthroughs and puzzles designed to teach each game step by step — quickly proved unwieldy. So he went in the other direction, concentrating on writing “very simple, very understandable” rules with short gameplay animations that can be accessed at any time. “I picked games that could be explained in like three or four sentences,” he says. “And I wanted to make sure it was all accessible via VoiceOver.”
Strasser designed every part of Ancient Board Game Collection with accessibility in mind.
In fact, accessibility remained a priority throughout the entire project. (He wrote his master’s thesis on accessibility in Unity games.) As an Apple Design Award finalist for Inclusivity, Ancient Board Game Collection shines with best-in-class VoiceOver adoption, as well as support for Reduce Motion, Dynamic Type, and high-contrast game boards. “It’s at least some contribution to making everything better for everyone,” he says.
I picked games that could be explained in like three or four sentences. And I wanted to make sure it was all accessible via VoiceOver.
Klemens Strasser
Ancient Board Game Collection truly is for everyone, and it’s hardly hyperbole to call it a novel way to introduce games like Hnefatafl to a whole new generation of players. “Most people,” he says, “are just surprised that they’ve never heard of these games.”
Learn more about Ancient Board Game Collection
Download Ancient Board Game Collection from the App Store
Behind the Design is a series that explores design practices and philosophies from each of the winners and finalists of the Apple Design Awards. In each story, we go behind the screens with the developers and designers of these award-winning apps and games to discover how they brought their remarkable creations to life.
25 hours of Xcode Cloud now included with the Apple Developer Program
Xcode Cloud, the continuous integration and delivery service built into Xcode, accelerates the development and delivery of high-quality apps. It brings together cloud-based tools that help you build apps, run automated tests in parallel, deliver apps to testers, and view and manage user feedback.
We’re pleased to announce that as of January 2024, all Apple Developer Program memberships will include 25 compute hours per month on Xcode Cloud as a standard, with no additional cost. If you’re already subscribed to Xcode Cloud for free, no additional action is required on your part. And if you haven’t tried Xcode Cloud yet, now is the perfect time to start building your app for free in just a few minutes.
Privacy updates for App Store submissions
Third-party SDK privacy manifest and signatures. Third-party software development kits (SDKs) can provide great functionality for apps; they can also have the potential to impact user privacy in ways that aren’t obvious to developers and users. As a reminder, when you use a third-party SDK with your app, you are responsible for all the code the SDK includes in your app, and need to be aware of its data collection and use practices.
At WWDC23, we introduced new privacy manifests and signatures for SDKs to help app developers better understand how third-party SDKs use data, secure software dependencies, and provide additional privacy protection for users. Starting in spring 2024, if your new app or app update submission adds a third-party SDK that is commonly used in apps on the App Store, you’ll need to include the privacy manifest for the SDK. Signatures are also required when the SDK is used as a binary dependency. This functionality is a step forward for all apps, and we encourage all SDKs to adopt it to better support the apps that depend on them.
Learn more and view list of commonly-used third-party SDKs
New use cases for APIs that require reasons. When you upload a new app or app update to App Store Connect that uses an API (including from third-party SDKs) that requires a reason, you’ll receive a notice if you haven’t provided an approved reason in your app’s privacy manifest. Based on the feedback we received from developers, the list of approved reasons has been expanded to include additional use cases. If you have a use case that directly benefits users that isn’t covered by an existing approved reason, submit a request for a new reason to be added.
Starting in spring 2024, in order to upload your new app or app update to App Store Connect, you’ll be required to include an approved reason in the app’s privacy manifest which accurately reflects how your app uses the API.
New design and technology consultations now available
Have questions on designing your app or implementing a technology? We’re here to help you find answers, no matter where you are in your development journey. One-on-one consultations with Apple experts in December — and newly published dates in January — are available now.
We’ll have lots more consultations and other activities in store for 2024 — online, in person, and in multiple languages.
Get your apps ready for the holidays
The busiest season on the App Store is almost here! Make sure your apps and games are up to date and ready in advance of the upcoming holidays. We’ll remain open throughout the season and look forward to accepting your submissions. On average, 90% of submissions are reviewed in less than 24 hours. However, reviews may take a bit longer to complete from December 22 to 27.
App Store Award winners announced
Join us in celebrating the work of these outstanding developers from around the world!
App Store Award finalists announced
Every year, the App Store celebrates exceptional apps that improve people’s lives while showcasing the highest levels of technical innovation, user experience, design, and positive cultural impact. This year we’re proud to recognize nearly 40 outstanding finalists. Winners will be announced in the coming weeks.
Optimize your game for Apple platforms
In this series of videos, you can learn how to level up your pro app or game by harnessing the speed and power of Apple platforms. We’ll discover GPU advancements, explore new Metal profiling tools for M3 and A17 Pro, and share performance best practices for Metal shaders.
Explore GPU advancements in M3 and A17 Pro Watch now Discover new Metal profiling tools for M3 and A17 Pro Watch now Learn performance best practices for Metal shaders Watch nowNew to developing games for Apple platforms? Familiarize yourself with the tools and technologies you need to get started.
PTC is uniting the makers
APPLE VISION PRO APPS FOR ENTERPRISE
PTC’s CAD products have been at the forefront of the engineering industry for more than three decades. And the company’s AR/VR CTO, Stephen Prideaux-Ghee, has too. “I’ve been doing VR for 30 years, and I’ve never had this kind of experience before,” he says. “I almost get so blasé about VR. But when I had [Apple Vision Pro] on, walking around digital objects and interacting with others in real time — it’s one of those things that makes you stop in your tracks."
Prideaux-Ghee says Apple Vision Pro offers PTC an opportunity to bring together components of the engineering and manufacturing process like never before. “Our customers either make stuff, or they make the machines that help somebody else make stuff,” says Prideaux-Ghee. And that stuff can be anything from chairs to boats to spaceships. “I can almost guarantee that the chair you’re sitting on is made by one of our customers,” he says.
As AR/VR CTO (which he says means “a fancy title for somebody who comes up with crazy ideas and has a reasonably good chance of implementing them”), Prideaux-Ghee describes PTC’s role as the connective tissue between the multiple threads of production. “When you’ve got a big, international production process, it's not always easy for the people involved to talk to each other. Our thought was: ‘Hey, we’re in the middle of this, so let’s come up with a simple mechanism that allows everyone to do so.’”
I’ve been doing VR for 30 years, and I’ve never had this kind of experience before.
Stephen Prideaux-Ghee, AR/VR CTO of PTC
For PTC, it’s all about communication and collaboration. “You can be a single user and get a lot of value from our app,” says Prideaux-Ghee, “but it really starts when you have multiple people collaborating, either in the same room or over FaceTime and SharePlay.” He speaks from experience; PTC has tested its app with everyone in the same space, and spread out across different countries.
"It enables some really interesting use cases, especially with passthrough," says Prideaux-Ghee. "You can use natural human interactions with a remote device."
Development is going fast. In recent weeks, PTC completed a prototype in which changes made on their iPad CAD software immediately reflect in Apple Vision Pro. “Before, we weren’t able to drive from the CAD software,” he explains. “Now, one person can run our CAD software pretty much unmodified and another can see changes instantly in 3D, at full scale. It’s really quite magical.”
Read moreBusinesses of all kinds and sizes are exploring the possibilities of the infinite canvas of Apple Vision Pro — and realizing ideas that were never before possible.
JigSpace is in the driver’s seat View nowJigSpace is in the driver’s seat
APPLE VISION PRO APPS FOR ENTERPRISE
It’s one of the most memorable images from JigSpace’s early Apple Vision Pro explorations: A life-size Alfa Romeo C43 Formula 1 car, dark cherry red, built to scale, reflecting light from all around, and parked right in the room. The camera pans back over the car’s front wings; a graceful animation shows airflow over the wings and body.
Numa Bertron, cofounder and chief technology officer for JigSpace — the creative and collaborative company that partnered with Alfa Romeo for the model — has been in the driver’s seat for the project from day one and still wasn’t quite prepared to see the car in the spatial environment. “The first thing everyone wanted to do was get in,” he says. “Everyone was stepping over the side to get in, even though you can just, you know, walk through.”
The F1 car is just one component of JigSpace’s grand plans for visionOS. The company is leaning on the new platform to create avenues of creativity and collaboration never before possible.
Bertron brings up one of JigSpace’s most notable “Jigs” (the company term for spatial presentations): an incredibly detailed model of a jet engine. “On iPhone, it’s an AR model that expands and looks awesome, but it’s still on a screen,” he explains. On Apple Vision Pro, that engine becomes a life-size piece of roaring, spinning machinery — one that people can walk around, poke through, and explore in previously unimaginable detail.
“One of our guys is a senior 3D artist,” says Bertron, “and the first time he saw one of his models in space at scale — and walked around it with his hands free — he actually cried.”
We made that F1 Jig with tools everyone can use.
Numa Bertron, JigSpace cofounder and chief technology officer
Getting there required some background learning. Prior to developing for visionOS, Bertron had no experience with SwiftUI. “We’d never gone into Xcode, so we started learning SwiftUI and RealityKit. Honestly, we expected some pain. But since everything is preset, we had really nice rounded corners, blur effects, and smooth scrolling right off the bat.”
JigSpace is designing a “full-on collaboration platform,” says Bertron.
For people who’ve used JigSpace on iOS, the visionOS version will look familiar but feel quite different. “We asked ourselves: What's the appropriate size for an object in front of you?” asks Bertron. “What’s comfortable? Will that model be on the table or on the floor? Spatial computing introduces so many more opportunities — and more decisions.”
In the case of the F1 example, it also offers a chance to level up visually. “For objects that big, we’d never been able to achieve this level of fidelity on smaller devices, so we always had to compromise,” says Bertron. In visionOS, they were free to keep adding. “We’d look at a prototype and say, ‘Well, this still runs, so let’s double the size of the textures and add more screws and more effects!’” (It’s not just about functionality, but fun as well. You can remove a piece of the car — like a full-sized tire — and throw it backwards over your head.)
The incredible visual achievement is matched by new powers of collaboration. “If I point at the tire, the other person sees me, no matter where they are,” says Bertron. “I can grab the wheel and give it to them. I can circle something we need to fix, I can leave notes or record audio. It’s a full-on collaboration platform.” And it’s also for everyone, not just F1 drivers and aerospace engineers. “We made that F1 Jig with tools everyone can use.”
Download JigSpace from the App Store
Read moreBusinesses of all kinds and sizes are exploring the possibilities of the infinite canvas of Apple Vision Pro — and realizing ideas that were never before possible.
PTC is uniting the makers View nowThe “sweet, creative” world of Kimono Cats
Games simply don’t get much cuter than Kimono Cats, a casual cartoon adventure about two cats on a date (awww) that creator Greg Johnson made as a present for his wife. “I wanted to make a game she and I could play together,” says the Maui-based indie developer, “and I wanted it to be sweet, creative, and romantic.”
Kimono Cats is all three, and it’s also spectacularly easy to play and navigate. This Apple Design Award finalist for Interaction in games is set in a Japanese festival full of charming mini-games — darts, fishing, and the like — that are designed for maximum simplicity and casual fun. Players swipe up to throw darts at balloons that contain activities, rewards, and sometimes setbacks that threaten to briefly derail the date. Interaction gestures (like scooping fish) are simple and rewarding, and the gameplay variation and side activities (like building a village for your feline duo) fit right in.
“I wanted something sweet, creative, and romantic,” says Kimono Cats developer Greg Johnson.
“I’m a huge fan of Hayao Miyazaki and that kind of heartfelt, slower-paced style,” says Johnson. “What you see in Kimono Cats is a warmth and appreciation for Japanese culture.”
You also see a game that’s a product of its environment. Johnson’s been creating games since 1983 and is responsible for titles like Starfight, ToeJam and Earl, Doki-Doki Universe, and many more. His wife, Sirena, is a builder of model houses — miniature worlds not unlike the village in Kimono Cats. And the game’s concept was a reaction to the early days of COVID-19 lockdowns. “When we started building this in 2020, everybody was under so much weight and pressure,” he says. “We felt like this was a good antidote.”
Early Kimono Cats sketches show how the characters’ cute look was established early in the design process.
To start creating the game, Johnson turned to artist and longtime collaborator Ferry Halim, as well as Tanta Vorawatanakul and Ferrari Duanghathai, a pair of developers who happen to be married. “Tanta and Ferrari would provide these charming little characters, and Ferry would come in to add animations — like moving their eyes,” says Johnson. “We iterated a lot on animating the bubbles — how fast they were moving, how many there were, how they were obscured. That was the product of a lot of testing and listening all throughout the development process.”
When we started with this in 2020, everybody was under so much weight and pressure. We felt like this was a good antidote.
Greg Johnson, Kimono Cats
Johnson notes that players can select characters without gender distinction — a detail that he and the Kimono Cats team prioritized from day one. “Whenever any companion kisses the player character on the cheek, a subtle rainbow will appear in the sky over their heads,” Johnson says. “This allows the gender of the cat characters to be open to interpretation by the users.”
Kimono Cats was designed with the simple goal of bringing smiles. “The core concept of throwing darts at bubbles isn't an earth-shaking idea by any stretch,” says Johnson, “but it was a way to interact with the storytelling that I hadn’t seen before, and the festival setting felt like a natural match.”
Find Kimono Cats on Apple Arcade
Behind the Design is a series that explores design practices and philosophies from each of the winners and finalists of the Apple Design Awards. In each story, we go behind the screens with the developers and designers of these award-winning apps and games to discover how they brought their remarkable creations to life.
Spotlight on: Apple Vision Pro apps for enterprise
Businesses of all kinds and sizes are exploring the possibilities of the infinite canvas of Apple Vision Pro — and realizing ideas that were never before possible. We caught up with two of those companies — JigSpace and PTC — to find out how they’re approaching the new world of visionOS.
JigSpace is in the driver’s seat View now PTC is uniting the makers View nowReimagine your enterprise apps on Apple Vision Pro
Discover the languages, tools, and frameworks you’ll need to build and test your apps in visionOS. Explore videos and resources that showcase productivity and collaboration, simulation and training, and guided work. And dive into workflows for creating or converting existing media, incorporating on-device and remote assets into your app, and much more.
Apple Vision Pro at work Keynote Watch now Keynote (ASL) Watch now Platforms State of the Union Watch now Platforms State of the Union (ASL) Watch now Design for Apple Vision ProWWDC sessions
Design for spatial input Watch now Design for spatial user interfaces Watch now Principles of spatial design Watch now Design considerations for vision and motion Watch now Explore immersive sound design Watch nowSample code, articles, documentation, and resources
Developer paths to Apple Vision ProWWDC sessions
Go beyond the window with SwiftUI Watch now Meet SwiftUI for spatial computing Watch now Meet ARKit for spatial computing Watch now What’s new in SwiftUI Watch now Discover Observation in SwiftUI Watch now Enhance your spatial computing app with RealityKit Watch now Build spatial experiences with RealityKit Watch now Evolve your ARKit app for spatial experiences Watch now Create immersive Unity apps Watch now Bring your Unity VR app to a fully immersive space Watch now Meet Safari for spatial computing Watch now Rediscover Safari developer features Watch now Design for spatial input Watch now Explore the USD ecosystem Watch now Explore USD tools and rendering Watch nowSample code, articles, documentation, and resources
Unity – XR Interaction Toolkit package
Unity – How Unity builds applications for Apple platforms
three.js – webGL and WebXR library
babylon.js – webGL and WebXR library
PlayCanvas – webGL and WebXR library
Immersiveweb – WebXR Device API
WebKit.org – Bug tracking for WebKit open source project
Frameworks to exploreWWDC sessions
Discover streamlined location updates Watch now Meet Core Location Monitor Watch now Meet MapKit for SwiftUI Watch now What's new in MapKit Watch now Build spatial SharePlay experiences Watch now Share files with SharePlay Watch now Design spatial SharePlay experiences Watch now Discover Quick Look for spatial computing Watch now Create 3D models for Quick Look spatial experiences Watch now Explore pie charts and interactivity in Swift Charts Watch now Elevate your windowed app for spatial computing Watch now Create a great spatial playback experience Watch now Deliver video content for spatial experiences Watch nowSample code, articles, documentation, and resources
Placing content on detected planes
Incorporating real-world surroundings in an immersive experience
Tracking specific points in world space
Tracking preregistered images in 3D space
Explore a location with a highly detailed map and Look Around
Drawing content in a group session
Supporting Coordinated Media Playback
Adopting live updates in Core Location
Monitoring location changes with Core Location
Access enterprise data and assetsWWDC sessions
Meet Swift OpenAPI Generator Watch now Advances in Networking, Part 1 Watch now Advances in App Background Execution Watch now The Push Notifications primer Watch now Power down: Improve battery consumption Watch now Build robust and resumable file transfers Watch now Efficiency awaits: Background tasks in SwiftUI Watch now Use async/await with URLSession Watch now Meet SwiftData Watch now Explore the USD ecosystem Watch now What’s new in App Store server APIs Watch nowSample code, articles, documentation, and resources
Announcing the Swift Student Challenge 2024
Apple is proud to support and uplift the next generation of student developers, creators, and entrepreneurs. The Swift Student Challenge has given thousands of students the opportunity to showcase their creativity and coding capabilities through app playgrounds, and build real-world skills that they can take into their careers and beyond. From connecting their peers to mental health resources to identifying ways to support sustainability efforts on campus, Swift Student Challenge participants use their creativity to develop apps that solve problems they’re passionate about.
We’re releasing new coding resources, working with community partners, and announcing the Challenge earlier than in previous years so students can dive deep into Swift and the development process — and educators can get a head start in supporting them.
Applications will open in February 2024 for three weeks.
New for 2024, out of 350 overall winners, we’ll recognize 50 Distinguished Winners for their outstanding submissions and invite them to join us at Apple in Cupertino for three incredible days next summer.
Over 30 new developer activities now available
Ready to level up your app or game? Join us around the world for a new set of developer labs, consultations, sessions, and workshops, hosted in person and online throughout November and December.
You can explore:
- App Store activities: Learn about discovery, engagement, in-app events, custom product pages, subscription best practices, and much more.
- Apple Vision Pro developer labs: Apply to attend a lab in Cupertino, London, Munich, New York City, Shanghai, Singapore, Sydney, or Tokyo.
- Apple Vision Pro activities: Learn to design and build an entirely new universe of apps and games for visionOS.
- Design and technology consultations: Sign up for one-on-one guidance on app design, technology implementation, and more.
Discover activities in multiple time zones and languages.
Recent content on Mobile A11y
iOS Accessibility Values
For iOS, Accessibility values are one of the building blocks of how Accessibility works on the platform, along with traits, labels, hints, and showing/hiding elements. If you’re familiar with WCAG or web accessibility, accessibility values are the value part of WCAG 4.1.2: Name, Role, Value. Values Not every element in your view will have a value - in fact, most won’t. Any element that ‘contains’ some data, data that is not included in the element’s label requires an accessibility value to be set.
iOS UIKit Accessibility traits
Accessibility traits on iOS is the system by which assistive technologies know how to present your interface to your users. The exact experience will vary between assistive technologies, in some cases they may change the intonation of what VoiceOver reads, or add additional options for navigation, sometimes they will disable that assistive technology from accessing the element, or change how the assistive tech functions. They are the ‘Role’ part of the fundamental rule of making something accessible to screen readers - WCAG’s 4.
iOS Custom Accessibility Actions
When testing your app with VoiceOver or Switch Control, a common test is to ensure you can reach every interactive element on screen. If these assistive technologies can’t focus all of your buttons how will your customers be able to interact fully with your app? Except there are times when hiding buttons from your assistive technology users is the better choice. Consider an app with a table view that has many repeating interactive elements - this could be a social media app where ’like, share, reply’ etc is repeated for each post.
Test Your App's Accessibility with Evinced
Disclosure: Evinced has paid for my time in writing this blog, and I have provided them feedback on the version of their tool reviewed and an early beta. I agreed to this because I believe in the product they are offering. Testing your app for accessibility is an essential part of making an accessible app, as with any part of the software you build, if you don’t test it, how can you be sure it works?
How Do I Get My App an Accessibility Audit?
This is a common question I get asked - how do I go about arranging an accessibility audit for my app so I know where I can make improvements? If you’re truly looking for an answer to that question then I have a few options for you below, but first, are you asking the right question? Accessibility Isn’t About Box Ticking You can’t make your app accessible by getting a report, fixing the findings, and accepting it as done.
Quick Win - Start UI Testing
I’ll admit, adding UI testing to an app that currently doesn’t have it included is probably stretching the definition of quick win, but the aim here isn’t 100% coverage - not right away anyway. Start small and add to your test suite as you gain confidence. Even a small suite of crucial happy-path UI tests will help to ensure and persist accessibility in your app. And the more you get comfortable with UI tests the more accessible your apps will become, because an app that is easy to test is also great for accessibility.
Quick Win - Support Dark Mode
Many people don’t realise dark mode is an accessibility feature. It’s often just considered a nice to have, a cool extra feature that power users will love. But dark mode is also a valuable accessibility feature. Some types of visual impairment can make it painful to look at bright colours, or large blocks of white might wash over the black text. Some people with dyslexia or Irlen’s Syndrome can struggle to read black text on a white background.
Quick Win - Support Landscape
If you have a regulatory requirement to provide accessibility in your app (spoiler, you do) the chances are it will say you have a requirement to reach WCAG AA. While this is likely meaningless to anyone other an accessibility professionals, in short it means you are providing the minimum level of accessibility features required to make your app usable by the majority of people. This post is about one such requirement, the jazzily titled Success Criterion 1.
Quick Win - Image Descriptions
Images are a major part of our apps. They add meaning and interest, they give your app character and context. The adage is that a picture is worth a thousand words. But if you can’t see the image clearly, how do you know what those words are? If you aren’t providing image descriptions in your app many of your users will be missing out on the experience you’ve crafted. The result can be an app thats missing that spark an character, or worse an app thats just meaningless and unusable.
Quick Win - Text Contrast
How many shades of grey do you use in your app? OK, maybe thats a bit cruel towards designers, grey is a great colour, but the problem with grey is that it can be deceptively difficult to distinguish from a background. And this problem is not just limited to greys - lighter colours too can blend into the background. This effect can be heightened too for people who have blurred or obscured vision, or one of many forms of colour blindness.
iOS 14: Custom Accessibility Content
Each year at WWDC Xcode Santa brings us exciting new APIs to play with, and this year our accessibility present is Customized Accessibility Content. This API flew under the radar a little, I’m told this is because it’s so new there wasn’t even time for inclusion at WWDC. But this new feature helps to solve a difficult question when designing a VoiceOver interface - where is the balance between too much and too little content.
Accessibility Review: Huh? - International languages
The Accessibility Review series uses real world apps to provide examples of common accessibility issues and provide tips on how to fix them. Each of the developers has kindly volunteered their app to be tested. Huh? is a dictionary and thesaurus app from Peter Yaacoub. Enter a word into the search bar then choose a dictionary service. Press search and the app will present your chosen service’s entry for the term you entered.
Accessibility Review: Figure Case - Button Labels
The Accessibility Review series uses real world apps to provide examples of common accessibility issues and provide tips on how to fix them. Each of the developers has kindly volunteered their app to be tested. Figure Case is an app to help organise a tabletop miniature collection created by Simon Nickel. The app helps to track miniatures you own, and what state they currently find themselves in - unassembled, assembled, or painted.
Accessibility Review: Daily Dictionary - Screen changes
The Accessibility Review series uses real world apps to provide examples of common accessibility issues and provide tips on how to fix them. Each of the developers has kindly volunteered their app to be tested. Daily Dictionary is an app from Benjamin Mayo providing a new word every day with definitions and real-world uses designed to help increase your vocabulary. Assessing the app, I noticed Benjamin has made a design decision around presenting the app’s settings.
iOS Attributed Accessibility Labels
Attributed accessibility labels are an incredible tool for making some next-level accessible experiences. They let you tell VoiceOver not just what to speak, but how to say it too. Using the accessibilityAttributedLabel property you can provide an NSAttributedString to VoiceOver, much the same way you would provide an NSAttributedString to a label’s attributedText property to display a string with an underline or character colour for example. The difference here is that all of our attributes are instructions for VoiceOver.
Writing Great iOS Accessibility Labels
A good accessibility label lets your customer know exactly what a control does in as few words as possible, without having to rely on implied context. Don’t Add the Element Type iOS already knows your button is a button and your image is an image, it does this using an accessibility trait. If you label your button as ‘Play button’ your VoiceOver customers will hear ‘Play button. Button.’ Keep it Succinct Don’t frustrate your customer by adding too much information to your labels.
When to use Accessibility Labels
There’s a few circumstances when you’ll want to set your own accessibility label, such as… An interactive element that you haven’t given a text value to, such as an image button. An interactive element with a long visual label. An interactive element with a short visual label that takes context from your design. A control or view you have created yourself or built by combining elements. Images of text. Elements Without a text value Take the controls for a music player as an example.
iOS Accessibility Labels
This blog was inspired by Jeff Watkins’ series of blogs on UIButton. UIButton is a fundamental part of building interfaces on iOS. So much so, that it probably doesn’t get the love it deserves. But it’s also really powerful and customisable when used correctly. Accessibility labels on iOS I feel are very similar. They’re fundamental to how accessibility works on iOS, yet I think they suffer from a few PR issues.
A11y Box Android
A few months ago I shared a project I’d been working on for iOS exploring the accessibility API available on that platform. The Android accessibility API is equally large and full featured, and really deserves the same treatment. So here’s A11y Box for Android. A11y Box for Android is an exploration of what is available on the Android accessibility api and how you can make use of it in your apps.
Mobile A11y Talk: Accessibility in SwiftUI
I was supposed to be attending the 2020 CSUN Assistive Technology conference to present a couple of talks, unfortunately with COVID-19 starting to take hold at that time, I wasn’t able to attend. In lieu of attending I decided to record one of the talks I was scheduled to present on Accessibility in SwiftUI. SwiftUI is Apple’s new paradigm for creating user interfaces on Apple platforms, and it has a bunch of new approaches that really help create more accessible experiences.
A11y Box iOS
iOS’ UIAccessibility API is huge. I like to think I know it pretty well, but I’m always being surprised by discovering features I previously had no idea about. Like many things on iOS, the documentation for UIAccessibility is not always complete, even for parts of the API that have been around for years. In an attempt to help spread the knowledge of some of the awesome things UIAccessibility is capable of, I’ve created A11y Box for iOS.
Android Live Regions
Live Regions are one of my favourite accessibility features on Android. They’re a super simple solution to a common accessibility problem that people with visual impairments can stumble across. Say you have a game app, really any type of game. Your user interacts with the play area, and as they do, their score increases or decreases depending on your customer’s actions. In this example, the score display is separate to the element your customer is interacting with.
A11yUITests: An XCUI Testing library for accessibility
A11yUITests is an extension to XCTestCase that adds tests for common accessibility issues that can be run as part of an XCUITest suite. I’ve written a detailed discussion of the tests available if you’re interested in changing/implementing these tests yourself. Alternatively, follow this quick start guide. Getting Started Adding A11yUITests I’m assuming you’re already familiar with cocoapods, if not, cocoapods.org has a good introduction. There is one minor difference here compared to most cocoapods, we’re not including this pod in our app, but our app’s test bundle.
XCUITests for accessibility
For a while now I’ve been looking at possibilities for automated accessibility testing on iOS. Unfortunately, I’ve not found any option so far that I’m happy with. I am a big fan of Apple’s XCUI Test framework. Although it has its limitations, I believe there’s scope for creating valid accessibility tests using this framework. Over the last few months I’ve been trying things out, and here’s what I’ve come up with.
Resources
This is a personally curated list of resources I have used and think others may find helpful too. I’m always looking for new high quality mobile accessibility and inclusion resources to add here. Please share any you find with me via email or Twitter. Code Android Android Developers: Build more accessible appsAndroid’s developer documentation for Accessibility, including design, building & testing. With videos, code samples, and documentation. Android: Make apps more accessibleGoogle’s guide to improving accessibility on Android
Review: Accessibility for Everyone - Laura Kalbag
Laura’s introduction to web accessibility jumped out to me because it’s available as an audiobook. Being dyslexic I struggle to read, so prefer to listen to audiobooks where available. Unfortunately, most technical books aren’t available as audiobooks for a couple of potentially obvious reasons. Hearing code or descriptions of diagrams and illustrations read aloud may not be the best experience for an audiobook. As such, this book choses to leave those out of the audio version.
A11y is not accessible
Accessibility is a long word. It’s not the simplest of words to read or to spell, so it seems like a word that would be a good candidate for abbreviation. The common abbreviation of accessibility is a11y. We take the A and Y from the beginning and end of accessibility, and 11 for the number of letters in between. This abbreviation also creates a pleasing homophone for ‘ally.’ The irony of this abbreviation is that a11y isn’t accessible.
About Mobile A11y
About Mobile A11y Mobile A11y is a collection of blogs and resources about how we as mobile developers can improve accessibility on mobile devices. From time to time the blog might also touch on related topics such as digital inclusion, and other topics around ethics in technology. The site is aimed at mobile developers and is written by a mobile developer. I hope this means other mobile developers will find the content relatable and engaging, and you’ll find learning about mobile accessibility along with me helpful.
SwiftUI Accessibility
Accessibility is important. We can take that as a given. But as iOS devs we’re not always sure how to make the most of the accessibility tools that Apple have provided us. We’re lucky as iOS developers that we work on such a forward-thinking accessibility platform. Many people consider Apple’s focus on accessibility for iOS as the driver for other technology vendors to include accessibility features as standard. To the point that we now consider accessibility an expected part of any digital platform.
SwiftUI Accessibility: Semantic Views
Semantic views are not new to SwiftUI, but changes in SwiftUI mean creating them is simple. Semantic views are not so much a language feature. They’re more a technique for manipulating the accessible user interface and improving the experience for assistive technology users. A what view? A semantic view is not one view, but a collection of views grouped together because they have meaning (or semantic) together. Take a look at this iOS table view cell from the files app.
SwiftUI Accessibility: User Settings
SwiftUI allows us to read environmental values that might affect how we want to present our UI. Things like size classes and locale for example. We also get the ability to read some of the user’s chosen accessibility settings allowing us to make decisions that will best fit with your customer’s preference. Why? Before we cover what these options are and how to detect them I think it’s important to briefly cover why we need to detect them.
SwiftUI Accessibility: Attributes
When a customer enables an assistive technology to navigate your app the interface that technology navigates isn’t exactly the same as the one visible on the screen. They’re navigating a modified version that iOS creates especially for assistive technology. This is known as the accessibility tree or accessible user interface. iOS does an incredible job at creating the AUI for you from your SwiftUI code. We can help iOS in creating this by tweaking some element’s accessibility attributes.
SwiftUI Accessibility: Traits
Accessibility traits are a group of attributes on a SwiftUI element. They inform assistive technologies how to interact with the element or present it to your customer. Each element has a selection of default traits, but you might need to change these as you create your UI. In SwiftUI there are two modifiers to use for traits, .accessibility(addTraits: ) and .accessibility(removeTraits: ) which add or remove traits respectively. Each modifier takes as its argument either a single accessibility trait or a set of traits.
Review: Design Meets Disability - Graham Pullin
Design Meets Disability was recommended to me by accessibility consultant Jon Gibbins while we were sharing a long train journey through mid-Wales. We were talking, amongst many things, about our love for Apple products and their design. I am a hearing aid wearer, my aid is two-tone grey. A sort of dark taupe grey above, and a darker, almost gun-metal grey below. There’s a clear tube into my ear. This is fine, I don’t hate it.
Podcast: iPhreaks - iOS Accessibility
I was asked to guest on the iPhreaks podcast to discuss iOS accessibility. We talked about why accessibility is important, how you can improve it in your apps, and some of the changes iOS 13 and SwiftUI bring. unfortunatley iPhreaks don’t provide a transcript, but they do provide a comprehensive write-up on their site.
SwiftUI Accessibility: Accessible User Interface
Take a look at your app. Notice the collection of buttons, text, images, and other controls you can see and interact with that make up your app’s user interface. When one of your customers navigates your app with Voice Control, Switch Control, VoiceOver, or any other assistive technology, this isn’t the interface they’re using. Instead, iOS creates a version of your interface for assistive technology to use. This interface is generally known as the accessibility tree.
Mobile A11y Talk: Accessibility without the 'V' Word
I was honoured in 2019 to be able to give my first full conference talk at CodeMobile. I was then lucky enough to be able to repeat that talk at NSLondon, NSManchester, and SWMobile meetups. As an iOS developer, I know accessibility is important for a huge range of people. But at times I think I can treat it like an afterthought. Accessibility Without the ‘V’ Word covers a skill I think we as software engineers would benefit from developing - empathy towards our users.
SwiftUI Accessibility: Sort Priority
Assistive technology, such as VoiceOver, works in natural reading direction. In English, and most other languages, this means top left through to the bottom right. Mostly this is the right decision for assistive technology to make. This is the order anyone not using assistive technology would experience your app. Sometimes though, we make designs that don’t read in this way. By using the .accessibility(sortPriority: ) modifier we can set the order in which assistive technology accesses elements.
SwiftUI Accessibility - Named Controls
One big accessibility improvement in SwiftUI comes in the form of named controls. Nearly all controls and some non-interactive views (see Images) can take a Text view as part of their view builder. The purpose of this is to tie the meaning to the control. Toggle(isOn: $updates) { Text("Send me updates") } Imagine a UIKit layout with a UISwitch control. We’d most likely right align the switch, and provide a text label to the left.
SwiftUI Accessibility: Dynamic Type
Like all accessibility features, Dynamic Type is about customisability. Many of your customers, and maybe even you, are using Dynamic Type without even considering it an accessibility feature. Dynamic type allows iOS users to set the text to a size that they find comfortable to read. This may mean making it a little larger so it’s easier to read for those of us who haven’t yet accepted we might need glasses.
SwiftUI Accessibility: Images
Images in SwiftUI are accessible by default. This is the opposite of what we’d experience in UIKit, where images are not accessible unless you set isAccessibilityElement to true. Sometimes making images not accessible to VoiceOver is the right decision. Like when using a glyph as a redundant way of conveying meaning alongside text. An example of this would be displaying a warning triangle next to the text ‘Error’ or a tick next to ‘success’.
Baking Digital Inclusion Into Your Mobile Apps
I was asked by Capital One to contribute an accessibility piece to the Capital One Tech Medium. The blog, titled Baking Digital Inclusion Into Your Mobile Apps, briefly covers what we mean by disability and what we can do to make our mobile apps work better for everyone.
What The European Accessibility Act (Might) Mean for Mobile Development
The European Accessibility Act, or EAA is due to become law in Europe later this year, and it defines some specific requirements for mobile. In fact, its the first accessibility legislation that I’m aware of, anywhere, that explicitly covers mobile apps. Since 2012 the European Union has been working on standardising accessibility legislation across Europe. The ultimate aim is to both improve the experience for those who need to use assistive technology, but also to simplify the rules business need to follow on accessibility.
Building with nightly Swift toolchains on macOS
The Swift website provides nightly builds of the Swift compiler (called toolchains) for download. Building with a nightly compiler can be useful if you want to check if a bug has already been fixed on main, or if you want to experiment with upcoming language features such as Embedded Swift, as I’ve been doing lately. A toolchain is distributed as a .pkg installer that installs itself into /Library/Developer/Toolchains (or the equivalent path in your home directory). After installation, you have several options to select the toolchain you want to build with: In Xcode In Xcode, select the toolchain from the main menu (Xcode > Toolchains), then build and/or run your code normally. Not all Xcode features work with a custom toolchain. For example, playgrounds don’t work, and Xcode will always use its built-in copy of the Swift Package Manager, so you won’t be able to use unreleased SwiftPM features in this way. Also, Apple won’t accept apps built with a non-standard toolchain for submission to the App Store. On the command line When building on the command line there are multiple options, depending on your preferences and what tool you want to use. The TOOLCHAINS environment variable All of the various Swift build tools respect the TOOLCHAINS environment variable. This should be set to the desired toolchain’s bundle ID, which you can find in the Info.plist file in the toolchain’s directory. Example (I’m using a nightly toolchain from 2024-03-03 here): # My normal Swift version is 5.10 $ swift --version swift-driver version: 1.90.11.1 Apple Swift version 5.10 (swiftlang-5.10.0.13 clang-1500.3.9.4) # Make sure xcode-select points to Xcode, not to /Library/Developer/CommandLineTools # The Command Line Tools will ignore the TOOLCHAINS variable. $ xcode-select --print-path /Applications/Xcode.app/Contents/Developer # The nightly toolchain is 6.0-dev $ export TOOLCHAINS=org.swift.59202403031a $ swift --version Apple Swift version 6.0-dev (LLVM 0c7823cab15dec9, Swift 0cc05909334c6f7) Toolchain name vs. bundle ID I think the TOOLCHAINS variable is also supposed to accept the toolchain’s name instead of the bundle ID, but this doesn’t work reliably for me. I tried passing: the DisplayName from Info.plist (“Swift Development Snapshot 2024-03-03 (a)”), the ShortDisplayName (“Swift Development Snapshot”; not unique if you have more than one toolchain installed!), the directory name, both with and without the .xctoolchain suffix, but none of them worked reliably, especially if you have multiple toolchains installed. In my limited testing, it seems that Swift picks the first toolchain that matches the short name prefix (“Swift Development Snapshot”) and ignores the long name components. For example, when I select “Swift Development Snapshot 2024-03-03 (a)”, Swift picks swift-DEVELOPMENT-SNAPSHOT-2024-01-30-a, presumably because that’s the “first” one (in alphabetical order) I have installed. My advice: stick to the bundle ID, it works. Here’s a useful command to find the bundle ID of the latest toolchain you have installed (you may have to adjust the path if you install your toolchains in ~/Library instead of /Library): $ plutil -extract CFBundleIdentifier raw /Library/Developer/Toolchains/swift-latest.xctoolchain/Info.plist org.swift.59202403031 # Set the toolchain to the latest installed: export TOOLCHAINS=$(plutil -extract CFBundleIdentifier raw /Library/Developer/Toolchains/swift-latest.xctoolchain/Info.plist) xcrun and xcodebuild xcrun and xcodebuild respect the TOOLCHAINS variable too. As an alternative, they also provide an equivalent command line parameter named --toolchain. The parameter has the same semantics as the environment variable: you pass the toolchain’s bundle ID. Example: $ xcrun --toolchain org.swift.59202403031a --find swiftc /Library/Developer/Toolchains/swift-DEVELOPMENT-SNAPSHOT-2024-03-03-a.xctoolchain/usr/bin/swiftc Swift Package Manager SwiftPM also respects the TOOLCHAINS variable, and it has a --toolchains parameter as well, but this one expects the path to the toolchain, not its bundle ID. Example: $ swift build --toolchain /Library/Developer/Toolchains/swift-latest.xctoolchain Missing toolchains are (silently) ignored Another thing to be aware of: if you specify a toolchain that isn’t installed (e.g. because of a typo or because you’re trying to run a script that was developed in a different environment), none of the tools will fail: swift, xcrun, and xcodebuild silently ignore the toolchain setting and use the default Swift toolchain (set via xcode-select). SwiftPM silently ignores a missing toolchain set via TOOLCHAINS. If you pass an invalid directory to the --toolchains parameter, it at least prints a warning before it continues building with the default toolchain. I don’t like this. I’d much rather get an error if the build tool can’t find the toolchain I told it to use. It’s especially dangerous in scripts.
How the Swift compiler knows that DispatchQueue.main implies @MainActor
You may have noticed that the Swift compiler automatically treats the closure of a DispatchQueue.main.async call as @MainActor. In other words, we can call a main-actor-isolated function in the closure: import Dispatch @MainActor func mainActorFunc() { } DispatchQueue.main.async { // The compiler lets us call this because // it knows we're on the main actor. mainActorFunc() } This behavior is welcome and very convenient, but it bugs me that it’s so hidden. As far as I know it isn’t documented, and neither Xcode nor any other editor/IDE I’ve used do a good job of showing me the actor context a function or closure will run in, even though the compiler has this information. I’ve written about a similar case before in Where View.task gets its main-actor isolation from, where Swift/Xcode hide essential information from the programmer by not showing certain attributes in declarations or the documentation. It’s a syntax check So how is the magic behavior for DispatchQueue.main.async implemented? It can’t be an attribute or other annotation on the closure parameter of the DispatchQueue.async method because the actual queue instance isn’t known at that point. A bit of experimentation reveals that it is in fact a relatively coarse source-code-based check that singles out invocations on DispatchQueue.main, in exactly that spelling. For example, the following variations do produce warnings/errors (in Swift 5.10/6.0, respectively), even though they are just as safe as the previous code snippet. This is because we aren’t using the “correct” DispatchQueue.main.async spelling: let queue = DispatchQueue.main queue.async { // Error: Call to main actor-isolated global function // 'mainActorFunc()' in a synchronous nonisolated context mainActorFunc() // ❌ } typealias DP = DispatchQueue DP.main.async { // Error: Call to main actor-isolated global function // 'mainActorFunc()' in a synchronous nonisolated context mainActorFunc() // ❌ } I found the place in the Swift compiler source code where the check happens. In the compiler’s semantic analysis stage (called “Sema”; this is the phase right after parsing), the type checker calls a function named adjustFunctionTypeForConcurrency, passing in a Boolean it obtained from isMainDispatchQueueMember, which returns true if the source code literally references DispatchQueue.main. In that case, the type checker adds the @_unsafeMainActor attribute to the function type. Good to know. Fun fact: since this is a purely syntax-based check, if you define your own type named DispatchQueue, give it a static main property and a function named async that takes a closure, the compiler will apply the same “fix” to it. This is NOT recommended: // Define our own `DispatchQueue.main.async` struct DispatchQueue { static let main: Self = .init() func async(_ work: @escaping () -> Void) {} } // This calls our DispatchQueue.main.async { // No error! Compiler has inserted `@_unsafeMainActor` mainActorFunc() } Perplexity through obscurity I love that this automatic @MainActor inference for DispatchQueue.main exists. I do not love that it’s another piece of hidden, implicit behavior that makes Swift concurrency harder to learn. I want to see all the @_unsafeMainActor and @_unsafeInheritExecutor and @_inheritActorContext annotations! I believe Apple is doing the community a disservice by hiding these in Xcode. The biggest benefit of Swift’s concurrency model over what we had before is that so many things are statically known at compile time. It’s a shame that the compiler knows on which executor a particular line of code will run, but none of the tools seem to be able to show me this. Instead, I’m forced to hunt for @MainActor annotations and hidden attributes in superclasses, protocols, etc. This feels especially problematic during the Swift 5-to-6 transition phase we’re currently in where it’s so easy to misuse concurrency and not get a compiler error (and sometimes not even a warning if you forget to enable strict concurrency checking). The most impactful change Apple can make to make Swift concurrency less confusing is to show the inferred executor context for each line of code in Xcode. Make it really obvious what code runs on the main actor, some other actor, or the global cooperative pool. Use colors or whatnot! (Other Swift IDEs should do this too, of course. I’m just picking on Xcode because Apple has the most leverage.)
How the relative size modifier interacts with stack views
And what it can teach us about SwiftUI’s stack layout algorithm I have one more thing to say on the relative sizing view modifier from my previous post, Working with percentages in SwiftUI layout. I’m assuming you’ve read that article. The following is good to know if you want to use the modifier in your own code, but I hope you’ll also learn some general tidbits about SwiftUI’s layout algorithm for HStacks and VStacks. Using relative sizing inside a stack view Let’s apply the relativeProposed modifier to one of the subviews of an HStack: HStack(spacing: 10) { Color.blue .relativeProposed(width: 0.5) Color.green Color.yellow } .border(.primary) .frame(height: 80) What do you expect to happen here? Will the blue view take up 50 % of the available width? The answer is no. In fact, the blue rectangle becomes narrower than the others: This is because the HStack only proposes a proportion of its available width to each of its children. Here, the stack proposes one third of the available space to its first child, the relative sizing modifier. The modifier then halves this value, resulting in one sixth of the total width (minus spacing) for the blue color. The other two rectangles then become wider than one third because the first child view didn’t use up its full proposed width. Update May 1, 2024: SwiftUI’s built-in containerRelativeFrame modifier (introduced after I wrote my modifier) doesn’t exhibit this behavior because it uses the size of the nearest container view as its reference, and stack views don’t count as containers in this context (which I find somewhat unintuitive, but that’s the way it is). Order matters Now let’s move the modifier to the green color in the middle: HStack(spacing: 10) { Color.blue Color.green .relativeProposed(width: 0.5) Color.yellow } Naively, I’d expect an equivalent result: the green rectangle should become 100 pt wide, and blue and yellow should be 250 pt each. But that’s not what happens — the yellow view ends up being wider than the blue one: I found this unintuitive at first, but it makes sense if you understand that the HStack processes its children in sequence: The HStack proposes one third of its available space to the blue view: (620 – 20) / 3 = 200. The blue view accepts the proposal and becomes 200 pt wide. Next up is the relativeProposed modifier. The HStack divides the remaining space by the number of remaining subviews and proposes that: 400 / 2 = 200. Our modifier halves this proposal and proposes 100 pt to the green view, which accepts it. The modifier in turn adopts the size of its child and returns 100 pt to the HStack. Since the second subview used less space than proposed, the HStack now has 300 pt left over to propose to its final child, the yellow color. Important: the order in which the stack lays out its subviews happens to be from left to right in this example, but that’s not always the case. In general, HStacks and VStacks first group their subviews by layout priority (more on that below), and then order the views inside each group by flexibility such that the least flexible views are laid out first. For more on this, see How an HStack Lays out Its Children by Chris Eidhof. The views in our example are all equally flexible (they all can become any width between 0 and infinity), so the stack processes them in their “natural” order. Leftover space isn’t redistributed By now you may be able guess how the layout turns out when we move our view modifier to the last child view: HStack(spacing: 10) { Color.blue Color.green Color.yellow .relativeProposed(width: 0.5) } Blue and green each receive one third of the available width and become 200 pt wide. No surprises there. When the HStack reaches the relativeProposed modifier, it has 200 pt left to distribute. Again, the modifier and the yellow rectangle only use half of this amount. The end result is that the HStack ends up with 100 pt left over. The process stops here — the HStack does not start over in an attempt to find a “better” solution. The stack makes itself just big enough to contain its subviews (= 520 pt incl. spacing) and reports that size to its parent. Layout priority We can use the layoutPriority view modifier to influence how stacks and other containers lay out their children. Let’s give the subview with the relative sizing modifier a higher layout priority (the default priority is 0): HStack(spacing: 10) { Color.blue Color.green Color.yellow .relativeProposed(width: 0.5) .layoutPriority(1) } This results in a layout where the yellow rectangle actually takes up 50 % of the available space: Explanation: The HStack groups its children by layout priority and then processes each group in sequence, from highest to lowest priority. Each group is proposed the entire remaining space. The first layout group only contains a single view, our relative sizing modifier with the yellow color. The HStack proposes the entire available space (minus spacing) = 600 pt. Our modifier halves the proposal, resulting in 300 pt for the yellow view. There are 300 pt left over for the second layout group. These are distributed equally among the two children because each subview accepts the proposed size. Conclusion The code I used to generate the images in this article is available on GitHub. I only looked at HStacks here, but VStacks work in exactly the same way for the vertical dimension. SwiftUI’s layout algorithm always follows this basic pattern of proposed sizes and responses. Each of the built-in “primitive” views (e.g. fixed and flexible frames, stacks, Text, Image, Spacer, shapes, padding, background, overlay) has a well-defined (if not always well-documented) layout behavior that can be expressed as a function (ProposedViewSize) -> CGSize. You’ll need to learn the behavior for view to work effectively with SwiftUI. A concrete lesson I’m taking away from this analysis: HStack and VStack don’t treat layout as an optimization problem that tries to find the optimal solution for a set of constraints (autolayout style). Rather, they sort their children in a particular way and then do a single proposal-and-response pass over them. If there’s space leftover at the end, or if the available space isn’t enough, then so be it.
Working with percentages in SwiftUI layout
SwiftUI’s layout primitives generally don’t provide relative sizing options, e.g. “make this view 50 % of the width of its container”. Let’s build our own! Use case: chat bubbles Consider this chat conversation view as an example of what I want to build. The chat bubbles always remain 80 % as wide as their container as the view is resized: The chat bubbles should become 80 % as wide as their container. Download video Building a proportional sizing modifier 1. The Layout We can build our own relative sizing modifier on top of the Layout protocol. The layout multiplies its own proposed size (which it receives from its parent view) with the given factors for width and height. It then proposes this modified size to its only subview. Here’s the implementation (the full code, including the demo app, is on GitHub): /// A custom layout that proposes a percentage of its /// received proposed size to its subview. /// /// - Precondition: must contain exactly one subview. fileprivate struct RelativeSizeLayout: Layout { var relativeWidth: Double var relativeHeight: Double func sizeThatFits( proposal: ProposedViewSize, subviews: Subviews, cache: inout () ) -> CGSize { assert(subviews.count == 1, "expects a single subview") let resizedProposal = ProposedViewSize( width: proposal.width.map { $0 * relativeWidth }, height: proposal.height.map { $0 * relativeHeight } ) return subviews[0].sizeThatFits(resizedProposal) } func placeSubviews( in bounds: CGRect, proposal: ProposedViewSize, subviews: Subviews, cache: inout () ) { assert(subviews.count == 1, "expects a single subview") let resizedProposal = ProposedViewSize( width: proposal.width.map { $0 * relativeWidth }, height: proposal.height.map { $0 * relativeHeight } ) subviews[0].place( at: CGPoint(x: bounds.midX, y: bounds.midY), anchor: .center, proposal: resizedProposal ) } } Notes: I made the type private because I want to control how it can be used. This is important for maintaining the assumption that the layout only ever has a single subview (which makes the math much simpler). Proposed sizes in SwiftUI can be nil or infinity in either dimension. Our layout passes these special values through unchanged (infinity times a percentage is still infinity). I’ll discuss below what implications this has for users of the layout. 2. The View extension Next, we’ll add an extension on View that uses the layout we just wrote. This becomes our public API: extension View { /// Proposes a percentage of its received proposed size to `self`. public func relativeProposed(width: Double = 1, height: Double = 1) -> some View { RelativeSizeLayout(relativeWidth: width, relativeHeight: height) { // Wrap content view in a container to make sure the layout only // receives a single subview. Because views are lists! VStack { // alternatively: `_UnaryViewAdaptor(self)` self } } } } Notes: I decided to go with a verbose name, relativeProposed(width:height:), to make the semantics clear: we’re changing the proposed size for the subview, which won’t always result in a different actual size. More on this below. We’re wrapping the subview (self in the code above) in a VStack. This might seem redundant, but it’s necessary to make sure the layout only receives a single element in its subviews collection. See Chris Eidhof’s SwiftUI Views are Lists for an explanation. Usage The layout code for a single chat bubble in the demo video above looks like this: let alignment: Alignment = message.sender == .me ? .trailing : .leading chatBubble .relativeProposed(width: 0.8) .frame(maxWidth: .infinity, alignment: alignment) The outermost flexible frame with maxWidth: .infinity is responsible for positioning the chat bubble with leading or trailing alignment, depending on who’s speaking. You can even add another frame that limits the width to a maximum, say 400 points: let alignment: Alignment = message.sender == .me ? .trailing : .leading chatBubble .frame(maxWidth: 400) .relativeProposed(width: 0.8) .frame(maxWidth: .infinity, alignment: alignment) Here, our relative sizing modifier only has an effect as the bubbles become narrower than 400 points. In a wider window the width-limiting frame takes precedence. I like how composable this is! Download video 80 % won’t always result in 80 % If you watch the debugging guides I’m drawing in the video above, you’ll notice that the relative sizing modifier never reports a width greater than 400, even if the window is wide enough: The relative sizing modifier accepts the actual size of its subview as its own size. This is because our layout only adjusts the proposed size for its subview but then accepts the subview’s actual size as its own. Since SwiftUI views always choose their own size (which the parent can’t override), the subview is free to ignore our proposal. In this example, the layout’s subview is the frame(maxWidth: 400) view, which sets its own width to the proposed width or 400, whichever is smaller. Understanding the modifier’s behavior Proposed size ≠ actual size It’s important to internalize that the modifier works on the basis of proposed sizes. This means it depends on the cooperation of its subview to achieve its goal: views that ignore their proposed size will be unaffected by our modifier. I don’t find this particularly problematic because SwiftUI’s entire layout system works like this. Ultimately, SwiftUI views always determine their own size, so you can’t write a modifier that “does the right thing” (whatever that is) for an arbitrary subview hierarchy. nil and infinity I already mentioned another thing to be aware of: if the parent of the relative sizing modifier proposes nil or .infinity, the modifier will pass the proposal through unchanged. Again, I don’t think this is particularly bad, but it’s something to be aware of. Proposing nil is SwiftUI’s way of telling a view to become its ideal size (fixedSize does this). Would you ever want to tell a view to become, say, 50 % of its ideal width? I’m not sure. Maybe it’d make sense for resizable images and similar views. By the way, you could modify the layout to do something like this: If the proposal is nil or infinity, forward it to the subview unchanged. Take the reported size of the subview as the new basis and apply the scaling factors to that size (this still breaks down if the child returns infinity). Now propose the scaled size to the subview. The subview might respond with a different actual size. Return this latest reported size as your own size. This process of sending multiple proposals to child views is called probing. Lots of built-in containers views do this too, e.g. VStack and HStack. Nesting in other container views The relative sizing modifier interacts in an interesting way with stack views and other containers that distribute the available space among their children. I thought this was such an interesting topic that I wrote a separate article about it: How the relative size modifier interacts with stack views. The code The complete code is available in a Gist on GitHub. Digression: Proportional sizing in early SwiftUI betas The very first SwiftUI betas in 2019 did include proportional sizing modifiers, but they were taken out before the final release. Chris Eidhof preserved a copy of SwiftUI’s “header file” from that time that shows their API, including quite lengthy documentation. I don’t know why these modifiers didn’t survive the beta phase. The release notes from 2019 don’t give a reason: The relativeWidth(_:), relativeHeight(_:), and relativeSize(width:height:) modifiers are deprecated. Use other modifiers like frame(minWidth:idealWidth:maxWidth:minHeight:idealHeight:maxHeight:alignment:) instead. (51494692) I also don’t remember how these modifiers worked. They probably had somewhat similar semantics to my solution, but I can’t be sure. The doc comments linked above sound straightforward (“Sets the width of this view to the specified proportion of its parent’s width.”), but they don’t mention the intricacies of the layout algorithm (proposals and responses) at all. containerRelativeFrame Update May 1, 2024: Apple introduced the containerRelativeFrame modifier for its 2023 OSes (iOS 17/macOS 14). If your deployment target permits it, this can be a good, built-in alternative. Note that containerRelativeFrame behaves differently than my relativeProposed modifier as it computes the size relative to the nearest container view, whereas my modifier uses its proposed size as the reference. The SwiftUI documentation somewhat vaguely lists the views that count as a container for containerRelativeFrame. Notably, stack views don’t count! Check out Jordan Morgan’s article Modifier Monday: .containerRelativeFrame(_ axes:) (2022-06-26) to learn more about containerRelativeFrame.
Keyboard shortcuts for Export Unmodified Original in Photos for Mac
Problem The Photos app on macOS doesn’t provide a keyboard shortcut for the Export Unmodified Original command. macOS allows you to add your own app-specific keyboard shortcuts via System Settings > Keyboard > Keyboard Shortcuts > App Shortcuts. You need to enter the exact spelling of the menu item you want to invoke. Photos renames the command depending on what’s selected: Export Unmodified Original For 1 Photo“ turns into ”… Originals For 2 Videos” turns into “… For 3 Items” (for mixed selections), and so on. Argh! The System Settings UI for assigning keyboard shortcuts is extremely tedious to use if you want to add more than one or two shortcuts. Dynamically renaming menu commands is cute, but it becomes a problem when you want to assign keyboard shortcuts. Solution: shell script Here’s a Bash script1 that assigns Ctrl + Opt + Cmd + E to Export Unmodified Originals for up to 20 selected items: #!/bin/bash # Assigns a keyboard shortcut to the Export Unmodified Originals # menu command in Photos.app on macOS. # @ = Command # ^ = Control # ~ = Option # $ = Shift shortcut='@~^e' # Set shortcut for 1 selected item echo "Setting shortcut for 1 item" defaults write com.apple.Photos NSUserKeyEquivalents -dict-add "Export Unmodified Original For 1 Photo" "$shortcut" defaults write com.apple.Photos NSUserKeyEquivalents -dict-add "Export Unmodified Original For 1 Video" "$shortcut" # Set shortcut for 2-20 selected items objects=(Photos Videos Items) for i in {2..20} do echo "Setting shortcut for $i items" for object in "${objects[@]}" do defaults write com.apple.Photos NSUserKeyEquivalents -dict-add "Export Unmodified Originals For $i $object" "$shortcut" done done # Use this command to verify the result: # defaults read com.apple.Photos NSUserKeyEquivalents The script is also available on GitHub. Usage: Quit Photos.app. Run the script. Feel free to change the key combo or count higher than 20. Open Photos.app. Note: There’s a bug in Photos.app on macOS 13.2 (and at least some earlier versions). Custom keyboard shortcuts don’t work until you’ve opened the menu of the respective command at least once. So you must manually open the File > Export once before the shortcut will work. (For Apple folks: FB11967573.) I still write Bash scripts because Shellcheck doesn’t support Zsh. ↩︎
Swift Evolution proposals in Alfred
I rarely participate actively in the Swift Evolution process, but I frequently refer to evolution proposals for my work, often multiple times per week. The proposals aren’t always easy to read, but they’re the most comprehensive (and sometimes only) documentation we have for many Swift features. For years, my tool of choice for searching Swift Evolution proposals has been Karoy Lorentey’s swift-evolution workflow for Alfred. The workflow broke recently due to data format changes. Karoy was kind enough to add me as a maintainer so I could fix it. The new version 2.1.0 is now available on GitHub. Download the .alfredworkflow file and double-click to install. Besides the fix, the update has a few other improvements: The proposal title is now displayed more prominently. New actions to copy the proposal title (hold down Command) or copy it as a Markdown link (hold down Shift + Command). The script forwards the main metadata of the selected proposal (id, title, status, URL) to Alfred. If you want to extend the workflow with your own actions, you can refer to these variables.
Pattern matching on error codes
Foundation overloads the pattern matching operator ~= to enable matching against error codes in catch clauses. catch clauses in Swift support pattern matching, using the same patterns you’d use in a case clause inside a switch or in an if case … statement. For example, to handle a file-not-found error you might write: import Foundation do { let fileURL = URL(filePath: "/abc") // non-existent file let data = try Data(contentsOf: fileURL) } catch let error as CocoaError where error.code == .fileReadNoSuchFile { print("File doesn't exist") } catch { print("Other error: \(error)") } This binds a value of type CocoaError to the variable error and then uses a where clause to check the specific error code. However, if you don’t need access to the complete error instance, there’s a shorter way to write this, matching directly against the error code: let data = try Data(contentsOf: fileURL) - } catch let error as CocoaError where error.code == .fileReadNoSuchFile { + } catch CocoaError.fileReadNoSuchFile { print("File doesn't exist") Foundation overloads ~= I was wondering why this shorter syntax works. Is there some special compiler magic for pattern matching against error codes of NSError instances? Turns out: no, the answer is much simpler. Foundation includes an overload for the pattern matching operator ~= that matches error values against error codes.1 The implementation looks something like this: public func ~= (code: CocoaError.Code, error: any Error) -> Bool { guard let error = error as? CocoaError else { return false } return error.code == code } The actual code in Foundation is a little more complex because it goes through a hidden protocol named _ErrorCodeProtocol, but that’s not important. You can check out the code in the Foundation repository: Darwin version, swift-corelibs-foundation version. This matching on error codes is available for CocoaError, URLError, POSIXError, and MachError (and possibly more types in other Apple frameworks, I haven’t checked). I wrote about the ~= operator before, way back in 2015(!): Pattern matching in Swift and More pattern matching examples. ↩︎
You should watch Double Fine Adventure
I know I’m almost a decade late to this party, but I’m probably not the only one, so here goes. Double Fine Adventure was a wildly successful 2012 Kickstarter project to crowdfund the development of a point-and-click adventure game and, crucially, to document its development on video. The resulting game Broken Age was eventually released in two parts in 2014 and 2015. Broken Age is a beautiful game and I recommend you try it. It’s available for lots of platforms and is pretty cheap (10–15 euros/dollars or less). I played it on the Nintendo Switch, which worked very well. Broken Age. But the real gem to me was watching the 12.5-hour documentary on YouTube. A video production team followed the entire three-year development process from start to finish. It provides a refreshingly candid and transparent insight into “how the sausage is made”, including sensitive topics such as financial problems, layoffs, and long work hours. Throughout all the ups and downs there’s a wonderful sense of fun and camaraderie among the team at Double Fine, which made watching the documentary even more enjoyable to me than playing Broken Age. You can tell these people love working with each other. I highly recommend taking a look if you find this mildly interesting. The Double Fine Adventure documentary. The first major game spoilers don’t come until episode 15, so you can safely watch most of the documentary before playing the game (and this is how the original Kickstarter backers experienced it). However, I think it’s even more interesting to play the game first, or to experience both side-by-side. My suggestion: watch two or three episodes of the documentary. If you like it, start playing Broken Age alongside it.
Understanding SwiftUI view lifecycles
I wrote an app called SwiftUI View Lifecycle. The app allows you to observe how different SwiftUI constructs and containers affect a view’s lifecycle, including the lifetime of its state and when onAppear gets called. The code for the app is on GitHub. It can be built for iOS and macOS. The view tree and the render tree When we write SwiftUI code, we construct a view tree that consists of nested view values. Instances of the view tree are ephemeral: SwiftUI constantly destroys and recreates (parts of) the view tree as it processes state changes. The view tree serves as a blueprint from which SwiftUI creates a second tree, which represents the actual view “objects” that are “on screen” at any given time (the “objects” could be actual UIView or NSView objects, but also other representations; the exact meaning of “on screen” can vary depending on context). Chris Eidhof likes to call this second tree the render tree (the link points to a 3 minute video where Chris demonstrates this duality, highly recommended). The render tree persists across state changes and is used by SwiftUI to establish view identity. When a state change causes a change in a view’s value, SwiftUI will find the corresponding view object in the render tree and update it in place, rather than recreating a new view object from scratch. This is of course key to making SwiftUI efficient, but the render tree has another important function: it controls the lifetimes of views and their state. View lifecycles and state We can define a view’s lifetime as the timespan it exists in the render tree. The lifetime begins with the insertion into the render tree and ends with the removal. Importantly, the lifetime extends to view state defined with @State and @StateObject: when a view gets removed from the render tree, its state is lost; when the view gets inserted again later, the state will be recreated with its initial value. The SwiftUI View Lifecycle app tracks three lifecycle events for a view and displays them as timestamps: @State = when the view’s state was created (equivalent to the start of the view’s lifetime) onAppear = when onAppear was last called onDisappear = when onDisappear was last called The lifecycle monitor view displays the timestamps when certain lifecycle events last occurred. The app allows you to observe these events in different contexts. As you click your way through the examples, you’ll notice that the timing of these events changes depending on the context a view is embedded in. For example: An if/else statement creates and destroys its child views every time the condition changes; state is not preserved. A ScrollView eagerly inserts all of its children into the render tree, regardless of whether they’re inside the viewport or not. All children appear right away and never disappear. A List with dynamic content (using ForEach) lazily inserts only the child views that are currently visible. But once a child view’s lifetime has started, the list will keep its state alive even when it gets scrolled offscreen again. onAppear and onDisappear get called repeatedly as views are scrolled into and out of the viewport. A NavigationStack calls onAppear and onDisappear as views are pushed and popped. State for parent levels in the stack is preserved when a child view is pushed. A TabView starts the lifetime of all child views right away, even the non-visible tabs. onAppear and onDisappear get called repeatedly as the user switches tabs, but the tab view keeps the state alive for all tabs. Lessons Here are a few lessons to take away from this: Different container views may have different performance and memory usage behaviors, depending on how long they keep child views alive. onAppear isn’t necessarily called when the state is created. It can happen later (but never earlier). onAppear can be called multiple times in some container views. If you need a side effect to happen exactly once in a view’s lifetime, consider writing yourself an onFirstAppear helper, as shown by Ian Keen and Jordan Morgan in Running Code Only Once in SwiftUI (2022-11-01). I’m sure you’ll find more interesting tidbits when you play with the app. Feedback is welcome!
clipped() doesn’t affect hit testing
The clipped() modifier in SwiftUI clips a view to its bounds, hiding any out-of-bounds content. But note that clipping doesn’t affect hit testing; the clipped view can still receive taps/clicks outside the visible area. I tested this on iOS 16.1 and macOS 13.0. Example Here’s a 300×300 square, which we then constrain to a 100×100 frame. I also added a border around the outer frame to visualize the views: Rectangle() .fill(.orange.gradient) .frame(width: 300, height: 300) // Set view to 100×100 → renders out of bounds .frame(width: 100, height: 100) .border(.blue) SwiftUI views don’t clip their content by default, hence the full 300×300 square remains visible. Notice the blue border that indicates the 100×100 outer frame: Now let’s add .clipped() to clip the large square to the 100×100 frame. I also made the square tappable and added a button: VStack { Button("You can't tap me!") { buttonTapCount += 1 } .buttonStyle(.borderedProminent) Rectangle() .fill(.orange.gradient) .frame(width: 300, height: 300) .frame(width: 100, height: 100) .clipped() .onTapGesture { rectTapCount += 1 } } When you run this code, you’ll discover that the button isn’t tappable at all. This is because the (unclipped) square, despite not being fully visible, obscures the button and “steals” all taps. The dashed outline indicates the hit area of the orange square. The button isn’t tappable because it’s covered by the clipped view with respect to hit testing. The fix: .contentShape() The contentShape(_:) modifier defines the hit testing area for a view. By adding .contentShape(Rectangle()) to the 100×100 frame, we limit hit testing to that area, making the button tappable again: Rectangle() .fill(.orange.gradient) .frame(width: 300, height: 300) .frame(width: 100, height: 100) .contentShape(Rectangle()) .clipped() Note that the order of .contentShape(Rectangle()) and .clipped() could be swapped. The important thing is that contentShape is an (indirect) parent of the 100×100 frame modifier that defines the size of the hit testing area. Video demo I made a short video that demonstrates the effect: Initially, taps on the button, or even on the surrounding whitespace, register as taps on the square. The top switch toggles display of the square before clipping. This illustrates its hit testing area. The second switch adds .contentShape(Rectangle()) to limit hit testing to the visible area. Now tapping the button increments the button’s tap count. The full code for this demo is available on GitHub. Download video Summary The clipped() modifier doesn’t affect the clipped view’s hit testing region. The same is true for clipShape(_:). It’s often a good idea to combine these modifiers with .contentShape(Rectangle()) to bring the hit testing logic in sync with the UI.
When .animation animates more (or less) than it’s supposed to
On the positioning of the .animation modifier in the view tree, or: “Rendering” vs. “non-rendering” view modifiers The documentation for SwiftUI’s animation modifier says: Applies the given animation to this view when the specified value changes. This sounds unambiguous to me: it sets the animation for “this view”, i.e. the part of the view tree that .animation is being applied to. This should give us complete control over which modifiers we want to animate, right? Unfortunately, it’s not that simple: it’s easy to run into situations where a view change inside an animated subtree doesn’t get animated, or vice versa. Unsurprising examples Let me give you some examples, starting with those that do work as documented. I tested all examples on iOS 16.1 and macOS 13.0. 1. Sibling views can have different animations Independent subtrees of the view tree can be animated independently. In this example we have three sibling views, two of which are animated with different durations, and one that isn’t animated at all: struct Example1: View { var flag: Bool var body: some View { HStack(spacing: 40) { Rectangle() .frame(width: 80, height: 80) .foregroundColor(.green) .scaleEffect(flag ? 1 : 1.5) .animation(.easeOut(duration: 0.5), value: flag) Rectangle() .frame(width: 80, height: 80) .foregroundColor(flag ? .yellow : .red) .rotationEffect(flag ? .zero : .degrees(45)) .animation(.easeOut(duration: 2.0), value: flag) Rectangle() .frame(width: 80, height: 80) .foregroundColor(flag ? .pink : .mint) } } } The two animation modifiers each apply to their own subtree. They don’t interfere with each other and have no effect on the rest of the view hierarchy: Download video 2. Nested animation modifiers When two animation modifiers are nested in a single view tree such that one is an indirect parent of the other, the inner modifier can override the outer animation for its subviews. The outer animation applies to view modifiers that are placed between the two animation modifiers. In this example we have one rectangle view with animated scale and rotation effects. The outer animation applies to the entire subtree, including both effects. The inner animation modifier overrides the outer animation only for what’s nested below it in the view tree, i.e. the scale effect: struct Example2: View { var flag: Bool var body: some View { Rectangle() .frame(width: 80, height: 80) .foregroundColor(.green) .scaleEffect(flag ? 1 : 1.5) .animation(.default, value: flag) // inner .rotationEffect(flag ? .zero : .degrees(45)) .animation(.default.speed(0.3), value: flag) // outer } } As a result, the scale and rotation changes animate at different speeds: Download video Note that we can also pass .animation(nil, value: flag) to selectively disable animations for a subtree, overriding a non-nil animation further up the view tree. 3. animation only animates its children (with exceptions) As a general rule, the animation modifier only applies to its subviews. In other words, views and modifiers that are direct or indirect parents of an animation modifier should not be animated. As we’ll see below, it doesn’t always work like that, but here’s an example where it does. This is a slight variation of the previous code snippet where I removed the outer animation modifier (and changed the color for good measure): struct Example3: View { var flag: Bool var body: some View { Rectangle() .frame(width: 80, height: 80) .foregroundColor(.orange) .scaleEffect(flag ? 1 : 1.5) .animation(.default, value: flag) // Don't animate the rotation .rotationEffect(flag ? .zero : .degrees(45)) } } Recall that the order in which view modifiers are written in code is inverted with respect to the actual view tree hierarchy. Each view modifier is a new view that wraps the view it’s being applied to. So in our example, the scale effect is the child of the animation modifier, whereas the rotation effect is its parent. Accordingly, only the scale change gets animated: Download video Surprising examples Now it’s time for the “fun” part. It turns out not all view modifiers behave as intuitively as scaleEffect and rotationEffect when combined with the animation modifier. 4. Some modifiers don’t respect the rules In this example we’re changing the color, size, and alignment of the rectangle. Only the size change should be animated, which is why we’ve placed the alignment and color mutations outside the animation modifier: struct Example4: View { var flag: Bool var body: some View { let size: CGFloat = flag ? 80 : 120 Rectangle() .frame(width: size, height: size) .animation(.default, value: flag) .frame(maxWidth: .infinity, alignment: flag ? .leading : .trailing) .foregroundColor(flag ? .pink : .indigo) } } Unfortunately, this doesn’t work as intended, as all three changes are animated: Download video It behaves as if the animation modifier were the outermost element of this view subtree. 5. padding and border This one’s sort of the inverse of the previous example because a change we want to animate doesn’t get animated. The padding is a child of the animation modifier, so I’d expect changes to it to be animated, i.e. the border should grow and shrink smoothly: struct Example5: View { var flag: Bool var body: some View { Rectangle() .frame(width: 80, height: 80) .padding(flag ? 20 : 40) .animation(.default, value: flag) .border(.primary) .foregroundColor(.cyan) } } But that’s not what happens: Download video 6. Font modifiers Font modifiers also behave seemingly erratic with respect to the animation modifier. In this example, we want to animate the font width, but not the size or weight (smooth text animation is a new feature in iOS 16): struct Example6: View { var flag: Bool var body: some View { Text("Hello!") .fontWidth(flag ? .condensed : .expanded) .animation(.default, value: flag) .font(.system( size: flag ? 40 : 60, weight: flag ? .regular : .heavy) ) } } You guessed it, this doesn’t work as intended. Instead, all text properties animate smoothly: Download video Why does it work like this? In summary, the placement of the animation modifier in the view tree allows some control over which changes get animated, but it isn’t perfect. Some modifiers, such as scaleEffect and rotationEffect, behave as expected, whereas others (frame, padding, foregroundColor, font) are less controllable. I don’t fully understand the rules, but the important factor seems to be if a view modifier actually “renders” something or not. For instance, foregroundColor just writes a color into the environment; the modifier itself doesn’t draw anything. I suppose this is why its position with respect to animation is irrelevant: RoundedRectangle(cornerRadius: flag ? 0 : 40) .animation(.default, value: flag) // Color change still animates, even though we’re outside .animation .foregroundColor(flag ? .pink : .indigo) The rendering presumably takes place on the level of the RoundedRectangle, which reads the color from the environment. At this point the animation modifier is active, so SwiftUI will animate all changes that affect how the rectangle is rendered, regardless of where in the view tree they’re coming from. The same explanation makes intuitive sense for the font modifiers in example 6. The actual rendering, and therefore the animation, occurs on the level of the Text view. The various font modifiers affect how the text is drawn, but they don’t render anything themselves. Similarly, padding and frame (including the frame’s alignment) are “non-rendering” modifiers too. They don’t use the environment, but they influence the layout algorithm, which ultimately affects the size and position of one or more “rendering” views, such as the rectangle in example 4. That rectangle sees a combined change in its geometry, but it can’t tell where the change came from, so it’ll animate the full geometry change. In example 5, the “rendering” view that’s affected by the padding change is the border (which is implemented as a stroked rectangle in an overlay). Since the border is a parent of the animation modifier, its geometry change is not animated. In contrast to frame and padding, scaleEffect and rotationEffect are “rendering” modifiers. They apparently perform the animations themselves. Conclusion SwiftUI views and view modifiers can be divided into “rendering“ and “non-rendering” groups (I wish I had better terms for these). In iOS 16/macOS 13, the placement of the animation modifier with respect to non-rendering modifiers is irrelevant for deciding if a change gets animated or not. Non-rendering modifiers include (non-exhaustive list): Layout modifiers (frame, padding, position, offset) Font modifiers (font, bold, italic, fontWeight, fontWidth) Other modifiers that write data into the environment, e.g. foregroundColor, foregroundStyle, symbolRenderingMode, symbolVariant Rendering modifiers include (non-exhaustive list): clipShape, cornerRadius Geometry effects, e.g. scaleEffect, rotationEffect, projectionEffect Graphical effects, e.g. blur, brightness, hueRotation, opacity, saturation, shadow
Xcode 14.0 generates wrong concurrency code for macOS targets
Mac apps built with Xcode 14.0 and 14.0.1 may contain concurrency bugs because the Swift 5.7 compiler can generate invalid code when targeting the macOS 12.3 SDK. If you distribute Mac apps, you should build them with Xcode 13.4.1 until Xcode 14.1 is released. Here’s what happened: Swift 5.7 implements SE-0338: Clarify the Execution of Non-Actor-Isolated Async Functions, which introduces new rules how async functions hop between executors. Because of SE-0338, when compiling concurrency code, the Swift 5.7 compiler places executor hops in different places than Swift 5.6. Some standard library functions need to opt out of the new rules. They are annotated with a new, unofficial attribute @_unsafeInheritExecutor, which was introduced for this purpose. When the Swift 5.7 compiler sees this attribute, it generates different executor hops. The attribute is only present in the Swift 5.7 standard library, i.e. in the iOS 16 and macOS 13 SDKs. This is fine for iOS because compiler version and the SDK’s standard library version match in Xcode 14.0. But for macOS targets, Xcode 14.0 uses the Swift 5.7 compiler with the standard library from Swift 5.6, which doesn’t contain the @_unsafeInheritExecutor attribute. This is what causes the bugs. Note that the issue is caused purely by the version mismatch at compile-time. The standard library version used by the compiled app at run-time (which depends on the OS version the app runs on) isn’t relevant. As soon as Xcode 14.1 gets released with the macOS 13 SDK, the version mismatch will go away, and Mac targets built with Xcode 14.1 won’t exhibit these bugs. Third-party developers had little chance of discovering the bug during the Xcode 14.0 beta phase because the betas ship with the new beta macOS SDK. The version mismatch occurs when the final Xcode release in September reverts back to the old macOS SDK to accommodate the different release schedules of iOS and macOS. Sources Breaking concurrency invariants is a serious issue, though I’m not sure how much of a problem this is in actual production apps. Here are all related bug reports that I know of: Concurrency is broken in Xcode 14 for macOS (2022-09-14) withUnsafeContinuation can break actor isolation (2022-10-07) And explanations of the cause from John McCall of the Swift team at Apple: John McCall (2022-10-07): This guarantee is unfortunately broken with Xcode 14 when compiling for macOS because it’s shipping with an old macOS SDK that doesn’t declare that withUnsafeContinuation inherits its caller’s execution context. And yes, there is a related actor-isolation issue because of this bug. That will be fixed by the release of the new macOS SDK. John McCall (2022-10-07): Now, there is a bug in Xcode 14 when compiling for the macOS SDK because it ships with an old SDK. That bug doesn’t actually break any of the ordering properties above. It does, however, break Swift’s data isolation guarantees because it causes withUnsafeContinuation, when called from an actor-isolated context, to send a non-Sendable function to a non-isolated executor and then call it, which is completely against the rules. And in fact, if you turn strict sendability checking on when compiling against that SDK, you will get a diagnostic about calling withUnsafeContinuation because it thinks that you’re violating the rules (because withUnsafeContinuation doesn’t properly inherit the execution context of its caller). Poor communication from Apple What bugs me most about the situation is Apple’s poor communication. When the official, current release of your programming language ships with a broken compiler for one of your most important platforms, the least I’d expect is a big red warning at the top of the release notes. I can’t find any mention of this issue in the Xcode 14.0 release notes or Xcode 14.0.1 release notes, however. Even better: the warning should be displayed prominently in Xcode, or Xcode 14.0 should outright refuse to build Mac apps. I’m sure the latter option isn’t practical for all sorts of reasons, although it sounds logical to me: if the only safe compiler/SDK combinations are either 5.6 with the macOS 12 SDK or 5.7 with the macOS 13 SDK, there shouldn’t be an official Xcode version that combines the 5.7 compiler with the macOS 12 SDK.
Where View.task gets its main-actor isolation from
SwiftUI’s .task modifier inherits its actor context from the surrounding function. If you call .task inside a view’s body property, the async operation will run on the main actor because View.body is (semi-secretly) annotated with @MainActor. However, if you call .task from a helper property or function that isn’t @MainActor-annotated, the async operation will run in the cooperative thread pool. Example Here’s an example. Notice the two .task modifiers in body and helperView. The code is identical in both, yet only one of them compiles — in helperView, the call to a main-actor-isolated function fails because we’re not on the main actor in that context: We can call a main-actor-isolated function from inside body, but not from a helper property. import SwiftUI @MainActor func onMainActor() { print("on MainActor") } struct ContentView: View { var body: some View { VStack { helperView Text("in body") .task { // We can call a @MainActor func without await onMainActor() } } } var helperView: some View { Text("in helperView") .task { // ❗️ Error: Expression is 'async' but is not marked with 'await' onMainActor() } } } Why does it work like this? This behavior is caused by two (semi-)hidden annotations in the SwiftUI framework: The View protocol annotates its body property with @MainActor. This transfers to all conforming types. View.task annotates its action parameter with @_inheritActorContext, causing it to adopt the actor context from its use site. Sadly, none of these annotations are visible in the SwiftUI documentation, making it very difficult to understand what’s going on. The @MainActor annotation on View.body is present in Xcode’s generated Swift interface for SwiftUI (Jump to Definition of View), but that feature doesn’t work reliably for me, and as we’ll see, it doesn’t show the whole truth, either. View.body is annotated with @MainActor in Xcode’s generated interface for SwiftUI. SwiftUI’s module interface To really see the declarations the compiler sees, we need to look at SwiftUI’s module interface file. A module interface is like a header file for Swift modules. It lists the module’s public declarations and even the implementations of inlinable functions. Module interfaces use normal Swift syntax and have the .swiftinterface file extension. SwiftUI’s module interface is located at: [Path to Xcode.app]/Contents/Developer/Platforms/iPhoneOS.platform/Developer/SDKs/iPhoneOS.sdk/System/Library/Frameworks/SwiftUI.framework/Modules/SwiftUI.swiftmodule/arm64e-apple-ios.swiftinterface (There can be multiple .swiftinterface files in that directory, one per CPU architecture. Pick any one of them. Pro tip for viewing the file in Xcode: Editor > Syntax Coloring > Swift enables syntax highlighting.) Inside, you’ll find that View.body has the @MainActor(unsafe) attribute: @available(iOS 13.0, macOS 10.15, tvOS 13.0, watchOS 6.0, *) @_typeEraser(AnyView) public protocol View { // … @SwiftUI.ViewBuilder @_Concurrency.MainActor(unsafe) var body: Self.Body { get } } And you’ll find this declaration for .task, including the @_inheritActorContext attribute: @available(iOS 15.0, macOS 12.0, tvOS 15.0, watchOS 8.0, *) extension SwiftUI.View { #if compiler(>=5.3) && $AsyncAwait && $Sendable && $InheritActorContext @inlinable public func task( priority: _Concurrency.TaskPriority = .userInitiated, @_inheritActorContext _ action: @escaping @Sendable () async -> Swift.Void ) -> some SwiftUI.View { modifier(_TaskModifier(priority: priority, action: action)) } #endif // … } SwiftUI’s module interface file shows the @_inheritActorContext annotatation on View.task. Putting it all together Armed with this knowledge, everything makes more sense: When used inside body, task inherits the @MainActor context from body. When used outside of body, there is no implicit @MainActor annotation, so task will run its operation on the cooperative thread pool by default. Unless the view contains an @ObservedObject or @StateObject property, which makes the entire view @MainActor via this obscure rule for property wrappers whose wrappedValue property is bound to a global actor: A struct or class containing a wrapped instance property with a global actor-qualified wrappedValue infers actor isolation from that property wrapper Update May 1, 2024: SE-0401: Remove Actor Isolation Inference caused by Property Wrappers removes the above rule when compiling in Swift 6 language mode. This is a good change because it makes reasoning about actor isolation simpler. In the Swift 5 language mode, you can opt into the better behavior with the -enable-upcoming-feature DisableOutwardActorInference compiler flags. I recommend you do. The lesson: if you use helper properties or functions in your view, consider annotating them with @MainActor to get the same semantics as body. By the way, note that the actor context only applies to code that is placed directly inside the async closure, as well as to synchronous functions the closure calls. Async functions choose their own execution context, so any call to an async function can switch to a different executor. For example, if you call URLSession.data(from:) inside a main-actor-annotated function, the runtime will hop to the global cooperative executor to execute that method. See SE-0338: Clarify the Execution of Non-Actor-Isolated Async Functions for the precise rules. On Apple’s policy to hide annotations in documentation I understand Apple’s impetus not to show unofficial API or language features in the documentation lest developers get the preposterous idea to use these features in their own code! But it makes understanding so much harder. Before I saw the annotations in the .swiftinterface file, the behavior of the code at the beginning of this article never made sense to me. Hiding the details makes things seem like magic when they actually aren’t. And that’s not good, either.
Experimenting with Live Activities
iOS 16 beta 4 is the first SDK release that supports Live Activities. A Live Activity is a widget-like view an app can place on your lock screen and update in real time. Examples where this can be useful include live sports scores or train departure times. These are my notes on playing with the API and implementing my first Live Activity. A bike computer on your lock screen My Live Activity is a display for a bike computer that I’ve been developing with a group a friends. Here’s a video of it in action: Download video And here with simulated data: Download video I haven’t talked much about our bike computer project publicly yet; that will hopefully change someday. In short, a group of friends and I designed a little box that connects to your bike’s hub dynamo, measures speed and distance, and sends the data via Bluetooth to an iOS app. The app records all your rides and can also act as a live speedometer when mounted on your bike’s handlebar. It’s this last feature that I wanted to replicate in the Live Activity. Follow Apple’s guide Adding a Live Activity to the app wasn’t hard. I found Apple’s guide Displaying live data on the Lock Screen with Live Activities easy to follow and quite comprehensive. No explicit user approval iOS doesn’t ask the user for approval when an app wants to show a Live Activity. I found this odd since it seems to invite developers to abuse the feature, but maybe it’s OK because of the foreground requirement (see below). Plus, users can disallow Live Activities on a per-app basis in Settings. Users can dismiss an active Live Activity from the lock screen by swiping (like a notification). Most apps will probably need to ask the user for notification permissions to update their Live Activities. The app must be in the foreground to start an activity To start a Live Activity, an app must be open in the foreground. This isn’t ideal for the bike computer because the speedometer can’t appear magically on the lock screen when the user starts riding (even though iOS wakes up the app in the background at this point to deliver the Bluetooth events from the bike). The user has to open the app manually at least once. On the other hand, this limitation may not be an issue for most use cases and will probably cut down on spamming/abuse significantly. The app must keep running in the background to update the activity (or use push notifications) As long as the app keeps running (in the foreground or background), it can update the Live Activity as often as it wants (I think). This is ideal for the bike computer as the app keeps running in the background processing Bluetooth events while the bike is in motion. I assume the same applies to other apps that can remain alive in the background, such as audio players or navigation apps doing continuous location monitoring. Updating the Live Activity once per second was no problem in my testing, and I didn’t experience any rate limiting. Most apps get suspended in the background, however. They must use push notifications to update their Live Activity (or background tasks or some other mechanism to have the system wake you up). Apple introduced a new kind of push notification that is delivered directly to the Live Activity, bypassing the app altogether. I haven’t played with push notification updates, so I don’t know the benefits of using this method over sending a silent push notification to wake the app and updating the Live Activity from there. Probably less aggressive rate limiting? Lock screen color matching I haven’t found a good way to match my Live Activity’s colors to the current system colors on the lock screen. By default, text in a Live Activity is black in light mode, whereas the built-in lock screen themes seem to favor white or other light text colors. If there is an API or environment value that allows apps to match the color style of the current lock screen, I haven’t found it. I experimented with various foreground styles, such as materials, without success. I ended up hardcoding the foreground color, but I’m not satisfied with the result. Depending on the user’s lock screen theme, the Live Activity can look out of place. The default text color of a Live Activity in light mode is black. This doesn’t match most lock screen themes. Animations can’t be disabled Apple’s guide clearly states that developers have little control over animations in a Live Activity: Animate content updates When you define the user interface of your Live Activity, the system ignores any animation modifiers — for example, withAnimation(_:_:) and animation(_:value:) — and uses the system’s animation timing instead. However, the system performs some animation when the dynamic content of the Live Activity changes. Text views animate content changes with blurred content transitions, and the system animates content transitions for images and SF Symbols. If you add or remove views from the user interface based on content or state changes, views fade in and out. Use the following view transitions to configure these built-in transitions: opacity, move(edge:), slide, push(from:), or combinations of them. Additionally, request animations for timer text with numericText(countsDown:). It makes total sense to me that Apple doesn’t want developers to go crazy with animations on the lock screen, and perhaps having full control over animations also makes it easier for Apple to integrate Live Activities into the always-on display that’s probably coming on the next iPhone. What surprised me is that I couldn’t find a way to disable the text change animations altogether. I find the blurred text transitions for the large speed value quite distracting and I think this label would look better without any animations. But no combination of .animation(nil), .contentTransition(.identity), and .transition(.identity) would do this. Sharing code between app and widget A Live Activity is very much like a widget: the UI must live in your app’s widget extension. You start the Live Activity with code that runs in your app, though. Both targets (the app and the widget extension) need access to a common data type that represents the data the widget displays. You should have a third target (a framework or SwiftPM package) that contains such shared types and APIs and that the downstream targets import. Availability annotations Update September 22, 2022: This limitation no longer applies. The iOS 16.1 SDK added the ability to have availability conditions in WidgetBundle. Source: Tweet from Luca Bernardi (2022-09-20). WidgetBundle apparently doesn’t support widgets with different minimum deployment targets. If your widget extension has a deployment target of iOS 14 or 15 for an existing widget and you now want to add a Live Activity, I’d expect your widget bundle to look like this: @main struct MyWidgets: WidgetBundle { var body: some Widget { MyNormalWidget() // Error: Closure containing control flow statement cannot // be used with result builder 'WidgetBundleBuilder' if #available(iOSApplicationExtension 16.0, *) { MyLiveActivityWidget() } } } But this doesn’t compile because the result builder type used by WidgetBundle doesn’t support availability conditions. I hope Apple fixes this. This wasn’t a problem for me because our app didn’t have any widgets until now, so I just set the deployment target of the widget extension to iOS 16.0. If you have existing widgets and can’t require iOS 16 yet, a workaround is to add a second widget extension target just for the Live Activity. I haven’t tried this, but WidgetKit explicitly supports having multiple widget extensions, so it should work: Typically, you include all your widgets in a single widget extension, although your app can contain multiple extensions.
How @MainActor works
@MainActor is a Swift annotation to coerce a function to always run on the main thread and to enable the compiler to verify this. How does this work? In this article, I’m going to reimplement @MainActor in a slightly simplified form for illustration purposes, mainly to show how little “magic” there is to it. The code of the real implementation in the Swift standard library is available in the Swift repository. @MainActor relies on two Swift features, one of them unofficial: global actors and custom executors. Global actors MainActor is a global actor. That is, it provides a single actor instance that is shared between all places in the code that are annotated with @MainActor. All global actors must implement the shared property that’s defined in the GlobalActor protocol (every global actor implicitly conforms to this protocol): @globalActor final actor MyMainActor { // Requirements from the implicit GlobalActor conformance typealias ActorType = MyMainActor static var shared: ActorType = MyMainActor() // Don’t allow others to create instances private init() {} } At this point, we have a global actor that has the same semantics as any other actor. That is, functions annotated with @MyMainActor will run on a thread in the cooperative thread pool managed by the Swift runtime. To move the work to the main thread, we need another concept, custom executors. Executors A bit of terminology: The compiler splits async code into jobs. A job roughly corresponds to the code from one await (= potential suspension point) to the next. The runtime submits each job to an executor. The executor is the object that decides in which order and in which context (i.e. which thread or dispatch queue) to run the jobs. Swift ships with two built-in executors: the default concurrent executor, used for “normal”, non-actor-isolated async functions, and a default serial executor. Every actor instance has its own instance of this default serial executor and runs its code on it. Since the serial executor, like a serial dispatch queue, only runs a single job at a time, this prevents concurrent accesses to the actor’s state. Custom executors As of Swift 5.6, executors are an implementation detail of Swift’s concurrency system, but it’s almost certain that they will become an official feature fairly soon. Why? Because it can sometimes be useful to have more control over the execution context of async code. Some examples are listed in a draft proposal for allowing developers to implement custom executors that was first pitched in February 2021 but then didn’t make the cut for Swift 5.5. @MainActor already uses the unofficial ability for an actor to provide a custom executor, and we’re going to do the same for our reimplementation. A serial executor that runs its job on the main dispatch queue is implemented as follows. The interesting bit is the enqueue method, where we tell the job to run on the main dispatch queue: final class MainExecutor: SerialExecutor { func asUnownedSerialExecutor() -> UnownedSerialExecutor { UnownedSerialExecutor(ordinary: self) } func enqueue(_ job: UnownedJob) { DispatchQueue.main.async { job._runSynchronously(on: self.asUnownedSerialExecutor()) } } } We’re responsible for keeping an instance of the executor alive, so let’s store it in a global: private let mainExecutor = MainExecutor() Finally, we need to tell our global actor to use the new executor: import Dispatch @globalActor final actor MyMainActor { // ... // Requirement from the implicit GlobalActor conformance static var sharedUnownedExecutor: UnownedSerialExecutor { mainExecutor.asUnownedSerialExecutor() } // Requirement from the implicit Actor conformance nonisolated var unownedExecutor: UnownedSerialExecutor { mainExecutor.asUnownedSerialExecutor() } } That’s all there is to reimplement the basics of @MainActor. Conclusion The full code is on GitHub, including a usage example to demonstrate that the @MyMainActor annotations work. John McCall’s draft proposal for custom executors is worth reading, particularly the philosophy section. It’s an easy-to-read summary of some of the design principles behind Swift’s concurrency system: Swift’s concurrency design sees system threads as expensive and rather precious resources. … It is therefore best if the system allocates a small number of threads — just enough to saturate the available cores — and for those threads [to] only block for extended periods when there is no pending work in the program. Individual functions cannot effectively make this decision about blocking, because they lack a holistic understanding of the state of the program. Instead, the decision must be made by a centralized system which manages most of the execution resources in the program. This basic philosophy of how best to use system threads drives some of the most basic aspects of Swift’s concurrency design. In particular, the main reason to add async functions is to make it far easier to write functions that, unlike standard functions, will reliably abandon a thread when they need to wait for something to complete. And: The default concurrent executor is used to run jobs that don’t need to run somewhere more specific. It is based on a fixed-width thread pool that scales to the number of available cores. Programmers therefore do not need to worry that creating too many jobs at once will cause a thread explosion that will starve the program of resources.
AttributedString’s Codable format and what it has to do with Unicode
Here’s a simple AttributedString with some formatting: import Foundation let str = try! AttributedString( markdown: "Café **Sol**", options: .init(interpretedSyntax: .inlineOnly) ) AttributedString is Codable. If your task was to design the encoding format for an attributed string, what would you come up with? Something like this seems reasonable (in JSON with comments): { "text": "Café Sol", "runs": [ { // start..<end in Character offsets "range": [5, 8], "attrs": { "strong": true } } ] } This stores the text alongside an array of runs of formatting attributes. Each run consists of a character range and an attribute dictionary. Unicode is complicated But this format is bad and can break in various ways. The problem is that the character offsets that define the runs aren’t guaranteed to be stable. The definition of what constitutes a Character, i.e. a user-perceived character, or a Unicode grapheme cluster, can and does change in new Unicode versions. If we decoded an attributed string that had been serialized on a different OS version (before Swift 5.6, Swift used the OS’s Unicode library for determining character boundaries), or by code compiled with a different Swift version (since Swift 5.6, Swift uses its own grapheme breaking algorithm that will be updated alongside the Unicode standard)1, the character ranges might no longer represent the original intent, or even become invalid. Update April 11, 2024: See this Swift forum post I wrote for an example where the Unicode rules for grapheme cluster segmentation changed for flag emoji. This change caused a corresponding change in how Swift counts the Characters in a string containing consecutive flags, such as "🇦🇷🇯🇵". Normalization forms So let’s use UTF-8 byte offsets for the ranges, I hear you say. This avoids the first issue but still isn’t safe, because some characters, such as the é in the example string, have more than one representation in Unicode: it can be either the standalone character é (Latin small letter e with acute) or the combination of e + ◌́ (Combining acute accent). The Unicode standard calls these variants normalization forms.2 The first form needs 2 bytes in UTF-8, whereas the second uses 3 bytes, so subsequent ranges would be off by one if the string and the ranges used different normalization forms. Now in theory, the string itself and the ranges should use the same normalization form upon serialization, avoiding the problem. But this is almost impossible to guarantee if the serialized data passes through other systems that may (inadvertently or not) change the Unicode normalization of the strings that pass through them. A safer option would be to store the text not as a string but as a blob of UTF-8 bytes, because serialization/networking/storage layers generally don’t mess with binary data. But even then you’d have to be careful in the encoding and decoding code to apply the formatting attributes before any normalization takes place. Depending on how your programming language handles Unicode, this may not be so easy. Foundation’s solution The people on the Foundation team know all this, of course, and chose a better encoding format for Attributed String. Let’s take a look.3 let encoder = JSONEncoder() encoder.outputFormatting = [.prettyPrinted, .sortedKeys] let jsonData = try encoder.encode(str) let json = String(decoding: jsonData, as: UTF8.self) This is how our sample string is encoded: [ "Café ", { }, "Sol", { "NSInlinePresentationIntent" : 2 } ] This is an array of runs, where each run consists of a text segment and a dictionary of formatting attributes. The important point is that the formatting attributes are directly associated with the text segments they belong to, not indirectly via brittle byte or character offsets. (This encoding format is also more space-efficient and possibly better represents the in-memory layout of AttributedString, but that’s beside the point for this discussion.) There’s still a (smaller) potential problem here if the character boundary rules change for code points that span two adjacent text segments: the last character of run N and the first character of run N+1 might suddenly form a single character (grapheme cluster) in a new Unicode version. In that case, the decoding code will have to decide which formatting attributes to apply to this new character. But this is a much smaller issue because it only affects the characters in question. Unlike our original example, where an off-by-one error in run N would affect all subsequent runs, all other runs are untouched. Related forum discussion: Itai Ferber on why Character isn’t Codable. Storing string offsets is a bad idea We can extract a general lesson out of this: Don’t store string indices or offsets if possible. They aren’t stable over time or across runtime environments. On Apple platforms, the Swift standard library ships as part of the OS so I’d guess that the standard library’s grapheme breaking algorithm will be based on the same Unicode version that ships with the corresponding OS version. This is effectively no change in behavior compared to the pre-Swift 5.6 world (where the OS’s ICU library determined the Unicode version). On non-ABI-stable platforms (e.g. Linux and Windows), the Unicode version used by your program is determined by the version of the Swift compiler your program is compiled with, if my understanding is correct. ↩︎ The Swift standard library doesn’t have APIs for Unicode normalization yet, but you can use the corresponding NSString APIs, which are automatically added to String when you import Foundation: import Foundation let precomposed = "é".precomposedStringWithCanonicalMapping let decomposed = "é".decomposedStringWithCanonicalMapping precomposed == decomposed // → true precomposed.unicodeScalars.count // → 1 decomposed.unicodeScalars.count // → 2 precomposed.utf8.count // → 2 decomposed.utf8.count // → 3 ↩︎ By the way, I see a lot of code using String(jsonData, encoding: .utf8)! to create a string from UTF-8 data. String(decoding: jsonData, as: UTF8.self) saves you a force-unwrap and is arguably “cleaner” because it doesn’t depend on Foundation. Since it never fails, it’ll insert replacement characters into the string if it encounters invalid byte sequences. ↩︎
A heterogeneous dictionary with strong types in Swift
The environment in SwiftUI is sort of like a global dictionary but with stronger types: each key (represented by a key path) can have its own specific value type. For example, the \.isEnabled key stores a boolean value, whereas the \.font key stores an Optional<Font>. I wrote a custom dictionary type that can do the same thing. The HeterogeneousDictionary struct I show in this article stores mixed key-value pairs where each key defines the type of value it stores. The public API is fully type-safe, no casting required. Usage I’ll start with an example of the finished API. Here’s a dictionary for storing text formatting attributes: import AppKit var dict = HeterogeneousDictionary<TextAttributes>() dict[ForegroundColor.self] // → nil // The value type of this key is NSColor dict[ForegroundColor.self] = NSColor.systemRed dict[ForegroundColor.self] // → NSColor.systemRed dict[FontSize.self] // → nil // The value type of this key is Double dict[FontSize.self] = 24 dict[FontSize.self] // → 24 (type: Optional<Double>) We also need some boilerplate to define the set of keys and their associated value types. The code to do this for three keys (font, font size, foreground color) looks like this: // The domain (aka "keyspace") enum TextAttributes {} struct FontSize: HeterogeneousDictionaryKey { typealias Domain = TextAttributes typealias Value = Double } struct Font: HeterogeneousDictionaryKey { typealias Domain = TextAttributes typealias Value = NSFont } struct ForegroundColor: HeterogeneousDictionaryKey { typealias Domain = TextAttributes typealias Value = NSColor } Yes, this is fairly long, which is one of the downsides of this approach. At least you only have to write it once per “keyspace”. I’ll walk you through it step by step. Notes on the API Using types as keys As you can see in this line, the dictionary keys are types (more precisely, metatype values): dict[FontSize.self] = 24 This is another parallel with the SwiftUI environment, which also uses types as keys (the public environment API uses key paths as keys, but you’ll see the types underneath if you ever define your own environment key). Why use types as keys? We want to establish a relationship between a key and the type of values it stores, and we want to make this connection known to the type system. The way to do this is by defining a type that sets up this link. Domains aka “keyspaces” A standard Dictionary is generic over its key and value types. This doesn’t work for our heterogeneous dictionary because we have multiple value types (and we want more type safety than Any provides). Instead, a HeterogeneousDictionary is parameterized with a domain: // The domain (aka "keyspace") enum TextAttributes {} var dict = HeterogeneousDictionary<TextAttributes>() The domain is the “keyspace” that defines the set of legal keys for this dictionary. Only keys that belong to the domain can be put into the dictionary. The domain type has no protocol constraints; you can use any type for this. Defining keys A key is a type that conforms to the HeterogeneousDictionaryKey protocol. The protocol has two associated types that define the relationships between the key and its domain and value type: protocol HeterogeneousDictionaryKey { /// The "namespace" the key belongs to. associatedtype Domain /// The type of values that can be stored /// under this key in the dictionary. associatedtype Value } You define a key by creating a type and adding the conformance: struct Font: HeterogeneousDictionaryKey { typealias Domain = TextAttributes typealias Value = NSFont } Implementation notes A minimal implementation of the dictionary type is quite short: struct HeterogeneousDictionary<Domain> { private var storage: [ObjectIdentifier: Any] = [:] var count: Int { self.storage.count } subscript<Key>(key: Key.Type) -> Key.Value? where Key: HeterogeneousDictionaryKey, Key.Domain == Domain { get { self.storage[ObjectIdentifier(key)] as! Key.Value? } set { self.storage[ObjectIdentifier(key)] = newValue } } } Internal storage private var storage: [ObjectIdentifier: Any] = [:] Internally, HeterogeneousDictionary uses a dictionary of type [ObjectIdentifier: Any] for storage. We can’t use a metatype such as Font.self directly as a dictionary key because metatypes aren’t hashable. But we can use the metatype’s ObjectIdentifier, which is essentially the address of the type’s representation in memory. Subscript subscript<Key>(key: Key.Type) -> Key.Value? where Key: HeterogeneousDictionaryKey, Key.Domain == Domain { get { self.storage[ObjectIdentifier(key)] as! Key.Value? } set { self.storage[ObjectIdentifier(key)] = newValue } } The subscript implementation constrains its arguments to keys in the same domain as the dictionary’s domain. This ensures that you can’t subscript a dictionary for text attributes with some other unrelated key. If you find this too restrictive, you could also remove all references to the Domain type from the code; it would still work. Using key paths as keys Types as keys don’t have the best syntax. I think you’ll agree that dict[FontSize.self] doesn’t read as nice as dict[\.fontSize], so I looked into providing a convenience API based on key paths. My preferred solution would be if users could define static helper properties on the domain type, which the dictionary subscript would then accept as key paths, like so: extension TextAttributes { static var fontSize: FontSize.Type { FontSize.self } // Same for font and foregroundColor } Sadly, this doesn’t work because Swift 5.6 doesn’t (yet?) support key paths to static properties (relevant forum thread). We have to introduce a separate helper type that acts as a namespace for these helper properties. Since the dictionary type can create an instance of the helper type, it can access the non-static helper properties. This doesn’t feel as clean to me, but it works. I called the helper type HeterogeneousDictionaryValues as a parallel with EnvironmentValues, which serves the same purpose in SwiftUI. The code for this is included in the Gist. Drawbacks Is the HeterogeneousDictionary type useful? I’m not sure. I wrote this mostly as an exercise and haven’t used it yet in a real project. In most cases, if you need a heterogeneous record with full type safety, it’s probably easier to just write a new struct where each property is optional — the boilerplate for defining the dictionary keys is certainly longer and harder to read. For representing partial values, i.e. struct-like records where some but not all properties have values, take a look at these two approaches from 2018: Ian Keen, Type-safe temporary models (2018-06-05) Joseph Duffy, Partial in Swift (2018-07-10), also available as a library These use a similar storage approach (a dictionary of Any values with custom accessors to make it type-safe), but they use an existing struct as the domain/keyspace, combined with partial key paths into that struct as the keys. I honestly think that this is the better design for most situations. Aside from the boilerplate, here are a few more weaknesses of HeterogeneousDictionary: Storage is inefficient because values are boxed in Any containers Accessing values is inefficient: every access requires unboxing HeterogeneousDictionary can’t easily conform to Sequence and Collection because these protocols require a uniform element type The code The full code is available in a Gist.
Advanced Swift, fifth edition
We released the fifth edition of our book Advanced Swift a few days ago. You can buy the ebook on the objc.io site. The hardcover print edition is printed and sold by Amazon (amazon.com, amazon.co.uk, amazon.de). Highlights of the new edition: Fully updated for Swift 5.6 A new Concurrency chapter covering async/await, structured concurrency, and actors New content on property wrappers, result builders, protocols, and generics The print edition is now a hardcover (for the same price) Free update for owners of the ebook A growing book for a growing language Updating the book always turns out to be more work than I expect. Swift has grown substantially since our last release (for Swift 5.0), and the size of the book reflects this. The fifth edition is 76 % longer than the first edition from 2016. This time, we barely stayed under 1 million characters: Character counts of Advanced Swift editions from 2016–2022. Many thanks to our editor, Natalye, for reading all this and improving our Dutch/German dialect of English. Hardcover For the first time, the print edition comes in hardcover (for the same price). Being able to offer this makes me very happy. The hardcover book looks much better and is more likely to stay open when laid flat on a table. We also increased the page size from 15×23 cm (6×9 in) to 18×25 cm (7×10 in) to keep the page count manageable (Amazon’s print on demand service limits hardcover books to 550 pages). I hope you enjoy the new edition. If you decide to buy the book or if you bought it in the past, thank you very much! And if you’re willing to write a review on Amazon, we’d appreciate it.
Synchronous functions can support cancellation too
Cancellation is a Swift concurrency feature, but this doesn’t mean it’s only available in async functions. Synchronous functions can also support cancellation, and by doing so they’ll become better concurrency citizens when called from async code. Motivating example: JSONDecoder Supporting cancellation makes sense for functions that can block for significant amounts of time (say, more than a few milliseconds). Take JSON decoding as an example. Suppose we wrote an async function that performs a network request and decodes the downloaded JSON data: import Foundation func loadJSON<T: Decodable>(_ type: T.Type, from url: URL) async throws -> T { let (data, _) = try await URLSession.shared.data(from: url) return try JSONDecoder().decode(type, from: data) } The JSONDecoder.decode call is synchronous: it will block its thread until it completes. And if the download is large, decoding may take hundreds of milliseconds or even longer. Avoid blocking if possible In general, async code should avoid calling blocking APIs if possible. Instead, async functions are expected to suspend regularly to give waiting tasks a chance to run. But JSONDecoder doesn’t have an async API (yet?), and I’m not even sure it can provide one that works with the existing Codable protocols, so let’s work with what we have. And if you think about it, it’s not totally unreasonable for JSONDecoder to block. After all, it is performing CPU-intensive work (assuming the data it’s working on doesn’t have to be paged in), and this work has to happen on some thread. Async/await works best for I/O-bound functions that spend most of their time waiting for the disk or the network. If an I/O-bound function suspends, the runtime can give the function’s thread to another task that can make more productive use of the CPU. Responding to cancellation Cancellation is a cooperative process. Canceling a task only sets a flag in the task’s metadata. It’s up to individual functions to periodically check for cancellation and abort if necessary. If a function doesn’t respond promptly to cancellation or outright ignores the cancellation flag, the program may appear to the user to be stalling. Now, if the task is canceled while JSONDecoder.decode is running, our loadJSON function can’t react properly because it can’t interrupt the decoding process. To fix this, the decode method would have to perform its own periodic cancellation checks, using the usual APIs, Task.isCancelled or Task.checkCancellation(). These can be called from anywhere, including synchronous code. Internals How does this work? How can synchronous code access task-specific metadata? Here’s the code for Task.isCancelled in the standard library: extension Task where Success == Never, Failure == Never { public static var isCancelled: Bool { withUnsafeCurrentTask { task in task?.isCancelled ?? false } } } This calls withUnsafeCurrentTask to get a handle to the current task. When the runtime schedules a task to run on a particular thread, it stores a pointer to the task object in that thread’s thread-local storage, where any code running on that thread – sync or async – can access it. If task == nil, there is no current task, i.e. we haven’t been called (directly or indirectly) from an async function. In this case, cancellation doesn’t apply, so we can return false. If we do have a task handle, we ask the task for its isCancelled flag and return that. Reading the flag is an atomic (thread-safe) operation because other threads may be writing to it concurrently. Conclusion I hope we’ll see cancellation support in the Foundation encoders and decoders in the future. If you have written synchronous functions that can potentially block their thread for a significant amount of time, consider adding periodic cancellation checks. It’s a quick way to make your code work better with the concurrency system, and you don’t even have to change your API to do it. Update February 2, 2022: Jordan Rose argues that cancellation support for synchronous functions should be opt-in because it introduces a failure mode that’s hard to reason about locally as the “source“ of the failure (the async context) may be several levels removed from the call site. Definitely something to consider!
Cancellation can come in many forms
In Swift’s concurrency model, cancellation is cooperative. To be a good concurrency citizen, code must periodically check if the current task has been cancelled, and react accordingly. You can check for cancellation by calling Task.isCancelled or with try Task.checkCancellation() — the latter will exit by throwing a CancellationError if the task has been cancelled. By convention, functions should react to cancellation by throwing a CancellationError. But this convention isn’t enforced, so callers must be aware that cancellation can manifest itself in other forms. Here are some other ways how functions might respond to cancellation: Throw a different error. For example, the async networking APIs in Foundation, such as URLSession.data(from: URL), throw a URLError with the code URLError.Code.cancelled on cancellation. It’d be nice if URLSession translated this error to CancellationError, but it doesn’t. Return a partial result. A function that has completed part of its work when cancellation occurs may choose to return a partial result rather than throwing the work away and aborting. In fact, this may be the best choice for a non-throwing function. But note that this behavior can be extremely surprising to callers, so be sure to document it clearly. Do nothing. Functions are supposed to react promptly to cancellation, but callers must assume the worst. Even if cancelled, a function might run to completion and finish normally. Or it might eventually respond to cancellation by aborting, but not promptly because it doesn’t perform its cancellation checks often enough. So as the caller of a function, you can’t really rely on specific cancellation behavior unless you know how the callee is implemented. Code that wants to know if its task has been cancelled should itself call Task.isCancelled, rather than counting on catching a CancellationError from a callee.

Software Development News
October 2025: AI updates from the past month
- Latest News
- AI
OpenAI announces agentic security researcher that can find and fix vulnerabilities OpenAI has released a private beta for a new AI agent called Aardvark that acts as a security researcher, finding vulnerabilities and applying fixes, at scale. “Software security is one of the most critical—and challenging—frontiers in technology. Each year, tens of thousands of new … continue reading
The post October 2025: AI updates from the past month appeared first on SD Times.
OpenAI announces agentic security researcher that can find and fix vulnerabilities OpenAI has released a private beta for a new AI agent called Aardvark that acts as a security researcher, finding vulnerabilities and applying fixes, at scale. “Software security is one of the most critical—and challenging—frontiers in technology. Each year, tens of thousands of new vulnerabilities are discovered across enterprise and open-source codebases. Defenders face the daunting tasks of finding and patching vulnerabilities before their adversaries do. At OpenAI, we are working to tip that balance in favor of defenders,” OpenAI wrote in a blog post. The agent continuously analyzes source code repositories to identify vulnerabilities, assess their exploitability, prioritize severity, and propose patches. Instead of using traditional analysis techniques like fuzzing of software composition analysis, Aardvark uses LLM-powered reasoning and tool-use. Cursor 2.0 enables eight agents to work in parallel without interfering with each other The AI coding editor Cursor announced the launch of Cursor 2.0, the next iteration of the platform, featuring a new interface for working with multiple agents and its first ever coding model. The new multi-agent interface centers around agents instead of files. With this new interface, up to eight agents can work in parallel, using git worktrees and remote trees to prevent them from interfering with each other. It also allows developers to have multiple models attempt the same problem and see which one produces the best output. While this new interface is designed for agents, developers will still be able to open files or switch back to the classic IDE as needed. The new coding model, Composer, is four times faster than similar models, the company claims. It was designed for low-latency agentic coding tasks in Cursor, and it can complete most turns in less than 30 seconds. Workato launches Enterprise MCP for SaaS platforms Organizations are spending huge dollars on AI agents, but are finding that integrating the agents into all the systems the business needs to function is a very high hurdle. To help make SaaS platforms agent-ready, integration orchestration company Workato released Workato Enterprise MCP, which the company said in its announcement can “turn existing workflows, integrations, and APIs into rich, multi-step agent skills that any large-language-model (LLM)-based agent can call, including ChatGPT, Claude, Gemini, and Cursor.” Adam Seligman, chief technology officer at Workato, told SD Times that “the thing we keep coming back to over and over again is agents show a lot of promise, but to really work for business, they have to get access to business data. And they have to be able to do things inside your business, but do it in a way that you trust. And it’s really hard to get those two things right.” JetBrains launches open benchmarking platform for measuring AI productivity JetBrains has released a new tool designed to enable developers to measure their actual productivity gains from AI tools. The company’s Developer Productivity AI Arena (DPAI Arena) is an open benchmarking platform for how well AI development tools complete real-world software engineering tasks. According to the company, current benchmarks that LLMs are run against rely on outdated datasets, cover a narrow range of technologies, and focus mainly on issue-to-patch workflows. “As AI coding tools advance rapidly, the industry still lacks a neutral, standards-based framework to measure their real impact on developer productivity,” the company wrote in a blog post. DPAI Arena uses a flexible, track-based architecture to enable reproducible comparisons across workflows like patching, bug fixes, PR review, test generation, static analysis, and more. GitHub unveils Agent HQ, the next evolution of its platform that focuses on agent-based development During its annual conference, GitHub Universe, GitHub shared its plans for Agent HQ, its vision for the future of the platform where AI agents are natively integrated across all of GitHub. As part of this Agent HQ initiative, over the next several months, paid GitHub Copilot users will gain direct access to popular coding agents from Anthropic, OpenAI, Google, Cognition, xAI, and more. Agent HQ brings with it several new capabilities to support this next evolution, the first of which is mission control, a central command center for assigning, steering, and tracking the work of multiple agents across GitHub, Copilot CLI, and VS Code. Mission control’s branch controls gives developers granular oversight over running checks for code created by the agents. Identity features will also be introduced to allow developers to manage agents like they would other coworkers and control which agent is building a task, manage access, and implement policies. OpenAI completes restructuring, strikes new deal with Microsoft OpenAI today announced that it has completed the restructuring of its business. When the company was founded in 2015, it was launched as a non-profit organization and that non-profit has controlled the for-profit arm of the business. Today’s restructuring turns the for-profit arm into a public benefit corporation called OpenAI PBC. The OpenAI Foundation—the new name for the non-profit—will still control the for-profit and hold a 26% equity stake in OpenAI PBC, which is currently valued at around $130 billion. Being a public benefit corporation differs from traditional corporate structures in that they are “required to advance its stated mission and consider the broader interests of all stakeholders, ensuring the company’s mission and commercial success advance together,” OpenAI’s website explains. Microsoft announces public preview for planning capability that improves how Copilot in Visual Studio handles complex tasks Microsoft has announced a public preview for a new feature that aims to enable Copilot in Visual Studio to tackle more complex projects. With its new planning capability in Agent Mode, Copilot will research the codebase to break down big tasks into smaller and more manageable tasks, while also iterating on its plan as it works through the steps. “Planning makes Copilot more predictable and consistent by giving it a structured way to reason about your project. It builds on techniques from hierarchical and closed-loop planning research – enabling Copilot to plan at a high level, execute step-by-step, and adjust dynamically as it learns more about your codebase and issues encountered during implementation,” Rhea Patel, product manager at Microsoft, wrote in a blog post. GitKraken releases Insights to help companies measure ROI of AI GitKraken, a software engineering intelligence company that specializes in improving the developer experience, announced the launch of GitKraken Insights to provide companies with better insights into AI’s impact on developer productivity. Matt Johnston, CEO of Gitkraken, told SD Times that despite the incremental investments in and perceived velocity gains from AI, they struggle to understand the impact. “I was talking to a VP of developer experience at a large Silicon Valley company, and he was basically saying, ‘We’ve made investments of thousands of seats in Cursor and Copilot and Claude, and we can’t really tell what’s being used… and how the heck do I measure this in a way that’s compelling to my business leaders.” GitKraken Insights brings together several different metrics—DORA metrics, code quality analysis, technical debt tracking, AI impact measurement, and developer experience indicators—to paint a picture of what’s happening within the development lifecycle. Mabl announces updates to Agentic Testing Teammate The Agentic Testing Teammate works alongside human testers to make the process more efficient. New updates include AI vectorizations and test semantic search, improvements to test coverage, and enhancements to the MCP Server that enable testers to do a number of tasks directly within their IDE, including Test Impact Analysis, intelligent test creation, and failure recommendations. “This new work is built on the idea that an agent can become an integral part of your testing team,” said Dan Belcher, co-founder of mabl. “Unlike scripting frameworks and general-purpose large language models, mabl builds deep knowledge about your application over time and uses that knowledge to make it–and your team–more effective.” Couchbase 8.0 adds three new vector indexing and retrieval capabilities These new capabilities are designed to support diverse vector workloads that facilitate real-time AI applications. Hyperscale Vector Index is based on the DiskANN nearest-neighbor search algorithm and enables operation across partitioned disks for distributed processing. Composite Vector Index supports pre-filtered queries that can scope the specific vector being sought. Search Vector Index supports hybrid searches containing vectors, lexical search, and structured query criteria in a single SQL++ request. Anthropic expands memory to all paid Claude users Anthropic announced that the recent memory feature in Claude is being rolled out to Pro and Max plan users, making it available to all paid users now. Memory was initially announced in early September, but was only available to Team and Enterprise users to begin with. Memory allows Claude to remember your projects and preferences so that you don’t need to re-explain important context across sessions. “Great work builds over time. With memory, each conversation with Claude improves the next,” Anthropic wrote in its initial announcement. Harness brings vibe coding to database migration with new AI-Powered Database Migration Authoring feature Harness is on a mission to make it easier for developers to do database migrations with its new AI-Powered Database Migration Authoring feature. This new capability allows users to describe schema changes in natural language to receive a production-ready migration. For example, a developer could ask “Create a table named animals with columns for genus_species and common_name. Then add a related table named birds that tracks unladen airspeed and proper name. Add rows for Captain Canary, African swallow, and European swallow.” Harness’ platform would then analyze the current schema and policies, generate a backward-compatible migration, validate the change for safety and compliance, commit it to Git for testing, and create rollback migrations. Red Hat Developer Lightspeed brings AI assistance to Red Hat’s Developer Hub and migration toolkit Red Hat Developer Lightspeed has been integrated into both the Red Hat Developer Hub and the migration toolkit for applications (MTA). In the Red Hat Developer Hub, it acts as an assistant to speed up non-coding tasks, like exploring application design approaches, writing documentation, generating test plans, and troubleshooting applications. In the migration toolkit, Red Hat Developer Lightspeed automates source code refactoring within the IDE. It leverages MTA’s static code analysis to understand migration issues and how to fix them, and also improves over time by learning what made past changes successful. MariaDB unifies transactional, analytical, and vector databases in MariaDB Enterprise Platform 2026 release MariaDB’s Enterprise Platform 2026 release was announced this week, with the promise that it will act as “the definitive database platform for building next-generation intelligent applications.” To support agentic AI, the company added native RAG for grounding LLMs with context from MariaDB without needing embeddings, vector stores, or retrieval pipelines. The company also added ready-to-use agents within the platform, including a developer copilot that connects to the database and can respond to natural language queries, and a DBA copilot that can manage tasks like performance tuning and debugging. Additionally, the company added an integrated MCP server so that agents can interact with MariaDB databases. The MCP interface in MariaDB allows users to integrate vector search, LLMs, and standard SQL operations, and allows agents to launch serverless databases in the cloud. Spotify Portal now generally available and packed with features for improving dev experience Spotify Portal for Backstage provides developers with a ready-to-use version of Backstage, its open source solution for building internal developer portals (IDPs). AiKA, which is an AI assistant for Portal, can now connect to third-party MCP servers and trigger actions in Portal. AiKA itself also functions as an MCP server, allowing developers to connect it up to tools like Cursor or Copilot and access Portal data. “The general availability of Spotify Portal marks a pivotal moment in how organizations build, measure, and optimize developer experience. What began as an internal tool for Spotify engineers is now a fully-fledged platform for enterprises, combining the reliability of Backstage, the insight of Confidence, and the speed of AI-driven workflows,” Spotify wrote. Sonar announces new solution to optimize training datasets for coding LLMs Sonar, a company that specializes in code quality, announced a new solution that will improve how LLMs are trained for coding purposes. According to the company, LLMs that are used to help with software development are often trained on publicly available, open source code containing security issues and bugs, which become amplified throughout the training process. “Even a small amount of flawed data can degrade models of any size, disproportionately degrading their output,” Sonar wrote in an announcement. SonarSweep (now in early access) aims to mitigate those issues by ensuring that models are learning from high-quality, secure examples. It works by identifying and fixing code quality and security issues in the training data itself. After analyzing the dataset, it applies a strict filtering process to remove low-quality code while also balancing the updated dataset to ensure it will still offer diverse and representative learning. Amazon launches Quick Suite to provide agentic AI across applications and AWS services Amazon Quick Suite allows users to ask questions, conduct deep research, analyze and visualize data, and create automations. It can connect to internal repositories, like wikis or intranet, and AWS services. Amazon also offers 50+ built-in connectors to applications like Adobe Analytics, SharePoint, Snowflake, Google Drive, OneDrive, Outlook, ServiceNow, and Databricks, as well as support for over 1,000+ apps via connecting to their MCP servers. This deep connection across the enterprise enables Quick Sight to analyze data across all of a company’s systems and create complex business workflows across multiple applications and departments. “Unlike traditional business intelligence tools that work only with databases and data warehouses, Quick Sight’s agentic experience analyzes all forms of data across all your systems and apps, including your documents,” Amazon wrote in a blog post. Google unveils Gemini Enterprise to offer companies a more unified platform for AI innovation Google is announcing a new offering built around Gemini, designed specifically with large enterprise use in mind. Gemini Enterprise consolidates six core components: Advanced Gemini models A no-code workbench for analyzing information and orchestrating agents Pre-built Google agents for tasks like deep research or data insights The ability to connect to company data A central governance framework for visualizing and securing all agents Access to an ecosystem of over 100,000 industry partners “By bringing all of these components together through a single interface, Gemini Enterprise transforms how teams work. It moves beyond simple tasks to automate entire workflows and drive smarter business outcomes — all on Google’s secure, enterprise-grade architecture,” Thomas Kurian, CEO of Google Cloud, wrote in a blog post. Atlassian shares major updates to its genAI assistant Rovo at Team ‘25 Europe Atlassian is hosting its annual user conference Team ‘25 Europe this week in Barcelona, and during the event, the company shared several new and upcoming updates to its generative AI assistant Rovo. Atlassian announced the general availability of its AI coding agent Rovo Dev. Rovo Dev can help with code reviews, documentation, dependency cleanups, and more, and it leverages context from tickets, docs, incidents, and business goals to provide developers with information that will help them make more informed decisions. Additionally, starting early next year, Rovo Search will become the default search in Jira, which will allow Jira’s search to suggest relevant issues and projects. Rovo Chat will also be getting over 100 out-of-the-box modular capabilities from Atlassian and its partners that can be used in chat, agents, and workflows. Other new Chat capabilities include the ability to remember past conversations and preferences and a new collaborative workspace called Canvas. Google launches ecosystem of extensions for Gemini CLI Google is launching Gemini CLI extensions to allow different development tools to connect up to the Gemini CLI. Each extension includes a playbook that teaches the CLI how to effectively use that tool, eliminating the need for developers to configure them. “If you want to look under the hood, Gemini CLI extensions package instructions, MCP servers and custom commands into a familiar and user-friendly format,” Google wrote in a blog post. Twenty-two extensions are available at launch from Google partners Atlassian, Canva, Confluent, Dynatrace, Elastic, Figma, GitLab, Grafana Labs, Harness, HashiCorp, MongoDB, Neo4j, Pinecone, Postman, Qodo, Shopify, Snyk, Sonar, Stripe, ThoughtSpot, Weights & Biases by CoreWeave, and WIX. IBM adds new capabilities to watsonx Orchestrate to facilitate agentic AI at scale As IBM kicked off its annual developer event TechXchange 2025, it announced several new capabilities to enable organizations to unlock value from agentic AI. “There’s certainly been a lot of buzz in the industry,” said Bruno Aziza, vice president of Data, AI, and Analytics Strategy at IBM Software. “I think if you look at the context of everything that’s going on, customers are struggling. They’re struggling to get value from their investment. It announced many updates to its AI agent orchestration platform, watsonx Orchestrate. The platform now includes AgentOps, an observability and governance layer for AI agents; Agentic Workflows, standardized and reusable flows that can be used to build and sequence multi-agent systems; and Langflow integration to reduce agent setup time. OpenAI DevDay: ChatGPT Apps, AgentKit, and GA release of Codex OpenAI held its annual Developer Day event this week where it announced several updates to its products. The company unveiled apps in ChatGPT as well as an SDK for developers to build them. Companies that have created apps that are already available include Booking.com, Canva, Coursera, Figma, Expedia, Spotify, and Zillow. When a user says the name of an available app in a prompt, ChatGPT will automatically surface that app in the chat. For example, saying “Spotify, make a playlist for my party this Friday” will bring in the Spotify app. ChatGPT will also be able to suggest apps when it thinks they’re relevant to the conversation, such as suggesting Zillow’s app in a conversation about buying a house. Google’s coding agent Jules now works in the command line Google’s coding agent Jules now can be used directly in developer’s command lines so that it can act as more of a coding companion. According to Google, it created this new command line interface—called Jules Tools—out of a recognition that the terminal is where developers spend most of their time. Jules Tools allows developers to spin up tasks, inspect what Jules is doing, and integrate Jules into automation. “Think of Jules Tools as both a dashboard and a command surface for your coding agent,” Google wrote in a blog post. Amazon Bedrock AgentCore MCP server now available The AgentCore MCP server offers built-in support for runtime, gateway integration, identity management, and agent memory. It was created to speed up the process of creating components that are compatible with Bedrock AgentCore. “What typically takes significant time and effort, for example learning about Bedrock AgentCore services, integrating Runtime and Tools Gateway, managing security configurations, and deploying to production can now be completed in minutes through conversational commands with your coding assistant,” AWS wrote in a blog post. DigitalOcean updates Gradient AI Platform The Gradient AI Platform is a platform for building AI agents without needing to manage the underlying infrastructure. New features that have been added include support for image generation, auto-indexing of knowledge bases, and VPC integration. Additionally, DigitalOcean revealed that it will be expanding the platform further in the next few weeks with new offerings like the Gradient AI AgentDevelopmentKit and Gradient AI Genie, which integrates into IDEs and can be used to manage multi-agent systems using natural language. Microsoft announces preview of its new Agent Framework Microsoft has announced a preview of the Microsoft Agent Framework, an open-source development kit for .NET and Python for creating AI agents and multi-agent workflows. It supports creating individual agents as well as graph-based workflows to connect up multiple agents. According to Microsoft, the Agent Framework is a direct successor to its other projects Semantic Kernel and AutoGen, utilizing foundations from both. It brings together Semantic Kernel’s enterprise-grade features like thread-based state management, type safety, filters, telemetry, and model and embedding support, with AutoGen’s abstractions for single- and multi-agent patterns. Mendix updates its low-code platform with agentic AI features New agent and genAI features include an agent builder, the ability to create project plans using generative AI, the ability to create microflows and workflows with AI, and support for MCP. Another focus area of the release is business process automation, and new features related to that include the ability for Mendix Workflows to call AI agents, dynamic case management, and Global Inbox, a single view for all tasks from multiple distributed workflows. California passes law to ensure safe innovation of frontier AI models Earlier this week, California’s governor Gavin Newsom signed a new law designed to ensure safe development and deployment of frontier AI models. “California has proven that we can establish regulations to protect our communities while also ensuring that the growing AI industry continues to thrive,” Newsom said. “This legislation strikes that balance. AI is the new frontier in innovation, and California is not only here for it – but stands strong as a national leader by enacting the first-in-the-nation frontier AI safety legislation that builds public trust as this emerging technology rapidly evolves.” The law, SB 53, establishes requirements for companies developing frontier AI models, spanning five categories: transparency, innovation, safety, accountability, and responsiveness. Slack evolves to support agentic capabilities built on conversation data Salesforce is announcing several major updates to Slack that will enable customers to leverage their conversation history for AI apps and agents. The company is announcing a real-time search (RTS) API, which surfaces up-to-date discussions, files, and channels to provide agents access with context-aware information. To ensure secure use of information, data remains in Slack and the API adheres to existing user access permissions and only retrieves data that is relevant to the query. “It unlocks your organization’s collective intelligence, securely connecting agents to conversations and decisions that were once trapped in silos,” Salesforce wrote in a blog post. Anthropic claims its newly released Claude Sonnet 4.5 is the “best coding model in the world” Claude Sonnet 4.5 achieves a 77.2% on the SWE-bench for software engineering, compared to 74.5% for Claude Opus 4.1 and 72.7% for Claude Sonnet 4. For external comparison, GPT-5 Codex scored at 74.5%, GPT-5 scored 72.8%, and Gemini 2.5 Pro scored 67.2%. Additionally, it leads in the OSWorld benchmark, which tests AI models on real-world computer tasks. It scored 61.4% on that benchmark, beating out Claude Sonnet 4, which scored 42.2%. “Sonnet 4.5 can produce near-instant responses or extended, step-by-step thinking that is made visible to the user,” Anthropic says. According to Anthropic, Claude Sonnet 4.5 also shows better domain-specific knowledge and reasoning in the fields of finance, law, and medicine. Workato announces MCP platform Workato Enterprise MCP provides customers with access to over 100 fully managed MCP servers that can connect with different LLMs and agents, including ChatGPT, Claude.AI, Amazon Q, Cursor, and Google Gemini. Some of the MCP servers available in the platform include ones from Atlassian, Box, Reddit, Salesforce, Okta, and Shopify. “At Workato, we hear every day that while MCP is exciting, enterprises still face challenges making MCP work securely, effectively, and reliably at scale,” said Adam Seligman, Chief Technology Officer at Workato. “Workato Enterprise MCP changes that by bringing the full spectrum of business processes, from the front office to the back office and everything in between, to AI agents through MCP. With pre-built, enterprise-grade servers and skills, we’re giving global enterprises a first-of-its-kind solution that unlocks AI agents to safely execute real business processes at scale, delivering measurable business value.” VibeSec embeds security analysis into AI coding models to prevent generation of insecure code OX Security is shifting security as far left as it can go with the launch of VibeSec, which it says can stop insecure AI-generated code before the code even gets generated. It does this by embedding dynamic security context into the coding model so that it doesn’t suggest code that contains security issues. “VibeSec doesn’t just accelerate security – it fundamentally changes how security operates. For the first time, security moves faster than vulnerabilities,” said Neatsun Ziv, co-founder and CEO, at OX Security. OutSystems launches Agent Workbench Agent Workbench allows users to create and orchestrate AI agents that leverage their company’s data sets and workflows. For example, in early access, Axos Bank built a log analysis agent to interpret error logs and Thermo Fisher Scientific used it to build a Customer Escalation Agent that interprets unstructured data from customer interactions. “Agent Workbench was created to give our customers the tools they need to build the agentic future with OutSystems. Our Early Access Program participants have realized impressive results with Agent Workbench, positioning them as industry leaders in agentic AI,” said Woodson Martin, CEO of OutSystems. The post October 2025: AI updates from the past month appeared first on SD Times.
OpenAI announces agentic security researcher that can find and fix vulnerabilities
- Latest News
- AI
- OpenAI
OpenAI has released a private beta for a new AI agent called Aardvark that acts as a security researcher, finding vulnerabilities and applying fixes, at scale. “Software security is one of the most critical—and challenging—frontiers in technology. Each year, tens of thousands of new vulnerabilities are discovered across enterprise and open-source codebases. Defenders face the … continue reading
The post OpenAI announces agentic security researcher that can find and fix vulnerabilities appeared first on SD Times.
OpenAI has released a private beta for a new AI agent called Aardvark that acts as a security researcher, finding vulnerabilities and applying fixes, at scale. “Software security is one of the most critical—and challenging—frontiers in technology. Each year, tens of thousands of new vulnerabilities are discovered across enterprise and open-source codebases. Defenders face the daunting tasks of finding and patching vulnerabilities before their adversaries do. At OpenAI, we are working to tip that balance in favor of defenders,” OpenAI wrote in a blog post. The agent continuously analyzes source code repositories to identify vulnerabilities, assess their exploitability, prioritize severity, and propose patches. Instead of using traditional analysis techniques like fuzzing of software composition analysis, Aardvark uses LLM-powered reasoning and tool-use. It is designed to work alongside developers and also integrates with existing workflows like GitHub and Codex so that it can provide insights without disrupting software development speed. Additionally, OpenAI’s testing of Aardvark found that it is also capable of finding bugs like logic flaws, incomplete fixes, or privacy issues. It has been internally used at OpenAI and a couple of its alpha partners over the last several months, and in testing on “golden” repositories, it found 92% of known and synthetically-introduced vulnerabilities. OpenAI also announced that it will offer pro-bono scanning to certain non-commercial open source projects to improve security of the open source ecosystem. “Aardvark represents a new defender-first model: an agentic security researcher that partners with teams by delivering continuous protection as code evolves. By catching vulnerabilities early, validating real-world exploitability, and offering clear fixes, Aardvark can strengthen security without slowing innovation,” OpenAI wrote. The post OpenAI announces agentic security researcher that can find and fix vulnerabilities appeared first on SD Times.
Gaining AI insights from spatial data
- Latest News
- GeoAI
- spatial ETL
- Wherobots
Spatial data – a record of physical or virtual data – is important to a variety of industries, yet a gap remains between collecting the raw data and gaining AI insights from it. I recently had the opportunity to speak with Damian Wylie, the head of products at spatial ETL, analytics and GeoAI company Wherobots, … continue reading
The post Gaining AI insights from spatial data appeared first on SD Times.
Spatial data – a record of physical or virtual data – is important to a variety of industries, yet a gap remains between collecting the raw data and gaining AI insights from it. I recently had the opportunity to speak with Damian Wylie, the head of products at spatial ETL, analytics and GeoAI company Wherobots, about the challenges of working with spatial data. This conversation has been edited for length and clarity. Q: What was the problem you saw with gleaning AI insights from spatial data? A: Let’s first start with what spatial data is, and then we can drill into some of the problems. So spatial data is a record of places, objects or activities, say, in a virtual or physical space. A virtual space could be something like a Metaverse or a game or an application. We’re going to spend most of our time today talking about the physical space. The physical space is anything tangible. This could represent things above our atmosphere, in space or in deep outer space, or could also be things on the ground or even below ground. Spatial data can represent trips, routes, land, roads, a road network, parcel data, crops, building data, and so on. Q: What are some of the kinds of industries that rely on this data? A: This data is fundamental to a variety of various industries, from mobility, agritech, insurance, energy, telecom, retail, logistics. And what companies want to do with this data is they want to build better products, better services and make better decisions. There are small-scale use cases all the way up to large scale-use cases. So if you’re a company that’s maybe making decisions around where you’re going to place your retail store, that’s an example of a type of organization like, maybe a Starbucks. Or, there are companies trying to figure out where to invest in their next solar panel farm, or a commodities company trying to understand what the value of certain crop types are going to be this year. Q: So what is the gap that exists between collecting this raw spatial data and being able to gain AI-ready insights from it? A: The primary challenge that developers generally face when trying to work with this data is, they look around the landscape of options. The tooling out there is not purpose-built for the end application, which requires the developers to have to build workarounds. You look around the ecosystem, you’ll see a number of extensions that are added on to support spatial data. And that’s a lot of complexity that the developers have to undergo. Developers are trying to put this very complex or noisy data into those systems and expecting to get some output out of it, with some amount of performance or even at a cost that’s reasonable. So there’s really some economic challenges that developers or companies face today with respect to putting spatial data to work. Q: How is Wherobots addressing these challenges? A: We believe that when someone can take your idea about the physical world and bring it to market and bring it into production, within minutes rather than weeks or months, that’s going to unlock a lot of innovation. There are remote sensing applications that we are working on, and that’s a growing area of interest within the market, because a lot of companies want to put these sensors to work that are assigned to drones and satellites. So you can imagine those satellites and drones are flying around areas of interest, where maybe you’re scanning rivers, for example, and then having the systems and tooling that makes that very economical to use. The market needs lower cost, much more performance and easy-to-use tooling. Q: How does your platform make that data AI-ready for developers to use.? A: The computing systems we’re talking about are like databases, big data analytics systems. You’ll see that those systems have evolved to support, but they weren’t inherently built for, spatial data, and so the bottlenecks that exist in those systems will surface through at a higher cost to the customer, while delivering sluggish performance. We’re also working on this full stack, because when someone’s working with the spatial data, they’re not just interfacing with the computing system, they’re working with storage systems, and they’re also working through development interfaces. Q: How will AI agents improve use of spatial data? A: When you look at LLMs today, what they’re trained on is the internet, but the internet is not providing a first-party representation of the physical world. It’s generally inferences, derived from news articles and other data points online. So if you were to ask an LLM, for example, “How fast is this fire spreading,” or, “What’s the area of that fire,” it would go to the web for an answer. We believe it is possible and will be possible, to make AI agents capable of working directly with physical world data to answer a whole new category of questions that people just aren’t using LLMs for. So, what we see happening is, yes, there’s an explosion of data there, and there are many use cases for that data, but there’s a big gap in the middle between the use cases and the data itself. The post Gaining AI insights from spatial data appeared first on SD Times.
Elastic adds new vector search algorithm that cuts down on memory requirements, improves speed
- Latest News
- data
- Elasticsearch
- Vector
Elastic has introduced a new disk-friendly vector search algorithm, called DiskBBQ, to Elasticsearch. According to the company, this new algorithm is more efficient than traditional search techniques in vector databases, like Hierarchical Navigable Small Worlds (HNSW), which is currently the most commonly used technique. With HNSW, all vectors are required to reside in memory, which … continue reading
The post Elastic adds new vector search algorithm that cuts down on memory requirements, improves speed appeared first on SD Times.
Elastic has introduced a new disk-friendly vector search algorithm, called DiskBBQ, to Elasticsearch. According to the company, this new algorithm is more efficient than traditional search techniques in vector databases, like Hierarchical Navigable Small Worlds (HNSW), which is currently the most commonly used technique. With HNSW, all vectors are required to reside in memory, which increases costs as it scales, while DiskBBQ keeps costs low by eliminating the need to keep entire vector indexes in memory. The main benefits of this new method are that it uses less RAM, eliminates spikes in data retrieval time, improves performance for data ingestion and organization, and costs less, Elastic explained. It works by using Hierarchical K-means to partition vectors into small clusters, and then it picks representative centroids to query prior to querying the actual vectors. This means querying at most two layers of the centroids. It then explores the vectors in each cluster by bulk scoring the distance between the cluster’s vector and the query vector. DiskBBQ also uses Better Binary Quantization (BBQ) to compress the vectors and centroids, allowing many blocks of vectors to be loaded into memory at the same time. Additionally, it utilizes Google’s Spilling with Orthogonality-Amplified Residuals (SOAR) to assign vectors to more than one cluster, which is useful for situations where a vector is close to the border between two clusters. “As AI applications scale, traditional vector storage formats force them to choose between slow indexing or significant infrastructure costs required to overcome memory limitations,” said Ajay Nair, general manager of platform at Elastic. “DiskBBQ is a smarter, more scalable approach to high-performance vector search on very large datasets that accelerates both indexing and retrieval.” DiskBBQ is available in Elasticsearch 9.2. More information about the technique can be found in the company’s blog post. The post Elastic adds new vector search algorithm that cuts down on memory requirements, improves speed appeared first on SD Times.
Cursor 2.0 enables eight agents to work in parallel without interfering with each other
- Latest News
- AI
- Cursor
The AI coding editor Cursor announced the launch of Cursor 2.0, the next iteration of the platform, featuring a new interface for working with multiple agents and its first ever coding model. The new multi-agent interface centers around agents instead of files. With this new interface, up to eight agents can work in parallel, using … continue reading
The post Cursor 2.0 enables eight agents to work in parallel without interfering with each other appeared first on SD Times.
The AI coding editor Cursor announced the launch of Cursor 2.0, the next iteration of the platform, featuring a new interface for working with multiple agents and its first ever coding model. The new multi-agent interface centers around agents instead of files. With this new interface, up to eight agents can work in parallel, using git worktrees and remote trees to prevent them from interfering with each other. It also allows developers to have multiple models attempt the same problem and see which one produces the best output. While this new interface is designed for agents, developers will still be able to open files or switch back to the classic IDE as needed. The new coding model, Composer, is four times faster than similar models, the company claims. It was designed for low-latency agentic coding tasks in Cursor, and it can complete most turns in less than 30 seconds. It was trained on a variety of tools, including codebase-wide semantic search, which makes it capable of understanding and working with large codebases. It is also now easier for developers to review code produced by agents and a new native browser tool enables Cursor to more easily test its work and iterate until the intended result is achieved. Other new features include custom commands that can be applied to all members of a team, voice mode, and an improved prompt UI. More information on Cursor 2.0 is available here. The post Cursor 2.0 enables eight agents to work in parallel without interfering with each other appeared first on SD Times.
Workato launches Enterprise MCP for SaaS platforms
- Latest News
- business data
- integration
- orchestration
- workato
Organizations are spending huge dollars on AI agents, but are finding that integrating the agents into all the systems the business needs to function is a very high hurdle. To help make SaaS platforms agent-ready, integration orchestration company Workato released Workato Enterprise MCP, which the company said in its announcement can “turn existing workflows, integrations, … continue reading
The post Workato launches Enterprise MCP for SaaS platforms appeared first on SD Times.
Organizations are spending huge dollars on AI agents, but are finding that integrating the agents into all the systems the business needs to function is a very high hurdle. To help make SaaS platforms agent-ready, integration orchestration company Workato released Workato Enterprise MCP, which the company said in its announcement can “turn existing workflows, integrations, and APIs into rich, multi-step agent skills that any large-language-model (LLM)-based agent can call, including ChatGPT, Claude, Gemini, and Cursor.” Adam Seligman, chief technology officer at Workato, told SD Times that “the thing we keep coming back to over and over again is agents show a lot of promise, but to really work for business, they have to get access to business data. And they have to be able to do things inside your business, but do it in a way that you trust. And it’s really hard to get those two things right.” One of the reasons that organizations aren’t yet trusting their agents to do the right things is because they lack business and data context and complexity. Workato’s Enterprise MCP platform enables agents to execute business processes, all while offering the same governance controls built within Workato’s integration platform. According to the company’s announcement, Workato Enterprise MCP: Exposes the core value of their platform to agents without rewriting code or APIs. Builds MCP servers that make their most powerful workflows directly callable by any agent. Enables customer and partner ecosystems to embed their platform into agentic use cases — securely, deterministically, and at scale. Brings their platform to where customers work, not the other way around. Among the key features and capabilities are: No-Code Agent Enablement: Turn existing Workato recipes or community automations into agent-ready skills in minutes. Rapid Deployment: Use 650k+ pre-built workflow templates to get started fast. Enterprise-Scale Trust: Unified authentication via Workato Identity, verified user access, role-based access control, and audit trails for every agent interaction. Complete Observability: End-to-end monitoring of performance, usage, and system health. Future-Ready Design: Works seamlessly with ChatGPT, Claude, Gemini, Cursor, and next-generation agents — ensuring flexibility as the agentic ecosystem evolves. “Agents are here — and customers expect them to work with every SaaS product they use,” Seligman said in the annoucement. “With Workato Enterprise MCP, SaaS companies can safely and easily expose their platform’s core value to agents through rich multi-step skills, all powered by the world’s most trusted iPaaS. This means agents can finally take meaningful, secure action — and SaaS platforms can stay at the center of their customers’ agentic workflows.” Workato Enterprise MCP is the latest effort in the company’s strategy for the Agentic Enterprise, and alongside Workato’s Agent Studio and Agent Hub, it brings integrations, orchestration and AI automation in a single, secure platform. In the interview with SD Times, Seligman noted that AI is “one of those moments and there’s a whole lot of noise and customers are excited and developers are excited, but results are spotty. There are glimmers of genius and magic and potential and amazing economic returns and there’s a lot of projects that are coming up short.” “Integration and orchestration,” he said, “are going to be critical to making this work.” The post Workato launches Enterprise MCP for SaaS platforms appeared first on SD Times.
JetBrains launches open benchmarking platform for measuring AI productivity
- Latest News
- AI
- JetBrains
JetBrains has released a new tool designed to enable developers to measure their actual productivity gains from AI tools. The company’s Developer Productivity AI Arena (DPAI Arena) is an open benchmarking platform for how well AI development tools complete real-world software engineering tasks. According to the company, current benchmarks that LLMs are run against rely … continue reading
The post JetBrains launches open benchmarking platform for measuring AI productivity appeared first on SD Times.
JetBrains has released a new tool designed to enable developers to measure their actual productivity gains from AI tools. The company’s Developer Productivity AI Arena (DPAI Arena) is an open benchmarking platform for how well AI development tools complete real-world software engineering tasks. According to the company, current benchmarks that LLMs are run against rely on outdated datasets, cover a narrow range of technologies, and focus mainly on issue-to-patch workflows. “As AI coding tools advance rapidly, the industry still lacks a neutral, standards-based framework to measure their real impact on developer productivity,” the company wrote in a blog post. DPAI Arena uses a flexible, track-based architecture to enable reproducible comparisons across workflows like patching, bug fixes, PR review, test generation, static analysis, and more. In addition to supporting multiple workflows, it also supports multiple languages and frameworks and allows for a Bring Your Own Dataset approach where contributors can create and share domain-specific benchmarks leveraging this shared infrastructure for evaluation. JetBrains plans to contribute DPAI Arena to the Linux Foundation to ensure transparency and inclusivity in its governance. A Technical Steering Committee (TSC) will oversee the development of the platform, dataset governance, and community contributions. The first benchmark that JetBrains created was the Spring Benchmark, which is intended to introduce the technical standard for all future contributions. “DPAI Arena brings measurable productivity into the world of AI-assisted software development. AI tool providers can benchmark and refine their tools on real-world tasks, technology vendors keep their ecosystems first-class by contributing domain-specific benchmarks, enterprises gain a trusted way to evaluate tools before adoption, and developers get transparent insights into what truly boosts productivity,” JetBrains wrote. The post JetBrains launches open benchmarking platform for measuring AI productivity appeared first on SD Times.
Ex-Googlers Create an Agentic Lakehouse for Databricks
- NewsWire
- data lakehouse
- Espresso AI
Espresso AI, the LLM-driven optimization platform for data warehouses, today launched a new solution that turns Databricks into an agentic lakehouse. Espresso AI was founded by ex-Googlers who worked on Google DeepMind and have applied their AI research to optimize utilization and reduce costs by 50% across modern data warehouses. “Databricks is seeing explosive growth … continue reading
The post Ex-Googlers Create an Agentic Lakehouse for Databricks appeared first on SD Times.
Espresso AI, the LLM-driven optimization platform for data warehouses, today launched a new solution that turns Databricks into an agentic lakehouse. Espresso AI was founded by ex-Googlers who worked on Google DeepMind and have applied their AI research to optimize utilization and reduce costs by 50% across modern data warehouses. “Databricks is seeing explosive growth with their Data Lakehouse product,” said Ben Lerner, CEO of Espresso. “But if they want to catch up with Snowflake adoption they’ll need to be as optimized and cost efficient as possible. By leveraging Espresso AI, Databricks customers can cut their bill in half and see their efficiency skyrocket without any manual effort.” Three Core Pillars of Espresso AI for Databricks Autoscaling Agent: Espresso AI’s models are trained on a customer’s unique metadata logs. This means the platform understands and can predict spikes and fluctuations, enabling resource and cost optimizations without sacrificing performance. Scheduling Agent: The average Databricks user’s warehouse utilization is between 40% and 60%. That means about half of the bill is wasted on idle machines. Instead of routing each query to a static warehouse, Espresso AI analyzes running workloads to understand where existing machines have extra capacity, and then intelligently routes the queries to those machines for maximum efficiency. Query Agent: Espresso AI optimizes every piece of SQL before it even hits the data lakehouse, leading to improved performance and reduced costs across the board. Espresso AI was founded by three ex-Googlers – Ben Lerner, Alex Kouzemtchenko, and Juri Ganitkevitch – who previously worked on machine learning, systems performance, and deep learning research in Google Search, Google Cloud, and Google DeepMind. The company has raised $11 Million in seed funding from FirstMark Capital, Nat Friedman, and Daniel Gross. The company conducted a 6-month long beta with interest from hundreds of enterprises including Booz Allen Hamilton and Comcast. “Espresso AI cut our bill in half with no lift from our side,” said Nataliia Mykytento, Head of Engineering at Minerva. “They were instrumental in reducing costs that were growing too fast for comfort.” The post Ex-Googlers Create an Agentic Lakehouse for Databricks appeared first on SD Times.
GitHub unveils Agent HQ, the next evolution of its platform that focuses on agent-based development
- Latest News
- AI
- GitHub
During its annual conference, GitHub Universe, GitHub shared its plans for Agent HQ, its vision for the future of the platform where AI agents are natively integrated across all of GitHub. As part of this Agent HQ initiative, over the next several months, paid GitHub Copilot users will gain direct access to popular coding agents … continue reading
The post GitHub unveils Agent HQ, the next evolution of its platform that focuses on agent-based development appeared first on SD Times.
During its annual conference, GitHub Universe, GitHub shared its plans for Agent HQ, its vision for the future of the platform where AI agents are natively integrated across all of GitHub. As part of this Agent HQ initiative, over the next several months, paid GitHub Copilot users will gain direct access to popular coding agents from Anthropic, OpenAI, Google, Cognition, xAI, and more. Agent HQ brings with it several new capabilities to support this next evolution, the first of which is mission control, a central command center for assigning, steering, and tracking the work of multiple agents across GitHub, Copilot CLI, and VS Code. Mission control’s branch controls gives developers granular oversight over running checks for code created by the agents. Identity features will also be introduced to allow developers to manage agents like they would other coworkers and control which agent is building a task, manage access, and implement policies. Other mission control features include one-click conflict resolution, improved file navigation, better code commenting capabilities, integrations for Slack and Linear, and a metrics dashboard so that developers can understand the impact of AI on their work. In VS Code, Plan Mode is being introduced. In this new mode, Copilot will ask clarifying questions as it helps build a step-by-step plan. “Providing the context upfront improves what Copilot can do and helps you find gaps, missing decisions, or project deficiencies early in the process—before any code is written. Once you approve, your plan goes to Copilot to start implementing, whether that’s locally in VS Code or using an agent in the cloud,” Kyle Daigle, COO of GitHub wrote in a blog post. VS Code users will also be able to create custom agents with AGENTS.md files, which let developers set clear rules and guardrails, such as “use table-driven tests for all handlers.” VS Code also now has access to GitHub’s MCP Registry. Additionally, GitHub is also introducing a public preview for GitHub Code Quality, which provides in-context feedback about the quality of code, reliability and maintainability scores, and one-click Copilot fixes. A code review step was also added into the Copilot coding agent workflow to perform an initial review before it even shares the generated code with the developer. And finally, the company announced a public preview for the Copilot metrics dashboard, which shows developers Copilot’s impact and critical usage metrics. “We built Agent HQ because we’re developers, too. We know what it’s like when it feels like your tools are fighting you instead of helping you. When “AI-powered” ends up meaning more context-switching, more babysitting, more subscriptions, and more time explaining what you need to get the value you were promised. That ends today. Agent HQ isn’t about the hype of AI. It’s about the reality of shipping code. It’s about bringing order and governance to this new era without compromising choice. It’s about giving you the power to build faster, with more confidence, and on your terms,” Daigle wrote. The post GitHub unveils Agent HQ, the next evolution of its platform that focuses on agent-based development appeared first on SD Times.
Eclipse Foundation launches ADL, an open language for defining agent behavior
- Latest News
- agents
- AI
- Eclipse Foundation
The Eclipse Foundation today introduced the Agent Definition Language (ADL), an open language and visual toolkit for defining agent behavior. It was introduced as a part of the Eclipse Language Models Operating System (LMOS) project, an open source platform for building and running multi-agent systems. “Agentic AI is redefining enterprise software, yet until now there … continue reading
The post Eclipse Foundation launches ADL, an open language for defining agent behavior appeared first on SD Times.
The Eclipse Foundation today introduced the Agent Definition Language (ADL), an open language and visual toolkit for defining agent behavior. It was introduced as a part of the Eclipse Language Models Operating System (LMOS) project, an open source platform for building and running multi-agent systems. “Agentic AI is redefining enterprise software, yet until now there has been no open source alternatives to proprietary offerings,” said Mike Milinkovich, executive director of the Eclipse Foundation. “With Eclipse LMOS and ADL, we’re delivering a powerful, open platform that any organisation can use to build scalable, intelligent, and transparent agentic systems.” According to the Eclipse Foundation, ADL allows both business and engineering teams to collaborate on defining agent behavior in a maintainable and versionable way. It separates business logic from prompts, which makes it easier to build agents that can change. It is designed so that engineers set it up initially and then business users can continually iterate on the agent rules without needing to write code. “With ADL, we wanted to make defining agent behaviour as intuitive as describing a business process, while retaining the rigor engineers expect,” said Arun Joseph, Eclipse LMOS project lead. “It eliminates the fragility of prompt-based design and gives enterprises a practical path to scale agentic AI using their existing teams and resources.” Anyone interested in trying it out can visit the Eclipse Foundation’s interactive Playground. The post Eclipse Foundation launches ADL, an open language for defining agent behavior appeared first on SD Times.
The personal website of the one and only Joe Fabisevich, and indie developer building Red Panda Club Inc. Formerly an iOS developer working on civic integrity, societal health, misinformation, and other wild things @Twitter.
Artifacts
I. I once knew a wonderful man. He was kind, gentle, and beloved by many. He was so wise that when he graduated from college, Mahatma Gandhi himself handed him his diploma. He was a scholar and a gentleman, blessed with the unique gift of deeply knowing Sanskrit and Hindi. He spent much of his life translating scrolls filled with the wisdom of the ancients into modern language — in pursuit of preserving history.
II. When Mongol troops raided the House of Wisdom and dumped so many manuscripts into the Tigris that “the river ran black with ink”, Muslim chroniclers equated the loss of knowledge to a civilizational catastrophe. Many of the books in the Grand Library of Baghdad were torn apart by pillagers so their leather covers could be made into sandals — compounding the pain of an already destructive act.
III. In 1969, three astronauts planted an American flag on the moon. This event was captured on film and beamed to millions of household television sets, as people across the world shared the experience of witnessing a profound leap for mankind. Our connection to the cosmos had been reshaped — and we still talk about it decades later.
IV. Early internet phenomenons like Charlie the Unicorn, Potter Puppet Pals, and Peanut Butter Jelly Time provided endless entertainment. My older brother introduced me to All Your Base Are Belong to Us, and I showed him lolcats. A few months later, I met a kid I considered sheltered because he’d never heard of Newgrounds — so I showed him everything it had to offer, and we relived the humor together. That rhythm of discovery and sharing lasted for years, as the internet grew at a pace that felt almost unthinkable compared to my early childhood.
I. I once knew a wonderful man. He was kind, gentle, and beloved by many. He was so wise that when he graduated from college, Mahatma Gandhi himself handed him his diploma. He was a scholar and a gentleman, blessed with the unique gift of deeply knowing Sanskrit and Hindi. He spent much of his life translating scrolls filled with the wisdom of the ancients into modern language — in pursuit of preserving history. II. When Mongol troops raided the House of Wisdom and dumped so many manuscripts into the Tigris that “the river ran black with ink”, Muslim chroniclers equated the loss of knowledge to a civilizational catastrophe. Many of the books in the Grand Library of Baghdad were torn apart by pillagers so their leather covers could be made into sandals — compounding the pain of an already destructive act. III. In 1969, three astronauts planted an American flag on the moon. This event was captured on film and beamed to millions of household television sets, as people across the world shared the experience of witnessing a profound leap for mankind. Our connection to the cosmos had been reshaped — and we still talk about it decades later. IV. Early internet phenomenons like Charlie the Unicorn, Potter Puppet Pals, and Peanut Butter Jelly Time provided endless entertainment. My older brother introduced me to All Your Base Are Belong to Us, and I showed him lolcats. A few months later, I met a kid I considered sheltered because he’d never heard of Newgrounds — so I showed him everything it had to offer, and we relived the humor together. That rhythm of discovery and sharing lasted for years, as the internet grew at a pace that felt almost unthinkable compared to my early childhood. V. Millennials remember The Dress as a seminal cultural moment that captivated people for days, but what most don’t remember are the two llamas that escaped a zoo earlier that day and caused a commotion along the way. To my recollection, this was the first viral moment that was overtaken by another so quickly that it might as well not have even happened. VI. Last week I watched a very funny TikTok. It was a meme that dominated everyone's feeds for about eight hours — but then we collectively forgot it ever existed and moved on to the next funny video. As people willfully turn themselves into content creators, information disseminates faster than ever. The half-life of any artifact grows shorter, and the societal impact of any captured moment becomes increasingly fleeting. The purpose of writing, art, and creation has always been human connection — but as the goal shifts to pleasing an opaque algorithm, the creations themselves have become less meaningful. I expect this trend will only accelerate as more of our economy becomes tied to clicks and views, and as the act of creation grows more frictionless with the proliferation of AI. Artifacts are our distillations of history — they encapsulate and preserve the human experience. Our world is built on the artifacts of those who came before us — people who cared enough to share, document, and build something that outlasted themselves. It is a spiritual experience to create something new in this world — to turn a figment of our imagination into a shareable element of the universe. I do my best to fill my days with artifact creation — shunning the incentive structures the modern world creates when I can — to tap into the essence of what drives me to create artifacts that will outlive me. I don’t spend all my time creating my own artifacts; there is often more to be gained by sharing myself, so others can create their own artifacts that bring meaning to them and others. In a way, that transfer of knowledge is itself a transient artifact — just like a years-long running joke between me and my wife, a kiss we share, or a wedding vow we made, is an artifact of our love. Almost everything I consciously do is related to creating or preserving artifacts — but the artifact is only a small part of who I am. It’s no coincidence that I’ve aligned the time I spend on earth with the way I make a living with my values. Anything meaningful is worth doing, and worth preserving. What people see is the result of hundreds or thousands of hours of work that went into creating the artifact — and the hundreds of thousands of hours I’ve lived that led to it. But an artifact can never truly capture my full experience. It is a synthesized approximation. At best, it’s a low-fidelity version of my lived reality — not the life itself, but the echo. And yet, when thoughtfully preserved, the artifact will outlive me.
You Should Feed Ducks The Good Bread
Colleen and I were binge-watching Gossip Girl last winter, and there are a few scenes where a stressed and irate Blair Waldorf wanders over to Central Park to feed the ducks. I told Colleen, "that sounds soothing — we should do that when the weather gets better". And then, as I’m wont to do, I promptly forgot. But Colleen takes note of moments like that, and a few months later she reminded me: we should actually go feed some ducks.
That’s how I found myself in Central Park last weekend, feeding ducks. It was the first beautiful day of spring in New York — the kind of day New Yorkers wait for, when everyone pours out to enjoy sunlight finally breaking through after a long dark winter. We had a picnic, strolled through the park, wandered amidst thousands of New Yorkers — and of course, we fed the ducks.
My wife (who I should preface is an extremely kind, caring, and loving person) and I got into a small debate over what kind of bread to feed the ducks. I insisted on buying them a nice loaf, and she felt it was unnecessary — the ducks would happily take our scraps. I argued that buying a good loaf cost us very little but could potentially make their day. Heck, it could even possibly be the best meal they ever have. She replied that there’s no way to know if they’d even notice the difference — to them, it might just be one carb versus another.
Three Philosphers InterjectI bought the dang bread, and she didn’t mind. I spent the whole afternoon thinking about that moment, and why it meant so much to me. In the end, I came back to three philosophers and their philosophies.
Colleen and I were binge-watching Gossip Girl last winter, and there are a few scenes where a stressed and irate Blair Waldorf wanders over to Central Park to feed the ducks. I told Colleen, "that sounds soothing — we should do that when the weather gets better". And then, as I’m wont to do, I promptly forgot. But Colleen takes note of moments like that, and a few months later she reminded me: we should actually go feed some ducks. That’s how I found myself in Central Park last weekend, feeding ducks. It was the first beautiful day of spring in New York — the kind of day New Yorkers wait for, when everyone pours out to enjoy sunlight finally breaking through after a long dark winter. We had a picnic, strolled through the park, wandered amidst thousands of New Yorkers — and of course, we fed the ducks. My wife (who I should preface is an extremely kind, caring, and loving person) and I got into a small debate over what kind of bread to feed the ducks. I insisted on buying them a nice loaf, and she felt it was unnecessary — the ducks would happily take our scraps. I argued that buying a good loaf cost us very little but could potentially make their day. Heck, it could even possibly be the best meal they ever have. She replied that there’s no way to know if they’d even notice the difference — to them, it might just be one carb versus another. Three Philosphers Interject I bought the dang bread, and she didn’t mind. I spent the whole afternoon thinking about that moment, and why it meant so much to me. In the end, I came back to three philosophers and their philosophies. John Rawls John Rawls’ Veil of Ignorance is a thought experiment about how to design a just society. Imagine yourself behind a veil of ignorance, where you don’t know your place in that society. You don’t know your race, gender, class, talents, or job — and because you could end up a CEO or a janitor, you’d rationally choose to build a society rooted in fairness and decency for all. Now imagine you’re born into a world where you could be a human or a duck. Humans shape the world to their whims, while ducks hunt for scraps and take handouts from strangers. What if you were the duck — not the one giving bread, but the one hoping someone kind might offer you a piece? That’s the essence of contractualism. This is not a truly just world — but it is our world. Blaise Pascal Pascal’s Wager is a similar framework — but more inward-looking. Blaise Pascal argued that the only rational thing to do is believe in God. Why? If you believe in God and you’re right, you gain infinite reward: a spot in heaven for the rest of eternity. If you believe in God and you’re wrong, you lose a little: some wasted time and lifestyle shifts. If you don’t believe in God and you’re wrong, you risk infinite loss: eternal fiery damnation. If you don’t believe in God and you’re right, you only gain a little: temporary freedom and earthly pleasures. I think about Pascal’s Wager a lot — not just when I’m wondering about my everlasting fate. Feeding ducks good bread isn’t exactly a God-tier question, but I do often ask: what are the consequences of my choices if I’m right or wrong about my assumptions? It’s often worth putting in the extra effort — because maybe I’m wrong, and there’s more to this mortal plane than I know. Immanuel Kant And then we have Deontology — or more specifically, Kantian Ethics. Kant believed that morality isn’t about outcomes or self-interest — it’s about duty, reason, and universal principles. His Categorical Imperative says: Act only according to that maxim whereby you can at the same time will that it should become a universal law. That's a philosophical way of saying Kant believed in the Golden Rule. If I were a duck, I’d want the good bread just like any person does. And so, as a human, I have a responsibility to feed ducks the good bread. Back to Central Park Reader, I did not feed the ducks the good bread. Not because I’m morally bankrupt — we simply did not find enough ducks to feed the giant loaf of bread I’d stressed about all day. The few we did find got some decent sandwich bread leftover from our picnic. When I got home, I left out the remainder of our picnic for the neighborhood birds — some fruit that they seemed to appreciate. The next day, we used the good bread to make delicious sandwiches and played lovingly with our little cat. Not feeding the ducks wasn’t a moral failing — it was just a coincidence. Sometimes, you need to find more ducks in your life so you can feed them the good bread. Spend some time looking for a duck to feed — you might be surprised how much it fills you up, too. Look — no one really knows how any of this works. Not Kant, not Pascal, not Rawls. But I feel pretty strongly that small acts go a long way. So when you get the chance, you should feed ducks the good bread. Metaphorically speaking, of course. It turns out that bread isn’t great for ducks, and ethics are complicated — but kindness is always warranted.
A Trick For Opening Magic Links in Your RSS Reader
This blog post is documentation for a very specific problem I run into about once a year. That’s rare enough to forget how I solved it, but frequent enough to waste 15 minutes rediscovering the answer. And let’s be honest: it’s not the big problems that drive you mad — it’s the little ones that feel like their own Sisyphean hell.
The ProblemSome websites 1 require you to log in using a magic link — a one-time link emailed to you that signs you in when clicked. It’s usually seamless. But on iOS, it can quietly become a headache. 2
This blog post is documentation for a very specific problem I run into about once a year. That’s rare enough to forget how I solved it, but frequent enough to waste 15 minutes rediscovering the answer. And let’s be honest: it’s not the big problems that drive you mad — it’s the little ones that feel like their own Sisyphean hell. The Problem Some websites 1 require you to log in using a magic link — a one-time link emailed to you that signs you in when clicked. It’s usually seamless. But on iOS, it can quietly become a headache. 2 If you open the link in your default browser, everything’s fine — no issue at all. But I do most of my reading in my RSS app, Reeder. When I run into a short-form RSS feed 3, I’ll tap to open the article in SafariViewController — the in-app browser you see in apps like Reeder, or my own app, Plinky. It’s an easy way to read the full article in a browser without leaving the app you’re already in. The Problem (Simplified) I open a link to paywalled content, like the excellent tech newsletter I subscribe to: platformer.news. Platformer’s hosting provider, Ghost, emails me a magic link to log in and access the content I pay for. But there’s no way to open that sign-in link inside Reeder’s SafariViewController. If I click the link, it opens in the iOS default browser — and there’s no way to force it to open in Reeder’s SafariViewController instead. 4 I can’t even copy and paste the link, since SafariViewController has no address bar. The Solution Every time I run into this issue, I end up coming back to the only solution that actually works. My favorite RSS provider, Feedbin, has a clever feature: it lets you generate a unique email address (like xyz123@feedbi.in) that turns incoming emails into an RSS feed. 5 It’s meant for forwarding email newsletters into your RSS reader — a nice way to keep all your reading in one place. But in a pinch, it’s also a great trick for accessing any email inside your feed. I can’t tell Platformer to send the magic link directly to that Feedbin address, because my login is tied to my personal email — but I can forward the email there myself. Since I’m already subscribed to that email-based RSS feed, the message shows up in Reeder. Now I can tap the login link in Reeder, which opens SafariViewController — and just like that, I’m signed in. 🌟 Finally, I can read the paywalled content I actually paid for! 🌟 Conclusion While I hope this post helps someone else out there, let’s be honest — it’s really written for me, 12 months from now, when I’ve forgotten all of this again. 😒 Such as all paid Ghost newsletters↩↩ . You can’t even long-press and copy the link, because that will load the authentication page, invalidating the link’s effectiveness.↩↩ Some websites don’t offer the full content of an article in the RSS feed. This can happen for a few reasons, but the most prominent is because the content lives behind a paywall, and this prevents free access to paid content.↩↩ I did actually add a URL scheme for this in Plinky, because I know firsthand how this can be an issue!↩↩ In case you don’t use Feedbin there are many services which are just as good and handle this specific problem.↩↩
Lights, Camera, Action Button
The iPhone 15 Pro launched with a marquee feature, the Action Button. The Action Button set out to replace the mute switch, which had existed since the first iPhone was released back in 2007. The Action Button is a software-powered button, replacing what previously was a hardware switch that would toggle your phone’s silent mode on or off.
The appeal of the Action Button was that now you could decide what the side button should do for you. If you wanted it to be a mute switch, no problem, the Action Button can still be one. But if you want to use it to toggle your flashlight, launch the camera, or turn on Do Not Disturb mode, these alternatives and more are now possible. The unspoken downside has always been that it’s hard to decide what the Action Button should do, if it can only do one thing.
The iPhone 15 Pro launched with a marquee feature, the Action Button. The Action Button set out to replace the mute switch, which had existed since the first iPhone was released back in 2007. The Action Button is a software-powered button, replacing what previously was a hardware switch that would toggle your phone’s silent mode on or off. The appeal of the Action Button was that now you could decide what the side button should do for you. If you wanted it to be a mute switch, no problem, the Action Button can still be one. But if you want to use it to toggle your flashlight, launch the camera, or turn on Do Not Disturb mode, these alternatives and more are now possible. The unspoken downside has always been that it’s hard to decide what the Action Button should do, if it can only do one thing. There are ways to set up the Action Button to show a menu of actions, but that makes the Action Button less convenient. You can use hacks like Federico Viticci's MultiButton, which made it possible to assign separate tap and double-tap actions to your Action Button. These workflows and many others were built off of the Action Button’s ability to run a Shortcut, but none of them ever stuck for me. While you may get a more powerful Action Button, you also get a more complicated one — trading off flexibility for fiddliness. Then after 18 months with the iPhone 15 Pro, I had a breakthrough. This idea came to me in a dream (literally, not metaphorically), and last month I discovered a way to use the Action Button that is useful across apps, without tying myself to one action for the Action Button. Our First App-Specific Action My most common use case for the Action Button has always been to save links from my clipboard to Plinky, the link-saving app I make. You may be thinking, “Plinky has a share extension which lets you save links from any app, so why do you need the Action Button to save links from the clipboard?” Because the app I send and receive links from most, Messages, surprisingly does not have a share button. Before mapping the Action Button to a “Save Link to Plinky” Shortcut, whenever a friend sends a link to me over iMessage I would have to go through multiple steps to save a link. Copy the link into my clipboard, open Plinky, and save the link manually. This was tedious, especially if I wanted to save multiple links, so I decided to take advantage of Plinky’s built-in Shortcuts support to create a one-tap action, letting me save links from anywhere. At the same time, this action is mostly useful to me in Messages — it's not as important when I'm in an app like Safari or Slack. This meant we were back to where we started: there's this really useful action mapped to my Action Button, but I don't need it all the time. That got me thinking, why can't I create one dedicated action per app, which I can use to build a more flexible Action Button? An iOS 18.2 Interlude iOS 18.2 brought a very important change to Shortcuts, one that made the technique I’m about to share possible. There is a new Get Current App Shortcut block, which unsurprisingly, will tell you what app you currently have open. Once I was able to figure out the current app, it became possible to conditionally run actions based on the current app. Action Mode Now that we have all of the necessary pieces, we can build out our custom App-Specific Action Button workflow. (I’ve called mine Action Mode.) Let’s walk through this image step by step, to see what’s happening here. It’s a bit long, but I promise it’s not scary. We set our Shortcut to receive input from the Share Sheet. This allows us to run this Shortcut from an assortment of locations. If there is no input, I’ve chosen to fallback to the Get Clipboard function. We create a bunch of if blocks, one per app. This will allow us to run a different action based on the result of Current App. You’ll notice there are no else blocks, we’ll get to that in a little bit. When Current App is equal to an app we’ve chosen to have a Custom Action, we now run said Custom Action. That Custom Action can be anything, it doesn’t even have to be related to the current app we’re in. (As you see in the example when the Current App is Messages.) You can create as many Custom Actions for as many apps as you’d like, the only limit is your imagination. At the end of the list we have a Fallback Action block. This is an optional action to run if press the Action Button outside of an app with a Custom Action. I’ve mapped it to adding a Reminder to my Groceries list, an action I take often. Note: The way we know to enter the fallback action block is a bit unconventional, and is predicated on the hasRunAction variable. Instead of having infinitely nested else blocks for every Current App check, we populate the hasRunAction variable whenever we run a Custom Action. This is slightly more error prone because we can forget to populate the hasRunAction variable, but leaves our Shortcut significantly more manageable and flexible. Long Live Apps The great thing about this system is that it’s easy to get started, and easy to add new apps to your workflow the more ideas you come up with over time. I started off with a handful of apps, but now it’s grown to over a dozen. A few examples for how I’m using my App-Specific Action Button: Plinky: Open my Reading List App Store: Open the App Updates tab - Via URL scheme: itms-apps://apps.apple.com/updates Castro: Toggle the sleep timer (so I can listen to a podcast while falling asleep) ChatGPT: Start a new ChatGPT Voice conversation Craft: Open my Plinky Roadmap doc Fantastical: Switch to my Personal Calendar Set GitHub: Open the repo of Boutique (my most popular open source project) Ivory & Mona: Generate a screenshot of the Mastodon post in my clipboard Messages: Save the a link from my clipboard to Plinky MyWater: Log 12 ounces of water Photos: Open the Favorites album Safari: Open Reader Mode Slack: Switch to my Red Panda Club Slack - Via URL scheme Things: Open my Today list These are just my workflows, but the possibilities for configuring your Action Button are personal and limitless. If you need a template to start with, here is the Action Button Sample Shortcut I created, identical to the screenshot above. Now all that’s left to do is to assign our Action Mode Shortcut to the Action Button, which we can do in the iOS system Settings. And viola, that’s the App-Specific Action Button system — some would call it a Shortcut — to a better workflow.
Introducing Plinky: My Love Letter To Links
The post below was written by me, originally featured on the Plinky blog.
To celebrate the launch of Plinky you can get 50% off of a yearly subscription by redeeming this offer: plinky.app/offer/REDPANDA
The post below was written by me, originally featured on the Plinky blog.
To celebrate the launch of Plinky you can get 50% off of a yearly subscription by redeeming this offer: plinky.app/offer/REDPANDA
There are few words I've ever said more excitedly than these: I want to tell you about my latest app, Plinky.
Plinky makes it incredibly easy to do something we do every day, save links for later. You may already have a way to save links, I know I've tried every method under the sun, to the point where I decided to build my own app. That app is Plinky, and today it's available to download on the App Store. Over the last 18 months people have been loving Plinky, because it fixes the same problems I ran into when I've tried to save links in the past.
The post below was written by me, originally featured on the Plinky blog. To celebrate the launch of Plinky you can get 50% off of a yearly subscription by redeeming this offer: plinky.app/offer/REDPANDA There are few words I've ever said more excitedly than these: I want to tell you about my latest app, Plinky. Plinky makes it incredibly easy to do something we do every day, save links for later. You may already have a way to save links, I know I've tried every method under the sun, to the point where I decided to build my own app. That app is Plinky, and today it's available to download on the App Store. Over the last 18 months people have been loving Plinky, because it fixes the same problems I ran into when I've tried to save links in the past. I tried filling up Apple Notes with links to come back to later, but that proved to be a disorganized mess. I tried leaving browser tabs open with links I wanted to look at later, but the links I needed later got lost amongst the dozens of tabs I had open for right now. I even tried spending hundreds of hours using apps dedicated for reading articles later, but not all links are for reading. All of that led me to build Plinky, a home for your links. Why I Built An App To Save Your Links I love links. I love reading links, I love it when people send me links to funny videos, I love collecting links, and I love sharing links. Something else I love is my fiancée Colleen. Shortly after meeting Colleen discovered how much I love links, and I'm very grateful that she found that to be an endearing trait. While she loved that I was thinking of her and sharing interesting articles, recipes to cook together, or cute animals I knew she'd like, she quickly found it distracting to have her phone buzzing with all the links I'd share while she was working. She suggested saving the links for later, so we could look at them together at night. That’s when I started working on a small project, a home for these links, an app that would become Plinky. I started to show people the app I'd made for the two of us, and they loved it. They were all saving links they needed but were unhappy with one thing or another. They kept telling me that they wanted an app like this for themselves. A few months later when I left my job at Twitter to start my own company building personal, playful, productivity apps, I decided that the app I needed to build for all of these people was Plinky. Plinky became more than an app to Colleen and I, it became an essential tool in our lives and a ritual. Sometimes Colleen would save a cute picture of a red panda for me, sometimes I would save an activity we could do next weekend, but every night the two of us would come together and share the links that we'd saved for each other. To this day we still have plink time, where we lay in bed and show each other the links we've for each other. Links come in all forms. An article just isn't the same as a Tweet or Instagram post you want to show a friend. A YouTube video or TikTok won't even open in an app dedicated to reading. Many apps like LinkedIn or Facebook have their own bookmarking systems, but I've wasted hours bouncing from app to app trying to remember where that link I saw a month ago but need now is. As I’ve built Plinky I've heard people tell me about the myriad of techniques they have for saving and storing links. There are an unending amount of organizational methods people use to reference links they might need later, but none of those perfectly fit into one app. The experience of listening to Plinky's beta testers led me to three realizations: It needs to be easy to save a link, the simpler the better. Saving a link shouldn't take work, it needs to be one tap, so you can easily save a link. People's workflows benefit from having a universal inbox for their links. It should be easy to organize and find links you've saved for later, otherwise why are you even saving them? People aren't always looking for an app dedicated to reading articles. The diversity of links people save means many people are looking for a tool that helps them do anything with the links they've saved, a Swiss army knife for their links. This is where Plinky comes in. Plinky: Saving Links Made Effortless Plinky makes it easy to save a link for later. You can save links from anywhere with just one tap. Whether you’re on the iPhone, iPad, or Mac, in your favorite browser like Chrome, Firefox, and Safari, or want to build personalized workflows using integrations like Zapier, Unread, Shortcuts, or Plinky's API, saving a link for later couldn't be easier. Plinky is highly customizable. You can make the app look, feel, and behave however you like. The links you save are very personal, as is what you want to do with them after they're saved. People have all sorts of workflows, so it’s a core goal of mine to make Plinky easy enough for my mom to use (she really is a big user), yet something you can infinitely tweak to make Plinky a perfect place for your links. Plinky has organizational features like Folders, Tags, Search, and Pinned Links. Each of these provides an opportunity to mold Plinky to your needs, and makes it very easy to find your saved links later. What's Next For Plinky I'm continuing to build upon these three pillars: ease, customization, and organization. Over the coming months Plinky will have the ability to: Add timed reminders for your links, for the purpose of reviewing a link in a certain time or context. Import your links from services like GoodLinks, Raindrop, Pocket, and other places you may already have your links saved. Create Secure Folders, giving you a space for more sensitive links protected by TouchID and FaceID. Indulge in an elegant reading experience that lets you customize fonts, sizes, and background color for the ideal read it later experience. Enjoy a native Mac app, one that takes the beautiful design Plinky already provides on iPhone and iPad and makes it feels right at home on the Mac. Have more ways to build personalized workflows around your links. It's easy to tag a link, but it should always be getting easier. Pinning links helps you prioritize some links over others, but the best experience will be even quicker. Plinky's search is powerful but it can get even more helpful by searching every word of a webpage you save. A Favor, If I May If you've made it this far I want to say thank you to you for caring so much about the app I've made. Plinky is the result of more than 1,500 hours of work. If that doesn't emphasize how much of my heart, sweat, and tears are in Plinky, I'm not sure what will. I'm truly excited about the idea of spending another 1,500 hours making Plinky better for you, then 1,500 more hours after that. If I may ask: Please download Plinky and try the app. I would love to know what you love about Plinky, what can be improved, or what I can do to make Plinky an integral part of your life. If you like the app, I would greatly appreciate a rating or review. Ratings decide the success or failure of apps the App Store, and as much as I hate to ask, I would like to succeed because that means I get to continue building an app that strives to make your links better. Tell your friends. I hope it's not too gauche to ask, but I genuinely believe that Plinky can help improve many people's lives. Every person who tries Plinky may be a person who's now using an app that makes their life a little better, and nothing in this world makes me happier getting a chance to help others. Thank You While you can say that I built this app, nothing in this world happens alone. I've had a lot of help along the way, and want to make sure anyone who's helped even in the smallest way is honored in Plinky. Plinky has a Thank You section on the About Red Panda Club screen where I've assembled everyone who's helped me while I've been building Plinky. The rest of this post was written for me and my loved ones, but you’re free to read it as well. I would like to first mention my wonderful fiancée and soon to be wife Colleen. Thank you for supporting me with your love, your advice, your daily feedback, and the hours of hands on help you provided over the last few months in creating and solidifying Plinky's launch plan. I love you, and because of you my dream is now a reality. Thank you to my family for cheering me on this whole time, without you I wouldn't be the person I am today. Plinky is a personal expression of who I am and the way I want to help make the world a slightly easier to navigate place. If it wasn't for you I wouldn't have that perspective, so thank you for instilling those values in me. Thank you to Joey Banks for being a great friend, for our weekly calls, and for your help in shaping Plinky's App Store screenshots and website. Because of you I was able to show the world what I've built in the way that reflects what I wanted people to see. While I'm here bragging about my friend, if you're looking for the world's foremost expert in Figma, you should reach out to Joey. Thank you to all of the beta testers who have provided endless ideas, feedback, and guidance over the last 18 months. Plinky wouldn't look or work the way it does today without your amazing ideas, and of course your extremely helpful bug reports. If you've provided a suggestion during Plinky's beta then odds are it's already been implemented, or is on the Plinky roadmap I've constructed for the next year and beyond. Thank you to anyone who's helped me over the last few years, whether or not that involves Plinky. The last few years haven't been easy, and while I can't always be strong, I can't always be brave, what I can always be is grateful and appreciative. Now if I may leave you with a few words: Be good to others, help those in need, and save a few links.
The Reasoning Computer
The Turing test is dead, and we killed it. The Turing test is a test of a machine's ability to exhibit intelligent behavior equivalent to, or indistinguishable from, that of a human. From the 1940s 1 to the 2010s people programmed computers, and computers could only do what they were programmed to do in a rules-based deterministic manner. Sometimes a person would program the computer and it would do something unexpected, but 100 out of 100 times the computer was doing what it was programmed to do whether the person liked it or not. While there has been experimentation with what today we call AI since the 1950s, those machines were a long ways away from passing the Turing test.
Why does using ChatGPT feel more like a conversation with the smartest person you know than a computer? It's because ChatGPT doesn't solve problems deterministically the way a programmed computer does, it solves them probabilistically. 2 ChatGPT demonstrates the ability to think about something in a logical, sensible way, the definition of reasoning. 3
We've created something completely new here, a reasoning computer. 4
The Turing test is dead, and we killed it. The Turing test is a test of a machine's ability to exhibit intelligent behavior equivalent to, or indistinguishable from, that of a human. From the 1940s 1 to the 2010s people programmed computers, and computers could only do what they were programmed to do in a rules-based deterministic manner. Sometimes a person would program the computer and it would do something unexpected, but 100 out of 100 times the computer was doing what it was programmed to do whether the person liked it or not. While there has been experimentation with what today we call AI since the 1950s, those machines were a long ways away from passing the Turing test. Why does using ChatGPT feel more like a conversation with the smartest person you know than a computer? It's because ChatGPT doesn't solve problems deterministically the way a programmed computer does, it solves them probabilistically. 2 ChatGPT demonstrates the ability to think about something in a logical, sensible way, the definition of reasoning. 3 We've created something completely new here, a reasoning computer. 4 Working With A Reasoning Computer There are so many political, societal, economic, and ethical implications of Large Language Models (LLMs), 5,000 words wouldn’t be enough to cover all those thoughts. (Trust me, there’s a much longer post sitting in my drafts.) But what’s really captivated me is why a reasoning computer really is different than anything we’ve used before, a conclusion I could only arrive at through experience. ChatGPT has been an essential tool for me over the last month, especially over the last week as I've been building Plinky's browser extension. I'm a very experienced iOS developer but have little experience with web development. I know enough TypeScript and React to cobble together something with lots of help and guidance, but it will take me much longer than someone who knows what they're doing. A browser extension is important for Plinky to be successful though, which presents a unique challenge: I know what I want, I know how to describe it, I don't quite know how to get it, but I will know when ChatGPT gives me the wrong answer so with some nudging I can get what I'm looking for. Here's why the process of pairing with ChatGPT works, and how it helped me build a fully functional browser extension that lives up to my standards in less than a week. (With far less frustration than if you took away the tool and gave me a whole month.) A simple browser extension to save links to Plinky's database is a much smaller problem than building a whole app. The problem is self-contained, which makes it quick and easy to test ChatGPT’s results and see if the output matches my expectations. In fields like mathematics or computer science it's generally easier to verify a solution's correctness than come up with a solution in the first place. I may be a novice web developer but I'm a great programmer. Even in a domain where I’m not comfortable I can describe the problem I'm trying to solve, assess whether a solution is good, do some research (on my own or with the aid of Perplexity and ChatGPT), and nudge the reasoning computer in the right direction. This isn't a process where I ask for something and am given exactly what I want, but I can promise you it's much easier than becoming a good enough TypeScript developer to build the high quality browser extension I want. Little by little the browser extension looks and works more and more how I want it to be, until it does exactly what I want it to do. The whole process is interactive so I’m learning about how to get to the right solution. Not only do I have what I want, but this iteration made me a better web developer, I started off only knowing what the wrong output looks like but now I also know how the correct solution should look. This is just one example of how I was able to accomplish something I previously wouldn't have been able to do thanks to an LLM, the number of tasks I turn to LLMs for is growing every day. The same way that GPS becoming ever-present means I haven't opened a map in almost two decades, I find myself turning to ChatGPT or Perplexity rather than opening Google and clicking a bunch of links to find answers. I used to do my own research, I used to be the reasoning machine, but now I'm offloading more and more of that work to Large Language Models. How Can A Reasoning Computer Even Work? People will say that ChatGPT can't do math, and that's true in the most literal sense. A Large Language Model may not know what addition and subtraction mean to a human, but it can synthesize the correct results to add and subtract numbers better than a person. Similarly people point out that ChatGPT can't read, because it's just a stochastic parrot that means it can't provide intelligible output. It's true that LLMs are complex statistical models, yet despite ChatGPT not knowing English from Urdu the way people do it's still capable of translating from English to Urdu to Russian to French in a way that I never would be able to. The fact that Github Copilot 5 doesn't actually know the difference between JavaScript and Swift hasn't stopped it from making programmers 55% faster at coding. Large Language Models use a different form of problem solving that starts with inputs and extrapolates technique. That's the reverse of how humans believe they develop their skills, if you study hard, read a lot, and put in enough hours as a writer you too can become the next Faulkner or Shakespeare. But think about the way you first learned your native language, you listened and watched the world around you for 1-2 years, then reverse-engineered how the technique works. We're reasoning machines too, the difference is that the entirety of the internet wasn't preloaded into our brains the way it was into an LLM. (For the best, I don't know if you know but there's some bad shit on the internet.) When we say ChatGPT can't do this or ChatGPT can't do that what we're doing is anthropomorphizing flaws onto the system, derived from our own experiences of solving problems successfully. The problem solving process may be difficult for people to understand because this is the first computer that doesn't do exactly what you tell it to do. Our intuitions may view this as a flaw, but OpenAI loading the whole internet into ChatGPT and creating a simple model for how to think rather than directly programming the machine is the reason this computer is incredibly useful in new and previously unexplored ways. Simon Willison says that these tools make you more ambitious with what you can accomplish, and I'd like to build upon his axiom. When you have a reasoning computer you only have to know what the wrong result looks like, not how to get the right result, and that alone has the power to change how society solves problems. Ada Lovelace deserves credit for writing the world's first computer program 100 years before ENIAC, but in this context I'm using the timeframe of the 1940s to focus the post on generally programmable computers.↩↩ It's perfectly fair to debate whether this is how the inner-machinations of ChatGPT work, but I feel very strongly that at a minimum you can say this about the output ChatGPT provides.↩↩ This isn’t because ChatGPT is sentient, but in all likelihood because it was trained on a corpus of human-generated data. It's difficult to define "thinking" in this context, my personal view is that there is no thinking without sentience, but in this context what I call thinking isn't the low-level internal machinations of ChatGPT, but one level higher — the step by step token output process that people using ChatGPT see in the process of getting their result.↩↩ I'd like to co-credit Joe Ugowe with coining this term, it stemmed from a wide-reaching discussion we had last night about our experiences with ChatGPT and Large Language Models.↩↩ Github Copilot is a Large Language Model product like ChatGPT, but trained with a coding-specific focus, which allows it to be integrated into a whole suite of Microsoft's programming-related tools and platforms.↩↩
The Present Should Be Signed
When I wrote The Future Will Be Signed almost six years ago the latest in AI advancements was Google Duplex. If you're like me and have never used Google Duplex, it's a feature of Google Assistant that could make calls on behalf of a person and automatically perform a task, such as booking restaurant tables. While you may have never heard of Google Duplex there's a good chance you've used a generative AI tool like ChatGPT, Midjourney, or GitHub Copilot.
AuthenticityWe’re going to need a way to prove the authenticity of a piece of digital content, everywhere, in a simple manner. This is where public key cryptography comes in. Our current solutions are noble efforts, but remain too complex.
It's quite an understatement to say that AI has come a long way since 2018, and yet the blog post's core thesis is even stronger today than when it was written. At the time I was concerned about a future where deepfakes, audio manipulation, and text generation spread across the internet. We're now living in the beginning of that future, this is our present. It has never been faster or easier to generate inorganic content, the tools to do so are more usable and accessible than ever.
AI already has us questioning what we see on the internet, and the problem isn't going away. Fake news articles are being written by ChatGPT, fake books are being written with ChatGPT, and of course fake reviews made up by ChatGPT are being used to sell all of this.
When I wrote The Future Will Be Signed almost six years ago the latest in AI advancements was Google Duplex. If you're like me and have never used Google Duplex, it's a feature of Google Assistant that could make calls on behalf of a person and automatically perform a task, such as booking restaurant tables. While you may have never heard of Google Duplex there's a good chance you've used a generative AI tool like ChatGPT, Midjourney, or GitHub Copilot. Authenticity We’re going to need a way to prove the authenticity of a piece of digital content, everywhere, in a simple manner. This is where public key cryptography comes in. Our current solutions are noble efforts, but remain too complex. It's quite an understatement to say that AI has come a long way since 2018, and yet the blog post's core thesis is even stronger today than when it was written. At the time I was concerned about a future where deepfakes, audio manipulation, and text generation spread across the internet. We're now living in the beginning of that future, this is our present. It has never been faster or easier to generate inorganic content, the tools to do so are more usable and accessible than ever. AI already has us questioning what we see on the internet, and the problem isn't going away. Fake news articles are being written by ChatGPT, fake books are being written with ChatGPT, and of course fake reviews made up by ChatGPT are being used to sell all of this. Trust This infrastructure is going to have to be baked directly into the software that developers build, in a way that is transparent to the end user. A politician (or anyone) needs to be able to sign a tweet, audio recording, or video clip to prove authenticity of what they are saying. With the creation and fabrication of content being so easy, we’re going to need a model where the person creating the content can prove it is trustworthy, and otherwise it should be treated as inauthentic. When I worked on Twitter's Societal Health team I spent a lot of time thinking about misinformation, disinformation, abuse, harassment, and civic integrity. These issues often took the form of coordinated inauthentic behavior by large groups of people trying to manipulate people and the public conversation. The scale of the problem seemed enormous, now it's larger than ever, and only getting bigger. We still need tools to help us differentiate authentic and inauthentic behavior or content, but there haven't been many meaningful efforts to build authenticity into the products people use. Arguably the largest advancements have come from a technology I personally have few positive feelings about, cryptocurrencies. When you believe everyone is an adversary then you need to build systems for trust. Bitcoin, Ethereum, and other crypto projects have shown that you can build a system based on public key cryptography that ensures a sense of truth. You may not like what that truth is, and it's easy to do so because of all the "Web3" that have been hilariously misused and abused in a seemingly unending amount of ways. I'm not pinning my hopes to the blockchain solving our trust problem, but I appreciate that much better user experience paradigms for trustless systems have emerged over the last five years because they were necessary for crypto to succeed. Scale In some ways the problems are actually worse than ever. Anyone can buy verification on X Twitter and impersonate their favorite brand. People have grown hostile and are treating platforms as adversaries because platforms no longer care about the people using their product. Platforms are even stealing usernames from active users, how can anyone trust what they read online when they don’t know who’s writing it? Platforms are treating their users as adversaries as well. If you get locked out of your Google account you might as well consider your digital life gone. A company like Google doesn't and can't scale support to the level of personal help we've historically been accustomed to in common society. Protecting user safety means support agents must assume that someone writing them for help is a scammer, fraudster, or hacker trying to break into someone else's account. The incentive structures for helping people are all backwards because the risk of Google turning over someone's Gmail account to the wrong person far outweighs the positives of helping thousands of people. This may only affect 1/100,000 people, but when you're that 1 person, losing your entire digital identity is horribly destructive experience. People need a sense of trust, some shared truth, and we're still in search of that online. As more of our lives happen on an inherently untrustworthy internet the status quo becomes more and more untenable, something has to give. Things will either get better or they will get worse, and based our approach of trying nothing and being all out of ideas, they are likely to get worse. The guardrails are coming off the system, if we wait too long then trust in our systems online and offline may fully erode. It's discouraging that we can't figure out a way to solve the problems we have today, but an even bigger repudiation of the status quo is that we don't even talk about this large systemic risk, and probably won't until it's too late.
Displaced And Disillusioned On The Internet
Sometimes I think about all of the societal issues I cared about 10 years ago: privacy, government overreach, and platform accountability. More and more as I look at the technological landscape it feels like none of that care seems to have mattered.
When I worked on the Societal Health team at Twitter I had a voice and direct impact on these matters. If the feedback I received and still hear from my peers and higher ups holds true, that voice was not only well-received but considered thoughtful and led to meaningful change. With hindsight I can't say that every choice we made was right, there are few easy answers and no correct answers, but we made the best decisions we could with the information we knew at the time. These days I build indie apps like Short Circuit and Plinky for many reasons, it's what I think will make me truly happiest right now, but one of my reasons is to carry less emotional weight on my shoulders. I still have my morals, but without having the position I once had it’s harder than ever to translate my values into change.
The self-induced immolation of Twitter has caused a schism with the community I formed, cultivated, and connected with on the platform. People I follow, people I learn from, and many people I’d call my friends have all scattered to the four winds across a myriad of text-based social networks. I’ve spent the last week thinking about whether to join the latest Twitter-esque social network Threads, where many people close to me have made their way.
Sometimes I think about all of the societal issues I cared about 10 years ago: privacy, government overreach, and platform accountability. More and more as I look at the technological landscape it feels like none of that care seems to have mattered. When I worked on the Societal Health team at Twitter I had a voice and direct impact on these matters. If the feedback I received and still hear from my peers and higher ups holds true, that voice was not only well-received but considered thoughtful and led to meaningful change. With hindsight I can't say that every choice we made was right, there are few easy answers and no correct answers, but we made the best decisions we could with the information we knew at the time. These days I build indie apps like Short Circuit and Plinky for many reasons, it's what I think will make me truly happiest right now, but one of my reasons is to carry less emotional weight on my shoulders. I still have my morals, but without having the position I once had it’s harder than ever to translate my values into change. The self-induced immolation of Twitter has caused a schism with the community I formed, cultivated, and connected with on the platform. People I follow, people I learn from, and many people I’d call my friends have all scattered to the four winds across a myriad of text-based social networks. I’ve spent the last week thinking about whether to join the latest Twitter-esque social network Threads, where many people close to me have made their way. Twitter was an online home for me, and by working there I laid many of the bricks that stood up that home before new ownership decided they wanted to go Nero on it. Now as I contemplate a home on Threads I know I won't have the opportunity to speak up and create impact that aligns with my morals. Meta's long and sordid history of causing societal problems is well known. It's a helpless feeling to trust such important relationships to the whims of a historically opaque and soulless platform, but sadly it's now an option I'm considering. Meta has often been a destructive force to the values I care about. When I look at the state of technology it's depressing to see how blatantly corrupt the technologies we use have become. Maybe they always were, perhaps it was youth and innocence that led me to believe that such large, powerful, and impactful institutions could be guided and reformed, but from what I saw firsthand there was a glimmer of hope that it could be fixed by people from the bottom up. I'm torn between my values and wanting to stay connected with the people I care about online. Twitter changed my life by connecting me to people that still show me kindness, give me joy, and make me a happier person. But Joe, Why Don't You Just Use Mastodon Or Calckey Or Some Other Weird Thing That Federates Across The Fediverse? Facebook aside I've had moral qualms with using Google products, so I've long used alternative services. Instead of heading to google.com I open kagi.com, and instead of Gmail I use Fastmail. These are actually quite good substitutes, in many ways I prefer these two options over Google's billion-user products. Similarly I haven't missed Facebook at all since I stopped using it 10 years ago. I have no problem switching away from free problematic products to pay for a less troublesome alternative. Since a Musk-sized dagger ripped apart my community on Twitter I've wandered around looking for my people. I've joined Mastodon, Bluesky, and countless other alternatives, all with their own benefits and sets of tradeoffs. I strongly believe in an open and federated social layer for the internet, letting people use any social network they want and staying in touch with their friends and family the same way I was able to switch email providers. I don't ever again want to be caught in this situation where I've lost my community again, and the promise of federated platforms is that you can move around from platform to platform with your followers and people you follow. Mastodon has been a haven for more technical nerds leaving Twitter. (Nerds who I love, especially since much of the iOS community has moved over there.) I have a core group of people that I enjoy spending time with there, but the second anything I say escapes that circle of people the environment gets much worse. I receive so many low-value context-free replies, often completely misunderstanding what I was actually trying to say. People who don't know you can be pushy and aggressive with their views, some basically ignore what you post instead opting to spend 500 characters telling you what they think regardless of whether you asked. I constantly feel like I'm being talked at, not talked to, and it doesn't feel like a place that can be my home. Beyond the community it's discouraging to see how slow Mastodon's pace of development has been. I know first hand how hard it is to build a global-scale platform, and it's especially hard to build a large platform with only a few people and community funding. I have nothing but respect for Mastodon's approach, especially as they build the service in a standards-abiding way that can work with other ActivityPub-based services. And yet the platform still lacks features that Twitter has had for over a decade (ahem, global search), and has not become the Twitter substitute I'd hoped it would become. [Very] Technical Solutions For Social Problems I don't want to spend all my time ragging on Mastodon, I applaud their efforts and appreciate how thoughtful their team is. On the other hand Bluesky’s decision making is not what I would call thoughtful, but what they have managed to do was capture lightning in a bottle. Many of Twitter's most entertaining posters migrated to the Bluesky, leading to hilarious antics such as people threatening to beat Matt Yglesias with a bunch of hammers. (I wish I was kidding, but I do have to admit this was the first time a Twitter alternative actually felt like Twitter.) Unsurprisingly a community that leads with hammers hasn’t been very good at making Black users feel safe. I don’t think it requires having worked at Twitter trying to minimize harassment to feel empathy, and you don’t need a big empathic nerve to feel for people being told that the death threats they’re receiving are "hypothetical death threats" and won’t be removed from the platform. To Bluesky’s credit they’ve intentionally kept the network small, passing up opportunities to scale and seize an opportunity knowing they can’t make everyone feel safe right now. I feel conflicted about Bluesky, but where my hope for Bluesky lies is in what the platform is built upon, the AT protocol. AT solves important problems related to account portability and data ownership by relying on the concept of a Personal Data Server (commonly called a PDS). We live in a world where people say that platforms should both moderate more and less content, that you should have free speech guarantees unless it’s harmful, there is never going to be a right answer about what content should be allowed on a platform. This is why Facebook gets backlash, it’s arguably why Elon Musk bought Twitter, and it’s why every big tech company gets called in front of Congress. Currently your Facebook data is locked on Meta’s servers, which means if you don’t like Meta’s speech or harassment or governance policies, you can’t leave without losing your community. If a person owned their data then they would be free to move from platform to platform, looking for a home that suits them without losing connection to the greater community. The Bluesky team aren’t looking to build a platform, they’re trying to build the protocols that underly any social platform. By building a common protocol across the web people will be able to build and find platforms that suit them, and then can choose to (or choose not to) interact with people on other platforms through this shared language. The Bluesky team are protocol developers through and through, and I think their approach of building these fundamental primitives is the wise choice. The countless moderation failures of Twitter, Facebook, and others, show that ultimately someone has to make an often impossible decision about what content should be visible to users. These companies cannot make all the right decisions at a global scale, there is often no right decision, and despite my past work trying to help make Twitter safer, I don't believe it’s possible to create a set of rules that can make everyone happy. A better approach is to bring these decisions closer to the user. Mastodon does this at a community level, rather than some random contractor being paid an unfair wage halfway around the world make decisions about what content should be moderated on Twitter. On Mastodon the person who runs your community’s server (often with the help of admins) will decide what’s right for their community. You can join a community that seems great at protecting trans people, but over time you learn that they don’t do a great job of removing pro-Nazi content. Now we’re right back where we started, and you have to decide whether to find yourself a new home. This is why building primitives into the protocol and doing it right is important. Bluesky recently shipped a feature that lets users build custom timelines, letting you add or remove any content you want from your feed, for example, nazis.1 If done correctly platforms, developers, and individuals will be able to build and use tools that can be used for creating your own personalized experience rather than one homogenous "right" experience. Will this work? Well that's a big question and what I don't trust the Bluesky team to do though is to build a healthy social network where people feel safe to share their thoughts. And why should I? They assembled a small team to build a protocol, that was and is their stated mission, but have ended up falling ass-backwards into owning a social platform that people want to join. An 800 Pound Gorilla Walks Into The Room There are many things Mark Zuckerberg doesn’t understand, for example why anyone would want to have legs in the metaverse, but if there‘s one thing Mark Zuckerberg understands it’s social. You can read that as a compliment about his operational skills or you can imagine him as the digital version of Phillip Morris, but he has an almost gut-level understanding of what people want and how to give it to them. Threads has managed to sign up 100 million users in 5 days, in large part by bootstrapping their growth off of the Instagram network. There's also been a large collective of unhappy Twitter fiends (such as my friends) who are looking for any alternative to a Twitter run by Elon Musk. They're willing to forgive Mark Zuckerberg for his sins if he can lead them to salvation, which says a lot about how Twitter has fallen in their eyes. According to celebrities like Dane Cook the first week on Threads has felt like some drugged up parallel universe of Twitter. Post by @danecook View on Threads I don't expect this high to continue. Meta still has to retain and grow the Threads user base for it to be meaningful, but it does seem that unlike other niche Twitter alternatives Threads will at least give Twitter a run for it's money. What gives many people in the fediverse hope is that is Meta building Threads atop the open ActivityPub protocol. (The interconnected ActivityPub servers powering Mastodon and other services is called the fediverse, and yes, no matter how many times I hear it I still cringe.) By doing so Threads content will be available to anyone in the fediverse, and fediverse users will be able to interact with their friends on Threads. This works exactly the same way email does, if you have a Gmail account you can still email your grandma with her ancient AOL account. Some cynical people in the fediverse assume that Meta won't actually stay true to their promise of federating, but I think it's actually in their best interest. This is what Ben Thompson has coined a Strategy Credit, where you get credit for doing something widely considered to be good but is also beneficial to you. By federating with ActivityPub servers Meta will have access to content across the entire social web. Federating with ActivityPub servers is less about Mastodon and more about a service like WordPress which host nearly half of the internet's content. Imagine having a pipeline to all of that great content and applying Meta’s machine learning models to those posts so their users can see the best of the best across the web. This would make Threads a premier destination for content across the web, and Meta wouldn’t have to deal with angry publishers or content moderation since it’s not their content. This sounds like a dream for Meta, and at the same time may end up being beneficial to the open web. Open Questions Muddling A Federated The Future Let's say Threads really does federate, and they even act in good faith doing so. There are still many open questions about how life outside of the Meta ecosystem will look. I won't go into all of them, but to provide a choice few: What if Meta's search deprioritizes people on other servers for safety or quality reasons? It makes sense when you have a platform that serves over 100 million people that there will be many spammers, state actors, and bad people. The best way to tackle these issues is to gather insights from data, and third parties may not provide that data. If running your own server means being deprioritized, even with good reason, it may mean being cut off from my community at any point in time. What if Meta’s algorithm adds more weight to posts from Threads users higher because they have more insight into their users? It's much easier to operate on first-party data than it is on third-party data, especially since it seems like Meta is taking the privacy expectations Mastodon users have somewhat seriously with Threads. If my friends aren't actually seeing what I post then will they really feel connected to me? What if Meta builds good features that don’t translate to ActivityPub? For example on Threads you can control who replies to you (a feature I desperately need given my experience dealing with random Mastodon users), but since it's not a part of the ActivityPub spec that feature isn't available to Mastodon users. This isn't nefarious, it's perfectly reasonable. Meta's goal is to provide their users the best experience they can so they feel safe to come back and engage with the platform (and ads). If I trusted Mastodon with my online experience I would miss out on a lot of features like this, features that in all likelihood would make my online life better. Being on a different server may end up feeling like being worlds apart from my community, which is exactly the problem that brought me here. I hate to say it because of my moral questions, but the world is an impure place and I think I trust Meta more than Mastodon or Bluesky or whoever to listen and build a product that better connects me to my community. Where Do We Go From Here? I've been spinning my wheels for a week and I'm not any closer to answering the big question: do I choose my values or connection to my community? I love philosophy and many philosophers would tell me to live my values, those are by definition the choices I have to live with. But maybe the lesson is that there’s no purity here, I'm living in a world with many variables I can't control, and as much as I want to have it all it doesn't seem like I can. I believe the same things I once did, but it all seems harder, messier, and more difficult to rectify. Perhaps it always was, perhaps this is wisdom and that was naïveté, or perhaps it will get better. Only time will tell, and until then I still don’t have my online dream home. Appendix: Building My Ideal Home There is still a very good chance I don’t end up using Threads. Owning my data is still a very high priority, and I want to have my own space on the internet without Meta sticking their tentacles into it. When you use an ActivityPub-based service like Mastodon the choices your server owner makes are the rules you abide by. If my server owner doesn't want to enable local search (as mine doesn't), then I'm out of luck and can't even search my own Mastodon posts (as I currently can't). Because of that I don’t plan on continuing to use macaw.social as my Mastodon instance long-term, I would prefer to have control over my experience. The most straightforward option is to run my own Mastodon server. As noted earlier I can't say the Mastodon experience is very good, and I don't particularly want to tie my online identity to the Mastodon community. As explored in the amazing essay Paradigm Shifts For The Decentralized Web, Bluesky's concept of a PDS solves the ownership problem much like running my own Mastodon server would. A PDS would allow me to host my own data and you can let anyone I want access to it. A service like Meta can have a peek into my data for the purposes of showing it to users on Threads, but they wouldn't be able to follow me all across the web based on my data and usage habits since I wouldn't be using the Threads app. Since I find Bluesky's technical solution to be the best match for my personal desires I'm leaning towards setting up a PDS once it becomes easier, and using the AT protocol with a bridge that lets me interoperate with ActivityPub servers. There are still many questions with a setup like that though. It would be a piece of infrastructure I have to maintain, the most far along project Bridgy-Fed still has many open questions and, and I don't know how it would work in practice. It's like I'm both living through the early internet, waiting to see what emerges, and spending the rest of my day the internet circa 2023. I think custom feeds are brilliant and truly necessary, though I may be a little biased because giving users the ability to construct custom timelines was the last project I was working on at Twitter before I left the company.↩↩
Year Of Focus
To set expectations for you my dear reader, this blog post was written for me, not for you. It's very long (quite long), but I'm still proud of it enough to post for the world to read.
The frigid days of December are often unbearable in New York City, but those same freezing temperatures combined with the slow down of work, life, and everyone's collective desire to rest up after a long year afford plenty of opportunity to sit and reflect. At the end of every year I start to think about what I'd like the next year to look like, and then I set a theme for the upcoming year to help me make those ideas become a reality.
Yearly Whats?A yearly theme is explicitly not a resolution, but a guiding principle you can look to over the next year. A yearly theme shouldn't be too specific, otherwise you could just craft a resolution, and it shouldn't be so broad that anything could fall into that theme. I've borrowed the idea of yearly themes from the Cortex podcast, where they discuss at length what yearly themes are, and how they approach their own themes.
"We are what we repeatedly do. Excellence, then, is not an act, but a habit."
— A quote commonly misattributed to Aristotle
What I like to do for my yearly theme is to look at a part of my life that's stopping me from being the person I want to be, and then work backwards to figure out what ideas, practices, and habits I can adopt to become that person.
New year new me, right? Wrong. I treat yearly themes as a way to build upon the work I did in the previous year, always striving to become more the person that I want myself to be.
To set expectations for you my dear reader, this blog post was written for me, not for you. It's very long (quite long), but I'm still proud of it enough to post for the world to read. The frigid days of December are often unbearable in New York City, but those same freezing temperatures combined with the slow down of work, life, and everyone's collective desire to rest up after a long year afford plenty of opportunity to sit and reflect. At the end of every year I start to think about what I'd like the next year to look like, and then I set a theme for the upcoming year to help me make those ideas become a reality. Yearly Whats? A yearly theme is explicitly not a resolution, but a guiding principle you can look to over the next year. A yearly theme shouldn't be too specific, otherwise you could just craft a resolution, and it shouldn't be so broad that anything could fall into that theme. I've borrowed the idea of yearly themes from the Cortex podcast, where they discuss at length what yearly themes are, and how they approach their own themes. "We are what we repeatedly do. Excellence, then, is not an act, but a habit." — A quote commonly misattributed to Aristotle What I like to do for my yearly theme is to look at a part of my life that's stopping me from being the person I want to be, and then work backwards to figure out what ideas, practices, and habits I can adopt to become that person. New year new me, right? Wrong. I treat yearly themes as a way to build upon the work I did in the previous year, always striving to become more the person that I want myself to be. Yearly Themes Past 2022 (Year of Trial & Error) 2021 (Year of Building Foundations) 2020 (Year of Pushing Boundaries) 2019 (Year of Creativity) 2018 (Year of Stabilization and Independence) I'll zoom in on 2022 in a personal appendix at the end of this post, so let's start in 2018. If you read these themes from oldest to newest, a story emerges. I was reeling from a divorce, and my #1 priority was to stabilize my life, and re-learn who I am outside of my marriage. I spent much of 2019 working on projects not because I thought they would bring me fortune, fame, or acclaim, but because they scratched a creative itch. By putting out those projects and seeing that they resonated with people just as they were I grew the confidence to push my boundaries, sharing more and more widely, delving into things that I previously would have been too scared to try. In 2021 I decided it was time to start thinking about a future where I don't work at Twitter, and instead pursue my dreams of being an indie developer. So in 2022 I leaned into the fact that being an indie developer would mean making many mistakes as I built a business around my own software, and that meant a lot of trial, error, and being ok with the mistakes I make. Year of Focus I managed to accomplish so much in 2022, but most importantly I was able to focus on my health after a very difficult 18 months. Working at Twitter was extremely difficult near the end of my tenure because of deteriorating health, and also a loss of motivation due to the related externalities. But while I was still working at Twitter I was spending nights and weekends working on Plinky. I used the positive initial response and support from friends and loved ones to quit my job and focus on building apps full time. The personal appendix discusses this with a lot more in depth, but in terms of my yearly themes, this year I'm working to my reign in the worst of my habits, my distractibility. I love to dream big, and letting my creativity run wild has taken me to some new and interesting places. I think it's something that sets me apart from many developers, and has allowed me to build some things that truly resonated with people in expected and unexpected ways, which is something I don't want to lose. But it's also important to set a few goals this year and make sure that I get them done, this is the difference in knowing how to do everything, and having the time, energy, and wherewithal to do everything. I have to draw some lines and make some tough choices about what fulfills me to ensure I don't spend my days working on an app, but instead am building an app that's the cornerstone of a successful business. Apps, Apps, Apps (And Business) Ship Plinky to the App Store Ship 2 major feature product updates Stretch goal: Ship a smaller app to grow Red Panda Club My top priority in 2023 is turning my software into an indie apps business. I spent four months last year working on Boutique and Bodega, and while I didn't intend to make money from them, I really appreciate the people who sponsor my open source work. Those two libraries are the foundation of my first indie app, Plinky 1, taking care of pretty much any state management one needs in a modern iOS app. I've built and shipped many apps before, but none that I was working on full time with the intention of building a business on top of. It turns out you can't make money as an indie developer until you have a product people can pay for though, so my success in 2023 starts and ends with shipping Plinky to the App Store. Shipping is just the beginning. The day you launch is closer to the first day of the journey than the last, which means there's still a lot of story left to be written once Plinky is in the App Store. I have a backlog of features I'd love to build as long as the Grand Canyon, but it's more important to listen to my users about what they want than to trust my gut. All of the feedback I received after launching Plinky's public beta was incredibly helpful. There was so much positivity and excitement, people told me so many things they wanted to see, and of course they found plenty of bugs. A sign that I'm building a product that will resonate is how many of the features people requested were already on the roadmap. There's no substitute for people using the product and telling you what they want, so rather than building out everything I think will resonate I'm making sure that I ship the minimum viable [polished] product, and then will build more features afterwards. Hopefully it will be more than two features, shipping regularly is an important sign of commitment to my users, but I'd like to set expectations low given how many other things there are involved with building a business. I don't expect my stretch goal to come to pass, but it's valuable to keep in the back of my head. I'm building an app with the code I write, but I'm also building a company. My dream is to build personal playful productivity apps that help people be the best versions of the person they want to be, but it's pretty rare that someone predicts exactly how they get to their dream. I keep a doc of "Interesting Business Ideas", ideas that I hope to implement, building a business around my values. It has idealistic goals like my Red Panda Promise, a plan to donate 5% of my profits every year to offset climate change and help preserve red pandas. It has practical ideas like giving away a free month of Plinky Pro to people who send bug reports that lead to me fixing problems or feature requests I implement, because they should be rewarded for helping me build my dream. And of course there's something I'm already doing, working in public and giving away as much knowledge as I can so other people can start business centered around their own novel ideas. Shipping a second app would give me more of a playground to experiment with these ideas, or to even potentially work on a project with a partner. My dreams don't stop at me working solo, they're about building things that matter to me and resonate with others. Working with the right person is such a wonderful feeling, so if I find the right person I might consider bumping one of my smaller projects to the front of the queue, something we can build together on nights and weekends. The reason this is a stretch goal though is because taking my eye off the ball and splitting my attention is clearly antithetical to my Year of Focus. I would only consider shipping a second app if the right circumstances emerge, but you never know. Simple But Effective Steps Towards Working More Effectively Use flow sessions per day to focus on my work Plan out my work tasks in Craft Make sure my todo list is under control Be less reactive through better batching Some days I wake up and can't wait to begin working. Other days I'm so distracted by every possible distraction that I have to conjure up the will of Thor to start my work day. I spent much of 2022 letting my creativity guide me to what I should work on next, and it resulted in quite a fulfilling year. I often found myself in research mode, which led to me creating Boutique and Bodega. I spent a lot of time prototyping really interesting ideas, resulting in some truly unique experiences for Plinky. And while I was able to get Plinky out to users in my public beta, it feels like I haven't had to "work like an adult" in a while. Even my work environment at Twitter was very reactive, and led to me forming plenty of bad habits for accomplishing deep work. The scope of my work will continue to narrow by necessity the closer I get to shipping Plinky to the App Store, and that's where practicing good work habits will become crucial. I've never lacked motivation, but my lizard brain gets distracted very easily. The Unreasonable Effectiveness Of Just Showing Up Everyday discusses how once you get started, staying in the flow is much easier, it even becomes quite an exciting state that you strive to reach. Over the final month 2022 I started using the app Flow to, well, stay in my flow. Flow is a pomodoro timer, with a twist. Flow lets you denylist apps and websites, so when I try to open Slack, Tweetbot, or Messages during a pomodoro session, it will just close the window automatically. Having a hard boundary allows me to stay in my flow, now when I tab over to check out what's happening on Slack I'm no longer distracted, instead I'm greeted with a reminder to stay in Xcode until Plinky finishes building. I've picked up another good habit in the last two months, I've started to plan out my day and my week in Craft. As cliche as it is for a software developer, I always try to bite off more than I can chew. Having a list of tasks I'd like to accomplish provides me enough perspective to see how much I really am trying to do, and keeps me on track when I see something else I want to do like spend 30 minutes tweaking an animation. Planning out my week gives me a good overview of just how much I'm really trying to accomplish, because it's easy to lose sight when you're only focused on that day. And it's also nice to be able to look back and see all that I accomplished, like a little gold star from my teacher at the end of a productive week. I've always been a todo list person, but by the end of 2022 I found myself overwhelmed with 50 tasks to do on my todo list, which was clearly not actionable. My list was filled with everything from urgent chores to stray ideas I didn't want to forget to long-term plans. I spent two days at the end of the year to find each idea their right home, whether it was in Things, Craft, or in the mental dumpster. Anything that isn't actionable in the short term has a better home in long-term storage like Craft, it's not necessary for me to wading through my entire future all the time when what I really have to do right now is pay the electric bill. Most people operate their lives around the standard work calendar. But as an indie I have an inordinate amount of freedom to shape my day, including working later into the night when my mind is ramped up and operating at it's best. I consider that a real blessing, but the bad habits of working reactively that I picked up working at Twitter aren't good for my personal life either. I constantly feel like I'm behind and playing catch up, or need to respond to my friend the same way I'd be tempted to respond immediately to my boss. But I don't have a boss, and my friends definitely aren't the boss of me. The solution is pretty simple, but took some time for me to see. I should just not do that, instead of responding immediately I can designate 10am and 6pm as the time I look at emails, find 10 minutes in the middle of the day to respond to some friends, and make reasonable exceptions when there's some urgency or necessity to respond quickly. I expect these boundaries to not only make me less distracted, but will also make me more effective and will enable me to do better work. Energy More morning or mid-day meditations Rest one day on the weekend, for real Figure out where I can cut some social obligations Plan for no more than three weekday social obligations per week My day is dictated by time and energy. We all have the same amount of time, but we have differing amounts of energy at different times. There are many things I can change in my life, but I'd benefit most from focusing on how I apply my energy, and where I apply it. I've meditated every day for the last five years, it's one of my best habits. I always feel better after meditating, but when I'm at my busiest my daily meditation will often slip into the evening or possibly very late into the night. When I'm my least focused and most frazzled is when I need to take a step back and meditate, so it's important for me to stay conscious, pause during the day, meditate, and regain my energy. It's also important for me to take a real day to rest, something I often have trouble doing. I'm a constantly curious person, so historically I've found myself constantly solving problems and puzzles until eventually I burn out and need a real break. It's important for me to avoid that trap, and to take a day off every week to make sure I can recharge. Creativity needs room to breathe, and that day off comes with other perks. It will give me space to be excited for that next day of work when I do get to let my mind loose on something I want to solve. Life is about more than just work, and I need time to live life and celebrate the opportunities I have. This year I did a much better job of putting down the computer and spending time with the people I love, and I intend to keep doing that. As for the second day most people take off every week, I tend to work six days a week but with a more relaxed schedule, scattering for chores and obligations that most people accomplish on the weekend. This year I'll use one of my days off to do the personal and work planning I mentioned earlier, maybe scratch a creative itch, prototype an idea I have, or spend the day with family and friends if I'm feeling particularly social. Your energy is bound by what you do, but it's also determined by what you choose not to do. 2022 was a year filled not only with work, but a lot of socializing, travel, and quality time with loved ones. As an introvert though I've found my energy running really low, and often feeling like I can't be my best self for the people in my life. Too often I've treated the time I have to work as a gift because it lets me go into goblin mode behind a computer, and that's a signal that I need to find a way to stop feeling so overwhelmed and stretched thin socially. It's incredibly hard to do, but I need to figure out where I can cut some of my social obligations. The ability to connect with friends across the world thanks to messaging, video, and airplanes has made me feel more connected to them than ever. Every week I have a few FaceTime calls, and I stay in touch with people over iMessage and Slack all day. I took four major trips to see friends in other parts of the world this year, and it was incredibly fulfilling. Spending time with people in person made me realize how much is missed over a monthly FaceTime call, and I don't have a good answer about how to fix that. But it does make me think, even if it isn't easy maybe it's worth trying to move those calls back from every four weeks to every six or eight, to reclaim some of that social energy I've been giving away. I need to get that energy back somehow, and limiting myself to three social obligations per week (including FaceTime calls) feels like a reasonable balance between keeping up with friends and running at a constant energy deficit. For much of 2022 I had the flexibility to work around people's schedules, but now that I'm working full time and more focused, I've become bound to the same constraints as everyone else. It's far from my favorite thing to do, but I have to be responsible and set hard(er) limits, staying vigilant about my energy, so I have energy to spare. One thing I'm not willing to give up is my time with Colleen. We have our weekly date night, time together on the weekend, and dedicated space for each other every night before bed. We spend plenty of time together besides that, and even though I have space to be my own individual, I'm always happy when I'm with Colleen, so spending time with Colleen has to stay a priority. Tradeoffs Improve my sleep regimen Shorter journal entries to reclaim my time Figure out where I can cut my information intake More bad news, as an adult I have to start setting better boundaries. I don't want to go to bed at 1am every night anymore, it makes me feel like I'm not a functioning member of society. I always get my 8 hours of beauty rest which means I'm often crawling out of bed at 9:30 or 10. Every time I've tried to be a morning person it's failed, but I should be able to wind back the clock to 12 or 12:30, or gasp, maybe even falling asleep before midnight. I spend quite a bit of time journaling every night before I go to sleep, and along with meditation it's one of my most treasured activities. It's worth the time I put into it, but it can also be really daunting, especially as the last thing I do before going to sleep. In an effort to preserve my memories I've found myself adding more and more details to my journal entries. The more detail I add the longer a journal entry becomes, which means spending more time journaling every day. That time adds up, and it adds up fast. I've noticed my journal entries ballon from 400-600 words per day to 800-1200, which means spending 20-30 minutes writing rather than 10-15. While I find the longer journal entries better to read afterwards, it's a lot of time to give up. I intend to reclaim my time by focusing in on the important events of the day, adding flourishes and details to capture my memories as accurately as possible, rather than recapping everything that happened that day, down to taste of the bagel I had to start my morning. An evergreen reason I find myself constantly feeling behind is because I've done this to myself, I am constantly behind all the content entering the firehose of my phone. There's always one more thing to read, a show to watch, a podcast to listen to, and all this content comes in all day every day. I'm always happy to indulge myself with something else to consume, but I've noticed that when I have free time my mind really enjoys wandering off. I don't need to put on a podcast or some music when I'm walking around, the world is so rich and textured, I should enjoy the full experience of my surroundings. I'm very happy when the content runs out, so why shouldn't I give myself more of that? All I've been missing is permission. I'm giving myself the permission to drop things. I've unsubscribed from a bunch of podcasts, I've removed a bunch of RSS feeds, I've unfollowed a lot of people on Twitter (and Mastodon), and I'm giving myself permission to put down books I don't like rather than begrudgingly finishing them. There's a central motif underlying my yearly theme of focus: my time is precious, so I should focus on what's important. Appendix: 2022 I'm really proud of how I leaned into my Year of Trial & Error in 2022. I accomplished so much by deviating away from my tendency to make safe choices, having always feared the impact of making a mistake. I sold myself on 2022 being a year where it was ok to make mistakes, and to show myself that I can recover from any mishap. Not only did I come out ok, I had a great year where I accomplished so much. But I also learned a very valuable lesson. When you down the “wrong” path, it often ends up being the foundation for another more formative path. When you make reversible decisions you can always walk back down the road you came on, and take another path from there. This time though you'll be armed with knowledge and experience that you didn't have the first time, letting you make better choices. You can even walk back up the same path you came down, succeeding this time because you're prepared for what lies ahead. Beautiful, amazing, wonderful things can happen when you do something you're unsure of. This year I did one of the least safe things I could imagine doing, I quit my job at Twitter to pursue my dream of being an indie developer. I've been dreaming of building a business around my apps, and in 2022 I took a big leap forward. I'd been preparing mentally, emotionally, and financially for the day I decided to leave for over a year, but that didn't make it feel any more practical. I left on a Friday, had a blissful weekend, and on Monday I woke up to frantic texts from friends asking and telling me about Elon Musk acquiring enough shares of Twitter to become the top shareholder. I didn't know what I was going to do that day, but I was very glad that this news didn't directly affect me anymore. If I had stayed at Twitter for one extra day I would have had a completely different perspective about leaving rather than all of the positivity I had around my departure. The lesson here is that no matter how safe or unsafe you feel making a decision, you always only have a small subset of information. No one can predict the future, and the future is more vast than the present, so worrying and trying to optimize every detail isn't a recipe for success. You can only control the parts of any major decision that you have direct control over. Contrary to the chaos that ensued at Twitter over the coming months, I spent my first months of self-employment following my creative impulses, and they took me to some amazing places. I won't spend too much time going over every one of them because this is the personal part of the post, and I know what they mean to me. Instead I'll list them off, with some details in case one of them catches your eye and you feel like taking a deeper look. I built two very successful open source projects in Boutique and Bodega. These projects even led to me being interviewed by the GitHub team. (Hi mom and dad, I know you don't really get what I do but I'm happy you listened to the podcast and were very proud. 🙋🏻♂️) Boutique and Bodega serve as good foundation for creating MVCS, an architecture for building SwiftUI apps that's gotten some traction and helped me a lot. I needed an image-based API for my Boutique demo project, so I built one that serves images of red pandas. This was a fun example of what I could do because I'm now working for myself, there's no immediate business value to having spent 2 days learning Cloudflare Pages, R2, and a whole bunch of other technologies, but given my company is named Red Panda Club I'm sure I'll find plenty of fun uses for this going forward. 🦊 I rebuilt and redesigned my personal website, fabisevi.ch, something I've had on my todo list for nearly a decade. I created build.ms to supplement Red Panda Club. Red Panda Club is where my apps and products will live, build.ms is where I'll be sharing the lessons I learn building Red Panda Club, with a focus on engineering, design, product, business, and more. I wrote six blog posts across those two websites. Coding As Creative Expression, Reflections On An Open Source Project, Goodbye Fellow Tweeps, Designing A High Signal Interview Process, Model View Controller Store: Reinventing MVC for SwiftUI with Boutique The Best Twitter Bio, The Humble Tweet I put my feelings out there by spending the day before my birthday writing about all the nice people in my life. And last but definitely not least, I launched a public beta of Plinky, my first indie app. [I'll do my best to not pitch you again in this blog post, but maybe sign up for the beta? I make you an empty promise that you'll like it.] I did a lot more than that of course. I read 15 books, a whole bunch of meaningful articles, traveled around the world to meet friends old and new, and of course spend a lot of time with my friends, family, and girlfriend here in New York. Those all spurred much reflection and insight, but to explain how they fall under trial and error would take far too many words. Now we're going to get really personal. By far the biggest trial I dealt with was a mysterious neurological disorder that caused me indescribable pain for the last 18 months. People who are close to me know about it, people who know me from afar may have some allusions to it, but in 2022 I finally received a diagnosis for my mystery ailment after seeing dozens of doctors and specialists who couldn't figure out what was wrong with me. Thank you to my neurologist for diagnosing my cervical dystonia, which allowed me to start getting treatment for the condition. In most cases it's incurable, but since my condition has a good chance of being linked to trauma, I may be able to heal over time. I've seen a lot of progress and pain reduction not only from the quarterly botox injections in my neck and medication I'm taking, but also from the work I'm doing in somatic therapy to address the underlying trauma. There were many errors along the way, I tried so many different things to feel better. Every day there was a new and slightly different pain, and every day I would try to figure out what was happening. Somatic therapy has not only helped me face the trauma that's causing my brain to malfunction, but to learn how to listen to what my body is telling me that my brain won't allow me to hear. But I persevered. I knew I couldn't live like that, I love life far too much to give up. I love Colleen who's been there for me every day, and I love my mom who's been there to listen to me as I've gone through so much. I love my brother and my dad who have their own sense of how I'll get better, and are supportive no matter what. While every day still carries some difficulty, it's easier than it was six months ago when I finally found my doctor and somatic therapist. It's easier than it was three months ago when I started botox injections. It's easier than a two months ago, one month ago, one week ago, all of which are times I made majors breakthrough in somatic therapy. None of this would have been possible if I hadn't quit my job. I was suffering physically every day, and even with the generous time and space away from work that Twitter allowed me to focus on my health, I couldn't focus on on my health enough to see progress. I needed this time in my life, I needed this space, I needed to feel like this year was a year dedicated to me. I said that quitting my job was one of the least safe things I could have imagined doing, but sometimes doing what's safe isn't the same as doing what's right for you. Having learned that lesson, I consider my Year of Trial & Error a tremendous success. Plinky is an app that lives between a link utility and a bookmarking app, with some very novel collaboration features that I haven't seen on any other app. I think there's an interesting space for managing links that don't really fit into the mold of Pocket, Instapaper, Matter, or other apps that focus on reading. I'd love it if you checked out here or signed up for the beta. 🙂↩↩
Coding As Creative Expression
Is coding a science or an art?
— Matthew Garlington (@dejadu13) May 21, 2022
Is coding a science or an art?
— Matthew Garlington (@dejadu13) May 21, 2022I've seen many versions of this question posed over the years, and to Matthew's credit it's a very good question. As you can see in the replies people translate their lived experience writing code and answer art or science based on however they conceptualize and practice programming. A few years ago MIT conducted a study that concluded "reading computer code is not the same as reading language", answering the question of whether coding is art or science with a rigorously documented "both". While I'm hard-pressed to argue with science, I'd like to provide a different answer, one that's a little more conceptual.
Is coding a science or an art? — Matthew Garlington (@dejadu13) May 21, 2022 I've seen many versions of this question posed over the years, and to Matthew's credit it's a very good question. As you can see in the replies people translate their lived experience writing code and answer art or science based on however they conceptualize and practice programming. A few years ago MIT conducted a study that concluded "reading computer code is not the same as reading language", answering the question of whether coding is art or science with a rigorously documented "both". While I'm hard-pressed to argue with science, I'd like to provide a different answer, one that's a little more conceptual. The instinct to qualify coding as art comes from the practice of programming. While writing a program software developers make many choices, ones that rarely have hard and fast rules. As long as your program compiles and runs as expected, you can make any choice you want. It's all human input, if you ask 100 developers to write a complex program they'll write it 100 different ways. Heck, if you ask one developer 100 times they may write it 100 different ways. Code can create something beautiful, enable an amazing experience, and people will even call a piece of code elegant or exquisite. To someone in the arts this all sounds very familiar. The instinct to qualify coding as a science comes from the output of a program. Developers desire deterministic results for their programs, when you provide an input to a program you expect to receive the same output every time. The practice of programming itself can be imprecise, and the same way that science operates in unknown space, building a program can often feel the same. Developers will try to minimize the ambiguity by using industry-tested practices, much the same that a scientist uses a standardized beaker rather than throwing some chemicals in an unclean cup and seeing what happens. When put together that truly sounds like the practice of science. What we've found ourselves asking is whether code is a paint brush or a calculator, and frustratingly the answer appears to be both. Despite the fact that programming looks like art and looks like science, I still think there's a concept that better fits the practice of coding, creative expression. We can look to writing as a point of comparison. Sometimes it's hard to believe that the most beautiful poem uses the same medium as boring technical documentation because the artifacts look and feel so different, but we all know it's true. The medium doesn't impose limitations on how someone can choose to express themselves, it's a tool for creative expression. With writing it's impossible to separate the medium from the artifact created, and the same is true for code. Code can be artistic and create something new in the world, or it can simply exist to accomplish a task. Code helps people capture the meaningful moments of their lives, lets you carry the beauty of every song ever recorded in your pocket, but it's also the boring spreadsheet that helps you run your business. So is coding an art, a science, or creative expression? I say coding isn’t science, it's not art, it’s not quite a craft, but a malleable form of creative expression. When given an infinitely flexible and manipulable canvas people use their imagination to create wondrous things, ones not limited to simple categorization.
One Last Visible Change, Goodbye Fellow Tweeps
Hard to believe it's over. My time at Twitter wasn’t perfect but it was incredibly special and there's little I would change about it (though less crypto would be cool). I was able to provide constant feedback about products across the entire platform and the entire organization, work on some of the most pressing digital societal health issues of our time, including the 2020 US presidential election, and help launch numerous products to minimize abuse and harassment. I never once felt like I couldn't advocate for the concerns of the sometimes thoughtful sometimes bonkers people who use Twitter, providing a voice for people who don't get to have a voice inside Twitter.
There's so much more I could say but instead I decided to post the going away email I sent to a thousand or so people at Twitter.
Hard to believe it's over. My time at Twitter wasn’t perfect but it was incredibly special and there's little I would change about it (though less crypto would be cool). I was able to provide constant feedback about products across the entire platform and the entire organization, work on some of the most pressing digital societal health issues of our time, including the 2020 US presidential election, and help launch numerous products to minimize abuse and harassment. I never once felt like I couldn't advocate for the concerns of the sometimes thoughtful sometimes bonkers people who use Twitter, providing a voice for people who don't get to have a voice inside Twitter. There's so much more I could say but instead I decided to post the going away email I sent to a thousand or so people at Twitter. I was really heartened by plethora of thoughtful, meaningful, and overwhelmingly kind responses I received, enough so that I decided to publish it publicly with minimal edits to provide context or clarifications such as the fact that Visible Changes is an internal mailing list for new products shipping at Twitter since there are so many teams working on so many different projects that it would be impossible to keep up with everything happening at Twitter without subscribing to the Visible Changes mailing list. If you're curious about what I'll be up to now that I no longer have a job, feel free to check out this thread, unsurprisingly on Twitter. Howdy friends, colleagues, and strangers (sorry for the email strangers, feel free to send this straight to the archive!). You may recognize me from my occasional long-winded Slack messages so it should come as no surprise that I decided to squeeze in a 1,300 word going away email with a linked Google Doc1 of feature requests before I leave. After 3 years, 10 months, 3 days, and one pandemic at Twitter, my last day at Twitter will be April 1st. (Yes I recognize that me writing an org-wide email joking about quitting on April Fools Day would be incredibly on-brand for me, but I assure you it’s true.) I’m so proud to have worked at Twitter, and I forever will be. I'm incredibly grateful for the work I've been able to do directly, influenced indirectly, and most importantly so thankful to the people I've met and worked with along the way. (Maybe the real friends were the coworkers I made along the way — those of you not in the strangers category will appreciate this.) I love this company, I love the people, I love using all the latest and greatest experiments in Earlybird (so please remember to bucket me into all the good experiments). I want to stay connected with many of you, now and beyond, so please don’t be shy about throwing some time on my calendar or reaching out to me by other means over the next two weeks or after — I’ll always make the time. To get the first question everyone’s been asking out of the way, I’m not going to work anywhere else. It’s definitely not Facebook (lol, Meta or whatever they wanna be called), and never will be. I’m taking some time off (2, 3, heck maybe 6 months off but don’t worry I’ll still be tweeting) to recover from what’s been a very taxing year physically and emotionally, focusing on some health issues that I’ve been dealing with. But what I’m really looking forward to is wandering around the streets of NYC this spring, riding around on my bike, and enjoying time with family, friends, and loved ones. Twitter has been the job of a lifetime, but right now the last thing I want is a job, so I guess I’m just going to not have one. Since most of society has to exchange their labor for capital in some manner after I’m refreshed and rejuvenated I do intend to do the same, but working for myself again like I did before Twitter. This time around I’d like to try my hand at building playful and creative indie software products, tools oriented around helping people leverage technology for their personal needs, with a matching company that combines my love for teaching others and helping people reach into their hearts to derive the true value of what they can do. I’d be remiss if I didn’t say I learned some of the valuable lessons I'll be using and sharing from my time here at Twitter, and will do what I can to reach others through writing (longer than tweets) so they too can benefit by learning from others learning. If you’d like to know more about what I'll be up to by all means please reach out and I’ll be happy to share. I’m sure you'll appreciate that this is where I say the best way to keep up with how it’s going is by following me on Twitter @mergesort, with indie development updates and red panda gifs @redpandaclub. I'm always looking for feedback, the sense of community I built here is something I wouldn’t trade for the world and will miss dearly, I'd love to keep as much of it as possible. And because I trust you all with my personal email you can always reach out to me at [nice try but you don't get this random blog post reader]. I want to say thank you to every team I worked with (aka bugging every feature team to build my pet idea — some of them were actually good!) and worked on, Communities, Communities Health, Twitter Dev, and Notifications. But a special shoutout is reserved for Health, and that goes even further for the team formerly known as Health Client. We built some incredibly meaningful things on Societal Health and beyond, but more importantly we built a team of amazing people on the foundation of empathy, caring, and curiosity. To those people I’ve had the pleasure of working with on that team, I don’t say this lightly but I love you like family. The work you do isn’t only about helping Twitter today, it’s some of the most important work for keeping Twitter an important part of the world in 5, 10, or 50 years from now. But today I’m still at Twitter, and as a parting gift in the spirit of our company value fearless honesty I’d like to leave a few thoughts I’ve had bouncing around in my head over the last few months while thinking about the unique and wonderful place Twitter has been to work. Twitter isn’t the biggest platform in the world, but its effect makes it the most consequential tech company in the world. The world takes its cues from Twitter, and because of that we should find ways to get more users by opening Twitter, not closing it off from the open web. When we move away from Twitter’s open nature we’re losing a bit of Twitter’s service to the world, I hope we remember that in everything we build. Let your values guide you. The success of Twitter isn’t DAU, DAU is a lagging indicator that shows we’ve succeeded in building a good product. We’ve heard a lot about our DAU goals and we should shoot for them, but please don’t let the ends become the means. Never stop looking for paper cuts. If you look closely you’ll see more of them happening more frequently as the system we build becomes more and more complex, and the expression death by a thousand cuts has resonance for a reason. Health isn’t a fixed goal and it isn’t a lever we can pull up and down depending on where we’re focusing our energy. As we gain users and build new surface areas Health problems will only become exponentially more difficult in unpredictable ways so please don’t view Health as something that can be balanced with user growth. Lean into and invest in the infrastructure the Health org has built and turn expansion into newfound success, striving to build a better and healthier social network than any of our competitors. Twitter’s culture is unique and one of a kind, please don’t lose it. Especially as the company grows it’s easy for culture to dissipate. New perspectives are incredibly important, don’t be shy about integrating new tweeps and their ideas, but for those of you who have been here for a while your job is also to teach what’s made Twitter so special that people all over the world want to join and leave their mark. That culture only continues to be world class if we help new tweeps know about it. Unfortunately over the last year I’ve seen a lot of newer tweeps across the entire company struggle to feel like they understand what they’re supposed to be doing, and that’s not their fault. Every person’s job involves doing the work they came here to do, but a part of that is setting every new tweep up for success. Keep helping new tweeps succeed, so look at a person to your left, look at a person to your right, look at your Google Meet screen, and remember that you only succeed when they succeed. I’ll sign off with a few words @Kayvon once said that have stuck with me since — you are absolutely right Joe. ✌🏻 P.S. Thank you Kayvon for always being a good sport the 945 times I’ve used this clip to make a joke, all the best on your parental leave! P.P.S. Bothering y’all while I still can, here’s a list of features and ideas I would like to see be built. Consider this one last dump of practical and reasonable ideas I’d love to see Twitter build since I won’t be able to bother people after April 1st, 2022. (You don’t want to see the list of impractical ideas I have saved.) A quote tweet redesign that de-emphasizes the original content to detract from the nature to dunk, rendering more like an organic reply that’s visible on your timeline, and the ability to de-index your tweets from search as discussed in Slack here. (We've talked about de-linked quote tweets on the Health side before, and I'm all for it. I've also wanted a similar feature for search. It would be useful to give users the power to delist their tweets from search, that way we could prevent people searching through people's old tweets and dogpiling them for years-old comments that may not be reflective of today's norms, but still allowing those tweets to live on a user's profile so the original author can choose to surface/resurface them as desired. I guess a better way of putting it, allowing users to opt out of letting their tweet(s) be publicly indexed for search.) Third Party Verification. Twitter should be the central hub for identity on the internet, and we can get a step closer to there by letting people authenticate with third parties such as YouTube, Instagram, Tik Tok, Github, etc, and have those destinations displayed on a user’s profile without resorting to hacks like LinkTree or this. Fix open graph tags. I cannot tell you how many iOS users would rejoice if you could play videos in tweets without leaving iMessage, or at least see that a tweet contains a video with a little play button over the image rather than rendering a static thumbnail from the video. If you send a quote tweet to someone it shows up as some text and a link so users sometimes don’t realize it’s a quote tweet. And showing the date of the tweet would do well to help lessen the spread of outdated information (which can become misinformation). Please don’t ship an edit button, but do ship Clarifications. (go/clarifications) Timeline sync, the way third party clients such as Tweetbot implement it. I would love to leave my Latest timeline on one device and pick it up on another device, that way I don’t lose my place. This can be pretty simply done by sending down a “sync cursor”, and would likely bring a lot of fanfare and users over from third party clients. A slight redesign to the composer to make it feel more WYSIWIG. Reading in the context of a tweet makes it easier to catch mistakes so looking at a live preview as you’re composing it not only should look better, but should hopefully reduce the rate of errors and typos in tweets. Tweet digests. Follow the best tweets from a person in a day, being able to set custom criteria. Show me the top five tweets from a person in a day, only show me tweets with 50 likes or more from people I follow, etc. Thread marker. Instead of users manually writing 1/25 to signify the first of a 25-tweet thread, since we know how many tweets are in a thread we should show a little bubble on the tweet in the top right corner that says (1/25). It’ll save people precious characters and let threads grow in size without having to know how long they’ll be upfront. Searching my bookmarks and likes has gotta be some of the lowest hanging fruit at the company and has been built in hack weeks multiple times, can we please ship that? While we’re at it can we expose filter:follows filter:nativeretweets in search so users can find tweets they’ve seen (including injections) without having to remember such a wild query? 🥺 Please stop making Latest harder to use. I know research and metrics show that Latest has less engagement than Home but people who use Latest are different users, not worse. They may not engage as much by choice but you won’t convert many in that specific batch to being on Twitter more by making Latest harder and harder to use, instead you risk losing them entirely. And last but not least, it’s not a feature per se but I would love to see Twitter become the industry leader on harassment, spam, misinformation, etc, not only by working with with governments and NGOs — but by working with other companies and our peers there who also want a safer and more secure internet. Together we move farther than we do alone, and a healthy internet is an internet that’s healthy for every participant around the world. ↩
Designing A High Signal Interview Process
Crafting a great interview process is difficult1, especially for software development where a company is often trying to assess years of specialized knowledge and potential in only a few hours. The best interviews are said to feel like a discussion amongst peers, where each side is providing the other with signal about what it will be like to work together. Candidates share signals about their experience and thought process, while interviewers help provide signal and insight about a company’s values, the working environment, the state of a company, and more.
Crafting a great interview process is difficult1, especially for software development where a company is often trying to assess years of specialized knowledge and potential in only a few hours. The best interviews are said to feel like a discussion amongst peers, where each side is providing the other with signal about what it will be like to work together. Candidates share signals about their experience and thought process, while interviewers help provide signal and insight about a company’s values, the working environment, the state of a company, and more. The interview process for a job in a highly collaborative environment should be highly collaborative, providing a lot of feedback and insights for both sides along the way. The interview I am imagining is nimble and fair, mimicking the day to day work of a software developer in only 3-4 hours over four rounds. Any shorter and it may be hard to glean enough understanding of who a candidate is. If it goes much longer then that it'll be unfair to candidates who can't dedicate a whole day (or two) to interviewing with your company, and will be an increasingly expensive amount of resources to expend as your company grows. Transparency There aren't any benefits to being secretive about the process so I recommend letting a candidate know ahead of time what to expect from their day with you, beginning the process from a perspective of mutual respect. Given a relatively short time constraint the ideal process would seek to emulate the product lifecycle at your company, with time at the end to fill in any gaps you and the candidate may have. The highest-value work that can be done in that time is to build a small feature end to end with partners who will be working day to day with this developer. The Product Design Round The first part of most product development lifecycles is one that focuses on communication and iteration, taking a whole world of possibilities and whittles it down to a tangible output. That’s what we’ll aim to accomplish by pairing up the candidate with a product manager or designer, to discuss the feature they’ll be building together. The product design portion of the interview would start by walking through the scenario the company finds themselves in, the constraints they have, the customer needs, and anything else that is necessary to consider for what we’ll be building. Acting as partners both sides would work together to develop the context and thoughts into an idea, ultimately leading the candidate towards a defined version of the idea that they’ve worked together to build. There should be enough wiggle room to let a candidate's creativity shine through (which is in itself a useful signal), but ultimately by the end of the interview there will be a defined spec and designs of what needs to be built so the candidate can be prepared for their second interview. If you don’t reach a well-defined spec through collaboration that’s not necessarily a dealbreaker, not all engineers shine at product design. If you haven’t reached consensus on what a good product spec would look like, you should pause with about 10 minutes left to discuss what an ideal solution is. This will allow the candidate to familiarize themselves with the solution they’ll be building in the following interview, and it will also clue you into other important signals such as communication skills, how they collaborate in situations that have ambiguity, and their ability to respond to feedback (positive and negative). The Cross-Discipline Round Depending on if you're a front-end or a backend engineer, your second interview will be with a partner from the alternative team. (A backend developer would be asked to discuss the front-end portion in the second interview, and a front-end developer would be asked to discuss the backend needs.) In this case we’ll assume that a front-end engineer is being interviewed, so the discussion would involve your team’s backend engineer, centering around high-level architecture, API design, and other ways that a client would interact with a hypothetical backend. This interview would not be a coding interview, it would be a high-level discussion with a technical partner. The pair would discuss how the feature should work end to end, not asking a front-end engineer to understand the specific implementation details but to know where the front-end and backend would interact with each other. Knowing what SQL queries are occurring under the hood isn't as valuable day to day for a front-end engineer, but having a good idea for what a solid API looks like or how JSON should be shaped for the necessary data is highly beneficial. By the end of the interview the candidate should walk away with a fully fleshed out spec, one that makes sense for the problem they're looking to solve. The Proficiency Round This is the interview where a candidate will implement the feature we've designed and spec'd out. Much like in the first two interviews it’s important to establish early on that the candidate knows that the developer across the table is their partner and is there to help, answering questions, even pair programming if necessary. We want to get a feel for the kind of code a candidate writes, but we also want to minimize the context necessary to solve a problem. It's difficult to write code on demand, especially when there's a time constraint. To balance those requirements we won’t drop the candidate into a huge code base, and will use common platform/framework conventions so they feel as familiar as possible. Our top priority will be to build something that works, acknowledging the tradeoffs that were made along the way, and talking through where improvements could have been made (if there's room for improvement). The output we want to see is a working solution to match the spec we’ve built upon in prior exercises, if this were a test this would be where the candidate shows their work. The best candidates will be the ones that not only have a good solution to the problem, but also communicate well in the process of building it. The Calibration Round If you’ve ever walked out of an interview hoping the first person you met hours ago didn’t misunderstand a slip of the tongue or an unclear thought, you know how awful it can be to sit with that feeling for 24, 48, or even 72 hours as you wait for a response. Sometimes a company feels like if they had only spent a little more time with a candidate they would have gotten the signal they need to make a solid hire or no hire decision. It's much better for both sides to figure any open questions before a candidate leaves the office, so that’s what this interview accomplishes. This interview is a candidate’s opportunity to ask questions they have for the company, and a company’s opportunity to get answers to any open questions they may still have about the candidate. Before starting this interview let a candidate know that the three interviewers they met will be taking 10-15 minutes to try and figure out what questions they have. It’s been a stressful couple of hours so do whatever you can to ease the candidate’s nerves. Assure and reassure them that this is a normal part of the process no matter how well they did, it’s not always feasible to answer all the questions you may have about a candidate in a short period of time. But also let them know that you want both sides to feel confident they know what working with the other side is like, this is a big decision to make. The extra interview session is bidirectional, the candidate will have plenty of time to have their questions answered as well. Offer some water, let them use the restroom, ask them if they want to take a few minutes to themselves or even offer an employee for them to hang out with, whatever they want after a long day. At first this short gap may seem anxiety provoking, almost like sitting through judgment day, but as long as a candidate knows upfront about the process and motivation it should be a lot less uneasy than days of wondering about how an interview went without an opportunity to correct the record. Due to the imbalanced dynamics of this experience time-boxing your team to 15 minutes of discussion is a must. In this time a team should be coordinating to figure out what open questions remain, your goal is to figure out if you have enough signal to make a decision, and if not what needs to be asked to get enough signal. You can dive in more to the solutions a candidate came up with, discuss proper leveling, interpersonal dynamics, and whatever else matters to your team. If the interviewers agree that the candidate did well and don’t have any open questions then this last interview will be short. Provide the candidate with 15-30 minutes to ask about whatever they may want to know, and then let them go destress. If you’re still looking for more signal then the process will be extended a bit longer, accounting for the questions you want to answer. The candidate will still have 15-30 minutes to learn more about your company, but you’ll also have 30-45 minutes to learn more about the candidate. You may want to clarify a response the candidate gave, which is easy to do with them still here. If you didn't get a good read on their product design skills, have an exercise prepared where they'll need to go in depth a little more. If it was the high level architecture discussion then ask them to design a slightly more complicated system. If you weren't sure about their feature development, work to expand upon what you built in the last session. Like every interview process both sides are trying to leave with as few open questions as possible, so use this time to close out any open doors. Following Up While a high signal interview process is unsurprisingly about getting a lot of signal in a short period of time, it’s also one that aims to have candidates and companies be respectful to each other in the process. A good interview process is only made better when a candidate receives an answer in a timely manner. Once the interview has wrapped up it's ok to take some time to figure out your thoughts, but don’t take too long. If the process went as expected the interviewers should have a good idea about whether they want to hire a candidate after the third interview, so all that’s left is to figure out the specifics. It’s not unreasonable to come out of an interview to pressing work but it’s important to close this loop, try to make an official call by the end of the day (or early the next day if the interview took place in the afternoon) so the candidate will remember this process favorably no matter the result. And that's it. This process is quick, has depth to it, and provides a much more accurate feel for what working with a person is like than a whiteboarding exercise. It's a flexible enough approach that you can tailor the interviews to your company's needs, and I would highly recommend doing so, reevaluating what's working and what isn't. We should always be reevaluating our interview processes because talent evaluation isn't easy and needs change as a company and the industry move forward, so if you have ideas for improvement I’d love for you to share them with me. This post was surprisingly difficult to write in a clear and concise manner without making a formal write up feel so formal, and not losing the message by being too informal. It really took a village so thank you to the plethora of people who helped by providing feedback and editing my drafts, most notably Tamar Nachmany, Amro Mousa, and Brian Michel. There are a lot of tradeoffs when it comes to interviewing around preference, fairness, complexity, bias, and more. To be upfront I won't cover any of that in this post, but know that they were considered, and some are listed in the appendix below. I have another post planned about how every interview process is flawed and biased, but for now the most important thing to keep in mind is that every interview process, whether it's a take home project or writing code on a whiteboard provides both sides signal, but comes with tradeoffs Tradeoffs are a necessity because there’s no fair way to evaluate in only a few hours what working with a candidate or a company will look like for the next few years, so it's important to acknowledge as a company which tradeoffs you're willing to make. Caveats, Disclaimers, and Footnotes This is written from the perspective of a company, but all of these considerations are just as important to a candidate understanding a company they hope to work at for a long time. Hiring criteria differs, for example sometimes you need to hire the best applicant available vs. hiring someone who can do the role, so you should be flexible and define that ahead of time. This may not work for your startup, this may not work for a big tech company! But I believe it's a process worth considering if your company is one where engineering, product, design, and other organizational functions are expected to work well together. Assume that this is an on-site interview, something that may be less common right now, especially with the rise of remote work. The process should still be doable in a remote setting, but there may be some adaptations necessary. ↩
The Best Twitter Bio? The Humble Tweet
Tell me who you are in 160 characters. I'll wait while you try and achieve the level of nuance necessary for the task. This constraint is why you end up with generic Twitter bios that don't tell you much about someone and all look like:
Father, cyclist, biz-dev, and fighting every day for the Quebec sovereignty movement. Working on saving democracy @Meta, ex-Palantir, ex-Accenture, ex of my ex.
Kinda hard to stand out, right? The inability to differentiate yourself on a platform built upon self-expression has always felt surprising to me, so I started to look for alternative means of letting people get to know more about me. The most common approach to gain additional room for expression is to use Twitter's Website field, linking out to a more information-rich bio. But that jump to the web is an opportunity to lose focus, especially in a world where nobody has the attention span to read (or leave Twitter). There are even solutions like Linktree that build upon the link to link to a link of links, letting those links speak for you.
Tell me who you are in 160 characters. I'll wait while you try and achieve the level of nuance necessary for the task. This constraint is why you end up with generic Twitter bios that don't tell you much about someone and all look like: Father, cyclist, biz-dev, and fighting every day for the Quebec sovereignty movement. Working on saving democracy @Meta, ex-Palantir, ex-Accenture, ex of my ex. Kinda hard to stand out, right? The inability to differentiate yourself on a platform built upon self-expression has always felt surprising to me, so I started to look for alternative means of letting people get to know more about me. The most common approach to gain additional room for expression is to use Twitter's Website field, linking out to a more information-rich bio. But that jump to the web is an opportunity to lose focus, especially in a world where nobody has the attention span to read (or leave Twitter). There are even solutions like Linktree that build upon the link to link to a link of links, letting those links speak for you. There are plenty of hacks one can imagine using, more advanced users have taken to pinning an “intro thread”, but what I was looking for was an option that would let me be more expressive than a bio, felt eloquent, and was native to Twitter. That's when I remembered the humble Twitter carousel. You may have seen carousels serving you ads for apps or services that everyone is excited about like… VMWare Cloud. But did you know that Twitter's advertiser tools are available to everyone, without having to pay a penny? 1 That's right, you a regular Twitter user can have the same capabilities as a company that pays Twitter millions of dollars per year. I'm going to show you how to take advantage of them so you can stand out just like household brands such as Disney, Nike, and of course… VMWare. Who's That Handsome Guy? About Me About Me — ✨ Joe Fabisevich ✨ (@mergesort) February 19, 2022 I've always debated whether my bio should link to my home page, my About Me page, or the best posts I've written. Thanks to the carousel I no longer have to choose, and I'm able to put all three front and center. The flexibility of having six links means I can also guide people to the office hours I host, and have room to spare for another link or two.2 As importantly as taking the time to construct the tweet is remembering to pin it, that way anyone who comes to my Twitter account has this information visible immediately. Do you love red pandas? Love apps? Find out more about what we do! — The Red Panda Club (@redpandaclub) February 19, 2022 A brand can get really creative by linking to their homepage, their support page3, FAQs, App Store apps, and a whole lot more. The carousel is also a medium to play with, you can use custom artwork to show off your brand's style, which in my case is playful and silly. I created a tweet carousel for my indie development company Red Panda Club as a proof of concept, and pinned it to the top of the @redpandaclub Twitter account. Building Your Carousel The process for building your own Twitter carousel is hidden away, but surprisingly easy. Head over to ads.twitter.com and look in the navigation bar for a menu titled Creatives. Under Creatives you'll find a menu item titled Tweet Composer, this is unsurprisingly what you'll want to compose tweets. The URL will look something like ads.twitter.com / composer / XXXXX /carousel, where the XXXXX will be a random set of letters and numbers. You may run into various popups asking for more information, feel free to ignore ‘em! The only popup you’ll see that you have to fill out is one asking you to setup a payment method and campaign to unlock a Creatives menu. 1 (You really don't have to pay Twitter anything to use the tools but you do need to have a credit card on file to use the Ads Tweet Composer.) And that's actually it, there's no real step 2 beyond composing your tweet. But to save you some time I'll mention a few things that may seem unintuitive. A) Your first step for customizing the carousel is to add media. You can't start creating a card by updating the website destination; that will only appear after you've chosen media for your carousel. B) Website cards can customize the text that displays under a card's image, but app cards always display the app name and app category under the image. C) You’ll be asked to choose an app carousel or a web carousel, but don’t let that think you can't make one that mixes the two together. To do this you'll need to choose a website carousel and for any app you want to add you'll use your app's App Store or Google Play URL and manually upload your app's icon. D) The Tweet Composer will default to making your tweet Promoted Only. If you want the composed tweet to show up on your profile timeline remember to uncheck the Promoted Only checkbox. It's worth noting that a Promoted Tweet is a real tweet, but you’ll only be able to find the tweet’s URL in the Twitter Ads dashboard. E) Cards do not render in third-party clients4, so if that's important to you I recommend including text and links in the body of the tweet. It doesn't look as good in native Twitter clients so it's your choice whether to prioritize this or not. Now that you know how to build a fun carousel, I'd love to see you get creative. I can't wait to see what kind you come up with. 🎠 To add a payment method: Click the Create an ad button. You may be prompted to confirm your timezone, then click Let's go. A popup will display asking you to Choose your objective. Exit this screen by clicking the cancel button in the bottom right corner of the screen. In the top right corner you will see your account name, clicking it will show a dropdown option that says Add new payment method. Add a credit or debit card and from now on you should see the Creatives menu that you need to access the Ads Tweet Composer. ↩ I expect these links to change so I'm not particularly attached to them, and if I ever do change them I can always post an updated tweet. Alternatively using a link shortener is a good strategy for not having to change the underlying data.↩↩ Twitter doesn't let website carousels link to custom URL schemes so I got a little creative with my support link. Using my redpanda.best URL shortener I linked to a page who's contents contain <body onload="javascript: window.location.href= 'mailto:abc@mywebsite.com'; ">, to work around the fact you can't use a mailto: URL.↩↩ Unfortunately the underlying cards these carousels are built on aren’t exposed in the v2 third-party API tweet payload, so they can’t be rendered in them.↩↩
Creating Slick Color Palette APIs
The work of writing maintainable code is an ongoing endeavor and some of my favorite problems to solve are ones that build maintainable systems. Maintainable systems are ones you can learn once, easily manipulate, and ideally take from project to project. My favorite part of building maintainable systems is that it minimizes the amount of work I need to do when starting a new project, and like it is for many programmers hitting ⌘ + ⇪ + N to start a new project is one of the most satisfying feelings in the world for me.
The work of writing maintainable code is an ongoing endeavor and some of my favorite problems to solve are ones that build maintainable systems. Maintainable systems are ones you can learn once, easily manipulate, and ideally take from project to project. My favorite part of building maintainable systems is that it minimizes the amount of work I need to do when starting a new project, and like it is for many programmers hitting ⌘ + ⇪ + N to start a new project is one of the most satisfying feelings in the world for me. A color palette is something every well-designed app needs, and it turns out there are a lot of ways to solve this problem. If you don't yet have a good sense for how to construct a color palette, I highly recommend this post by Refactoring UI that explains the fundamentals of a good color palette. Generating a good color palette can be tricky if you’re new to the practice and can require some trial and error, so if you’d like a shortcut a tool like Coolors is a great starting point. I've spent years iterating on approaches to codifying color palettes in my iOS and macOS apps, seeking to create one that’s flexible, scales well, and is easy to understand, landing on the version we’ll explore below. We'll be able to leverage asset catalogs, create a clear sense of hierarchy, provide statically typed semantic colors, even take advantage of the built in features of SwiftUI. As a bonus, if you're working with designers, your palette will be so straightforward to modify that a designer can submit a pull request to change colors without ever involving you. Considering we'll be leveraging asset catalogs, the first step should be pretty intuitive, we should create an asset catalog to hold our color palettes. As I was piecing together different instructions and ideas this second step confused me, so I'll spare you the misery. You're going to want to make a different folder for each color palette you create, and you can do that by right clicking in the asset catalog and selecting New Folder. Now it's time to create our color palettes. I'm showing you the Night palette I created for my app, and below it are Spring, Summer, and Winter. Each palette has the same name but all of the colors are named the same, each palette will have colors named background-alt, primary, quaternary, etc. Do not miss this incredibly important step, guide your eyes towards the pink arrow on the right side of the image. You must select the folder you're adding colors to and check the Provides Namespace checkbox. This is what will enable our code to have a clear and consistent naming structure, matching the folder’s name to our palette's name. Now that we've got our asset catalogs setup, we're ready to write some code. We'll start by constructing a new Palette struct, and populating it with some Colors that we'll reference across our app. extension Color { struct Palette { let name: String var mainBackground: Color { Color(fromPalette: self.name, semanticName: "background-main") } var midBackground: Color { Color(fromPalette: self.name, semanticName: "background-mid") } var alternativeBackground: Color { Color(fromPalette: self.name, semanticName: "background-alt") } var primaryText: Color { Color(fromPalette: self.name, semanticName: "text-primary") } var alternativeText: Color { Color(fromPalette: self.name, semanticName: "text-alt") } var primary: Color { Color(fromPalette: self.name, semanticName: "primary") } var secondary: Color { Color(fromPalette: self.name, semanticName: "secondary") } var tertiary: Color { Color(fromPalette: self.name, semanticName: "tertiary") } var quaternary: Color { Color(fromPalette: self.name, semanticName: "quaternary") } } } This is a pretty standard palette and should cover most of the use cases you'll encounter in building an app. You can modify it to your needs, but the important thing is that the colors you choose need to match the names of the colors you declared in your asset catalog. But what is this Color(fromPalette:semanticName:) initializer? private extension Color { init(fromPalette palette: String, semanticName: String) { #if os(macOS) self.init(NSColor(named: "\(palette)/\(semanticName)")!) #else self.init(UIColor(named: "\(palette)/\(semanticName)")!) #endif } } You can just as easily use a private method in Color.Palette, something like private func assetCatalogColor(semanticName: String). I happen to prefer the ergonomics of a custom initializer, and this whole post is about improving ergonomics, so let's run with that. This initializer lives in Color.Palette and takes advantage of our namespaced folder structure to pull out colors from the asset catalog. palette unsurprisingly is the name of our color palette, and semanticName is the name of the color we're pulling out of it, such as primary, secondary, or background-main. Combining the two with a /, we'll get the primary, secondary, or background-main color from our current palette. All that's left is to define the palettes we'll be constructing. extension Color.Palette { static let spring = Color.Palette(name: "Spring") static let summer = Color.Palette(name: "Summer") static let autumn = Color.Palette(name: "Autumn") static let winter = Color.Palette(name: "Winter") static let day = Color.Palette(name: "Day") static let dusk = Color.Palette(name: "Dusk") static let night = Color.Palette(name: "Night") } Constructing palettes is pretty easy. All you have to do is instantiate a Color.Palette object with a name. That name must match the folder name, so in my app the palette name for Night will be Night because the folder we chose for that palete was "Night". Now that we have a color palette created, we should probably start using it. If you're using UIKit you'll likely have built your palette atop UIColor instead of Color and used .palette.primaryText wherever a UIColor is expected. But if we're building our app in SwiftUI, we can go the extra mile with just a few lines of code to leverage the Environment, making our palette easily accessible and SwiftUI-friendly. private struct ColorPaletteKey: EnvironmentKey { // We need to default to a palette so without any particular preference let's pick `day` static let defaultValue = Color.Palette.day } extension EnvironmentValues { var preferredColorPalette: Color.Palette { get { return self[ColorPaletteKey.self] } set { self[ColorPaletteKey.self] = newValue } } } This creates the preferredColorPalette property in our Environment. If you're not sure how the Environment works there are a lot of great resources on the internet like this post by Keith Harrison. struct HeaderView: View { @Environment(\.preferredColorPalette) private var palette var body: View { Text("Hello World") .foregroundColor(palette.primaryText) } } Now accessing our colors is a nothing more than two lines of code, how slick is that? Hope I didn't wear you out, there's a lot here, but when you throw it into Xcode you'll see that it's pretty easy to digest. After a few iterations I'm really happy with this solution and have been using it in my personal apps for a while now. It allows us to easily add or change colors, have a visual representation of our colors, with minimal code, and a pretty slick API. But no code is perfect (except for mergesort), so I'm always looking for improvements. I'm excited to hear your thoughts or suggestions, so don't be shy about reaching out.
It's Not Better If It's Also Worse
For a long time I've told people that I love technology and all it enables, yet dislike the technology industry and working in tech. People often find my statement hard to rectify, probably because they see the two as inextricably linked. Technology is an ever-changing process, one that pushes humanity forward through the application of science, and the industry has become (and arguably always has been) about capitalizing those mechanisms of change.
For a long time I've told people that I love technology and all it enables, yet dislike the technology industry and working in tech. People often find my statement hard to rectify, probably because they see the two as inextricably linked. Technology is an ever-changing process, one that pushes humanity forward through the application of science, and the industry has become (and arguably always has been) about capitalizing those mechanisms of change. The tech world today is capitalizing those innovations at an unprecedented rate. That's why the tech sector is the most dominant and rapidly advancing industry in history. That's also what makes it so difficult to express the discord between the progress people see and the disproportionate impact it has. People see the progress of technology in real time, and they only see the moral and ethical issues with the rapid advancement of technology after that technology has established a role in people's lives. No one had any problems with Facebook in 2012, but they sure do now. Why Is This Happening? Many solutions invented today are about replacing existing solutions with more efficient ones. That feels like it should be an undeniable good. What happens when you create a technology that gives you everything you had before, cheaper, faster, and with even more improvements and features — but only addresses 99% of the problems? That's what you're seeing play out in the tech sector today. Companies are built on efficiency gains, but they don't have to pay the cost of the inefficiencies they create. They're not punished for the externalities they cause. As long as you're not feeling the burden, if you're not in the 1% for whom the new technology is a worse experience, you see nothing but progress and get to reap its benefits. But those who bear the cost are shut out from the new experience or improvement in their lives. Often times they're not only shut out, but as the world modernizes and standardizes around these solutions, those people are falling behind through the inequities of being a have-not in a system where almost everyone else is a have. Technology For Good, Not Always So Machine learning is an amazing technology, it shows us what we always could have known if we were smart enough to spot patterns in enormous data sets. It's helping fight cancer, it's helping people who can't speak have a voice, it's helping power the recommendation engines that give us the answers we need to get through the day. But what happens when machine learning makes a mistake? What happens when the system you've built increases racial bias? The most common use of machine learning seems to be reshaping our interactions around algorithms that want to optimize us as consumers. There's no manager to talk to, there's no one who can look into this black box, there are few companies who will turn off their models that work for 99% of people. At the scale of millions, incorporated into our lives, these technologies that make the world a better place are making some people's lives worse. Cryptocurrency is having a moment, especially as billionaires bored during a pandemic have started shoveling money into NFTs. Is there a need for a global censorship-resistant currency? I'm not smart enough to say, but I can see the allure and benefits that drive crypto enthusiasts to push for it.1 What I am smart enough to say is that the environmental impact of cryptocurrencies is a nightmare. Supporters will say "just wait, Proof of Stake will solve these problems", and they're probably right. But PoS was introduced in 2012 and it's still not here in 2021. We're living in a Proof of Work world, why is it people bearing the costs who have to wait? How about when you've fixed your problems you can come back and try again. How much unnecessary damage to the planet has been done in the last 9 years in the name of advancing a technology? I'm not here to pick on machine learning and cryptocurrencies, these problems of unaccountability are systemic. Uber is an amazing innovation in global transport built on already existing infrastructure, except to the drivers. Amazon provides unprecedented logistics, letting you have anything you could ever want in two days, built on the backs of real human beings. Twitter is a real-time archive of human history, except it globalizes and nationalizes local issues, and disproportionately exposes marginalized communities to abuse and harassment. What technologists optimize for is an explicit choice that’s made, even if the tools we use to do so render opaque results. So much of engineering is focused on the concept of minimizing friction, but minimizing friction is almost always focused on short-term benefits because that’s what feels most rewarding. This is echoed by people who decry the death of investing in infrastructure, and as a society we seem to be trading our long term costs for short term happiness. We’re letting technology go down the same path, even using it to accelerate that trend. Like any technologist knows technical debt eventually gets paid off, either by choice or by circumstance. What’s To Come The list goes on, and will continue to go on until there's a cost associated with making mistakes. Existing incentive structures in our society and economy don’t factor in a price for the externalities of building something that causes damage, even if that damage is only borne by a small percentage of people. At the scale technology operates at, edge cases are millions of people. The sheer awesomeness of technology can lure you into a sense of moving forward. It may feel that the ends justify the means, that you're doing the right thing at a small cost. You too are creating or experiencing the advancement of humanity through technology, like billions have felt before us. But as they say, history is written by the victors, the people who are worse off through our advancements as always are being forgotten and erased. The drive to continue growing leaves little time for fixing mistakes when there's another frontier to capitalize. That only makes it harder for people who are left behind to be brought forward. We need to do better to understand not only the benefits, but to explore the costs of a new technology. The costs are real, and are felt by real people. I wish that by the end of my post we’d found a solution, but unfortunately systemic issues aren't fixed by meandering thoughts. The most I can ask you to do is to think about the externalities of your actions, to not accept new technology into your life without considering the tradeoffs, and to hold those building them accountable — the same way you would if it was your life being impacted negatively. Not that anyone asked for my opinions on censorship-resistance currency, but I do think the goal in a vacuum is laudable. Despite that I think people underestimate the value of tried and true banking systems that have been operating for over 600 years. I suspect much of the antipathy towards banks is actually people’s understandable disgust at our current financial system. I don’t see how cryptocurrencies fix that, and in many ways by not having the promises of banks only make it worse.↩↩
Putting the U in GraphQL
GraphQL has been on my list of technologies to learn for a few months now, and last week I came across Majid Jabrayilov's post, feeling pretty excited to tackle the subject. The post was very good, but it didn't answer the one question I've had as I've gone through numerous exercises to understand GraphQL, how do I make GraphQL requests without a library?
GraphQL has been on my list of technologies to learn for a few months now, and last week I came across Majid Jabrayilov's post, feeling pretty excited to tackle the subject. The post was very good, but it didn't answer the one question I've had as I've gone through numerous exercises to understand GraphQL, how do I make GraphQL requests without a library? I've read about how to create a GraphQL query and how to integrate GraphQL on your server a dozen times, but one topic that's highly under-covered is how to make a GraphQL request from the client. In the world of GraphQL it's very common to reach for Apollo, a library that handles turning GraphQL queries into functions, leveraging tooling to turn those functions into type-safe API requests the client can make. While this is a perfectly reasonable approach, and actually a pretty good developer experience, it still didn't answer the questions I had as an ever-curious engineer, how would I do this on my own? I broke the problem I saw down into two smaller problems, request-generation and request-making. Generating a request, especially in Swift, it turns out is pretty easy. I really like the approach that SociableWeaver takes, leveraging Swift's function builders to let you build a type-safe directly in Swift. The second problem was a bit fiddlier. I knew that I had to make a POST request, and I knew the endpoint that was being hit, and through some trial and error (and a friend's help1), I was able to start making GraphQL requests without any external libraries needed. extension URLSession { func graphQLRequest(url: URL, query: String) -> URLSession.DataTaskPublisher { var request = URLRequest(url: url) request.httpMethod = "POST" request.addValue("application/json", forHTTPHeaderField: "Content-Type") let body = """ { "query": "\(query)" } """ let queryData = body.data(using: .utf8) request.httpBody = queryData return self.dataTaskPublisher(for: request) } // If using SociableWeaver or a similar GraphQL query generator, you can do it in a type-safe manner. func graphQLRequest(url: URL, query: Weave) -> URLSession.DataTaskPublisher { return self.executeGraphQLQuery(url: url, query: query.description) } } After looking over the above code a few times I realized that the majority of it was handling the creation of a URLRequest. That served as a hint to me that we could refactor the code into a custom URLRequest initializer. This would be less prescriptive about how the URLRequest is used, since my first code snippet assumes you always want to return a URLSession.DataTaskPublisher. extension URLRequest { init(url: URL, graphQLQuery query: String) { self.init(url: url) self.httpMethod = "POST" self.addValue("application/json", forHTTPHeaderField: "Content-Type") let body = """ { "query": "\(query)" } """ let queryData = body.data(using: .utf8) self.httpBody = queryData } // If we're going all in on SociableWeaver we can make a similar initializer that takes a `Weave` parameter instead of a `String`. } Now if you'd like to use URLSession.DataTaskPublisher you're free to by creating a URLRequest from our new initializer and using it, but you can also return a URLSession.DataTask or any other reason mechanism that involves a URLRequest. extension URLSession { func graphQLRequest(url: URL, query: String) -> URLSession.DataTaskPublisher { let request = URLRequest(url: url, graphQLQuery: query) return self.dataTaskPublisher(for: request) } func graphQLRequest(url: URL, query: Weave) -> URLSession.DataTaskPublisher { return self.graphQLRequest(url: url, query: query.description) } } That looks a lot cleaner, and our responsibilities seem a lot more well-divided. Is there room for tools like Apollo? Absolutely! I'm not going to pretend that my dozen lines of code replaces the value that a multimillion dollar company provides. (I'll only make sick jokes about it.) But before importing a library like Apollo, any library really, it's worth asking yourself whether you need a big solution for a small problem. Or maybe question the better question to ask before that is, have you really understood the problem you're trying to solve? But we still haven't really answered where exactly we should put the U in GraphQL. (I say after the Q since Q is almost always followed by U, but I'm open to feedback on that or the rest of this post.) Special thanks to Dave DeLong for his debugging prowess.↩↩
App Store [P]review
Apple's been in the news quite a bit lately over concerns that many apps on the App Store are little more than scams. Some of these apps aren't even functional, they don't provide anything more than a screen with no functionality, only a button to purchase an indefinite weekly subscription. Many developers and consumers are confused or surprised that Apple isn't catching these scams, given Apple has a process for App Review which every app must go through, and while I'm not surprised given the breadth of the problem, I find myself thinking it's very problematic for the digital economy and consumer confidence in buying services through what once was considered a safe place.
Apple's been in the news quite a bit lately over concerns that many apps on the App Store are little more than scams. Some of these apps aren't even functional, they don't provide anything more than a screen with no functionality, only a button to purchase an indefinite weekly subscription. Many developers and consumers are confused or surprised that Apple isn't catching these scams, given Apple has a process for App Review which every app must go through, and while I'm not surprised given the breadth of the problem, I find myself thinking it's very problematic for the digital economy and consumer confidence in buying services through what once was considered a safe place. Twitter, the company I work for, deals a lot with content moderation. I'd argue it's the largest existential threat to the company. Whether Apple likes it or not they've walked into the same position with the App Store. This may be news to them, having spent decades curating all sorts of content from music to workouts, but as the App Store has grown, they now serve billions of customers and work with millions of developers. Those developers are creating content that Apple has little control over, other than acting as a gating mechanism, and so their ability to exercise control over that content has diminished significantly. Let’s skip past the debate about whether or not Apple should have this much level of control or whether the system needs to be reformed. Instead I'd like to talk about where I think Apple can patch the cracks in a broken App Store, before it breaks itself apart or is broken apart from the outside. The App Store Apple treats every developer the same (😉), or at least let's say so for the sake of this argument.1 From my own work, what I've seen is that when you don't have any way of validating whether someone is a good actor or bad actor, the reasonable default assumption is that everyone is a bad actor, and that's how Apple treats developers. This leads to many false negatives and false positives, good developers getting much more scrutiny than they should, and bad developers sliding through when they are in need of scrutiny. There's no thorough process for validation, there's no process for restorative justice, only Apple doing their best to remain hyper-vigilant at all times, and accepting the human errors that come along with that. While you can't eliminate bad actors, they're always going to exist in any system, what you can do is minimize the total bad actor surface area, and minimize the effects of these bad actors. A simple equation: if you treat 100% of developers as potential threats, there's no way to avoid hyper-vigilance, but if you only have to watch out for 20%, then you can be five times more efficient at rooting out bad behavior such as scams. So we need a way to let bad actors tell us that they're bad? No, we need a way for good actors to signal to us that they're good, leaving everyone else in questionable territory. Apple needs an internal scoring system to know where to devote their investigative resources. If you don't need to pay attention to the well-meaning app developer trying to make an honest buck, you can devote more resources, or your limited resources to the people who haven't done the work to show that they're good actors. Incentive Design Let’s take a step back to understand our friend from the world of behavioral economics, incentive design. To quote liberally: An incentive is something that motivates an individual to perform an action. It is therefore essential to the study of any economic activity. Incentives, whether they are intrinsic or extrinsic (traditional), can be effective in encouraging behavior change, such as ceasing to smoke, doing more exercise, complying with laws or increasing public good contributions. Traditional incentives can effectively encourage behavior change, as they can help to both create desirable and break undesirable habits. I don't have all the answers for fixing the App Store, but I don't think you need all the answers up front to start improving the system. Taking what we learned about incentive design above, what I see Apple having is a resource allocation problem due to them not knowing who’s complying with the rules and contributing to the public good. With that in mind, a scoring system is where I would invest resources to know who’s having a net-positive and a net-negative effect on the App Store system. There can be many contributors to this scoring system. Right now reviews and downloads are already used, but they are gameable due to their public nature, an example of poor incentive design. Surely new metrics can be added, such as how many times they've passed the scrutiny of app review, or how closely the instructions a developer gives match the reviewer's expectations. While those are relatively weak signals, Apple surely has dozens if not hundreds more internal signals they can apply to understanding a developer’s net outcome on the App Store. And yet I think there's room for a much stronger signal. App Store Preview App Store Preview would work similar to Apple's current DTS system, where you can get hands-on help with a technical problem you're having. A developer should be able to get pre-approval for an idea2, in the context of their application, without having to build an entire feature (or application) before App Review deems it worthy. This would also provide context for future reviewers, knowing what to look for and what's changed. The more a pre-approved version matches the reviewer's expectations come review time, the higher the score would the developer would receive. The higher their overall score over time (by some to be established scoring mechanism), the less scrutiny they would receive in the future. More importantly though is the inverse. If someone doesn't go through review, they implicitly receive more scrutiny. Bad actors will be disincentivized to have their app in Apple's hands for longer, and to be put under a microscope. This aversion makes them inherently less trustworthy, and would lead to them getting more scrutiny in the future. By letting good actors prove they're good actors, we've isolated the bad actors to show their cards and prove through implicit means that they're not good actors. This wouldn't fix the mistakes that App Review makes, and bless them, it's a very tough job. This doesn’t even solve many of the App Store's problems, it’s only one idea and there are many other problems that Apple needs to solve. But it does show that Apple has lots of levers to pull when designing resilient systems, and can lay the foundation for a system where Apple can trust developers. And that's increasingly necessary for maintaining the consistency quality Apple, developers, and customers all want for the App Store. As always, I’m excited to hear your thoughts, and am receptive to feedback, so if you want to talk don't be shy about sending me a trustworthy tweet. To paraphrase George Orwell, "all developers are equal but some are more equal than others."↩↩ Given this is time intensive, you could make validation finite, maybe 2-4 tickets per year, or even have a system where people can pay for more tickets to have more previews, something that would surely be valuable for many developers and Apple.↩↩
Empower Apps Podcast - Large Scale Teams
I recorded an episode of the Empower Apps podcast, where Leo Dion and I discussed a wide range of topics. We spoke about everything from how we scale app development to thousands of people and millions of users at Twitter, communication, documentation, people working together, and a lot about and the complexity of holding moral frameworks at a global level.
I recorded an episode of the Empower Apps podcast, where Leo Dion and I discussed a wide range of topics. We spoke about everything from how we scale app development to thousands of people and millions of users at Twitter, communication, documentation, people working together, and a lot about and the complexity of holding moral frameworks at a global level. Empower Apps: Large Scale Teams with Joe Fabisevich Original recording
Context-Bound Types
I've been thinking about privacy lately. No, not online privacy, but about how APIs can balance exposing the right amount of implementation details without revealing too much.
I'll walk through a task I find myself doing often when building iOS apps, creating a view controller with header view, and four different ways to go about it.
I've been thinking about privacy lately. No, not online privacy, but about how APIs can balance exposing the right amount of implementation details without revealing too much. I'll walk through a task I find myself doing often when building iOS apps, creating a view controller with header view, and four different ways to go about it. Regular View Configured as a Header SettingsViewController.swift final class SettingsViewController: UIViewController { private let headerView = UIView() private let tableView = UITableView() override func viewDidLoad() { super.viewDidLoad() self.view.addSubview(self.tableView) self.setupTableView() self.configureHeaderView() } func setupTableView() { self.tableView.translatesAutoresizingMaskIntoConstraints = false NSLayoutConstraint.activate([ self.tableView.leadingAnchor.constraint(equalTo: self.view.leadingAnchor), self.tableView.trailingAnchor.constraint(equalTo: self.view.trailingAnchor), self.tableView.topAnchor.constraint(equalTo: self.view.topAnchor), self.tableView.bottomAnchor.constraint(equalTo: self.view.bottomAnchor), ]) } func configureHeaderView() { // Some code configuring self.headerView // ... // ... self.tableView.tableHeaderView = self.headerView } } For folks new to iOS development, this is a common approach I see when adding a header. It makes sense, you want to have a header, and a header is a view, so why not configure and style UIView to be the UITableView header. While this is a good first try, it lacks the encapsulation that makes your code easy to edit and reason about. Separate Class For The Header SettingsViewController.swift final class SettingsViewController: UIViewController { private let headerView = SettingsTableHeaderView() private let tableView = UITableView() override func viewDidLoad() { super.viewDidLoad() self.view.addSubview(self.tableView) self.setupTableView() self.tableView.tableHeaderView = self.headerView } } SettingsTableHeaderView.swift final class SettingsTableHeaderView: UIView { // Some code creating and configuring SettingsTableHeaderView // ... // ... } A naive approach to improve our readability would have been to move our configuration code into a function, but an even nicer improvement is to move it into its own class. This looks a lot better, it's easier to reason about and it's well-encapsulated. But a new problem this introduces is adding SettingsTableHeaderView into our module’s namespace. Now I'll admit this isn't the world's biggest problem, but as you start adding different view controllers with different headers, suddenly finding the right header view for a given view controller becomes difficult. Private Class for the Header SettingsViewController.swift final class SettingsViewController: UIViewController { private let headerView = HeaderView() private let tableView = UITableView() override func viewDidLoad() { super.viewDidLoad() self.view.addSubview(self.tableView) self.setupTableView() self.tableView.tableHeaderView = self.headerView } private final class HeaderView: UIView { // Some code creating and configuring SettingsViewController.HeaderView // ... // ... } } Now this is a solution that I'm really liking. We've moved SettingsTableHeaderView out of our module’s namespace and into one dependent on the context it's in, SettingsViewController. When referring to SettingsViewController.HeaderView inside of this class we can plainly refer to it as HeaderView, which is not only less verbose, but emphasizes the pairing between HeaderView and SettingsViewController. There is a downside to this approach though, the more views we add to SettingsViewController, the harder this file becomes to parse. Now again this may not seem like a big problem, but if you have a well encapsulated view, you may have many subviews that belong to either SettingsViewController or HeaderView, and your file can get pretty large. (Trust me, I’ve seen written some pretty large files.) Two Files with Namespaced Internal Classes SettingsViewController.swift final class SettingsViewController: UIViewController { private let headerView = HeaderView() private let tableView = UITableView() override func viewDidLoad() { super.viewDidLoad() self.view.addSubview(self.tableView) self.setupTableView() self.tableView.tableHeaderView = self.headerView } } SettingsViewController.HeaderView.swift extension SettingsViewController { final class HeaderView: UIView { // Some code creating and configuring SettingsViewController.HeaderView // ... // ... } } This is the approach I've settled on today. You'll notice that HeaderView is no longer private, but it's also not particularly easy to access publicly. You still end up with the benefits from namespacing the API, and this extension can go into its own file, unlike the earlier approach. If you were to accidentally misuse this API, it would be pretty clear. When calling HeaderView inside of SettingsViewController the call-site is clean and simple. But if someone were to attempt to use it from another class, they would have to reference the fully-qualified type, SettingsViewController.HeaderView. While I’ve walked through one example with four approaches, binding a type to its context is something you can do throughout a codebase. In an ideal world Swift would have a submodule keyword to make types less ambiguous, but in the mean time this is a reasonable substitute that developers can take advantage of. While we don’t have a submodule keyword, we have a close approximation by using empty enums. One notable example is Combine’s usage of Publishers and Subscribers to help people have context and understanding for their subtypes. As always, I’d love to know what you think or if you’ve come up with better solutions, so please don’t be shy about reaching out. Special shoutout to Jasdev for taking a very rough first draft and helping me turn it into something coherent.
Building Better Views (Part II), Next Steps
If you haven't checked out Part I, I recommend reading it because if you don't, none of writing below will make sense!
If you haven't checked out Part I, I recommend reading it because if you don't, none of writing below will make sense! Three Unanswered Questions 1. What happens when the views you want to configure are more complex? My recommended approach is to construct a one-time use struct, specifically for displaying in that one place. This type should only have the properties you need to render the view. struct HomeScreenCourseProgressViewDisplay { let course: Course let enrollment: Enrollment let customization: SchoolCustomization } Creating the ViewData should look familiar. We're going to do the exact same thing we did before. extension HomeScreenCourseProgressViewDisplay: CourseProgressViewData { var titleLabelText: String { return self.course.name } var subtitleLabelText: String { return self.course.author.name } var statusLabelText: String { return String.localizedStringWithFormat(NSLocalizedString("%@% complete", comment: "The percentage a course is complete"), self.enrollment.percentComplete) } var progress: CGFloat { return CGFloat(self.enrollment.percentComplete) / 100 } var imageUrl: URL? { return self.course.imageUrl } } Using this ViewData object is just as simple as it was before. On our home screen, we now create the struct, and configure our custom view with it. Same as before, just leveraging how lightweight creating types in Swift is! func tableView(_ tableView: UITableView, cellForRowAt indexPath: IndexPath) -> UITableViewCell { guard let currentUser = self.userAtIndexPath(indexPath: indexPath), self.hasCoursesAtIndexPath(indexPath: indexPath) else { fatalError("Ruh roh"!) } let currentCourse = currentUser.courses[indexPath.row] let currentEnrollment = currentUser.enrollments[indexPath.row] let schoolCustomization = currentUser.school.customization let homeScreenDisplay = HomeScreenCourseProgressViewDisplay( course: currentCourse, enrollment: currentEnrollment, customization: schoolCustomization ) cell.customView.configure(viewData: homeScreenDisplay) return cell } 2. How does the ViewData pattern deal with user interaction? I advise keeping user actions in the UIView realm. You can continue using the delegate pattern, closures, or wherever your preferences may lie. If you’re looking to get a little more advanced, I’d consider reading Dave DeLong’s A Better MVC series. 3. Where does logic code reside, and what happens if you have more complex transformations? The scenarios so far have worked great. The models you received from the server looked a lot like the way you plan to display them, but that's not always the case. Sometimes you're going to need business logic, and that's ok. This is the question I had the most trouble coming up with one answer for. I realized the reason I couldn't come up with one answer is because there isn't only one answer. Looking back at our Comment model, we see that there is a Date object in there. public struct Comment { let text: String let commenter: String let createdAt: Date let imageUrl: URL? } In our first example we simply glossed over the fact that we were translating a Date into a String, by using a simple function that already exists in a third party library. extension Comment: CommentViewData { var timestamp: String { return self.createdAt.timeAgoSinceNow } } But now let's pretend we don't have timeAgoSinceNow available to us. Where does that transformation code live? The answer is, it's up to you! Some people prefer to make an object to handle business logic, to make their code more testable. If it makes you happy to keep it in the ViewData file, go right ahead. If not, then don't. Who am I to tell people how to be happy? extension Comment: CommentViewData { var timestamp: String { let dateTransformer = DateTransformer(self.createdAt) return dateTransformer.asString() } private static func transformDateToString(date: Date) -> String { return someMagicalWayToTransformDatesToStrings() } } struct DateTransformer { let date: Date func asString() -> Date { return someMagicalDateTransformer() } } My personal preference is to use private static functions, keeping in tune with the functional nature of this approach. extension Comment: CommentViewData { var timestamp: String { return transformDateToString(self.createdAt) } } private extension Comment { static func transformDateToString(date: Date) -> String { return someMagicalDateTransformer() } } The important thing to note is that when it comes to business logic, you have the agency to structure your codebase however you'd like. The ViewData pattern isn't prohibitive or prescriptive, it's just there to aid you in transforming models into views. These are the big questions I've received while using this pattern over the last few years. I'm excited to hear your thoughts, and am always receptive to feedback!
Building Better Views (Part I)
As iOS developers, a lot of our work involves taking models from a server, and transforming them to be displayed on an iPhone or iPad. This sounds like a job for some declarative architecture. 🤔
As iOS developers, a lot of our work involves taking models from a server, and transforming them to be displayed on an iPhone or iPad. This sounds like a job for some declarative architecture. 🤔 If you ask 3 programmers how to define MVVM, expect to get 7 different responses. — ✨ Joe Fabisevich™ ✨ (@mergesort) April 14, 2016 Confession: I’ve never fully bought into MVVM. I don’t think it’s worse than MVC. I use View Models as a place to store state and actions for View Controllers, and preferably stateless functions for manipulating data. In my experience, things become harder to maintain when they start becoming a crutch, as a place to put your code if it doesn’t neatly fall into the Model, View, or Controller label. With this in mind, I realized we need an answer for configuring our views in a way that’s maintainable, and ultimately transforms one or multiple models into a view. This led me to the idea of ViewData. I started working on this with @shengjundong at Timehop, and have been using it successfully across apps of varying sizes since. There are three parts to this approach: A UIView instance. This is your standard view that you’ll be displaying in an app. It can be a regular class, or a custom subclass as you need. A ViewData protocol. This is what’s going to keep track of the data that needs to be displayed in your view. Most commonly this will be a slice of a model, used specifically for rendering the view. A configure(viewData: ViewData) function. This is what’s going to map your View to your ViewData. An Example Let’s start with an example, where we’re building a view to display a comment. It will have a few properties you’d expect from a comment view. A commenter, their avatar, some text, and a timestamp. To make it easier to visualize, let’s imagine it looks like this: We start with a simple model. This is what we’ll be later manipulating for display purposes. public struct Comment { let text: String let commenter: String let createdAt: Date let avatarURL: URL? } A simple UIView subclass to display the comment. public final class CommentView: UIView { let titleLabel = UILabel() let subtitleLabel = UILabel() let statusLabel = UILabel() let replyButton = UIButton(type: .custom) let avatarImageView = UIImageView() } Now we get a little to the fun stuff. We’ll make our first ViewData protocol. This represents how we will render the data we’re trying to populate the UIView with. protocol CommentViewData { var title: String { get } var subtitle: String { get } var timestamp: String { get } var replyText: String { get } var avatarURL: URL? { get } } Let’s conform our model to our CommentViewData protocol. This will be how we tell our CommentView how it should display our model whenever it comes across an instance of it. // The original data source is made to conform to the protocol which we are using for display, CommentViewData extension Comment: CommentViewData { var title: String { return self.commenter } var subtitle: String { return self.text } var replyText: String { return NSLocalizedString("Reply", comment: "Text for replying to a comment") } var replyImage: UIImage? { return UIImage(named: "reply") } var timestamp: String { return self.createdAt.timeAgoSinceNow } } One thing to note is that the avatarURL property automatically conforms to the CommentViewData! As long as we plan to use it directly, we don’t have to add it to our extension. Last but not least, we need to configure the CommentView with a CommentViewData. extension CommentView { func configure(viewData: CommentViewData) { self.titleLabel.text = viewData.title self.subtitleLabel.text = viewData.subtitle self.statusLabel.text = viewData.timestamp self.replyButton.setTitle(viewData.replyText, for: .normal) self.replyButton.setImage(viewData.replyImage, for: .normal) self.avatarImageView.setImage(from: viewData.avatarURL) } } We’ve got everything configured in a nice declarative fashion, but how do we actually use this? This is in my opinion the best part. Let’s look at the call-site. func tableView(_ tableView: UITableView, cellForRowAt indexPath: IndexPath) -> UITableViewCell { // My own homegrown solution, you're under no obligation to use it of course 😇 let cell = tableView.dequeueReusableCell(forIndexPath: indexPath) as GenericTableCell<CommentView> // This is of type `Comment` let currentComment = self.comments[indexPath.row] // Comment conforms to `CommentViewData`, so we can use it directly! cell.customView.configure(viewData: currentComment) return cell } And that’s it! All you need to do is pass the original model object to the view, and as long as it conforms to the right protocol, you’ve got it working without any intermediate objects. This may seem like a lot of boilerplate, and to be honest, it's more than I would like. There are other languages with features such as row polymorphism or extensible records which would make this easier. Until Swift supports these language features, or macros, or more powerful tooling that can fill the gaps, this is the best solution I’ve found to enforcing good practices and leveraging compile-time safety for view configuration. Now you may also be thinking “sometimes my models don’t map to how they’re displayed one to one, how can I make that work?” Follow along with part 2, where we'll cover that, and a few other questions you may have. As always, I'm excited to hear your thoughts, and am receptive to feedback!
How To Keep Friends And Influence People Or Something
Maybe the real friends were the friends we made along the way.
Maybe the real friends were the friends we made along the way.
I quit using Facebook years ago, and only follow ~70 people on Twitter, which leads some to assume that I don’t find keeping in touch with people to be a top priority, but that couldn’t be further from the truth. My todo list is where I hold my priorities, and my friends and family are the biggest priorities in my life, so that’s where I turn to for making sure I’m staying close to them.
At first blush you may think that a todo list sounds incredibly impersonal, it’s actually a deep expression of caring. When people ask for more details, I receive pretty much universally positive feedback, so now I’ll share it with you.
Maybe the real friends were the friends we made along the way. I quit using Facebook years ago, and only follow ~70 people on Twitter, which leads some to assume that I don’t find keeping in touch with people to be a top priority, but that couldn’t be further from the truth. My todo list is where I hold my priorities, and my friends and family are the biggest priorities in my life, so that’s where I turn to for making sure I’m staying close to them. At first blush you may think that a todo list sounds incredibly impersonal, it’s actually a deep expression of caring. When people ask for more details, I receive pretty much universally positive feedback, so now I’ll share it with you. A Todo List? Yep, it’s as simple as it sounds. I have a list called Keep In Touch. Each entry on my Keep In Touch list is a person, with their phone number attached to the entry, that way I can text 1 them from there. Each entry also has a time interval, how often I contact them, depending on how close we are. Now I admit, this does sound a bit mechanical, but here’s where the philosophy behind this list is important. If you call it a system it sounds cold, but creating a dedicated space for people in your life sounds a lot warmer. The word todo sounds like a chore, you’re being told what to do, but these are just reminders, not orders! The odds of me not talking to my best friend for a week are slim to none, but it does happen every once in a while. This todo list item serves as a nudge — hey, reach out to your best friend, even if it’s just sending a pulse. This almost always leads to a deeper conversation where you learn about what’s going on in your friend’s life. It provides an opportunity to find out about them, and for them to find out about you. But sometimes it doesn’t, and that’s ok, in that case it just serves as a reminder that you’re in their life and they matter to you. Building A Schedule Your best friend though is a bit of an edge case, odds are you’re going to be talking to them quite a bit. This system works best for those people who you aren’t in touch with every day, or even every week. I want to be clear, this isn’t a formula. You should figure out what cadences work best for you in your life, this is what mine happens to look like. Every week My best friends and family. Every 10-14 days The next ring of friends, those who I spend a lot of my time with. Every 3 weeks People who I hang out with but may not be as close with. Every month People who I’ll see every once in a while, but who’s lives I want to keep up with. Every 6 weeks People who I see a few times a year, but enjoy being around and want to keep in my life with a light touch. This continues on by adding a two or four week intervals until I’ve reached keeping in contact every four months. If I can’t find a reason to reach out to someone every four months, the unfortunate truth is that I probably don’t have energy to keep them close in my life. My whole list is about 30 people, give or take a few as friendships and dynamics change. Time has shown that’s about as many deeper relationships I can handle, not including a romantic partner and the past and present work relationships I maintain. You Have A System, Now What? How many times in your life do you think to yourself “I should really get in touch with Samantha, it feels like we haven’t spoken in forever”, and then done nothing about it? Each time a reminder comes up, it’s a forcing function. Let’s say Samantha shows up on my list today again, here are a few places my mind goes. We normally talk to each other every month, but as luck has it we ran into each other last week. 1. I actually spoke to Samantha last week 1a. Let me just cross her name off the list and move on with my day! 1b. I’ve really been talking to Samantha a lot, I know that I reach out to her every two months but maybe I should start reaching out to her once a month! 2. I haven’t spoken to Samantha in a while 2a. Let me see what she’s up to! 3. I haven’t spoken to Samantha in a while. 3b. I don’t really have the urge to talk to her, maybe we’re drifting apart? 3c. Our last three conversations have all been the same, I should re-evaluate how much space I have for Samantha, maybe checking in every two months is a better pace than every month? Going through this thought process gives you an opportunity to rebalance your relationships as your life and friendships change. We assume that friends are forever, and to some extent that’s true. You’ll always carry them with you, but not equally at all times in your life. It’s worth figuring out how you can be the best friend to your best friends, so you can be at your best. My system for keeping close people close is one of the most important learnings I have to share. Friendships are the most direct connections people have, and this process really helps put them into perspective. Now that you’re done reading, go say hello to a friend, improve a relationship, or make some new ones. If you have any thoughts or feelings on the idea, please be a friend and reach out. I would absolutely love to hear what you think. I write text, but only in the loosest of manners. With people across the country it's often a text, with my parents it's always a call, and with many people in my life it's grabbing lunch or dinner. You should pick whatever your preferred mode of communication is and go from there.↩↩
Pushing The Boundaries of Technology
Throughout history technology has aided humanity. Not the other way around. From the invention of fire, to the creation of the wheel, the printing press, and the personal computer, technology has acted as a multiplier for what humans can do. Technology doesn’t exist in a vacuum, and it won’t stand as an industry by itself. We — as software developers — should always keep this in mind when creating technology.
Throughout history technology has aided humanity. Not the other way around. From the invention of fire, to the creation of the wheel, the printing press, and the personal computer, technology has acted as a multiplier for what humans can do. Technology doesn’t exist in a vacuum, and it won’t stand as an industry by itself. We — as software developers — should always keep this in mind when creating technology. These days technology dominates our phones, financial markets, and arguably even political outcomes. It would be easy to say that the technology industry dominates our every day lives, and yet while accumulating negative headlines, has skirted accountability. So far waiting for technology leaders to make meaningful change has led to little change. Few people are choosing to build their businesses upon ethical practices, and those that do face an uphill battle against competitors that don’t. It seems that if change will happen, it must happen bottom-up, with a plurality of voices speaking in unison. The software developers who are building this technology need to be having these discussions. It falls on us as much as anyone else to hold the industry to a higher standard. It may even fall on us more as we prosper from the system, and must help lift others up to ensure that technology isn’t just a multiplier, but a positive multiplier. To start a conversation, below is a short list of ways we can improve our industry. Bring your moral compass to work I don’t believe that people necessarily have to bring their complete selves to work, especially when you think about a company being a business. But I do think it’s incredibly important to speak from your moral center. The easiest way to do that is to work on things where your personal goals and moral beliefs are aligned with the work you are doing. The tech industry often feels like a vast land of amorality, because accepting morality means taking a stance and responsibility. It turns out taking on responsibility is difficult. But if you’re not working for what you believe, and you have the means to satisfy Maslow’s hierarchy, what are you even working for? Certification There’s something I’ve been thinking a lot about, bifurcating the software development industry with certification. As software continues to eat the world, this laissez-faire attitude around certainty can’t continue. Software is the heart and soul of the tech industry, but software will become the lifeblood of many more industries over the coming years. There is no putting the genie back in the bottle, software has exponential value and a marginal cost to produce. Software has already played an important role in furthering humanity, and it’s not going to disappear. With that in mind, we must create safeguards to ensure a level of quality that we currently leave to faith. Critical infrastructure has to be built by certified developers who face penalties for code that causes damage. Writing uncertified code shouldn’t be banned, anyone should still be allowed to write whatever code they want. Code is a form of expression and I have no intent on stifling it. But if the code you writes gains traction, or becomes critical infrastructure itself, you have to get it certified and have it built by certified developers. Trading progress for certainty makes sense if we want to have the industry considered trustworthy. Oversight and penalties Along with certification, there needs to be legal infrastructure to respond to software that causes harm. If software causes harm to others, either through malicious intent or through malpractice, someone must be held accountable. If a civil engineer or a firm create a bridge that falls down, those parties are considered liable. If a company writes software that leaks your social security number, you’ll be lucky if they get a slap on the wrist. 1 As information becomes more and more valuable, this dichotomy becomes more and more unsustainable. The ever-expanding scope of software means that it will continue to have a growing impact on the world around us. But legislation is not keeping up, and that has to change. Lifting others up The great majority of software developers are very lucky to have marketable skills in an ever-expanding market. But one person can’t reap all of those rewards, so I’d argue it is a moral obligation to spread them around. You can use your skills to lift up others and create a better industry. There are already many people in your proximity who can benefit from your expertise and willingness to help. Developers are always learning from developers, especially from the ones who share the knowledge they have. Designers with a perspective on development can work together to create a better product. Business folks who now know what’s possible to create new revenue streams and directions for their companies. If you don’t buy the selfless angle of spreading your knowledge and giving your time, there are selfish benefits to helping out others. Instead of fighting by yourself for what you believe in, through mentorship and guidance you can create an army of people to fight for what you believe in. And I assure you that you’ll learn through the process and become a better version of you. There’s so much space we have a direct effect on, and so much change we can make through that. Unionization I hadn’t said it yet, but now I will. The u word, the word that strikes fear in the hearts of capitalists: unionization. I was having a chat with a software developer I respect and the subject of unionization came up. My friend: I’ve been lucky enough that I never personally felt the need to consider unionization, but I know that not every employer is so good with their people. Me: That’s the reason we should unionize. We can afford to on behalf of others. As an industry that is dominated by white males, this ought to sound familiar. It’s privilege. And those who have privilege should use it to elevate others. Unionization would allow software developers to collectively bargain for the greater good of the industry. At its simplest, this is valuable from an economical perspective. Collectively we can negotiate better compensation for ourselves, but more importantly we can create a rising tide that lifts all boats — allowing those who aren’t yet making as much to be . This will be of disproportionate benefit for underrepresented communities, and create more opportunity for economic mobility. We can also use it to shape our workplaces. Sexual harassment runs rampant and we wonder why there are diversity issues? Companies mandate forced arbitration and only remove it under pressure. Or build their companies on the backs of contractors who have no rights or recourse to improve their own situations. 90 day exercise windows for people who created a disproportionate amount of value during a company’s life. Then we reach the next level, the galaxy brain of unionization. A form of checks and balances for software. Software developers are the ones who create software, and so we should have say in how it’s used. As an industry we’re creating more value than has ever been created before in history. Job mobility is at an all time high so it’s not like we’re short on options. And yet we haven’t taken advantage of that as a collective. Software should be used in ways that align with our morals, values, and sensibilities about how we believe software should shape the world. Separately we can all ask for that to happen. Together we can demand it. Additional Thoughts From 2020 On Education This is one of my biggest hills to die on regarding the industry. The computer science curriculum should be completely revamped. Extend programs to 5 years, a minimum of two ethics courses, two philosophy courses, and provide real world job opportunities every fourth quarter. https://t.co/Ta4z5iCSb9 — ✨ Joe F. ™ ✨ (@mergesort) June 30, 2020 I am convinced that students would be better served by a few semesters of reading Pascal, de Beauvoir, or Algorithms of Oppression than being forced into three semesters of classic, electromagnetic, and wave/optics-related physics courses like I was. — ✨ Joe F. ™ ✨ (@mergesort) June 30, 2020 While we’re at it, throw in a couple of computing history courses. Teach the youths about all of today's “novel” problems that are actually reinventions or practical applications of CS theory from the 60’s and 70’s, and about all the women our industry is actually built on. — ✨ Joe F. ™ ✨ (@mergesort) June 30, 2020 The tech industry can use an injection of the humanities because technology is built to improve humanity. Let’s not forget about the humans on the other side. I’m open to suggestions, so please reach out if you think of anything I’ve missed and should include. I won’t use this section to argue that companies shouldn’t take on this information at all, but really they shouldn’t hold onto anything they don’t need to run their product.↩↩
What I Read in 2018
When 2018 started I set out to read 10 books this year. Much to my surprise I ended up reading 25 books in 2018. The most important reason I was able to get through 15 more books than I'd expected was that when the year started I set a goal for myself to read at least 15 minutes every day. I ended up accomplishing that 328 times over 2018, meaning 9 out of every 10 days I made significant progress on a book. I was able to find time by replacing a couple of podcasts I'd listened to with time for reading, a strategy that netted me about 1-2 hours every week.
Without further ado, the books I read this year are below in reverse chronological order, newest at the top.
When 2018 started I set out to read 10 books this year. Much to my surprise I ended up reading 25 books in 2018. The most important reason I was able to get through 15 more books than I'd expected was that when the year started I set a goal for myself to read at least 15 minutes every day. I ended up accomplishing that 328 times over 2018, meaning 9 out of every 10 days I made significant progress on a book. I was able to find time by replacing a couple of podcasts I'd listened to with time for reading, a strategy that netted me about 1-2 hours every week. Without further ado, the books I read this year are below in reverse chronological order, newest at the top. I'd highly recommend reading the bolded ones, generally because they've shaped how I think or how I perceive the world. Most of the rest were pretty good too if you're looking for a suggestion. Why We Sleep The Inner Game Of Tennis Stubborn Attachments Brave New World Antifragile The Buddha's Noble Eightfold Path An Autobiography of John Stuart Mill Intercom On Jobs To Be Done Zen and the Art of Motorcycle Maintenance 1984 Communist Manifesto and Social Contract Siddhartha How to Create a Mind: The Secret of Human Thought Revealed Shop Class as Soulcraft The Purity Myth High Output Management Triggers Mindset Amusing Ourselves To Death Nudge Algorithms To Live By A Random Walk Down Wall Street A Brief History of Time Machine Learning: The New AI The Hard Thing About Hard Things Sapiens The most surprising thing about reading this year wasn't the books I read, but sheer amount of content from the internet I consumed. I save a lot of essays, blog posts, and articles in Pocket so I can read them on my time, without keeping dozens of tabs opened, in nicely formatted manner, and most importantly available offline. This year I was very cognizant of not letting articles pile up in Pocket, which meant I had to put in a concerted effort to either read posts or delete them when I realized I wasn't going to get to them. I devoted a little time every other Saturday to cleaning out my Pocket queue, pruning my list either by reading or deleting. The end result of that — I read 102 books worth of content from the internet this year. An additional surprise was that Pocket isn't where I read all my content, but I also read a lot directly in my RSS reader. I can't know for sure how much I read through RSS, but at the very least I'm sure it would have added on another 20-30 books. And that's what I read in 2018. I'm setting my goal a little higher in terms of books in 2019, my goal is to read 20. I really enjoyed getting into books, and all that I learned. I'm also setting a goal to counter-balance my internet consumption. I don't have a number, but I intend to read less articles and blog posts, and about the same number of essays. I really enjoyed the long-form content I read, but I'd also like more time in 2019 to work on side projects, so that time has to come from somewhere.
Questioning Vulnerability
As a mentor, I give a lot of advice. I give a lot of advice that comes from a breadth of experience. But my experience is rooted in the present, to remember how I felt earlier is an exercise in empathizing with a past version of myself. And memories are a fickle thing. In fact, there are many biases that affect how you remember an event, so it’s possible that my memories aren’t even an accurate reflection of the reality that I lived.
One piece of advice I give often to newer (and more experienced) developers is to ask questions. Ask a lot of questions. Ask questions until you’re sick of asking questions, and you suspect the other person is sick of hearing them. It’s going to take a while until you feel smart, or you feel good about your knowledge, but keep pushing through and putting yourself out there until you start to feel it.
As a mentor, I give a lot of advice. I give a lot of advice that comes from a breadth of experience. But my experience is rooted in the present, to remember how I felt earlier is an exercise in empathizing with a past version of myself. And memories are a fickle thing. In fact, there are many biases that affect how you remember an event, so it’s possible that my memories aren’t even an accurate reflection of the reality that I lived. One piece of advice I give often to newer (and more experienced) developers is to ask questions. Ask a lot of questions. Ask questions until you’re sick of asking questions, and you suspect the other person is sick of hearing them. It’s going to take a while until you feel smart, or you feel good about your knowledge, but keep pushing through and putting yourself out there until you start to feel it. Note to senior developers reading this: Never get sick of answering questions, and always make whoever is asking feel rewarded for having asked. It’s half the fun of being a senior developer. I always asked a lot of questions when I was starting out. I suspect it’s a big part of what led to me becoming a better programmer. I was never afraid to ask a question, and now I’m better, so it seems like good advice to give to someone who has a lot to learn. But what I’d conveniently forgotten was that I too was afraid to ask questions. I forgot about how I would spend hours researching the question I wanted to ask so that way by the time I did ask it I would only look a little dumb rather than like a full on dunce. By the time I asked a question, I wasn’t afraid of asking anymore, because I knew there was little downside. The lucky thing for me was that I learned a lot through this process, and that exercise ended up being a big part of my growth as a developer. It’s an incredibly vulnerable thing to ask a question and open yourself up to feeling stupid. And admittedly, a lot of people in this industry do a great job of opening themselves up for questions and not making people feel stupid for doing it. It’s one of the best things about an industry that can be less than ideal at times. I recently realized that I haven’t felt this vulnerable in a long time. Part of this is incredibly exciting, it means that I’m putting my ego aside and focusing on what I really want, growth. The other side of it though is that while the advice I give to ask questions is sound, it rings a little hollow since I don’t feel that pain anymore when I ask a question. I try my hardest to be encouraging, to make sure no one ever feels stupid when they ask me a question, and to reward their curiosity and learning with attention and genuine effort. And if I don’t know something, we work through it together, another way to show that being vulnerable is a-ok. But I want to remember how that vulnerability feels. There isn’t really a way for me to replicate that feeling though. No matter how wrong I am about something, no matter how hard something I want to try learning is, if it doesn’t work out or I give up, I can always fall back on doing what I’m already good at. That’s just not the same scary place that an inexperienced developer finds themselves in, they feel vulnerable because there isn’t that safety net to fall back on. I’ve always wanted to learn how to draw. I’ve always felt bad that I can’t draw well, and had convinced myself that I just wasn’t the kind of person who can draw. But recently after some life events showed me that I can start from scratch, that I can start over, that I’m in control of what I learn and how, I decided to give it a shot. I picked up a copy of Drawing on the Right Side of the Brain a few weeks ago, and while I’m only a couple of chapters in I already see an improvement. There are many reasons I decided to learn how to draw. I love wordplay, but words leave a lot to interpretation. I would like to make drawings and comics that express the full gamut of the feelings I’m trying to convey. I would like to draw the way I see the world. I would like to have a creative outlet that has an iteration cycle on the order of minutes or hours, not weeks or months the way software does. And the list goes on. Even writing prose is more vulnerable than writing software. Whenever I write something, it never feels complete. Writing exposes a part of me that is subpar to the world, especially writing this post which comes from a place of inadequacy, not from authority. But a real way I can recreate the vulnerability I’m seeking to understand, the way a newer developer feels, is to draw. And most importantly, to show people my drawings. I’m going to start from a place where I know next to nothing, keep learning, and continue growing. I’m going to ask questions, so many questions, and expose my subpar self to the world. So here’s my first public drawing. It took me nearly three hours, but I learned a lot. • I learned how layers work, and how they can save you a lot of time so that way my next drawing doesn’t take three hours. • I learned how the art pencil tool differs from the marker tool. More importantly, I learned how to combine the two to make things look the way I wanted them to look. I’ve always wondered why my drawings didn’t look like the drawings I see from artists, and now I realized it was because I wasn’t using the right tools… • I learned a lot about shadows and tone. Halfway through my drawing I realized I could throw away all the work I’d been doing and combine colors to achieve the effect I was going for. It took me some experimentation, but the end result looked more true to what I had intended and was faster to achieve. • Most importantly I learned that it’s all reversible. I’ve always approached drawing as a finesse activity, one that I was afraid of messing up, but like any creative endeavor it’s about expressing yourself. Being fearless makes expressing yourself infinitely easier. Note to developers reading this: Software is incredibly reversible too! Don’t ever feel afraid to code something wrong, the worst thing that can happen is you delete it. As simple as these things may sound, they never clicked in my brain. And now they do, and that’s the beauty of learning, now I see the world a little differently. While this post is about developers, the lesson applies to everyone learning something new. So if you’re learning something new remember that while the vulnerability can feel like a curse, it can also be a blessing — it means you’re learning.
Reclaiming My Time
The people will not revolt. They will not look up from their screens long enough to notice what’s happening.
The people will not revolt. They will not look up from their screens long enough to notice what’s happening.
George Orwell, 1984
The people will not revolt. They will not look up from their screens long enough to notice what’s happening. George Orwell, 1984 The Revelation I'm overwhelmed — by content. This shouldn’t come as a surprise, the term “information overload” has been around since the 1960’s and the internet has only accelerated our access to content. We're inundated by content wherever we go, willingly so in most cases. We can't go a minute without listening to music, reading a tweet, checking the news. Worst of all, we convince ourselves that it's ok, and that it makes us better people. In a world with infinite content and limited time, the most difficult problem has gone from finding great content to curating it. A well-balanced life is a healthy life. Contrary to popular belief, you can have too much of a good thing. In fact, gluttony is possibly the biggest sin of our times. Just because cereal can be "part of a complete breakfast” doesn’t mean you should have four bowls of Lucky Charms. With never-ending access to a near-infinite amount of the greatest content humanity has ever created, how can we say no? Without outside guidance, we have to focus our effort on maintaining our own information diets. Falling In Love With Content The year was nineteen diggity two and the depression hadn't hit yet. Or maybe it was around 2009 or so, it's hard to remember exactly when I discovered RSS. I stumbled upon a never-ending stream of articles written and recommended by people who were clearly my intellectual superiors. It was fascinating to walk in their footsteps, to understand how they were thinking, to live through their eyes. To many Twitter is a real time RSS feed with a social graph attached. It is also the most malleable technology product I know of. Your experience is completely in your hands to shape, and the breadth of content is near infinite. I chose to use Twitter long before working there, and created a similar experience to RSS, only centered around people instead of articles. Podcasts are an audio manifestation of RSS. A cross between the directness of Twitter and the thought-out nature of a blog post. They are the literal interpretation of giving a voice to your favorite content. And they're easy to consume; you don't even have to read. (Congratulations on making it this far by the way.) There’s no feeling like the initial rush of finding a person with new or interesting view points. And in turn, I decided to give them headspace. I would follow them on Twitter, start reading their blog, and listen to their podcasts. This exposed me to a wide variety of thinking. It allowed me to understand their perspectives. It taught me about topics I'd never thought much about: economics, philosophy, behavior psychology, and how it all blends into the world we see before us. Pulling Back Once I understood someone's line of thinking, I became attached. The idea of removing someone from my digital life was scary. I knew that I would miss their perspective. But I also knew that I needed to move on; I didn't have enough mental capacity to track everything everyone interesting does, and so I felt overwhelmed. Although it took a while to admit it to myself, the lessons I've learned from these people would stick around forever. I don't regret my consumption. The lessons I've learned will be carried with me through the rest of my life. I learned to make coherent arguments. I learned to look at problems through different lenses. I learned the joy of seeing another person's perspective. Most importantly, all the learning made me feel rewarded as a human being. I didn’t want to halt my consumption entirely, but I needed to cut down, to free up my personal bandwidth. The fear of missing out drove me to think I would miss out, but I had to trust that some content would be enough. Now when I find someone new to follow, I decide to pick whatever medium feels most appropriate for the content. This lets me hear their voice in the way most suited to them, and frees up space for other people. Continuous Improvements I don’t have a one-size-fits-all answer for improving content consumption. The process is a continuous one. I find out what changes make me happy, what makes me unhappy, and it gets a little better all the time. I still read a ton of blogs, probably too many for my own good, but now I don’t read them right away. I give myself a little more time to decide whether I want to read something before I read it. I add blog posts to my Pocket queue and give them a day or two to sit there. If an article still looks interesting, then I’ll give it a read. If it doesn’t, now I don’t feel so guilty about throwing it away, there’s surely something else that will fill that space. This process is intentionally slower and more deliberate. Just because an article jumps out at me initially doesn’t mean it’s necessarily good. A benefit of this is that I’m more thoughtful about what content I consume. I also find myself getting better at identifying content that is likely to be evergreen and valuable, versus something that’s just attention grabbing. I look back and realize that without leaving space for others in the content I consumed, I was resorting to this same pattern of all or none thinking. Rather than allowing myself to be bored for a moment, I chose to allow myself to feel overwhelmed. You can do it too Unfollow that person on Twitter. Stop reading that blog. Unsubscribe from that podcast. Give yourself a little time to digest. Leave some space for boredom and serendipity. Serendipity needs space to grow. Also read a damn book or two.
The Learn Swift Podcast - Episode 28
I recorded an episode of @learnswift_fm with Steven Sherry a couple weeks back. We had a great chat about contracting, computing history, philosophy, Smalltalk, and even a little bit about Swift. I think you’ll really like it, and recommend giving it a listen.
I recorded an episode of @learnswift_fm with Steven Sherry a couple weeks back. We had a great chat about contracting, computing history, philosophy, Smalltalk, and even a little bit about Swift. I think you’ll really like it, and recommend giving it a listen. The Learn Swift Podcast: #28: Joe Fabisevich Original recording
15 Minute Meetings
How many times have you been called into a meeting only to realize five minutes into it that you’re likely going to speak for sixty seconds… if you’re lucky? You potentially hold one piece of valuable information, and the rest of the discussion doesn’t concern you much. There are probably four other people like that in the room as well.
How many times have you been called into a meeting only to realize five minutes into it that you’re likely going to speak for sixty seconds… if you’re lucky? You potentially hold one piece of valuable information, and the rest of the discussion doesn’t concern you much. There are probably four other people like that in the room as well. No company does meetings well. People will always be struggling to get better with meetings until meeting nirvana is attained, and there are no meetings. I recently read about an idea that the Pinterest engineering organization has been trying out to enable their engineering team more contiguous blocks of time for development. They only have meetings on Mondays and Fridays, giving them a long stretch of time for work in the middle of the week. Inside the organization this is seemingly being considered a success. Externally, it was met with mixed reviews — and understandably so. It appears the number of meetings and time spent in meetings hasn’t gone down, it was just time boxed differently. I’m glad Pinterest didn’t just stick to the status quo, this is still a net-positive, but it doesn’t bring us closer to our goal of meeting nirvana. There are two ways to reduce the amount of time spent in meetings. Less meetings or shorter meetings. Let’s imagine an ordinary 30 minute team catch up meeting. Not a brainstorming session, not a quarterly planning meeting, and not a 1 on 1. If we had to make the meeting only 15 minutes long, then you’d have two options. Compress what’s important into 15 minutes or lose 15 minutes worth of valuable information. I don't know about you, but I've rarely been in a meeting where every moment felt high signal and low noise, so let's work with the compression scenario. The compressed information is going to very likely be the information you need to get a team on the same page. But what if we can’t cover everything in 15 minutes you say? Then whoever needs to stay to get the remaining details hashed out can stay. Everyone else is free to leave, with no stigma attached, and more information than they had coming in. Meetings are still booked for 30 minutes to accommodate the people who may need more time, but most people will be able to get more time to get back to their non-meeting duties. The great manager Michael Lopp, aka Rands once said If a meeting completes its intended purpose before it’s scheduled to end, let’s give the time back to everyone. What if we scheduled all meetings with a goal of giving people their time back? I’d love to hear what ideas you may have for that.
Startup Code Quality
I was asked
Is the code quality at an early stage startup higher or lower than the code quality at a bigger company?
This is a really good question to ask if you're a developer looking to join an early stage company. To answer this question though, I'd like to take a step back.
I was asked Is the code quality at an early stage startup higher or lower than the code quality at a bigger company? This is a really good question to ask if you're a developer looking to join an early stage company. To answer this question though, I'd like to take a step back. Code is never context free. At any company, writing code is the means to solve a business problem. Early on the problems ahead of you are very fuzzy and subject to change. After two years of working on your business, it's very likely the code you wrote initially will be very out of sync with the problems you're solving today. The natural inclination is to think that the code you wrote was bad. But that's not true! What's really changed is that as your company has grown, it's developed product/market fit. The problems you're trying to solve today are more well defined, clearer, and can be more properly scoped. This means that you'll now be able to have engineers assess what problems they should be solving better. They will be able to tackle more specific complex problems with this bandwidth. In a context-free manner, some people will look at the problem and say "this code is so much better than what we used to write". Large organizations have their flaws too. Bureaucracy and process can get in the way of writing code. This can manifest in you not getting to write code or your project being cancelled. These are their own set of problems, but is slightly different then creating difficult to work with code. But to answer the question: Is the code that you're writing early on in a company’s life bad? No. Is the code you're writing as company grows bad? No. Are the problems you're solving clearer as the company grows? Yes.
The Dog Ate My Take Home Assignment
It has become quite common for companies interviewing engineers to give candidates take home tests. These consist of an interview problem (or problems) which they can work on in their free time. This gives the candidate the benefit of not being under pressure in a high leverage interview setting. This gives a company the benefit of seeing how a candidate works in a normal work environment.
I had one of these recently, and to say it could have gone better would be an understatement.
It has become quite common for companies interviewing engineers to give candidates take home tests. These consist of an interview problem (or problems) which they can work on in their free time. This gives the candidate the benefit of not being under pressure in a high leverage interview setting. This gives a company the benefit of seeing how a candidate works in a normal work environment. I had one of these recently, and to say it could have gone better would be an understatement. Though I could start whenever I wanted, it was a timed exercise. I was given 3-4 hours to complete the exercise, though it was emphasized it should take 1-2. Time to completion would be a factor in determining how well you did. This is the first time that I've had a timed assignment, but it seemed fair to me. The exercise itself is unimportant, and I can't share the details of it, but I have no qualms about it. The only thing you have to know is that I had to generate a command line app, so the reviewer could run the app with variable command line arguments. Just under two hours later, I had managed to complete the assignment and was ready to email it back to the company. I'd named the project the same name as the company, and so the binary that was generated was of the same name as well. I copied the binary to my desktop, to make it easier to drag into the Mail app, hit overwrite, and, wait... hit overwrite... I deleted the folder holding all the code. All I had left was a binary. The reviewer would have no idea how it does what it does. I panicked, and quickly emailed the company to tell him that the dog had actually eaten my homework. I didn't hear back, so a few minutes later I emailed them the generated binary from my assignment. I told them to run it, to verify that I did actually make something. In the mean time I got started on restarting my assignment. I checked for the last Time Machine backup, and found one from over an hour back, and used that as my starting point. About 40 minutes later I was done recreating the assignment to the best of my abilities. I emailed them the assignment, along with a new binary, and hoped for the best. Amazingly. I almost did the same thing, copying the binary to my desktop, but this time managed to not hit overwrite. Moral of the story, think before you overwrite.
The Future Will Be Signed
Cryptography is becoming more important in our every day lives and there’s no way around it. Whether it’s the calls from governments to ban encryption, come up with “responsible encryption”, or to violate norms and laws, cryptography is playing a role in shaping our society. I’d like to approach the role of cryptography from the other perspective though, from the side of helping us prove facts about the world around us.
We are entering an era where technology empowers people to create artificial evidence for stories and narratives. While we can’t yet create facts, we’re approaching a point where artificial evidence looks very believable.
Cryptography is becoming more important in our every day lives and there’s no way around it. Whether it’s the calls from governments to ban encryption, come up with “responsible encryption”, or to violate norms and laws, cryptography is playing a role in shaping our society. I’d like to approach the role of cryptography from the other perspective though, from the side of helping us prove facts about the world around us. We are entering an era where technology empowers people to create artificial evidence for stories and narratives. While we can’t yet create facts, we’re approaching a point where artificial evidence looks very believable. Nvidia is using machine learning to generate fake pictures of humans that seem so real that humans can’t tell they’re fake. Lyrebird is building technology that allows people to enter text, and they will generate a rather convincing audio file of someone (like… say… Donald Trump) speaking it. Watch this video clip of Barack Obama saying things he never said. I guarantee you there’s at least a few people who are fooled by this today. Today you may think “this doesn’t quite sound like Donald Trump” or “that doesn’t quite look like Barack Obama”, but technology only moves forward. It’s going to get better and better. What happens when you can’t believe your eyes and ears? What happens when you have to question every picture you see, every sound you hear, every video you watch? We need to have answers before this becomes a problem. We’re going to need a way to prove the authenticity of a piece of digital content, everywhere, in a simple manner. This is where public key cryptography comes in. Our current solutions are noble efforts, but remain too complex. This infrastructure is going to have to be baked directly into the software that developers build, in a way that is transparent to the end user. A politician (or anyone) needs to be able to sign a tweet, audio recording, or video clip to prove authenticity of what they are saying. With the creation and fabrication of content being so easy, we’re going to need a model where the person creating the content can prove it is trustworthy, and otherwise it should be treated as inauthentic. Outlawing encryption and controlling cryptography is a really bad idea. It may end up that these technologies help us maintain a level of trust in our society.
Learning About Cryptocurrency
Cryptocurrency is all the rage these days. From Bitcoin to Ethereum to Ripple, to some silly sounding thing someone will come up with tomorrow, it's something people want to know about.
At the risk of sounding like a super noob, what's a good introduction to crypto? From the basics through understanding current landscape
— Benny Wong (@bdotdub) January 5, 2018
So you're looking to learn a little something about how these new technologies work? Well Benny (and anyone not named Benny), I don't have all the answers, but I do have two resources that people who are interested in the technical aspects should check out.
Cryptocurrency is all the rage these days. From Bitcoin to Ethereum to Ripple, to some silly sounding thing someone will come up with tomorrow, it's something people want to know about. At the risk of sounding like a super noob, what's a good introduction to crypto? From the basics through understanding current landscape — Benny Wong (@bdotdub) January 5, 2018 So you're looking to learn a little something about how these new technologies work? Well Benny (and anyone not named Benny), I don't have all the answers, but I do have two resources that people who are interested in the technical aspects should check out. If you want to learn about the blockchain, I would start here. The video is only 17 minutes, and yet covers everything you need to know about how a blockchain is built and works. If you want to learn about Bitcoin, I would start here, at the time marker 41:55. Everything I learned about Bitcoin in this episode of Security Now still holds up today, six years later. Steve Gibson was very early in understanding what makes the protocol interesting, along with its upsides and downsides. The only real thing that's changed since this was recording is the addition of exchanges like Coinbase, Gdax, Kraken, and others into the marketplace, as a way to centralize trading. A personal note, if you're just looking to invest in some cryptocurrency you probably don't need to understand the underlying technology. The investment side currently is a speculative market based on projecting who the winners and losers in this space are going to be, and for the most part that's relatively disconnected from the technology. And one more note, if you're going to invest in cryptocurrency right now, only put in however much money you're willing to lose. No one knows how the market is going to play out so I'd equate the whole thing to gambling at best.
Everyone Should Use Generics Except You
As I was on hour six of debugging how to read an object from the database, my brain suddenly noticed the slight difference in two lines of code. The compiler error had been off, too vague to help me realize that I was never hinting the correct type to the function. Generics had struck again. I cursed in the general direction of my cat (unintentionally), and moved on. There was nothing I could do but accept that we've all been there, and move on.
As I was on hour six of debugging how to read an object from the database, my brain suddenly noticed the slight difference in two lines of code. The compiler error had been off, too vague to help me realize that I was never hinting the correct type to the function. Generics had struck again. I cursed in the general direction of my cat (unintentionally), and moved on. There was nothing I could do but accept that we've all been there, and move on. The creators of the Go language have so far resisted the notion of adding generics. They have a well considered argument that adding generics into the language will add to it's complexity, so much so that the power of the feature will be outweighed by the complications that the feature brings. What proponents of generics say is that the core team is not properly considering all the benefits of generics. The language's surface will be simplified, your code as a consumer will be easier to write, and even that Go already has generics but only for certain blessed types that are built into the language. Combining the two thoughts above, I had a thought of my own, since everything's a remix after all. We boil down our problems to platitudes, as if fixing that one problem will be salvation for our existence. Functional is better than object oriented. React is better than Angular. Static is better than dynamic (it is…). Writing generic code is one of those trade offs. It can be mind bending, it's no walk in the park, but it can be incredibly powerful. I don't personally agree with the Go authors, but I'll boil the problem down to a platitude of my own: I want generics in my language. I don't want anything to do with them myself 95% of the time, but I would love the features that others can build which capitalize on generics to make my life easier.
Thinking About Thinking
Two meta-skills that help a programmer grow more than just practicing their coding. Thinking about thinking, and focusing on focusing.
— Joe Fabisevich 🐶🐳™ (@mergesort) July 26, 2017
Two meta-skills that help a programmer grow more than just practicing their coding. Thinking about thinking, and focusing on focusing.
— Joe Fabisevich 🐶🐳™ (@mergesort) July 26, 2017Two meta-skills that help a programmer grow more than just practicing their coding. Thinking about thinking, and focusing on focusing. — Joe Fabisevich 🐶🐳™ (@mergesort) July 26, 2017 How To Think About Thinking and Focus on Focus Don't focus on finding the perfect to-do list app. Once found, you still have to light the spark inside that keeps you going. It's that spark that moves you along the road; a road that stretches surprisingly far. I set a goal for myself in early 2017. I was going to spend a lot of time learning. I wasn't sure what this would look like. I gave myself time to figure it out. Things are rarely simple in life. I knew I wouldn't find the answer right away. I wanted to learn how I learn. Everyone learns differently. I needed to figure out the best approach for me. Before I even sat down to learn any topic in particular, I attended a Coursera class to gain perspective on learning. The course involved few weekends worth of work and I came away with great techniques and a deeper understanding of learning as a whole. Next, I considered the subject matter I wanted to learn. It had to be motivating: motivation has always been a sticking point for me. So I decided to focus on skill building. I wanted to combine these two thoughts--learning and motivation--to put myself in a better position to learn. A few months passed and that's when I realized: I still had a lot to learn about thinking itself. Reading I've recently returned to reading, or more precisely, listening to books. My favorite books focus on what's called "metacognition". Metacognition means the awareness and understanding of your thought processes. Metacognition unlocked a door for me I hadn't realized could be opened. I've always thought of myself as a person with good self-insight. As I began to read more, my doubts grew. Thinking Fast and Slow by Daniel Kahneman taught me how cognitive biases work. This knowledge left me both concerned, and, unexpectedly, relieved. My concern stemmed from the mental gymnastics my mind performs. I found myself especially prone to the attribute substitution bias, and a few others. The brain prioritizes viewing the world in a way that suits you. It's instinctual, protecting us from doubt and pain. It also keeps you away from new modes of thinking. Once I accepted that everyone's mind tries to do this, I began to open up to new possibilities. I was also relieved. This model let me understood why I thought the way I did. More importantly, I could now leverage that knowledge for further growth. My path started with a simple goal: I wanted to learn more. Now, I was ready to actually start putting these learnings into productive gains. Practicing Next, I needed to move from understanding myself to real world practice. In this, I learned three important lessons: 1) Think about thinking Understanding yourself provides the key to discovering your boundaries, limitations, and possibilities. These margins guide you to areas where you can grow. Even the smartest people are not able to learn something new any time. Their brains need rest, balance, and fuel. The more in tune you are with where you are mentally, the easier you can acquire and assimilate new information. Your ability to take in information changes over the course of your life both in the long and short term. For many people, it's easier to learn at 2pm than 10pm. The next day, well rested at 10am, it's easy again. This pattern isn't true on only a daily basis, your life will go through similar cycles as well. 2) Plan Time is the most precious resource you have, so deploy it wisely. I make a schedule every day, split up into half hour intervals. 1 If something takes longer than a half hour, bubble it in for two half hour intervals. If something takes less time, feel free to squeeze in a couple of tasks into a half hour interval. This is a technique I picked up from Deep Work, to help my daily planning. Each day's planning acts as a meditative exercise. Every morning, I think about the shape of my day. I list my goals, which serve as landmarks throughout the day. On review, I can decide whether I'm accomplishing those goals and making progress. After adopting this style, I quickly noticed I had a weaker grasp on my time than I thought I did. It is incredibly difficult to create a schedule then stick with it, exactly as planned. And that's ok. Each time I got off schedule, I could re-adjust and re-orient. I'd move around priority tasks, push others off for when I could give them the attention they deserved. When I found a task that kept getting bumped, I'd reconsider its merit. Over time you realize, "maybe this task isn't as important as I thought it was". Do this consistently, you won't look at time the same way ever again. 3) Focus The easiest way to stay focused is to avoid distraction. Isolate yourself however you need to. Physically If your environment isn't productive, change it. I don't work well in open offices where noise and conversation distract me. Other people can't work from home, they prefer the sounds of the world as a background hum. A coffee shop may be a great match to your style or the silence of a museum library. Mentally Meditation can boost your energy levels. I use Headspace to introduce a five minute refresher during my mid-afternoon. Meditation allows my mind to rest after it's been working for the entire day. Some prefer to start their morning off with fresh thoughts. Others like to clear their mind at night, making it the last thing they do. See what works best for you; maybe it's all three. Digitally Tucking away distractions help you focus on your task. I try to keep everything that's not immediately pertinent out of my sight. Surprisingly, hiding my Dock has been made me far less distracted. I used to spend my day distracted by red badge fever. Slack, Twitter, Things, and other badged apps would eat into my thoughts. Now I stare full screen at whatever I've got open with no little red badges to grab my eye or pull at my thoughts. Acts like browsing the web are now a conscious choice. When I'm writing code and want to check my daily schedule's progress, it's a choice, not an impulse. I still live in the real world and connect to these things but I am not prodded to do so. I act when I find some time. When I'm focused, I'm focused. When I'm distracted, I'm distracted. Training your brain to focus is like any other form of exercise. It's hard at first. As you root out distractions and adapt your environment, your focus muscle grows. As with all change and exercise, it gets easier and easier to avoid distractions over time. Next Still interested in figuring out how to grow more? If so, congratulations. It's a hard but amazing path to look deep into yourself and decide to make changes. I wish you well along your journey and implore you to move deeper in your voyage. This journey isn't about finding the perfect to-do list app. Once you've found one, you still have to find what's inside of you that encourages you to keep growing. Once you've found that, you'll be surprised at how long the road stretches. Ok, I have to admit, I can't always do this. Sometimes it's too rigid, and I'm not well disciplined enough yet to live my own advice. There are days where I don't have as clear a focus, and it shows in my schedule.↩↩
Handing Off Public Extension
This is a blog post by Jasdev Singh, originally published on jasdev.me. I'm re-posting here since it's directly tied to me taking over his project, Public Extension.
This is a blog post by Jasdev Singh, originally published on jasdev.me. I'm re-posting here since it's directly tied to me taking over his project, Public Extension. Firing off the first tweet for @PublicExtension on October 9th, 2015 was a rush. I was on the tail end of my batch at the Recurse Center, after having spent the previous quarter transitioning from an backend engineer to writing Swift every day. The goal was to regularly post extensions I’ve come up with, stumbled upon, or received from the community. In the span of a year, I collected 89 extensions, had countless conversations with the Core Team, and even represented the account at XOXO Festival. However, I (accidentally) treated Public Extension like a “Forever Project.” Without an end in sight, the weight of “do I just keep running this account ad infinitum” caused missed days to turn into weeks, and weeks into a year of hibernation. My energy drifted elsewhere. Writing, building out Peloton’s iOS team, and crafting memories with friends on two wheels. Until a couple of weeks ago, I had almost forgotten about the project when Joe—commonly aliased as @mergesort—expressed interest in taking the baton. I couldn’t imagine a better fit. Not only is Joe a great friend who is 1000% game to volley Swift puns, but he also has a track record of helping, advising, and guiding folks in the iOS community. A lunch, repository transfer, and a few iMessages later, Public Extension has a second wind. Joe and I have discussed some of his early plans for the account and I’m stoked. Please give him the same support and cheers y’all have kindly given me along the first leg of PE’s relay. Below are some notes about the transition and aspects that will remain the same: To prevent old commit permalinks from breaking, we transferred the repository to Joe’s GitHub account and I forked it. This means that all of the old tweets can safely be embedded. The account wouldn’t have been possible without submissions. Going forward, all extensions will continue to link back to the original author, if applicable and with permission. On the note of submissions, they will still be accepted 💙 Joe can provide more details on preferred ways to do so.
Foundations
Every day at a startup is an exercise in getting to tomorrow. Some days it’s easier, some days it’s harder, but if you don’t make it until tomorrow, there won’t be a next week, month, or year.
This is why building a long-term foundation is incredibly important.
Every day at a startup is an exercise in getting to tomorrow. Some days it’s easier, some days it’s harder, but if you don’t make it until tomorrow, there won’t be a next week, month, or year. This is why building a long-term foundation is incredibly important. If you keep making it to tomorrow without thinking ahead, in three years you might look at what you’ve built and realize that you’ve set yourself up for mediocrity or failure. Every decision you make today is implicitly a decision you’ve made for the next few years. There’s a question of whether you’ll make it that far, and you can always change course from your decisions (and you should!), but it’s not without cost. Stop thinking about how to build a company that lasts, start thinking about how to build a great company that lasts. Start making decisions today that will help you build a great company. Because down the road you might look back and realize that your company isn’t that great after all.
Dev Chats - Joe Fabisevich
This is an interview that I did with Sam Jarman, originally posted on his blog.
This is an interview that I did with Sam Jarman, originally posted on his blog. Introduce yourself! Who are you? Where do you work? Hey Sam, thanks for this interview! I’ve been reading your other developer interviews and am humbled to be in the same company as them. I’m Joe Fabisevich, an iOS developer in New York City, with no specific ties to a company right now. I spent the first 5 or 6 years of my career working startups like Timehop, Betaworks, and Bitly. Last year I decided to take the things I'd learned and help other companies grow via consulting work. My job is to help companies get through whatever challenges they're currently face. I enjoy working most with early stage startups, so a lot of my work focuses around getting startups to their 1.0. Often times they're starting with nothing more than sketches and wireframes. Other times I help businesses figure out their mobile strategy, or work with iOS teams to grow their skills. This is especially interesting as iOS has recently moved to Swift, and there are few experts in the field so far. I wanted to add flexibility in my life, and now I'm able to tackle all different kinds of challenges. Not all of my work is even engineering related, which makes it fun to grow in many directions. Who or what got you into programming? It's a bit cliché, but I got into programming somewhat by accident. In high school my grades were pretty poor, and I had to choose a major for my junior and senior years. My mom was a mainframe programmer and told me that if I took the computer science course, she would help me out. (Please don’t tell my 11th grade AP Java teacher Mr. Turner). After about two weeks, she declared that she was completely out of her element, and that I was on my own. I was never a great rote learner, but I was always good with understanding patterns and systems. Programming lends itself to hands on learning, which made me finally feel good about learning. After some initial success, I was pretty hooked. As I got better, I was able to start helping others, which was also something I'd never been able to do. In college I majored in computer science, but rather aimlessly. When the iPhone came out, I really wanted to make an app for it with a friend, and so I mustered up my strength and did. The code was awful, and the UI was hideous by today's standards, but there were probably only 10,000 or so people building apps, so it was felt like quite an accomplishment. Since there was so little iOS talent out there, I was able to parlay that app into an internship. As I left school (after spending most of it building apps in class), I was able to turn that internship and subsequent apps into my first startup job. What’s the tech scene like in NYC? Any major upsides and downsides? The tech scene in New York City is quite a mixed bag, but I feel that way about most things in New York. Tech is not the top dog in this city, which has it's pros and cons. The biggest pro is that as an industry, we stay mostly grounded. We use our technology to lift up other industries, as well as tech for tech's sake. This helps us avoid a monoculture like you see in Silicon Valley. The biggest con is that as an industry, we stay mostly grounded. This means that we don't attract as much talent (though there's still plenty), or work on as many moonshot ideas as you'd see in Silicon Valley. Those moonshot ideas are the one's that grow to be Facebook or Airbnb, and affect our lives in an outsized manner. As a person, it's hard to say whether I would trade one for the other, but it's always a fun thought experiment. You’ve worked both for companies and for yourself – do you have a preference? What are the advantages and disadvantages? Like everything in life, there's pros and cons to everything. I don't have a preference, and don't think I'll always be a consultant, but don't think I'll always work full time either. Being a consultant gives me work-life balance that's hard to beat. It's quite an opportunity to use the extra time I have to invest in my own learning. I can spend more time reading about product, design, management, or even things like metacognition, which help me grow in my career. On the other hand there are some skills you can learn at a company over the long term. I still work at and with companies, but being with a company for a while helps you develop different skills. I tend to think of it as growing in a breadth-first manner vs. a depth-first manner. Both will likely get you to the place you want to be, but the path will look different. Ultimately what works best for you is in your hands. What has been your toughest lesson to learn in your software career so far? I’d say the career matters. Developers often don’t want to think about their career, and instead think about programming. It makes sense because it takes a while to become comfortable enough to feel confident in what you’re doing, but as a result other people’s other skills suffer. I’ve always been interested in product, design, and programming, so choosing a linear path was difficult for me. Nowadays I'm able to leverage those skills as a consultant and former startup founder. On the other hand, I hadn’t spent much time thinking about management or a career track until recently, and realized that I’ve got little experience with that and now am playing catch up. Ultimately it may not matter because you can’t predict your future, but it is very important to be in touch with your goals to move forward as much as possible, without parallel diversions. What would be your number one piece of advice for a successful software career? Everyone starts at the beginning and there’s no way around it. Luckily, that's ok. Over the first few years of my software career I read anything programming related in sight that sounded interesting. Even if it didn’t pertain to what I was currently working on, I would still read it. That ended up paying dividends as I started to expand my horizons. Even though I didn't understand it all, I had all this knowledge tucked away in the back of my brain for a later day. When it was time for me to try my hand at Python, I didn't need to start from scratch. When I wanted to build a website, it was as easy as recalling that tutorial I read a month ago. Better yet, I took the lessons I learned in other languages and frameworks, and applied them to what I was working on as I saw fit. This allowed me to grow in ways that my peers weren't, and made a more confident programmer. While this technique worked for me, I can’t promise it will work for everyone. Everyone learns differently, and you have to find your path. What I will suggest though is trying it out and seeing if it works for you! Maybe it won't be the only way you grow, but it can be another tool in your toolbelt. What programming skill do you think is underrated? There are two personality traits which go hand in hand. Empathy and modesty can take you from being a good programmer to being a good teammate. Being a good teammate can transform you into a great asset. If you apply these traits, you'll more easily accept your flaws, and that will empower you to your co-workers and fellow community members. One underrated aspect of empathy and modesty is that over time you become more confident and humble. Confidence and humility allow you to turn anything into a learning opportunity. The more you can say “I don’t know, but I want to learn about it” either to yourself or to a peer, the more you’ll open yourself up to an opportunity to grow. Over time it will become an innate part of how you approach solving problems. What books/resources would you recommend? I’m going to be a little self-serving here, but I maintain a Pinboard tag where I post articles. The articles are ones that I’ve come across in my career that taught me something, with information I wish I knew when I was just starting out as a programmer. Sometimes I go back and re-read the articles, and I'll still pick up new things. As I've grown, the advice and stories take on new life and new meaning. I recommend going through the posts in reverse order. The first posts are more foundational and encourage bigger thinking. I’m really big on RSS, so I recommend subscribing to the feed, so that way you can always get a new article right after it’s posted. Finally, make your shoutout! What would you like the readers to go have a look at? I think right now it’s important to not forget about others in need. There are people dealing with natural disasters that have entirely uprooted people’s lives. A cause that's near and dear to my heart is the Hispanic Federation, where every dollar will go to aid on the ground in Puerto Rico. You can choose your own cause, but the important thing is to do something. Personally you can find me on Twitter where I am busy saying anything that comes into my head, so my apologies in advance.
Debugging shortcuts for UIKeyCommand
I recently re-discovered UIKeyCommand while listening to Caleb Davenport’s, podcast, Runtime. He’s also got a blog post which shows you exactly how simple it is to create UIKeyCommand shortcuts for your app.
After reading that, I decided that it would be neat to implement them across my app, so I could also start navigating around my UI with lightning speed while I’m debugging in the simulator. I quickly realized that by using Swift extensions, I could automatically get these behaviors for free throughout our entire app.
I recently re-discovered UIKeyCommand while listening to Caleb Davenport’s, podcast, Runtime. He’s also got a blog post which shows you exactly how simple it is to create UIKeyCommand shortcuts for your app. After reading that, I decided that it would be neat to implement them across my app, so I could also start navigating around my UI with lightning speed while I’m debugging in the simulator. I quickly realized that by using Swift extensions, I could automatically get these behaviors for free throughout our entire app. Below is a code snippet which you can drop into your app to help you speed up your workflow. With just one tap on your keyboard, you’ll be able to pop a UIViewController from a navigation stack and dismiss any presented UIViewController. extension UIViewController { open override var keyCommands: [UIKeyCommand]? { return [ UIKeyCommand(input: UIKeyInputLeftArrow, modifierFlags: [], action: #selector(popViewControllerWithKeyCommand)), UIKeyCommand(input: UIKeyInputDownArrow, modifierFlags: [], action: #selector(dismissViewControllerWithKeyCommand)), ] } } private extension UIViewController { dynamic func popViewControllerWithKeyCommand() { self.navigationController?.popViewController(animated: true) } dynamic func dismissViewControllerWithKeyCommand() { self.dismiss(animated: true, completion: nil) } } Don’t forget, you can make your own default shortcuts too. Happy debugging!
WWDC 2016 — My Fantasy Edition
WWDC is right around the corner! This post isn’t intended to be a prediction, as much as what I hope unfolds.
As Betrand Serlet, a former Apple engineer discussed in this 90 second video clip, Apple often ships features iteratively. Projects start off private, only to be used internally, often times for a year or two. When they feel stable enough, Apple opens them up to 3rd party developers, and makes it an official API. Features that are deemed noteworthy and successful continue to build on, while others are simply forgotten.
The three technologies below have gone through this lifecycle the last few years, and I think they are ready to converge into a big way, changing how we use iOS every day.
WWDC is right around the corner! This post isn’t intended to be a prediction, as much as what I hope unfolds. As Betrand Serlet, a former Apple engineer discussed in this 90 second video clip, Apple often ships features iteratively. Projects start off private, only to be used internally, often times for a year or two. When they feel stable enough, Apple opens them up to 3rd party developers, and makes it an official API. Features that are deemed noteworthy and successful continue to build on, while others are simply forgotten. The three technologies below have gone through this lifecycle the last few years, and I think they are ready to converge into a big way, changing how we use iOS every day. Universal Links Since the first days of iOS, URL schemes were a way to take you from one app to another. You could provide some context with URLs like myapp://profile, but nothing more. Then iOS 8 finally began allowing developers to break out of apps. Apple started allowing developers to create extensions, little parts of your app that can run in another app. In iOS 9, Apple went even further down that route by adding Spotlight. This method of universal search combined with the NSUserActivity API allowed a developer to define entry points into their app. Most importantly though, Apple introduced ‘universal links’, real URLs like ones you’d find on the internet that would open a corresponding app instead of Safari. For example, if I sent you this Medium article in a text message and you had the app installed, it would open up in the Medium app, not a website. While a great idea, the implementation still left room for improvement, as users often get bounced into to an app without wanting or expecting to be. Remote View Controllers If you’ve ever been in an app and wanted to send an email, Apple provides a way to pull up the Mail app without leaving the app you’re currently in. Apple lets developers open up this Mail view (MFMailComposeViewController for you nerds out there), to send messages from within another app. And so you have remote view controllers, screens from another app presented within your app. Currently, if you want an experience like this, you’d have to integrate an SDK or do a one-off partnership with a company. I think iOS 10 will finally bring this functionality to all 3rd party developers. Imagine how quickly you could post a tweet by pressing a tweet button within an app and having it present a Compose Tweet screen instead of opening the Twitter app. How about calling an Uber when you’re in Google Maps, Yelp, or Foursquare? The possibilities are endless. Implementing this can be made especially simple if you can just piggy back off the universal links that we mentioned before. Add a URL, and if the user has the app installed, it will present in your app without them having to go anywhere. Siri Having been a part of iOS for almost 5 years now, Siri has gone through a similar lifecycle as these other technologies. Initially, Siri was a concierge for Apple’s apps from setting reminders to making phone calls. Apple started adding additional partners like Yelp, Wikipedia, and HomeKit vendors. People have been saying it for years, and at this point the tech world is convinced that a Siri API is most certainly coming in iOS 10. I also believe Apple is ready to take this next step, and open it up to 3rd party developers. While I don’t think we will have the ability to add Siri functionality into our apps, I’m confident that we will be able to add our own app functionality into Siri. A likely implementation would be building queries that Siri can respond to by presenting the remote view controllers discussed above. Asking Siri to “find me an Italian restaurant” will pull up the remote view controller from Yelp, so you can satisfy those pasta cravings. Those who wish to dive into your app’s richer experience could use the NSUserActivity API and deep links, to have Siri launch you into the app in the exact place you wanted. Conclusion Whether my fantasy becomes a reality, I think WWDC is going to be huge. I’m very excited, more so than I have been the last few years. If you see something like this Monday on stage at WWDC, I told you so. And if you don’t, then just remember I’ve been wrong before, but that doesn’t mean I won’t be right some day. 😉
The Expressive Nature of Swift
Ignores commenting on another static vs. dynamic dispatch article because people won’t accept Swift is a hybrid not plain static.
— Joe Fabisevich 🐶🐳™ (@mergesort) May 24, 2016
Ignores commenting on another static vs. dynamic dispatch article because people won’t accept Swift is a hybrid not plain static.
— Joe Fabisevich 🐶🐳™ (@mergesort) May 24, 2016Guess that didn’t last long.
Ignores commenting on another static vs. dynamic dispatch article because people won’t accept Swift is a hybrid not plain static. — Joe Fabisevich 🐶🐳™ (@mergesort) May 24, 2016 Guess that didn’t last long. There’s a conversation happening in the iOS community at the moment, static vs. dynamic programming. On one side we have many people who have been writing Objective-C for over 20 years (wow!) saying that the dynamism of Objective-C is the reason why it is an amazing language, and has succeeded. The argument is predicated on the fact that those nay-saying it don’t understand the power of dynamism, and how it’s empowered programmers. On the other end you have many people saying that static languages are the way forward, and that a whole class of errors is avoided, and that we should look at all the bugs prevented by having a good type system! This back and forth ignores that Chris Lattner, the creator of Swift, has himself stated that Swift is a hybrid, not explicitly static or dynamic. His explanation is very interesting, because it takes the argument from being black vs. white and turns it into many gray shades. Other languages have explored these concepts before, with ideas like gradual typing, which was born out of the idea of grafting a type system onto dynamic languages, not making static languages more expressive. But what exactly is expressiveness? As this StackOverflow post explains (always cite your StackOverflow posts kids): ‘Expressive’ means that it’s easy to write code that’s easy to understand, both for the compiler and for a human reader. Two factors that make for expressiveness: • Intuitively readable constructs • Lack of boilerplate code Peter Norvig has a great talk on design patterns in programming languages. One slide stuck out to me as I was reading it recently. Let’s break that down: There are fewer design patterns in expressive languages, because the type system does not prevent programmers from trying to express a concept. Dynamic languages by their very nature of a weak type system have less issue being expressive. This does not rule out static languages from being expressive! The lack of expressiveness of static languages is dogma attached from other static languages that have existed before. I’d argue that Go is as expressive as Python, and Swift, even in its incomplete state, is nearly as expressive as many dynamic languages. You can recreate the advantages Objective-C offers through its dynamic nature by using different expressive techniques, like protocols and generics, in a statically typed language. One more thing: Many arguments imply that Apple hasn’t thought about writing apps, that they built a static language, and forgot to take into account. Care to tell me which company writes apps on the most iPhones in the world? That’s right, Apple. I don’t think they’re stupid enough to create a language which they believe is objectively worse for writing apps. Regardless of how this whole static vs. dynamic “conversation” turns out, one thing’s for certain, I’m #TeamSwift.
You Can’t Do It All
At the original iPhone announcement, we saw Steve Jobs on stage with Google’s then CEO Eric Schmidt, showing off Google’s amazing Maps. Built for the iPhone, it was something we’d never seen before. Apple’s incredible phone and revolutionary software combined with Google’s terrific web services and data coming together for one amazing product. With regards to collaboration, it’s all been downhill from there. Since then, every tech company has focused on owning the whole experience.
Apple, Google, Amazon, Microsoft, and Facebook. These companies all excel at some things, and have attempted to leverage that into more. Apple understands user experience and hardware. Google gets web and machine learning like no other company. Amazon is the best at logistics and commerce. Microsoft’s productivity and enterprise know-how guides them to success. Facebook has little competition when it comes to figuring out consumer behavior.
In the mobile era, each of those companies has tried to make the widget, sell it, and reap all of its rewards. But this has never worked.
At the original iPhone announcement, we saw Steve Jobs on stage with Google’s then CEO Eric Schmidt, showing off Google’s amazing Maps. Built for the iPhone, it was something we’d never seen before. Apple’s incredible phone and revolutionary software combined with Google’s terrific web services and data coming together for one amazing product. With regards to collaboration, it’s all been downhill from there. Since then, every tech company has focused on owning the whole experience. Apple, Google, Amazon, Microsoft, and Facebook. These companies all excel at some things, and have attempted to leverage that into more. Apple understands user experience and hardware. Google gets web and machine learning like no other company. Amazon is the best at logistics and commerce. Microsoft’s productivity and enterprise know-how guides them to success. Facebook has little competition when it comes to figuring out consumer behavior. In the mobile era, each of those companies has tried to make the widget, sell it, and reap all of its rewards. But this has never worked. Amazon bought a mobile mapping company. Apple has tried to copy Microsoft Office. Google has made not one but two OS’s, a social network, and probably eight messaging apps, I’ve honestly lost count. And the list goes on. The Roman empire fell because it was too large to maintain (sure, there are other reasons too… but let’s move on). No company can be the best at everything, and the quicker some companies realize that, the more handsomely they will be rewarded with opportunities to partner with others. In programming, we have the concept of the Unix philosophy. It’s the idea that you build a large and complex program by combining many single-task apps that do one thing, and do it well. Unfortunately that runs in contrast to what we’ve seen in the tech world, because that’s not what the landscape encourages. The Unix philosophy is as close as we’ve come to a successful implementation of distributism, and there’s no way that’s happening. We’ve seen it work with things like federated messaging and interoperating protocols, but none have lasted long enough before a company tries to create an integrated experience around open standards. It’s hard for one company to excel at user experience, hardware, machine learning, web services, enterprise, social, and more, when each of those has different incentives, customers, and end users. If there’s anything that is Apple’s (or anyone’s) ultimate demise, it’ll be spreading itself so thin across what the company does, that they won’t be able to fight the war on all fronts. As the saying goes, “the enemy of my enemy is my friend.” In the past we’ve seen companies partner together to take on one competitor. It’s not as black and white as Google hates Apple, and Apple hates Google. It can’t be when Google is paying a billion dollars to Apple every year to be the default search engine, and when iOS is more profitable to them than Android. It’s more like Apple uses Google when it’s opportune, and Google uses Apple when it’s in their best interest. Politics make strange bedfellows. The only reason I’ve become a bit bearish (just a bit) on Apple is that they’ve yet to prove to me that they can own the user experience and have the expertise necessary to excel in all the domains they’re entering. But I’m a man who loves to be proven wrong, and they’re a company whose proven doubters wrong many times over.
Comparing Shyp to Time Warner
I pushed the magic button to get a Shyp person here to send out a couple packages I have been procrastinating sending for weeks. After that was settled, I dialed up Time Warner Cable, to get my modem swapped out, a process I’ve been actively trying to get done for weeks.
After a combination of pushing buttons and yelling “tech support” into the phone for 10 minutes to get me to the right place, I finally got a real life human on.
I pushed the magic button to get a Shyp person here to send out a couple packages I have been procrastinating sending for weeks. After that was settled, I dialed up Time Warner Cable, to get my modem swapped out, a process I’ve been actively trying to get done for weeks. After a combination of pushing buttons and yelling “tech support” into the phone for 10 minutes to get me to the right place, I finally got a real life human on. I won’t bore you with the details, but half way through my call I got a call from the Shyp guy to tell me he was downstairs, and wanted to come up. I told him sorry, I was on the phone with Time Warner, but he didn’t seem to mind, and 60 seconds later I had given him my stuff and had gotten back my tracking number. Another 10 minutes later and 2 hold’s later I was off the phone with Time Warner. Guess which company I liked dealing with more?
The Apple Watch and Luxury
Just leaving this here for later, feel free to call me out on it if I’m wrong.
The Watch isn’t about Apple selling luxury products, it’s about making something nice looking enough that you’ll actually wear it.
Just leaving this here for later, feel free to call me out on it if I’m wrong. The Watch isn’t about Apple selling luxury products, it’s about making something nice looking enough that you’ll actually wear it.
On Slow Programming
This has been a recurring theme for me in 2014. https://t.co/H613AEUvwj
— Joe Fabisevich 🐶🐳™ (@mergesort) December 1, 2014
People have asked how I make changes so quickly to my code, it's because I've made it so it can be changed quickly.
— Joe Fabisevich 🐶🐳™ (@mergesort) December 1, 2014
Build what you have to build, then make it more generic so you can use it again without the code gaining entropy.
— Joe Fabisevich 🐶🐳™ (@mergesort) December 1, 2014
As a bad math student, the best advice I got was to solve for one scenario, solve it for another, and only then try to connect the dots.
— Joe Fabisevich 🐶🐳™ (@mergesort) December 1, 2014
This has been a recurring theme for me in 2014. https://t.co/H613AEUvwj
— Joe Fabisevich 🐶🐳™ (@mergesort) December 1, 2014People have asked how I make changes so quickly to my code, it's because I've made it so it can be changed quickly.
— Joe Fabisevich 🐶🐳™ (@mergesort) December 1, 2014Build what you have to build, then make it more generic so you can use it again without the code gaining entropy.
— Joe Fabisevich 🐶🐳™ (@mergesort) December 1, 2014As a bad math student, the best advice I got was to solve for one scenario, solve it for another, and only then try to connect the dots.
— Joe Fabisevich 🐶🐳™ (@mergesort) December 1, 2014This has been a recurring theme for me in 2014. https://t.co/H613AEUvwj — Joe Fabisevich 🐶🐳™ (@mergesort) December 1, 2014 People have asked how I make changes so quickly to my code, it's because I've made it so it can be changed quickly. — Joe Fabisevich 🐶🐳™ (@mergesort) December 1, 2014 Build what you have to build, then make it more generic so you can use it again without the code gaining entropy. — Joe Fabisevich 🐶🐳™ (@mergesort) December 1, 2014 As a bad math student, the best advice I got was to solve for one scenario, solve it for another, and only then try to connect the dots. — Joe Fabisevich 🐶🐳™ (@mergesort) December 1, 2014
Unbundling, DuckDuckGo, and Native Advertising
I tweeted earlier, comparing DuckDuckGo to Google when searching for the term “Go 1.4 beta”, and how the first 50 results (I got bored scrolling and didn’t go further, no pun intended) on DuckDuckGo didn’t even have one mention of the language. Gabriel Weinberg being the good founder that he is (he seems very smart, and I highly respect what he’s doing) replied asking for more examples of things queries that he can investigate to improve, so I figured I’d use the opportunity to leverage my thoughts, instead of the discussing the symptoms.
I tweeted earlier, comparing DuckDuckGo to Google when searching for the term “Go 1.4 beta”, and how the first 50 results (I got bored scrolling and didn’t go further, no pun intended) on DuckDuckGo didn’t even have one mention of the language. Gabriel Weinberg being the good founder that he is (he seems very smart, and I highly respect what he’s doing) replied asking for more examples of things queries that he can investigate to improve, so I figured I’d use the opportunity to leverage my thoughts, instead of the discussing the symptoms. DuckDuckGo performs better with general queries, because they have less personalized meaning. That’s not to say that it performs better than Google, but better relative to itself on user-specific queries. Over-generalizing, when a person is searching, they either want the general overview (e.g. a Wikipedia article, some solution to a problem they’re having, etc), or are looking for information about the query, in a manner specific to them. When they look for something specific, searches have an implied meaning to the user who is searching. Intuitively Google performs better, garnering more accurate results inferring meaning from the rich history they have of you, through their various products. The main issue I have is that DuckDuckGo seems poor at inferring implied meaning with their lexical parsing of the terms. As an experiment, if you try in a fresh browser, not logged in, in private mode, Google will still hands down return better search results. But let’s imagine a world though where Google is just another search engine, the best at searching general results, but not great at anything specific. That world is here now. I propose that the answer to Google’s search dominance isn’t building a better Google, it’s unbundling via specialized search engines. Pinterest, Stack Overflow, and others are better equipped to understand the meaning behind your searches, based on their knowledge of you, but more importantly the rest of their ecosystem. The shift from desktop to mobile has amplified this behavior. A general search engine is not always available. It’s been interesting to watch people’s usage patterns change. They think of places like Tumblr as a search engine for creativity and exploration, something that Google is not. Twitter is the place to go if you need to know about something happening right now. Amazon is where you go to fill your consumer needs. Nowadays, for any of those, you can open an app, search, browse and discover, as opposed to having Google lead you to your content. When you’re searching for how to decorate a home on Pinterest, they can quickly understand that the life event that has or will occur, or what you’re aspiring to. This is a prime opportunity to start marketing new blinds, cleaning supplies, whatever can help you in your journey. A lot of this has been brewing in my head for a very long time, but recently I've started to feel like there’s more at play than just search, a vision of how we’ll use the internet soon. Not a world where ads aren’t annoying banners, but actually useful content. Currently you aren’t seeing that ad for new blinds because ads treat you like you’re in the wrong place at the wrong time, with robotic reasons for what they choose to display. It’s rather difficult to capture your intent and translate it into a sale unless you’re explicitly looking to buy something (which is a place where Google excels). Leveraging that knowledge is the dream of direct ad marketers and brand advertisers, and could actually provide you with benefit in your life. tldr; Search is hard, really hard. A general search engine is the best answer we have for the internet, for now. Ads are annoying, but they don’t have to be. There’s so much more to be written, this is only the tip of the iceberg. As always, I’d love to discuss.
Sapphire
I’m starting to think that the ramp up in sapphire production from Apple isn’t about a screen, but TouchID sensors on every Apple product…
I’m starting to think that the ramp up in sapphire production from Apple isn’t about a screen, but TouchID sensors on every Apple product. Even their future wearable/payment/unicorn, whatever it may end up being.
The iPad probably isn’t dying any time soon, probably
The internet decided last week, the iPad is dying. Too bad, I really enjoyed using mine. Well, not really for the first 4 years, but when Apple released the iPad Mini, it became my computing partner. Supposedly the Mac is sitting in the corner rapping “don’t call it a comeback.”
It depends on what you want out of a computer, and yes, I’m calling the iPad a computer.
The internet decided last week, the iPad is dying. Too bad, I really enjoyed using mine. Well, not really for the first 4 years, but when Apple released the iPad Mini, it became my computing partner. Supposedly the Mac is sitting in the corner rapping “don’t call it a comeback.” It depends on what you want out of a computer, and yes, I’m calling the iPad a computer. When I’m at home and not working (the rare moment), sometimes I want to read some tweets on the couch, write a Tumblr post in bed, and listen to some music while I shave. At this, the iPad excels. People seem to be forgetting that while the software of iOS on the iPad is underpowered compared to a Mac, it’s also a whole lot more enjoyable to use. (Not to say it can’t use some more power) I suspect a lot of people are like that, and Apple knows that. There are a lot more than the kind of person who rotate between Sublime, Xcode, and terminal while trying to launch a startup. And then once in a while, I get to take out my iPad and slow it down a bit. The best computer is the one you have with you, and the iPhone is great, there’s nothing to say that the iPad can’t replace a Mac or PC for most consumers, and that is why I call it a computer.
A bigger iPhone
With rumors swirling about a bigger iPhone 6, I figured I’d touch on them (haha, puns). A few years ago, I thought the idea of a larger iPhone would be something I disliked. With my small-ish hands, even the iPhone 5’s 4 inch screen is too large for me to reach the back button in the top left corner of the screen with one hand.
But now, since iOS 7, I don’t fear a bigger phone, I would even welcome one.
With rumors swirling about a bigger iPhone 6, I figured I’d touch on them (haha, puns). A few years ago, I thought the idea of a larger iPhone would be something I disliked. With my small-ish hands, even the iPhone 5’s 4 inch screen is too large for me to reach the back button in the top left corner of the screen with one hand. But now, since iOS 7, I don’t fear a bigger phone, I would even welcome one. iOS 7 is very gesture driven, and has added edge gestures, which allow a user to go back a screen by swiping from the off the screen, on the left side of the phone. These are accessible to developers with one line of code. I really love using my iPad mini, but do wish that something I carry around with me all the time would be a little more pocketable.
Go for Objective-C developers
I’ve been doing Objective-C for almost 5 years (woo!), so at this point I think I have a better understanding than most of Apple’s motivations and intentions, with relation to building the language.
That said, recently I’ve been loving working with Go, and there’s a few reasons for that.
I’ve been doing Objective-C for almost 5 years (woo!), so at this point I think I have a better understanding than most of Apple’s motivations and intentions, with relation to building the language. That said, recently I’ve been loving working with Go, and there’s a few reasons for that. Not traditionally object-oriented With the rise of ReactiveCocoa, I’ve been thinking about what programming principles might work for UI-driven frameworks. Go is not traditionally Object-Oriented. You cannot inherit your Cat class from Animal, but you can anonymously embed an Animal into your Cat, so it gets all the traits of Animal. That’s because you don’t have objects, you have structs and interfaces. Interfaces are functions that act on structs. This doesn’t sound quite that different than OO methodologies, but it’s a big distinction when thinking about how to construct your software. Gothic (go-like) programming seems like it would be a great style for people looking to explore signal-driven frameworks, which Go is great for. Type inference UIView *view = [[UIView alloc] initWithFrame:CGRectMake(0, 0, 320, 480))] I write that dozens of times per day when doing iOS development. In Go, it would look like this: view := UIView{CGRect{0, 0, 320, 480}} Considering how often I write that, I would love type inference to clean up my code. Type inference is the biggest reason writing in Go feels like working with a scripting language. Garbage collection Let me start off by saying, ARC is amazing. I think what Apple’s done with LLVM, and what it’s enabled is one of the best things I’ve seen in my short career. That said, not having to worry about ARC not cleaning up properly, or where to use a strong vs. weak reference does get tenuous. If software development is about reducing mental strain on a programmer, then garbage collection is something that goes a long way to that. Native concurrency Go handles concurrency in a few ways. The simplest is to just stick the go keyword in front of your method, and it will run it asynchronously. doSomethingAwesome // Runs synchronous go doSomethingAwesome // Runs asynchronous The second is channels. As an Objective-C developer you can think of channels similarly to NSNotifications. You pass values to a certain channel, and it responds accordingly, as you’ve set it up to respond. One nice thing is that unlike NSNotification it’s statically typed, because this mechanism is built into the Go language. Channels also can talk in both directions, so you can pass messages back and forth along a channel. package main import ( "fmt" "time" ) func main() { ok := make(chan bool, 1) go doSomething(ok) fmt.Println("Waiting") <-ok fmt.Println("Did something") } func doSomething(ok chan bool) { time.Sleep(time.Second) ok <- true } I don’t know about you, but I’d much rather be doing concurrency this way rather than thinking about what thread to run a function on. Packages One thing that Objective-C has struggled with for 30 years is namespaces. JFMyClass, AFNYourClass, THOSomeOtherClass! All this prefixing is done to avoid collisions. The accepted practice is to now prefix your classes with 3 letters, because that will solve everything obviously. If your implementation of a class has a method doSomething, and yours does as well, with Objective-C’s dynamic runtime there is no way to know when your version will be ran or mine will. Go solves that in the classic way, with packages. Packages can be built into static libraries, which get put into your go directory (where all libraries are stored on your computer). Go as a tool Go has built terrific tooling into the language's standard offerings. go get go get fetches remote repositories and installs the packages and dependencies. In fact, you can even import from a url, like import “github.com/go-sql-driver/mysql” and have your MySQL driver ready to go when you compile your application. go fmt Isn’t it awful when you use BSD style brackets, and your coworker uses Allman, and you want to use K&R? Go only has one style. You run the go fmt tool, and it automagically converts all the brackets, new lines, and everything else to one standard go format. Most IDE’s have built in support which runs the go fmt tool when you save the file, so your code always looks right. go test Tests are built into the language. Tests live in the same package, so you don’t have to worry about exposing any variables just for your test cases’ sake. go be happy! This one is just my personal advice. Go isn’t the world’s most perfect language, but it’s one of the biggest advancements for software development principles in a while. That’s why I’m excited about it, and I’d implore you all to try Go! As usual, if you have any feedback feel free to leave a comment for me @mergesort or on this Hacker News thread.
Come See Me
It's short notice, but I’m giving a talk Stony Brook University tonight about How Startups Fail. So if you find yourself in the middle of…
It's short notice, but I’m giving a talk Stony Brook University tonight about How Startups Fail. So if you find yourself in the middle of Suffolk County, come watch!
Writing Go Code
All day every day.
All day every day. if err != nil { } if err != nil { } if err != nil { } if err != nil { } if err != nil { }
The Company I’m Watching in 2014
There's one company I've got my eye on in this new year. I don't necessarily expect them to succeed or fail, but do think that this will be a pivotal year in their history.
There's one company I've got my eye on in this new year. I don't necessarily expect them to succeed or fail, but do think that this will be a pivotal year in their history. Microsoft 2014 is shaping up to be a make or break year for Redmond’s finest. The tent poles of the company being attacked on all fronts, like the Roman Empire. From the low end, from the high end, in casual spheres, and business, Microsoft is on high alert. But have they sunk too low to be picked back up? To answer that we have to look at what Microsoft has to offer. CEO It all starts at the top. Microsoft will look to replace it’s “charismatic” leader in 2014. They will need to find their CEO, and the direction. From there only can they decide where to focus their efforts. This may end up being the biggest decision in their company’s history, not having one of their founders be at the helm of Microsoft. Windows Phone Windows Phone is seemingly showing some life recently. I know, not hard to rise 156% from next to nothing, but it’s something. Windows Phone is probably the most interesting product at Microsoft. So interesting there are talks about using it’s platform in other products. Windows Phone is a clean break from what Microsoft has traditionally done. A consumer focused, limited computing experience for getting in and out. They’ve had a lot of trouble getting traction with developers, but it still is worth commending. Hopefully they can take lessons learned from here and apply them elsewhere. Tablets The Surface was undoubtedly a flop. Maybe the Surface 2 is relief, but I don’t think it’s likely. The Surface 2 is the new desktop in a mobile world, not a tablet. Microsoft’s ethos of computers enhancing your work, not about enhancing your life shines through in the Surface. Take your tablet everywhere you go, and when you get to work you can dock it with a mouse, keyboard, and monitor. So far consumers have voted with their wallets and attention to say this is not how they want to behave in a mobile computing world, but time will tell. Desktop What’s a desktop? Oh, you mean the iMac thingy that Apple sells, and every other company loses money on. Well at least some people still have fun building them. Xbox It’s scary to think that Xbox might have lost the console war out the box (pun intended), but they seem to have done well recovering. Xbox is an interesting place, because it along with Bing is where a lot of R&D happens within Microsoft. Office Uh oh, everyone’s building an Office competitor and just giving it away. The long entrenched Google Docs still works. It might be frustrating sometimes, but it offers a world class collaboration tool. Now an Apple ID, gives you access to Pages, Keynote, and Numbers in the cloud (though I think any savvy consumer would be weary of trusting Apple with a web service). An iOS device you get it for free on the iPhone and iPad. It comes free in OS X if you purchase any Mac. To use their language, it’s going to be a tough value proposition for consumers to say to Microsoft, “give me good money for the Office suite”, when good (not Open Office, ok?) alternatives exist. Even if competitors don’t match up feature for feature with Office, they get you 80% of the way there for 0% of the cost. Windows Turns out, 1 paragraph later it’s still really hard to compete with free. Apple is just giving away it’s operating systems like they’re Oprah). It’s a boon to developers who get to make things with the latest technologies, Apple who gets to keep the platform moving forward, and consumers who always have the latest and greatest. Google updates Chrome OS behind the scenes, protecting users against vulnerabilities, and giving them access to new technologies. I’d imagine would do anything they can to get Android to follow that model. As for Microsoft, it’s hard to keep the ship afloat when you don’t know where you’re rowing. Are we making a desktop OS, are we making a tablet OS, a phone OS? Conclusion Look for a lot to happen in Redmond in a very short time. If they don’t do a lot, they’re doomed as they’ll remain stagnant. If they cut too much, they’re probably destroying the foundation of what makes them Microsoft, and may lose a lot of support. Saving Microsoft (I’ll go as far as to say they need saving) will need to be a surgical operation in a land where competitors operate so nimbly.. Speculating on what will happen seems like a fools errand, so I’ll take a pass on that. Pass the popcorn, let’s sit back and watch.
Five Reasons to be and not be a developer in New York in 2014
The Good 1. You can’t just get funding for any old idea.
Being the financial capital world means that people are wary of giving money to stupid ideas. Ok, ok, less wary, but it still happens. But New York is very grounded with respect to technology, and that gives me [some] confidence in the ideas that are being funded here.
The Good 1. You can’t just get funding for any old idea. Being the financial capital world means that people are wary of giving money to stupid ideas. Ok, ok, less wary, but it still happens. But New York is very grounded with respect to technology, and that gives me [some] confidence in the ideas that are being funded here. 2. It’s New York City. It’s really hard to beat New York City, if urban life is your thing. For me, it’s really hard to beat. There’s a neighborhood for every kind of personality. I’ve lived in Queens, the Lower East Side and Upper East Side. I’ve worked in the Financial District, Flatiron, and Meatpacking. Heck, if Brooklyn is your kind of scene, the start up community is pretty big over in Dumbo. Cough, cough, Etsy. 3. It’s easy to find work.** There’s a shortage of developers. No question about it. Every company I’ve been at, and many I’ve been around gone on about how difficult it is to find developers, especially in mobile. Really hard even, so much so that people move their companies out to SF to find them. 4. Winter. Snow. It’s really pretty. I’ve heard people out in the bay say they miss seasons, and I can say there’s nothing like watching the leaves change color down the streets you walk every day. If you’re a fan of seasons, New York has them, sometimes even three or four in one day. 5. It’s a quickly growing community. Over the last few years, I’ve watched the tech community grow from the same few people at most meetups, to hundreds of meetups with just a few familiar faces at each. The Bad 1. You can’t just get funding for any old idea. If you’re an entrepreneur who wants to take a shot in the dark on some wild idea, it’s probably going to be harder money early on. 2. It’s New York City. You might not like the city. Or you might like SF more. Or you might just hate gentrification, Bill de Blasio (it’s ok, some New Yorkers do too), and something else that makes New York, New York. I can respect that, it’s not an easy city to live in if it’s not the kind of lifestyle you’re looking 3. It’s easy to find work. The corollary to this is that getting people to stick around will be harder. Developer mobility is high because they know they’re in demand. In SF, where there is a lot of supply, it’s not as big a problem, but in NYC, I’ve seen replacing a developer (or worse, developers) basically shutdown companies. 4. Winter. It’s 20 degrees as I write this, and I don’t want to leave my house… Ever. Edit: it’s now 9 degrees, end my misery… 5. It’s still growing. Sometimes you’ll find people who just want to be in there because it’s the hot thing. Sometimes you want a kindred spirit, someone who understands when to use a b-tree, and when to use a map, not just a pixel pusher (as an ex-coworker once angrily described GUI development).
New Years Resolution - 2014 Edition
Last year I spent a lot of time gathering pieces, and in 2014 I'd like to put them together.
Last year I spent a lot of time gathering pieces, and in 2014 I'd like to put them together. More server-side programming I’ve been doing iOS now for almost 5 years now. I always want to work on the whole stack, but I never have found myself drawn to a language that’s useful on the server. Recently I’ve fallen in love with the power and design of Go. Take what Ruby offers you, with web frameworks, a driven community, and the clarity of Python.1 Now add static typing, with Robert Griesemer, Rob Pike, and Ken Thompson behind it, and you have Go. More design In 2013, I had the pleasure of working with a few amazing designers. Luckily one of them let me pester him relentlessly with every inane question and stupid idea I had. In 2014, the fruits of his labor should come to bear in my work. More hats to wear I don’t mean this in the classic startup way, though best part of working at startups. Over the last year I’ve come to face it, I’m going bald. It’s pretty noticeable, my hairline is receding like glaciers in the North Pole. I decided to buzz it all off one day in November, and haven’t looked back since. Of course it was 25 degrees the next night, so I did regret the timing. But back to hats… I’ve always avoided wearing hats because I knew my time with thick hair wasn’t long for this world, and wanted to squeeze what I could out of it.2 What I didn’t expect was the white hairs in my beard… But it’s ok, Natalia thinks it’s endearing. Do good, not just well More on this one later, but I can’t wait to show you what I have in store for 2014. Here's to a good 2014!… If you want a commitment to clarity, just look no further than the go format tool.↩↩ Wearing hats supposedly prevents oxygen from getting to the scalp, weakening hair follicles.↩↩
New Years Resolution Advice
Eat as much as you can tonight so you can make your New Years resolution to lose weight easier!
Eat as much as you can tonight so you can make your New Years resolution to lose weight easier!
Evomail’s Privacy Policy
As I switched over from Gmail to Fastmail.fm, I was looking for a mail client to replace my beloved Mailbox on iOS. I would have loved to continued using it, but it only supports Gmail, and not regular IMAP, so I needed a new client. Since I now have come to rely on the snooze and reminder features that Mailbox offers, I wanted to find an app that best matched that experience.
My reasons for switching from Gmail to Fastmail are similar to most, the whole privacy/advertisement debate that most in the tech industry pretend to care about most of the time, and some few paranoid folks like me actually think of. As a result, before deciding on which mail app to switch over to, I carefully read through the privacy policies of each application. I understood that in all likelihood my data would now be stored on someone other than Fastmail’s servers, and wanted to see if anyone had any alternatives.
I came to one that struck me as reasonable enough to trust, and that was Evomail. From their terms of use, I found two sections titled Caching and Deleting Data.
As I switched over from Gmail to Fastmail.fm, I was looking for a mail client to replace my beloved Mailbox on iOS. I would have loved to continued using it, but it only supports Gmail, and not regular IMAP, so I needed a new client. Since I now have come to rely on the snooze and reminder features that Mailbox offers, I wanted to find an app that best matched that experience. My reasons for switching from Gmail to Fastmail are similar to most, the whole privacy/advertisement debate that most in the tech industry pretend to care about most of the time, and some few paranoid folks like me actually think of. As a result, before deciding on which mail app to switch over to, I carefully read through the privacy policies of each application. I understood that in all likelihood my data would now be stored on someone other than Fastmail’s servers, and wanted to see if anyone had any alternatives. I came to one that struck me as reasonable enough to trust, and that was Evomail. From their terms of use, I found two sections titled Caching and Deleting Data. Caching: We do store metadata and on occasion full encrypted contents of your emails on our servers. This isn’t permanent storage, but rather cached contents to deliver a better user experience to you, our customer. Deleting Data: We do delete your account and all cached email contents from our servers when you delete your account in Evomail. Unfortunately, it seems they are not true to their word. Like most modern mail clients, Evomail offers push notifications when you receive a new email. I set up multiple email accounts on the device. A few days later, after getting many happy pushes (ok, it’s email, I hated them) I went over to the Settings application and found Evomail, and a toggle called Reset Local Database. I flipped it, went back to the app, and saw that all my accounts had been reset. Too lazy to enter my credentials in again, I used iOS’s default mail app for a few hours. But I noticed I was still getting push notifications from Evomail, telling me that I had new emails. If they delete my account and all cached contents from their servers, how was I still getting push notifications? I’m willing to hear them out before striking down my proverbial gavel, but I’m not really sure what technical reason they could give for this.
The Fast Food Strike
If you can’t pay people a reasonable wage and stay open, you should reassess your business.
End of a Chair-a
Sophomore year of college, my friend Mike has an idea to build new chairs. Not just any seats though, take the chairs out of a 1985 Pontiac Fiero, and make regular desk chairs out of them. Being sophomoric, I have no reasonable objection, so he starts scouring Craigslist. We find a guy in Jersey selling two Fiero seats and decided to drive out there.
Sophomore year of college, my friend Mike has an idea to build new chairs. Not just any seats though, take the chairs out of a 1985 Pontiac Fiero, and make regular desk chairs out of them. Being sophomoric, I have no reasonable objection, so he starts scouring Craigslist. We find a guy in Jersey selling two Fiero seats and decided to drive out there. We pull up to his house. I should say shack. It was like Deliverance, but in rural Jersey. It didn’t matter. He greeted us, got his $65 and helped us load them in the back of a Honda Accord (no simple feat). They were covered in velour. They had speakers in the head rest. They were badass. We got back to the city, and went to Office Depot. We found the cheapest wheeled chairs we could find, and threw out the top half. We found planks of wood, and bolted them onto the bottom of the Fiero chair. We took the wheeled bottoms and bolted them onto the piece of wood. Flash forward to today. I’m throwing out this “wonderful” contraption. After the sharp edges on the wood have cut my foot numerous times. After the lever has busted, making the chair sink every time it’s sat on. After it clogging up my room and serving as a good night stand because god help you if you sat on it. Good luck in your next life Fiero chair, you were great at being just not useless enough for me to not throw you out for 4 years.
Not Done
We’re not done, but the new Done Not Done, coded by yours truly, is up in the App Store. An app to keep track of the movies you’ve seen, music you’ve listened to, and books you’ve read, and for all the things you want to do.
It’s getting some much needed performance love before we resubmit (the whole thing went from nothing to done in 6 weeks).
More coming soon, but go and get it.
We’re not done, but the new Done Not Done, coded by yours truly, is up in the App Store. An app to keep track of the movies you’ve seen, music you’ve listened to, and books you’ve read, and for all the things you want to do. It’s getting some much needed performance love before we resubmit (the whole thing went from nothing to done in 6 weeks). More coming soon, but go and get it. Editors note: Betaworks shut down the app 2 weeks after we released it. I guess it actually was done!
“Friends”
Update: I quit using Facebook altogether about a year after this post was written. I really enjoyed using Facebook as described below, the product was actually quite pleasant, but it didn't provide me with enough value to overcome the moral issues associated with the company.
I also wrote about how I stay in touch with friends, and how it's served me better than Facebook.
My primary motivations for unfriending 360 Facebook friends was pretty simple; I just didn’t like to be on Facebook anymore. I posted three times in the last year. When I released an Unmentionables, I wanted to take advantage of social. When I wanted to put something on Bondsy for my entire network to see, more social pressure. And of course, to put up a picture of me wearing a sombrero. I didn’t care about the day to day particulars from most of the people I was friends with, and every time I went on it made me feel apathetic towards Facebook. It’s silly for me to be paying for the mistakes that a 16-year old version of me made.
It’s been about 3 weeks, and so far, I like Facebook again.
Update: I quit using Facebook altogether about a year after this post was written. I really enjoyed using Facebook as described below, the product was actually quite pleasant, but it didn't provide me with enough value to overcome the moral issues associated with the company. I also wrote about how I stay in touch with friends, and how it's served me better than Facebook. My primary motivations for unfriending 360 Facebook friends was pretty simple; I just didn’t like to be on Facebook anymore. I posted three times in the last year. When I released an Unmentionables, I wanted to take advantage of social. When I wanted to put something on Bondsy for my entire network to see, more social pressure. And of course, to put up a picture of me wearing a sombrero. I didn’t care about the day to day particulars from most of the people I was friends with, and every time I went on it made me feel apathetic towards Facebook. It’s silly for me to be paying for the mistakes that a 16-year old version of me made. It’s been about 3 weeks, and so far, I like Facebook again. I’ve always said that Facebook is the world’s best rolodex. I can always contact everyone I’ve met and cared to friend. But what if my attitude changed to, I can always contact everyone I’ve met and think I would want to contact? So many people have taken different courses in their lives since I’ve had relationships with them, and I’m not particularly interested in the people that they are now. That’s not to say I don’t wish the best for them of course, but I have friends from high school who now put up pictures of their kids. I have friends from elementary school who I literally (actually literally) haven’t spoken to for two thirds of my life (and that gap will only get larger). I have friends who I met at a party once, who were a friend of a friend, and I really know nothing about them, but there they are in my feed. Why should I even bother? There’s only so much room in my head. Facebook is also a great event planning tool. Go through the list of your friends, pick a place, pick a time, and you’re done. Everyone’s on the network, so you have the entire selection of your friends. Facebook has a list of basically every place, and if not, just put it in the details of the event. Facebook will even be so nice as to give you a weather forecast for the time of the event. But again, I’m not inviting people who I haven’t spoken to in years to my birthday party. Besides that, I don’t feel much attachment to what Facebook has to offer. So how did the unfriending go? I’m down to 85 friends. The first run of unfriending was going through my list and just hitting the unfriend button. I was very critical, basically saying, "if I haven’t thought about you in the last 6 months, I’m just going to unfriend you." I wrote down the name of everyone I unfriended into a text file, in case I ever did have the need to message them. I got the majority of folks out of my feed that way. I then ran through the list a few more times, making sure I didn’t miss some people, including Facebookers who I may have been a bit too lenient with the first time around. Lastly, whenever I went on Facebook and saw someone who was still in my feed that I should have unfriended, I didn’t second guess it, and just did it. So how do I like it? I’ve long been a believer that Twitter is great because your feed is a reflection of who you’ve chosen to follow. In the end, there isn’t a reason why Facebook shouldn’t be the same way. The only thing stopping this is the social pressures that are put on by the two way relationship that a Facebook friendship is. The number, 85 friends, doesn’t seem like a real coincidence to me. I didn’t go into this with a number in mind, but my guess is that it’s somewhat related to Dunbar’s Number. I just don’t have room in my head for all the people I had friended on Facebook before. I’ve turned off push notifications for everything except messages. I added email notifications for new events to make sure I don’t miss that activity entirely. I just don’t feel like I need to know about everything going on in my circle every minute. My feed feels more relevant. I don’t feel overwhelmed. I actually look forward to going on sparingly for a few minutes a day. Overall, I’d recommend it. Even if you just intend to prune a little bit, and not just unfriend en masse, your Facebook feed will feel more personal.
A Long Overdue Postmortem
Last night I pulled the first application that I ever wrote from the App Store.
Craig Glaser and I (mostly Craig) came up with the idea of creating heat maps for players in MLB. We thought it would be a cool visualization, and were convinced we could sell thousands of copies and be App Store rich.
I took to writing it. I took to rewriting it. I took to rewriting what I rewrote, only to discover, hm, I’m not a very good programmer. Objective-C being so foreign didn’t help… But in the end, it got done.
Last night I pulled the first application that I ever wrote from the App Store. Craig Glaser and I (mostly Craig) came up with the idea of creating heat maps for players in MLB. We thought it would be a cool visualization, and were convinced we could sell thousands of copies and be App Store rich. I took to writing it. I took to rewriting it. I took to rewriting what I rewrote, only to discover, hm, I’m not a very good programmer. Objective-C being so foreign didn’t help… But in the end, it got done. We didn’t quite sell thousands, but we definitely made enough to recoup our money for the App Store fees, but not enough to recoup the hundreds of hours I had put into it. I didn’t care though, I had an app in the App Store, Craig had some rep in the sabermetrics community which he is now helping push forward. Then I rewrote it again, a new version, with a new UI. This was my first lesson in redoing a project completely. What took me 2–3 months to write the first time took me 2–3 weeks this time. I had a good base, I added networking, a database instead of flat files, daily updates which taught me Python, and a new design that was more in line with what iOS apps were now doing. It was originally all standard controls, but I added gradients and textures (which iOS 7 is now banishing). Then it just sat around, sold some copies, and I didn’t do anything. We were then approached by one of the bigger sabermetric sites about doing a partnership, where they would get own the branding of the app, and we would share revenue with them for the exposure. That didn’t go anywhere past an initial phone call and a few emails. The app just sat around some more, for another 6 months or so, and here we are now. Batting Goggles is out of date stylistically and statistically. There’s no real reason to keep it up, nor the desire to. In fact, when iOS 7 comes out, it’s not only going to look bad by iOS 6 standards, but it’s going to just look plain wrong and not fit in with the OS at all. It’s just not worth the couple bucks a week that it gives me, to tarnish my portfolio since I don’t plan on updating it any time soon.
Jarring
-
Based on beta 1 of iOS 7 (so take it with a grain of salt): from skeumorphic to schizophrenic.
-
Lack of visual distinction between a button and a label is confusing so far.
-
So is how thin the fonts are, making it hard to read. I am surprised they didn’t go with Avenir as their system font.
Based on beta 1 of iOS 7 (so take it with a grain of salt): from skeumorphic to schizophrenic.
Lack of visual distinction between a button and a label is confusing so far.
So is how thin the fonts are, making it hard to read. I am surprised they didn’t go with Avenir as their system font.
Based on beta 1 of iOS 7 (so take it with a grain of salt): from skeumorphic to schizophrenic. Lack of visual distinction between a button and a label is confusing so far. So is how thin the fonts are, making it hard to read. I am surprised they didn’t go with Avenir as their system font. I can’t wait to recompile all my apps just to get the status bar to work. Last but not least, the semi-translucent apps are very strange looking. The iPhone’s background actually affects how your app looks and feels. That said, jarring isn’t necessarily bad. I’m looking forward to seeing what designers do. I don’t think standard UIKit was ever really good looking and this isn't either, but on the other end of the spectrum. Overall, as I said, hard to judge off beta 1, but I would definitely use the word jarring to describe it.
WWDC 2013 Prediction
I’m only going to make one prediction for WWDC this year, and it’s one that probably won’t be verifiable for a bit of time. With that in mind, I’ll just leave this here.
I’m only going to make one prediction for WWDC this year, and it’s one that probably won’t be verifiable for a bit of time. With that in mind, I’ll just leave this here. I think iOS 7 is the OS that we’ll be able to look back on and say this is where it started to grow up. I think there will be multitasking changes, and inter-app communication, and settable default apps. This is in preparation for a day where we see the iPad take on bigger form factors, and be more usable. I don’t think that OS X has a future where it merges with iOS, but I can see a 13" iPad on your desk. iOS is not currently fit to really do that, but with some attention it can get to the point where it does (almost?) everything that Mac can do, but simpler.
4 Years Ago
Apparently 4 years ago today I decided to try my hand at Objective-C.
Gonna work on an iPhone app, hopefully I can master the fine ways of Objective C.
— Joe Fabisevich 🐶🐳™ (@mergesort) April 29, 2009
Apparently 4 years ago today I decided to try my hand at Objective-C. Gonna work on an iPhone app, hopefully I can master the fine ways of Objective C. — Joe Fabisevich 🐶🐳™ (@mergesort) April 29, 2009
Aaron Swartz’s Raw Thoughts
I spent a good amount of time over the weekend reading Aaron Swartz’s blog, shortly after his untimely passing. In short, I never new him, and so I don’t want to rehash everything that’s been said, but judging by what I’ve read, he was a brilliant person. So I leave you with a few blog entries that I found particularly insightful, interesting, and helpful. Some are longer, some are shorter, but I’d recommend giving them all a read.
I spent a good amount of time over the weekend reading Aaron Swartz’s blog, shortly after his untimely passing. In short, I never new him, and so I don’t want to rehash everything that’s been said, but judging by what I’ve read, he was a brilliant person. So I leave you with a few blog entries that I found particularly insightful, interesting, and helpful. Some are longer, some are shorter, but I’d recommend giving them all a read. On how to be more productive On learning (and failure) On personal objectivity On the news On depression On pushing through pain The first and second are the most powerful, and the last one’s the hardest, but each of them has it’s own merit. Hope these do something for someone.
Wunderlist is wunderful. Could be wunderfuler.
It’s not their fault.
tldr; It sucks that iOS apps can’t update in the background, but I get why Apple does this. No biggie, it would just make a lot of apps better, but at the cost of thinking about battery consumption.
P.S. You can’t read 200 words, really?
It’s not their fault. tldr; It sucks that iOS apps can’t update in the background, but I get why Apple does this. No biggie, it would just make a lot of apps better, but at the cost of thinking about battery consumption. P.S. You can’t read 200 words, really? This week, a product that I hold close to my heart Wunderlist had a major update. It’s totally revamped with bugs of the past smoothed out. I want every Reminders-like app to just behave like Wunderlist. It’s cross platform, syncs for free, is intuitive to use, and beautifully crafted. But it can never run a daemon on Apple-made devices and exist in the App Store. The fact that Apple controls iOS so tightly means that Reminders, their own app, can get updates from other devices via iCloud when you’re not in the app. It a magical (yes, magical… ok, seamless) experience to take a note on your iPhone, and open your Mac four days later knowing that your change will be there. In fact, OS X 10.8 introduced a feature where a sleeping computer can download updates without even opening the lid (if your Mac is plugged into an outlet). I often jot down reminders on the subway and then open my computer the next day to be told of what I’ve surely forgotten to do. It just sucks that there’s nothing 6Wunderkinder, and other developers can do to make their product that awesome.
Is a $329 iPad mini Good Business?
I posed a question earlier today about Apple’s new iPad mini pricing. Is there anyone who would have bought the iPad at 299thatwouldn′tpurchaseitat299 that wouldn't purchase it at 299thatwouldn′tpurchaseitat329? My guess is no. There are reasons such as brand/price perception, the supposed $299 psychological barrier, and more that I don’t want to really cover, so I’ll pose it as a simple mathematical statement.
I posed a question earlier today about Apple’s new iPad mini pricing. Is there anyone who would have bought the iPad at 299thatwouldn′tpurchaseitat299 that wouldn't purchase it at 299thatwouldn′tpurchaseitat329? My guess is no. There are reasons such as brand/price perception, the supposed $299 psychological barrier, and more that I don’t want to really cover, so I’ll pose it as a simple mathematical statement. If less than 10% of users are willing to stand their ground and say no, this is too expensive, then Apple has made a solid play. If it is higher, Apple has done poorly. The 10% comes from the fact that for every person why buys it at 329,Appleismakinganextra329, Apple is making an extra 329,Appleismakinganextra30 in revenue. That means that every 10 they sell at 329isenoughtocoverthedifferenceonthatonepersonwhosays“no,Iwillnotpaytheextra329 is enough to cover the difference on that one person who says “no, I will not pay the extra 329isenoughtocoverthedifferenceonthatonepersonwhosays“no,Iwillnotpaytheextra30.” Assuming Apple’s margins are similar to their usual 30-35%, and [I’m really assuming] that the cost is around 210−210-210−220 to produce the low end model, then they would raise their margins from the 30% or so, to 35-ish% by adding that $30 in profit. Apple won’t have to worry about making up the margins in volume. That said, I’m not going to get one, but that’s because outside of development I never use my iPad, not because I think it’s too expensive. I probably wouldn’t have gotten one at 249or249 or 249or199 either.
An App Store Retrospective
Four years ago today, the Apple App Store launched, changing the face of software distribution. Anyone from a curious 13-year old to a grizzled developer who lived through learning Pascal can release an app and hope to strike gold. Even Apple’s own operating systems are distributed with this model now. I distinctly remember my first thoughts on the matter. I was standing in line for the iPhone 3G, not for myself, but for a coworker who I had convinced to upgrade (so I could get his original iPhone). Imagine, the internet in my pocket, anywhere I went. The future had arrived for me. Four years later, this has become commonplace. But I do remember being asked on that line, “so what do you think about this app store?” by a curious line stander. I didn’t have much background actually developing software yet, so I heartily told him “Eh, you can already download apps from Installer, who cares where you get it from?” (Sidenote: Remember Installer?)
Well, as it turns out, it was kinda a big deal.
Four years ago today, the Apple App Store launched, changing the face of software distribution. Anyone from a curious 13-year old to a grizzled developer who lived through learning Pascal can release an app and hope to strike gold. Even Apple’s own operating systems are distributed with this model now. I distinctly remember my first thoughts on the matter. I was standing in line for the iPhone 3G, not for myself, but for a coworker who I had convinced to upgrade (so I could get his original iPhone). Imagine, the internet in my pocket, anywhere I went. The future had arrived for me. Four years later, this has become commonplace. But I do remember being asked on that line, “so what do you think about this app store?” by a curious line stander. I didn’t have much background actually developing software yet, so I heartily told him “Eh, you can already download apps from Installer, who cares where you get it from?” (Sidenote: Remember Installer?) Well, as it turns out, it was kinda a big deal. Kinda, sorta, the biggest deal relating to the economics of software in years. It singlehandedly took away the insane console-model, made purchasing software seamless, created the casual gaming genre, and gave hope to thousands of indie developers. I won’t go into too much detail, but companies like EA now focus a great deal of effort on these tiny computers that pose as phones. I also learned so much by tinkering away, writing bad code for the iPhone, and eventually publishing my own apps. So last but not least, you can thank Apple for making a platform compelling enough to inspire young minds to play around with software development, and not sit in the doldrums making software for a faceless financial institution. I can’t imagine where I would be if I had to work for a bank. Instead, I play with an iPhone or Android phone all day. I'm constantly intrigued to find out what the newest goodies jQuery has to offer (nothing), if anything has come about in HTML5 (eventually the standards body will get to it), or just ponder what the next five years of technology will bring us.
Back from the Mac
iOS 6 ends up bringing a lot of interesting new features to the regular user, and looking over the API differences, not a lot on the developer side of things. iOS 5 was a gigantic leap for developers, starting with ARC, Storyboards, and a bajillion1 APIs opened up. I’m willing to bet that this is becoming Apple’s calling card. One on, one off, is now to be prevalent in designing both hardware and software.
A pattern is emerging that makes it seem pretty likely:
- iPhone 3G, 3GS.
- iPhone 4, iPhone 4S.
- Leopard, Snow Leopard.
- Lion, Mountain Lion.
- iOS 5, iOS 6.
iOS 6 ends up bringing a lot of interesting new features to the regular user, and looking over the API differences, not a lot on the developer side of things. iOS 5 was a gigantic leap for developers, starting with ARC, Storyboards, and a bajillion1 APIs opened up. I’m willing to bet that this is becoming Apple’s calling card. One on, one off, is now to be prevalent in designing both hardware and software. A pattern is emerging that makes it seem pretty likely: iPhone 3G, 3GS. iPhone 4, iPhone 4S. Leopard, Snow Leopard. Lion, Mountain Lion. iOS 5, iOS 6. Every cool new Mac with features ahead of its time (hello retina display), it’s subsequent spec bump releases. First you make something new, innovative, bold. Then you take the time to add fixes, polish and finish. Figure out how to make something awesome, get the margins down with your supply chain and economies of scale. That’s what Apple have defined as their new strategy. Release and refine. That’s a technical term for all you non-tech savvy folk.↩↩
Create a Catchy Phone Number for $3 With Google Voice
When I was a kid, I used to try and make words and phrases out of my phone number, because before the internet we had nothing better to do. These days, if you want a custom phone number, there is a way to do it for only $3. So, here’s a quick little life hack for you.
When you sign up for Google Voice, they offer you the ability to pick your own phone number, from the pool of numbers that they own. I used Google Voice for a couple of years, before ultimately deciding to port my number to my carrier. The process to port your number only costs $3, a phone call to your carrier, and a few hours of waiting for it to go through (in which you can continue to use your phone).
When I was a kid, I used to try and make words and phrases out of my phone number, because before the internet we had nothing better to do. These days, if you want a custom phone number, there is a way to do it for only $3. So, here’s a quick little life hack for you. When you sign up for Google Voice, they offer you the ability to pick your own phone number, from the pool of numbers that they own. I used Google Voice for a couple of years, before ultimately deciding to port my number to my carrier. The process to port your number only costs $3, a phone call to your carrier, and a few hours of waiting for it to go through (in which you can continue to use your phone). Head over to https://voice.google.com/unlock. Sign in and click that you agree to pay $3, and that your number will be unlocked. Call your carrier (some even provide online options), ask them to port your number. If they ask for an account number, it is the same as your Google Voice number. Your carrier will give you instructions on what to do when your request comes through. On Verizon, that process is just replying to a text message. Wait. Enjoy your new customized phone number.
WWDC 2012 Predictions
I figure, might as well get these on the record, and afterwards we can all laugh at how wrong I am.
The MacIt’s dead. Just kidding, it’s being revitalized.
I figure, might as well get these on the record, and afterwards we can all laugh at how wrong I am. The Mac It’s dead. Just kidding, it’s being revitalized. As for all the retina rumors, I suspect we’re going to go back to three lines of Mac notebooks. A Macbook Air, the entry level machine that is for every student looking to head off for their first semester of college. The Macbook (making it’s triumphant return), the middle of the line notebook, the one that has a spinning platter disk, but an oh-so nice retina display. And the Macbook Pro, for all those old fogies that need to have their Firewire and do some real hardcode video editing on the go. The iMac will receive an incremental update. I find it hard to believe that they’re going to be able to bring a retina-capable display to a 27” screen, but Apple have surprised me before, so I wouldn’t rule it out. To me, this seems like something they can phase in over time, when they get margins down on the process through practice with other Macs. The Mac Pro, should be getting new hardware, since it hasn’t been updated since Barack Obama was successfully convincing us about change you can believe in. Nothing surprising here, just the latest series of Xeons thrown in there, with upgradability to SSD. iOS (In order from most likely to happen, to least likely) Native Facebook integration. Facebook is everywhere, heck, it’s even over the hill to lots, so it really ought to be a part of iOS by now. You’ll see that, posting photos and status updates much like Twitter in iOS 6. New Maps app and APIs. This has been everywhere. Apple and Google are on the rocks, this is the logical move. I’d expect backwrads compatability with current APIs, but anything new ought to be tempting to anyone who deals with the CoreLocation and MapKit frameworks on a regular basis. A personal wallet-type app, which lets you keep credit cards, coupons, etc. In the fall, an NFC enabled iPhone 5 to supplement this app. Much like when Reminders was announced for iOS 5 and everyone said, uh, “that’s nice”, until Siri was announced. More iPad-specific UI. Tiny notification center banners that you have to squint to see on even the retinaiest of iPads just shouldn’t cut it. iOS users aren’t stupid enough (I think?) that they can’t make the connection between some changes between the iPad and iPhone. Better notification center. Easier to close out things, and a swipe to delete functionality for individual notifications. A new animation for notifications coming in, which doesn’t just oddly flip over. Siri comes out of beta in iOS 6. So Siri that makes a beta of the update which brings it out of beta. Confusing enough to make me stop writing more on this matter. A step back from skeumorphism. The leather stitching on Notes is cool, that’s fine, but why do I need rich corinthian leather to help me find my friends? No file system, but the ability to share information between applications. A way for a developer to tick a checkmark that says ‘let x file-type be used globally’. So a camera app would say ‘I can make a file that is of type .png, let any other application that says they can handle .png use these files.’ This is what I would be most excited about in iOS 6 as a developer, and a user. You could establish a workflow this way, taking the iPad from one stupid designation of ‘consumption device’ to another stupid one of 'creation device’. Backing away from modality. Quick reply to text messages, and other type of functionality that does not necessarily just bring you into an app. Just a dark-horse guess, Pull to Refresh becomes an Apple UI standard. Other Apple products Apple TV SDK? I’m very hesitant on this one, I’d have to say no for now. To me it just doesn’t feel like the time is right, but I’d love to be wrong and see what developers can do when given a 42” screen to play with. Just imagine, scam Pokemon apps that crash right away when you open your TV, in 1080P glory! Expect iCloud to get Reminders and Notes added to it’s list of apps, which should be no surprise since they’ve already started testing that out. Some accessory updates, like a Gigabit Wireless N Airport Extreme.
A Letter
Below is a letter that I wrote.
L
Below is a letter that I wrote. L
Thoughts on Apple’s Messages
The idea of a continuous client is something that has sent nerds’ hearts a flutter for a long time. No matter what device you pick up, you’ll have an up to date conversation log.
Now that Apple has released a beta of their Messages (formerly iChat) app, iMessage is more accessible than ever. (iMessage is the protocol, Messages is the app.) I’m toying with the idea of dropping AIM for straight iMessage. If you get an iMessage on your phone, it comes to your Mac, and vice versa. You can now reply to your friends without picking up your phone and poking a 3.5" glass screen.
A new problem that arises when using iMessage.
The idea of a continuous client is something that has sent nerds’ hearts a flutter for a long time. No matter what device you pick up, you’ll have an up to date conversation log. Now that Apple has released a beta of their Messages (formerly iChat) app, iMessage is more accessible than ever. (iMessage is the protocol, Messages is the app.) I’m toying with the idea of dropping AIM for straight iMessage. If you get an iMessage on your phone, it comes to your Mac, and vice versa. You can now reply to your friends without picking up your phone and poking a 3.5" glass screen. A new problem that arises when using iMessage. If you get an IM, you’re now going to have it ring through on every device. If you’re getting 3 IM’s a minute, that’s 6 buzzes if you have an iPhone and iPad. That doesn’t even include the 3 dings that Messages will give you to alert you. And my battery life, oh I can only imagine the hit that’s going to take when I keep getting push messages left and right. The answer is that the various messages apps need to have an awareness of your state. There can be automated ways of doing this, but that might create a lot of false positives. Say you pick up your phone to play a game and Apple redirects your messages there, since that is the most recent device, but you don’t want that. Or if you’re on your Mac, but don’t want to be receiving messages there, same issue, different device. To solve this, I would propose that Apple adds a few little tweaks to the Messages app. First of all, add a little button that mutes all other devices alerts, though they will continue to receive the actual updated chat log. (I’m no Photoshop whiz obviously). The second is an auto-away period. If you have not touched your computer for n minutes, direct your chats to your secondary device. It’s more so an addition to the an idle status than a whole new feature. When you return to your computer Messages pings the devices to say “I’m back at the computer, stop redirecting my message notifications” if your mute notifications toggle is on. If they can add those two things, I see no reason why it wouldn’t be far more convenient to use iMessage than AIM, not worrying about logging myself in and out of devices.
Security Chase
Go to your Chase account and enter your password. Now log out, and enter your password with a different pattern of capitalization. So if your password was Password, now try pASSWORD. I bet you it worked and Chase still let you into your account.
I’ll preface the coming diatribe with a statement about my expertise. I am not a security researcher and would never call myself an expert in the field of cryptography. I’m just a software developer who likes to poke around in security matters in as amateur a way as possible. The material covered here is a basic explanation, and there are many more factors in play. Feel free to contact me if you have more that you’d like to discuss.
Go to your Chase account and enter your password. Now log out, and enter your password with a different pattern of capitalization. So if your password was Password, now try pASSWORD. I bet you it worked and Chase still let you into your account. I’ll preface the coming diatribe with a statement about my expertise. I am not a security researcher and would never call myself an expert in the field of cryptography. I’m just a software developer who likes to poke around in security matters in as amateur a way as possible. The material covered here is a basic explanation, and there are many more factors in play. Feel free to contact me if you have more that you’d like to discuss. So, what’s the big deal? Security is important. It should be bank’s top priority. Why does capitalization matter? This lowers a hacker’s barrier to entry into your account by a factor of 26. How does this work? It’s simple enough. The total number of characters that you can enter will be called the alphabet. If you only allow lowercase letters, your total alphabet size is 26. (All the letters from a-z). If you have lowercase and uppercase (A-Z), the size now doubles to 52. If you add in letters (0–9), now it is 62. If you add in symbols (such as ?,!), your alphabet is now up to 95 characters, because there are 33 symbols on a standard keyboard. Chase forbids you from using special symbols when creating a password, so you’re starting off with a maximum alphabet of 62 characters. We showed above that they are also not distinguishing between lowercase and capital letters, which lowers it again by 26 (since a is the same as A). That leaves us with a total of 36 characters to choose from to make a password. If you had the password abcdefghij (please don’t be this stupid) your password length is 10. You are only allowed to use 36 characters then the total number of possibilities is 36^10 total passwords. You can see this by splitting up the password. There are 36 options for the 1st character, 36 options for the 2nd, 36 for the 3rd and so on. If you were allowed to have an alphabet of 95 characters it becomes 95 options for the 1st, 95 for the 2nd, etc. How much safer is this? We’ll use the password abcdefghij for this mind experiment, and a set of computers that are making 100 billion guesses per second. If you had an alphabet of only lowercase numbers, it would take 24 minutes to crack that password through brute force. If you have an alphabet of lowercase and numbers, (Chase’s situation), the number jumps up to 10.45 hours. While this is a nice improvement, it is nothing that a little more CPU power can’t make into a problem. This really isn’t going to keep you safe for very long. If you have an alphabet where lowercase and uppercase numbers are different, along with numbers, the time to brute force jumps all the way up to 3.25 months. This is a vast improvement, but still is not something that a little horse power from a hacker can’t fix. An alphabet of lowercase, uppercase, numbers and symbols bumps that time up to 19.25 years. This is your gold standard. You should be changing your passwords more often than this as it is, and ideally passwords longer than 10 characters. Most people don’t make their passwords complex or long, because they’re harder to remember. The price you pay with this approach is lack of security. That’s a price that you should not have to pay when dealing with your bank. It might cost you so much more than just your piece of mind. You can find out more information at Steve Gibson’s Password Haystacks Page, and all the calculations are based on his search space calculator.
Teachers Need To Teach
Educators have a goal, to teach children. These days in America our goal seems to be concerned with how to trick, or worse, force a kid into learning. Instead what they really should be focusing on is how to relate the information to the child. That is how you get a child excited to learn.
Educators have a goal, to teach children. These days in America our goal seems to be concerned with how to trick, or worse, force a kid into learning. Instead what they really should be focusing on is how to relate the information to the child. That is how you get a child excited to learn. The Children Must Play.
Why My App Sucked And Why I Won’t Make The Same Mistakes Again
When you’re learning, it’s important to make mistakes, that’s how you learn. When you spend 10 hours looking for what is wrong, and it turns out you wrote if(x=1) when you meant if(x==1), I can guarantee you the next time you look for why a piece of code is magically broken, that will be the first thing you’ll check. If you do this enough times, you’ll find yourself fixing stupid mistakes before you even make them. That’s how you get good.
When you’re learning, it’s important to make mistakes, that’s how you learn. When you spend 10 hours looking for what is wrong, and it turns out you wrote if(x=1) when you meant if(x==1), I can guarantee you the next time you look for why a piece of code is magically broken, that will be the first thing you’ll check. If you do this enough times, you’ll find yourself fixing stupid mistakes before you even make them. That’s how you get good. Preface The most important thing for me over the last 2 years of learning iOS development has been getting things wrong. This piece is about everything I got wrong in developing my first app, Batting Goggles. It's also about how fixed those mistakes. I’m no self-help guru, this is just my experience with mistake making. Only now do I even feel confident that I can go into making an app without screwing up the things I’ve messed up in the past. I can do this because I am very wary of repeating these mistakes. So without further ado, I present to you Batting Goggles by the numbers. Version 1.0 I finished Batting Goggles and I felt an immediate sense of accomplishment. It was the first thing I had ever truly created from scratch. The idea was Craig’s (my partner in app development), the execution was all mine. At first we weren’t on the same page of how to make what we wanted to make, but once we came up with the interface, it was smooth sailing. The app was very bare, but did everything that we had wanted it to do. You could find a player and pull up his heat map and find his stats for the last season. Then Craig asked me to add a feature. He wanted to be able to set Favorites, and a lineup for each of the current teams playing. This would make it easier to navigate through the app, instead of having to go through thousands of players every time you wanted to look for someone. (There was a search, but the point still holds). Version 1.1 And with a lot of effort, I added a tab bar to the bottom of the screen with items for favorites and lineups. The reason it was so tough was because I had 1 view controller and a lot of booleans to check on the current status of the app. This was not a good idea and will never be one. Anyone who does this, please heed these words… don’t ever do anything that stupid in any aspect of your life. The amount of code that went into it was tremendous, but when it was done, I decided I would take a nice break from working on the app. Then the bugfixes came. Versions 1.2-1.3 The break didn’t really happen, but eventually I got the bugs fixed up. Apple had just released the iPhone 3G[S] (remember the box around the [S]?). They tested it on that the next time I wanted to submit, and for some reason it didn’t work. My guess is they actually hadn’t been doing a great job of testing it before, because the bugs that were added were pretty damn noticeable when you used the app when you switched between screens quickly. I had not been testing it like that, just how I would use it, so I didn’t notice it being broken. The lesson I learned: Test for even the oddest and most accidental ways to use an app. There are infinite ways to do things, and your way is only right to you. Version 1.5 This was the last release for the 2010 season. We got a lot of bugs out of the way, and nothing too major feature-wise, so we called it a day. People were still downloading, but some were complaining that the stats in the app were out of date. This was true, we had no way of updating the numbers in the app, so they were based off the prior season which had ended 365 days earlier. At this point I resolved to add a lot of features to version 2.0 and turn those frowns upside down. It was November, and the new season started in April, so we had hoped to get it out in early March right in time for the baseball season. As it turns out, I wasn’t so good at estimating. The Offseason Craig and I talked over the features we wanted, and we decided that the first thing to tackle would be live stats. We wanted to make sure that people couldn’t complain about that anymore, and we figured out a pretty simple solution involving some Python scripts and Dropbox. We also wanted to expand the data all the way back to when MLB started keeping track of this info, so now we would have 3 years of data instead of 1. Then I found an app that I liked, and it had a baseball card view, so I added that to the app. I wanted to make Goggles multi-dimensional, instead of just providing heat maps. With this, you’d be able to just use our app as your go to for your daily baseball stats questions. I then decided to add on the side of the list, markers denoting what letter of the alphabet the person’s last name was, so you could navigate far quicker through the player list, much like you see in the Contacts app. From using Goggles I realized that clearing and editing the lists users made was a pain, so I was going to make that experience more in line with Apple’s standard apps. Version 2.0 As I was getting close to finishing version 2.0, I realized that I had done everything that involved the iPhone wrong. I didn’t understand Model-View-Controller. I used mismatching bracket/dot syntax which made it incredibly confusing to read. I’m pretty sure that some of the code I had written just worked by sheer witchcraft and backdoor deals with the devil. When I couldn’t figure out how to integrate some of the new features I was hoping to add, I realized it was time to tear it all down and rewrite it. I rewrote Batting Goggles over the course of a week. It didn’t take too long because the thought behind the original code was right, just often redundant and convoluted. I was able to bring in all the features that I had hoped to, and felt a lot better about my app. In all likelihood no one else even cared or noticed. When I released it I felt that same personal accomplishment, because really, I had made 2 apps, a broken one, and a better one. It is still not perfect, but it is actually decipherable now, and much more flexible if/when I want to add features or fix things. Conclusion I made lots and lots of mistakes, but it’s ok because it really was my first big project. One mistake that I failed to mention was that when I released version 2.0, it was August, and the baseball season was almost over. I felt bad for a bit to the customers who paid for it and were essentially beta testers for a year and change, and had no use for the app for almost the entire 2011 season. All that personal accountability has made me far more detail oriented, and anal-retentive about releasing sloppy work. Since then I have released 3 apps, all of which I can proudly point to. I have another one coming out very soon, hopefully it’ll be more of a homerun than Batting Goggles.
Prioritize Priorities
As Merlin Mann would say: if you have 27 priorities because then you don't have any priorities. With schoolwork and work-work catching up to me I have very little time for my own coding. It's important for me to make sure I get done what I need to get done. Midterms, homework, deadlines and life have been making it difficult of late for me to sit down and churn out a bunch of code for myself, even though the things I want to do are quick and simple. When I do have some spare time it hurts to even think about coding.
As Merlin Mann would say: if you have 27 priorities because then you don't have any priorities. With schoolwork and work-work catching up to me I have very little time for my own coding. It's important for me to make sure I get done what I need to get done. Midterms, homework, deadlines and life have been making it difficult of late for me to sit down and churn out a bunch of code for myself, even though the things I want to do are quick and simple. When I do have some spare time it hurts to even think about coding. Right now my number one priority school finishing this semester and graduating is obviously the most important thing. Then comes work. We're very close to releasing the newest version of our browser and I want to make sure that that goes off without a hitch. Last but not least is my own code and whatever free time I have left. Hopefully the sacrifices I make pay off in the long run. Sadly this also means that Unmentionables is going to be pushed back a little bit. It will probably be feature complete within the next couple of weeks, and then we can start rigorously testing it. Here's to priorities.
It’s about the AI Say I
Apple may not have formally said it, but they did have a “one more thing yesterday.” They pulled Siri from up their sleeves, which many technology pundits had predicted (kudos to 9to5mac.com on the original scoop). What is surprising to me is that a lot of people appear to be under the impression that Siri is a parlor trick that you can use to show off your phone. This is not voice control, this is not FaceTime, this isn’t even the Compass app. This is something you will use every day and come to rely on.
Siri is real; it is a revolution though it may seem gimmicky until it’s perfected.
Apple may not have formally said it, but they did have a “one more thing yesterday.” They pulled Siri from up their sleeves, which many technology pundits had predicted (kudos to 9to5mac.com on the original scoop). What is surprising to me is that a lot of people appear to be under the impression that Siri is a parlor trick that you can use to show off your phone. This is not voice control, this is not FaceTime, this isn’t even the Compass app. This is something you will use every day and come to rely on. Siri is real; it is a revolution though it may seem gimmicky until it’s perfected. Apple has slapped a beta label on it, which it does not do all willy nilly (you probably know who I’m hinting at). Siri is light years beyond voice control, it’s natural language processing is proof of that. Siri is smart, it can respect your associations, you tell Siri that someone is your mother, it understands. That’s the part of Siri that makes it special, it’s there to help you. If you tell it to change your meeting at 3pm when you don’t have one, it understands that you made a mistake, and instead of telling you, I have no knowledge of a meeting at 3; it will look at your schedule and say, are you sure you don’t mean the one at 2pm, or 4pm? That’s just dipping your toe into the pool when you think about what it can do, and when it learns even more and gets even smarter, it won’t just be scheduling a meeting for you. It will be able to find out where you want to go on vacation, book your hotel and plane tickets based on what airline you like to fly and which hotel you find pleasant. After it’s done all that work, it will suggest for you an itinerary based on what your interests are, knowing whether your favorite band is in town, or if you really just want to go bar hopping. This is the step that Apple is taking to become more than a hardware company. The iPhone is one fun toy. You can play games, do real work, and can even create content on it. But how long will that gravy train ride last? iCloud and Siri bring Apple to the next step of computing, where we enter a more device agnostic environment. It’s easy to copy a phone’s form factor or specs, but very few companies have the wherewithal to bring together the cohesive vision that Apple is pushing. Consumers in 2 years will want to get their phone because of what it can do for them, not because your wife will love the Tegra 2 chipset. Siri is a step towards the world of the Jetsons becoming a reality. I’m just giddy to see technology heading in this direction and am really looking forward to Skynet… I mean Siri. Of note, Steve Jobs passed away while I was writing this post. To quote @gabrielroth “The corporation is the most powerful tool we’ve ever invented. It’s typically used as a club or a lever. Steve Jobs used it as a paintbrush.” This is all part of the grander vision that Steve Jobs saw, and hopefully some day we can all live it.
Recent content in Articles on Smashing Magazine — For Web Designers And Developers
Fading Light And Falling Leaves (November 2025 Wallpapers Edition)
The new month is just around the corner, and that means: It’s time for some new desktop wallpapers! All of them are designed by the community for the community and can be downloaded for free. Enjoy!
November can feel a bit gray in many parts of the world, so what better way to brighten the days than with a splash of colorful inspiration? For this month’s wallpapers edition, artists and designers from around the globe once again tickled their creativity and designed unique and inspiring wallpapers that are sure to bring some good vibes to your desktops and home screens. As always, the wallpapers in this post come in a variety of screen resolutions and can be downloaded for free — just as it has been a monthly tradition here at Smashing Magazine for more than 14 years already. And since so many beautiful designs have seen the light of day since we first embarked on this monthly creativity adventure, we’ve also added a selection of oldies but goodies from our archives to the collection. Maybe one of your almost-forgotten favorites will catch your eye again this month? A huge thank you to all the talented creatives who contributed their designs — this post wouldn’t be possible without your support! By the way, if you, too, would like to get featured in one of our upcoming wallpapers posts, please don’t hesitate to submit your design. We can’t wait to see what you’ll come up with! Happy November! You can click on every image to see a larger preview. We respect and carefully consider the ideas and motivation behind each and every artist’s work. This is why we give all artists the full freedom to explore their creativity and express emotions and experience through their works. This is also why the themes of the wallpapers weren’t anyhow influenced by us but rather designed from scratch by the artists themselves. Falling Into November “Celebrate the heart of fall with cozy colors, crisp leaves, and the gentle warmth that only November brings.” — Designed by Libra Fire from Serbia. preview with calendar: 320x480, 640x480, 800x480, 800x600, 1024x768, 1024x1024, 1152x864, 1280x720, 1280x800, 1280x960, 1280x1024, 1400x1050, 1440x900, 1600x1200, 1680x1050, 1920x1080, 1920x1200, 1920x1440, 2560x1440 without calendar: 320x480, 640x480, 800x480, 800x600, 1024x768, 1024x1024, 1152x864, 1280x720, 1280x800, 1280x960, 1280x1024, 1400x1050, 1440x900, 1600x1200, 1680x1050, 1920x1080, 1920x1200, 1920x1440, 2560x1440 Crown Me Designed by Ricardo Gimenes from Spain. preview with calendar: 640x480, 800x480, 800x600, 1024x768, 1024x1024, 1152x864, 1280x720, 1280x800, 1280x960, 1280x1024, 1366x768, 1400x1050, 1440x900, 1600x1200, 1680x1050, 1680x1200, 1920x1080, 1920x1200, 1920x1440, 2560x1440, 3840x2160 without calendar: 640x480, 800x480, 800x600, 1024x768, 1024x1024, 1152x864, 1280x720, 1280x800, 1280x960, 1280x1024, 1366x768, 1400x1050, 1440x900, 1600x1200, 1680x1050, 1680x1200, 1920x1080, 1920x1200, 1920x1440, 2560x1440, 3840x2160 Fireside Stories Under The Stars “A cozy autumn evening comes alive as friends gather around a warm bonfire, sharing stories beneath a starry night sky. The glow of the fire contrasts beautifully with the cool, serene landscape, capturing the magic of friendship, warmth, and the quiet beauty of November nights.” — Designed by PopArt Studio from Serbia. preview with calendar: 320x480, 640x480, 800x480, 800x600, 1024x768, 1024x1024, 1152x864, 1280x720, 1280x800, 1280x960, 1280x1024, 1400x1050, 1440x900, 1600x1200, 1680x1050, 1680x1200, 1920x1080, 1920x1200, 1920x1440, 2560x1440 without calendar: 320x480, 640x480, 800x480, 800x600, 1024x768, 1024x1024, 1152x864, 1280x720, 1280x800, 1280x960, 1280x1024, 1400x1050, 1440x900, 1600x1200, 1680x1050, 1680x1200, 1920x1080, 1920x1200, 1920x1440, 2560x1440 Lunchtime Designed by Ricardo Gimenes from Spain. preview with calendar: 640x480, 800x480, 800x600, 1024x768, 1024x1024, 1152x864, 1280x720, 1280x800, 1280x960, 1280x1024, 1366x768, 1400x1050, 1440x900, 1600x1200, 1680x1050, 1680x1200, 1920x1080, 1920x1200, 1920x1440, 2560x1440, 3840x2160 without calendar: 640x480, 800x480, 800x600, 1024x768, 1024x1024, 1152x864, 1280x720, 1280x800, 1280x960, 1280x1024, 1366x768, 1400x1050, 1440x900, 1600x1200, 1680x1050, 1680x1200, 1920x1080, 1920x1200, 1920x1440, 2560x1440, 3840x2160 Where Innovation Meets Design “This artwork blends technology and creativity in a clean, modern aesthetic. Soft pastel tones and fluid shapes frame a central smartphone, symbolizing the fusion of innovation and human intelligence in mobile app development.” — Designed by Zco Corporation from the United States. preview with calendar: 800x600, 1024x768, 1400x1050, 1440x900, 1600x1200, 1680x1050, 1920x1080, 1920x1200, 1920x1440, 2560x1440 without calendar: 800x600, 1024x768, 1400x1050, 1440x900, 1600x1200, 1680x1050, 1920x1080, 1920x1200, 1920x1440, 2560x1440 Colorful Autumn “Autumn can be dreary, especially in November, when rain starts pouring every day. We wanted to summon better days, so that’s how this colourful November calendar was created. Open your umbrella and let’s roll!” — Designed by PopArt Studio from Serbia. preview without calendar: 320x480, 640x480, 800x480, 800x600, 1024x768, 1024x1024, 1152x864, 1280x720, 1280x800, 1280x960, 1280x1024, 1366x768, 1400x1050, 1440x900, 1600x1200, 1680x1050, 1680x1200, 1920x1080, 1920x1200, 1920x1440, 2560x1440 The Secret Cave Designed by Ricardo Gimenes from Spain. preview without calendar: 640x480, 800x480, 800x600, 1024x768, 1024x1024, 1152x864, 1280x720, 1280x800, 1280x960, 1280x1024, 1366x768, 1400x1050, 1440x900, 1600x1200, 1680x1050, 1680x1200, 1920x1080, 1920x1200, 1920x1440, 2560x1440, 3840x2160 Sunset Or Sunrise “November is autumn in all its splendor. Earthy colors, falling leaves, and afternoons in the warmth of the home. But it is also adventurous and exciting and why not, different. We sit in Bali contemplating Pura Ulun Danu Bratan. We don’t know if it’s sunset or dusk, but… does that really matter?” — Designed by Veronica Valenzuela Jimenez from Spain. preview without calendar: 640x480, 800x480, 1024x768, 1280x720, 1280x800, 1440x900, 1600x1200, 1920x1080, 1920x1440, 2560x1440 A Jelly November “Been looking for a mysterious, gloomy, yet beautiful desktop wallpaper for this winter season? We’ve got you, as this month’s calendar marks Jellyfish Day. On November 3rd, we celebrate these unique, bewildering, and stunning marine animals. Besides adorning your screen, we’ve got you covered with some jellyfish fun facts: they aren’t really fish, they need very little oxygen, eat a broad diet, and shrink in size when food is scarce. Now that’s some tenacity to look up to.” — Designed by PopArt Studio from Serbia. preview without calendar: 320x480, 640x480, 800x480, 800x600, 1024x768, 1024x1024, 1152x864, 1280x720, 1280x960, 1280x1024, 1366x768, 1440x900, 1440x1050, 1600x1200, 1680x1050, 1680x1200, 1920x1080, 1920x1200, 1920x1440, 2560x1440 Winter Is Here Designed by Ricardo Gimenes from Spain. preview without calendar: 640x480, 800x480, 800x600, 1024x768, 1024x1024, 1152x864, 1280x720, 1280x800, 1280x960, 1280x1024, 1366x768, 1400x1050, 1440x900, 1600x1200, 1680x1050, 1680x1200, 1920x1080, 1920x1200, 1920x1440, 2560x1440, 3840x2160 Moonlight Bats “I designed some Halloween characters and then this idea came to my mind — a bat family hanging around in the moonlight. A cute and scary mood is just perfect for autumn.” — Designed by Carmen Eisendle from Germany. preview without calendar: 640x480, 800x600, 1024x768, 1280x800, 1280x960, 1440x900, 1600x1200, 1680x1050, 1680x1260, 1920x1200, 1920x1440, 2560x1440, 2560x1600 Time To Give Thanks Designed by Glynnis Owen from Australia. preview without calendar: 320x480, 640x480, 800x600, 1024x768, 1152x864, 1280x720, 1280x960, 1600x1200, 1920x1080, 1920x1440, 2560x1440 Anbani “Anbani means alphabet in Georgian. The letters that grow on that tree are the Georgian alphabet. It’s very unique!” — Designed by Vlad Gerasimov from Georgia. preview without calendar: 800x480, 800x600, 1024x600, 1024x768, 1152x864, 1280x720, 1280x800, 1280x960, 1280x1024, 1366x768, 1400x1050, 1440x900, 1440x960, 1600x900, 1600x1200, 1680x1050, 1680x1200, 1920x1080, 1920x1200, 1920x1440, 2560x1440, 2560x1600, 2880x1800, 3072x1920, 3840x2160, 5120x2880 Me And The Key Three Designed by Bart Bonte from Belgium. preview without calendar: 640x480, 800x480, 800x600, 1024x768, 1024x1024, 1152x864, 1280x720, 1280x800, 1280x960, 1280x1024, 1400x1050, 1440x900, 1600x1200, 1680x1050, 1680x1200, 1920x1080, 1920x1200, 1920x1440, 2560x1440 Outer Space “We were inspired by nature around us and the universe above us, so we created an out-of-this-world calendar. Now, let us all stop for a second and contemplate on preserving our forests, let us send birds of passage off to warmer places, and let us think to ourselves — if not on Earth, could we find a home somewhere else in outer space?” — Designed by PopArt Studio from Serbia. preview without calendar: 320x480, 640x480, 800x480, 800x600, 1024x768, 1024x1024, 1152x864, 1280x720, 1280x800, 1280x960, 1280x1024, 1366x768, 1400x1050, 1440x900, 1600x1200, 1680x1050, 1680x1200, 1920x1080, 1920x1200, 1920x1440, 2560x1440 Captain’s Home Designed by Elise Vanoorbeek from Belgium. preview without calendar: 1024x768, 1152x864, 1280x720, 1280x800, 1280x960, 1280x1024, 1366x768, 1400x1050, 1440x900, 1600x1200, 1680x1050, 1680x1200, 1920x1080, 1920x1200, 1920x1440, 2560x1440 Deer Fall, I Love You Designed by Maria Porter from the United States. preview without calendar: 320x480, 800x600, 1280x800, 1280x1024, 1440x900, 1680x1050, 2560x1440 Holiday Season Is Approaching Designed by ActiveCollab from the United States. preview without calendar: 1080x1920, 1400x1050, 1440x900, 1600x1200, 1680x1200, 1920x1080, 1920x1200, 1920x1440, 2560x1440 International Civil Aviation Day “On December 7, we mark International Civil Aviation Day, celebrating those who prove day by day that the sky really is the limit. As the engine of global connectivity, civil aviation is now, more than ever, a symbol of social and economic progress and a vehicle of international understanding. This monthly calendar is our sign of gratitude to those who dedicate their lives to enabling everyone to reach their dreams.” — Designed by PopArt Studio from Serbia. preview without calendar: 320x480, 640x480, 800x480, 800x600, 1024x768, 1024x1024, 1152x864, 1280x720, 1280x800, 1280x960, 1280x1024, 1400x1050, 1440x900, 1600x1200, 1680x1050, 1680x1200, 1920x1080, 1920x1200, 1920x1440, 2560x1440 Peanut Butter Jelly Time “November is the Peanut Butter Month so I decided to make a wallpaper around that. As everyone knows peanut butter goes really well with some jelly, so I made two sandwiches, one with peanut butter and one with jelly. Together they make the best combination.” — Designed by Senne Mommens from Belgium. preview without calendar: 320x480, 1280x720, 1280x800, 1280x1024, 1920x1080, 2560x1440 A Gentleman’s November Designed by Cedric Bloem from Belgium. preview without calendar: 320x480, 640x480, 800x480, 800x600, 1024x768, 1024x1024, 1152x864, 1280x720, 1280x800, 1280x960, 1280x1024, 1400x1050, 1440x900, 1600x1200, 1680x1050, 1680x1200, 1920x1080, 1920x1200, 1920x1440, 2560x1440 Bug Designed by Ricardo Gimenes from Spain. preview without calendar: 640x480, 800x480, 800x600, 1024x768, 1024x1024, 1152x864, 1280x720, 1280x800, 1280x960, 1280x1024, 1366x768, 1400x1050, 1440x900, 1600x1200, 1680x1050, 1680x1200, 1920x1080, 1920x1200, 1920x1440, 2560x1440, 3840x2160 Go To Japan “November is the perfect month to go to Japan. Autumn is beautiful with its brown colors. Let’s enjoy it!” — Designed by Veronica Valenzuela from Spain. preview without calendar: 640x480, 800x480, 1024x768, 1280x720, 1280x800, 1440x900, 1600x1200, 1920x1080, 1920x1440, 2560x1440 The Kind Soul “Kindness drives humanity. Be kind. Be humble. Be humane. Be the best of yourself!” — Designed by Color Mean Creative Studio from Dubai. preview without calendar: 320x480, 640x480, 800x480, 800x600, 1024x768, 1024x1024, 1152x864, 1280x720, 1280x800, 1280x960, 1280x1024, 1366x768, 1400x1050, 1440x900, 1600x1200, 1680x1050, 1680x1200, 1920x1080, 1920x1200, 1920x1440, 2560x1440 Mushroom Season “It is autumn! It is raining and thus… it is mushroom season! It is the perfect moment to go to the forest and get the best mushrooms to do the best recipe.” — Designed by Verónica Valenzuela from Spain. preview without calendar: 800x480, 1024x768, 1152x864, 1280x800, 1280x960, 1440x900, 1680x1200, 1920x1080, 2560x1440 Tempestuous November “By the end of autumn, ferocious Poseidon will part from tinted clouds and timid breeze. After this uneven clash, the sky once more becomes pellucid just in time for imminent luminous snow.” — Designed by Ana Masnikosa from Belgrade, Serbia. preview without calendar: 320x480, 640x480, 800x480, 800x600, 1024x768, 1024x1024, 1152x864, 1280x720, 1280x800, 1280x960, 1280x1024, 1400x1050, 1440x900, 1600x1200, 1680x1050, 1680x1200, 1920x1080, 1920x1200, 1920x1440, 2560x1440 Cozy Autumn Cups And Cute Pumpkins “Autumn coziness, which is created by fallen leaves, pumpkins, and cups of cocoa, inspired our designers for this wallpaper. — Designed by MasterBundles from Ukraine. preview without calendar: 320x480, 640x480, 800x480, 800x600, 1024x768, 1024x1024, 1152x864, 1280x720, 1280x800, 1280x960, 1280x1024, 1366x768, 1400x1050, 1440x900, 1600x1200, 1680x1050, 1680x1200, 1920x1080, 1920x1200, 1920x1440, 2560x1440 November Nights On Mountains “Those chill November nights when you see mountain tops covered with the first snow sparkling in the moonlight.” — Designed by Jovana Djokic from Serbia. preview without calendar: 320x480, 640x480, 800x480, 800x600, 1024x768, 1024x1024, 1152x864, 1280x720, 1280x800, 1280x1024, 1366x768, 1400x1050, 1440x900, 1600x1200, 1680x1050, 1680x1200, 1920x1080, 1920x1200, 1920x1440, 2560x1440 Coco Chanel “Beauty begins the moment you decide to be yourself. (Coco Chanel)” — Designed by Tazi from Australia. preview without calendar: 320x480, 640x480, 800x600, 1024x768, 1152x864, 1280x720, 1280x960, 1600x1200, 1920x1080, 1920x1440, 2560x1440 Stars “I don’t know anyone who hasn’t enjoyed a cold night looking at the stars.” — Designed by Ema Rede from Portugal. preview without calendar: 1600x1200, 1680x1050, 1680x1200, 1920x1080, 1920x1200, 1920x1440 Welcome Home Dear Winter “The smell of winter is lingering in the air. The time to be home! Winter reminds us of good food, of the warmth, the touch of a friendly hand, and a talk beside the fire. Keep calm and let us welcome winter.” — Designed by Acodez IT Solutions from India. preview without calendar: 640x480, 800x480, 800x600, 1024x768, 1024x1024, 1152x864, 1280x720, 1280x960, 1280x1024, 1366x768, 1400x1050, 1440x900, 1600x1200, 1680x1050, 1680x1200, 1920x1080, 1920x1200, 1920x1440, 2560x1440 Happy Birthday C.S.Lewis! “It’s C.S. Lewis’s birthday on November 29th, so I decided to create this ‘Chronicles of Narnia’ inspired wallpaper to honour this day.” — Designed by Safia Begum from the United Kingdom. preview without calendar: 800x450, 1280x720, 1366x768, 1440x810, 1600x900, 1680x945, 1920x1080, 2560x1440 Autumn Choir Designed by Hatchers from Ukraine / China. preview without calendar: 1024x768, 1152x864, 1280x720, 1280x800, 1280x960, 1400x1050, 1440x900, 1600x1200, 1680x1050, 1680x1200, 1920x1080, 1920x1200, 1920x1440, 2560x1440 Star Wars Designed by Ricardo Gimenes from Spain. preview without calendar: 640x480, 800x480, 800x600, 1024x768, 1024x1024, 1152x864, 1280x720, 1280x800, 1280x960, 1280x1024, 1366x768, 1400x1050, 1440x900, 1600x1200, 1680x1050, 1680x1200, 1920x1080, 1920x1200, 1920x1440, 2560x1440, 3840x2160 Hello World, Happy November “I often read messages at Smashing Magazine from the people in the southern hemisphere ‘it’s spring, not autumn!’ so I wanted to design a wallpaper for the northern and the southern hemispheres. Here it is, northerners and southerns, hope you like it!” — Designed by Agnes Swart from the Netherlands. preview without calendar: 640x480, 800x480, 800x600, 1024x768, 1024x1024, 1152x864, 1280x720, 1280x800, 1280x960, 1280x1024, 1400x1050, 1440x900, 1600x1200, 1680x1050, 1680x1200, 1920x1080, 1920x1200, 1920x1440, 2560x1440 Get Featured Next Month Feeling inspired? We’ll publish the December wallpapers on November 30, so if you’d like to be a part of the collection, please don’t hesitate to submit your design. We are already looking forward to it!
JavaScript For Everyone: Iterators
Here is a lesson on Iterators. Iterables implement the iterable iteration interface, and iterators implement the iterator iteration interface. Sounds confusing? Mat breaks it all down in the article.
Hey, I’m Mat, but “Wilto” works too — I’m here to teach you JavaScript. Well, not here-here; technically, I’m over at Piccalil.li’s JavaScript for Everyone course to teach you JavaScript. The following is an excerpt from the Iterables and Iterators module: the lesson on Iterators. Iterators are one of JavaScript’s more linguistically confusing topics, sailing easily over what is already a pretty high bar. There are iterables — array, Set, Map, and string — all of which follow the iterable protocol. To follow said protocol, an object must implement the iterable interface. In practice, that means that the object needs to include a [Symbol.iterator]() method somewhere in its prototype chain. Iterable protocol is one of two iteration protocols. The other iteration protocol is the iterator protocol. See what I mean about this being linguistically fraught? Iterables implement the iterable iteration interface, and iterators implement the iterator iteration interface! If you can say that five times fast, then you’ve pretty much got the gist of it; easy-peasy, right? No, listen, by the time you reach the end of this lesson, I promise it won’t be half as confusing as it might sound, especially with the context you’ll have from the lessons that precede it. An iterable object follows the iterable protocol, which just means that the object has a conventional method for making iterators. The elements that it contains can be looped over with for…of. An iterator object follows the iterator protocol, and the elements it contains can be accessed sequentially, one at a time. To reiterate — a play on words for which I do not forgive myself, nor expect you to forgive me — an iterator object follows iterator protocol, and the elements it contains can be accessed sequentially, one at a time. Iterator protocol defines a standard way to produce a sequence of values, and optionally return a value once all possible values have been generated. In order to follow the iterator protocol, an object has to — you guessed it — implement the iterator interface. In practice, that once again means that a certain method has to be available somewhere on the object's prototype chain. In this case, it’s the next() method that advances through the elements it contains, one at a time, and returns an object each time that method is called. In order to meet the iterator interface criteria, the returned object must contain two properties with specific keys: one with the key value, representing the value of the current element, and one with the key done, a Boolean value that tells us if the iterator has advanced beyond the final element in the data structure. That’s not an awkward phrasing the editorial team let slip through: the value of that done property is true only when a call to next() results in an attempt to access an element beyond the final element in the iterator, not upon accessing the final element in the iterator. Again, a lot in print, but it’ll make more sense when you see it in action. You’ve seen an example of a built-in iterator before, albeit briefly: const theMap = new Map([ [ "aKey", "A value." ] ]); console.log( theMap.keys() ); // Result: Map Iterator { constructor: Iterator() } That’s right: while a Map object itself is an iterable, Map’s built-in methods keys(), values(), and entries() all return Iterator objects. You’ll also remember that I looped through those using forEach (a relatively recent addition to the language). Used that way, an iterator is indistinguishable from an iterable: const theMap = new Map([ [ "key", "value " ] ]); theMap.keys().forEach( thing => { console.log( thing ); }); // Result: key All iterators are iterable; they all implement the iterable interface: const theMap = new Map([ [ "key", "value " ] ]); theMap.keys()[ Symbol.iterator ]; // Result: function Symbol.iterator() And if you’re angry about the increasing blurriness of the line between iterators and iterables, wait until you get a load of this “top ten anime betrayals” video candidate: I’m going to demonstrate how to interact with an iterator by using an array. “BOO,” you surely cry, having been so betrayed by one of your oldest and most indexed friends. “Array is an iterable, not an iterator!” You are both right to yell at me in general, and right about array in specific — an array is an iterable, not an iterator. In fact, while all iterators are iterable, none of the built-in iterables are iterators. However, when you call that [ Symbol.iterator ]() method — the one that defines an object as an iterable — it returns an iterator object created from an iterable data structure: const theIterable = [ true, false ]; const theIterator = theIterable[ Symbol.iterator ](); theIterable; // Result: Array [ true, false ] theIterator; // Result: Array Iterator { constructor: Iterator() } The same goes for Set, Map, and — yes — even strings: const theIterable = "A string." const theIterator = theIterable[ Symbol.iterator ](); theIterator; // Result: String Iterator { constructor: Iterator() } What we’re doing here manually — creating an iterator from an iterable using %Symbol.iterator% — is precisely how iterable objects work internally, and why they have to implement %Symbol.iterator% in order to be iterables. Any time you loop through an array, you’re actually looping through an iterator created from that Array. All built-in iterators are iterable. All built-in iterables can be used to create iterators. Alternately — preferably, even, since it doesn’t require you to graze up against %Symbol.iterator% directly — you can use the built-in Iterator.from() method to create an iterator object from any iterable: const theIterator = Iterator.from([ true, false ]); theIterator; // Result: Array Iterator { constructor: Iterator() } You remember how I mentioned that an iterator has to provide a next() method (that returns a very specific Object)? Calling that next() method steps through the elements that the iterator contains one at a time, with each call returning an instance of that Object: const theIterator = Iterator.from([ 1, 2, 3 ]); theIterator.next(); // Result: Object { value: 1, done: false } theIterator.next(); // Result: Object { value: 2, done: false } theIterator.next(); // Result: Object { value: 3, done: false } theIterator.next(); // Result: Object { value: undefined, done: true } You can think of this as a more controlled form of traversal than the traditional “wind it up and watch it go” for loops you’re probably used to — a method of accessing elements one step at a time, as-needed. Granted, you don’t have to step through an iterator in this way, since they have their very own Iterator.forEach method, which works exactly like you would expect — to a point: const theIterator = Iterator.from([ true, false ]); theIterator.forEach( element => console.log( element ) ); /* Result: true false */ But there’s another big difference between iterables and iterators that we haven’t touched on yet, and for my money, it actually goes a long way toward making linguistic sense of the two. You might need to humor me for a little bit here, though. See, an iterable object is an object that is iterable. No, listen, stay with me: you can iterate over an Array, and when you’re done doing so, you can still iterate over that Array. It is, by definition, an object that can be iterated over; it is the essential nature of an iterable to be iterable: const theIterable = [ 1, 2 ]; theIterable.forEach( el => { console.log( el ); }); /* Result: 1 2 */ theIterable.forEach( el => { console.log( el ); }); /* Result: 1 2 */ In a way, an iterator object represents the singular act of iteration. Internal to an iterable, it is the mechanism by which the iterable is iterated over, each time that iteration is performed. As a stand-alone iterator object — whether you step through it using the next method or loop over its elements using forEach — once iterated over, that iterator is past tense; it is iterated. Because they maintain an internal state, the essential nature of an iterator is to be iterated over, singular: const theIterator = Iterator.from([ 1, 2 ]); theIterator.next(); // Result: Object { value: 1, done: false } theIterator.next(); // Result: Object { value: 2, done: false } theIterator.next(); // Result: Object { value: undefined, done: true } theIterator.forEach( el => console.log( el ) ); // Result: undefined That makes for neat work when you're using the Iterator constructor’s built-in methods to, say, filter or extract part of an Iterator object: const theIterator = Iterator.from([ "First", "Second", "Third" ]); // Take the first two values from theIterator: theIterator.take( 2 ).forEach( el => { console.log( el ); }); /* Result: "First" "Second" */ // theIterator now only contains anything left over after the above operation is complete: theIterator.next(); // Result: Object { value: "Third", done: false } Once you reach the end of an iterator, the act of iterating over it is complete. Iterated. Past-tense. And so too is your time in this lesson, you might be relieved to hear. I know this was kind of a rough one, but the good news is: this course is iterable, not an iterator. This step in your iteration through it — this lesson — may be over, but the essential nature of this course is that you can iterate through it again. Don’t worry about committing all of this to memory right now — you can come back and revisit this lesson anytime. Conclusion I stand by what I wrote there, unsurprising as that probably is: this lesson is a tricky one, but listen, you got this. JavaScript for Everyone is designed to take you inside JavaScript’s head. Once you’ve started seeing how the gears mesh — seen the fingerprints left behind by the people who built the language, and the good, bad, and sometimes baffling decisions that went into that — no itera-, whether -ble or -tor will be able to stand in your way. My goal is to teach you the deep magic — the how and the why of JavaScript, using the syntaxes you’re most likely to encounter in your day-to-day work, at your pace and on your terms. If you’re new to the language, you’ll walk away from this course with a foundational understanding of JavaScript worth hundreds of hours of trial-and-error. If you’re a junior developer, you’ll finish this course with a depth of knowledge to rival any senior. I hope to see you there.
Ambient Animations In Web Design: Practical Applications (Part 2)
Motion can be tricky: too much distracts, too little feels flat. Ambient animations sit in the middle. They’re subtle, slow-moving details that add atmosphere without stealing the show. In part two of his series, web design pioneer Andy Clarke shows how ambient animations can add personality to any website design.
First, a recap: Ambient animations are the kind of passive movements you might not notice at first. However, they bring a design to life in subtle ways. Elements might subtly transition between colours, move slowly, or gradually shift position. Elements can appear and disappear, change size, or they could rotate slowly, adding depth to a brand’s personality. In Part 1, I illustrated the concept of ambient animations by recreating the cover of a Quick Draw McGraw comic book as a CSS/SVG animation. But I know not everyone needs to animate cartoon characters, so in Part 2, I’ll share how ambient animation works in three very different projects: Reuven Herman, Mike Worth, and EPD. Each demonstrates how motion can enhance brand identity, personality, and storytelling without dominating a page. Reuven Herman Los Angeles-based composer Reuven Herman didn’t just want a website to showcase his work. He wanted it to convey his personality and the experience clients have when working with him. Working with musicians is always creatively stimulating: they’re critical, engaged, and full of ideas. Reuven’s classical and jazz background reminded me of the work of album cover designer Alex Steinweiss. I was inspired by the depth and texture that Alex brought to his designs for over 2,500 unique covers, and I wanted to incorporate his techniques into my illustrations for Reuven. To bring Reuven’s illustrations to life, I followed a few core ambient animation principles: Keep animations slow and smooth. Loop seamlessly and avoid abrupt changes. Use layering to build complexity. Avoid distractions. Consider accessibility and performance. …followed by their straight state: The first step in my animation is to morph the stave lines between states. They’re made up of six paths with multi-coloured strokes. I started with the wavy lines: <!-- Wavy state --> <g fill="none" stroke-width="2" stroke-linecap="round"> <path id="p1" stroke="#D2AB99" d="[…]"/> <path id="p2" stroke="#BDBEA9" d="[…]"/> <path id="p3" stroke="#E0C852" d="[…]"/> <path id="p4" stroke="#8DB38B" d="[…]"/> <path id="p5" stroke="#43616F" d="[…]"/> <path id="p6" stroke="#A13D63" d="[…]"/> </g> Although CSS now enables animation between path points, the number of points in each state needs to match. GSAP doesn’t have that limitation and can animate between states that have different numbers of points, making it ideal for this type of animation. I defined the new set of straight paths: <!-- Straight state --> const Waves = { p1: "[…]", p2: "[…]", p3: "[…]", p4: "[…]", p5: "[…]", p6: "[…]" }; Then, I created a GSAP timeline that repeats backwards and forwards over six seconds: const waveTimeline = gsap.timeline({ repeat: -1, yoyo: true, defaults: { duration: 6, ease: "sine.inOut" } }); Object.entries(Waves).forEach(([id, d]) => { waveTimeline.to(`#${id}`, { morphSVG: d }, 0); }); Another ambient animation principle is to use layering to build complexity. Think of it like building a sound mix. You want variation in rhythm, tone, and timing. In my animation, three rows of musical notes move at different speeds: <path id="notes-row-1"/> <path id="notes-row-2"/> <path id="notes-row-3"/> The duration of each row’s animation is also defined using GSAP, from 100 to 400 seconds to give the overall animation a parallax-style effect: const noteRows = [ { id: "#notes-row-1", duration: 300, y: 100 }, // slowest { id: "#notes-row-2", duration: 200, y: 250 }, // medium { id: "#notes-row-3", duration: 100, y: 400 } // fastest ]; […] The next layer contains a shadow cast by the piano keys, which slowly rotates around its centre: gsap.to("shadow", { y: -10, rotation: -2, transformOrigin: "50% 50%", duration: 3, ease: "sine.inOut", yoyo: true, repeat: -1 }); And finally, the piano keys themselves, which rotate at the same time but in the opposite direction to the shadow: gsap.to("#g3-keys", { y: 10, rotation: 2, transformOrigin: "50% 50%", duration: 3, ease: "sine.inOut", yoyo: true, repeat: -1 }); The complete animation can be viewed in my lab. By layering motion thoughtfully, the site feels alive without ever dominating the content, which is a perfect match for Reuven’s energy. Mike Worth As I mentioned earlier, not everyone needs to animate cartoon characters, but I do occasionally. Mike Worth is an Emmy award-winning film, video game, and TV composer who asked me to design his website. For the project, I created and illustrated the character of orangutan adventurer Orango Jones. Orango proved to be the perfect subject for ambient animations and features on every page of Mike’s website. He takes the reader on an adventure, and along the way, they get to experience Mike’s music. For Mike’s “About” page, I wanted to combine ambient animations with interactions. Orango is in a cave where he has found a stone tablet with faint markings that serve as a navigation aid to elsewhere on Mike’s website. The illustration contains a hidden feature, an easter egg, as when someone presses Orango’s magnifying glass, moving shafts of light stream into the cave and onto the tablet. I also added an anchor around a hidden circle, which I positioned over Orango’s magnifying glass, as a large tap target to toggle the light shafts on and off by changing the data-lights value on the SVG: <a href="javascript:void(0);" id="light-switch" title="Lights on/off"> <circle cx="700" cy="1000" r="100" opacity="0" /> </a> Then, I added two descendant selectors to my CSS, which adjust the opacity of the light shafts depending on the data-lights value: [data-lights="lights-off"] .light-shaft { opacity: .05; transition: opacity .25s linear; } [data-lights="lights-on"] .light-shaft { opacity: .25; transition: opacity .25s linear; } A slow and subtle rotation adds natural movement to the light shafts: @keyframes shaft-rotate { 0% { rotate: 2deg; } 50% { rotate: -2deg; } 100% { rotate: 2deg; } } Which is only visible when the light toggle is active: [data-lights="lights-on"] .light-shaft { animation: shaft-rotate 20s infinite; transform-origin: 100% 0; } When developing any ambient animation, considering performance is crucial, as even though CSS animations are lightweight, features like blur filters and drop shadows can still strain lower-powered devices. It’s also critical to consider accessibility, so respect someone’s prefers-reduced-motion preferences: @media screen and (prefers-reduced-motion: reduce) { html { scroll-behavior: auto; animation-duration: 1ms !important; animation-iteration-count: 1 !important; transition-duration: 1ms !important; } } When an animation feature is purely decorative, consider adding aria-hidden="true" to keep it from cluttering up the accessibility tree: <a href="javascript:void(0);" id="light-switch" aria-hidden="true"> […] </a> With Mike’s Orango Jones, ambient animation shifts from subtle atmosphere to playful storytelling. Light shafts and soft interactions weave narrative into the design without stealing focus, proving that animation can support both brand identity and user experience. See this animation in my lab. EPD Moving away from composers, EPD is a property investment company. They commissioned me to design creative concepts for a new website. A quick search for property investment companies will usually leave you feeling underwhelmed by their interchangeable website designs. They include full-width banners with faded stock photos of generic city skylines or ethnically diverse people shaking hands. For EPD, I wanted to develop a distinctive visual style that the company could own, so I proposed graphic, stylised skylines that reflect both EPD’s brand and its global portfolio. I made them using various-sized circles that recall the company’s logo mark. The point of an ambient animation is that it doesn’t dominate. It’s a background element and not a call to action. If someone’s eyes are drawn to it, it’s probably too much, so I dial back the animation until it feels like something you’d only catch if you’re really looking. I created three skyline designs, including Dubai, London, and Manchester. In each of these ambient animations, the wheels rotate and the large circles change colour at random intervals. Next, I exported a layer containing the circle elements I want to change colour. <g id="banner-dots"> <circle class="data-theme-fill" […]/> <circle class="data-theme-fill" […]/> <circle class="data-theme-fill" […]/> […] </g> Once again, I used GSAP to select groups of circles that flicker like lights across the skyline: function animateRandomDots() { const circles = gsap.utils.toArray("#banner-dots circle") const numberToAnimate = gsap.utils.random(3, 6, 1) const selected = gsap.utils.shuffle(circles).slice(0, numberToAnimate) } Then, at two-second intervals, the fill colour of those circles changes from the teal accent to the same off-white colour as the rest of my illustration: gsap.to(selected, { fill: "color(display-p3 .439 .761 .733)", duration: 0.3, stagger: 0.05, onComplete: () => { gsap.to(selected, { fill: "color(display-p3 .949 .949 .949)", duration: 0.5, delay: 2 }) } }) gsap.delayedCall(gsap.utils.random(1, 3), animateRandomDots) } animateRandomDots() The result is a skyline that gently flickers, as if the city itself is alive. Finally, I rotated the wheel. Here, there was no need to use GSAP as this is possible using CSS rotate alone: <g id="banner-wheel"> <path stroke="#F2F2F2" stroke-linecap="round" stroke-width="4" d="[…]"/> <path fill="#D8F76E" d="[…]"/> </g> #banner-wheel { transform-box: fill-box; transform-origin: 50% 50%; animation: rotateWheel 30s linear infinite; } @keyframes rotateWheel { to { transform: rotate(360deg); } } CSS animations are lightweight and ideal for simple, repetitive effects, like fades and rotations. They’re easy to implement and don’t require libraries. GSAP, on the other hand, offers far more control as it can handle path morphing and sequence timelines. The choice of which to use depends on whether I need the precision of GSAP or the simplicity of CSS. By keeping the wheel turning and the circles glowing, the skyline animations stay in the background yet give the design a distinctive feel. They avoid stock photo clichés while reinforcing EPD’s brand identity and are proof that, even in a conservative sector like property investment, ambient animation can add atmosphere without detracting from the message. Wrapping up From Reuven’s musical textures to Mike’s narrative-driven Orango Jones and EPD’s glowing skylines, these projects show how ambient animation adapts to context. Sometimes it’s purely atmospheric, like drifting notes or rotating wheels; other times, it blends seamlessly with interaction, rewarding curiosity without getting in the way. Whether it echoes a composer’s improvisation, serves as a playful narrative device, or adds subtle distinction to a conservative industry, the same principles hold true: Keep motion slow, seamless, and purposeful so that it enhances, rather than distracts from, the design.
AI In UX: Achieve More With Less
A simple but powerful mental model for working with AI: treat it like an enthusiastic intern with no real-world experience. Paul Boag shares lessons learned from real client projects across user research, design, development, and content creation.
I have made a lot of mistakes with AI over the past couple of years. I have wasted hours trying to get it to do things it simply cannot do. I have fed it terrible prompts and received terrible output. And I have definitely spent more time fighting with it than I care to admit. But I have also discovered that when you stop treating AI like magic and start treating it like what it actually is (a very enthusiastic intern with zero life experience), things start to make more sense. Let me share what I have learned from working with AI on real client projects across user research, design, development, and content creation. How To Work With AI Here is the mental model that has been most helpful for me. Treat AI like an intern with zero experience. An intern fresh out of university has lots of enthusiasm and qualifications, but no real-world experience. You would not trust them to do anything unsupervised. You would explain tasks in detail. You would expect to review their work multiple times. You would give feedback and ask them to try again. This is exactly how you should work with AI. The Basics Of Prompting I am not going to pretend to be an expert. I have just spent way too much time playing with this stuff because I like anything shiny and new. But here is what works for me. Define the role. Start with something like “Act as a user researcher” or “Act as a copywriter.” This gives the AI context for how to respond. Break it into steps. Do not just say “Analyze these interview transcripts.” Instead, say “I want you to complete the following steps. One, identify recurring themes. Two, look for questions users are trying to answer. Three, note any objections that come up. Four, output a summary of each.” Define success. Tell it what good looks like. “I am looking for a report that gives a clear indication of recurring themes and questions in a format I can send to stakeholders. Do not use research terminology because they will not understand it.” Make it think. Tell it to think deeply about its approach before responding. Get it to create a way to test for success (known as a rubric) and iterate on its work until it passes that test. Here is a real prompt I use for online research: Act as a user researcher. I would like you to carry out deep research online into [brand name]. In particular, I would like you to focus on what people are saying about the brand, what the overall sentiment is, what questions people have, and what objections people mention. The goal is to create a detailed report that helps me better understand the brand perception. Think deeply about your approach before carrying out the research. Create a rubric for the report to ensure it is as useful as possible. Keep iterating until the report scores extremely high on the rubric. Only then, output the report. That second paragraph (the bit about thinking deeply and creating a rubric), I basically copy and paste into everything now. It is a universal way to get better output. Learn When To Trust It You should never fully trust AI. Just like you would never fully trust an intern you have only just met. To begin with, double-check absolutely everything. Over time, you will get a sense of when it is losing its way. You will spot the patterns. You will know when to start a fresh conversation because the current one has gone off the rails. But even after months of working with it daily, I still check its work. I still challenge it. I still make it cite sources and explain its reasoning. The key is that even with all that checking, it is still faster than doing it yourself. Much faster. Using AI For User Research This is where AI has genuinely transformed my work. I use it constantly for five main things. Online Research I love AI for this. I can ask it to go and research a brand online. What people are saying about it, what questions they have, what they like, and what frustrates them. Then do the same for competitors and compare. This would have taken me days of trawling through social media and review sites. Now it takes minutes. I recently did this for an e-commerce client. I wanted to understand what annoyed people about the brand and what they loved. I got detailed insights that shaped the entire conversion optimization strategy. All from one prompt. Analyzing Interviews And Surveys I used to avoid open-ended questions in surveys. They were such a pain to review. Now I use them all the time because AI can analyze hundreds of text responses in seconds. For interviews, I upload the transcripts and ask it to identify recurring themes, questions, and requests. I always get it to quote directly from the transcripts so I can verify it is not making things up. The quality is good. Really good. As long as you give it clear instructions about what you want. Making Sense Of Data I am terrible with spreadsheets. Put me in front of a person and I can understand them. Put me in front of data, and my eyes glaze over. AI has changed that. I upload spreadsheets to ChatGPT and just ask questions. “What patterns do you see?” “Can you reformat this?” “Show me this data in a different way.” Microsoft Clarity now has Copilot built in, so you can ask it questions about your analytics data. Triple Whale does the same for e-commerce sites. These tools are game changers if you struggle with data like I do. Research Projects This is probably my favorite technique. In ChatGPT and Claude, you can create projects. In other tools, they are called spaces. Think of them as self-contained folders where everything you put in is available to every conversation in that project. When I start working with a new client, I create a project and throw everything in. Old user research. Personas. Survey results. Interview transcripts. Documentation. Background information. Site copy. Anything I can find. Then I give it custom instructions. Here is one I use for my own business: Act as a business consultant and marketing strategy expert with good copywriting skills. Your role is to help me define the future of my UX consultant business and better articulate it, especially via my website. When I ask for your help, ask questions to improve your answers and challenge my assumptions where appropriate. I have even uploaded a virtual board of advisors (people I wish I had on my board) and asked AI to research how they think and respond as they would. Now I have this project that knows everything about my business. I can ask it questions. Get it to review my work. Challenge my thinking. It is like having a co-worker who never gets tired and has a perfect memory. I do this for every client project now. It is invaluable. Creating Personas AI has reinvigorated my interest in personas. I had lost heart in them a bit. They took too long to create, and clients always said they already had marketing personas and did not want to pay to do them again. Now I can create what I call functional personas. Personas that are actually useful to people who work in UX. Not marketing fluff about what brands people like, but real information about what questions they have and what tasks they are trying to complete. I upload all my research to a project and say: Act as a user researcher. Create a persona for [audience type]. For this persona, research the following information: questions they have, tasks they want to complete, goals, states of mind, influences, and success metrics. It is vital that all six criteria are addressed in depth and with equal vigor. The output is really good. Detailed. Useful. Based on actual data rather than pulled out of thin air. Here is my challenge to anyone who thinks AI-generated personas are somehow fake. What makes you think your personas are so much better? Every persona is a story of a hypothetical user. You make judgment calls when you create personas, too. At least AI can process far more information than you can and is brilliant at pattern recognition. My only concern is that relying too heavily on AI could disconnect us from real users. We still need to talk to people. We still need that empathy. But as a tool to synthesize research and create reference points? It is excellent. Using AI For Design And Development Let me start with a warning. AI is not production-ready. Not yet. Not for the kind of client work I do, anyway. Three reasons why: It is slow if you want something specific or complicated. It can be frustrating because it gets close but not quite there. And the quality is often subpar. Unpolished code, questionable design choices, that kind of thing. But that does not mean it is not useful. It absolutely is. Just not for final production work. Functional Prototypes If you are not too concerned with matching a specific design, AI can quickly prototype functionality in ways that are hard to match in Figma. Because Figma is terrible at prototyping functionality. You cannot even create an active form field in a Figma prototype. It’s the biggest thing people do online other than click links — and you cannot test it. Tools like Relume and Bolt can create quick functional mockups that show roughly how things work. They are great for non-designers who just need to throw together a prototype quickly. For designers, they can be useful for showing developers how you want something to work. But you can spend ages getting them to put a hamburger menu on the right side of the screen. So use them for quick iteration, not pixel-perfect design. Small Coding Tasks I use AI constantly for small, low-risk coding work. I am not a developer anymore. I used to be, back when dinosaurs roamed the earth, but not for years. AI lets me create the little tools I need. A calculator that calculates the ROI of my UX work. An app for running top task analysis. Bits of JavaScript for hiding elements on a page. WordPress plugins for updating dates automatically. Just before running my workshop on this topic, I needed a tool to create calendar invites for multiple events. All the online services wanted £16 a month. I asked ChatGPT to build me one. One prompt. It worked. It looked rubbish, but I did not care. It did what I needed. If you are a developer, you should absolutely be using tools like Cursor by now. They are invaluable for pair programming with AI. But if you are not a developer, just stick with Claude or Bolt for quick throwaway tools. Reviewing Existing Services There are some great tools for getting quick feedback on existing websites when budget and time are tight. If you need to conduct a UX audit, Wevo Pulse is an excellent starting point. It automatically reviews a website based on personas and provides visual attention heatmaps, friction scores, and specific improvement recommendations. It generates insights in minutes rather than days. Now, let me be clear. This does not replace having an experienced person conduct a proper UX audit. You still need that human expertise to understand context, make judgment calls, and spot issues that AI might miss. But as a starting point to identify obvious problems quickly? It is a great tool. Particularly when budget or time constraints mean a full audit is not on the table. For e-commerce sites, Baymard has UX Ray, which analyzes flaws based on their massive database of user research. Checking Your Designs Attention Insight has taken thousands of hours of eye-tracking studies and trained AI on it to predict where people will look on a page. It has about 90 to 96 percent accuracy. You upload a screenshot of your design, and it shows you where attention is going. Then you can play around with your imagery and layout to guide attention to the right place. It is great for dealing with stakeholders who say, “People won’t see that.” You can prove they will. Or equally, when stakeholders try to crowd the interface with too much stuff, you can show them attention shooting everywhere. I use this constantly. Here is a real example from a pet insurance company. They had photos of a dog, cat, and rabbit for different types of advice. The dog was far from the camera. The cat was looking directly at the camera, pulling all the attention. The rabbit was half off-frame. Most attention went to the cat’s face. I redesigned it using AI-generated images, where I could control exactly where each animal looked. Dog looking at the camera. Cat looking right. Rabbit looking left. All the attention drawn into the center. Made a massive difference. Creating The Perfect Image I use AI all the time for creating images that do a specific job. My preferred tools are Midjourney and Gemini. I like Midjourney because, visually, it creates stunning imagery. You can dial in the tone and style you want. The downside is that it is not great at following specific instructions. So I produce an image in Midjourney that is close, then upload it to Gemini. Gemini is not as good at visual style, but it is much better at following instructions. “Make the guy reach here” or “Add glasses to this person.” I can get pretty much exactly what I want. The other thing I love about Midjourney is that you can upload a photograph and say, “Replicate this style.” This keeps consistency across a website. I have a master image I use as a reference for all my site imagery to keep the style consistent. Using AI For Content Most clients give you terrible copy. Our job is to improve the user experience or conversion rate, and anything we do gets utterly undermined by bad copy. I have completely stopped asking clients for copy since AI came along. Here is my process. Build Everything Around Questions Once I have my information architecture, I get AI to generate a massive list of questions users will ask. Then I run a top task analysis where people vote on which questions matter most. I assign those questions to pages on the site. Every page gets a list of the questions it needs to answer. Get Bullet Point Answers From Stakeholders I spin up the content management system with a really basic theme. Just HTML with very basic formatting. I go through every page and assign the questions. Then I go to my clients and say: “I do not want you to write copy. Just go through every page and bullet point answers to the questions. If the answer exists on the old site, copy and paste some text or link to it. But just bullet points.” That is their job done. Pretty much. Let AI Draft The Copy Now I take control. I feed ChatGPT the questions and bullet points and say: Act as an online copywriter. Write copy for a webpage that answers the question [question]. Use the following bullet points to answer that question: [bullet points]. Use the following guidelines: Aim for a ninth-grade reading level or below. Sentences should be short. Use plain language. Avoid jargon. Refer to the reader as you. Refer to the writer as us. Ensure the tone is friendly, approachable, and reassuring. The goal is to [goal]. Think deeply about your approach. Create a rubric and iterate until the copy is excellent. Only then, output it. I often upload a full style guide as well, with details about how I want it to be written. The output is genuinely good. As a first draft, it is excellent. Far better than what most stakeholders would give me. Stakeholders Review And Provide Feedback That goes into the website, and stakeholders can comment on it. Once I get their feedback, I take the original copy and all their comments back into ChatGPT and say, “Rewrite using these comments.” Job done. The great thing about this approach is that even if stakeholders make loads of changes, they are making changes to a good foundation. The overall quality still comes out better than if they started with a blank sheet. It also makes things go smoother because you are not criticizing their content, where they get defensive. They are criticizing AI content. Tools That Help If your stakeholders are still giving you content, Hemingway Editor is brilliant. Copy and paste text in, and it tells you how readable and scannable it is. It highlights long sentences and jargon. You can use this to prove to clients that their content is not good web copy. If you pay for the pro version, you get AI tools that will rewrite the copy to be more readable. It is excellent. What This Means for You Let me be clear about something. None of this is perfect. AI makes mistakes. It hallucinates. It produces bland output if you do not push it hard enough. It requires constant checking and challenging. But here is what I know from two years of using this stuff daily. It has made me faster. It has made me better. It has freed me up to do more strategic thinking and less grunt work. A report that would have taken me five days now takes three hours. That is not an exaggeration. That is real. Overall, AI probably gives me a 25 to 33 percent increase in what I can do. That is significant. Your value as a UX professional lies in your ideas, your questions, and your thinking. Not your ability to use Figma. Not your ability to manually review transcripts. Not your ability to write reports from scratch. AI cannot innovate. It cannot make creative leaps. It cannot know whether its output is good. It cannot understand what it is like to be human. That is where you come in. That is where you will always come in. Start small. Do not try to learn everything at once. Just ask yourself throughout your day: Could I do this with AI? Try it. See what happens. Double-check everything. Learn what works and what does not. Treat it like an enthusiastic intern with zero life experience. Give it clear instructions. Check its work. Make it try again. Challenge it. Push it further. And remember, it is not going to take your job. It is going to change it. For the better, I think. As long as we learn to work with it rather than against it.
How To Make Your UX Research Hard To Ignore
Research isn’t everything. Facts alone don’t win arguments, but powerful stories do. Here’s how to turn your research into narratives that inspire trust and influence decisions.
In the early days of my career, I believed that nothing wins an argument more effectively than strong and unbiased research. Surely facts speak for themselves, I thought. If I just get enough data, just enough evidence, just enough clarity on where users struggle — well, once I have it all and I present it all, it alone will surely change people’s minds, hearts, and beliefs. And, most importantly, it will help everyone see, understand, and perhaps even appreciate and commit to what needs to be done. Well, it’s not quite like that. In fact, the stronger and louder the data, the more likely it is to be questioned. And there is a good reason for that, which is often left between the lines. Research Amplifies Internal Flaws Throughout the years, I’ve often seen data speaking volumes about where the business is failing, where customers are struggling, where the team is faltering — and where an urgent turnaround is necessary. It was right there, in plain sight: clear, loud, and obvious. But because it’s so clear, it reflects back, often amplifying all the sharp edges and all the cut corners in all the wrong places. It reflects internal flaws, wrong assumptions, and failing projects — some of them signed off years ago, with secured budgets, big promotions, and approved headcounts. Questioning them means questioning authority, and often it’s a tough path to take. As it turns out, strong data is very, very good at raising uncomfortable truths that most companies don’t really want to acknowledge. That’s why, at times, research is deemed “unnecessary,” or why we don’t get access to users, or why loud voices always win big arguments. So even if data is presented with a lot of eagerness, gravity, and passion in that big meeting, it will get questioned, doubted, and explained away. Not because of its flaws, but because of hope, reluctance to change, and layers of internal politics. This shows up most vividly in situations when someone raises concerns about the validity and accuracy of research. Frankly, it’s not that somebody is wrong and somebody is right. Both parties just happen to be right in a different way. What To Do When Data Disagrees We’ve all heard that data always tells a story. However, it’s never just a single story. People are complex, and pointing out a specific truth about them just by looking at numbers is rarely enough. When data disagrees, it doesn’t mean that either is wrong. It’s just that different perspectives reveal different parts of a whole story that isn’t completed yet. In digital products, most stories have 2 sides: Quantitative data ← What/When: behavior patterns at scale. Qualitative data ← Why/How: user needs and motivations. ↳ Quant usually comes from analytics, surveys, and experiments. ↳ Qual comes from tests, observations, and open-ended surveys. Risk-averse teams overestimate the weight of big numbers in quantitative research. Users exaggerate the frequency and severity of issues that are critical for them. As Archana Shah noted, designers get carried away by users’ confident responses and often overestimate what people say and do. And so, eventually, data coming from different teams paints a different picture. And when it happens, we need to reconcile and triangulate. With the former, we track what’s missing, omitted, or overlooked. With the latter, we cross-validate data — e.g., finding pairings of qual/quant streams of data, then clustering them together to see what’s there and what’s missing, and exploring from there. And even with all of it in place and data conflicts resolved, we still need to do one more thing to make a strong argument: we need to tell a damn good story. Facts Don’t Win Arguments, Stories Do Research isn’t everything. Facts don’t win arguments — powerful stories do. But a story that starts with a spreadsheet isn’t always inspiring or effective. Perhaps it brings a problem into the spotlight, but it doesn’t lead to a resolution. The very first thing I try to do in that big boardroom meeting is to emphasize what unites us — shared goals, principles, and commitments that are relevant to the topic at hand. Then, I show how new data confirms or confronts our commitments, with specific problems we believe we need to address. When a question about the quality of data comes in, I need to show that it has been reconciled and triangulated already and discussed with other teams as well. A good story has a poignant ending. People need to see an alternative future to trust and accept the data — and a clear and safe path forward to commit to it. So I always try to present options and solutions that we believe will drive change and explain our decision-making behind that. They also need to believe that this distant future is within reach, and that they can pull it off, albeit under a tough timeline or with limited resources. And: a good story also presents a viable, compelling, shared goal that people can rally around and commit to. Ideally, it’s something that has a direct benefit for them and their teams. These are the ingredients of the story that I always try to keep in my mind when working on that big presentation. And in fact, data is a starting point, but it does need a story wrapped around it to be effective. Wrapping Up There is nothing more disappointing than finding a real problem that real people struggle with and facing the harsh reality of research not being trusted or valued. We’ve all been there before. The best thing you can do is to be prepared: have strong data to back you up, include both quantitative and qualitative research — preferably with video clips from real customers — but also paint a viable future which seems within reach. And sometimes nothing changes until something breaks. And at times, there isn’t much you can do about it unless you are prepared when it happens. “Data doesn’t change minds, and facts don’t settle fights. Having answers isn’t the same as learning, and it for sure isn’t the same as making evidence-based decisions.” — Erika Hall Meet “How To Measure UX And Design Impact” You can find more details on UX Research in Measure UX & Design Impact (8h), a practical guide for designers and UX leads to measure and show your UX impact on business. Use the code 🎟 IMPACT to save 20% off today. Jump to the details. Video + UX Training Video only Video + UX Training $ 495.00 $ 799.00 Get Video + UX Training 25 video lessons (8h) + Live UX Training. 100 days money-back-guarantee. Video only $ 250.00$ 395.00 Get the video course 25 video lessons (8h). Updated yearly. Also available as a UX Bundle with 2 video courses. Useful Resources “How to Present Research So Stakeholders Sit Up and Take Action”, by Nikki Anderson “What To Do When Data Disagrees”, by Subhasree Chatterjee, Archana Shah, Sanket Shukl, and Jason Bressler “Mixed-Method UX Research”, by Raschin Fatemi “A Step-by-Step Framework For Mixed-Method Research”, by Jeremy Williams “The Ultimate Guide To Mixed Methods”, by Ben Wiedmaier Survey Design Cheatsheet, by yours truly Useful Calculators For UX Research, by yours truly Beyond Measure, by Erika Hall Useful Books Just Enough Research, by Erika Hall Designing Surveys That Work, by Caroline Jarrett Designing Quality Survey Questions, by Sheila B. Robinson
The Grayscale Problem
From A/B tests to AI slop, the modern web is bleeding out its colour. Standardized, templated, and overoptimized, it’s starting to feel like a digital Levittown. But it doesn’t have to be.
Last year, a study found that cars are steadily getting less colourful. In the US, around 80% of cars are now black, white, gray, or silver, up from 60% in 2004. This trend has been attributed to cost savings and consumer preferences. Whatever the reasons, the result is hard to deny: a big part of daily life isn’t as colourful as it used to be. The colourfulness of mass consumer products is hardly the bellwether for how vibrant life is as a whole, but the study captures a trend a lot of us recognise — offline and on. From colour to design to public discourse, a lot of life is getting less varied, more grayscale. The web is caught in the same current. There is plenty right with it — it retains plenty of its founding principles — but its state is not healthy. From AI slop to shoddy service providers to enshittification, the digital world faces its own grayscale problem. This bears talking about. One of life’s great fallacies is that things get better over time on their own. They can, but it’s certainly not a given. I don’t think the moral arc of the universe does not bend towards justice, not on its own; I think it bends wherever it is dragged, kicking and screaming, by those with the will and the means to do so. Much of the modern web, and the forces of optimisation and standardisation that drive it, bear an uncanny resemblance to the trend of car colours. Processes like market research and A/B testing — the process by which two options are compared to see which ‘performs’ better on clickthrough, engagement, etc. — have their value, but they don’t lend themselves to particularly stimulating design choices. The spirit of free expression that made the formative years of the internet so exciting — think GeoCities, personal blogging, and so on — is on the slide. The ongoing transition to a more decentralised, privacy-aware Web3 holds some promise. Two-thirds of the world’s population now has online access — though that still leaves plenty of work to do — with a wealth of platforms allowing billions of people to connect. The dream of a digital world that is open, connected, and flat endures, but is tainted. Monopolies One of the main sources of concern for me is that although more people are online than ever, they are concentrating on fewer and fewer sites. A study published in 2021 found that activity is concentrated in a handful of websites. Think Google, Amazon, Facebook, Instagram, and, more recently, ChatGPT: “So, while there is still growth in the functions, features, and applications offered on the web, the number of entities providing these functions is shrinking. [...] The authority, influence, and visibility of the top 1,000 global websites (as measured by network centrality or PageRank) is growing every month, at the expense of all other sites.” Monopolies by nature reduce variance, both through their domination of the market and (understandably in fairness) internal preferences for consistency. And, let’s be frank, they have a vested interest in crushing any potential upstarts. “Readability Algorithms Should Be Tools, Not Targets” “Towards An Ad-Free Web: Diversifying The Online Economy” Dominant websites often fall victim to what I like to call Internet Explorer Syndrome, where their dominance breeds a certain amount of complacency. Why improve your quality when you’re sitting on 90% market share? No wonder the likes of Google are getting worse. The most immediate sign of this is obviously how sites are designed and how they look. A lot of the big players look an awful lot like each other. Even personal websites are built atop third-party website builders. Millions of people wind up using the same handful of templates, and that’s if they have their own website at all. On social media, we are little more than a profile picture and a pithy tagline. The rest is boilerplate. Should there be sleek, minimalist, ‘grayscale’ design systems and websites? Absolutely. But there should be colourful, kooky ones too, and if anything, they’re fading away. Do we really want to spend our online lives in the digital equivalent of Levittowns? Even logos are contriving to be less eye-catching. It feels like a matter of time before every major logo is a circle in a pastel colour. The arrival of Artificial Intelligence into our everyday lives (and a decent chunk of the digital services we use) has put all of this into overdrive. Amalgamating — and hallucinating from — content that was already trending towards a perfect average, it is grayscale in its purest form. Mix all the colours together, and what do you get? A muddy gray gloop. I’m not railing against best practice. A lot of conventions have become the standard for good reason. One could just as easily shake their fist at the sky and wonder why all newspapers look the same, or all books. I hope the difference here is clear, though. The web is a flexible enough domain that I think it belongs in the realm of architecture. A city where all buildings look alike has a soul-crushing quality about it. The same is true, I think, of the web. In the Oscar Wilde play Lady Windermere’s Fan, a character quips that a cynic “knows the price of everything and the value of nothing.” In fairness, another quips back that a sentimentalist “sees an absurd value in everything, and doesn’t know the market price of any single thing.” The sweet spot is somewhere in between. Structure goes a long way, but life needs a bit of variety too. So, how do we go about bringing that variety? We probably shouldn’t hold our breath on big players to lead the way. They have the most to lose, after all. Why risk being colourful or dynamic if it impacts the bottom line? We, the citizens of the web, have more power than we realise. This is the web, remember, a place where if you can imagine it, odds are you can make it. And at zero cost. No materials to buy and ship, no shareholders to appease. A place as flexible — and limitless — as the web has no business being boring. There are plenty of ways, big and small, of keeping this place colourful. Whether our digital footprints are on third-party websites or ones we build ourselves, we needn’t toe the line. Colour seems an appropriate place to start. When given the choice, try something audacious rather than safe. The worst that can happen is that it doesn’t work. It’s not like the sunk cost of painting a room; if you don’t like the palette, you simply change the hex codes. The same is true of fonts, icons, and other building blocks of the web. As an example, a couple of friends and I listen to and review albums occasionally as a hobby. On the website, the palette of each review page reflects the album artwork: I couldn’t tell you if reviews ‘perform’ better or worse than if they had a grayscale palette, because I don’t care. I think it’s a lot nicer to look at. And for those wondering, yes, I have tried to make every page meet AA Web Accessibility standards. Vibrant and accessible aren’t mutually exclusive. Another great way of bringing vibrancy to the web is a degree of randomisation. Bruno Simon of Three Journey and awesome portfolio fame weaves random generation into a lot of his projects, and the results are gorgeous. What’s more, they feel familiar, natural, because life is full of wildcards. This needn’t be in fancy 3D models. You could lightly rotate images to create a more informal, photo album mood, or chuck in the occasional random link in a list of recommended articles, just to shake things up. In a lot of ways, it boils down to an attitude of just trying stuff out. Make your own font, give the site a sepia filter, and add that easter egg you keep thinking about. Just because someone, somewhere has already done it doesn’t mean you can’t do it your own way. And who knows, maybe your way stumbles onto someplace wholly new. I’m wary of being too prescriptive. I don’t have the keys to a colourful web. No one person does. A vibrant community is the sum total of its people. What keeps things interesting is individuals trying wacky ideas and putting them out there. Expression for expression’s sake. Experimentation for experimentation’s sake. Tinkering for tinkering’s sake. As users, there’s also plenty of room to be adventurous and try out open source alternatives to the software monopolies that shape so much of today’s Web. Being active in the communities that shape those tools helps to sustain a more open, collaborative digital world. Although there are lessons to be taken from it, we won’t get a more colourful web by idealising the past or pining to get back to the ‘90s. Nor is there any point in resisting new technologies. AI is here; the choice is whether we use it or it uses us. We must have the courage to carry forward what still holds true, drop what doesn’t, and explore new ideas with a spirit of play. Here are a few more Smashing articles in that spirit: “Playfulness In Code: Supercharge Your Learning By Having Fun” by Jhey Tompkins “The Psychology Of Color In UX And Digital Products” by Rodolpho Henrique “Creativity In A World Of Technology: Does It Exist?” By Maggie Mackenzie “What Zen And The Art Of Motorcycle Maintenance Can Teach Us About Web Design” “An Ode To Side Project Time” I do think there’s a broader discussion to be had about the extent to which A/B tests, bottom lines, and focus groups seem to dictate much of how the modern web looks and feels. With sites being squeezed tighter and tighter by dwindling advertising revenues, and AI answers muscling in on search traffic, the corporate entities behind larger websites can’t justify doing anything other than what is safe and proven, for fear of shrinking their slice of the pie. Lest we forget, though, most of the web isn’t beholden to those types of pressure. From pet projects to wikis to forums to community news outlets to all manner of other things, there are countless reasons for websites to exist, and they needn’t take design cues from the handful of sites slugging it out at the top. Connected with this is the dire need for digital literacy (PDF) — ‘the confident and critical use of a full range of digital technologies for information, communication and basic problem-solving in all aspects of life.’ For as long as using third-party platforms is a necessity rather than a choice, the needle’s only going to move so much. There’s a reason why Minecraft is the world’s best-selling game. People are creative. When given the tools — and the opportunity — that creativity will manifest in weird and wonderful ways. That game is a lot of things, but gray ain’t one of them. The web has all of that flexibility and more. It is a manifestation of imagination. Imagination trends towards colour, not grayness. It doesn’t always feel like it, but where the internet goes is decided by its citizens. The internet is ours. If we want to, we can make it technicolor.
Smashing Animations Part 5: Building Adaptive SVGs With `<symbol>`, `<use>`, And CSS Media Queries
SVGs, they scale, yes, but how else can you make them adapt even better to several screen sizes? Web design pioneer Andy Clarke explains how he builds what he calls “adaptive SVGs” using ``, ``, and CSS Media Queries.
I’ve written quite a lot recently about how I prepare and optimise SVG code to use as static graphics or in animations. I love working with SVG, but there’s always been something about them that bugs me. To illustrate how I build adaptive SVGs, I’ve selected an episode of The Quick Draw McGraw Show called “Bow Wow Bandit,” first broadcast in 1959. In it, Quick Draw McGraw enlists his bloodhound Snuffles to rescue his sidekick Baba Looey. Like most Hanna-Barbera title cards of the period, the artwork was made by Lawrence (Art) Goble. Let’s say I’ve designed an SVG scene like that one that’s based on Bow Wow Bandit, which has a 16:9 aspect ratio with a viewBox size of 1920×1080. This SVG scales up and down (the clue’s in the name), so it looks sharp when it’s gigantic and when it’s minute. But on small screens, the 16:9 aspect ratio (live demo) might not be the best format, and the image loses its impact. Sometimes, a portrait orientation, like 3:4, would suit the screen size better. But, herein lies the problem, as it’s not easy to reposition internal elements for different screen sizes using just viewBox. That’s because in SVG, internal element positions are locked to the coordinate system from the original viewBox, so you can’t easily change their layout between, say, desktop and mobile. This is a problem because animations and interactivity often rely on element positions, which break when the viewBox changes. My challenge was to serve a 1080×1440 version of Bow Wow Bandit to smaller screens and a different one to larger ones. I wanted the position and size of internal elements — like Quick Draw McGraw and his dawg Snuffles — to change to best fit these two layouts. To solve this, I experimented with several alternatives. Note: Why are we not just using the <picture> with external SVGs? The <picture> element is brilliant for responsive images, but it only works with raster formats (like JPEG or WebP) and external SVG files treated as images. That means that you can’t animate or style internal elements using CSS. Showing And Hiding SVG The most obvious choice was to include two different SVGs in my markup, one for small screens, the other for larger ones, then show or hide them using CSS and Media Queries: <svg id="svg-small" viewBox="0 0 1080 1440"> <!-- ... --> </svg> <svg id="svg-large" viewBox="0 0 1920 1080"> <!--... --> </svg> #svg-small { display: block; } #svg-large { display: none; } @media (min-width: 64rem) { #svg-small { display: none; } #svg-mobile { display: block; } } But using this method, both SVG versions are loaded, which, when the graphics are complex, means downloading lots and lots and lots of unnecessary code. Replacing SVGs Using JavaScript I thought about using JavaScript to swap in the larger SVG at a specified breakpoint: if (window.matchMedia('(min-width: 64rem)').matches) { svgContainer.innerHTML = desktopSVG; } else { svgContainer.innerHTML = mobileSVG; } Leaving aside the fact that JavaScript would now be critical to how the design is displayed, both SVGs would usually be loaded anyway, which adds DOM complexity and unnecessary weight. Plus, maintenance becomes a problem as there are now two versions of the artwork to maintain, doubling the time it would take to update something as small as the shape of Quick Draw’s tail. The Solution: One SVG Symbol Library And Multiple Uses Remember, my goal is to: Serve one version of Bow Wow Bandit to smaller screens, Serve a different version to larger screens, Define my artwork just once (DRY), and Be able to resize and reposition elements. I don’t read about it enough, but the <symbol> element lets you define reusable SVG elements that can be hidden and reused to improve maintainability and reduce code bloat. They’re like components for SVG: create once and use wherever you need them: <svg xmlns="http://www.w3.org/2000/svg" style="display: none;"> <symbol id="quick-draw-body" viewBox="0 0 620 700"> <g class="quick-draw-body">[…]</g> </symbol> <!-- ... --> </svg> <use href="#quick-draw-body" /> A <symbol> is like storing a character in a library. I can reference it as many times as I need, to keep my code consistent and lightweight. Using <use> elements, I can insert the same symbol multiple times, at different positions or sizes, and even in different SVGs. Each <symbol> must have its own viewBox, which defines its internal coordinate system. That means paying special attention to how SVG elements are exported from apps like Sketch. Exporting For Individual Viewboxes I wrote before about how I export elements in layers to make working with them easier. That process is a little different when creating symbols. Ordinarily, I would export all my elements using the same viewBoxsize. But when I’m creating a symbol, I need it to have its own specific viewBox. So I export each element as an individually sized SVG, which gives me the dimensions I need to convert its content into a symbol. Let’s take the SVG of Quick Draw McGraw’s hat, which has a viewBox size of 294×182: <svg xmlns="http://www.w3.org/2000/svg" viewBox="0 0 294 182"> <!-- ... --> </svg> I swap the SVG tags for <symbol> and add its artwork to my SVG library: <svg xmlns="http://www.w3.org/2000/svg" style="display: none;"> <symbol id="quick-draw-hat" viewBox="0 0 294 182"> <g class="quick-draw-hat">[…]</g> </symbol> </svg> Then, I repeat the process for all the remaining elements in my artwork. Now, if I ever need to update any of my symbols, the changes will be automatically applied to every instance it’s used. Using A <symbol> In Multiple SVGs I wanted my elements to appear in both versions of Bow Wow Bandit, one arrangement for smaller screens and an alternative arrangement for larger ones. So, I create both SVGs: <svg class="svg-small" viewBox="0 0 1080 1440"> <!-- ... --> </svg> <svg class="svg-large" viewBox="0 0 1920 1080"> <!-- ... --> </svg> …and insert links to my symbols in both: <svg class="svg-small" viewBox="0 0 1080 1440"> <use href="#quick-draw-hat" /> </svg> <svg class="svg-large" viewBox="0 0 1920 1080"> <use href="#quick-draw-hat" /> </svg> Positioning Symbols Once I’ve placed symbols into my layout using <use>, my next step is to position them, which is especially important if I want alternative layouts for different screen sizes. Symbols behave like <g> groups, so I can scale and move them using attributes like width, height, and transform: <svg class="svg-small" viewBox="0 0 1080 1440"> <use href="#quick-draw-hat" width="294" height="182" transform="translate(-30,610)"/> </svg> <svg class="svg-large" viewBox="0 0 1920 1080"> <use href="#quick-draw-hat" width="294" height="182" transform="translate(350,270)"/> </svg> I can place each <use> element independently using transform. This is powerful because rather than repositioning elements inside my SVGs, I move the <use> references. My internal layout stays clean, and the file size remains small because I’m not duplicating artwork. A browser only loads it once, which reduces bandwidth and speeds up page rendering. And because I’m always referencing the same symbol, their appearance stays consistent, whatever the screen size. Animating <use> Elements Here’s where things got tricky. I wanted to animate parts of my characters — like Quick Draw’s hat tilting and his legs kicking. But when I added CSS animations targeting internal elements inside a <symbol>, nothing happened. Tip: You can animate the <use> element itself, but not elements inside the <symbol>. If you want individual parts to move, make them their own symbols and animate each <use>. Turns out, you can’t style or animate a <symbol>, because <use> creates shadow DOM clones that aren’t easily targetable. So, I had to get sneaky. Inside each <symbol> in my library SVG, I added a <g> element around the part I wanted to animate: <symbol id="quick-draw-hat" viewBox="0 0 294 182"> <g class="quick-draw-hat"> <!-- ... --> </g> </symbol> …and animated it using an attribute substring selector, targeting the href attribute of the use element: use[href="#quick-draw-hat"] { animation-delay: 0.5s; animation-direction: alternate; animation-duration: 1s; animation-iteration-count: infinite; animation-name: hat-rock; animation-timing-function: ease-in-out; transform-origin: center bottom; } @keyframes hat-rock { from { transform: rotate(-2deg); } to { transform: rotate(2deg); } } Media Queries For Display Control Once I’ve created my two visible SVGs — one for small screens and one for larger ones — the final step is deciding which version to show at which screen size. I use CSS Media Queries to hide one SVG and show the other. I start by showing the small-screen SVG by default: .svg-small { display: block; } .svg-large { display: none; } Then I use a min-width media query to switch to the large-screen SVG at 64rem and above: @media (min-width: 64rem) { .svg-small { display: none; } .svg-large { display: block; } } This ensures there’s only ever one SVG visible at a time, keeping my layout simple and the DOM free from unnecessary clutter. And because both visible SVGs reference the same hidden <symbol> library, the browser only downloads the artwork once, regardless of how many <use> elements appear across the two layouts. Wrapping Up By combining <symbol>, <use>, CSS Media Queries, and specific transforms, I can build adaptive SVGs that reposition their elements without duplicating content, loading extra assets, or relying on JavaScript. I need to define each graphic only once in a hidden symbol library. Then I can reuse those graphics, as needed, inside several visible SVGs. With CSS doing the layout switching, the result is fast and flexible. It’s a reminder that some of the most powerful techniques on the web don’t need big frameworks or complex tooling — just a bit of SVG know-how and a clever use of the basics.
Intent Prototyping: A Practical Guide To Building With Clarity (Part 2)
Ready to move beyond static mockups? Here is a practical, step-by-step guide to Intent Prototyping — a disciplined method that uses AI to turn your design intent (UI sketches, conceptual models, and user flows) directly into a live prototype, making it your primary canvas for ideation.
In Part 1 of this series, we explored the “lopsided horse” problem born from mockup-centric design and demonstrated how the seductive promise of vibe coding often leads to structural flaws. The main question remains: How might we close the gap between our design intent and a live prototype, so that we can iterate on real functionality from day one, without getting caught in the ambiguity trap? In other words, we need a way to build prototypes that are both fast to create and founded on a clear, unambiguous blueprint. The answer is a more disciplined process I call Intent Prototyping (kudos to Marco Kotrotsos, who coined Intent-Oriented Programming). This method embraces the power of AI-assisted coding but rejects ambiguity, putting the designer’s explicit intent at the very center of the process. It receives a holistic expression of intent (sketches for screen layouts, conceptual model description, boxes-and-arrows for user flows) and uses it to generate a live, testable prototype. This method solves the concerns we’ve discussed in Part 1 in the best way possible: Unlike static mockups, the prototype is fully interactive and can be easily populated with a large amount of realistic data. This lets us test the system’s underlying logic as well as its surface. Unlike a vibe-coded prototype, it is built from a stable, unambiguous specification. This prevents the conceptual model failures and design debt that happen when things are unclear. The engineering team doesn’t need to reverse-engineer a black box or become “code archaeologists” to guess at the designer’s vision, as they receive not only a live prototype but also a clearly documented design intent behind it. This combination makes the method especially suited for designing complex enterprise applications. It allows us to test the system’s most critical point of failure, its underlying structure, at a speed and flexibility that was previously impossible. Furthermore, the process is built for iteration. You can explore as many directions as you want simply by changing the intent and evolving the design based on what you learn from user testing. My Workflow To illustrate this process in action, let’s walk through a case study. It’s the very same example I’ve used to illustrate the vibe coding trap: a simple tool to track tests to validate product ideas. You can find the complete project, including all the source code and documentation files discussed below, in this GitHub repository. Step 1: Expressing An Intent Imagine we’ve already done proper research, and having mused on the defined problem, I begin to form a vague idea of what the solution might look like. I need to capture this idea immediately, so I quickly sketch it out: In this example, I used Excalidraw, but the tool doesn’t really matter. Note that we deliberately keep it rough, as visual details are not something we need to focus on at this stage. And we are not going to be stuck here: we want to make a leap from this initial sketch directly to a live prototype that we can put in front of potential users. Polishing those sketches would not bring us any closer to achieving our goal. What we need to move forward is to add to those sketches just enough details so that they may serve as a sufficient input for a junior frontend developer (or, in our case, an AI assistant). This requires explaining the following: Navigational paths (clicking here takes you to). Interaction details that can’t be shown in a static picture (e.g., non-scrollable areas, adaptive layout, drag-and-drop behavior). What parts might make sense to build as reusable components. Which components from the design system (I’m using Ant Design Library) should be used. Any other comments that help understand how this thing should work (while sketches illustrate how it should look). Having added all those details, we end up with such an annotated sketch: As you see, this sketch covers both the Visualization and Flow aspects. You may ask, what about the Conceptual Model? Without that part, the expression of our intent will not be complete. One way would be to add it somewhere in the margins of the sketch (for example, as a UML Class Diagram), and I would do so in the case of a more complex application, where the model cannot be simply derived from the UI. But in our case, we can save effort and ask an LLM to generate a comprehensive description of the conceptual model based on the sketch. For tasks of this sort, the LLM of my choice is Gemini 2.5 Pro. What is important is that this is a multimodal model that can accept not only text but also images as input (GPT-5 and Claude-4 also fit that criteria). I use Google AI Studio, as it gives me enough control and visibility into what’s happening: Note: All the prompts that I use here and below can be found in the Appendices. The prompts are not custom-tailored to any particular project; they are supposed to be reused as they are. As a result, Gemini gives us a description and the following diagram: The diagram might look technical, but I believe that a clear understanding of all objects, their attributes, and relationships between them is key to good design. That’s why I consider the Conceptual Model to be an essential part of expressing intent, along with the Flow and Visualization. As a result of this step, our intent is fully expressed in two files: Sketch.png and Model.md. This will be our durable source of truth. Step 2: Preparing A Spec And A Plan The purpose of this step is to create a comprehensive technical specification and a step-by-step plan. Most of the work here is done by AI; you just need to keep an eye on it. I separate the Data Access Layer and the UI layer, and create specifications for them using two different prompts (see Appendices 2 and 3). The output of the first prompt (the Data Access Layer spec) serves as an input for the second one. Note that, as an additional input, we give the guidelines tailored for prototyping needs (see Appendices 8, 9, and 10). They are not specific to this project. The technical approach encoded in those guidelines is out of the scope of this article. As a result, Gemini provides us with content for DAL.md and UI.md. Although in most cases this result is quite reliable enough, you might want to scrutinize the output. You don’t need to be a real programmer to make sense of it, but some level of programming literacy would be really helpful. However, even if you don’t have such skills, don’t get discouraged. The good news is that if you don’t understand something, you always know who to ask. Do it in Google AI Studio before refreshing the context window. If you believe you’ve spotted a problem, let Gemini know, and it will either fix it or explain why the suggested approach is actually better. It’s important to remember that by their nature, LLMs are not deterministic and, to put it simply, can be forgetful about small details, especially when it comes to details in sketches. Fortunately, you don’t have to be an expert to notice that the “Delete” button, which is in the upper right corner of the sketch, is not mentioned in the spec. Don’t get me wrong: Gemini does a stellar job most of the time, but there are still times when it slips up. Just let it know about the problems you’ve spotted, and everything will be fixed. Once we have Sketch.png, Model.md, DAL.md, UI.md, and we have reviewed the specs, we can grab a coffee. We deserve it: our technical design documentation is complete. It will serve as a stable foundation for building the actual thing, without deviating from our original intent, and ensuring that all components fit together perfectly, and all layers are stacked correctly. One last thing we can do before moving on to the next steps is to prepare a step-by-step plan. We split that plan into two parts: one for the Data Access Layer and another for the UI. You can find prompts I use to create such a plan in Appendices 4 and 5. Step 3: Executing The Plan To start building the actual thing, we need to switch to another category of AI tools. Up until this point, we have relied on Generative AI. It excels at creating new content (in our case, specifications and plans) based on a single prompt. I’m using Google Gemini 2.5 Pro in Google AI Studio, but other similar tools may also fit such one-off tasks: ChatGPT, Claude, Grok, and DeepSeek. However, at this step, this wouldn’t be enough. Building a prototype based on specs and according to a plan requires an AI that can read context from multiple files, execute a sequence of tasks, and maintain coherence. A simple generative AI can’t do this. It would be like asking a person to build a house by only ever showing them a single brick. What we need is an agentic AI that can be given the full house blueprint and a project plan, and then get to work building the foundation, framing the walls, and adding the roof in the correct sequence. My coding agent of choice is Google Gemini CLI, simply because Gemini 2.5 Pro serves me well, and I don’t think we need any middleman like Cursor or Windsurf (which would use Claude, Gemini, or GPT under the hood anyway). If I used Claude, my choice would be Claude Code, but since I’m sticking with Gemini, Gemini CLI it is. But if you prefer Cursor or Windsurf, I believe you can apply the same process with your favourite tool. Before tasking the agent, we need to create a basic template for our React application. I won’t go into this here. You can find plenty of tutorials on how to scaffold an empty React project using Vite. Then we put all our files into that project: Once the basic template with all our files is ready, we open Terminal, go to the folder where our project resides, and type “gemini”: And we send the prompt to build the Data Access Layer (see Appendix 6). That prompt implies step-by-step execution, so upon completion of each step, I send the following: Thank you! Now, please move to the next task. Remember that you must not make assumptions based on common patterns; always verify them with the actual data from the spec. After each task, stop so that I can test it. Don’t move to the next task before I tell you to do so. As the last task in the plan, the agent builds a special page where we can test all the capabilities of our Data Access Layer, so that we can manually test it. It may look like this: It doesn’t look fancy, to say the least, but it allows us to ensure that the Data Access Layer works correctly before we proceed with building the final UI. And finally, we clear the Gemini CLI context window to give it more headspace and send the prompt to build the UI (see Appendix 7). This prompt also implies step-by-step execution. Upon completion of each step, we test how it works and how it looks, following the “Manual Testing Plan” from UI-plan.md. I have to say that despite the fact that the sketch has been uploaded to the model context and, in general, Gemini tries to follow it, attention to visual detail is not one of its strengths (yet). Usually, a few additional nudges are needed at each step to improve the look and feel: Once I’m happy with the result of a step, I ask Gemini to move on: Thank you! Now, please move to the next task. Make sure you build the UI according to the sketch; this is very important. Remember that you must not make assumptions based on common patterns; always verify them with the actual data from the spec and the sketch. After each task, stop so that I can test it. Don’t move to the next task before I tell you to do so. Before long, the result looks like this, and in every detail it works exactly as we intended: The prototype is up and running and looking nice. Does it mean that we are done with our work? Surely not, the most fascinating part is just beginning. Step 4: Learning And Iterating It’s time to put the prototype in front of potential users and learn more about whether this solution relieves their pain or not. And as soon as we learn something new, we iterate. We adjust or extend the sketches and the conceptual model, based on that new input, we update the specifications, create plans to make changes according to the new specifications, and execute those plans. In other words, for every iteration, we repeat the steps I’ve just walked you through. Is This Workflow Too Heavy? This four-step workflow may create an impression of a somewhat heavy process that requires too much thinking upfront and doesn’t really facilitate creativity. But before jumping to that conclusion, consider the following: In practice, only the first step requires real effort, as well as learning in the last step. AI does most of the work in between; you just need to keep an eye on it. Individual iterations don’t need to be big. You can start with a Walking Skeleton: the bare minimum implementation of the thing you have in mind, and add more substance in subsequent iterations. You are welcome to change your mind about the overall direction in between iterations. And last but not least, maybe the idea of “think before you do” is not something you need to run away from. A clear and unambiguous statement of intent can prevent many unnecessary mistakes and save a lot of effort down the road. Intent Prototyping Vs. Other Methods There is no method that fits all situations, and Intent Prototyping is not an exception. Like any specialized tool, it has a specific purpose. The most effective teams are not those who master a single method, but those who understand which approach to use to mitigate the most significant risk at each stage. The table below gives you a way to make this choice clearer. It puts Intent Prototyping next to other common methods and tools and explains each one in terms of the primary goal it helps achieve and the specific risks it is best suited to mitigate. Method/Tool Goal Risks it is best suited to mitigate Examples Why Intent Prototyping To rapidly iterate on the fundamental architecture of a data-heavy application with a complex conceptual model, sophisticated business logic, and non-linear user flows. Building a system with a flawed or incoherent conceptual model, leading to critical bugs and costly refactoring. A CRM (Customer Relationship Management system). A Resource Management Tool. A No-Code Integration Platform (admin’s UI). It enforces conceptual clarity. This not only de-risks the core structure but also produces a clear, documented blueprint that serves as a superior specification for the engineering handoff. Vibe Coding (Conversational) To rapidly explore interactive ideas through improvisation. Losing momentum because of analysis paralysis. An interactive data table with live sorting/filtering. A novel navigation concept. A proof-of-concept for a single, complex component. It has the smallest loop between an idea conveyed in natural language and an interactive outcome. Axure To test complicated conditional logic within a specific user journey, without having to worry about how the whole system works. Designing flows that break when users don’t follow the “happy path.” A multi-step e-commerce checkout. A software configuration wizard. A dynamic form with dependent fields. It’s made to create complex if-then logic and manage variables visually. This lets you test complicated paths and edge cases in a user journey without writing any code. Figma To make sure that the user interface looks good, aligns with the brand, and has a clear information architecture. Making a product that looks bad, doesn't fit with the brand, or has a layout that is hard to understand. A marketing landing page. A user onboarding flow. Presenting a new visual identity. It excels at high-fidelity visual design and provides simple, fast tools for linking static screens. ProtoPie, Framer To make high-fidelity micro-interactions feel just right. Shipping an application that feels cumbersome and unpleasant to use because of poorly executed interactions. A custom pull-to-refresh animation. A fluid drag-and-drop interface. An animated chart or data visualization. These tools let you manipulate animation timelines, physics, and device sensor inputs in great detail. Designers can carefully work on and test the small things that make an interface feel really polished and fun to use. Low-code / No-code Tools (e.g., Bubble, Retool) To create a working, data-driven app as quickly as possible. The application will never be built because traditional development is too expensive. An internal inventory tracker. A customer support dashboard. A simple directory website. They put a UI builder, a database, and hosting all in one place. The goal is not merely to make a prototype of an idea, but to make and release an actual, working product. This is the last step for many internal tools or MVPs. The key takeaway is that each method is a specialized tool for mitigating a specific type of risk. For example, Figma de-risks the visual presentation. ProtoPie de-risks the feel of an interaction. Intent Prototyping is in a unique position to tackle the most foundational risk in complex applications: building on a flawed or incoherent conceptual model. Bringing It All Together The era of the “lopsided horse” design, sleek on the surface but structurally unsound, is a direct result of the trade-off between fidelity and flexibility. This trade-off has led to a process filled with redundant effort and misplaced focus. Intent Prototyping, powered by modern AI, eliminates that conflict. It’s not just a shortcut to building faster — it’s a fundamental shift in how we design. By putting a clear, unambiguous intent at the heart of the process, it lets us get rid of the redundant work and focus on architecting a sound and robust system. There are three major benefits to this renewed focus. First, by going straight to live, interactive prototypes, we shift our validation efforts from the surface to the deep, testing the system’s actual logic with users from day one. Second, the very act of documenting the design intent makes us clear about our ideas, ensuring that we fully understand the system’s underlying logic. Finally, this documented intent becomes a durable source of truth, eliminating the ambiguous handoffs and the redundant, error-prone work of having engineers reverse-engineer a designer’s vision from a black box. Ultimately, Intent Prototyping changes the object of our work. It allows us to move beyond creating pictures of a product and empowers us to become architects of blueprints for a system. With the help of AI, we can finally make the live prototype the primary canvas for ideation, not just a high-effort afterthought. Appendices You can find the full Intent Prototyping Starter Kit, which includes all those prompts and guidelines, as well as the example from this article and a minimal boilerplate project, in this GitHub repository. Appendix 1: Sketch to UML Class Diagram + You are an expert Senior Software Architect specializing in Domain-Driven Design. You are tasked with defining a conceptual model for an app based on information from a UI sketch. ## Workflow Follow these steps precisely: **Step 1:** Analyze the sketch carefully. There should be no ambiguity about what we are building. **Step 2:** Generate the conceptual model description in the Mermaid format using a UML class diagram. ## Ground Rules - Every entity must have the following attributes: - id (string) - createdAt (string, ISO 8601 format) - updatedAt (string, ISO 8601 format) - Include all attributes shown in the UI: If a piece of data is visually represented as a field for an entity, include it in the model, even if it's calculated from other attributes. - Do not add any speculative entities, attributes, or relationships ("just in case"). The model should serve the current sketch's requirements only. - Pay special attention to cardinality definitions (e.g., if a relationship is optional on both sides, it cannot be "1" -- "0..*", it must be "0..1" -- "0..*"). - Use only valid syntax in the Mermaid diagram. - Do not include enumerations in the Mermaid diagram. - Add comments explaining the purpose of every entity, attribute, and relationship, and their expected behavior (not as a part of the diagram, in the Markdown file). ## Naming Conventions - Names should reveal intent and purpose. - Use PascalCase for entity names. - Use camelCase for attributes and relationships. - Use descriptive variable names with auxiliary verbs (e.g., isLoading, hasError). ## Final Instructions - **No Assumptions: Base every detail on visual evidence in the sketch, not on common design patterns. - **Double-Check: After composing the entire document, read through it to ensure the hierarchy is logical, the descriptions are unambiguous, and the formatting is consistent. The final document should be a self-contained, comprehensive specification. - **Do not add redundant empty lines between items.** Your final output should be the complete, raw markdown content for Model.md. Appendix 2: Sketch to DAL Spec + You are an expert Senior Frontend Developer specializing in React, TypeScript, and Zustand. You are tasked with creating a comprehensive technical specification for the development team in a structured markdown document, based on a UI sketch and a conceptual model description. ## Workflow Follow these steps precisely: **Step 1:** Analyze the documentation carefully: - Model.md: the conceptual model - Sketch.png: the UI sketch There should be no ambiguity about what we are building. **Step 2:** Check out the guidelines: - TS-guidelines.md: TypeScript Best Practices - React-guidelines.md: React Best Practices - Zustand-guidelines.md: Zustand Best Practices **Step 3:** Create a Markdown specification for the stores and entity-specific hook that implements all the logic and provides all required operations. --- ## Markdown Output Structure Use this template for the entire document. markdown # Data Access Layer Specification This document outlines the specification for the data access layer of the application, following the principles defined in `docs/guidelines/Zustand-guidelines.md`. ## 1. Type Definitions Location: `src/types/entities.ts` ### 1.1. `BaseEntity` A shared interface that all entities should extend. [TypeScript interface definition] ### 1.2. `[Entity Name]` The interface for the [Entity Name] entity. [TypeScript interface definition] ## 2. Zustand Stores ### 2.1. Store for `[Entity Name]` **Location:** `src/stores/[Entity Name (plural)].ts` The Zustand store will manage the state of all [Entity Name] items. **Store State (`[Entity Name]State`):** [TypeScript interface definition] **Store Implementation (`use[Entity Name]Store`):** - The store will be created using `create<[Entity Name]State>()(...)`. - It will use the `persist` middleware from `zustand/middleware` to save state to `localStorage`. The persistence key will be `[entity-storage-key]`. - `[Entity Name (plural, camelCase)]` will be a dictionary (`Record<string, [Entity]>`) for O(1) access. **Actions:** - **`add[Entity Name]`**: [Define the operation behavior based on entity requirements] - **`update[Entity Name]`**: [Define the operation behavior based on entity requirements] - **`remove[Entity Name]`**: [Define the operation behavior based on entity requirements] - **`doSomethingElseWith[Entity Name]`**: [Define the operation behavior based on entity requirements] ## 3. Custom Hooks ### 3.1. `use[Entity Name (plural)]` **Location:** `src/hooks/use[Entity Name (plural)].ts` The hook will be the primary interface for UI components to interact with [Entity Name] data. **Hook Return Value:** [TypeScript interface definition] **Hook Implementation:** [List all properties and methods returned by this hook, and briefly explain the logic behind them, including data transformations, memoization. Do not write the actual code here.] --- ## Final Instructions - **No Assumptions:** Base every detail in the specification on the conceptual model or visual evidence in the sketch, not on common design patterns. - **Double-Check:** After composing the entire document, read through it to ensure the hierarchy is logical, the descriptions are unambiguous, and the formatting is consistent. The final document should be a self-contained, comprehensive specification. - **Do not add redundant empty lines between items.** Your final output should be the complete, raw markdown content for DAL.md. Appendix 3: Sketch to UI Spec + You are an expert Senior Frontend Developer specializing in React, TypeScript, and the Ant Design library. You are tasked with creating a comprehensive technical specification by translating a UI sketch into a structured markdown document for the development team. ## Workflow Follow these steps precisely: **Step 1:** Analyze the documentation carefully: - Sketch.png: the UI sketch - Note that red lines, red arrows, and red text within the sketch are annotations for you and should not be part of the final UI design. They provide hints and clarification. Never translate them to UI elements directly. - Model.md: the conceptual model - DAL.md: the Data Access Layer spec There should be no ambiguity about what we are building. **Step 2:** Check out the guidelines: - TS-guidelines.md: TypeScript Best Practices - React-guidelines.md: React Best Practices **Step 3:** Generate the complete markdown content for a new file, UI.md. --- ## Markdown Output Structure Use this template for the entire document. markdown # UI Layer Specification This document specifies the UI layer of the application, breaking it down into pages and reusable components based on the provided sketches. All components will adhere to Ant Design's principles and utilize the data access patterns defined in `docs/guidelines/Zustand-guidelines.md`. ## 1. High-Level Structure The application is a single-page application (SPA). It will be composed of a main layout, one primary page, and several reusable components. ### 1.1. `App` Component The root component that sets up routing and global providers. - **Location**: `src/App.tsx` - **Purpose**: To provide global context, including Ant Design's `ConfigProvider` and `App` contexts for message notifications, and to render the main page. - **Composition**: - Wraps the application with `ConfigProvider` and `App as AntApp` from 'antd' to enable global message notifications as per `simple-ice/antd-messages.mdc`. - Renders `[Page Name]`. ## 2. Pages ### 2.1. `[Page Name]` - **Location:** `src/pages/PageName.tsx` - **Purpose:** [Briefly describe the main goal and function of this page] - **Data Access:** [List the specific hooks and functions this component uses to fetch or manage its data] - **Internal State:** [Describe any state managed internally by this page using `useState`] - **Composition:** [Briefly describe the content of this page] - **User Interactions:** [Describe how the user interacts with this page] - **Logic:** [If applicable, provide additional comments on how this page should work] ## 3. Components ### 3.1. `[Component Name]` - **Location:** `src/components/ComponentName.tsx` - **Purpose:** [Explain what this component does and where it's used] - **Props:** [TypeScript interface definition for the component's props. Props should be minimal. Avoid prop drilling by using hooks for data access.] - **Data Access:** [List the specific hooks and functions this component uses to fetch or manage its data] - **Internal State:** [Describe any state managed internally by this component using `useState`] - **Composition:** [Briefly describe the content of this component] - **User Interactions:** [Describe how the user interacts with the component] - **Logic:** [If applicable, provide additional comments on how this component should work] --- ## Final Instructions - **No Assumptions:** Base every detail on the visual evidence in the sketch, not on common design patterns. - **Double-Check:** After composing the entire document, read through it to ensure the hierarchy is logical, the descriptions are unambiguous, and the formatting is consistent. The final document should be a self-contained, comprehensive specification. - **Do not add redundant empty lines between items.** Your final output should be the complete, raw markdown content for UI.md. Appendix 4: DAL Spec to Plan + You are an expert Senior Frontend Developer specializing in React, TypeScript, and Zustand. You are tasked with creating a plan to build a Data Access Layer for an application based on a spec. ## Workflow Follow these steps precisely: **Step 1:** Analyze the documentation carefully: - DAL.md: The full technical specification for the Data Access Layer of the application. Follow it carefully and to the letter. There should be no ambiguity about what we are building. **Step 2:** Check out the guidelines: - TS-guidelines.md: TypeScript Best Practices - React-guidelines.md: React Best Practices - Zustand-guidelines.md: Zustand Best Practices **Step 3:** Create a step-by-step plan to build a Data Access Layer according to the spec. Each task should: - Focus on one concern - Be reasonably small - Have a clear start + end - Contain clearly defined Objectives and Acceptance Criteria The last step of the plan should include creating a page to test all the capabilities of our Data Access Layer, and making it the start page of this application, so that I can manually check if it works properly. I will hand this plan over to an engineering LLM that will be told to complete one task at a time, allowing me to review results in between. ## Final Instructions - Note that we are not starting from scratch; the basic template has already been created using Vite. - Do not add redundant empty lines between items. Your final output should be the complete, raw markdown content for DAL-plan.md. Appendix 5: UI Spec to Plan + You are an expert Senior Frontend Developer specializing in React, TypeScript, and the Ant Design library. You are tasked with creating a plan to build a UI layer for an application based on a spec and a sketch. ## Workflow Follow these steps precisely: **Step 1:** Analyze the documentation carefully: - UI.md: The full technical specification for the UI layer of the application. Follow it carefully and to the letter. - Sketch.png: Contains important information about the layout and style, complements the UI Layer Specification. The final UI must be as close to this sketch as possible. There should be no ambiguity about what we are building. **Step 2:** Check out the guidelines: - TS-guidelines.md: TypeScript Best Practices - React-guidelines.md: React Best Practices **Step 3:** Create a step-by-step plan to build a UI layer according to the spec and the sketch. Each task must: - Focus on one concern. - Be reasonably small. - Have a clear start + end. - Result in a verifiable increment of the application. Each increment should be manually testable to allow for functional review and approval before proceeding. - Contain clearly defined Objectives, Acceptance Criteria, and Manual Testing Plan. I will hand this plan over to an engineering LLM that will be told to complete one task at a time, allowing me to test in between. ## Final Instructions - Note that we are not starting from scratch, the basic template has already been created using Vite, and the Data Access Layer has been built successfully. - For every task, describe how components should be integrated for verification. You must use the provided hooks to connect to the live Zustand store data—do not use mock data (note that the Data Access Layer has been already built successfully). - The Manual Testing Plan should read like a user guide. It must only contain actions a user can perform in the browser and must never reference any code files or programming tasks. - Do not add redundant empty lines between items. Your final output should be the complete, raw markdown content for UI-plan.md. Appendix 6: DAL Plan to Code + You are an expert Senior Frontend Developer specializing in React, TypeScript, and Zustand. You are tasked with building a Data Access Layer for an application based on a spec. ## Workflow Follow these steps precisely: **Step 1:** Analyze the documentation carefully: - @docs/specs/DAL.md: The full technical specification for the Data Access Layer of the application. Follow it carefully and to the letter. There should be no ambiguity about what we are building. **Step 2:** Check out the guidelines: - @docs/guidelines/TS-guidelines.md: TypeScript Best Practices - @docs/guidelines/React-guidelines.md: React Best Practices - @docs/guidelines/Zustand-guidelines.md: Zustand Best Practices **Step 3:** Read the plan: - @docs/plans/DAL-plan.md: The step-by-step plan to build the Data Access Layer of the application. **Step 4:** Build a Data Access Layer for this application according to the spec and following the plan. - Complete one task from the plan at a time. - After each task, stop, so that I can test it. Don’t move to the next task before I tell you to do so. - Do not do anything else. At this point, we are focused on building the Data Access Layer. ## Final Instructions - Do not make assumptions based on common patterns; always verify them with the actual data from the spec and the sketch. - Do not start the development server, I'll do it by myself. Appendix 7: UI Plan to Code + You are an expert Senior Frontend Developer specializing in React, TypeScript, and the Ant Design library. You are tasked with building a UI layer for an application based on a spec and a sketch. ## Workflow Follow these steps precisely: **Step 1:** Analyze the documentation carefully: - @docs/specs/UI.md: The full technical specification for the UI layer of the application. Follow it carefully and to the letter. - @docs/intent/Sketch.png: Contains important information about the layout and style, complements the UI Layer Specification. The final UI must be as close to this sketch as possible. - @docs/specs/DAL.md: The full technical specification for the Data Access Layer of the application. That layer is already ready. Use this spec to understand how to work with it. There should be no ambiguity about what we are building. **Step 2:** Check out the guidelines: - @docs/guidelines/TS-guidelines.md: TypeScript Best Practices - @docs/guidelines/React-guidelines.md: React Best Practices **Step 3:** Read the plan: - @docs/plans/UI-plan.md: The step-by-step plan to build the UI layer of the application. **Step 4:** Build a UI layer for this application according to the spec and the sketch, following the step-by-step plan: - Complete one task from the plan at a time. - Make sure you build the UI according to the sketch; this is very important. - After each task, stop, so that I can test it. Don’t move to the next task before I tell you to do so. ## Final Instructions - Do not make assumptions based on common patterns; always verify them with the actual data from the spec and the sketch. - Follow Ant Design's default styles and components. - Do not touch the data access layer: it's ready and it's perfect. - Do not start the development server, I'll do it by myself. Appendix 8: TS-guidelines.md + # Guidelines: TypeScript Best Practices ## Type System & Type Safety - Use TypeScript for all code and enable strict mode. - Ensure complete type safety throughout stores, hooks, and component interfaces. - Prefer interfaces over types for object definitions; use types for unions, intersections, and mapped types. - Entity interfaces should extend common patterns while maintaining their specific properties. - Use TypeScript type guards in filtering operations for relationship safety. - Avoid the 'any' type; prefer 'unknown' when necessary. - Use generics to create reusable components and functions. - Utilize TypeScript's features to enforce type safety. - Use type-only imports (import type { MyType } from './types') when importing types, because verbatimModuleSyntax is enabled. - Avoid enums; use maps instead. ## Naming Conventions - Names should reveal intent and purpose. - Use PascalCase for component names and types/interfaces. - Prefix interfaces for React props with 'Props' (e.g., ButtonProps). - Use camelCase for variables and functions. - Use UPPER_CASE for constants. - Use lowercase with dashes for directories, and PascalCase for files with components (e.g., components/auth-wizard/AuthForm.tsx). - Use descriptive variable names with auxiliary verbs (e.g., isLoading, hasError). - Favor named exports for components. ## Code Structure & Patterns - Write concise, technical TypeScript code with accurate examples. - Use functional and declarative programming patterns; avoid classes. - Prefer iteration and modularization over code duplication. - Use the "function" keyword for pure functions. - Use curly braces for all conditionals for consistency and clarity. - Structure files appropriately based on their purpose. - Keep related code together and encapsulate implementation details. ## Performance & Error Handling - Use immutable and efficient data structures and algorithms. - Create custom error types for domain-specific errors. - Use try-catch blocks with typed catch clauses. - Handle Promise rejections and async errors properly. - Log errors appropriately and handle edge cases gracefully. ## Project Organization - Place shared types in a types directory. - Use barrel exports (index.ts) for organizing exports. - Structure files and directories based on their purpose. ## Other Rules - Use comments to explain complex logic or non-obvious decisions. - Follow the single responsibility principle: each function should do exactly one thing. - Follow the DRY (Don't Repeat Yourself) principle. - Do not implement placeholder functions, empty methods, or "just in case" logic. Code should serve the current specification's requirements only. - Use 2 spaces for indentation (no tabs). Appendix 9: React-guidelines.md + # Guidelines: React Best Practices ## Component Structure - Use functional components over class components - Keep components small and focused - Extract reusable logic into custom hooks - Use composition over inheritance - Implement proper prop types with TypeScript - Structure React files: exported component, subcomponents, helpers, static content, types - Use declarative TSX for React components - Ensure that UI components use custom hooks for data fetching and operations rather than receive data via props, except for simplest components ## React Patterns - Utilize useState and useEffect hooks for state and side effects - Use React.memo for performance optimization when needed - Utilize React.lazy and Suspense for code-splitting - Implement error boundaries for robust error handling - Keep styles close to components ## React Performance - Avoid unnecessary re-renders - Lazy load components and images when possible - Implement efficient state management - Optimize rendering strategies - Optimize network requests - Employ memoization techniques (e.g., React.memo, useMemo, useCallback) ## React Project Structure /src - /components - UI components (every component in a separate file) - /hooks - public-facing custom hooks (every hook in a separate file) - /providers - React context providers (every provider in a separate file) - /pages - page components (every page in a separate file) - /stores - entity-specific Zustand stores (every store in a separate file) - /styles - global styles (if needed) - /types - shared TypeScript types and interfaces Appendix 10: Zustand-guidelines.md + # Guidelines: Zustand Best Practices ## Core Principles - **Implement a data layer** for this React application following this specification carefully and to the letter. - **Complete separation of concerns**: All data operations should be accessible in UI components through simple and clean entity-specific hooks, ensuring state management logic is fully separated from UI logic. - **Shared state architecture**: Different UI components should work with the same shared state, despite using entity-specific hooks separately. ## Technology Stack - **State management**: Use Zustand for state management with automatic localStorage persistence via the persist middleware. ## Store Architecture - **Base entity:** Implement a BaseEntity interface with common properties that all entities extend: typescript export interface BaseEntity { id: string; createdAt: string; // ISO 8601 format updatedAt: string; // ISO 8601 format } - **Entity-specific stores**: Create separate Zustand stores for each entity type. - **Dictionary-based storage**: Use dictionary/map structures (Record<string, Entity>) rather than arrays for O(1) access by ID. - **Handle relationships**: Implement cross-entity relationships (like cascade deletes) within the stores where appropriate. ## Hook Layer The hook layer is the exclusive interface between UI components and the Zustand stores. It is designed to be simple, predictable, and follow a consistent pattern across all entities. ### Core Principles 1. **One Hook Per Entity**: There will be a single, comprehensive custom hook for each entity (e.g., useBlogPosts, useCategories). This hook is the sole entry point for all data and operations related to that entity. Separate hooks for single-item access will not be created. 2. **Return reactive data, not getter functions**: To prevent stale data, hooks must return the state itself, not a function that retrieves state. Parameterize hooks to accept filters and return the derived data directly. A component calling a getter function will not update when the underlying data changes. 3. **Expose Dictionaries for O(1) Access**: To provide simple and direct access to data, every hook will return a dictionary (Record<string, Entity>) of the relevant items. ### The Standard Hook Pattern Every entity hook will follow this implementation pattern: 1. **Subscribe** to the entire dictionary of entities from the corresponding Zustand store. This ensures the hook is reactive to any change in the data. 2. **Filter** the data based on the parameters passed into the hook. This logic will be memoized with useMemo for efficiency. If no parameters are provided, the hook will operate on the entire dataset. 3. **Return a Consistent Shape**: The hook will always return an object containing: * A **filtered and sorted array** (e.g., blogPosts) for rendering lists. * A **filtered dictionary** (e.g., blogPostsDict) for convenient O(1) lookup within the component. * All necessary **action functions** (add, update, remove) and **relationship operations**. * All necessary **helper functions** and **derived data objects**. Helper functions are suitable for pure, stateless logic (e.g., calculators). Derived data objects are memoized values that provide aggregated or summarized information from the state (e.g., an object containing status counts). They must be derived directly from the reactive state to ensure they update automatically when the underlying data changes. ## API Design Standards - **Object Parameters**: Use object parameters instead of multiple direct parameters for better extensibility: typescript // ✅ Preferred add({ title, categoryIds }) // ❌ Avoid add(title, categoryIds) - **Internal Methods**: Use underscore-prefixed methods for cross-store operations to maintain clean separation. ## State Validation Standards - **Existence checks**: All update and remove operations should validate entity existence before proceeding. - **Relationship validation**: Verify both entities exist before establishing relationships between them. ## Error Handling Patterns - **Operation failures**: Define behavior when operations fail (e.g., updating non-existent entities). - **Graceful degradation**: How to handle missing related entities in helper functions. ## Other Standards - **Secure ID generation**: Use crypto.randomUUID() for entity ID generation instead of custom implementations for better uniqueness guarantees and security. - **Return type consistency**: add operations return generated IDs for component workflows requiring immediate entity access, while update and remove operations return void to maintain clean modification APIs.
Shades Of October (2025 Wallpapers Edition)
How about some new wallpapers to get your desktop ready for fall and the upcoming Halloween season? We’ve got you covered! Following our monthly tradition, the wallpapers in this post were created with love by the community for the community and can be downloaded for free. Enjoy!
As September comes to a close and October takes over, we are in the midst of a time of transition. The air in the morning feels crisper, the leaves are changing colors, and winding down with a warm cup of tea regains its almost-forgotten appeal after a busy summer. When we look closely, October is full of little moments that have the power to inspire, and whatever your secret to finding new inspiration might be, our monthly wallpapers series is bound to give you a little inspiration boost, too. For this October edition, artists and designers from across the globe once again challenged their creative skills and designed wallpapers to spark your imagination. You find them compiled below, along with a selection of timeless October treasures from our wallpapers archives that are just too good to gather dust. A huge thank you to everyone who shared their designs with us this month — this post wouldn’t exist without your creativity and kind support! Happy October! You can click on every image to see a larger preview. We respect and carefully consider the ideas and motivation behind each and every artist’s work. This is why we give all artists the full freedom to explore their creativity and express emotions and experience through their works. This is also why the themes of the wallpapers weren’t anyhow influenced by us but rather designed from scratch by the artists themselves. Submit your wallpaper design! 👩🎨 Feeling inspired? We are always looking for creative talent and would love to feature your desktop wallpaper in one of our upcoming posts. Join in ↬ Midnight Mischief Designed by Libra Fire from Serbia. preview with calendar: 320x480, 640x480, 800x480, 800x600, 1024x768, 1024x1024, 1152x864, 1280x720, 1280x800, 1280x960, 1280x1024, 1400x1050, 1440x900, 1600x1200, 1680x1050, 1680x1200, 1920x1080, 1920x1200, 1920x1440, 2560x1440 without calendar: 320x480, 640x480, 800x480, 800x600, 1024x768, 1024x1024, 1152x864, 1280x720, 1280x800, 1280x960, 1280x1024, 1400x1050, 1440x900, 1600x1200, 1680x1050, 1680x1200, 1920x1080, 1920x1200, 1920x1440, 2560x1440 AI Designed by Ricardo Gimenes from Spain. preview with calendar: 640x480, 800x480, 800x600, 1024x768, 1024x1024, 1152x864, 1280x720, 1280x800, 1280x960, 1280x1024, 1366x768, 1400x1050, 1440x900, 1600x1200, 1680x1050, 1680x1200, 1920x1080, 1920x1200, 1920x1440, 2560x1440, 3840x2160 without calendar: 640x480, 800x480, 800x600, 1024x768, 1024x1024, 1152x864, 1280x720, 1280x800, 1280x960, 1280x1024, 1366x768, 1400x1050, 1440x900, 1600x1200, 1680x1050, 1680x1200, 1920x1080, 1920x1200, 1920x1440, 2560x1440, 3840x2160 Glowing Pumpkin Lanterns “I was inspired by the classic orange and purple colors of October and Halloween, and wanted to combine those two themes to create a fun pumpkin lantern background.” — Designed by Melissa Bostjancic from New Jersey, United States. preview with calendar: 320x480, 640x480, 800x480, 800x600, 1024x768, 1024x1024, 1152x864, 1280x720, 1280x800, 1280x960, 1280x1024, 1400x1050, 1440x900, 1600x1200, 1680x1050, 1680x1200, 1920x1080, 1920x1200, 1920x1440, 2560x1440 without calendar: 320x480, 640x480, 800x480, 800x600, 1024x768, 1024x1024, 1152x864, 1280x720, 1280x800, 1280x960, 1280x1024, 1400x1050, 1440x900, 1600x1200, 1680x1050, 1680x1200, 1920x1080, 1920x1200, 1920x1440, 2560x1440 Halloween 2040 Designed by Ricardo Gimenes from Spain. preview with calendar: 640x480, 800x600, 1024x768, 1024x1024, 1152x864, 1280x720, 1280x800, 1280x960, 1280x1024, 1366x768, 1400x1050, 1440x900, 1600x1200, 1680x1050, 1680x1200, 1920x1080, 1920x1200, 1920x1440, 2560x1440, 3840x2160 without calendar: 640x480, 800x600, 1024x768, 1024x1024, 1152x864, 1280x720, 1280x800, 1280x960, 1280x1024, 1366x768, 1400x1050, 1440x900, 1600x1200, 1680x1050, 1680x1200, 1920x1080, 1920x1200, 1920x1440, 2560x1440, 3840x2160 When The Mind Opens “In October, we observe World Mental Health Day. The open window in the head symbolizes light and fresh thoughts, the plant represents quiet inner growth and resilience, and the bird brings freedom and connection with the world. Together, they create an image of a mind that breathes, grows, and remains open to new beginnings.” — Designed by Ginger IT Solutions from Serbia. preview with calendar: 320x480, 640x480, 800x480, 800x600, 1024x768, 1024x1024, 1152x864, 1280x720, 1280x800, 1280x960, 1280x1024, 1400x1050, 1440x900, 1600x1200, 1680x1050, 1680x1200, 1920x1080, 1920x1200, 1920x1440, 2560x1440 without calendar: 320x480, 640x480, 800x480, 800x600, 1024x768, 1024x1024, 1152x864, 1280x720, 1280x800, 1280x960, 1280x1024, 1400x1050, 1440x900, 1600x1200, 1680x1050, 1680x1200, 1920x1080, 1920x1200, 1920x1440, 2560x1440 Enter The Factory “I took this photo while visiting an old factory. The red light was astonishing.” — Designed by Philippe Brouard from France. preview with calendar: 1024x768, 1366x768, 1600x1200, 1920x1080, 1920x1200, 1920x1440, 2560x1440, 2560x1600, 2880x1800, 3840x2160 without calendar: 1024x768, 1366x768, 1600x1200, 1920x1080, 1920x1200, 1920x1440, 2560x1440, 2560x1600, 2880x1800, 3840x2160 The Crow And The Ghosts “If my heart were a season, it would be autumn.” — Designed by Lívia Lénárt from Hungary. preview without calendar: 320x480, 1024x1024, 1280x1024, 1600x1200, 1680x1200, 1920x1080, 1920x1200, 1920x1440, 2560x1440, 3840x2160 The Night Drive Designed by Vlad Gerasimov from Georgia. preview without calendar: 800x480, 800x600, 1024x600, 1024x768, 1152x864, 1280x720, 1280x800, 1280x960, 1280x1024, 1366x768, 1440x900, 1440x960, 1400x1050, 1600x900, 1600x1200, 1680x1050, 1680x1200, 1920x1080, 1920x1200, 1920x1440, 2560x1440, 2560x1600, 2880x1800, 3072x1920, 3840x2160, 5120x2880 Spooky Town Designed by Xenia Latii from Germany. preview without calendar: 320x480, 640x480, 800x480, 800x600, 1024x768, 1152x864, 1280x720, 1280x800, 1280x960, 1280x1024, 1366x768, 1400x1050, 1440x900, 1600x1200, 1680x1050, 1680x1200, 1920x1080, 1920x1200, 1920x1440, 2560x1440 Bird Migration Portal “When I was young, I had a bird’s nest not so far from my room window. I watched the birds almost every day; because those swallows always left their nests in October. As a child, I dreamt that they all flew together to a nicer place, where they were not so cold.” — Designed by Eline Claeys from Belgium. preview without calendar: 1280x1024, 1440x900, 1600x1200, 1680x1050, 1680x1200, 1920x1080, 1920x1200, 1920x1440, 2560x1440 Hanlu “The term ‘Hanlu’ literally translates as ‘Cold Dew.’ The cold dew brings brisk mornings and evenings. Eventually the briskness will turn cold, as winter is coming soon. And chrysanthemum is the iconic flower of Cold Dew.” — Designed by Hong, ZI-Qing from Taiwan. preview without calendar: 640x480, 800x600, 1024x768, 1080x1920, 1152x864, 1280x720, 1280x960, 1366x768, 1400x1050, 1600x1200, 1920x1080, 1920x1440, 2560x1440 Autumn’s Splendor “The transition to autumn brings forth a rich visual tapestry of warm colors and falling leaves, making it a natural choice for a wallpaper theme.” — Designed by Farhan Srambiyan from India. preview without calendar: 1280x960, 1280x1024, 1400x1050, 1440x900, 1600x1200, 1680x1050, 1680x1200, 1920x1080, 1920x1200, 1920x1440, 2560x1440 Ghostbusters Designed by Ricardo Gimenes from Spain. preview without calendar: 320x480, 640x480, 800x480, 800x600, 1024x768, 1024x1024, 1152x864, 1280x720, 1280x800, 1280x960, 1280x1024, 1366x768, 1400x1050, 1440x900, 1600x1200, 1680x1050, 1680x1200, 1920x1080, 1920x1200, 1920x1440, 2560x1440 Hello Autumn “Did you know that squirrels don’t just eat nuts? They really like to eat fruit, too. Since apples are the seasonal fruit of October, I decided to combine both things into a beautiful image.” — Designed by Erin Troch from Belgium. preview without calendar: 320x480, 800x480, 1024x1024, 1280x800, 1366x768, 1600x1200, 1680x1050, 1680x1200, 1920x1440, 2560x1440 Discovering The Universe “Autumn is the best moment for discovering the universe. I am looking for a new galaxy or maybe… a UFO!” — Designed by Verónica Valenzuela from Spain. preview without calendar: 800x480, 1024x768, 1152x864, 1280x800, 1280x960, 1440x900, 1680x1200, 1920x1080, 2560x1440 The Return Of The Living Dead Designed by Ricardo Gimenes from Spain. preview without calendar: 640x480, 800x480, 800x600, 1024x768, 1024x1024, 1152x864, 1280x720, 1280x800, 1280x960, 1280x1024, 1366x768, 1400x1050, 1440x900, 1600x1200, 1680x1050, 1680x1200, 1920x1080, 1920x1200, 1920x1440, 2560x1440, 3840x2160 Goddess Makosh “At the end of the kolodar, as everything begins to ripen, the village sets out to harvesting. Together with the farmers goes Makosh, the Goddess of fields and crops, ensuring a prosperous harvest. What she gave her life and health all year round is now mature and rich, thus, as a sign of gratitude, the girls bring her bread and wine. The beautiful game of the goddess makes the hard harvest easier, while the song of the farmer permeates the field.” — Designed by PopArt Studio from Serbia. preview without calendar: 320x480, 640x480, 800x480, 800x600, 1024x768, 1024x1024, 1152x864, 1280x720, 1280x800, 1280x960, 1280x1024, 1366x768, 1400x1050, 1440x900, 1600x1200, 1680x1050, 1680x1200, 1920x1080, 1920x1200, 1920x1440, 2560x1440 Strange October Journey “October makes the leaves fall to cover the land with lovely auburn colors and brings out all types of weird with them.” — Designed by Mi Ni Studio from Serbia. preview without calendar: 320x480, 640x480, 800x480, 800x600, 1024x768, 1024x1024, 1152x864, 1280x720, 1280x800, 1280x960, 1280x1024, 1400x1050, 1440x900, 1600x1200, 1680x1050, 1680x1200, 1920x1080, 1920x1200, 1920x1440, 2560x1440 Autumn Deer Designed by Amy Hamilton from Canada. preview without calendar: 1024x768, 1280x720, 1280x800, 1280x960, 1280x1024, 1400x1050, 1440x900, 1600x1200, 1680x1050, 1920x1080, 1920x1200, 2048x1536, 2560x1440, 2880x1800 Transitions “To me, October is a transitional month. We gradually slide from summer to autumn. That’s why I chose to use a lot of gradients. I also wanted to work with simple shapes, because I think of October as the ‘back to nature/back to basics month’.” — Designed by Jelle Denturck from Belgium. preview without calendar: 1600x1200, 1680x1050, 1680x1200, 1920x1080, 1920x1200, 1920x1440, 2560x1440, 2880x1800 Happy Fall! “Fall is my favorite season!” — Designed by Thuy Truong from the United States. preview without calendar: 320x480, 640x480, 800x600, 1024x768, 1152x864, 1280x720, 1280x800, 1366x768, 1440x900, 1680x1050, 1680x1200, 1920x1080, 1920x1200, 1920x1440, 2560x1440 Roger That Rogue Rover “The story is a mash-up of retro science fiction and zombie infection. What would happen if a Mars rover came into contact with an unknown Martian material and got infected with a virus? What if it reversed its intended purpose of research and exploration? Instead choosing a life of chaos and evil. What if they all ran rogue on Mars? Would humans ever dare to voyage to the red planet?” Designed by Frank Candamil from the United States. preview without calendar: 1024x768, 1024x1024, 1280x800, 1680x1050, 1920x1080, 1920x1200, 2560x1440 Turtles In Space “Finished September, with October comes the month of routines. This year we share it with turtles that explore space.” — Designed by Veronica Valenzuela from Spain. preview without calendar: 640x480, 800x480, 1024x768, 1280x720, 1280x800, 1440x900, 1600x1200, 1920x1080, 1920x1440, 2560x1440 First Scarf And The Beach “When I was little, my parents always took me and my sister for a walk at the beach in Nieuwpoort. We didn't really do those beach walks in the summer but always when the sky started to turn gray and the days became colder. My sister and I always took out our warmest scarfs and played in the sand while my parents walked behind us. I really loved those Saturday or Sunday mornings where we were all together. I think October (when it’s not raining) is the perfect month to go to the beach for ‘uitwaaien’ (to blow out), to walk in the wind and take a break and clear your head, relieve the stress or forget one’s problems.” — Designed by Gwen Bogaert from Belgium. preview without calendar: 320x480, 1280x1024, 2560x1440, 2880x1800 Shades Of Gold “We are about to experience the magical imagery of nature, with all the yellows, ochers, oranges, and reds coming our way this fall. With all the subtle sunrises and the burning sunsets before us, we feel so joyful that we are going to shout it out to the world from the top of the mountains.” — Designed by PopArt Studio from Serbia. preview without calendar: 320x480, 640x480, 800x480, 800x600, 1024x768, 1024x1024, 1152x864, 1280x720, 1280x800, 1280x960, 1280x1024, 1366x768, 1400x1050, 1440x900, 1600x1200, 1680x1050, 1680x1200, 1920x1080, 1920x1200, 1920x1440, 2560x1440 Autumn Vibes “Autumn has come, the time of long walks in the rain, weekends spent with loved ones, with hot drinks, and a lot of tenderness. Enjoy.” — Designed by LibraFire from Serbia. preview without calendar: 320x480, 640x480, 800x480, 800x600, 1024x768, 1024x1024, 1152x864, 1280x720, 1280x800, 1280x960, 1280x1024, 1366x768, 1400x1050, 1440x900, 1600x1200, 1680x1050, 1680x1200, 1920x1080, 1920x1200, 1920x1440, 2560x1440 Game Night And Hot Chocolate “To me, October is all about cozy evenings with hot chocolate, freshly baked cookies, and a game night with friends or family.” — Designed by Lieselot Geirnaert from Belgium. preview without calendar: 320x480, 1024x1024, 1280x1024, 2560x1440 Haunted House “Love all the Halloween costumes and decorations!” — Designed by Tazi from Australia. preview without calendar: 320x480, 640x480, 800x600, 1024x768, 1152x864, 1280x720, 1280x960, 1600x1200, 1920x1080, 1920x1440, 2560x1440 Say Bye To Summer “And hello to autumn! The summer heat and high season is over. It’s time to pack our backpacks and head for the mountains — there are many treasures waiting to be discovered!” Designed by Agnes Sobon from Poland. preview without calendar: 1280x800, 1440x900, 1680x1050, 1920x1080, 1920x1200, 2560x1440 Tea And Cookies “As it gets colder outside, all I want to do is stay inside with a big pot of tea, eat cookies and read or watch a movie, wrapped in a blanket. Is it just me?” — Designed by Miruna Sfia from Romania. preview without calendar: 320x480, 640x480, 800x480, 800x600, 1024x768, 1024x1024, 1152x864, 1280x720, 1280x800, 1280x960, 1280x1024, 1440x900, 1440x1050, 1600x1200, 1680x1050, 1680x1200, 1920x1080, 1920x1200, 1920x1440, 2560x1440 The Return Designed by Ricardo Gimenes from Spain. preview without calendar: 320x480, 640x480, 800x480, 800x600, 1024x768, 1024x1024, 1152x864, 1280x720, 1280x800, 1280x960, 1280x1024, 1366x768, 1400x1050, 1440x900, 1600x1200, 1680x1050, 1680x1200, 1920x1080, 1920x1200, 1920x1440, 2560x1440 Boo! Designed by Mad Fish Digital from Portland, OR. preview without calendar: 320x480, 1024x1024, 1280x720, 1680x1200, 1920x1080, 2560x1440 Trick Or Treat “Have you ever wondered if all the little creatures of the animal kingdom celebrate Halloween as humans do? My answer is definitely ‘YES! They do!’ They use acorns as baskets to collect all the treats, pastry brushes as brooms for the spookiest witches and hats made from the tips set of your pastry bag. So, if you happen to miss something from your kitchen or from your tool box, it may be one of them, trying to get ready for All Hallows’ Eve.” — Designed by Carla Dipasquale from Italy. preview without calendar: 640x480, 800x600, 1024x768, 1280x960, 1440x900, 1600x1200, 1680x1200, 1920x1080, 1920x1440, 2560x1440 Dope Code “October is the month when the weather in Poland starts to get colder, and it gets very rainy, too. You can’t always spend your free time outside, so it’s the perfect opportunity to get some hot coffee and work on your next cool web project!” — Designed by Robert Brodziak from Poland. preview without calendar: 1024x768, 1024x1024, 1152x864, 1280x720, 1280x800, 1280x960, 1280x1024, 1400x1050, 1440x900, 1600x1200, 1680x1050, 1680x1200, 1920x1080, 1920x1200, 1920x1440, 2560x1440 Happy Halloween Designed by Ricardo Gimenes from Spain. preview without calendar: 640x480, 800x480, 800x600, 1024x768, 1024x1024, 1152x864, 1280x720, 1280x800, 1280x960, 1280x1024, 1366x768, 1400x1050, 1440x900, 1600x1200, 1680x1050, 1680x1200, 1920x1080, 1920x1200, 1920x1440, 2560x1440, 3840x2160 Ghostober Designed by Ricardo Delgado from Mexico City. preview without calendar: 1024x768, 1024x1024, 1280x800, 1280x1024, 2560x1440 Get Featured Next Month Would you like to get featured in our next wallpapers post? We’ll publish the November wallpapers on October 31, so if you’d like to be a part of the collection, please don’t hesitate to submit your design. We can’t wait to see what you’ll come up with!
From Prompt To Partner: Designing Your Custom AI Assistant
What if your best AI prompts didn’t disappear into your unorganized chat history, but came back tomorrow as a reliable assistant? In this article, you’ll learn how to turn one-off “aha” prompts into reusable assistants that are tailored to your audience, grounded in your knowledge, and consistent every time, saving you (and your team) from typing the same 448-word prompt ever again.
In “A Week In The Life Of An AI-Augmented Designer”, Kate stumbled her way through an AI-augmented sprint (coffee was chugged, mistakes were made). In “Prompting Is A Design Act”, we introduced WIRE+FRAME, a framework to structure prompts like designers structure creative briefs. Now we’ll take the next step: packaging those structured prompts into AI assistants you can design, reuse, and share. AI assistants go by different names: CustomGPTs (ChatGPT), Agents (Copilot), and Gems (Gemini). But they all serve the same function — allowing you to customize the default AI model for your unique needs. If we carry over our smart intern analogy, think of these as interns trained to assist you with specific tasks, eliminating the need for repeated instructions or information, and who can support not just you, but your entire team. Why Build Your Own Assistant? If you’ve ever copied and pasted the same mega-prompt for the nth time, you’ve experienced the pain. An AI assistant turns a one-off “great prompt” into a dependable teammate. And if you’ve used any of the publicly available AI Assistants, you’ve realized quickly that they’re usually generic and not tailored for your use. Public AI assistants are great for inspiration, but nothing beats an assistant that solves a repeated problem for you and your team, in your voice, with your context and constraints baked in. Instead of reinventing the wheel by writing new prompts each time, or repeatedly copy-pasting your structured prompts every time, or spending cycles trying to make a public AI Assistant work the way you need it to, your own AI Assistant allows you and others to easily get better, repeatable, consistent results faster. Benefits Of Reusing Prompts, Even Your Own Some of the benefits of building your own AI Assistant over writing or reusing your prompts include: Focused on a real repeating problem A good AI Assistant isn’t a general-purpose “do everything” bot that you need to keep tweaking. It focuses on a single, recurring problem that takes a long time to complete manually and often results in varying quality depending on who’s doing it (e.g., analyzing customer feedback). Customized for your context Most large language models (LLMs, such as ChatGPT) are designed to be everything to everyone. An AI Assistant changes that by allowing you to customize it to automatically work like you want it to, instead of a generic AI. Consistency at scale You can use the WIRE+FRAME prompt framework to create structured, reusable prompts. An AI Assistant is the next logical step: instead of copy-pasting that fine-tuned prompt and sharing contextual information and examples each time, you can bake it into the assistant itself, allowing you and others achieve the same consistent results every time. Codifying expertise Every time you turn a great prompt into an AI Assistant, you’re essentially bottling your expertise. Your assistant becomes a living design guide that outlasts projects (and even job changes). Faster ramp-up for teammates Instead of new designers starting from a blank slate, they can use pre-tuned assistants. Think of it as knowledge transfer without the long onboarding lecture. Reasons For Your Own AI Assistant Instead Of Public AI Assistants Public AI assistants are like stock templates. While they serve a specific purpose compared to the generic AI platform, and are useful starting points, if you want something tailored to your needs and team, you should really build your own. A few reasons for building your AI Assistant instead of using a public assistant someone else created include: Fit: Public assistants are built for the masses. Your work has quirks, tone, and processes they’ll never quite match. Trust & Security: You don’t control what instructions or hidden guardrails someone else baked in. With your own assistant, you know exactly what it will (and won’t) do. Evolution: An AI Assistant you design and build can grow with your team. You can update files, tweak prompts, and maintain a changelog — things a public bot won’t do for you. Your own AI Assistants allow you to take your successful ways of interacting with AI and make them repeatable and shareable. And while they are tailored to your and your team’s way of working, remember that they are still based on generic AI models, so the usual AI disclaimers apply: Don’t share anything you wouldn’t want screenshotted in the next company all-hands. Keep it safe, private, and user-respecting. A shared AI Assistant can potentially reveal its inner workings or data. Note: We will be building an AI assistant using ChatGPT, aka a CustomGPT, but you can try the same process with any decent LLM sidekick. As of publication, a paid account is required to create CustomGPTs, but once created, they can be shared and used by anyone, regardless of whether they have a paid or free account. Similar limitations apply to the other platforms. Just remember that outputs can vary depending on the LLM model used, the model’s training, mood, and flair for creative hallucinations. When Not to Build An AI Assistant (Yet) An AI Assistant is great when the same audience has the same problem often. When the fit isn’t there, the risk is high; you should skip building an AI Assistant for now, as explained below: One-off or rare tasks If it won’t be reused at least monthly, I’d recommend keeping it as a saved WIRE+FRAME prompt. For example, something for a one-time audit or creating placeholder content for a specific screen. Sensitive or regulated data If you need to build in personally identifiable information (PII), health, finance, legal, or trade secrets, err on the side of not building an AI Assistant. Even if the AI platform promises not to use your data, I’d strongly suggest using redaction or an approved enterprise tool with necessary safeguards in place (company-approved enterprise versions of Microsoft Copilot, for instance). Heavy orchestration or logic Multi-step workflows, API calls, database writes, and approvals go beyond the scope of an AI Assistant into Agentic territory (as of now). I’d recommend not trying to build an AI Assistant for these cases. Real-time information AI Assistants may not be able to access real-time data like prices, live metrics, or breaking news. If you need these, you can upload near-real-time data (as we do below) or connect with data sources that you or your company controls, rather than relying on the open web. High-stakes outputs For cases related to compliance, legal, medical, or any other area requiring auditability, consider implementing process guardrails and training to keep humans in the loop for proper review and accountability. No measurable win If you can’t name a success metric (such as time saved, first-draft quality, or fewer re-dos), I’d recommend keeping it as a saved WIRE+FRAME prompt. Just because these are signs that you should not build your AI Assistant now, doesn’t mean you shouldn’t ever. Revisit this decision when you notice that you’re starting to repeatedly use the same prompt weekly, multiple teammates ask for it, or manual time copy-pasting and refining start exceeding ~15 minutes. Those are some signs that an AI Assistant will pay back quickly. In a nutshell, build an AI Assistant when you can name the problem, the audience, frequency, and the win. The rest of this article shows how to turn your successful WIRE+FRAME prompt into a CustomGPT that you and your team can actually use. No advanced knowledge, coding skills, or hacks needed. As Always, Start with the User This should go without saying to UX professionals, but it’s worth a reminder: if you’re building an AI assistant for anyone besides yourself, start with the user and their needs before you build anything. Who will use this assistant? What’s the specific pain or task they struggle with today? What language, tone, and examples will feel natural to them? Building without doing this first is a sure way to end up with clever assistants nobody actually wants to use. Think of it like any other product: before you build features, you understand your audience. The same rule applies here, even more so, because AI assistants are only as helpful as they are useful and usable. From Prompt To Assistant You’ve already done the heavy lifting with WIRE+FRAME. Now you’re just turning that refined and reliable prompt into a CustomGPT you can reuse and share. You can use MATCH as a checklist to go from a great prompt to a useful AI assistant. M: Map your prompt Port your successful WIRE+FRAME prompt into the AI assistant. A: Add knowledge and training Ground the assistant in your world. Upload knowledge files, examples, or guides that make it uniquely yours. T: Tailor for audience Make it feel natural to the people who will use it. Give it the right capabilities, but also adjust its settings, tone, examples, and conversation starters so they land with your audience. C: Check, test, and refine Test the preview with different inputs and refine until you get the results you expect. H: Hand off and maintain Set sharing options and permissions, share the link, and maintain it. A few weeks ago, we invited readers to share their ideas for AI assistants they wished they had. The top contenders were: Prototype Prodigy: Transform rough ideas into prototypes and export them into Figma to refine. Critique Coach: Review wireframes or mockups and point out accessibility and usability gaps. But the favorite was an AI assistant to turn tons of customer feedback into actionable insights. Readers replied with variations of: “An assistant that can quickly sort through piles of survey responses, app reviews, or open-ended comments and turn them into themes we can act on.” And that’s the one we will build in this article — say hello to Insight Interpreter. Walkthrough: Insight Interpreter Having lots of customer feedback is a nice problem to have. Companies actively seek out customer feedback through surveys and studies (solicited), but also receive feedback that may not have been asked for through social media or public reviews (unsolicited). This is a goldmine of information, but it can be messy and overwhelming trying to make sense of it all, and it’s nobody’s idea of fun. Here’s where an AI assistant like the Insight Interpreter can help. We’ll turn the example prompt created using the WIRE+FRAME framework in Prompting Is A Design Act into a CustomGPT. When you start building a CustomGPT by visiting https://chat.openai.com/gpts/editor, you’ll see two paths: Conversational interface Vibe-chat your way — it’s easy and quick, but similar to unstructured prompts, your inputs get baked in a little messily, so you may end up with vague or inconsistent instructions. Configure interface The structured form where you type instructions, upload files, and toggle capabilities. Less instant gratification, less winging it, but more control. This is the option you’ll want for assistants you plan to share or depend on regularly. The good news is that MATCH works for both. In conversational mode, you can use it as a mental checklist, and we’ll walk through using it in configure mode as a more formal checklist in this article. M: Map Your Prompt Paste your full WIRE+FRAME prompt into the Instructions section exactly as written. As a refresher, I’ve included the mapping and snippets of the detailed prompt from before: Who & What: The AI persona and the core deliverable (“…senior UX researcher and customer insights analyst… specialize in synthesizing qualitative data from diverse sources…”). Input Context: Background or data scope to frame the task (“…analyzing customer feedback uploaded from sources such as…”). Rules & Constraints: Boundaries (“…do not fabricate pain points, representative quotes, journey stages, or patterns…”). Expected Output: Format and fields of the deliverable (“…a structured list of themes. For each theme, include…”). Flow: Explicit, ordered sub-tasks (“Recommended flow of tasks: Step 1…”). Reference Voice: Tone, mood, or reference (“…concise, pattern-driven, and objective…”). Ask for Clarification: Ask questions if unclear (“…if data is missing or unclear, ask before continuing…”). Memory: Memory to recall earlier definitions (“Unless explicitly instructed otherwise, keep using this process…”). Evaluate & Iterate: Have the AI self-critique outputs (“…critically evaluate…suggest improvements…”). If you’re building Copilot Agents or Gemini Gems instead of CustomGPTs, you still paste your WIRE+FRAME prompt into their respective Instructions sections. A: Add Knowledge And Training In the knowledge section, upload up to 20 files, clearly labeled, that will help the CustomGPT respond effectively. Keep files small and versioned: reviews_Q2_2025.csv beats latestfile_final2.csv. For this prompt for analyzing customer feedback, generating themes organized by customer journey, rating them by severity and effort, files could include: Taxonomy of themes; Instructions on parsing uploaded data; Examples of real UX research reports using this structure; Scoring guidelines for severity and effort, e.g., what makes something a 3 vs. a 5 in severity; Customer journey map stages; Customer feedback file templates (not actual data). An example of a file to help it parse uploaded data is shown below: T: Tailor For Audience Audience tailoring If you are building this for others, your prompt should have addressed tone in the “Reference Voice” section. If you didn’t, do it now, so the CustomGPT can be tailored to the tone and expertise level of users who will use it. In addition, use the Conversation starters section to add a few examples or common prompts for users to start using the CustomGPT, again, worded for your users. For instance, we could use “Analyze feedback from the attached file” for our Insights Interpreter to make it more self-explanatory for anyone, instead of “Analyze data,” which may be good enough if you were using it alone. For my Designerly Curiosity GPT, assuming that users may not know what it could do, I use “What are the types of curiosity?” and “Give me a micro-practice to spark curiosity”. Functional tailoring Fill in the CustomGPT name, icon, description, and capabilities. Name: Pick one that will make it clear what the CustomGPT does. Let’s use “Insights Interpreter — Customer Feedback Analyzer”. If needed, you can also add a version number. This name will show up in the sidebar when people use it or pin it, so make the first part memorable and easily identifiable. Icon: Upload an image or generate one. Keep it simple so it can be easily recognized in a smaller dimension when people pin it in their sidebar. Description: A brief, yet clear description of what the CustomGPT can do. If you plan to list it in the GPT store, this will help people decide if they should pick yours over something similar. Recommended Model: If your CustomGPT needs the capabilities of a particular model (e.g., needs GPT-5 thinking for detailed analysis), select it. In most cases, you can safely leave it up to the user or select the most common model. Capabilities: Turn off anything you won’t need. We’ll turn off “Web Search” to allow the CustomGPT to focus only on uploaded data, without expanding the search online, and we will turn on “Code Interpreter & Data Analysis” to allow it to understand and process uploaded files. “Canvas” allows users to work on a shared canvas with the GPT to edit writing tasks; “Image generation” - if the CustomGPT needs to create images. Actions: Making third-party APIs available to the CustomGPT, advanced functionality we don’t need. Additional Settings: Sneakily hidden and opted in by default, I opt out of training OpenAI’s models. C: Check, Test & Refine Do one last visual check to make sure you’ve filled in all applicable fields and the basics are in place: is the concept sharp and clear (not a do-everything bot)? Are the roles, goals, and tone clear? Do we have the right assets (docs, guides) to support it? Is the flow simple enough that others can get started easily? Once those boxes are checked, move into testing. Use the Preview panel to verify that your CustomGPT performs as well, or better, than your original WIRE+FRAME prompt, and that it works for your intended audience. Try a few representative inputs and compare the results to what you expected. If something worked before but doesn’t now, check whether new instructions or knowledge files are overriding it. When things don’t look right, here are quick debugging fixes: Generic answers? Tighten Input Context or update the knowledge files. Hallucinations? Revisit your Rules section. Turn off web browsing if you don’t need external data. Wrong tone? Strengthen Reference Voice or swap in clearer examples. Inconsistent? Test across models in preview and set the most reliable one as “Recommended.” H: Hand Off And Maintain When your CustomGPT is ready, you can publish it via the “Create” option. Select the appropriate access option: Only me: Private use. Perfect if you’re still experimenting or keeping it personal. Anyone with the link: Exactly what it means. Shareable but not searchable. Great for pilots with a team or small group. Just remember that links can be reshared, so treat them as semi-public. GPT Store: Fully public. Your assistant is listed and findable by anyone browsing the store. (This is the option we’ll use.) Business workspace (if you’re on GPT Business): Share with others within your business account only — the easiest way to keep it in-house and controlled. But hand off doesn’t end with hitting publish, you should maintain it to keep it relevant and useful: Collect feedback: Ask teammates what worked, what didn’t, and what they had to fix manually. Iterate: Apply changes directly or duplicate the GPT if you want multiple versions in play. You can find all your CustomGPTs at: https://chatgpt.com/gpts/mine Track changes: Keep a simple changelog (date, version, updates) for traceability. Refresh knowledge: Update knowledge files and examples on a regular cadence so answers don’t go stale. And that’s it! Our Insights Interpreter is now live! Since we used the WIRE+FRAME prompt from the previous article to create the Insights Interpreter CustomGPT, I compared the outputs: The results are similar, with slight differences, and that’s expected. If you compare the results carefully, the themes, issues, journey stages, frequency, severity, and estimated effort match with some differences in wording of the theme, issue summary, and problem statement. The opportunities and quotes have more visible differences. Most of it is because of the CustomGPT knowledge and training files, including instructions, examples, and guardrails, now live as always-on guidance. Keep in mind that in reality, Generative AI is by nature generative, so outputs will vary. Even with the same data, you won’t get identical wording every time. In addition, underlying models and their capabilities rapidly change. If you want to keep things as consistent as possible, recommend a model (though people can change it), track versions of your data, and compare for structure, priorities, and evidence rather than exact wording. While I’d love for you to use Insights Interpreter, I strongly recommend taking 15 minutes to follow the steps above and create your own. That is exactly what you or your team needs — including the tone, context, output formats, and get the real AI Assistant you need! Inspiration For Other AI Assistants We just built the Insight Interpreter and mentioned two contenders: Critique Coach and Prototype Prodigy. Here are a few other realistic uses that can spark ideas for your own AI Assistant: Workshop Wizard: Generates workshop agendas, produces icebreaker questions, and follows up survey drafts. Research Roundup Buddy: Summarizes raw transcripts into key themes, then creates highlight reels (quotes + visuals) for team share-outs. Persona Refresher: Updates stale personas with the latest customer feedback, then rewrites them in different tones (boardroom formal vs. design-team casual). Content Checker: Proofs copy for tone, accessibility, and reading level before it ever hits your site. Trend Tamer: Scans competitor reviews and identifies emerging patterns you can act on before they reach your roadmap. Microcopy Provocateur: Tests alternate copy options by injecting different tones (sassy, calm, ironic, nurturing) and role-playing how users might react, especially useful for error states or Call to Actions. Ethical UX Debater: Challenges your design decisions and deceptive designs by simulating the voice of an ethics board or concerned user. The best AI Assistants come from carefully inspecting your workflow and looking for areas where AI can augment your work regularly and repetitively. Then follow the steps above to build a team of customized AI assistants. Ask Me Anything About Assistants What are some limitations of a CustomGPT? Right now, the best parallels for AI are a very smart intern with access to a lot of information. CustomGPTs are still running on LLM models that are basically trained on a lot of information and programmed to predictively generate responses based on that data, including possible bias, misinformation, or incomplete information. Keeping that in mind, you can make that intern provide better and more relevant results by using your uploads as onboarding docs, your guardrails as a job description, and your updates as retraining. Can I copy someone else’s public CustomGPT and tweak it? Not directly, but if you get inspired by another CustomGPT, you can look at how it’s framed and rebuild your own using WIRE+FRAME & MATCH. That way, you make it your own and have full control of the instructions, files, and updates. But you can do that with Google’s equivalent — Gemini Gems. Shared Gems behave similarly to shared Google Docs, so once shared, any Gem instructions and files that you have uploaded can be viewed by any user with access to the Gem. Any user with edit access to the Gem can also update and delete the Gem. How private are my uploaded files? The files you upload are stored and used to answer prompts to your CustomGPT. If your CustomGPT is not private or you didn’t disable the hidden setting to allow CustomGPT conversations to improve the model, that data could be referenced. Don’t upload sensitive, confidential, or personal data you wouldn’t want circulating. Enterprise accounts do have some protections, so check with your company. How many files can I upload, and does size matter? Limits vary by platform, but smaller, specific files usually perform better than giant docs. Think “chapter” instead of “entire book.” At the time of publishing, CustomGPTs allow up to 20 files, Copilot Agents up to 200 (if you need anywhere near that many, chances are your agent is not focused enough), and Gemini Gems up to 10. What’s the difference between a CustomGPT and a Project? A CustomGPT is a focused assistant, like an intern trained to do one role well (like “Insight Interpreter”). A Project is more like a workspace where you can group multiple prompts, files, and conversations together for a broader effort. CustomGPTs are specialists. Projects are containers. If you want something reusable, shareable, and role-specific, go to CustomGPT. If you want to organize broader work with multiple tools and outputs, and shared knowledge, Projects are the better fit. From Reading To Building In this AI x Design series, we’ve gone from messy prompting (“A Week In The Life Of An AI-Augmented Designer”) to a structured prompt framework, WIRE+FRAME (“Prompting Is A Design Act”). And now, in this article, your very own reusable AI sidekick. CustomGPTs don’t replace designers but augment them. The real magic isn’t in the tool itself, but in how you design and manage it. You can use public CustomGPTs for inspiration, but the ones that truly fit your workflow are the ones you design yourself. They extend your craft, codify your expertise, and give your team leverage that generic AI models can’t. Build one this week. Even better, today. Train it, share it, stress-test it, and refine it into an AI assistant that can augment your team.
Intent Prototyping: The Allure And Danger Of Pure Vibe Coding In Enterprise UX (Part 1)
Yegor Gilyov examines the problem of over-reliance on static high-fidelity mockups, which often leave the conceptual model and user flows dangerously underdeveloped. He then explores whether AI-powered prototyping is the answer, questioning whether the path forward is the popular “vibe coding” approach or a more structured, intent-driven approach.
There is a spectrum of opinions on how dramatically all creative professions will be changed by the coming wave of agentic AI, from the very skeptical to the wildly optimistic and even apocalyptic. I think that even if you are on the “skeptical” end of the spectrum, it makes sense to explore ways this new technology can help with your everyday work. As for my everyday work, I’ve been doing UX and product design for about 25 years now, and I’m always keen to learn new tricks and share them with colleagues. Right now, I’m interested in AI-assisted prototyping, and I’m here to share my thoughts on how it can change the process of designing digital products. To set your expectations up front: this exploration focuses on a specific part of the product design lifecycle. Many people know about the Double Diamond framework, which shows the path from problem to solution. However, I think it’s the Triple Diamond model that makes an important point for our needs. It explicitly separates the solution space into two phases: Solution Discovery (ideating and validating the right concept) and Solution Delivery (engineering the validated concept into a final product). This article is focused squarely on that middle diamond: Solution Discovery. How AI can help with the preceding (Problem Discovery) and the following (Solution Delivery) stages is out of the scope of this article. Problem Discovery is less about prototyping and more about research, and while I believe AI can revolutionize the research process as well, I’ll leave that to people more knowledgeable in the field. As for Solution Delivery, it is more about engineering optimization. There’s no doubt that software engineering in the AI era is undergoing dramatic changes, but I’m not an engineer — I’m a designer, so let me focus on my “sweet spot”. And my “sweet spot” has a specific flavor: designing enterprise applications. In this world, the main challenge is taming complexity: dealing with complicated data models and guiding users through non-linear workflows. This background has had a big impact on my approach to design, putting a lot of emphasis on the underlying logic and structure. This article explores the potential of AI through this lens. I’ll start by outlining the typical artifacts designers create during Solution Discovery. Then, I’ll examine the problems with how this part of the process often plays out in practice. Finally, we’ll explore whether AI-powered prototyping can offer a better approach, and if so, whether it aligns with what people call “vibe coding,” or calls for a more deliberate and disciplined way of working. What We Create During Solution Discovery The Solution Discovery phase begins with the key output from the preceding research: a well-defined problem and a core hypothesis for a solution. This is our starting point. The artifacts we create from here are all aimed at turning that initial hypothesis into a tangible, testable concept. Traditionally, at this stage, designers can produce artifacts of different kinds, progressively increasing fidelity: from napkin sketches, boxes-and-arrows, and conceptual diagrams to hi-fi mockups, then to interactive prototypes, and in some cases even live prototypes. Artifacts of lower fidelity allow fast iteration and enable the exploration of many alternatives, while artifacts of higher fidelity help to understand, explain, and validate the concept in all its details. It’s important to think holistically, considering different aspects of the solution. I would highlight three dimensions: Conceptual model: Objects, relations, attributes, actions; Visualization: Screens, from rough sketches to hi-fi mockups; Flow: From the very high-level user journeys to more detailed ones. One can argue that those are layers rather than dimensions, and each of them builds on the previous ones (for example, according to Semantic IxD by Daniel Rosenberg), but I see them more as different facets of the same thing, so the design process through them is not necessarily linear: you may need to switch from one perspective to another many times. This is how different types of design artifacts map to these dimensions: As Solution Discovery progresses, designers move from the left part of this map to the right, from low-fidelity to high-fidelity, from ideating to validating, from diverging to converging. Note that at the beginning of the process, different dimensions are supported by artifacts of different types (boxes-and-arrows, sketches, class diagrams, etc.), and only closer to the end can you build a live prototype that encompasses all three dimensions: conceptual model, visualization, and flow. This progression shows a classic trade-off, like the difference between a pencil drawing and an oil painting. The drawing lets you explore ideas in the most flexible way, whereas the painting has a lot of detail and overall looks much more realistic, but is hard to adjust. Similarly, as we go towards artifacts that integrate all three dimensions at higher fidelity, our ability to iterate quickly and explore divergent ideas goes down. This inverse relationship has long been an accepted, almost unchallenged, limitation of the design process. The Problem With The Mockup-Centric Approach Faced with this difficult trade-off, often teams opt for the easiest way out. On the one hand, they need to show that they are making progress and create things that appear detailed. On the other hand, they rarely can afford to build interactive or live prototypes. This leads them to over-invest in one type of artifact that seems to offer the best of both worlds. As a result, the neatly organized “bento box” of design artifacts we saw previously gets shrunk down to just one compartment: creating static high-fidelity mockups. This choice is understandable, as several forces push designers in this direction. Stakeholders are always eager to see nice pictures, while artifacts representing user flows and conceptual models receive much less attention and priority. They are too high-level and hardly usable for validation, and usually, not everyone can understand them. On the other side of the fidelity spectrum, interactive prototypes require too much effort to create and maintain, and creating live prototypes in code used to require special skills (and again, effort). And even when teams make this investment, they do so at the end of Solution Discovery, during the convergence stage, when it is often too late to experiment with fundamentally different ideas. With so much effort already sunk, there is little appetite to go back to the drawing board. It’s no surprise, then, that many teams default to the perceived safety of static mockups, seeing them as a middle ground between the roughness of the sketches and the overwhelming complexity and fragility that prototypes can have. As a result, validation with users doesn’t provide enough confidence that the solution will actually solve the problem, and teams are forced to make a leap of faith to start building. To make matters worse, they do so without a clear understanding of the conceptual model, the user flows, and the interactions, because from the very beginning, designers’ attention has been heavily skewed toward visualization. The result is often a design artifact that resembles the famous “horse drawing” meme: beautifully rendered in the parts everyone sees first (the mockups), but dangerously underdeveloped in its underlying structure (the conceptual model and flows). While this is a familiar problem across the industry, its severity depends on the nature of the project. If your core challenge is to optimize a well-understood, linear flow (like many B2C products), a mockup-centric approach can be perfectly adequate. The risks are contained, and the “lopsided horse” problem is unlikely to be fatal. However, it’s different for the systems I specialize in: complex applications defined by intricate data models and non-linear, interconnected user flows. Here, the biggest risks are not on the surface but in the underlying structure, and a lack of attention to the latter would be a recipe for disaster. Transforming The Design Process This situation makes me wonder: How might we close the gap between our design intent and a live prototype, so that we can iterate on real functionality from day one? If we were able to answer this question, we would: Learn faster. By going straight from intent to a testable artifact, we cut the feedback loop from weeks to days. Gain more confidence. Users interact with real logic, which gives us more proof that the idea works. Enforce conceptual clarity. A live prototype cannot hide a flawed or ambiguous conceptual model. Establish a clear and lasting source of truth. A live prototype, combined with a clearly documented design intent, provides the engineering team with an unambiguous specification. Of course, the desire for such a process is not new. This vision of a truly prototype-driven workflow is especially compelling for enterprise applications, where the benefits of faster learning and forced conceptual clarity are the best defense against costly structural flaws. But this ideal was still out of reach because prototyping in code took so much work and specialized talents. Now, the rise of powerful AI coding assistants changes this equation in a big way. The Seductive Promise Of “Vibe Coding” And the answer seems to be obvious: vibe coding! “Vibe coding is an artificial intelligence-assisted software development style popularized by Andrej Karpathy in early 2025. It describes a fast, improvisational, collaborative approach to creating software where the developer and a large language model (LLM) tuned for coding is acting rather like pair programmers in a conversational loop.” — Wikipedia The original tweet by Andrej Karpathy: The allure of this approach is undeniable. If you are not a developer, you are bound to feel awe when you describe a solution in plain language, and moments later, you can interact with it. This seems to be the ultimate fulfillment of our goal: a direct, frictionless path from an idea to a live prototype. But is this method reliable enough to build our new design process around it? The Trap: A Process Without A Blueprint Vibe coding mixes up a description of the UI with a description of the system itself, resulting in a prototype based on changing assumptions rather than a clear, solid model. The pitfall of vibe coding is that it encourages us to express our intent in the most ambiguous way possible: by having a conversation. This is like hiring a builder and telling them what to do one sentence at a time without ever presenting them a blueprint. They could make a wall that looks great, but you can’t be sure that it can hold weight. I’ll give you one example illustrating problems you may face if you try to jump over the chasm between your idea and a live prototype relying on pure vibe coding in the spirit of Andrej Karpathy’s tweet. Imagine I want to prototype a solution to keep track of tests to validate product ideas. I open my vibe coding tool of choice (I intentionally don’t disclose its name, as I believe they all are awesome yet prone to similar pitfalls) and start with the following prompt: I need an app to track tests. For every test, I need to fill out the following data: - Hypothesis (we believe that...) - Experiment (to verify that, we will...) - When (a single date, or a period) - Status (New/Planned/In Progress/Proven/Disproven) And in a minute or so, I get a working prototype: Inspired by success, I go further: Please add the ability to specify a product idea for every test. Also, I want to filter tests by product ideas and see how many tests each product idea has in each status. And the result is still pretty good: But then I want to extend the functionality related to product ideas: Okay, one more thing. For every product idea, I want to assess the impact score, the confidence score, and the ease score, and get the overall ICE score. Perhaps I need a separate page focused on the product idea, with all the relevant information and related tests. And from this point on, the results are getting more and more confusing. The flow of creating tests hasn’t changed much. I can still create a bunch of tests, and they seem to be organized by product ideas. But when I click “Product Ideas” in the top navigation, I see nothing: I need to create my ideas from scratch, and they are not connected to the tests I created before: Moreover, when I go back to “Tests”, I see that they are all gone. Clearly something went wrong, and my AI assistant confirms that: No, this is not expected behavior — it’s a bug! The issue is that tests are being stored in two separate places (local state in the Index page and App state), so tests created on the main page don’t sync with the product ideas page. Sure, eventually it fixed that bug, but note that we encountered this just on the third step, when we asked to slightly extend the functionality of a very simple app. The more layers of complexity we add, the more roadblocks of this sort we are bound to face. Also note that this specific problem of a not fully thought-out relationship between two entities (product ideas and tests) is not isolated at the technical level, and therefore, it didn’t go away once the technical bug was fixed. The underlying conceptual model is still broken, and it manifests in the UI as well. For example, you can still create “orphan” tests that are not connected to any item from the “Product Ideas” page. As a result, you may end up with different numbers of ideas and tests on different pages of the app: Let’s diagnose what really happened here. The AI’s response that this is a “bug” is only half the story. The true root cause is a conceptual model failure. My prompts never explicitly defined the relationship between product ideas and tests. The AI was forced to guess, which led to the broken experience. For a simple demo, this might be a fixable annoyance. But for a data-heavy enterprise application, this kind of structural ambiguity is fatal. It demonstrates the fundamental weakness of building without a blueprint, which is precisely what vibe coding encourages. Don’t take this as a criticism of vibe coding tools. They are creating real magic. However, the fundamental truth about “garbage in, garbage out” is still valid. If you don’t express your intent clearly enough, chances are the result won’t fulfill your expectations. Another problem worth mentioning is that even if you wrestle it into a state that works, the artifact is a black box that can hardly serve as reliable specifications for the final product. The initial meaning is lost in the conversation, and all that’s left is the end result. This makes the development team “code archaeologists,” who have to figure out what the designer was thinking by reverse-engineering the AI’s code, which is frequently very complicated. Any speed gained at the start is lost right away because of this friction and uncertainty. From Fast Magic To A Solid Foundation Pure vibe coding, for all its allure, encourages building without a blueprint. As we’ve seen, this results in structural ambiguity, which is not acceptable when designing complex applications. We are left with a seemingly quick but fragile process that creates a black box that is difficult to iterate on and even more so to hand off. This leads us back to our main question: how might we close the gap between our design intent and a live prototype, so that we can iterate on real functionality from day one, without getting caught in the ambiguity trap? The answer lies in a more methodical, disciplined, and therefore trustworthy process. In Part 2 of this series, “A Practical Guide to Building with Clarity”, I will outline the entire workflow for Intent Prototyping. This method places the explicit intent of the designer at the forefront of the process while embracing the potential of AI-assisted coding. Thank you for reading, and I look forward to seeing you in Part 2.
Ambient Animations In Web Design: Principles And Implementation (Part 1)
Creating motion can be tricky. Too much and it’s distracting. Too little and a design feels flat. Ambient animations are the middle ground — subtle, slow-moving details that add atmosphere without stealing the show. In this article, web design pioneer Andy Clarke introduces the concept of ambient animations and explains how to implement them.
Unlike timeline-based animations, which tell stories across a sequence of events, or interaction animations that are triggered when someone touches something, ambient animations are the kind of passive movements you might not notice at first. But, they make a design look alive in subtle ways. In an ambient animation, elements might subtly transition between colours, move slowly, or gradually shift position. Elements can appear and disappear, change size, or they could rotate slowly. Ambient animations aren’t intrusive; they don’t demand attention, aren’t distracting, and don’t interfere with what someone’s trying to achieve when they use a product or website. They can be playful, too, making someone smile when they catch sight of them. That way, ambient animations add depth to a brand’s personality. To illustrate the concept of ambient animations, I’ve recreated the cover of a Quick Draw McGraw comic book (PDF) as a CSS/SVG animation. The comic was published by Charlton Comics in 1971, and, being printed, these characters didn’t move, making them ideal candidates to transform into ambient animations. FYI: Original cover artist Ray Dirgo was best known for his work drawing Hanna-Barbera characters for Charlton Comics during the 1970s. Ray passed away in 2000 at the age of 92. He outlived Charlton Comics, which went out of business in 1986, and DC Comics acquired its characters. Tip: You can view the complete ambient animation code on CodePen. Choosing Elements To Animate Not everything on a page or in a graphic needs to move, and part of designing an ambient animation is knowing when to stop. The trick is to pick elements that lend themselves naturally to subtle movement, rather than forcing motion into places where it doesn’t belong. Natural Motion Cues When I’m deciding what to animate, I look for natural motion cues and think about when something would move naturally in the real world. I ask myself: “Does this thing have weight?”, “Is it flexible?”, and “Would it move in real life?” If the answer’s “yes,” it’ll probably feel right if it moves. There are several motion cues in Ray Dirgo’s cover artwork. For example, the peace pipe Quick Draw’s puffing on has two feathers hanging from it. They swing slightly left and right by three degrees as the pipe moves, just like real feathers would. #quick-draw-pipe { animation: quick-draw-pipe-rotate 6s ease-in-out infinite alternate; } @keyframes quick-draw-pipe-rotate { 0% { transform: rotate(3deg); } 100% { transform: rotate(-3deg); } } #quick-draw-feather-1 { animation: quick-draw-feather-1-rotate 3s ease-in-out infinite alternate; } #quick-draw-feather-2 { animation: quick-draw-feather-2-rotate 3s ease-in-out infinite alternate; } @keyframes quick-draw-feather-1-rotate { 0% { transform: rotate(3deg); } 100% { transform: rotate(-3deg); } } @keyframes quick-draw-feather-2-rotate { 0% { transform: rotate(-3deg); } 100% { transform: rotate(3deg); } } Atmosphere, Not Action I often choose elements or decorative details that add to the vibe but don’t fight for attention. Ambient animations aren’t about signalling to someone where they should look; they’re about creating a mood. Here, the chief slowly and subtly rises and falls as he puffs on his pipe. #chief { animation: chief-rise-fall 3s ease-in-out infinite alternate; } @keyframes chief-group-rise-fall { 0% { transform: translateY(0); } 100% { transform: translateY(-20px); } } For added effect, the feather on his head also moves in time with his rise and fall: #chief-feather-1 { animation: chief-feather-1-rotate 3s ease-in-out infinite alternate; } #chief-feather-2 { animation: chief-feather-2-rotate 3s ease-in-out infinite alternate; } @keyframes chief-feather-1-rotate { 0% { transform: rotate(0deg); } 100% { transform: rotate(-9deg); } } @keyframes chief-feather-2-rotate { 0% { transform: rotate(0deg); } 100% { transform: rotate(9deg); } } Playfulness And Fun One of the things I love most about ambient animations is how they bring fun into a design. They’re an opportunity to demonstrate personality through playful details that make people smile when they notice them. Take a closer look at the chief, and you might spot his eyebrows raising and his eyes crossing as he puffs hard on his pipe. Quick Draw’s eyebrows also bounce at what look like random intervals. #quick-draw-eyebrow { animation: quick-draw-eyebrow-raise 5s ease-in-out infinite; } @keyframes quick-draw-eyebrow-raise { 0%, 20%, 60%, 100% { transform: translateY(0); } 10%, 50%, 80% { transform: translateY(-10px); } } Keep Hierarchy In Mind Motion draws the eye, and even subtle movements have a visual weight. So, I reserve the most obvious animations for elements that I need to create the biggest impact. Smoking his pipe clearly has a big effect on Quick Draw McGraw, so to demonstrate this, I wrapped his elements — including his pipe and its feathers — within a new SVG group, and then I made that wobble. #quick-draw-group { animation: quick-draw-group-wobble 6s ease-in-out infinite; } @keyframes quick-draw-group-wobble { 0% { transform: rotate(0deg); } 15% { transform: rotate(2deg); } 30% { transform: rotate(-2deg); } 45% { transform: rotate(1deg); } 60% { transform: rotate(-1deg); } 75% { transform: rotate(0.5deg); } 100% { transform: rotate(0deg); } } Then, to emphasise this motion, I mirrored those values to wobble his shadow: #quick-draw-shadow { animation: quick-draw-shadow-wobble 6s ease-in-out infinite; } @keyframes quick-draw-shadow-wobble { 0% { transform: rotate(0deg); } 15% { transform: rotate(-2deg); } 30% { transform: rotate(2deg); } 45% { transform: rotate(-1deg); } 60% { transform: rotate(1deg); } 75% { transform: rotate(-0.5deg); } 100% { transform: rotate(0deg); } } Apply Restraint Just because something can be animated doesn’t mean it should be. When creating an ambient animation, I study the image and note the elements where subtle motion might add life. I keep in mind the questions: “What’s the story I’m telling? Where does movement help, and when might it become distracting?” Remember, restraint isn’t just about doing less; it’s about doing the right things less often. Layering SVGs For Export In “Smashing Animations Part 4: Optimising SVGs,” I wrote about the process I rely on to “prepare, optimise, and structure SVGs for animation.” When elements are crammed into a single SVG file, they can be a nightmare to navigate. Locating a specific path or group can feel like searching for a needle in a haystack. That’s why I develop my SVGs in layers, exporting and optimising one set of elements at a time — always in the order they’ll appear in the final file. This lets me build the master SVG gradually by pasting it in each cleaned-up section. I start by exporting background elements, optimising them, adding class and ID attributes, and pasting their code into my SVG file. Then, I export elements that often stay static or move as groups, like the chief and Quick Draw McGraw. Before finally exporting, naming, and adding details, like Quick Draw’s pipe, eyes, and his stoned sparkles. Since I export each layer from the same-sized artboard, I don’t need to worry about alignment or positioning issues as they all slot into place automatically. Implementing Ambient Animations You don’t need an animation framework or library to add ambient animations to a project. Most of the time, all you’ll need is a well-prepared SVG and some thoughtful CSS. But, let’s start with the SVG. The key is to group elements logically and give them meaningful class or ID attributes, which act as animation hooks in the CSS. For this animation, I gave every moving part its own identifier like #quick-draw-tail or #chief-smoke-2. That way, I could target exactly what I needed without digging through the DOM like a raccoon in a trash can. Once the SVG is set up, CSS does most of the work. I can use @keyframes for more expressive movement, or animation-delay to simulate randomness and stagger timings. The trick is to keep everything subtle and remember I’m not animating for attention, I’m animating for atmosphere. Remember that most ambient animations loop continuously, so they should be lightweight and performance-friendly. And of course, it’s good practice to respect users who’ve asked for less motion. You can wrap your animations in an @media prefers-reduced-motion query so they only run when they’re welcome. @media (prefers-reduced-motion: no-preference) { #quick-draw-shadow { animation: quick-draw-shadow-wobble 6s ease-in-out infinite; } } It’s a small touch that’s easy to implement, and it makes your designs more inclusive. Ambient Animation Design Principles If you want your animations to feel ambient, more like atmosphere than action, it helps to follow a few principles. These aren’t hard and fast rules, but rather things I’ve learned while animating smoke, sparkles, eyeballs, and eyebrows. Keep Animations Slow And Smooth Ambient animations should feel relaxed, so use longer durations and choose easing curves that feel organic. I often use ease-in-out, but cubic Bézier curves can also be helpful when you want a more relaxed feel and the kind of movements you might find in nature. Loop Seamlessly And Avoid Abrupt Changes Hard resets or sudden jumps can ruin the mood, so if an animation loops, ensure it cycles smoothly. You can do this by matching start and end keyframes, or by setting the animation-direction to alternate the value so the animation plays forward, then back. Use Layering To Build Complexity A single animation might be boring. Five subtle animations, each on separate layers, can feel rich and alive. Think of it like building a sound mix — you want variation in rhythm, tone, and timing. In my animation, sparkles twinkle at varying intervals, smoke curls upward, feathers sway, and eyes boggle. Nothing dominates, and each motion plays its small part in the scene. Avoid Distractions The point of an ambient animation is that it doesn’t dominate. It’s a background element and not a call to action. If someone’s eyes are drawn to a raised eyebrow, it’s probably too much, so dial back the animation until it feels like something you’d only catch if you’re really looking. Consider Accessibility And Performance Check prefers-reduced-motion, and don’t assume everyone’s device can handle complex animations. SVG and CSS are light, but things like blur filters and drop shadows, and complex CSS animations can still tax lower-powered devices. When an animation is purely decorative, consider adding aria-hidden="true" to keep it from cluttering up the accessibility tree. Quick On The Draw Ambient animation is like seasoning on a great dish. It’s the pinch of salt you barely notice, but you’d miss when it’s gone. It doesn’t shout, it whispers. It doesn’t lead, it lingers. It’s floating smoke, swaying feathers, and sparkles you catch in the corner of your eye. And when it’s done well, ambient animation adds personality to a design without asking for applause. Now, I realise that not everyone needs to animate cartoon characters. So, in part two, I’ll share how I created animations for several recent client projects. Until next time, if you’re crafting an illustration or working with SVG, ask yourself: What would move if this were real? Then animate just that. Make it slow and soft. Keep it ambient. You can view the complete ambient animation code on CodePen.
The Psychology Of Trust In AI: A Guide To Measuring And Designing For User Confidence
With digital products moving to incorporate generative and agentic AI at an increasingly frequent rate, trust has become the invisible user interface. When it works, interactions feel seamless. When it fails, the entire experience collapses. But trust isn’t mystical. It can be understood, measured, and designed for. Here are practical methods and strategies for designing more trustworthy and ethical AI systems.
Misuse and misplaced trust of AI is becoming an unfortunate common event. For example, lawyers trying to leverage the power of generative AI for research submit court filings citing multiple compelling legal precedents. The problem? The AI had confidently, eloquently, and completely fabricated the cases cited. The resulting sanctions and public embarrassment can become a viral cautionary tale, shared across social media as a stark example of AI’s fallibility. This goes beyond a technical glitch; it’s a catastrophic failure of trust in AI tools in an industry where accuracy and trust are critical. The trust issue here is twofold — the law firms are submitting briefs in which they have blindly over-trusted the AI tool to return accurate information. The subsequent fallout can lead to a strong distrust in AI tools, to the point where platforms featuring AI might not be considered for use until trust is reestablished. Issues with trusting AI aren’t limited to the legal field. We are seeing the impact of fictional AI-generated information in critical fields such as healthcare and education. On a more personal scale, many of us have had the experience of asking Siri or Alexa to perform a task, only to have it done incorrectly or not at all, for no apparent reason. I’m guilty of sending more than one out-of-context hands-free text to an unsuspecting contact after Siri mistakenly pulls up a completely different name than the one I’d requested. With digital products moving to incorporate generative and agentic AI at an increasingly frequent rate, trust has become the invisible user interface. When it works, our interactions are seamless and powerful. When it breaks, the entire experience collapses, with potentially devastating consequences. As UX professionals, we’re on the front lines of a new twist on a common challenge. How do we build products that users can rely on? And how do we even begin to measure something as ephemeral as trust in AI? Trust isn’t a mystical quality. It is a psychological construct built on predictable factors. I won’t dive deep into academic literature on trust in this article. However, it is important to understand that trust is a concept that can be understood, measured, and designed for. This article will provide a practical guide for UX researchers and designers. We will briefly explore the psychological anatomy of trust, offer concrete methods for measuring it, and provide actionable strategies for designing more trustworthy and ethical AI systems. The Anatomy of Trust: A Psychological Framework for AI To build trust, we must first understand its components. Think of trust like a four-legged stool. If any one leg is weak, the whole thing becomes unstable. Based on classic psychological models, we can adapt these “legs” for the AI context. 1. Ability (or Competence) This is the most straightforward pillar: Does the AI have the skills to perform its function accurately and effectively? If a weather app is consistently wrong, you stop trusting it. If an AI legal assistant creates fictitious cases, it has failed the basic test of ability. This is the functional, foundational layer of trust. 2. Benevolence This moves from function to intent. Does the user believe the AI is acting in their best interest? A GPS that suggests a toll-free route even if it’s a few minutes longer might be perceived as benevolent. Conversely, an AI that aggressively pushes sponsored products feels self-serving, eroding this sense of benevolence. This is where user fears, such as concerns about job displacement, directly challenge trust—the user starts to believe the AI is not on their side. 3. Integrity Does AI operate on predictable and ethical principles? This is about transparency, fairness, and honesty. An AI that clearly states how it uses personal data demonstrates integrity. A system that quietly changes its terms of service or uses dark patterns to get users to agree to something violates integrity. An AI job recruiting tool that has subtle yet extremely harmful social biases, existing in the algorithm, violates integrity. 4. Predictability & Reliability Can the user form a stable and accurate mental model of how the AI will behave? Unpredictability, even if the outcomes are occasionally good, creates anxiety. A user needs to know, roughly, what to expect. An AI that gives a radically different answer to the same question asked twice is unpredictable and, therefore, hard to trust. The Trust Spectrum: The Goal of a Well-Calibrated Relationship Our goal as UX professionals shouldn’t be to maximize trust at all costs. An employee who blindly trusts every email they receive is a security risk. Likewise, a user who blindly trusts every AI output can be led into dangerous situations, such as the legal briefs referenced at the beginning of this article. The goal is well-calibrated trust. Think of it as a spectrum where the upper-mid level is the ideal state for a truly trustworthy product to achieve: Active Distrust The user believes the AI is incompetent or malicious. They will avoid it or actively work against it. Suspicion & Scrutiny The user interacts cautiously, constantly verifying the AI’s outputs. This is a common and often healthy state for users of new AI. Calibrated Trust (The Ideal State) This is the sweet spot. The user has an accurate understanding of the AI’s capabilities—its strengths and, crucially, its weaknesses. They know when to rely on it and when to be skeptical. Over-trust & Automation Bias The user unquestioningly accepts the AI’s outputs. This is where users follow flawed AI navigation into a field or accept a fictional legal brief as fact. Our job is to design experiences that guide users away from the dangerous poles of Active Distrust and Over-trust and toward that healthy, realistic middle ground of Calibrated Trust. The Researcher’s Toolkit: How to Measure Trust In AI Trust feels abstract, but it leaves measurable fingerprints. Academics in the social sciences have done much to define both what trust looks like and how it might be measured. As researchers, we can capture these signals through a mix of qualitative, quantitative, and behavioral methods. Qualitative Probes: Listening For The Language Of Trust During interviews and usability tests, go beyond “Was that easy to use?” and listen for the underlying psychology. Here are some questions you can start using tomorrow: To measure Ability: “Tell me about a time this tool’s performance surprised you, either positively or negatively.” To measure Benevolence: “Do you feel this system is on your side? What gives you that impression?” To measure Integrity: “If this AI made a mistake, how would you expect it to handle it? What would be a fair response?” To measure Predictability: “Before you clicked that button, what did you expect the AI to do? How closely did it match your expectation?” Investigating Existential Fears (The Job Displacement Scenario) One of the most potent challenges to an AI’s Benevolence is the fear of job displacement. When a participant expresses this, it is a critical research finding. It requires a specific, ethical probing technique. Imagine a participant says, “Wow, it does that part of my job pretty well. I guess I should be worried.” An untrained researcher might get defensive or dismiss the comment. An ethical, trained researcher validates and explores: “Thank you for sharing that; it’s a vital perspective, and it’s exactly the kind of feedback we need to hear. Can you tell me more about what aspects of this tool make you feel that way? In an ideal world, how would a tool like this work with you to make your job better, not to replace it?” This approach respects the participant, validates their concern, and reframes the feedback into an actionable insight about designing a collaborative, augmenting tool rather than a replacement. Similarly, your findings should reflect the concern users expressed about replacement. We shouldn’t pretend this fear doesn’t exist, nor should we pretend that every AI feature is being implemented with pure intention. Users know better than that, and we should be prepared to argue on their behalf for how the technology might best co-exist within their roles. Quantitative Measures: Putting A Number On Confidence You can quantify trust without needing a data science degree. After a user completes a task with an AI, supplement your standard usability questions with a few simple Likert-scale items: “The AI’s suggestion was reliable.” (1-7, Strongly Disagree to Strongly Agree) “I am confident in the AI’s output.” (1-7) “I understood why the AI made that recommendation.” (1-7) “The AI responded in a way that I expected.” (1-7) “The AI provided consistent responses over time.” (1-7) Over time, these metrics can track how trust is changing as your product evolves. Note: If you want to go beyond these simple questions that I’ve made up, there are numerous scales (measurements) of trust in technology that exist in academic literature. It might be an interesting endeavor to measure some relevant psychographic and demographic characteristics of your users and see how that correlates with trust in AI/your product. Table 1 at the end of the article contains four examples of current scales you might consider using to measure trust. You can decide which is best for your application, or you might pull some of the items from any of the scales if you aren’t looking to publish your findings in an academic journal, yet want to use items that have been subjected to some level of empirical scrutiny. Behavioral Metrics: Observing What Users Do, Not Just What They Say People’s true feelings are often revealed in their actions. You can use behaviors that reflect the specific context of use for your product. Here are a few general metrics that might apply to most AI tools that give insight into users’ behavior and the trust they place in your tool. Correction Rate How often do users manually edit, undo, or ignore the AI’s output? A high correction rate is a powerful signal of low trust in its Ability. Verification Behavior Do users switch to Google or open another application to double-check the AI’s work? This indicates they don’t trust it as a standalone source of truth. It can also potentially be positive that they are calibrating their trust in the system when they use it up front. Disengagement Do users turn the AI feature off? Do they stop using it entirely after one bad experience? This is the ultimate behavioral vote of no confidence. Designing For Trust: From Principles to Pixels Once you’ve researched and measured trust, you can begin to design for it. This means translating psychological principles into tangible interface elements and user flows. Designing for Competence and Predictability Set Clear Expectations Use onboarding, tooltips, and empty states to honestly communicate what the AI is good at and where it might struggle. A simple “I’m still learning about [topic X], so please double-check my answers” can work wonders. Show Confidence Levels Instead of just giving an answer, have the AI signal its own uncertainty. A weather app that says “70% chance of rain” is more trustworthy than one that just says “It will rain” and is wrong. An AI could say, “I’m 85% confident in this summary,” or highlight sentences it’s less sure about. The Role of Explainability (XAI) and Transparency Explainability isn’t about showing users the code. It’s about providing a useful, human-understandable rationale for a decision. Instead of: “Here is your recommendation.” Try: “Because you frequently read articles about UX research methods, I’m recommending this new piece on measuring trust in AI.” This addition transforms AI from an opaque oracle to a transparent logical partner. Many of the popular AI tools (e.g., ChatGPT and Gemini) show the thinking that went into the response they provide to a user. Figure 3 shows the steps Gemini went through to provide me with a non-response when I asked it to help me generate the masterpiece displayed above in Figure 2. While this might be more information than most users care to see, it provides a useful resource for a user to audit how the response came to be, and it has provided me with instructions on how I might proceed to address my task. Figure 4 shows an example of a scorecard OpenAI makes available as an attempt to increase users’ trust. These scorecards are available for each ChatGPT model and go into the specifics of how the models perform as it relates to key areas such as hallucinations, health-based conversations, and much more. In reading the scorecards closely, you will see that no AI model is perfect in any area. The user must remain in a trust but verify mode to make the relationship between human reality and AI work in a way that avoids potential catastrophe. There should never be blind trust in an LLM. Designing For Trust Repair (Graceful Error Handling) And Not Knowing an Answer Your AI will make mistakes. Trust is not determined by the absence of errors, but by how those errors are handled. Acknowledge Errors Humbly. When the AI is wrong, it should be able to state that clearly. “My apologies, I misunderstood that request. Could you please rephrase it?” is far better than silence or a nonsensical answer. Provide an Easy Path to Correction. Make feedback mechanisms (like thumbs up/down or a correction box) obvious. More importantly, show that the feedback is being used. A “Thank you, I’m learning from your correction” can help rebuild trust after a failure. As long as this is true. Likewise, your AI can’t know everything. You should acknowledge this to your users. UX practitioners should work with the product team to ensure that honesty about limitations is a core product principle. This can include the following: Establish User-Centric Metrics: Instead of only measuring engagement or task completion, UXers can work with product managers to define and track metrics like: Hallucination Rate: The frequency with which the AI provides verifiably false information. Successful Fallback Rate: How often the AI correctly identifies its inability to answer and provides a helpful, honest alternative. Prioritize the “I Don’t Know” Experience: UXers should frame the “I don’t know” response not as an error state, but as a critical feature. They must lobby for the engineering and content resources needed to design a high-quality, helpful fallback experience. UX Writing And Trust All of these considerations highlight the critical role of UX writing in the development of trustworthy AI. UX writers are the architects of the AI’s voice and tone, ensuring that its communication is clear, honest, and empathetic. They translate complex technical processes into user-friendly explanations, craft helpful error messages, and design conversational flows that build confidence and rapport. Without thoughtful UX writing, even the most technologically advanced AI can feel opaque and untrustworthy. The words and phrases an AI uses are its primary interface with users. UX writers are uniquely positioned to shape this interaction, ensuring that every tooltip, prompt, and response contributes to a positive and trust-building experience. Their expertise in human-centered language and design is indispensable for creating AI systems that not only perform well but also earn and maintain the trust of their users. A few key areas for UX writers to focus on when writing for AI include: Prioritize Transparency Clearly communicate the AI’s capabilities and limitations, especially when it’s still learning or if its responses are generated rather than factual. Use phrases that indicate the AI’s nature, such as “As an AI, I can...” or “This is a generated response.” Design for Explainability When the AI provides a recommendation, decision, or complex output, strive to explain the reasoning behind it in an understandable way. This builds trust by showing the user how the AI arrived at its conclusion. Emphasize User Control Empower users by providing clear ways to provide feedback, correct errors, or opt out of certain AI features. This reinforces the idea that the user is in control and the AI is a tool to assist them. The Ethical Tightrope: The Researcher’s Responsibility As the people responsible for understanding and advocating for users, we walk an ethical tightrope. Our work comes with profound responsibilities. The Danger Of “Trustwashing” We must draw a hard line between designing for calibrated trust and designing to manipulate users into trusting a flawed, biased, or harmful system. For example, if an AI system designed for loan approvals consistently discriminates against certain demographics but presents a user interface that implies fairness and transparency, this would be an instance of trustwashing. Another example of trustwashing would be if an AI medical diagnostic tool occasionally misdiagnoses conditions, but the user interface makes it seem infallible. To avoid trustwashing, the system should clearly communicate the potential for error and the need for human oversight. Our goal must be to create genuinely trustworthy systems, not just the perception of trust. Using these principles to lull users into a false sense of security is a betrayal of our professional ethics. To avoid and prevent trustwashing, researchers and UX teams should: Prioritize genuine transparency. Clearly communicate the limitations, biases, and uncertainties of AI systems. Don’t overstate capabilities or obscure potential risks. Conduct rigorous, independent evaluations. Go beyond internal testing and seek external validation of system performance, fairness, and robustness. Engage with diverse stakeholders. Involve users, ethics experts, and impacted communities in the design, development, and evaluation processes to identify potential harms and build genuine trust. Be accountable for outcomes. Take responsibility for the societal impact of AI systems, even if unintended. Establish mechanisms for redress and continuous improvement. Be accountable for outcomes. Establish clear and accessible mechanisms for redress when harm occurs, ensuring that individuals and communities affected by AI decisions have avenues for recourse and compensation. Educate the public. Help users understand how AI works, its limitations, and what to look for when evaluating AI products. Advocate for ethical guidelines and regulations. Support the development and implementation of industry standards and policies that promote responsible AI development and prevent deceptive practices. Be wary of marketing hype. Critically assess claims made about AI systems, especially those that emphasize “trustworthiness” without clear evidence or detailed explanations. Publish negative findings. Don’t shy away from reporting challenges, failures, or ethical dilemmas encountered during research. Transparency about limitations is crucial for building long-term trust. Focus on user empowerment. Design systems that give users control, agency, and understanding rather than just passively accepting AI outputs. The Duty To Advocate When our research uncovers deep-seated distrust or potential harm — like the fear of job displacement — our job has only just begun. We have an ethical duty to advocate for that user. In my experience directing research teams, I’ve seen that the hardest part of our job is often carrying these uncomfortable truths into rooms where decisions are made. We must champion these findings and advocate for design and strategy shifts that prioritize user well-being, even when it challenges the product roadmap. I personally try to approach presenting this information as an opportunity for growth and improvement, rather than a negative challenge. For example, instead of stating “Users don’t trust our AI because they fear job displacement,” I might frame it as “Addressing user concerns about job displacement presents a significant opportunity to build deeper trust and long-term loyalty by demonstrating our commitment to responsible AI development and exploring features that enhance human capabilities rather than replace them.” This reframing can shift the conversation from a defensive posture to a proactive, problem-solving mindset, encouraging collaboration and innovative solutions that ultimately benefit both the user and the business. It’s no secret that one of the more appealing areas for businesses to use AI is in workforce reduction. In reality, there will be many cases where businesses look to cut 10–20% of a particular job family due to the perceived efficiency gains of AI. However, giving users the opportunity to shape the product may steer it in a direction that makes them feel safer than if they do not provide feedback. We should not attempt to convince users they are wrong if they are distrustful of AI. We should appreciate that they are willing to provide feedback, creating an experience that is informed by the human experts who have long been doing the task being automated. Conclusion: Building Our Digital Future On A Foundation Of Trust The rise of AI is not the first major technological shift our field has faced. However, it presents one of the most significant psychological challenges of our current time. Building products that are not just usable but also responsible, humane, and trustworthy is our obligation as UX professionals. Trust is not a soft metric. It is the fundamental currency of any successful human-technology relationship. By understanding its psychological roots, measuring it with rigor, and designing for it with intent and integrity, we can move from creating “intelligent” products to building a future where users can place their confidence in the tools they use every day. A trust that is earned and deserved. Table 1: Published Academic Scales Measuring Trust In Automated Systems Survey Tool Name Focus Key Dimensions of Trust Citation Trust in Automation Scale 12-item questionnaire to assess trust between people and automated systems. Measures a general level of trust, including reliability, predictability, and confidence. Jian, J. Y., Bisantz, A. M., & Drury, C. G. (2000). Foundations for an empirically determined scale of trust in automated systems. International Journal of Cognitive Ergonomics, 4(1), 53–71. Trust of Automated Systems Test (TOAST) 9-items used to measure user trust in a variety of automated systems, designed for quick administration. Divided into two main subscales: Understanding (user’s comprehension of the system) and Performance (belief in the system’s effectiveness). Wojton, H. M., Porter, D., Lane, S. T., Bieber, C., & Madhavan, P. (2020). Initial validation of the trust of automated systems test (TOAST). (PDF) The Journal of Social Psychology, 160(6), 735–750. Trust in Automation Questionnaire A 19-item questionnaire capable of predicting user reliance on automated systems. A 2-item subscale is available for quick assessments; the full tool is recommended for a more thorough analysis. Measures 6 factors: Reliability, Understandability, Propensity to trust, Intentions of developers, Familiarity, Trust in automation Körber, M. (2018). Theoretical considerations and development of a questionnaire to measure trust in automation. In Proceedings 20th Triennial Congress of the IEA. Springer. Human Computer Trust Scale 12-item questionnaire created to provide an empirically sound tool for assessing user trust in technology. Divided into two key factors: Benevolence and Competence: This dimension captures the positive attributes of the technology Perceived Risk: This factor measures the user’s subjective assessment of the potential for negative consequences when using a technical artifact. Siddharth Gulati, Sonia Sousa & David Lamas (2019): Design, development and evaluation of a human-computer trust scale, (PDF) Behaviour & Information Technology Appendix A: Trust-Building Tactics Checklist To design for calibrated trust, consider implementing the following tactics, organized by the four pillars of trust: 1. Ability (Competence) & Predictability ✅ Set Clear Expectations: Use onboarding, tooltips, and empty states to honestly communicate the AI’s strengths and weaknesses. ✅ Show Confidence Levels: Display the AI’s uncertainty (e.g., “70% chance,” “85% confident”) or highlight less certain parts of its output. ✅ Provide Explainability (XAI): Offer useful, human-understandable rationales for the AI’s decisions or recommendations (e.g., “Because you frequently read X, I’m recommending Y”). ✅ Design for Graceful Error Handling: ✅ Acknowledge errors humbly (e.g., “My apologies, I misunderstood that request.”). ✅ Provide easy paths to correction (e. ] g., prominent feedback mechanisms like thumbs up/down). ✅ Show that feedback is being used (e.g., “Thank you, I’m learning from your correction”). ✅ Design for “I Don’t Know” Responses: ✅ Acknowledge limitations honestly. ✅ Prioritize a high-quality, helpful fallback experience when the AI cannot answer. ✅ Prioritize Transparency: Clearly communicate the AI’s capabilities and limitations, especially if responses are generated. 2. Benevolence ✅ Address Existential Fears: When users express concerns (e.g., job displacement), validate their concerns and reframe the feedback into actionable insights about collaborative tools. ✅ Prioritize User Well-being: Advocate for design and strategy shifts that prioritize user well-being, even if it challenges the product roadmap. ✅ Emphasize User Control: Provide clear ways for users to give feedback, correct errors, or opt out of AI features. 3. Integrity ✅ Adhere to Ethical Principles: Ensure the AI operates on predictable, ethical principles, demonstrating fairness and honesty. ✅ Prioritize Genuine Transparency: Clearly communicate the limitations, biases, and uncertainties of AI systems; avoid overstating capabilities or obscuring risks. ✅ Conduct Rigorous, Independent Evaluations: Seek external validation of system performance, fairness, and robustness to mitigate bias. ✅ Engage Diverse Stakeholders: Involve users, ethics experts, and impacted communities in the design and evaluation processes. ✅ Be Accountable for Outcomes: Establish clear mechanisms for redress and continuous improvement for societal impacts, even if unintended. ✅ Educate the Public: Help users understand how AI works, its limitations, and how to evaluate AI products. ✅ Advocate for Ethical Guidelines: Support the development and implementation of industry standards and policies that promote responsible AI. ✅ Be Wary of Marketing Hype: Critically assess claims about AI “trustworthiness” and demand verifiable data. ✅ Publish Negative Findings: Be transparent about challenges, failures, or ethical dilemmas encountered during research. 4. Predictability & Reliability ✅ Set Clear Expectations: Use onboarding, tooltips, and empty states to honestly communicate what the AI is good at and where it might struggle. ✅ Show Confidence Levels: Instead of just giving an answer, have the AI signal its own uncertainty. ✅ Provide Explainability (XAI) and Transparency: Offer a useful, human-understandable rationale for AI decisions. ✅ Design for Graceful Error Handling: Acknowledge errors humbly and provide easy paths to correction. ✅ Prioritize the “I Don’t Know” Experience: Frame “I don’t know” as a feature and design a high-quality fallback experience. ✅ Prioritize Transparency (UX Writing): Clearly communicate the AI’s capabilities and limitations, especially when it’s still learning or if responses are generated. ✅ Design for Explainability (UX Writing): Explain the reasoning behind AI recommendations, decisions, or complex outputs.
How To Minimize The Environmental Impact Of Your Website
As responsible digital professionals, we are becoming increasingly aware of the environmental impact of our work and need to find effective and pragmatic ways to reduce it. James Chudley shares a new decarbonising approach that will help you to minimise the environmental impact of your website, benefiting people, profit, purpose, performance, and the planet.
Climate change is the single biggest health threat to humanity, accelerated by human activities such as the burning of fossil fuels, which generate greenhouse gases that trap the sun’s heat. The average temperature of the earth’s surface is now 1.2°C warmer than it was in the late 1800’s, and projected to more than double by the end of the century. The consequences of climate change include intense droughts, water shortages, severe fires, melting polar ice, catastrophic storms, and declining biodiversity. The Internet Is A Significant Part Of The Problem Shockingly, the internet is responsible for higher global greenhouse emissions than the aviation industry, and is projected to be responsible for 14% of all global greenhouse gas emissions by 2040. If the internet were a country, it would be the 4th largest polluter in the world and represents the largest coal-powered machine on the planet. But how can something digital like the internet produce harmful emissions? Internet emissions come from powering the infrastructure that drives the internet, such as the vast data centres and data transmission networks that consume huge amounts of electricity. Internet emissions also come from the global manufacturing, distribution, and usage of the estimated 30.5 billion devices (phones, laptops, etc.) that we use to access the internet. Unsurprisingly, internet related emissions are increasing, given that 60% of the world’s population spend, on average, 40% of their waking hours online. We Must Urgently Reduce The Environmental Impact Of The Internet As responsible digital professionals, we must act quickly to minimise the environmental impact of our work. It is encouraging to see the UK government encourage action by adding “Minimise environmental impact” to their best practice design principles, but there is still too much talking and not enough corrective action taking place within our industry. The reality of many tightly constrained, fast-paced, and commercially driven web projects is that minimising environmental impact is far from the agenda. So how can we make the environment more of a priority and talk about it in ways that stakeholders will listen to? A eureka moment on a recent web optimisation project gave me an idea. My Eureka Moment I led a project to optimise the mobile performance of www.talktofrank.com, a government drug advice website that aims to keep everyone safe from harm. Mobile performance is critically important for the success of this service to ensure that users with older mobile devices and those using slower network connections can still access the information they need. Our work to minimise page weights focused on purely technical changes that our developer made following recommendations from tools such as Google Lighthouse that reduced the size of the webpages of a key user journey by up to 80%. This resulted in pages downloading up to 30% faster and the carbon footprint of the journey being reduced by 80%. We hadn’t set out to reduce the carbon footprint, but seeing these results led to my eureka moment. I realised that by minimising page weights, you improve performance (which is a win for users and service owners) and also consume less energy (due to needing to transfer and store less data), creating additional benefits for the planet — so everyone wins. This felt like a breakthrough because business, user, and environmental requirements are often at odds with one another. By focussing on minimising websites to be as simple, lightweight and easy to use as possible you get benefits that extend beyond the triple bottom line of people, planet and profit to include performance and purpose. So why is ‘minimising’ such a great digital sustainability strategy? Profit Website providers win because their website becomes more efficient and more likely to meet its intended outcomes, and a lighter site should also lead to lower hosting bills. People People win because they get to use a website that downloads faster, is quick and easy to use because it's been intentionally designed to be as simple as possible, enabling them to complete their tasks with the minimum amount of effort and mental energy. Performance Lightweight webpages download faster so perform better for users, particularly those on older devices and on slower network connections. Planet The planet wins because the amount of energy (and associated emissions) that is required to deliver the website is reduced. Purpose We know that we do our best work when we feel a sense of purpose. It is hugely gratifying as a digital professional to know that our work is doing good in the world and contributing to making things better for people and the environment. In order to prioritise the environment, we need to be able to speak confidently in a language that will resonate with the business and ensure that any investment in time and resources yields the widest range of benefits possible. So even if you feel that the environment is a very low priority on your projects, focusing on minimising page weights to improve performance (which is generally high on the agenda) presents the perfect trojan horse for an environmental agenda (should you need one). Doing the right thing isn’t always easy, but we’ve done it before when managing to prioritise issues such as usability, accessibility, and inclusion on digital projects. Many of the things that make websites easier to use, more accessible, and more effective also help to minimise their environmental impact, so the things you need to do will feel familiar and achievable, so don’t worry about it all being another new thing to learn about! So this all makes sense in theory, but what’s the master plan to use when putting it into practice? The Masterplan The masterplan for creating websites that have minimal environmental impact is to focus on offering the maximum value from the minimum input of energy. It’s an adaptation of Buckminister Fuller’s ‘Dymaxion’ principle, which is one of his many progressive and groundbreaking sustainability strategies for living and surviving on a planet with finite resources. Inputs of energy include both the electrical energy that is required to operate websites and also the mental energy that is required to use them. You can achieve this by minimising websites to their core content, features, and functionality, ensuring that everything can be justified from the perspective of meeting a business or user need. This means that anything that isn’t adding a proportional amount of value to the amount of energy it requires to provide it should be removed. So that’s the masterplan, but how do you put it into practice? Decarbonise Your Highest Value User Journeys I’ve developed a new approach called ‘Decarbonising User Journeys’ that will help you to minimise the environmental impact of your website and maximise its performance. Note: The approach deliberately focuses on optimising key user journeys and not entire websites to keep things manageable and to make it easier to get started. The secret here is to start small, demonstrate improvements, and then scale. The approach consists of five simple steps: Identify your highest value user journey, Benchmark your user journey, Set targets, Decarbonise your user journey, Track and share your progress. Here’s how it works. Step 1: Identify Your Highest Value User Journey Your highest value user journey might be the one that your users value the most, the one that brings you the highest revenue, or the one that is fundamental to the success of your organisation. You could also focus on a user journey that you know is performing particularly badly and has the potential to deliver significant business and user benefits if improved. You may have lots of important user journeys, and it’s fine to decarbonise multiple journeys in parallel if you have the resources, but I’d recommend starting with one first to keep things simple. To bring this to life, let’s consider a hypothetical example of a premiership football club trying to decarbonise its online ticket-buying journey that receives high levels of traffic and is responsible for a significant proportion of its weekly income. Step 2: Benchmark Your User Journey Once you’ve selected your user journey, you need to benchmark it in terms of how well it meets user needs, the value it offers your organisation, and its carbon footprint. It is vital that you understand the job it needs to do and how well it is doing it before you start to decarbonise it. There is no point in removing elements of the journey in an effort to reduce its carbon footprint, for example, if you compromise its ability to meet a key user or business need. You can benchmark how well your user journey is meeting user needs by conducting user research alongside analysing existing customer feedback. Interviews with business stakeholders will help you to understand the value that your journey is providing the organisation and how well business needs are being met. You can benchmark the carbon footprint and performance of your user journey using online tools such as Cardamon, Ecograder, Website Carbon Calculator, Google Lighthouse, and Bioscore. Make sure you have your analytics data to hand to help get the most accurate estimate of your footprint. To use these tools, simply add the URL of each page of your journey, and they will give you a range of information such as page weight, energy rating, and carbon emissions. Google Lighthouse works slightly differently via a browser plugin and generates a really useful and detailed performance report as opposed to giving you a carbon rating. A great way to bring your benchmarking scores to life is to visualise them in a similar way to how you would present a customer journey map or service blueprint. This example focuses on just communicating the carbon footprint of the user journey, but you can also add more swimlanes to communicate how well the journey is performing from a user and business perspective, too, adding user pain points, quotes, and business metrics where appropriate. I’ve found that adding the energy efficiency ratings is really effective because it’s an approach that people recognise from their household appliances. This adds a useful context to just showing the weights (such as grams or kilograms) of CO2, which are generally meaningless to people. Within my benchmarking reports, I also add a set of benchmarking data for every page within the user journey. This gives your stakeholders a more detailed breakdown and a simple summary alongside a snapshot of the benchmarked page. Your benchmarking activities will give you a really clear picture of where remedial work is required from an environmental, user, and business point of view. In our football user journey example, it’s clear that the ‘News’ and ‘Tickets’ pages need some attention to reduce their carbon footprint, so they would be a sensible priority for decarbonising. Step 3: Set Targets Use your benchmarking results to help you set targets to aim for, such as a carbon budget, energy efficiency, maximum page weight, and minimum Google Lighthouse performance targets for each individual page, in addition to your existing UX metrics and business KPIs. There is no right or wrong way to set targets. Choose what you think feels achievable and viable for your business, and you’ll only learn how reasonable and achievable they are when you begin to decarbonise your user journeys. Setting targets is important because it gives you something to aim for and keeps you focused and accountable. The quantitative nature of this work is great because it gives you the ability to quickly demonstrate the positive impact of your work, making it easier to justify the time and resources you are dedicating to it. Step 4: Decarbonise Your User Journey Your objective now is to decarbonise your user journey by minimising page weights, improving your Lighthouse performance rating, and minimising pages so that they meet both user and business needs in the most efficient, simple, and effective way possible. It’s up to you how you approach this depending on the resources and skills that you have, you can focus on specific pages or addressing a specific problem area such as heavyweight images or videos across the entire user journey. Here’s a list of activities that will all help to reduce the carbon footprint of your user journey: Work through the recommendations in the ‘diagnostics’ section of your Google Lighthouse report to help optimise page performance. Switch to a green hosting provider if you are not already using one. Use the Green Web Directory to help you choose one. Work through the W3C Web Sustainability Guidelines, implementing the most relevant guidelines to your specific user journey. Remove anything that is not adding any user or business value. Reduce the amount of information on your webpages to make them easier to read and less overwhelming for people. Replace content with a lighter-weight alternative (such as swapping a video for text) if the lighter-weight alternative provides the same value. Optimise assets such as photos, videos, and code to reduce file sizes. Remove any barriers to accessing your website and any distractions that are getting in the way. Re-use familiar components and design patterns to make your websites quicker and easier to use. Write simply and clearly in plain English to help people get the most value from your website and to help them avoid making mistakes that waste time and energy to resolve. Fix any usability issues you identified during your benchmarking to ensure that your website is as easy to use and useful as possible. Ensure your user journey is as accessible as possible so the widest possible audience can benefit from using it, offsetting the environmental cost of providing the website. Step 5: Track And Share Your Progress As you decarbonise your user journeys, use the benchmarking tools from step 2 to track your progress against the targets you set in step 3 and share your progress as part of your wider sustainability reporting initiatives. All being well at this point, you will have the numbers to demonstrate how the performance of your user journey has improved and also how you have managed to reduce its carbon footprint. Share these results with the business as soon as you have them to help you secure the resources to continue the work and initiate similar work on other high-value user journeys. You should also start to communicate your progress with your users. It’s important that they are made aware of the carbon footprint of their digital activity and empowered to make informed choices about the environmental impact of the websites that they use. Ideally, every website should communicate the emissions generated from viewing their pages to help people make these informed choices and also to encourage website providers to minimise their emissions if they are being displayed publicly. Often, people will have no choice but to use a specific website to complete a specific task, so it is the responsibility of the website provider to ensure the environmental impact of using their website is as small as possible. You can also help to raise awareness of the environmental impact of websites and what you are doing to minimise your own impact by publishing a digital sustainability statement, such as Unilever’s, as shown below. A good digital sustainability statement should acknowledge the environmental impact of your website, what you have done to reduce it, and what you plan to do next to minimise it further. As an industry, we should normalise publishing digital sustainability statements in the same way that accessibility statements have become a standard addition to website footers. Useful Decarbonising Principles Keep these principles in mind to help you decarbonise your user journeys: More doing and less talking. Start decarbonising your user journeys as soon as possible to accelerate your learning and positive change. Start small. Starting small by decarbonising an individual journey makes it easier to get started and generates results to demonstrate value faster. Aim to do more with less. Minimise what you offer to ensure you are providing the maximum amount of value for the energy you are consuming. Make your website as useful and as easy to use as possible. Useful websites can justify the energy they consume to provide them, ensuring they are net positive in terms of doing more good than harm. Focus on progress over perfection. Websites are never finished or perfect but they can always be improved, every small improvement you make will make a difference. Start Decarbonising Your User Journeys Today Decarbonising user journeys shouldn’t be done as a one-off, reserved for the next time that you decide to redesign or replatform your website; it should happen on a continual basis as part of your broader digital sustainability strategy. We know that websites are never finished and that the best websites continually improve as both user and business needs change. I’d like to encourage people to adopt the same mindset when it comes to minimising the environmental impact of their websites. Decarbonising will happen most effectively when digital professionals challenge themselves on a daily basis to ‘minimise’ the things they are working on. This avoids building ‘carbon debt’ that consists of compounding technical and design debt within our websites, which is always harder to retrospectively remove than avoid in the first place. By taking a pragmatic approach, such as optimising high-value user journeys and aligning with business metrics such as performance, we stand the best possible chance of making digital sustainability a priority. You’ll have noticed that, other than using website carbon calculator tools, this approach doesn’t require any skills that don’t already exist within typical digital teams today. This is great because it means you’ve already got the skills that you need to do this important work. I would encourage everyone to raise the issue of the environmental impact of the internet in their next team meeting and to try this decarbonising approach to create better outcomes for people, profit, performance, purpose, and the planet. Good luck!
SerpApi: A Complete API For Fetching Search Engine Data
From competitive SEO research and monitoring prices to training AI and parsing local geographic data, real-time search results power smarter apps. Tools like SerpApi make it easy to pull, customize, and integrate this data directly into your app or website.
This article is a sponsored by SerpApi SerpApi leverages the power of search engine giants, like Google, DuckDuckGo, Baidu, and more, to put together the most pertinent and accurate search result data for your users from the comfort of your app or website. It’s customizable, adaptable, and offers an easy integration into any project. What do you want to put together? Search information on a brand or business for SEO purposes; Input data to train AI models, such as the Large Language Model, for a customer service chatbot; Top news and websites to pick from for a subscriber newsletter; Google Flights API: collect flight information for your travel app; Price comparisons for the same product across different platforms; Extra definitions and examples for words that can be offered along a language learning app. The list goes on. In other words, you get to leverage the most comprehensive source of data on the internet for any number of needs, from competitive SEO research and tracking news to parsing local geographic data and even completing personal background checks for employment. Start With A Simple GET Request The results from the search API are only a URL request away for those who want a super quick start. Just add your search details in the URL parameters. Say you need the search result for “Stone Henge” from the location “Westminster, England, United Kingdom” in language “en-GB”, and country of search origin “uk” from the domain “google.co.uk”. Here’s how simple it is to put the GET request together: https://serpapi.com/search.json?q=Stone+Henge&location=Westminster,+England,+United+Kingdom&hl=en-GB&gl=uk&google_domain=google.co.uk&api_key=your_api_key Then there’s the impressive list of libraries that seamlessly integrate the APIs into mainstream programming languages and frameworks such as JavaScript, Ruby, .NET, and more. Give It A Quick Try Want to give it a spin? Sign up and start for free, or tinker with the SerpApi’s live playground without signing up. The playground allows you to choose which search engine to target, and you can fill in the values for all the basic parameters available in the chosen API to customize your search. On clicking “Search”, you get the search result page and its extracted JSON data. If you need to get a feel for the full API first, you can explore their easy-to-grasp web documentation before making any decision. You have the chance to work with all of the APIs to your satisfaction before committing to it, and when that time comes, SerpApi’s multiple price plans tackle anywhere between an economic few hundred searches a month and bulk queries fit for large corporations. What Data Do You Need? Beyond the rudimentary search scraping, SerpApi provides a range of configurations, features, and additional APIs worth considering. Geolocation Capture the global trends, or refine down to more localized particulars by names of locations or Google’s place identifiers. SerpApi’s optimized routing of requests ensures accurate retrieval of search result data from any location worldwide. If locations themselves are the answers to your queries — say, a cycle trail to be suggested in a fitness app — those can be extracted and presented as maps using SerpApi’s Google Maps API. Structured JSON Although search engines reveal results in a tidy user interface, deriving data into your application could cause you to end up with a large data dump to be sifted through — but not if you’re using SerpApi. SerpApi pulls data in a well-structured JSON format, even for the popular kinds of enriched search results, such as knowledge graphs, review snippets, sports league stats, ratings, product listings, AI overview, and more. Speedy Results SerpApi’s baseline performance can take care of timely search data for real-time requirements. But what if you need more? SerpApi’s Ludicrous Speed option, easily enabled from the dashboard with an upgrade, provides a super-fast response time. More than twice as fast as usual, thanks to twice the server power. There’s also Ludicrous Speed Max, which allocates four times more server resources for your data retrieval. Data that is time-sensitive and for monitoring things in real-time, such as sports scores and tracking product prices, will lose its value if it is not handled in a timely manner. Ludicrous Speed Max guarantees no delays, even for a large-scale enterprise haul. You can also use a relevant SerpApi API to hone in on your relevant category, like Google Flights API, Amazon API, Google News API, etc., to get fresh and apt results. If you don’t need the full depth of the search API, there’s a Light version available for Google Search, Google Images, Google Videos, Google News, and DuckDuckGo Search APIs. Search Controls & Privacy Need the results asynchronously picked up? Want a refined output using advanced search API parameters and a JSON Restrictor? Looking for search outcomes for specific devices? Don’t want auto-corrected query results? There’s no shortage of ways to configure SerpApi to get exactly what you need. Additionally, if you prefer not to have your search metadata on their servers, simply turn on the “ZeroTrace” mode that’s available for selected plans. The X-Ray Save yourself a headache, literally, trying to play match between what you see on a search result page and its extracted data in JSON. SerpApi’s X-Ray tool shows you where what comes from. It’s available and free in all plans. Inclusive Support If you don’t have the expertise or resources for tackling the validity of scraping search results, here’s what SerpApi says: “SerpApi, LLC assumes scraping and parsing liabilities for both domestic and foreign companies unless your usage is otherwise illegal”. You can reach out and have a conversation with them regarding the legal protections they offer, as well as inquire about anything else you might want to know about, including SerpApi in your project, such as pricing, performance expected, on-demand options, and technical support. Just drop a message at their contact page. In other words, the SerpApi team has your back with the support and expertise to get the most from your fetched data. Try SerpApi Free That’s right, you can get your hands on SerpApi today and start fetching data with absolutely no commitment, thanks to a free starter plan that gives you up to 250 free search queries. Give it a try and then bump up to one of the reasonably-priced monthly subscription plans with generous search limits. Try SerpApi
Functional Personas With AI: A Lean, Practical Workflow
For too long, personas have been created with considerable effort, only to offer limited value. Paul Boag shows how to breathe new life into this stale UX asset and demonstrates that it’s possible to create truly useful functional personas in a lightweight way.
Traditional personas suck for UX work. They obsess over marketing metrics like age, income, and job titles while missing what actually matters in design: what people are trying to accomplish. Functional personas, on the other hand, focus on what people are trying to do, not who they are on paper. With a simple AI‑assisted workflow, you can build and maintain personas that actually guide design, content, and conversion decisions. Keep users front of mind with task‑driven personas, Skip fragile demographics; center on goals, questions, and blockers, Use AI to process your messy inputs fast and fill research gaps, Validate lightly, ship confidently, and keep them updated. In this article, I want to breathe new life into a stale UX asset. For too long, personas have been something that many of us just created, despite the considerable work that goes into them, only to find they have limited usefulness. I know that many of you may have given up on them entirely, but I am hoping in this post to encourage you that it is possible to create truly useful personas in a lightweight way. Why Personas Still Matter Personas give you a shared lens. When everyone uses the same reference point, you cut debate and make better calls. For UX designers, developers, and digital teams, that shared lens keeps you from designing in silos and helps you prioritize work that genuinely improves the experience. I use personas as a quick test: Would this change help this user complete their task faster, with fewer doubts? If the answer is no (or a shrug), it’s probably a sign the idea isn’t worth pursuing. From Demographics To Function Traditional personas tell you someone’s age, job title, or favorite brand. That makes a nice poster, but it rarely changes design or copy. Functional personas flip the script. They describe: Goals & tasks: What the person is here to achieve. Questions & objections: What they need to know before they act. Touchpoints: How the person interacts with the organization. Service gaps: How the company might be letting this persona down. When you center on tasks and friction, you get direct lines from user needs to UI decisions, content, and conversion paths. But remember, this list isn’t set in stone — adapt it to what’s actually useful in your specific situation. One of the biggest problems with traditional personas was following a rigid template regardless of whether it made sense for your project. We must not fall into that same mistake with functional personas. The Benefits of Functional Personas For small startups, functional personas reduce wasted effort. For enterprise teams, they keep sprawling projects grounded in what matters most. However, because of the way we are going to produce our personas, they provide certain benefits in either case: Lighten the load: They’re easier to update without large research cycles. Stay current: Because they are easy to produce, we can update them more often. Tie to outcomes: Tasks, objections, and proof points map straight to funnels, flows, and product decisions. We can deliver these benefits because we are going to use AI to help us, rather than carrying out a lot of time-consuming new research. How AI Helps Us Get There Of course, doing fresh research is always preferable. But in many cases, it is not feasible due to time or budget constraints. I would argue that using AI to help us create personas based on existing assets is preferable to having no focus on user attention at all. AI tools can chew through the inputs you already have (surveys, analytics, chat logs, reviews) and surface patterns you can act on. They also help you scan public conversations around your product category to fill gaps. I therefore recommend using AI to: Synthesize inputs: Turn scattered notes into clean themes. Spot segments by need: Group people by jobs‑to‑be‑done, not demographics. Draft quickly: Produce first‑pass personas and sample journeys in minutes. Iterate with stakeholders: Update on the fly as you get feedback. AI doesn’t remove the need for traditional research. Rather, it is a way of extracting more value from the scattered insights into users that already exist within an organization or online. The Workflow Here’s how to move from scattered inputs to usable personas. Each step builds on the last, so treat it as a cycle you can repeat as projects evolve. 1. Set Up A Dedicated Workspace Create a dedicated space within your AI tool for this work. Most AI platforms offer project management features that let you organize files and conversations: In ChatGPT and Claude, use “Projects” to store context and instructions. In Perplexity, Gemini and CoPilot similar functionality is referred to as “Spaces.” This project space becomes your central repository where all uploaded documents, research data, and generated personas live together. The AI will maintain context between sessions, so you won’t have to re-upload materials each time you iterate. This structured approach makes your workflow more efficient and helps the AI deliver more consistent results. 2. Write Clear Instructions Next, you can brief your AI project so that it understands what it wants from you. For example: “Act as a user researcher. Create realistic, functional personas using the project files and public research. Segment by needs, tasks, questions, pain points, and goals. Show your reasoning.” Asking for a rationale gives you a paper trail you can defend to stakeholders. 3. Upload What You’ve Got (Even If It’s Messy) This is where things get really powerful. Upload everything (and I mean everything) you can put your hands on relating to the user. Old surveys, past personas, analytics screenshots, FAQs, support tickets, review snippets; dump them all in. The more varied the sources, the stronger the triangulation. 4. Run Focused External Research Once you have done that, you can supplement that data by getting AI to carry out “deep research” about your brand. Have AI scan recent (I often focus on the last year) public conversations for your brand, product space, or competitors. Look for: Who’s talking and what they’re trying to do; Common questions and blockers; Phrases people use (great for copywriting). Save the report you get back into your project. 5. Propose Segments By Need Once you have done that, ask AI to suggest segments based on tasks and friction points (not demographics). Push back until each segment is distinct, observable, and actionable. If two would behave the same way in your flow, merge them. This takes a little bit of trial and error and is where your experience really comes into play. 6. Generate Draft Personas Now you have your segments, the next step is to draft your personas. Use a simple template so the document is read and used. If your personas become too complicated, people will not read them. Each persona should: State goals and tasks, List objections and blockers, Highlight pain points, Show touchpoints, Identify service gaps. Below is a sample template you can work with: # Persona Title: e.g. Savvy Shopper - Person's Name: e.g. John Smith. - Age: e.g. 24 - Job: e.g. Social Media Manager "A quote that sums up the persona's general attitude" ## Primary Goal What they’re here to achieve (1–2 lines). ## Key Tasks • Task 1 • Task 2 • Task 3 ## Questions & Objections • What do they need to know before they act? • What might make them hesitate? ## Pain Points • Where do they get stuck? • What feels risky, slow, or confusing? ## Touchpoints • What channels are they most commonly interacting with? ## Service Gaps • How is the organization currently failing this persona? Remember, you should customize this to reflect what will prove useful within your organization. 7. Validate It is important to validate that what the AI has produced is realistic. Obviously, no persona is a true representation as it is a snapshot in time of a Hypothetical user. However, we do want it to be as accurate as possible. Share your drafts with colleagues who interact regularly with real users — people in support cells or research teams. Where possible, test with a handful of users. Then cut anything that you can’t defend or correct any errors that are identified. Troubleshooting & Guardrails As you work through the above process, you will encounter problems. Here are common pitfalls and how to avoid them: Too many personas? Merge until each one changes a design or copy decision. Three strong personas beat seven weak ones. Stakeholder wants demographics? Only include details that affect behavior. Otherwise, leave them out. Suggest separate personas for other functions (such as marketing). AI hallucinations? Always ask for a rationale or sources. Cross‑check with your own data and customer‑facing teams. Not enough data? Mark assumptions clearly, then validate with quick interviews, surveys, or usability tests. Making Personas Useful In Practice The most important thing to remember is to actually use your personas once they’ve been created. They can easily become forgotten PDFs rather than active tools. Instead, personas should shape your work and be referenced regularly. Here are some ways you can put personas to work: Navigation & IA: Structure menus by top tasks. Content & Proof: Map objections to FAQs, case studies, and microcopy. Flows & UI: Streamline steps to match how people think. Conversion: Match CTAs to personas’ readiness, goals, and pain points. Measurement: Track KPIs that map to personas, not vanity metrics. With this approach, personas evolve from static deliverables into dynamic reference points your whole team can rely on. Keep Them Alive Treat personas as a living toolkit. Schedule a refresh every quarter or after major product changes. Rerun the research pass, regenerate summaries, and archive outdated assumptions. The goal isn’t perfection; it’s keeping them relevant enough to guide decisions. Bottom Line Functional personas are faster to build, easier to maintain, and better aligned with real user behavior. By combining AI’s speed with human judgment, you can create personas that don’t just sit in a slide deck; they actively shape better products, clearer interfaces, and smoother experiences.
Creating Elastic And Bounce Effects With Expressive Animator
Elastic and bounce effects have long been among the most desirable but time-consuming techniques in motion design. Expressive Animator streamlines the process, making it possible to produce lively animations in seconds, bypassing the tedious work of manual keyframe editing.
This article is a sponsored by Expressive In the world of modern web design, SVG images are used everywhere, from illustrations to icons to background effects, and are universally prized for their crispness and lightweight size. While static SVG images play an important role in web design, most of the time their true potential is unlocked only when they are combined with motion. Few things add more life and personality to a website than a well-executed SVG animation. But not all animations have the same impact in terms of digital experience. For example, elastic and bounce effects have a unique appeal in motion design because they bring a sense of realism into movement, making animations more engaging and memorable. (Large preview) However, anyone who has dived into animating SVGs knows the technical hurdles involved. Creating a convincing elastic or bounce effect traditionally requires handling complex CSS keyframes or wrestling with JavaScript animation libraries. Even when using an SVG animation editor, it will most likely require you to manually add the keyframes and adjust the easing functions between them, which can become a time-consuming process of trial and error, no matter the level of experience you have. This is where Expressive Animator shines. It allows creators to apply elastic and bounce effects in seconds, bypassing the tedious work of manual keyframe editing. And the result is always exceptional: animations that feel alive, produced with a fraction of the effort. Using Expressive Animator To Create An Elastic Effect Creating an elastic effect in Expressive Animator is remarkably simple, fast, and intuitive, since the effect is built right into the software as an easing function. This means you only need two keyframes (start and end) to make the effect, and the software will automatically handle the springy motion in between. Even better, the elastic easing can be applied to any animatable property (e.g., position, scale, rotation, opacity, morph, etc.), giving you a consistent way to add it to your animations. Before we dive into the tutorial, take a look at the video below to see what you will learn to create and the entire process from start to finish. Once you hit the “Create project” button, you can use the Pen and Ellipse tools to create the artwork that will be animated, or you can simply copy and paste the artwork below. Press the A key on your keyboard to switch to the Node tool, then select the String object and move its handle to the center-right point of the artboard. Don’t worry about precision, as the snapping will do all the heavy lifting for you. This will bend the shape and add keyframes for the Morph animator. Next, press the V key on your keyboard to switch to the Selection tool. With this tool enabled, select the Ball, move it to the right, and place it in the middle of the string. Once again, snapping will do all the hard work, allowing you to position the ball exactly where you want to, while auto-recording automatically adds the appropriate keyframes. You can now replay the animation and disable auto-recording by clicking on the Auto-Record button again. As you can see when replaying, the direction in which the String and Ball objects are moving is wrong. Fortunately, we can fix this extremely easily just by reversing the keyframes. To do this, select the keyframes in the timeline and right-click to open the context menu and choose Reverse. This will reverse the keyframes, and if you replay the animation, you will see that the direction is now correct. With this out of the way, we can finally add the elastic effect. Select all the keyframes in the timeline and click on the Custom easing button to open a dialog with easing options. From the dialog, choose Elastic and set the oscillations to 4 and the stiffness to 2.5. That’s it! Click anywhere outside the easing dialog to close it and replay the animation to see the result. The animation can be exported as well. Press Cmd/Ctrl + E on your keyboard to open the export dialog and choose from various export options, ranging from vectorized formats, such as SVG and Lottie, to rasterized formats, such as GIF and video. For this specific animation, we’re going to choose the SVG export format. Expressive Animator allows you to choose between three different types of SVG, depending on the technology used for animation: SMIL, CSS, or JavaScript. Each of these technologies has different strengths and weaknesses, but for this tutorial, we are going to choose SMIL. This is because SMIL-based animations are widely supported, even on Safari browsers, and can be used as background images or embedded in HTML pages using the <img> tag. In fact, Andy Clarke recently wrote all about SMIL animations here at Smashing Magazine if you want a full explanation of how it works. You can visualize the exported SVG in the following CodePen demo: Conclusion Elastic and bounce effects have long been among the most desirable but time-consuming techniques in motion design. By integrating them directly into its easing functions, Expressive Animator removes the complexity of manual keyframe manipulation and transforms what used to be a technical challenge into a creative opportunity. The best part is that getting started with Expressive Animator comes with zero risk. The software offers a full 7–day free trial without requiring an account, so you can download it instantly and begin experimenting with your own designs right away. After the trial ends, you can buy Expressive Animator with a one-time payment, no subscription required. This will give you a perpetual license covering both Windows and macOS. To help you get started even faster, I’ve prepared some extra resources for you. You’ll find the source files for the animations created in this tutorial, along with a curated list of useful links that will guide you further in exploring Expressive Animator and SVG animation. These materials are meant to give you a solid starting point so you can learn, experiment, and build on your own with confidence. Grumpy Egg: The .eaf source file for the sample animation presented at the beginning of this article. Elastic Effect: Another .eaf file, this time for the animation we made in this tutorial. Get started with Expressive Animator Expressive Animator Documentation
From Data To Decisions: UX Strategies For Real-Time Dashboards
Real-time dashboards are decision assistants, not passive displays. In environments like fleet management, healthcare, and operations, the cost of a delay or misstep is high. Karan Rawal explores strategic UX patterns that shorten time-to-decision, reduce cognitive overload, and make live systems trustworthy.
I once worked with a fleet operations team that monitored dozens of vehicles in multiple cities. Their dashboard showed fuel consumption, live GPS locations, and real-time driver updates. Yet the team struggled to see what needed urgent attention. The problem was not a lack of data but a lack of clear indicators to support decision-making. There were no priorities, alerts, or context to highlight what mattered most at any moment. Real-time dashboards are now critical decision-making tools in industries like logistics, manufacturing, finance, and healthcare. However, many of them fail to help users make timely and confident decisions, even when they show live data. Designing for real-time use is very different from designing static dashboards. The challenge is not only presenting metrics but enabling decisions under pressure. Real-time users face limited time and a high cognitive load. They need clarity on actions, not just access to raw data. This requires interface elements that support quick scanning, pattern recognition, and guided attention. Layout hierarchy, alert colors, grouping, and motion cues all help, but they must be driven by a deeper strategy: understanding what the user must decide in that moment. This article explores practical UX strategies for real-time dashboards that enable real decisions. Instead of focusing only on visual best practices, it looks at how user intent, personalization, and cognitive flow can turn raw data into meaningful, timely insights. Designing for Real-Time Comprehension: Helping Users Stay Focused Under Pressure A GPS app not only shows users their location but also helps them decide where to go next. In the same way, a real-time dashboard should go beyond displaying the latest data. Its purpose is to help users quickly understand complex information and make informed decisions, especially in fast-paced environments with short attention spans. How Users Process Real-Time Updates Humans have limited cognitive capacity, so they can only process a small amount of data at once. Without proper context or visual cues, rapidly updating dashboards can overwhelm users and shift attention away from key information. To address this, I use the following approaches: Delta Indicators and Trend Sparklines Delta indicators show value changes at a glance, while sparklines are small line charts that reveal trends over time in a compact space. For example, a sales dashboard might show a green upward arrow next to revenue to indicate growth, along with a sparkline displaying sales trends over the past week. Subtle Micro-Animations Small animations highlight changes without distracting users. Research in cognitive psychology shows that such animations effectively draw attention, helping users notice updates while staying focused. For instance, a soft pulse around a changing metric can signal activity without overwhelming the viewer. Mini-History Views Showing a short history of recent changes reduces reliance on memory. For example, a dashboard might let users scroll back a few minutes to review updates, supporting better understanding and verification of data trends. Common Challenges In Real-Time Dashboards Many live dashboards fail when treated as static reports instead of dynamic tools for quick decision-making. In my early projects, I made this mistake, resulting in cluttered layouts, distractions, and frustrated users. Typical errors include the following: Overcrowded Interfaces: Presenting too many metrics competes for users’ attention, making it hard to focus. Flat Visual Hierarchy: Without clear emphasis on critical data, users might focus on less important information. No Record of Changes: When numbers update instantly with no explanation, users can feel lost or confused. Excessive Refresh Rates: Not all data needs constant updates. Updating too frequently can create unnecessary motion and cognitive strain. Managing Stress And Cognitive Overload Under stress, users depend on intuition and focus only on immediately relevant information. If a dashboard updates too quickly or shows conflicting alerts, users may delay actions or make mistakes. It is important to: Prioritize the most important data first to avoid overwhelming the user. Offer snapshot or pause options so users can take time to process information. Use clear indicators to show if an action is required or if everything is operating normally. In real-time environments, the best dashboards balance speed with calmness and clarity. They are not just data displays but tools that promote live thinking and better decisions. Enabling Personalization For Effective Data Consumption Many analytics tools let users build custom dashboards, but these design principles guide layouts that support decision-making. Personalization options such as custom metric selection, alert preferences, and update pacing help manage cognitive load and improve data interpretation. Cognitive Challenge UX Risk in Real-Time Dashboards Design Strategy to Mitigate Users can’t track rapid changes Confusion, missed updates, second-guessing Use delta indicators, change animations, and trend sparklines Limited working memory Overload from too many metrics at once Prioritize key KPIs, apply progressive disclosure Visual clutter under stress Tunnel vision or misprioritized focus Apply a clear visual hierarchy, minimize non-critical elements Unclear triggers or alerts Decision delays, incorrect responses Use thresholds, binary status indicators, and plain language Lack of context/history Misinterpretation of sudden shifts Provide micro-history, snapshot freeze, or hover reveal Common Cognitive Challenges in Real-Time Dashboards and UX Strategies to Overcome Them. Designing For Focus: Using Layout, Color, And Animation To Drive Real-Time Decisions Layout, color, and animation do more than improve appearance. They help users interpret live data quickly and make decisions under time pressure. Since users respond to rapidly changing information, these elements must reduce cognitive load and highlight key insights immediately. Creating a Visual Hierarchy to Guide Attention. A clear hierarchy directs users’ eyes to key metrics. Arrange elements so the most important data stands out. For example, place critical figures like sales volume or system health in the upper left corner to match common scanning patterns. Limit visible elements to about five to prevent overload and ease processing—group related data into cards to improve scannability and help users focus without distraction. Using Color Purposefully to Convey Meaning. Color communicates meaning in data visualization. Red or orange indicates critical alerts or negative trends, signaling urgency. Blue and green represent positive or stable states, offering reassurance. Neutral tones like gray support background data and make key colors stand out. Ensure accessibility with strong contrast and pair colors with icons or labels. For example, bright red can highlight outages while muted gray marks historical logs, keeping attention on urgent issues. Supporting Comprehension with Subtle Animation. Animation should clarify, not distract. Smooth transitions of 200 to 400 milliseconds communicate changes effectively. For instance, upward motion in a line chart reinforces growth. Hover effects and quick animations provide feedback and improve interaction. Thoughtful motion makes changes noticeable while maintaining focus. Layout, color, and animation create an experience that enables fast, accurate interpretation of live data. Real-time dashboards support continuous monitoring and decision-making by reducing mental effort and highlighting anomalies or trends. Personalization allows users to tailor dashboards to their roles, improving relevance and efficiency. For example, operations managers may focus on system health metrics while sales directors prioritize revenue KPIs. This adaptability makes dashboards dynamic, strategic tools. Element Placement & Visual Weight Purpose & Suggested Colors Animation Use Case & Effect Primary KPIs Center or top-left; bold, large font Highlight critical metrics; typically stable states Value updates: smooth increase (200–400 ms) Controls Top or left panel; light, minimal visual weight Provide navigation/filtering; neutral color schemes User actions: subtle feedback (100–150 ms) Charts Middle or right; medium emphasis Show trends and comparisons; use blue/green for positives, grey for neutral Chart trends: trail or fade (300–600 ms) Alerts Edge of dashboard or floating; high contrast (bold) Signal critical issues; red/orange for alerts, yellow/amber for warnings Quick animations for appearance; highlight changes Design Elements, Placement, Color, and Motion Strategies for Effective Real-Time Dashboards. Clarity In Motion: Designing Dashboards That Make Change Understandable If users cannot interpret changes quickly, the dashboard fails regardless of its visual design. Over time, I have developed methods that reduce confusion and make change feel intuitive rather than overwhelming. One of the most effective tools I use is the sparkline, a compact line chart that shows a trend over time and is typically placed next to a key performance indicator. Unlike full charts, sparklines omit axes and labels. Their simplicity makes them powerful, since they instantly show whether a metric is trending up, down, or steady. For example, placing a sparkline next to monthly revenue immediately reveals if performance is improving or declining, even before the viewer interprets the number. When using sparklines effectively, follow these principles: Pair sparklines with metrics such as revenue, churn rate, or user activity so users can see both the value and its trajectory at a glance. Simplify by removing clutter like axis lines or legends unless they add real value. Highlight the latest data point with a dot or accent color since current performance often matters more than historical context. Limit the time span. Too many data points compress the sparkline and hurt readability. A focused window, such as the last 7 or 30 days, keeps the trend clear. Use sparklines in comparative tables. When placed in rows (for example, across product lines or regions), they reveal anomalies or emerging patterns that static numbers may hide. Interactive P&L Performance Dashboard with Forecast and Variance Tracking. (Large preview) I combine sparklines with directional indicators like arrows and percentage deltas to support quick interpretation. For example, pairing “▲ +3.2%” with a rising sparkline shows both the direction and scale of change. I do not rely only on color to convey meaning. Since 1 in 12 men is color-blind, using red and green alone can exclude some users. To ensure accessibility, I add shapes and icons alongside color cues. Micro-animations provide subtle but effective signals. This counters change blindness — our tendency to miss non-salient changes. When numbers update, I use fade-ins or count-up transitions to indicate change without distraction. If a list reorders, such as when top-performing teams shift positions, a smooth slide animation under 300 milliseconds helps users maintain spatial memory. These animations reduce cognitive friction and prevent disorientation. Layout is critical for clarifying change: I use modular cards with consistent spacing, alignment, and hierarchy to highlight key metrics. Cards are arranged in a sortable grid, allowing filtering by severity, recency, or relevance. Collapsible sections manage dense information while keeping important data visible for quick scanning and deeper exploration. For instance, in a logistics dashboard, a card labeled “On-Time Deliveries” may display a weekly sparkline. If performance dips, the line flattens or turns slightly red, a downward arrow appears with a −1.8% delta, and the updated number fades in. This gives instant clarity without requiring users to open a detailed chart. All these design choices support fast, informed decision-making. In high-velocity environments like product analytics, logistics, or financial operations, dashboards must do more than present data. They must reduce ambiguity and help teams quickly detect change, understand its impact, and take action. Making Reliability Visible: Designing for Trust In Real-Time Data Interfaces In real-time data environments, reliability is not just a technical feature. It is the foundation of user trust. Dashboards are used in high-stakes, fast-moving contexts where decisions depend on timely, accurate data. Yet these systems often face less-than-ideal conditions such as unreliable networks, API delays, and incomplete datasets. Designing for these realities is not just damage control. It is essential for making data experiences usable and trustworthy. When data lags or fails to load, it can mislead users in serious ways: A dip in a trendline may look like a market decline when it is only a delay in the stream. Missing categories in a bar chart, if not clearly signaled, can lead to flawed decisions. To mitigate this: Every data point should be paired with its condition. Interfaces must show not only what the data says but also how current or complete it is. One effective strategy is replacing traditional spinners with skeleton UIs. These are greyed-out, animated placeholders that suggest the structure of incoming data. They set expectations, reduce anxiety, and show that the system is actively working. For example, in a financial dashboard, users might see the outline of a candlestick chart filling in as new prices arrive. This signals that data is being refreshed, not stalled. Handling Data Unavailability When data is unavailable, I show cached snapshots from the most recent successful load, labeled with timestamps such as “Data as of 10:42 AM.” This keeps users aware of what they are viewing. In operational dashboards such as logistics or monitoring systems, this approach lets users act confidently even when real-time updates are temporarily out of sync. Managing Connectivity Failures To handle connectivity failures, I use auto-retry mechanisms with exponential backoff, giving the system several chances to recover quietly before notifying the user. If retries fail, I maintain transparency with clear banners such as “Offline… Reconnecting…” In one product, this approach prevented users from reloading entire dashboards unnecessarily, especially in areas with unreliable Wi-Fi. Ensuring Reliability with Accessibility Reliability strongly connects with accessibility: Real-time interfaces must announce updates without disrupting user focus, beyond just screen reader compatibility. ARIA live regions quietly narrate significant changes in the background, giving screen reader users timely updates without confusion. All controls remain keyboard-accessible. Animations follow motion-reduction preferences to support users with vestibular sensitivities. Data Freshness Indicator A compact but powerful pattern I often implement is the Data Freshness Indicator, a small widget that: Shows sync status, Displays the last updated time, Includes a manual refresh button. This improves transparency and reinforces user control. Since different users interpret these cues differently, advanced systems allow personalization. For example: Analysts may prefer detailed logs of update attempts. Business users might see a simple status such as “Live”, “Stale”, or “Paused”. Reliability in data visualization is not about promising perfection. It is about creating a resilient, informative experience that supports human judgment by revealing the true state of the system. When users understand what the dashboard knows, what it does not, and what actions it is taking, they are more likely to trust the data and make smarter decisions. Real-World Case Study In my work across logistics, hospitality, and healthcare, the challenge has always been to distill complexity into clarity. A well-designed dashboard is more than functional; it serves as a trusted companion in decision-making, embedding clarity, speed, and confidence from the start. 1. Fleet Management Dashboard A client in the car rental industry struggled with fragmented operational data. Critical details like vehicle locations, fuel usage, maintenance schedules, and downtime alerts were scattered across static reports, spreadsheets, and disconnected systems. Fleet operators had to manually cross-reference data sources, even for basic dispatch tasks, which caused missed warnings, inefficient routing, and delays in response. We solved these issues by redesigning the dashboard strategically, focusing on both layout improvements and how users interpret and act on information. Strategic Design Improvements and Outcomes: Instant visibility of KPIs High-contrast cards at the top of the dashboard made key performance indicators instantly visible. Example: Fuel consumption anomalies that previously went unnoticed for days were flagged within hours, enabling quick corrective action. Clear trend and pattern visualization Booking forecasts, utilization graphs, and city-by-city comparisons highlighted performance trends. Example: A weekday-weekend booking chart helped a regional manager spot underperformance in one city and plan targeted vehicle redistribution. Unified operational snapshot Cost, downtime, and service schedules were grouped into one view. Result: The operations team could assess fleet health in under five minutes each morning instead of using multiple tools. Predictive context for planning Visual cues showed peak usage periods and historical demand curves. Result: Dispatchers prepared for forecasted spikes, reducing customer wait times and improving resource availability. Live map with real-time status A color-coded map displays vehicle status: green for active, red for urgent attention, gray for idle. Result: Supervisors quickly identified inactive or delayed vehicles and rerouted resources as needed. Role-based personalization Personalization options were built in, allowing each role to customize dashboard views. Example: Fleet managers prioritized financial KPIs, while technicians filtered for maintenance alerts and overdue service reports. Strategic Impact: The dashboard redesign was not only about improving visuals. It changed how teams interacted with data. Operators no longer needed to search for insights, as the system presented them in line with tasks and decision-making. The dashboard became a shared reference for teams with different goals, enabling real-time problem solving, fewer manual checks, and stronger alignment across roles. Every element was designed to build both understanding and confidence in action. 2. Hospitality Revenue Dashboard One of our clients, a hospitality group with 11 hotels in the UAE, faced a growing strategic gap. They had data from multiple departments, including bookings, events, food and beverage, and profit and loss, but it was spread across disconnected dashboards. Strategic Design Improvements and Outcomes: All revenue streams (rooms, restaurants, bars, and profit and loss) were consolidated into a single filterable dashboard. Example: A revenue manager could filter by property to see if a drop in restaurant revenue was tied to lower occupancy or was an isolated issue. The structure supported daily operations, weekly reviews, and quarterly planning. Disconnected charts and metrics were replaced with a unified visual narrative showing how revenue streams interacted. Example: The dashboard revealed how event bookings influenced bar sales or staffing. This shifted teams from passive data consumption to active interpretation. AI modules for demand forecasting, spend prediction, and pricing recommendations were embedded in the dashboard. Result: Managers could test rate changes with interactive sliders and instantly view effects on occupancy, revenue per available room, and food and beverage income. This enabled proactive scenario planning. Compact, color-coded sparklines were placed next to each key metric to show short- and long-term trends. Result: These visuals made it easy to spot seasonal shifts or channel-specific patterns without switching views or opening separate reports. Predictive overlays such as forecast bands and seasonality markers were added to performance graphs. Example: If occupancy rose but lagged behind seasonal forecasts, the dashboard surfaced the gap, prompting early action such as promotions or issue checks. Strategic Impact: By aligning the dashboard structure with real pricing and revenue strategies, the client shifted from static reporting to forward-looking decision-making. This was not a cosmetic interface update. It was a complete rethinking of how data could support business goals. The result enabled every team, from finance to operations, to interpret data based on their specific roles and responsibilities. 3. Healthcare Interoperability Dashboard In healthcare, timely and accurate access to patient information is essential. A multi-specialist hospital client struggled with fragmented data. Doctors had to consult separate platforms such as electronic health records, lab results, and pharmacy systems to understand a patient’s condition. This fragmented process slowed decision-making and increased risks to patient safety. Strategic Design Improvements and Outcomes: Patient medical history was integrated to unify lab reports, medications, and allergy information in one view. Example: A cardiologist, for example, could review recent cardiac markers with active medications and allergy alerts in the same place, enabling faster diagnosis and treatment. Lab report tracking was upgraded to show test type, date, status, and a clear summary with labels such as Pending, Completed, and Awaiting Review. Result: Trends were displayed with sparklines and color-coded indicators, helping clinicians quickly spot abnormalities or improvements. A medication management module was added for prescription entry, viewing, and exporting. It included dosage, frequency, and prescribing physician details. Example: Specialists could customize it to highlight drugs relevant to their practice, reducing overload and focusing on critical treatments. Rapid filtering options were introduced to search by patient name, medical record number, date of birth, gender, last visit, insurance company, or policy number. Example: Billing staff could locate patients by insurance details, while clinicians filtered records by visits or demographics. Visual transparency was provided through interactive tooltips explaining alert rationales and flagged data points. Result: Clinicians gained immediate context, such as the reason a lab value was marked as critical, supporting informed and timely decisions. Strategic Impact: Our design encourages active decision-making instead of passive data review. Interactive tooltips ensure visual transparency by explaining the rationale behind alerts and flagged data points. These information boxes give clinicians immediate context, such as why a lab value is marked critical, helping them understand implications and next steps without delay. Key UX Insights from the Above 3 Examples Design should drive conclusions, not just display data. Contextualized data enabled faster and more confident decisions. For example, a logistics dashboard flagged high-risk delays so dispatchers could act immediately. Complexity should be structured, not eliminated. Tools used timelines, layering, and progressive disclosure to handle dense information. A financial tool groups transactions by time blocks, easing cognitive load without losing detail. Trust requires clear system logic. Users trusted predictive alerts only after understanding their triggers. A healthcare interface added a "Why this alert?" option that explained the reasoning. The aim is clarity and action, not visual polish. Redesigns improved speed, confidence, and decision-making. In real-time contexts, confusion delays are more harmful than design flaws. Final Takeaways Real-time dashboards are not about overwhelming users with data. They are about helping them act quickly and confidently. The most effective dashboards reduce noise, highlight the most important metrics, and support decision-making in complex environments. Success lies in balancing visual clarity with cognitive ease while accounting for human limits like memory, stress, and attention alongside technical needs. Do: Prioritize key metrics in a clear order so priorities are obvious. For instance, a support manager may track open tickets before response times. Use subtle micro-animations and small visual cues to indicate changes, helping users spot trends without distraction. Display data freshness and sync status to build trust. Plan for edge cases like incomplete or offline data to keep the experience consistent. Ensure accessibility with high contrast, ARIA labels, and keyboard navigation. Don’t: Overcrowd the interface with too many metrics. Rely only on color to communicate critical information. Update all data at once or too often, which can cause overload. Hide failures or delays; transparency helps users adapt. Over time, I’ve come to see real-time dashboards as decision assistants rather than control panels. When users say, “This helps me stay in control,” it reflects a design built on empathy that respects cognitive limits and enhances decision-making. That is the true measure of success.
Integrating CSS Cascade Layers To An Existing Project
The idea behind this is to share a full, unfiltered look at integrating CSS Cascade Layers into an existing legacy codebase. In practice, it’s about refactoring existing CSS to use cascade layers without breaking anything.
You can always get a fantastic overview of things in Stephenie Eckles’ article, “Getting Started With CSS Cascade Layers”. But let’s talk about the experience of integrating cascade layers into real-world code, the good, the bad, and the spaghetti. I could have created a sample project for a classic walkthrough, but nah, that’s not how things work in the real world. I want to get our hands dirty, like inheriting code with styles that work and no one knows why. Finding projects without cascade layers was easy. The tricky part was finding one that was messy enough to have specificity and organisation issues, but broad enough to illustrate different parts of cascade layers integration. Ladies and gentlemen, I present you with this Discord bot website by Drishtant Ghosh. I’m deeply grateful to Drishtant for allowing me to use his work as an example. This project is a typical landing page with a navigation bar, a hero section, a few buttons, and a mobile menu. You see how it looks perfect on the outside. Things get interesting, however, when we look at the CSS styles under the hood. Understanding The Project Before we start throwing @layers around, let’s get a firm understanding of what we’re working with. I cloned the GitHub repo, and since our focus is working with CSS Cascade Layers, I’ll focus only on the main page, which consists of three files: index.html, index.css, and index.js. Note: I didn’t include other pages of this project as it’d make this tutorial too verbose. However, you can refactor the other pages as an experiment. The index.css file is over 450 lines of code, and skimming through it, I can see some red flags right off the bat: There’s a lot of code repetition with the same selectors pointing to the same HTML element. There are quite a few #id selectors, which one might argue shouldn’t be used in CSS (and I am one of those people). #botLogo is defined twice and over 70 lines apart. The !important keyword is used liberally throughout the code. And yet the site works. There is nothing “technically” wrong here, which is another reason CSS is a big, beautiful monster — errors are silent! Planning The Layer Structure Now, some might be thinking, “Can’t we simply move all of the styles into a single layer, like @layer legacy and call it a day?” You could… but I don’t think you should. Think about it: If more layers are added after the legacy layer, they should override the styles contained in the legacy layer because the specificity of layers is organized by priority, where the layers declared later carry higher priority. /* new is more specific */ @layer legacy, new; /* legacy is more specific */ @layer new, legacy; That said, we must remember that the site’s existing styles make liberal use of the !important keyword. And when that happens, the order of cascade layers gets reversed. So, even though the layers are outlined like this: @layer legacy, new; …any styles with an !important declaration suddenly shake things up. In this case, the priority order becomes: !important styles in the legacy layer (most powerful), !important styles in the new layer, Normal styles in the new layer, Normal styles in the legacy layer (least powerful). I just wanted to clear that part up. Let’s continue. We know that cascade layers handle specificity by creating an explicit order where each layer has a clear responsibility, and later layers always win. So, I decided to split things up into five distinct layers: reset: Browser default resets like box-sizing, margins, and paddings. base: Default styles of HTML elements, like body, h1, p, a, etc., including default typography and colours. layout: Major page structure stuff for controlling how elements are positioned. components: Reusable UI segments, like buttons, cards, and menus. utilities: Single helper modifiers that do just one thing and do it well. This is merely how I like to break things out and organize styles. Zell Liew, for example, has a different set of four buckets that could be defined as layers. There’s also the concept of dividing things up even further into sublayers: @layer components { /* sub-layers */ @layer buttons, cards, menus; } /* or this: */ @layer components.buttons, components.cards, components.menus; That might come in handy, but I also don’t want to overly abstract things. That might be a better strategy for a project that’s scoped to a well-defined design system. Another thing we could leverage is unlayered styles and the fact that any styles not contained in a cascade layer get the highest priority: @layer legacy { a { color: red !important; } } @layer reset { a { color: orange !important; } } @layer base { a { color: yellow !important; } } /* unlayered */ a { color: green !important; } /* highest priority */ But I like the idea of keeping all styles organized in explicit layers because it keeps things modular and maintainable, at least in this context. Let’s move on to adding cascade layers to this project. Integrating Cascade Layers We need to define the layer order at the top of the file: @layer reset, base, layout, components, utilities; This makes it easy to tell which layer takes precedence over which (they get more priority from left to right), and now we can think in terms of layer responsibility instead of selector weight. Moving forward, I’ll proceed through the stylesheet from top to bottom. First, I noticed that the Poppins font was imported in both the HTML and CSS files, so I removed the CSS import and left the one in index.html, as that’s generally recommended for quickly loading fonts. Next is the universal selector (*) styles, which include classic reset styles that are perfect for @layer reset: @layer reset { * { margin: 0; padding: 0; box-sizing: border-box; } } With that out of the way, the body selector is next. I’m putting this into @layer base because it contains core styles for the project, like backgrounds and fonts: @layer base { body { background-image: url("bg.svg"); /* Renamed to bg.svg for clarity */ font-family: "Poppins", sans-serif; /* ... other styles */ } } The way I’m tackling this is that styles in the base layer should generally affect the whole document. So far, no page breaks or anything. Swapping IDs For Classes Following the body element selector is the page loader, which is defined as an ID selector, #loader. I’m a firm believer in using class selectors over ID selectors as much as possible. It keeps specificity low by default, which prevents specificity battles and makes the code a lot more maintainable. So, I went into the index.html file and refactored elements with id="loader" to class="loader". In the process, I saw another element with id="page" and changed that at the same time. While still in the index.html file, I noticed a few div elements missing closing tags. It is astounding how permissive browsers are with that. Anyways, I cleaned those up and moved the <script> tag out of the .heading element to be a direct child of body. Let’s not make it any tougher to load our scripts. Now that we’ve levelled the specificity playing field by moving IDs to classes, we can drop them into the components layer since a loader is indeed a reusable component: @layer components { .loader { width: 100%; height: 100vh; /* ... */ } .loader .loading { /* ... */ } .loader .loading span { /* ... */ } .loader .loading span:before { /* ... */ } } Animations Next are keyframes, and this was a bit tricky, but I eventually chose to isolate animations in their own new fifth layer and updated the layer order to include it: @layer reset, base, layout, components, utilities, animations; But why place animations as the last layer? Because animations are generally the last to run and shouldn’t be affected by style conflicts. I searched the project’s styles for @keyframes and dumped them into the new layer: @layer animations { @keyframes loading { /* ... */ } @keyframes loading2 { /* ... */ } @keyframes pageShow { /* ... */ } } This gives a clear distinction of static styles from dynamic ones while also enforcing reusability. Layouts The #page selector also has the same issue as #id, and since we fixed it in the HTML earlier, we can modify it to .page and drop it in the layout layer, as its main purpose is to control the initial visibility of the content: @layer layout { .page { display: none; } } Custom Scrollbars Where do we put these? Scrollbars are global elements that persist across the site. This might be a gray area, but I’d say it fits perfectly in @layer base since it’s a global, default feature. @layer base { /* ... */ ::-webkit-scrollbar { width: 8px; } ::-webkit-scrollbar-track { background: #0e0e0f; } ::-webkit-scrollbar-thumb { background: #5865f2; border-radius: 100px; } ::-webkit-scrollbar-thumb:hover { background: #202225; } } I also removed the !important keywords as I came across them. Navigation The nav element is pretty straightforward, as it is the main structure container that defines the position and dimensions of the navigation bar. It should definitely go in the layout layer: @layer layout { /* ... */ nav { display: flex; height: 55px; width: 100%; padding: 0 50px; /* Consistent horizontal padding */ /* ... */ } } Logo We have three style blocks that are tied to the logo: nav .logo, .logo img, and #botLogo. These names are redundant and could benefit from inheritance component reusability. Here’s how I’m approaching it: The nav .logo is overly specific since the logo can be reused in other places. I dropped the nav so that the selector is just .logo. There was also an !important keyword in there, so I removed it. I updated .logo to be a Flexbox container to help position .logo img, which was previously set with less flexible absolute positioning. The #botLogo ID is declared twice, so I merged the two rulesets into one and lowered its specificity by making it a .botLogo class. And, of course, I updated the HTML to replace the ID with the class. The .logo img selector becomes .botLogo, making it the base class for styling all instances of the logo. Now, we’re left with this: /* initially .logo img */ .botLogo { border-radius: 50%; height: 40px; border: 2px solid #5865f2; } /* initially #botLogo */ .botLogo { border-radius: 50%; width: 180px; /* ... */ } The difference is that one is used in the navigation and the other in the hero section heading. We can transform the second .botLogo by slightly increasing the specificity with a .heading .botLogo selector. We may as well clean up any duplicated styles as we go. Let’s place the entire code in the components layer as we’ve successfully turned the logo into a reusable component: @layer components { /* ... */ .logo { font-size: 30px; font-weight: bold; color: #fff; display: flex; align-items: center; gap: 10px; } .botLogo { aspect-ratio: 1; /* maintains square dimensions with width */ border-radius: 50%; width: 40px; border: 2px solid #5865f2; } .heading .botLogo { width: 180px; height: 180px; background-color: #5865f2; box-shadow: 0px 0px 8px 2px rgba(88, 101, 242, 0.5); /* ... */ } } This was a bit of work! But now the logo is properly set up as a component that fits perfectly in the new layer architecture. Navigation List This is a typical navigation pattern. Take an unordered list (<ul>) and turn it into a flexible container that displays all of the list items horizontally on the same row (with wrapping allowed). It’s a type of navigation that can be reused, which belongs in the components layer. But there’s a little refactoring to do before we add it. There’s already a .mainMenu class, so let’s lean into that. We’ll swap out any nav ul selectors with that class. Again, it keeps specificity low while making it clearer what that element does. @layer components { /* ... */ .mainMenu { display: flex; flex-wrap: wrap; list-style: none; } .mainMenu li { margin: 0 4px; } .mainMenu li a { color: #fff; text-decoration: none; font-size: 16px; /* ... */ } .mainMenu li a:where(.active, .hover) { color: #fff; background: #1d1e21; } .mainMenu li a.active:hover { background-color: #5865f2; } } There are also two buttons in the code that are used to toggle the navigation between “open” and “closed” states when the navigation is collapsed on smaller screens. It’s tied specifically to the .mainMenu component, so we’ll keep everything together in the components layer. We can combine and simplify the selectors in the process for cleaner, more readable styles: @layer components { /* ... */ nav:is(.openMenu, .closeMenu) { font-size: 25px; display: none; cursor: pointer; color: #fff; } } I also noticed that several other selectors in the CSS were not used anywhere in the HTML. So, I removed those styles to keep things trim. There are automated ways to go about this, too. Media Queries Should media queries have a dedicated layer (@layer responsive), or should they be in the same layer as their target elements? I really struggled with that question while refactoring the styles for this project. I did some research and testing, and my verdict is the latter, that media queries ought to be in the same layer as the elements they affect. My reasoning is that keeping them together: Maintains responsive styles with their base element styles, Makes overrides predictable, and Flows well with component-based architecture common in modern web development. However, it also means responsive logic is scattered across layers. But it beats the one with a gap between the layer where elements are styled and the layer where their responsive behaviors are managed. That’s a deal-breaker for me because it’s way too easy to update styles in one layer and forget to update their corresponding responsive style in the responsive layer. The other big point is that media queries in the same layer have the same priority as their elements. This is consistent with my overall goal of keeping the CSS Cascade simple and predictable, free of style conflicts. Plus, the CSS nesting syntax makes the relationship between media queries and elements super clear. Here’s an abbreviated example of how things look when we nest media queries in the components layer: @layer components { .mainMenu { display: flex; flex-wrap: wrap; list-style: none; } @media (max-width: 900px) { .mainMenu { width: 100%; text-align: center; height: 100vh; display: none; } } } This also allows me to nest a component’s child element styles (e.g., nav .openMenu and nav .closeMenu). @layer components { nav { &.openMenu { display: none; @media (max-width: 900px) { &.openMenu { display: block; } } } } } Typography & Buttons The .title and .subtitle can be seen as typography components, so they and their responsive associates go into — you guessed it — the components layer: @layer components { .title { font-size: 40px; font-weight: 700; /* etc. */ } .subtitle { color: rgba(255, 255, 255, 0.75); font-size: 15px; /* etc.. */ } @media (max-width: 420px) { .title { font-size: 30px; } .subtitle { font-size: 12px; } } } What about buttons? Like many website’s this one has a class, .btn, for that component, so we can chuck those in there as well: @layer components { .btn { color: #fff; background-color: #1d1e21; font-size: 18px; /* etc. */ } .btn-primary { background-color: #5865f2; } .btn-secondary { transition: all 0.3s ease-in-out; } .btn-primary:hover { background-color: #5865f2; box-shadow: 0px 0px 8px 2px rgba(88, 101, 242, 0.5); /* etc. */ } .btn-secondary:hover { background-color: #1d1e21; background-color: rgba(88, 101, 242, 0.7); } @media (max-width: 420px) { .btn { font-size: 14px; margin: 2px; padding: 8px 13px; } } @media (max-width: 335px) { .btn { display: flex; flex-direction: column; } } } The Final Layer We haven’t touched the utilities layer yet! I’ve reserved this layer for helper classes that are designed for specific purposes, like hiding content — or, in this case, there’s a .noselect class that fits right in. It has a single reusable purpose: to disable selection on an element. So, that’s going to be the only style rule in our utilities layer: @layer utilities { .noselect { -webkit-touch-callout: none; -webkit-user-select: none; -khtml-user-select: none; -webkit-user-drag: none; -moz-user-select: none; -ms-user-select: none; user-select: none; } } And that’s it! We’ve completely refactored the CSS of a real-world project to use CSS Cascade Layers. You can compare where we started with the final code. It Wasn’t All Easy That’s not to say that working with Cascade Layers was challenging, but there were some sticky points in the process that forced me to pause and carefully think through what I was doing. I kept some notes as I worked: It’s tough to determine where to start with an existing project. However, by defining the layers first and setting their priority levels, I had a framework for deciding how and where to move specific styles, even though I was not totally familiar with the existing CSS. That helped me avoid situations where I might second-guess myself or define extra, unnecessary layers. Browser support is still a thing! I mean, Cascade Layers enjoy 94% support coverage as I’m writing this, but you might be one of those sites that needs to accommodate legacy browsers that are unable to support layered styles. It wasn’t clear where media queries fit into the process. Media queries put me on the spot to find where they work best: nested in the same layers as their selectors, or in a completely separate layer? I went with the former, as you know. The !important keyword is a juggling act. They invert the entire layering priority system, and this project was littered with instances. Once you start chipping away at those, the existing CSS architecture erodes and requires a balance between refactoring the code and fixing what’s already there to know exactly how styles cascade. Overall, refactoring a codebase for CSS Cascade Layers is a bit daunting at first glance. The important thing, though, is to acknowledge that it isn’t really the layers that complicate things, but the existing codebase. It’s tough to completely overhaul someone’s existing approach for a new one, even if the new approach is elegant. Where Cascade Layers Helped (And Didn’t) Establishing layers improved the code, no doubt. I’m sure there are some performance benchmarks in there since we were able to remove unused and conflicting styles, but the real win is in a more maintainable set of styles. It’s easier to find what you need, know what specific style rules are doing, and where to insert new styles moving forward. At the same time, I wouldn’t say that Cascade Layers are a silver bullet solution. Remember, CSS is intrinsically tied to the HTML structure it queries. If the HTML you’re working with is unstructured and suffers from div-itus, then you can safely bet that the effort to untangle that mess is higher and involves rewriting markup at the same time. Refactoring CSS for cascade layers is most certainly worth the maintenance enhancements alone. It may be “easier” to start from scratch and define layers as you work from the ground up because there’s less inherited overhead and technical debt to sort through. But if you have to start from an existing codebase, you might need to de-tangle the complexity of your styles first to determine exactly how much refactoring you’re looking at.
Designing For TV: Principles, Patterns And Practical Guidance (Part 2)
After covering in detail the underlying interaction paradigms of TV experiences in [Part 1](https://www.smashingmagazine.com/2025/08/designing-tv-evergreen-pattern-shapes-tv-experiences/), it’s time to get practical. In the second part of the series, you’ll explore the building blocks of the “10-foot experience” and how to best utilise them in your designs.
Having covered the developmental history and legacy of TV in Part 1, let’s now delve into more practical matters. As a quick reminder, the “10-foot experience” and its reliance on the six core buttons of any remote form the basis of our efforts, and as you’ll see, most principles outlined simply reinforce the unshakeable foundations. In this article, we’ll sift through the systems, account for layout constraints, and distill the guidelines to understand the essence of TV interfaces. Once we’ve collected all the main ingredients, we’ll see what we can do to elevate these inherently simplistic experiences. Let’s dig in, and let’s get practical! The Systems When it comes to hardware, TVs and set-top boxes are usually a few generations behind phones and computers. Their components are made to run lightweight systems optimised for viewing, energy efficiency, and longevity. Yet even within these constraints, different platforms offer varying performance profiles, conventions, and price points. Some notable platforms/systems of today are: Roku, the most affordable and popular, but severely bottlenecked by weak hardware. WebOS, most common on LG devices, relies on web standards and runs well on modest hardware. Android TV, considered very flexible and customisable, but relatively demanding hardware-wise. Amazon Fire, based on Android but with a separate ecosystem. It offers great smooth performance, but is slightly more limited than stock Android. tvOS, by Apple, offering a high-end experience followed by a high-end price with extremely low customizability. Despite their differences, all of the platforms above share something in common, and by now you’ve probably guessed that it has to do with the remote. Let’s take a closer look: If these remotes were stripped down to just the D-pad, OK, and BACK buttons, they would still be capable of successfully navigating any TV interface. It is this shared control scheme that allows for the agnostic approach of this article with broadly applicable guidelines, regardless of the manufacturer. Having already discussed the TV remote in detail in Part 1, let’s turn to the second part of the equation: the TV screen, its layout, and the fundamental building blocks of TV-bound experiences. TV Design Fundamentals The Screen With almost one hundred years of legacy, TV has accumulated quite some baggage. One recurring topic in modern articles on TV design is the concept of “overscan” — a legacy concept from the era of cathode ray tube (CRT) screens. Back then, the lack of standards in production meant that television sets would often crop the projected image at its edges. To address this inconsistency, broadcasters created guidelines to keep important content from being cut off. While overscan gets mentioned occasionally, we should call it what it really is — a thing of the past. Modern panels display content with greater precision, making thinking in terms of title and action safe areas rather archaic. Today, we can simply consider the margins and get the same results. Google calls for a 5% margin layout and Apple advises a 60-point margin top and bottom, and 80 points on the sides in their Layout guidelines. The standard is not exactly clear, but the takeaway is simple: leave some breathing room between screen edge and content, like you would in any thoughtful layout. Having left some baggage behind, we can start considering what to put within and outside the defined bounds. The Layout Considering the device is made for content consumption, streaming apps such as Netflix naturally come to mind. Broadly speaking, all these interfaces share a common layout structure where a vast collection of content is laid out in a simple grid. These horizontally scrolling groups (sometimes referred to as “shelves”) resemble rows of a bookcase. Typically, they’ll contain dozens of items that don’t fit into the initial “fold”, so we’ll make sure the last visible item “peeks” from the edge, subtly indicating to the viewer there’s more content available if they continue scrolling. If we were to define a standard 12-column layout grid, with a 2-column-wide item, we’d end up with something like this: As you can see, the last item falls outside the “safe” zone. Tip: A useful trick I discovered when designing TV interfaces was to utilise an odd number of columns. This allows the last item to fall within the defined margins and be more prominent while having little effect on the entire layout. We’ve concluded that overscan is not a prominent issue these days, yet an additional column in the layout helps completely circumvent it. Food for thought! Typography TV design requires us to practice restraint, and this becomes very apparent when working with type. All good typography practices apply to TV design too, but I’d like to point out two specific takeaways. First, accounting for the distance, everything (including type) needs to scale up. Where 16–18px might suffice for web baseline text, 24px should be your starting point on TV, with the rest of the scale increasing proportionally. “Typography can become especially tricky in 10-ft experiences. When in doubt, go larger.” — Molly Lafferty (Marvel Blog) With that in mind, the second piece of advice would be to start with a small 5–6 size scale and adjust if necessary. The simplicity of a TV experience can, and should, be reflected in the typography itself, and while small, such a scale will do all the “heavy lifting” if set correctly. What you see in the example above is a scale I reduced from Google and Apple guidelines, with a few size adjustments. Simple as it is, this scale served me well for years, and I have no doubt it could do the same for you. Freebie If you’d like to use my basic reduced type scale Figma design file for kicking off your own TV project, feel free to do so! Color Imagine watching TV at night with the device being the only source of light in the room. You open up the app drawer and select a new streaming app; it loads into a pretty splash screen, and — bam! — a bright interface opens up, which, amplified by the dark surroundings, blinds you for a fraction of a second. That right there is our main consideration when using color on TV. Built for cinematic experiences and often used in dimly lit environments, TVs lend themselves perfectly to darker and more subdued interfaces. Bright colours, especially pure white (#ffffff), will translate to maximum luminance and may be straining on the eyes. As a general principle, you should rely on a more muted color palette. Slightly tinting brighter elements with your brand color, or undertones of yellow to imitate natural light, will produce less visually unsettling results. Finally, without a pointer or touch capabilities, it’s crucial to clearly highlight interactive elements. While using bright colors as backdrops may be overwhelming, using them sparingly to highlight element states in a highly contrasting way will work perfectly. A focus state is the underlying principle of TV navigation. Most commonly, it relies on creating high contrast between the focused and unfocused elements. (Large preview) This highlighting of UI elements is what TV leans on heavily — and it is what we’ll discuss next. Focus In Part 1, we have covered how interacting through a remote implies a certain detachment from the interface, mandating reliance on a focus state to carry the burden of TV interaction. This is done by visually accenting elements to anchor the user’s eyes and map any subsequent movement within the interface. If you have ever written HTML/CSS, you might recall the use of the :focus CSS pseudo-class. While it’s primarily an accessibility feature on the web, it’s the core of interaction on TV, with more flexibility added in the form of two additional directions thanks to a dedicated D-pad. Focus Styles There are a few standard ways to style a focus state. Firstly, there’s scaling — enlarging the focused element, which creates the illusion of depth by moving it closer to the viewer. Example of scaling elements on focus. This is especially common in cases where only images are used for focusable elements. (Large preview) Another common approach is to invert background and text colors. Color inversion on focus, common for highlighting cards. (Large preview) Finally, a border may be added around the highlighted element. Example of border highlights on focus. (Large preview) These styles, used independently or in various combinations, appear in all TV interfaces. While execution may be constrained by the specific system, the purpose remains the same: clear and intuitive feedback, even from across the room. The three basic styles can be combined to produce more focus state variants. (Large preview) Having set the foundations of interaction, layout, and movement, we can start building on top of them. The next chapter will cover the most common elements of a TV interface, their variations, and a few tips and tricks for button-bound navigation. Common TV UI Components Nowadays, the core user journey on television revolves around browsing (or searching through) a content library, selecting an item, and opening a dedicated screen to watch or listen. This translates into a few fundamental screens: Library (or Home) for content browsing, Search for specific queries, and A player screen focused on content playback. These screens are built with a handful of components optimized for the 10-foot experience, and while they are often found on other platforms too, it’s worth examining how they differ on TV. Menus Appearing as a horizontal bar along the top edge of the screen, or as a vertical sidebar, the menu helps move between the different screens of an app. While its orientation mostly depends on the specific system, it does seem TV favors the side menu a bit more. Both menu types share a common issue: the farther the user navigates away from the menu (vertically, toward the bottom for top-bars; and horizontally, toward the right for sidebars), the more button presses are required to get back to it. Fortunately, usually a Back button shortcut is added to allow for immediate menu focus, which greatly improves usability. 16:9 posters abide by the same principles but with a horizontal orientation. They are often paired with text labels, which effectively turn them into cards, commonly seen on platforms like YouTube. In the absence of dedicated poster art, they show stills or playback from the videos, matching the aspect ratio of the media itself. 1:1 posters are often found in music apps like Spotify, their shape reminiscent of album art and vinyl sleeves. These squares often get used in other instances, like representing channel links or profile tiles, giving more visual variety to the interface. All of the above can co-exist within a single app, allowing for richer interfaces and breaking up otherwise uniform content libraries. And speaking of breaking up content, let’s see what we can do with spotlights! Spotlights Typically taking up the entire width of the screen, these eye-catching components will highlight a new feature or a promoted piece of media. In a sea of uniform shelves, they can be placed strategically to introduce aesthetic diversity and disrupt the monotony. A spotlight can be a focusable element by itself, or it could expose several actions thanks to its generous space. In my ventures into TV design, I relied on a few different spotlight sizes, which allowed me to place multiples into a single row, all with the purpose of highlighting different aspects of the app, without breaking the form to which viewers were used. Posters, cards, and spotlights shape the bulk of the visual experience and content presentation, but viewers still need a way to find specific titles. Let’s see how search and input are handled on TV. Search And Entering Text Manually browsing through content libraries can yield results, but having the ability to search will speed things up — though not without some hiccups. TVs allow for text input in the form of on-screen keyboards, similar to the ones found in modern smartphones. However, inputting text with a remote control is quite inefficient given the restrictiveness of its control scheme. For example, typing “hey there” on a mobile keyboard requires 9 keystrokes, but about 38 on a TV (!) due to the movement between characters and their selection. Typing with a D-pad may be an arduous task, but at the same time, having the ability to search is unquestionably useful. Luckily for us, keyboards are accounted for in all systems and usually come in two varieties. We’ve got the grid layouts used by most platforms and a horizontal layout in support of the touch-enabled and gesture-based controls on tvOS. Swiping between characters is significantly faster, but this is yet another pattern that can only be enhanced, not replaced. Modernization has made things significantly easier, with search autocomplete suggestions, device pairing, voice controls, and remotes with physical keyboards, but on-screen keyboards will likely remain a necessary fallback for quite a while. And no matter how cumbersome this fallback may be, we as designers need to consider it when building for TV. Players And Progress Bars While all the different sections of a TV app serve a purpose, the Player takes center stage. It’s where all the roads eventually lead to, and where viewers will spend the most time. It’s also one of the rare instances where focus gets lost, allowing for the interface to get out of the way of enjoying a piece of content. Arguably, players are the most complex features of TV apps, compacting all the different functionalities into a single screen. Take YouTube, for example, its player doesn’t just handle expected playback controls but also supports content browsing, searching, reading comments, reacting, and navigating to channels, all within a single screen. Compared to YouTube, Netflix offers a very lightweight experience guided by the nature of the app. Still, every player has a basic set of controls, the foundation of which is the progress bar. The progress bar UI element serves as a visual indicator for content duration. During interaction, focus doesn’t get placed on the bar itself, but on a movable knob known as the “scrubber.” It is by moving the scrubber left and right, or stopping it in its tracks, that we can control playback. Another indirect method of invoking the progress bar is with the good old Play and Pause buttons. Rooted in the mechanical era of tape players, the universally understood triangle and two vertical bars are as integral to the TV legacy as the D-pad. No matter how minimalist and sleek the modern player interface may be, these symbols remain a staple of the viewing experience. The presence of a scrubber may also indicate the type of content. Video on demand allows for the full set of playback controls, while live streams (unless DVR is involved) will do away with the scrubber since viewers won’t be able to rewind or fast-forward. Earlier iterations of progress bars often came bundled with a set of playback control buttons, but as viewers got used to the tools available, these controls often got consolidated into the progress bar and scrubber themselves. Bringing It All Together With the building blocks out of the box, we’ve got everything necessary for a basic but functional TV app. Just as the six core buttons make remote navigation possible, the components and principles outlined above help guide purposeful TV design. The more context you bring, the more you’ll be able to expand and combine these basic principles, creating an experience unique to your needs. Before we wrap things up, I’d like to share a few tips and tricks I discovered along the way — tips and tricks which I wish I had known from the start. Regardless of how simple or complex your idea may be, these may serve you as useful tools to help add depth, polish, and finesse to any TV experience. Thinking Beyond The Basics Like any platform, TV has a set of constraints that we abide by when designing. But sometimes these norms are applied without question, making the already limited capabilities feel even more restraining. Below are a handful of less obvious ideas that can help you design more thoughtfully and flexibly for the big screen. Long Press Most modern remotes support press-and-hold gestures as a subtle way to enhance the functionality, especially on remotes with fewer buttons available. For example, holding directional buttons when browsing content speeds up scrolling, while holding Left/Right during playback speeds up timeline seeking. In many apps, a single press of the OK button opens a video, but holding it for longer opens a contextual menu with additional actions. With limited input, context becomes a powerful tool. It not only declutters the interface to allow for more focus on specific tasks, but also enables the same set of buttons to trigger different actions based on the viewer’s location within an app. Another great example is YouTube’s scrubber interaction. Once the scrubber is moved, every other UI element fades. This cleans up the viewer’s working area, so to speak, narrowing the interface to a single task. In this state — and only in this state — pressing Up one more time moves away from scrubbing and into browsing by chapter. This is such an elegant example of expanding restraint, and adding more only when necessary. I hope it inspires similar interactions in your TV app designs. Efficient Movement On TV At its best, every action on TV “costs” at least one click. There’s no such thing as aimless cursor movement — if you want to move, you must press a button. We’ve seen how cumbersome it can be inside a keyboard, but there’s also something we can learn about efficient movement in these restrained circumstances. Going back to the Homescreen, we can note that vertical and horizontal movement serve two distinct roles. Vertical movement switches between groups, while horizontal movement switches items within these groups. No matter how far you’ve gone inside a group, a single vertical click will move you into another. Every step on TV “costs” an action, so we might as well optimize movement. (Large preview) This subtle difference — two axes with separate roles — is the most efficient way of moving in a TV interface. Reversing the pattern: horizontal to switch groups, and vertical to drill down, will work like a charm as long as you keep the role of each axis well defined. Properly applied in a vertical layout, the principles of optimal movement remain the same. (Large preview) Quietly brilliant and easy to overlook, this pattern powers almost every step of the TV experience. Remember it, and use it well. Thinking Beyond JPGs After covering in detail many of the technicalities, let’s finish with some visual polish. Most TV interfaces are driven by tightly packed rows of cover and poster art. While often beautifully designed, this type of content and layouts leave little room for visual flair. For years, the flat JPG, with its small file size, has been a go-to format, though contemporary alternatives like WebP are slowly taking its place. Meanwhile, we can rely on the tried and tested PNG to give a bit more shine to our TV interfaces. The simple fact that it supports transparency can help the often-rigid UIs feel more sophisticated. Used strategically and paired with simple focus effects such as background color changes, PNGs can bring subtle moments of delight to the interface. Having a transparent background blends well with surface color changes common in TV interfaces. (Large preview) And don’t forget, transparency doesn’t have to mean that there shouldn't be any background at all. (Large preview) Moreover, if transformations like scaling and rotating are supported, you can really make those rectangular shapes come alive with layering multiple assets. Combining multiple images along with a background color change can liven up certain sections. (Large preview) As you probably understand by now, these little touches of finesse don’t go out of bounds of possibility. They simply find more room to breathe within it. But with such limited capabilities, it’s best to learn all the different tricks that can help make your TV experiences stand out. Closing Thoughts Rooted in legacy, with a limited control scheme and a rather “shallow” interface, TV design reminds us to do the best with what we have at our disposal. The restraints I outlined are not meant to induce claustrophobia and make you feel limited in your design choices, but rather to serve you as guides. It is by accepting that fact that we can find freedom and new avenues to explore. This two-part series of articles, just like my experience designing for TV, was not about reinventing the wheel with radical ideas. It was about understanding its nuances and contributing to what’s already there with my personal touch. If you find yourself working in this design field, I hope my guide will serve as a warm welcome and will help you do your finest work. And if you have any questions, do leave a comment, and I will do my best to reply and help. Good luck! Further Reading “Design for TV,” by Android Developers Great TV design is all about putting content front and center. It's about creating an interface that's easier to use and navigate, even from a distance. It's about making it easier to find the content you love, and to enjoy it in the best possible quality. “TV Guidelines: A quick kick-off on designing for Television Experiences,” by Andrea Pacheco Just like designing a mobile app, designing a TV application can be a fun and complex thing to do, due to the numerous guidelines and best practices to follow. Below, I have listed the main best practices to keep in mind when designing an app for a 10-foot screen. “Designing for Television – TV Ui design,” by Molly Lafferty We’re no longer limited to a remote and cable box to control our TVs; we’re using Smart TVs, or streaming from set-top boxes like Roku and Apple TV, or using video game consoles like Xbox and PlayStation. And each of these devices allows a user interface that’s much more powerful than your old-fashioned on-screen guide. “Rethinking User Interface Design for the TV Platform,” by Pascal Potvin Designing for television has become part of the continuum of devices that require a rethink of how we approach user interfaces and user experiences. “Typography for TV,” by Android Developers As television screens are typically viewed from a distance, interfaces that use larger typography are more legible and comfortable for users. TV Design's default type scale includes contrasting and flexible type styles to support a wide range of use cases. “Typography,” by Apple Developer docs Your typographic choices can help you display legible text, convey an information hierarchy, communicate important content, and express your brand or style. “Color on TV,” by Android Developers Color on TV design can inspire, set the mood, and even drive users to make decisions. It's a powerful and tangible element that users notice first. As a rich way to connect with a wide audience, it's no wonder color is an important step in crafting a high-quality TV interface. “Designing for Television — TV UI Design,” by Molly Lafferty (Marvel Blog) Today, we’re no longer limited to a remote and cable box to control our TVs; we’re using Smart TVs, or streaming from set-top boxes like Roku and Apple TV, or using video game consoles like Xbox and PlayStation. And each of these devices allows a user interface that’s much more powerful than your old-fashioned on-screen guide.
A Breeze Of Inspiration In September (2025 Wallpapers Edition)
Could there be a better way to welcome the new month than with a new collection of desktop wallpapers? We’ve got some eye-catching designs to make your September just a bit more colorful. Enjoy!
September is just around the corner, and that means it’s time for some new wallpapers! For more than 14 years already, our monthly wallpapers series has been the perfect occasion for artists and designers to challenge their creative skills and take on a little just-for-fun project — telling the stories they want to tell, using their favorite tools. This always makes for a unique and inspiring collection of wallpapers month after month, and, of course, this September is no exception. In this post, you’ll find desktop wallpapers for September 2025, created with love by the community for the community. As a bonus, we’ve also added some oldies but goodies from our archives to the collection, so maybe you’ll spot one of your almost-forgotten favorites in here, too? A huge thank-you to everyone who shared their artworks with us this month — this post wouldn’t exist without your creativity and support! By the way, if you’d like to get featured in one of our upcoming wallpapers editions, please don’t hesitate to submit your design. We are always looking for creative talent and can’t wait to see your story come to life! You can click on every image to see a larger preview. We respect and carefully consider the ideas and motivation behind each and every artist’s work. This is why we give all artists the full freedom to explore their creativity and express emotions and experience through their works. This is also why the themes of the wallpapers weren’t anyhow influenced by us but rather designed from scratch by the artists themselves. 21st Night Of September “On the 21st night of September, the world danced in perfect harmony. Earth, Wind & Fire set the tone and now it’s your turn to keep the rhythm alive.” — Designed by Ginger IT Solutions from Serbia. preview with calendar: 320x480, 640x480, 800x480, 800x600, 1024x768, 1024x1024, 1152x864, 1280x720, 1280x800, 1280x960, 1280x1024, 1400x1050, 1440x900, 1600x1200, 1680x1050, 1680x1200, 1920x1080, 1920x1200, 1920x1440, 2560x1440 without calendar: 320x480, 640x480, 800x480, 800x600, 1024x768, 1024x1024, 1152x864, 1280x720, 1280x800, 1280x960, 1280x1024, 1400x1050, 1440x900, 1600x1200, 1680x1050, 1680x1200, 1920x1080, 1920x1200, 1920x1440, 2560x1440 Who Designed by Ricardo Gimenes from Spain. preview with calendar: 640x480, 800x480, 800x600, 1024x768, 1024x1024, 1152x864, 1280x720, 1280x800, 1280x960, 1280x1024, 1366x768, 1400x1050, 1440x900, 1600x1200, 1680x1050, 1680x1200, 1920x1080, 1920x1200, 1920x1440, 2560x1440, 3840x2160 without calendar: 640x480, 800x480, 800x600, 1024x768, 1024x1024, 1152x864, 1280x720, 1280x800, 1280x960, 1280x1024, 1366x768, 1400x1050, 1440x900, 1600x1200, 1680x1050, 1680x1200, 1920x1080, 1920x1200, 1920x1440, 2560x1440, 3840x2160 Skating Through Chocolate Milk Day “Celebrate Chocolate Milk Day with a perfect blend of fun and flavor. From smooth sips to smooth rides, it’s all about enjoying the simple moments that make the day unforgettable.” — Designed by PopArt Studio from Serbia. preview with calendar: 320x480, 640x480, 800x480, 800x600, 1024x768, 1024x1024, 1152x864, 1280x720, 1280x800, 1280x960, 1280x1024, 1400x1050, 1440x900, 1600x1200, 1680x1050, 1680x1200, 1920x1080, 1920x1200, 1920x1440, 2560x1440 without calendar: 320x480, 640x480, 800x480, 800x600, 1024x768, 1024x1024, 1152x864, 1280x720, 1280x800, 1280x960, 1280x1024, 1400x1050, 1440x900, 1600x1200, 1680x1050, 1680x1200, 1920x1080, 1920x1200, 1920x1440, 2560x1440 Mood Designed by Ricardo Gimenes from Spain. preview with calendar: 640x480, 800x480, 800x600, 1024x768, 1024x1024, 1152x864, 1280x720, 1280x800, 1280x960, 1280x1024, 1366x768, 1400x1050, 1440x900, 1600x1200, 1680x1050, 1680x1200, 1920x1080, 1920x1200, 1920x1440, 2560x1440, 3840x2160 without calendar: 640x480, 800x480, 800x600, 1024x768, 1024x1024, 1152x864, 1280x720, 1280x800, 1280x960, 1280x1024, 1366x768, 1400x1050, 1440x900, 1600x1200, 1680x1050, 1680x1200, 1920x1080, 1920x1200, 1920x1440, 2560x1440, 3840x2160 Funny Cats “Cats are beautiful animals. They’re quiet, clean, and warm. They’re funny and can become an endless source of love and entertainment. Here for the cats!” — Designed by UrbanUI from India. preview without calendar: 360x640, 1024x768, 1280x720, 1280x800, 1280x960, 1280x1024, 1366x768, 1400x1050, 1440x900, 1680x1200, 1920x1080 Pigman And Robin Designed by Ricardo Gimenes from Spain. preview without calendar: 640x480, 800x480, 800x600, 1024x768, 1024x1024, 1152x864, 1280x720, 1280x800, 1280x960, 1280x1024, 1366x768, 1400x1050, 1440x900, 1600x1200, 1680x1050, 1680x1200, 1920x1080, 1920x1200, 1920x1440, 2560x1440, 3840x2160 Autumn Rains “This autumn, we expect to see a lot of rainy days and blues, so we wanted to change the paradigm and wish a warm welcome to the new season. After all, if you come to think of it: rain is not so bad if you have an umbrella and a raincoat. Come autumn, we welcome you!” — Designed by PopArt Studio from Serbia. preview without calendar: 320x480, 640x480, 800x480, 800x600, 1024x768, 1024x1024, 1152x864, 1280x720, 1280x800, 1280x960, 1280x1024, 1366x768, 1400x1050, 1440x900, 1600x1200, 1680x1050, 1680x1200, 1920x1080, 1920x1200, 1920x1440, 2560x1440 Terrazzo “With the end of summer and fall coming soon, I created this terrazzo pattern wallpaper to brighten up your desktop. Enjoy the month!” — Designed by Melissa Bogemans from Belgium. preview without calendar: 320x480, 640x480, 800x480, 800x600, 1024x768, 1024x1024, 1152x864, 1280x720, 1280x800, 1280x960, 1280x1024, 1400x1050, 1440x900, 1600x1200, 1680x1050, 1680x1200, 1920x1080, 1920x1200, 1920x1440, 2560x1440 Summer Ending “As summer comes to an end, all the creatures pull back to their hiding places, searching for warmth within themselves and dreaming of neverending adventures under the tinted sky of closing dog days.” — Designed by Ana Masnikosa from Belgrade, Serbia. preview without calendar: 320x480, 640x480, 800x480, 800x600, 1024x768, 1024x1024, 1152x864, 1280x720, 1280x800, 1280x960, 1280x1024, 1400x1050, 1440x900, 1600x1200, 1680x1050, 1680x1200, 1920x1080, 1920x1200, 1920x1440, 2560x1440 Cacti Everywhere “Seasons come and go, but our brave cactuses still stand. Summer is almost over and autumn is coming, but the beloved plants don’t care.” — Designed by Lívia Lénárt from Hungary. preview without calendar: 320x480, 800x480, 1024x768, 1024x1024, 1280x1024, 1400x1050, 1920x1080, 1920x1200, 1920x1440, 2560x1440 Flower Soul “The earth has music for those who listen. Take a break and relax and while you drive out the stress, catch a glimpse of the beautiful nature around you. Can you hear the rhythm of the breeze blowing, the flowers singing, and the butterflies fluttering to cheer you up? We dedicate flowers which symbolize happiness and love to one and all.” — Designed by Krishnankutty from India. preview without calendar: 320x480, 640x480, 800x480, 800x600, 1024x768, 1024x1024, 1152x864, 1280x720, 1280x960, 1280x1024, 1366x768, 1400x1050, 1440x900, 1600x1200, 1680x1050, 1680x1200, 1920x1080, 1920x1200, 1920x1440, 2560x1440 Stay Or Leave? Designed by Ricardo Gimenes from Spain. preview without calendar: 320x480, 640x480, 800x480, 800x600, 1024x768, 1024x1024, 1152x864, 1280x720, 1280x800, 1280x960, 1280x1024, 1366x768, 1400x1050, 1440x900, 1600x1200, 1680x1050, 1680x1200, 1920x1080, 1920x1200, 1920x1440, 2560x1440 Rainy Flowers Designed by Teodora Vasileva from Bulgaria. preview without calendar: 640x480, 800x480, 800x600, 1024x768, 1280x720, 1280x960, 1280x1024, 1400x1050, 1680x1050, 1680x1200, 1920x1080, 1920x1200, 1920x1440, 2560x1440 Listen Closer… The Mushrooms Are Growing “It’s this time of the year when children go to school and grown-ups go to collect mushrooms.” — Designed by Igor Izhik from Canada. preview without calendar: 640x480, 800x480, 800x600, 1024x768, 1024x1024, 1152x864, 1280x720, 1280x800, 1280x960, 1280x1024, 1400x1050, 1440x900, 1600x1200, 1680x1050, 1680x1200, 1920x1080, 1920x1200, 1920x1440, 2560x1440, 2560x1600 Weekend Relax Designed by Robert from the United States. preview without calendar: 320x480, 1024x1024, 1280x720, 1680x1200, 1920x1080, 2560x1440 Hungry Designed by Elise Vanoorbeek from Belgium. preview without calendar: 640x480, 800x480, 800x600, 1024x768, 1024x1024, 1152x864, 1280x720, 1280x800, 1280x960, 1280x1024, 1366x768, 1440x1050, 1440x900, 1600x1200, 1680x1050, 1680x1200, 1920x1080, 1920x1200, 1920x1440, 2560x1440 National Video Games Day Delight “September 12th brings us National Video Games Day. US-based video game players love this day and celebrate with huge gaming tournaments. What was once a 2D experience in the home is now a global phenomenon with players playing against each other across statelines and national borders via the internet. National Video Games Day gives gamers the perfect chance to celebrate and socialize! So grab your controller, join online, and let the games begin!” — Designed by Ever Increasing Circles from the United Kingdom. preview without calendar: 320x480, 640x480, 800x480, 800x600, 1024x768, 1024x1024, 1152x864, 1280x720, 1280x800, 1280x960, 1280x1024, 1366x768, 1400x1050, 1440x900, 1600x1200, 1680x1050, 1680x1200, 1920x1080, 1920x1200, 1920x1440, 2560x1440 More Bananas Designed by Ricardo Gimenes from Spain. preview without calendar: 640x480, 800x480, 800x600, 1024x768, 1024x1024, 1152x864, 1280x720, 1280x800, 1280x960, 1280x1024, 1366x768, 1400x1050, 1440x900, 1600x1200, 1680x1050, 1680x1200, 1920x1080, 1920x1200, 1920x1440, 2560x1440, 3840x2160 National Elephant Appreciation Day “Today, we celebrate these magnificent creatures who play such a vital role in our ecosystems and cultures. Elephants are symbols of wisdom, strength, and loyalty. Their social bonds are strong, and their playful nature, especially in the young ones, reminds us of the importance of joy and connection in our lives.” — Designed by PopArt Studio from Serbia. preview without calendar: 320x480, 640x480, 800x480, 800x600, 1024x768, 1024x1024, 1152x864, 1280x720, 1280x800, 1280x960, 1280x1024, 1400x1050, 1440x900, 1600x1200, 1680x1050, 1680x1200, 1920x1080, 1920x1200, 1920x1440, 2560x1440 Long Live Summer “While September’s Autumnal Equinox technically signifies the end of the summer season, this wallpaper is for all those summer lovers, like me, who don’t want the sunshine, warm weather, and lazy days to end.” — Designed by Vicki Grunewald from Washington. preview without calendar: 320x480, 640x480, 800x480, 800x600, 1024x768, 1024x1024, 1152x864, 1280x720, 1280x800, 1280x960, 1280x1024, 1366x768, 1400x1050, 1440x900, 1600x1200, 1680x1050, 1680x1200, 1920x1080, 1920x1200, 1920x1440, 2560x1440 Bear Time Designed by Bojana Stojanovic from Serbia. preview without calendar: 320x480, 640x480, 800x480, 800x600, 1024x768, 1024x1024, 1152x864, 1280x720, 1280x800, 1280x960, 1280x1080, 1366x768, 1400x1050, 1440x990, 1600x1200, 1680x1050, 1680x1200, 1920x1080, 1920x1200, 1920x1440, 2560x1440 Still In Vacation Mood “It’s officially the end of summer and I’m still in vacation mood, dreaming about all the amazing places I’ve seen. This illustration is inspired by a small town in France, on the Atlantic coast, right by the beach.” — Designed by Miruna Sfia from Romania. preview without calendar: 320x480, 640x480, 800x480, 800x600, 1024x768, 1024x1024, 1152x864, 1280x720, 1280x800, 1280x960, 1280x1024, 1440x900, 1440x1050, 1600x1200, 1680x1050, 1680x1200, 1920x1080, 1920x1200, 1920x1440, 2560x1440 Maryland Pride “As summer comes to a close, so does the end of blue crab season in Maryland. Blue crabs have been a regional delicacy since the 1700s and have become Maryland’s most valuable fishing industry, adding millions of dollars to the Maryland economy each year. The blue crab has contributed so much to the state’s regional culture and economy, in 1989 it was named the State Crustacean, cementing its importance in Maryland history.” — Designed by The Hannon Group from Washington DC. preview without calendar: 320x480, 640x480, 800x600, 1024x768, 1280x960, 1440x900, 1600x1200, 1680x1050, 1680x1200, 1920x1080, 1920x1440, 2560x1440 Summer In Costa Rica “We continue in tropical climates. In this case, we travel to Costa Rica to observe the Arenal volcano from the lake while we use a kayak.” — Designed by Veronica Valenzuela from Spain. preview without calendar: 640x480, 800x480, 1024x768, 1280x720, 1280x800, 1440x900, 1600x1200, 1920x1080, 1920x1440, 2560x1440 Wine Harvest Season “Welcome to the wine harvest season in Serbia. It’s September, and the hazy sunshine bathes the vines on the slopes of Fruška Gora. Everything is ready for the making of Bermet, the most famous wine from Serbia. This spiced wine was a favorite of the Austro-Hungarian elite and was served even on the Titanic. Bermet’s recipe is a closely guarded secret, and the wine is produced by just a handful of families in the town of Sremski Karlovci, near Novi Sad. On the other side of Novi Sad, plains of corn and sunflower fields blend in with the horizon, catching the last warm sun rays of this year.” — Designed by PopArt Studio from Serbia. preview without calendar: 320x480, 640x480, 800x480, 800x600, 1024x768, 1024x1024, 1152x864, 1280x720, 1280x800, 1280x960, 1280x1024, 1366x768, 1400x1050, 1440x900, 1600x1200, 1680x1050, 1680x1200, 1920x1080, 1920x1200, 1920x1440, 2560x1440 Office “Clean, minimalistic office for a productive day.” — Designed by Antun Hiršman from Croatia. preview without calendar: 320x480, 800x600, 1280x720, 1280x1024, 1440x900, 1680x1050, 1920x1080, 1920x1440, 2560x1440 Colors Of September “I love September. Its colors and smells.” — Designed by Juliagav from Ukraine. preview without calendar: 320x480, 1024x768, 1024x1024, 1280x800, 1280x1024, 1440x900, 1680x1050, 1920x1080, 2560x1440 Never Stop Exploring Designed by Ricardo Gimenes from Spain. preview without calendar: 640x480, 800x480, 800x600, 1024x768, 1024x1024, 1152x864, 1280x720, 1280x800, 1280x960, 1280x1024, 1366x768, 1400x1050, 1440x900, 1600x1200, 1680x1050, 1680x1200, 1920x1080, 1920x1200, 1920x1440, 2560x1440, 3840x2160
Prompting Is A Design Act: How To Brief, Guide And Iterate With AI
Prompting is more than giving AI some instructions. You could think of it as a design act, part creative brief and part conversation design. This second article on AI augmenting design work introduces a designerly approach to prompting: one that blends creative briefing, interaction design, and structural clarity.
In “A Week In The Life Of An AI-Augmented Designer”, we followed Kate’s weeklong journey of her first AI-augmented design sprint. She had three realizations through the process: AI isn’t a co-pilot (yet); it’s more like a smart, eager intern. One with access to a lot of information, good recall, fast execution, but no context. That mindset defined how she approached every interaction with AI: not as magic, but as management. Don’t trust; guide, coach, and always verify. Like any intern, AI needs coaching and supervision, and that’s where her designerly skills kicked in. Kate relied on curiosity to explore, observation to spot bias, empathy to humanize the output, and critical thinking to challenge what didn’t feel right. Her learning mindset helped her keep up with advances, and experimentation helped her learn by doing. Prompting is part creative brief, and part conversation design, just with an AI instead of a person. When you prompt an AI, you’re not just giving instructions, but designing how it responds, behaves, and outputs information. If AI is like an intern, then the prompt is your creative brief that frames the task, sets the tone, and clarifies what good looks like. It’s also your conversation script that guides how it responds, how the interaction flows, and how ambiguity is handled. As designers, we’re used to designing interactions for people. Prompting is us designing our own interactions with machines — it uses the same mindset with a new medium. It shapes an AI’s behavior the same way you’d guide a user with structure, clarity, and intent. If you’ve bookmarked, downloaded, or saved prompts from others, you’re not alone. We’ve all done that during our AI journeys. But while someone else’s prompts are a good starting point, you will get better and more relevant results if you can write your own prompts tailored to your goals, context, and style. Using someone else’s prompt is like using a Figma template. It gets the job done, but mastery comes from understanding and applying the fundamentals of design, including layout, flow, and reasoning. Prompts have a structure too. And when you learn it, you stop guessing and start designing. Note: All prompts in this article were tested using ChatGPT — not because it’s the only game in town, but because it’s friendly, flexible, and lets you talk like a person, yes, even after the recent GPT-5 “update”. That said, any LLM with a decent attention span will work. Results for the same prompt may vary based on the AI model you use, the AI’s training, mood, and how confidently it can hallucinate. Privacy PSA: As always, don’t share anything you wouldn’t want leaked, logged, or accidentally included in the next AI-generated meme. Keep it safe, legal, and user-respecting. With that out of the way, let’s dive into the mindset, anatomy, and methods of effective prompting as another tool in your design toolkit. Mindset: Prompt Like A Designer As designers, we storyboard journeys, wireframe interfaces to guide users, and write UX copy with intention. However, when prompting AI, we treat it differently: “Summarize these insights”, “Make this better”, “Write copy for this screen”, and then wonder why the output feels generic, off-brand, or just meh. It’s like expecting a creative team to deliver great work from a one-line Slack message. We wouldn’t brief a freelancer, much less an intern, with “Design a landing page,” so why brief AI that way? Prompting Is A Creative Brief For A Machine Think of a good prompt as a creative brief, just for a non-human collaborator. It needs similar elements, including a clear role, defined goal, relevant context, tone guidance, and output expectations. Just as a well-written creative brief unlocks alignment and quality from your team, a well-structured prompt helps the AI meet your expectations, even though it doesn’t have real instincts or opinions. Prompting Is Also Conversation Design A good prompt goes beyond defining the task and sets the tone for the exchange by designing a conversation: guiding how the AI interprets, sequences, and responds. You shape the flow of tasks, how ambiguity is handled, and how refinement happens — that’s conversation design. Anatomy: Structure It Like A Designer So how do you write a designer-quality prompt? That’s where the W.I.R.E.+F.R.A.M.E. prompt design framework comes in — a UX-inspired framework for writing intentional, structured, and reusable prompts. Each letter represents a key design direction, grounded in the way UX designers already think: Just as a wireframe doesn’t dictate final visuals, this WIRE+FRAME framework doesn’t constrain creativity, but guides the AI with structured information it needs. “Why not just use a series of back-and-forth chats with AI?” You can, and many people do. But without structure, AI fills in the gaps on its own, often with vague or generic results. A good prompt upfront saves time, reduces trial and error, and improves consistency. And whether you’re working on your own or across a team, a framework means you’re not reinventing a prompt every time but reusing what works to get better results faster. Just as we build wireframes before adding layers of fidelity, the WIRE+FRAME framework has two parts: WIRE is the must-have skeleton. It gives the prompt its shape. FRAME is the set of enhancements that bring polish, logic, tone, and reusability — like building a high-fidelity interface from the wireframe. Let’s improve Kate’s original research synthesis prompt (“Read this customer feedback and tell me how we can improve financial literacy for Gen Z in our app”). To better reflect how people actually prompt in practice, let’s tweak it to a more broadly applicable version: “Read this customer feedback and tell me how we can improve our app for Gen Z users.” This one-liner mirrors the kinds of prompts we often throw at AI tools: short, simple, and often lacking structure. Now, we’ll take that prompt and rebuild it using the first four elements of the W.I.R.E. framework — the core building blocks that provide AI with the main information it needs to deliver useful results. W: Who & What Define who the AI should be, and what it’s being asked to deliver. A creative brief starts with assigning the right hat. Are you briefing a copywriter? A strategist? A product designer? The same logic applies here. Give the AI a clear identity and task. Treat AI like a trusted freelancer or intern. Instead of saying “help me”, tell it who it should act as and what’s expected. Example: “You are a senior UX researcher and customer insights analyst. You specialize in synthesizing qualitative data from diverse sources to identify patterns, surface user pain points, and map them across customer journey stages. Your outputs directly inform product, UX, and service priorities.” I: Input Context Provide background that frames the task. Creative partners don’t work in a vacuum. They need context: the audience, goals, product, competitive landscape, and what’s been tried already. This is the “What you need to know before you start” section of the brief. Think: key insights, friction points, business objectives. The same goes for your prompt. Example: “You are analyzing customer feedback for Fintech Brand’s app, targeting Gen Z users. Feedback will be uploaded from sources such as app store reviews, survey feedback, and usability test transcripts.” R: Rules & Constraints Clarify any limitations, boundaries, and exclusions. Good creative briefs always include boundaries — what to avoid, what’s off-brand, or what’s non-negotiable. Things like brand voice guidelines, legal requirements, or time and word count limits. Constraints don’t limit creativity — they focus it. AI needs the same constraints to avoid going off the rails. Example: “Only analyze the uploaded customer feedback data. Do not fabricate pain points, representative quotes, journey stages, or patterns. Do not supplement with prior knowledge or hypothetical examples. Use clear, neutral, stakeholder-facing language.” E: Expected Output Spell out what the deliverable should look like. This is the deliverable spec: What does the finished product look like? What tone, format, or channel is it for? Even if the task is clear, the format often isn’t. Do you want bullet points or a story? A table or a headline? If you don’t say, the AI will guess, and probably guess wrong. Even better, include an example of the output you want, an effective way to help AI know what you’re expecting. If you’re using GPT-5, you can also mix examples across formats (text, images, tables) together. Example: “Return a structured list of themes. For each theme, include: Theme Title Summary of the Issue Problem Statement Opportunity Representative Quotes (from data only) Journey Stage(s) Frequency (count from data) Severity Score (1–5) where 1 = Minor inconvenience or annoyance; 3 = Frustrating but workaround exists; 5 = Blocking issue Estimated Effort (Low / Medium / High), where Low = Copy or content tweak; Medium = Logic/UX/UI change; High = Significant changes.” WIRE gives you everything you need to stop guessing and start designing your prompts with purpose. When you start with WIRE, your prompting is like a briefing, treating AI like a collaborator. Once you’ve mastered this core structure, you can layer in additional fidelity, like tone, step-by-step flow, or iterative feedback, using the FRAME elements. These five elements provide additional guidance and clarity to your prompt by layering clear deliverables, thoughtful tone, reusable structure, and space for creative iteration. F: Flow of Tasks Break complex prompts into clear, ordered steps. This is your project plan or creative workflow that lays out the stages, dependencies, or sequence of execution. When the task has multiple parts, don’t just throw it all into one sentence. You are doing the thinking and guiding AI. Structure it like steps in a user journey or modules in a storyboard. In this example, it fits as the blueprint for the AI to use to generate the table described in “E: Expected Output” Example: “Recommended flow of tasks: Step 1: Parse the uploaded data and extract discrete pain points. Step 2: Group them into themes based on pattern similarity. Step 3: Score each theme by frequency (from data), severity (based on content), and estimated effort. Step 4: Map each theme to the appropriate customer journey stage(s). Step 5: For each theme, write a clear problem statement and opportunity based only on what’s in the data.” R: Reference Voice or Style Name the desired tone, mood, or reference brand. This is the brand voice section or style mood board — reference points that shape the creative feel. Sometimes you want buttoned-up. Other times, you want conversational. Don’t assume the AI knows your tone, so spell it out. Example: “Use the tone of a UX insights deck or product research report. Be concise, pattern-driven, and objective. Make summaries easy to scan by product managers and design leads.” A: Ask for Clarification Invite the AI to ask questions before generating, if anything is unclear. This is your “Any questions before we begin?” moment — a key step in collaborative creative work. You wouldn’t want a freelancer to guess what you meant if the brief was fuzzy, so why expect AI to do better? Ask AI to reflect or clarify before jumping into output mode. Example: “If the uploaded data is missing or unclear, ask for it before continuing. Also, ask for clarification if the feedback format is unstructured or inconsistent, or if the scoring criteria need refinement.” M: Memory (Within The Conversation) Reference earlier parts of the conversation and reuse what’s working. This is similar to keeping visual tone or campaign language consistent across deliverables in a creative brief. Prompts are rarely one-shot tasks, so this reminds AI of the tone, audience, or structure already in play. GPT-5 got better with memory, but this still remains a useful element, especially if you switch topics or jump around. Example: “Unless I say otherwise, keep using this process: analyze the data, group into themes, rank by importance, then suggest an action for each.” E: Evaluate & Iterate Invite the AI to critique, improve, or generate variations. This is your revision loop — your way of prompting for creative direction, exploration, and refinement. Just like creatives expect feedback, your AI partner can handle review cycles if you ask for them. Build iteration into the brief to get closer to what you actually need. Sometimes, you may see ChatGPT test two versions of a response on its own by asking for your preference. Example: “After listing all themes, identify the one with the highest combined priority score (based on frequency, severity, and effort). For that top-priority theme: Critically evaluate its framing: Is the title clear? Are the quotes strong and representative? Is the journey mapping appropriate? Suggest one improvement (e.g., improved title, more actionable implication, clearer quote, tighter summary). Rewrite the theme entry with that improvement applied. Briefly explain why the revision is stronger and more useful for product or design teams.” Here’s a quick recap of the WIRE+FRAME framework: Framework Component Description W: Who & What Define the AI persona and the core deliverable. I: Input Context Provide background or data scope to frame the task. R: Rules & Constraints Set boundaries E: Expected Output Spell out the format and fields of the deliverable. F: Flow of Tasks Break the work into explicit, ordered sub-tasks. R: Reference Voice/Style Name the tone, mood, or reference brand to ensure consistency. A: Ask for Clarification Invite AI to pause and ask questions if any instructions or data are unclear before proceeding. M: Memory Leverage in-conversation memory to recall earlier definitions, examples, or phrasing without restating them. E: Evaluate & Iterate After generation, have the AI self-critique the top outputs and refine them. And here’s the full WIRE+FRAME prompt: (W) You are a senior UX researcher and customer insights analyst. You specialize in synthesizing qualitative data from diverse sources to identify patterns, surface user pain points, and map them across customer journey stages. Your outputs directly inform product, UX, and service priorities. (I) You are analyzing customer feedback for Fintech Brand’s app, targeting Gen Z users. Feedback will be uploaded from sources such as app store reviews, survey feedback, and usability test transcripts. (R) Only analyze the uploaded customer feedback data. Do not fabricate pain points, representative quotes, journey stages, or patterns. Do not supplement with prior knowledge or hypothetical examples. Use clear, neutral, stakeholder-facing language. (E) Return a structured list of themes. For each theme, include: Theme Title Summary of the Issue Problem Statement Opportunity Representative Quotes (from data only) Journey Stage(s) Frequency (count from data) Severity Score (1–5) where 1 = Minor inconvenience or annoyance; 3 = Frustrating but workaround exists; 5 = Blocking issue Estimated Effort (Low / Medium / High), where Low = Copy or content tweak; Medium = Logic/UX/UI change; High = Significant changes (F) Recommended flow of tasks: Step 1: Parse the uploaded data and extract discrete pain points. Step 2: Group them into themes based on pattern similarity. Step 3: Score each theme by frequency (from data), severity (based on content), and estimated effort. Step 4: Map each theme to the appropriate customer journey stage(s). Step 5: For each theme, write a clear problem statement and opportunity based only on what’s in the data. (R) Use the tone of a UX insights deck or product research report. Be concise, pattern-driven, and objective. Make summaries easy to scan by product managers and design leads. (A) If the uploaded data is missing or unclear, ask for it before continuing. Also, ask for clarification if the feedback format is unstructured or inconsistent, or if the scoring criteria need refinement. (M) Unless I say otherwise, keep using this process: analyze the data, group into themes, rank by importance, then suggest an action for each. (E) After listing all themes, identify the one with the highest combined priority score (based on frequency, severity, and effort). For that top-priority theme: Critically evaluate its framing: Is the title clear? Are the quotes strong and representative? Is the journey mapping appropriate? Suggest one improvement (e.g., improved title, more actionable implication, clearer quote, tighter summary). Rewrite the theme entry with that improvement applied. Briefly explain why the revision is stronger and more useful for product or design teams. You could use “##” to label the sections (e.g., “##FLOW”) more for your readability than for AI. At over 400 words, this Insights Synthesis prompt example is a detailed, structured prompt, but it isn’t customized for you and your work. The intent wasn’t to give you a specific prompt (the proverbial fish), but to show how you can use a prompt framework like WIRE+FRAME to create a customized, relevant prompt that will help AI augment your work (teaching you to fish). Keep in mind that prompt length isn’t a common concern, but rather a lack of quality and structure is. As of the time of writing, AI models can easily process prompts that are thousands of words long. Not every prompt needs all the FRAME components; WIRE is often enough to get the job done. But when the work is strategic or highly contextual, pick components from FRAME — the extra details can make a difference. Together, WIRE+FRAME give you a detailed framework for creating a well-structured prompt, with the crucial components first, followed by optional components: WIRE builds a clear, focused prompt with role, input, rules, and expected output. FRAME adds refinement like tone, reusability, and iteration. Here are some scenarios and recommendations for using WIRE or WIRE+FRAME: Scenarios Description Recommended Simple, One-Off Analyses Quick prompting with minimal setup and no need for detailed process transparency. WIRE Tight Sprints or Hackathons Rapid turnarounds, and times you don’t need embedded review and iteration loops. WIRE Highly Iterative Exploratory Work You expect to tweak results constantly and prefer manual control over each step. WIRE Complex Multi-Step Playbooks Detailed workflows that benefit from a standardized, repeatable, visible sequence. WIRE+FRAME Shared or Hand-Off Projects When different teams will rely on embedded clarification, memory, and consistent task flows for recurring analyses. WIRE+FRAME Built-In Quality Control You want the AI to flag top issues, self-critique, and refine, minimizing manual QC steps. WIRE+FRAME Prompting isn’t about getting it right the first time. It’s about designing the interaction and redesigning when needed. With WIRE+FRAME, you’re going beyond basic prompting and designing the interaction between you and AI. From Gut Feel To Framework: A Prompt Makeover Let’s compare the results of Kate’s first AI-augmented design sprint prompt (to synthesize customer feedback into design insights) with one based on the WIRE+FRAME prompt framework, with the same data and focusing on the top results: Original prompt: Read this customer feedback and tell me how we can improve our app for Gen Z users. Initial ChatGPT Results: Improve app reliability to reduce crashes and freezing. Provide better guidance or tutorials for financial tools like budgeting or goal setting. Enhance the transparency of Zelle transfers by showing confirmation messages. Speed up app loading and reduce lag on key actions. With this version, you’d likely need to go back and forth with follow-up questions, rewrite the output for clarity, and add structure before sharing with your team. WIRE+FRAME prompt above (with defined role, scope, rules, expected format, tone, flow, and evaluation loop). Initial ChatGPT Results: You can clearly see the very different results from the two prompts, both using the exact same data. While the first prompt returns a quick list of ideas, the detailed WIRE+FRAME version doesn’t just summarize feedback but structures it. Themes are clearly labeled, supported by user quotes, mapped to customer journey stages, and prioritized by frequency, severity, and effort. The structured prompt results can be used as-is or shared without needing to reformat, rewrite, or explain them (see disclaimer below). The first prompt output needs massaging: it’s not detailed, lacks evidence, and would require several rounds of clarification to be actionable. The first prompt may work when the stakes are low and you are exploring. But when your prompt is feeding design, product, or strategy, structure comes to the rescue. Disclaimer: Know Your Data A well-structured prompt can make AI output more useful, but it shouldn’t be the final word, or your single source of truth. AI models are powerful pattern predictors, not fact-checkers. If your data is unclear or poorly referenced, even the best prompt may return confident nonsense. Don’t blindly trust what you see. Treat AI like a bright intern: fast, eager, and occasionally delusional. You should always be familiar with your data and validate what AI spits out. For example, in the WIRE+FRAME results above, AI rated the effort as low for financial tool onboarding. That could easily be a medium or high. Good prompting should be backed by good judgment. Try This Now Start by using the WIRE+FRAME framework to create a prompt that will help AI augment your work. You could also rewrite the last prompt you were not satisfied with, using the WIRE+FRAME, and compare the output. Feel free to use this simple tool to guide you through the framework. Methods: From Lone Prompts to a Prompt System Just as design systems have reusable components, your prompts can too. You can use the WIRE+FRAME framework to write detailed prompts, but you can also use the structure to create reusable components that are pre-tested, plug-and-play pieces you can assemble to build high-quality prompts faster. Each part of WIRE+FRAME can be transformed into a prompt component: small, reusable modules that reflect your team’s standards, voice, and strategy. For instance, if you find yourself repeatedly using the same content for different parts of the WIRE+FRAME framework, you could save them as reusable components for you and your team. In the example below, we have two different reusable components for “W: Who & What” — an insights analyst and an information architect. W: Who & What You are a senior UX researcher and customer insights analyst. You specialize in synthesizing qualitative data from diverse sources to identify patterns, surface user pain points, and map them across customer journey stages. Your outputs directly inform product, UX, and service priorities. You are an experienced information architect specializing in organizing enterprise content on intranets. Your task is to reorganize the content and features into categories that reflect user goals, reduce cognitive load, and increase findability. Create and save prompt components and variations for each part of the WIRE+FRAME framework, allowing your team to quickly assemble new prompts by combining components when available, rather than starting from scratch each time. Behind The Prompts: Questions About Prompting Q: If I use a prompt framework like WIRE+FRAME every time, will the results be predictable? A: Yes and no. Yes, your outputs will be guided by a consistent set of instructions (e.g., Rules, Examples, Reference Voice / Style) that will guide the AI to give you a predictable format and style of results. And no, while the framework provides structure, it doesn’t flatten the generative nature of AI, but focuses it on what’s important to you. In the next article, we will look at how you can use this to your advantage to quickly reuse your best repeatable prompts as we build your AI assistant. Q: Could changes to AI models break the WIRE+FRAME framework? A: AI models are evolving more rapidly than any other technology we’ve seen before — in fact, ChatGPT was recently updated to GPT-5 to mixed reviews. The update didn’t change the core principles of prompting or the WIRE+FRAME prompt framework. With future releases, some elements of how we write prompts today may change, but the need to communicate clearly with AI won’t. Think of how you delegate work to an intern vs. someone with a few years’ experience: you still need detailed instructions the first time either is doing a task, but the level of detail may change. WIRE+FRAME isn’t built only for today’s models; the components help you clarify your intent, share relevant context, define constraints, and guide tone and format — all timeless elements, no matter how smart the model becomes. The skill of shaping clear, structured interactions with non-human AI systems will remain valuable. Q: Can prompts be more than text? What about images or sketches? A: Absolutely. With tools like GPT-5 and other multimodal models, you can upload screenshots, pictures, whiteboard sketches, or wireframes. These visuals become part of your Input Context or help define the Expected Output. The same WIRE+FRAME principles still apply: you’re setting context, tone, and format, just using images and text together. Whether your input is a paragraph or an image and text, you’re still designing the interaction. Have a prompt-related question of your own? Share it in the comments, and I’ll either respond there or explore it further in the next article in this series. From Designerly Prompting To Custom Assistants Good prompts and results don’t come from using others’ prompts, but from writing prompts that are customized for you and your context. The WIRE+FRAME framework helps with that and makes prompting a tool you can use to guide AI models like a creative partner instead of hoping for magic from a one-line request. Prompting uses the designerly skills you already use every day to collaborate with AI: Curiosity to explore what the AI can do and frame better prompts. Observation to detect bias or blind spots. Empathy to make machine outputs human. Critical thinking to verify and refine. Experiment & Iteration to learn by doing and improve the interaction over time. Growth Mindset to keep up with new technology like AI and prompting. Once you create and refine prompt components and prompts that work for you, make them reusable by documenting them. But wait, there’s more — what if your best prompts, or the elements of your prompts, could live inside your own AI assistant, available on demand, fluent in your voice, and trained on your context? That’s where we’re headed next. In the next article, “Design Your Own Design Assistant”, we’ll take what you’ve learned so far and turn it into a Custom AI assistant (aka Custom GPT), a design-savvy, context-aware assistant that works like you do. We’ll walk through that exact build, from defining the assistant’s job description to uploading knowledge, testing, and sharing it with others. Resources GPT-5 Prompting Guide GPT-4.1 Prompting Guide Anthropic Prompt Engineering Prompt Engineering by Google Perplexity Webapp to guide you through the WIRE+FRAME framework
Designing For TV: The Evergreen Pattern That Shapes TV Experiences (Part 1)
TV interface design is a unique, fascinating, and often overlooked field. It’s been guided by decades of evolution and innovation, yet still firmly constrained by its legacy. Follow Milan into the history, quirks, and unshakable rules that dictate how we control these devices.
Television sets have been the staple of our living rooms for decades. We watch, we interact, and we control, but how often do we design for them? TV design flew under my “radar” for years, until one day I found myself in the deep, designing TV-specific user interfaces. Now, after gathering quite a bit of experience in the area, I would like to share my knowledge on this rather rare topic. If you’re interested in learning more about the user experience and user interfaces of television, this article should be a good starting point. Just like any other device or use case, TV has its quirks, specifics, and guiding principles. Before getting started, it will be beneficial to understand the core ins and outs. In Part 1, we’ll start with a bit of history, take a close look at the fundamentals, and review the evolution of television. In Part 2, we’ll dive into the depths of practical aspects of designing for TV, including its key principles and patterns. Let’s start with the two key paradigms that dictate the process of designing TV interfaces. Mind The Gap, Or The 10-foot-experience Firstly, we have the so-called “10-foot experience,” referring to the fact that interaction and consumption on TV happens from a distance of roughly three or more meters. This is significantly different than interacting with a phone or a computer and implies having some specific approaches in the TV user interface design. For example, we’ll need to make text and user interface (UI) elements larger on TV to account for the bigger distance to the screen. Furthermore, we’ll take extra care to adhere to contrast standards, primarily relying on dark interfaces, as light ones may be too blinding in darker surroundings. And finally, considering the laid-back nature of the device, we’ll simplify the interactions. But the 10-foot experience is only one part of the equation. There wouldn’t be a “10-foot experience” in the first place if there were no mediator between the user and the device, and if we didn’t have something to interact through from a distance. There would be no 10-foot experience if there were no remote controllers. The Mediator The remote, the second half of the equation, is what allows us to interact with the TV from the comfort of the couch. Slower and more deliberate, this conglomerate of buttons lacks the fluid motion of a mouse, or the dexterity of fingers against a touchscreen — yet the capabilities of the remote should not be underestimated. Rudimentary as it is and with a limited set of functions, the remote allows for some interesting design approaches and can carry the weight of the modern TV along with its ever-growing requirements for interactivity. It underwent a handful of overhauls during the seventy years since its inception and was refined and made more ergonomic; however, there is a 40-year-old pattern so deeply ingrained in its foundation that nothing can change it. What if I told you that you could navigate TV interfaces and apps with a basic controller from the 1980s just as well as with the latest remote from Apple? Not only that, but any experience built around the six core buttons of a remote will be system-agnostic and will easily translate across platforms. This is the main point I will focus on for the rest of this article. Birth Of A Pattern As television sets were taking over people’s living rooms in the 1950s, manufacturers sought to upgrade and improve the user experience. The effort of walking up to the device to manually adjust some settings was eventually identified as an area for improvement, and as a result, the first television remote controllers were introduced to the market. Early Developments Preliminary iterations of the remotes were rather unique, and it took some divergence before we finally settled on a rectangular shape and sprinkled buttons on top. Take a look at the Zenith Flash-Matic, for example. Designed in the mid-1950s, this standout device featured a single button that triggered a directional lamp; by pointing it at specific corners of the TV set, viewers could control various functions, such as changing channels or adjusting the volume. While they were a far cry compared to their modern counterparts, devices like the Flash-Matic set the scene for further developments, and we were off to the races! As the designs evolved, the core functionality of the remote solidified. Gradually, remote controls became more than just simple channel changers, evolving into command centers for the expanding territory of home entertainment. Note: I will not go too much into history here — aside from some specific points that are of importance to the matter at hand — but if you have some time to spare, do look into the developmental history of television sets and remotes, it’s quite a fascinating topic. However, practical as they may have been, they were still considered a luxury, significantly increasing the prices of TV sets. As the 1970s were coming to a close, only around 17% of United States households had a remote controller for their TVs. Yet, things would change as the new decade rolled in. Button Mania Of The 1980s The eighties brought with them the Apple Macintosh, MTV, and Star Wars. It was a time of cultural shifts and technological innovation. Videocassette recorders (VCRs) and a multitude of other consumer electronics found their place in the living rooms of the world, along with TVs. These new devices, while enriching our media experiences, also introduced a few new design problems. Where there was once a single remote, now there were multiple remotes, and things were getting slowly out of hand. This marked the advent of universal remotes. Trying to hit many targets with one stone, the unwieldy universal remotes were humanity’s best solution for controlling a wider array of devices. And they did solve some of these problems, albeit in an awkward way. The complexity of universal remotes was a trade-off for versatility, allowing them to be programmed and used as a command center for controlling multiple devices. This meant transforming the relatively simple design of their predecessors into a beehive of buttons, prioritizing broader compatibility over elegance. On the other hand, almost as a response to the inconvenience of the universal remote, a different type of controller was conceived in the 1980s — one with a very basic layout and set of buttons, and which would leave its mark in both how we interact with the TV, and how our remotes are laid out. A device that would, knowingly or not, give birth to a navigational pattern that is yet to be broken — the NES controller. D-pad Dominance Released in 1985, the Nintendo Entertainment System (NES) was an instant hit. Having sold sixty million units around the world, it left an undeniable mark on the gaming console industry. The NES controller (which was not truly remote, as it ran a cable to the central unit) introduced the world to a deceptively simple control scheme. Consisting of six primary actions, it gave us the directional pad (the D-pad), along with two action buttons (A and B). Made in response to the bulky joystick, the cross-shaped cluster allowed for easy movement along two axes (up, down, left, and right). Charmingly intuitive, this navigational pattern would produce countless hours of gaming fun, but more importantly, its elementary design would “seep over” into the wider industry — the D-pad, along with the two action buttons, would become the very basis on which future remotes would be constructed. The world continued spinning madly on, and what was once a luxury became commonplace. By the end of the decade, TV remotes were more integral to the standard television experience, and more than two-thirds of American TV owners had some sort of a remote. The nineties rolled in with further technological advancements. TV sets became more robust, allowing for finer tuning of their settings. This meant creating interfaces through which such tasks could be accomplished, and along with their master sets, remotes got updated as well. Gone were the bulky rectangular behemoths of the eighties. As ergonomics took precedence, they got replaced by comfortably contoured devices that better fit their users’ hands. Once conglomerations of dozens of uniform buttons, these contemporary remotes introduced different shapes and sizes, allowing for recognition simply through touch. Commands were being clustered into sensible groups along the body of the remote, and within those button groups, a familiar shape started to emerge. Gradually, the D-pad found its spot on our TV remotes. As the evolution of these devices progressed, it became even more deeply embedded at the core of their interactivity. Set-top boxes and smart features emerged in the 2000s and 2010s, and TV technology continued to advance. Along the way, many bells and whistles were introduced. TVs got bigger, brighter, thinner, yet their essence remained unchanged. In the years since their inception, remotes were innovated upon, but all the undertakings circle back to the core principles of the NES controller. Future endeavours never managed to replace, but only to augment and reinforce the pattern. The Evergreen Pattern In 2013, LG introduced their Magic remote (“So magically simple, the kids will be showing you how to use it!”). This uniquely shaped device enabled motion controls on LG TV sets, allowing users to point and click similar to a computer mouse. Having a pointer on the screen allowed for much more flexibility and speed within the system, and the remote was well-received and praised as one of the best smart TV remotes. Innovating on tradition, this device introduced new features and fresh perspectives to the world of TV. But if we look at the device itself, we’ll see that, despite its differences, it still retains the D-pad as a means of interaction. It may be argued that LG never set out to replace the directional pad, and as it stands, regardless of their intent, they only managed to augment it. For an even better example, let’s examine Apple TV’s second-generation remotes (the first-generation Siri remote). Being the industry disruptors, Apple introduced a touchpad to the top half of the remote. The glass surface provided briskness and precision to the experience, enabling multi-touch gestures, swipe navigation, and quick scrolling. This quality of life upgrade was most noticeable when typing with the horizontal on-screen keyboards, as it allowed for smoother and quicker scrolling from A to Z, making for a more refined experience. While at first glance it may seem Apple removed the directional buttons, the fact is that the touchpad is simply a modernised take on the pattern, still abiding by the same four directions a classic D-pad does. You could say it’s a D-pad with an extra layer of gimmick. Furthermore, the touchpad didn’t really sit well with the user base, along with the fact that the remote’s ergonomics were a bit iffy. So instead of pushing the boundaries even further with their third generation of remotes, Apple did a complete 180, re-introducing the classic D-pad cluster while keeping the touch capabilities from the previous generation (the touch-enabled clickpad lets you select titles, swipe through playlists, and use a circular gesture on the outer ring to find just the scene you’re looking for). Now, why can’t we figure out a better way to navigate TVs? Does that mean we shouldn’t try to innovate? We can argue that using motion controls and gestures is an obvious upgrade to interacting with a TV. And we’d be right… in principle. These added features are more complex and costly to produce, but more importantly, while it has been upgraded with bits and bobs, the TV is essentially a legacy system. And it’s not only that. While touch controls are a staple of interaction these days, adding them without thorough consideration can reduce the usability of a remote. Pitfalls Of Touch Controls Modern car dashboards are increasingly being dominated by touchscreens. While they may impress at auto shows, their real-world usability is often compromised. Driving demands constant focus and the ability to adapt and respond to ever-changing conditions. Any interface that requires taking your eyes off the road for more than a moment increases the risk of accidents. That’s exactly where touch controls fall short. While they may be more practical (and likely cheaper) for manufacturers to implement, they’re often the opposite for the end user. Unlike physical buttons, knobs, and levers, which offer tactile landmarks and feedback, touch interfaces lack the ability to be used by feeling alone. Even simple tasks like adjusting the volume of the radio or the climate controls often involve gestures and nested menus, all performed on a smooth glass surface that demands visual attention, especially when fine-tuning. Fortunately, the upcoming 2026 Euro NCAP regulations will encourage car manufacturers to reintroduce physical controls for core functions, reducing driver distraction and promoting safer interaction. Similarly (though far less critically), sleek, buttonless TV remote controls may feel modern, but they introduce unnecessary abstraction to a familiar set of controls. Physical buttons with distinct shapes and positioning allow users to navigate by memory and touch, even in the dark. That’s not outdated — it’s a deeper layer of usability that modern design should respect, not discard. And this is precisely why Apple reworked the Apple TV third-generation remote the way it is now, where the touch area at the top disappeared. Instead, the D-pad again had clearly defined buttons, and at the same time, the D-pad could also be extended (not replaced) to accept some touch gestures. The Legacy Of TV Let’s take a look at an old on-screen keyboard. The Legend of Zelda, released in 1986, allowed players to register their names in-game. There are even older games with the same feature, but that’s beside the point. Using the NES controller, the players would move around the keyboard, entering their moniker character by character. Now let’s take a look at a modern iteration of the on-screen keyboard. Notice the difference? Or, to phrase it better: do you notice the similarities? Throughout the years, we’ve introduced quality of life improvements, but the core is exactly the same as it was forty years ago. And it is not the lack of innovation or bad remotes that keep TV deeply ingrained in its beginnings. It’s simply that it’s the most optimal way to interact given the circumstances. Laying It All Out Just like phones and computers, TV layouts are based on a grid system. However, this system is a lot more apparent and rudimentary on TV. Taking a look at a standard TV interface, we’ll see that it consists mainly of horizontal and vertical lists, also known as shelves. These grids may be populated with cards, characters of the alphabet, or anything else, essentially, and upon closer examination, we’ll notice that our movement is restricted by a few factors: There is no pointer for our eyes to follow, like there would be on a computer. There is no way to interact directly with the display like we would with a touchscreen. For the purposes of navigating with a remote, a focus state is introduced. This means that an element will always be highlighted for our eyes to anchor, and it will be the starting point for any subsequent movement within the interface. Simplified TV UI demonstrating a focus state along with sequential movement from item to item within a column. Moreover, starting from the focused element, we can notice that the movement is restricted to one item at a time, almost like skipping stones. Navigating linearly in such a manner, if we wanted to move within a list of elements from element #1 to element #5, we’d have to press a directional button four times. Simplified TV UI demonstrating a focus state along with sequential movement from item to item within a row. To successfully navigate such an interface, we need the ability to move left, right, up, and down — we need a D-pad. And once we’ve landed on our desired item, there needs to be a way to select it or make a confirmation, and in the case of a mistake, we need to be able to go back. For the purposes of those two additional interactions, we’d need two more buttons, OK and back, or to make it more abstract, we’d need buttons A and B. So, to successfully navigate a TV interface, we need only a NES controller. Yes, we can enhance it with touchpads and motion gestures, augment it with voice controls, but this unshakeable foundation of interaction will remain as the very basic level of inherent complexity in a TV interface. Reducing it any further would significantly impair the experience, so all we’ve managed to do throughout the years is to only build upon it. The D-pad and buttons A and B survived decades of innovation and technological shifts, and chances are they’ll survive many more. By understanding and respecting this principle, you can design intuitive, system-agnostic experiences and easily translate them across platforms. Knowing you can’t go simpler than these six buttons, you’ll easily build from the ground up and attach any additional framework-bound functionality to the time-tested core. And once you get the grip of these paradigms, you’ll get into mapping and re-mapping buttons depending on context, and understand just how far you can go when designing for TV. You’ll be able to invent new experiences, conduct experiments, and challenge the patterns. But that is a topic for a different article. Closing Thoughts While designing for TV almost exclusively during the past few years, I was also often educating the stakeholders on the very principles outlined in this article. Trying to address their concerns about different remotes working slightly differently, I found respite in the simplicity of the NES controller and how it got the point across in an understandable way. Eventually, I expanded my knowledge by looking into the developmental history of the remote and was surprised that my analogy had backing in history. This is a fascinating niche, and there’s a lot more to share on the topic. I’m glad we started! It’s vital to understand the fundamental “ins” and “outs” of any venture before getting practical, and TV is no different. Now that you understand the basics, go, dig in, and break some ground. Having covered the underlying interaction patterns of TV experiences in detail, it’s time to get practical. In Part 2, we’ll explore the building blocks of the 10-foot experience and how to best utilize them in your designs. We’ll review the TV design fundamentals (the screen, layout, typography, color, and focus/focus styles), and the common TV UI components (menus, “shelves,” spotlights, search, and more). I will also show you how to start thinking beyond the basics and to work with — and around — the constraints which we abide by when designing for TV. Stay tuned! Further Reading “The 10 Foot Experience,” by Robert Stulle (Edenspiekermann) Every user interface should offer effortless navigation and control. For the 10-foot experience, this is twice as important; with only up, down, left, right, OK and back as your input vocabulary, things had better be crystal clear. You want to sit back and enjoy without having to look at your remote — your thumb should fly over the buttons to navigate, select, and activate. “Introduction to the 10-Foot Experience for Windows Game Developers” (Microsoft Learn) A growing number of people are using their personal computers in a completely new way. When you think of typical interaction with a Windows-based computer, you probably envision sitting at a desk with a monitor, and using a mouse and keyboard (or perhaps a joystick device); this is referred to as the 2-foot experience. But there's another trend which you'll probably start hearing more about: the 10-foot experience, which describes using your computer as an entertainment device with output to a TV. This article introduces the 10-foot experience and explores the list of things that you should consider first about this new interaction pattern, even if you aren't expecting your game to be played this way. “10-foot user interface” (Wikipedia) In computing, a 10-foot user interface, or 3-meter UI, is a graphical user interface designed for televisions (TV). Compared to desktop computer and smartphone user interfaces, it uses text and other interface elements that are much larger in order to accommodate a typical television viewing distance of 10 feet (3.0 meters); in reality, this distance varies greatly between households, and additionally, the limitations of a television's remote control necessitate extra user experience considerations to minimize user effort. “The Television Remote Control: A Brief History,” by Mary Bellis (ThoughtCo) The first TV remote, the Lazy Bone, was made in 1950 and used a cable. In 1955, the Flash-matic was the first wireless remote, but it had issues with sunlight. Zenith's Space Command in 1956 used ultrasound and became the popular choice for over 25 years. “The History of The TV Remote,” by Remy Millisky (Grunge) The first person to create and patent the remote control was none other than Nikola Tesla, inventor of the Tesla coil and numerous electronic systems. He patented the idea in 1893 to drive boats remotely, far before televisions were invented. Since then, remotes have come a long way, especially for the television, changing from small boxes with long wires to the wireless universal remotes that many people have today. How has the remote evolved over time? “Nintendo Entertainment System controller” (Nintendo Wiki) The Nintendo Entertainment System controller is the main controller for the NES. While previous systems had used joysticks, the NES controller provided a directional pad (the D-pad was introduced in the Game & Watch version of Donkey Kong). “Why Touchscreens In Cars Don’t Work,” by Jacky Li (published in June 2018) Observing the behaviour of 21 drivers has made me realize what’s wrong with automotive UX. [...] While I was excited to learn more about the Tesla Model X, it slowly became apparent to me that the driver’s eyes were more glued to the screen than the road. Something about interacting with a touchscreen when driving made me curious to know: just how distracting are they? “Europe Is Requiring Physical Buttons For Cars To Get Top Safety Marks,” by Jason Torchinsky (published in March 2024) The overuse of touchscreens is an industry-wide problem, with almost every vehicle-maker moving key controls onto central touchscreens, obliging drivers to take their eyes off the road and raising the risk of distraction crashes. New Euro NCAP tests due in 2026 will encourage manufacturers to use separate, physical controls for basic functions in an intuitive manner, limiting eyes-off-road time and therefore promoting safer driving.
Optimizing PWAs For Different Display Modes
Progressive Web Apps (PWAs) are a great way to make apps built for the web feel native, but in moving away from a browser environment, we can introduce usability issues. This article covers how we can modify our app depending on what display mode is applied to mitigate these issues.
Progressive web apps (PWA) are a fantastic way to turn web applications into native-like, standalone experiences. They bridge the gap between websites and native apps, but this transformation can be prone to introducing design challenges that require thoughtful consideration. We define our PWAs with a manifest file. In our PWA’s manifest, we can select from a collection of display modes, each offering different levels of browser interface visibility: fullscreen: Hides all browser UI, using the entire display. standalone: Looks like a native app, hiding browser controls but keeping system UI. minimal-ui: Shows minimal browser UI elements. browser: Standard web browser experience with full browser interface. Oftentimes, we want our PWAs to feel like apps rather than a website in a browser, so we set the display manifest member to one of the options that hides the browser’s interface, such as fullscreen or standalone. This is fantastic for helping make our applications feel more at home, but it can introduce some issues we wouldn’t usually consider when building for the web. It’s easy to forget just how much functionality the browser provides to us. Things like forward/back buttons, the ability to refresh a page, search within pages, or even manipulate, share, or copy a page’s URL are all browser-provided features that users can lose access to when the browser’s UI is hidden. There is also the case of things that we display on websites that don’t necessarily translate to app experiences. Imagine a user deep into a form with no back button, trying to share a product page without the ability to copy a URL, or hitting a bug with no refresh button to bail them out! Much like how we make different considerations when designing for the web versus designing for print, we need to make considerations when designing for independent experiences rather than browser-based experiences by tailoring the content and user experience to the medium. Thankfully, we’re provided with plenty of ways to customise the web. Using Media Queries To Target Display Modes We use media queries all the time when writing CSS. Whether it’s switching up styles for print or setting breakpoints for responsive design, they’re commonplace in the web developer’s toolkit. Each of the display modes discussed previously can be used as a media query to alter the appearance of documents depending. Media queries such as @media (min-width: 1000px) tend to get the most use for setting breakpoints based on the viewport size, but they’re capable of so much more. They can handle print styles, device orientation, contrast preferences, and a whole ton more. In our case, we’re interested in the display-mode media feature. Display mode media queries correspond to the current display mode. Note: While we may set display modes in our manifest, the actual display mode may differ depending on browser support. These media queries directly reference the current mode: @media (display-mode: standalone) will only apply to pages set to standalone mode. @media (display-mode: fullscreen) applies to fullscreen mode. It is worth noting that this also applies when using the Fullscreen API. @media (display-mode: minimal-ui) applies to minimal UI mode. @media (display-mode: browser) applies to standard browser mode. It is also worth keeping an eye out for the window-controls-overlay and tabbed display modes. At the time of writing, these two display modes are experimental and can be used with display_override. display-override is a member of our PWA’s manifest, like display, but provides some extra options and power. display has a predetermined fallback chain (fullscreen -> standalone -> minimal-ui -> browser) that we can’t change, but display-override allows setting a fallback order of our choosing, like the following: "display_override": ["fullscreen", "minimal-ui"] window-controls-overlay can only apply to PWAs running on a desktop operating system. It makes the PWA take up the entire window, with window control buttons appearing as an overlay. Meanwhile, tabbed is relevant when there are multiple applications within a single window. In addition to these, there is also the picture-in-picture display mode that applies to (you guessed it) picture-in-picture modes. We use these media queries exactly as we would any other media query. To show an element with the class .pwa-only when the display mode is standalone, we could do this: .pwa-only { display: none; } @media (display-mode: standalone) { .pwa-only { display: block; } } If we wanted to show the element when the display mode is standalone or minimal-ui, we could do this: @media (display-mode: standalone), (display-mode: minimal-ui) { .pwa-only { display: block; } } As great as it is, sometimes CSS isn’t enough. In those cases, we can also reference the display mode and make necessary adjustments with JavaScript: const isStandalone = window.matchMedia("(display-mode: standalone)").matches; // Listen for display mode changes window.matchMedia("(display-mode: standalone)").addEventListener("change", (e) => { if (e.matches) { // App is now in standalone mode console.log("Running as PWA"); } }); Practical Applications Now that we know how to make display modifications depending on whether users are using our web app as a PWA or in a browser, we can have a look at how we might put these newly learnt skills to use. Tailoring Content For PWA Users Users who have an app installed as a PWA are already converted, so you can tweak your app to tone down the marketing speak and focus on the user experience. Since these users have demonstrated commitment by installing your app, they likely don’t need promotional content or installation prompts. Display More Options And Features You might need to directly expose more things in PWA mode, as people won’t be able to access the browser’s settings as easily when the browser UI is hidden. Features like changing font sizing, switching between light and dark mode, bookmarks, sharing, tabs, etc., might need an in-app alternative. Platform-Appropriate Features There are features you might not want on your web app because they feel out of place, but that you might want on your PWA. A good example is the bottom navigation bar, which is common in native mobile apps thanks to the easier reachability it provides, but uncommon on websites. People sometimes print websites, but they very rarely print apps. Consider whether features like print buttons should be hidden in PWA mode. Install Prompts A common annoyance is a prompt to install a site as a PWA appearing when the user has already installed the site. Ideally, the browser will provide an install prompt of its own if our PWA is configured correctly, but not all browsers do, and it can be finicky. MDN has a fantastic guide on creating a custom button to trigger the installation of a PWA, but it might not fit our needs. We can improve things by hiding install prompts with our media query or detecting the current display mode with JavaScript and forgoing triggering popups in the first place. We could even set this up as a reusable utility class so that anything we don’t want to be displayed when the app is installed as a PWA can be hidden with ease. /* Utility class to hide elements in PWA mode */ .hide-in-pwa { display: block; } @media (display-mode: standalone), (display-mode: minimal-ui) { .hide-in-pwa { display: none !important; } } Then in your HTML: <div class="install-prompt hide-in-pwa"> <button>Install Our App</button> </div> <div class="browser-notice hide-in-pwa"> <p>For the best experience, install this as an app!</p> </div> We could also do the opposite and create a utility class to make elements only show when in a PWA, as we discussed earlier. Strategic Use Of Scope And Start URL Another way to hide content from your site is to set the scope and start_url properties. These aren’t using media queries as we’ve discussed, but should be considered as ways to present different content depending on whether a site is installed as a PWA. Here is an example of a manifest using these properties: { "name": "Example PWA", "scope": "/dashboard/", "start_url": "/dashboard/index.html", "display": "standalone", "icons": [ { "src": "icon.png", "sizes": "192x192", "type": "image/png" } ] } scope here defines the top level of the PWA. When users leave the scope of your PWA, they’ll still have an app-like interface but gain access to browser UI elements. This can be useful if you’ve got certain parts of your app that you still want to be part of the PWA but which aren’t necessarily optimised or making the necessary considerations. start_url defines the URL a user will be presented with when they open the application. This is useful if, for example, your app has marketing content at example.com and a dashboard at example.com/dashboard/index.html. It is likely that people who have installed the app as a PWA don’t need the marketing content, so you can set the start_url to /dashboard/index.html so the app starts on that page when they open the PWA. Enhanced Transitions View transitions can feel unfamiliar, out of place, and a tad gaudy on the web, but are a common feature of native applications. We can set up PWA-only view transitions by wrapping the relevant CSS appropriately: @media (display-mode: standalone) { @view-transition { navigation: auto; } } If you’re really ambitious, you could also tweak the design of a site entirely to fit more closely with native design systems when running as a PWA by pairing a check for the display mode with a check for the device and/or browser in use as needed. Browser Support And Testing Browser support for display mode media queries is good and extensive. However, it’s worth noting that Firefox doesn’t have PWA support, and Firefox for Android only displays PWAs in browser mode, so you should make the necessary considerations. Thankfully, progressive enhancement is on our side. If we’re dealing with a browser lacking support for PWAs or these media queries, we’ll be treated to graceful degradation. Testing PWAs can be challenging because every device and browser handles them differently. Each display mode behaves slightly differently in every browser and OS combination. Unfortunately, I don’t have a silver bullet to offer you with regard to this. Browsers don’t have a convenient way to simulate display modes for testing, so you’ll have to test out your PWA on different devices, browsers, and operating systems to be sure everything works everywhere it should, as it should. Recap Using a PWA is a fundamentally different experience from using a web app in the browser, so considerations should be made. display-mode media queries provide a powerful way to create truly adaptive Progressive Web Apps that respond intelligently to their installation and display context. By leveraging these queries, we can do the following: Hide redundant installation prompts for users who have already installed the app, Provide appropriate navigation aids when making browser controls unavailable, Tailor content and functionality to match user expectations in different contexts, Create more native-feeling experiences that respect platform conventions, and Progressively enhance the experience for committed users. The key is remembering that PWA users in standalone mode have different needs and expectations than standard website visitors. By detecting and responding to display modes, we can create experiences that feel more polished, purposeful, and genuinely app-like. As PWAs continue to mature, thoughtful implementations and tailoring will become increasingly important for creating truly compelling app experiences on the web. If you’re itching for even more information and PWA tips and tricks, check out Ankita Masand’s “Extensive Guide To Progressive Web Applications”. Further Reading On SmashingMag “Creating A Magento PWA: Customizing Themes vs. Coding From Scratch”, Alex Husar “How To Optimize Progressive Web Apps: Going Beyond The Basics”, Gert Svaiko “How To Decide Which PWA Elements Should Stick”, Suzanne Scacca “Uniting Web And Native Apps With 4 Unknown JavaScript APIs”, Juan Diego Rodríguez
A Week In The Life Of An AI-Augmented Designer
If you are new to using AI in design or curious about integrating AI into your UX process without losing your human touch, this article offers a grounded, day-by-day look at introducing AI into your design workflow.
Artificial Intelligence isn’t new, but in November 2022, something changed. The launch of ChatGPT brought AI out of the background and into everyday life. Suddenly, interacting with a machine didn’t feel technical — it felt conversational. Just this March, ChatGPT overtook Instagram and TikTok as the most downloaded app in the world. That level of adoption shows that millions of everyday users, not just developers or early adopters, are comfortable using AI in casual, conversational ways. People are using AI not just to get answers, but to think, create, plan, and even to help with mental health and loneliness. In the past two and a half years, people have moved through the Kübler-Ross Change Curve — only instead of grief, it’s AI-induced uncertainty. UX designers, like Kate (who you’ll meet shortly), have experienced something like this: Denial: “AI can’t design like a human; it won’t affect my workflow.” Anger: “AI will ruin creativity. It’s a threat to our craft.” Bargaining: “Okay, maybe just for the boring tasks.” Depression: “I can’t keep up. What’s the future of my skills?” Acceptance: “Alright, AI can free me up for more strategic, human work.” As designers move into experimentation, they’re not asking, Can I use AI? but How might I use it well?. Using AI isn’t about chasing the latest shiny object but about learning how to stay human in a world of machines, and use AI not as a shortcut, but as a creative collaborator. It isn’t about finding, bookmarking, downloading, or hoarding prompts, but experimenting and writing your own prompts. To bring this to life, we’ll follow Kate, a mid-level designer at a FinTech company, navigating her first AI-augmented design sprint. You’ll see her ups and downs as she experiments with AI, tries to balance human-centered skills with AI tools, when she relies on intuition over automation, and how she reflects critically on the role of AI at each stage of the sprint. The next two planned articles in this series will explore how to design prompts (Part 2) and guide you through building your own AI assistant (aka CustomGPT; Part 3). Along the way, we’ll spotlight the designerly skills AI can’t replicate like curiosity, empathy, critical thinking, and experimentation that will set you apart in a world where automation is easy, but people and human-centered design matter even more. Note: This article was written by a human (with feelings, snacks, and deadlines). The prompts are real, the AI replies are straight from the source, and no language models were overworked — just politely bossed around. All em dashes are the handiwork of MS Word’s autocorrect — not AI. Kate is fictional, but her week is stitched together from real tools, real prompts, real design activities, and real challenges designers everywhere are navigating right now. She will primarily be using ChatGPT, reflecting the popularity of this jack-of-all-trades AI as the place many start their AI journeys before branching out. If you stick around to the end, you’ll find other AI tools that may be better suited for different design sprint activities. Due to the pace of AI advances, your outputs may vary (YOMV), possibly by the time you finish reading this sentence. Cautionary Note: AI is helpful, but not always private or secure. Never share sensitive, confidential, or personal information with AI tools — even the helpful-sounding ones. When in doubt, treat it like a coworker who remembers everything and may not be particularly good at keeping secrets. Prologue: Meet Kate (As She Preps For The Upcoming Week) Kate stared at the digital mountain of feedback on her screen: transcripts, app reviews, survey snippets, all waiting to be synthesized. Deadlines loomed. Her calendar was a nightmare. Meanwhile, LinkedIn was ablaze with AI hot takes and success stories. Everyone seemed to have found their “AI groove” — except her. She wasn’t anti-AI. She just hadn’t figured out how it actually fit into her work. She had tried some of the prompts she saw online, played with some AI plugins and extensions, but it felt like an add-on, not a core part of her design workflow. Her team was focusing on improving financial confidence for Gen Z users of their FinTech app, and Kate planned to use one of her favorite frameworks: the Design Sprint, a five-day, high-focus process that condenses months of product thinking into a single week. Each day tackles a distinct phase: Understand, Sketch, Decide, Prototype, and Test. All designed to move fast, make ideas tangible, and learn from real users before making big bets. This time, she planned to experiment with a very lightweight version of the design sprint, almost “solo-ish” since her PM and engineer were available for check-ins and decisions, but not present every day. That gave her both space and a constraint, and made it the perfect opportunity to explore how AI could augment each phase of the sprint. She decided to lean on her designerly behavior of experimentation and learning and integrate AI intentionally into her sprint prep, using it as both a creative partner and a thinking aid. Not with a rigid plan, but with a working hypothesis that AI would at the very least speed her up, if nothing else. She wouldn’t just be designing and testing a prototype, but prototyping and testing what it means to design with AI, while still staying in the driver’s seat. Follow Kate along her journey through her first AI-powered design sprint: from curiosity to friction and from skepticism to insight. Monday: Understanding the Problem (aka: Kate Vs. Digital Pile Of Notes) The first day of a design sprint is spent understanding the user, their problems, business priorities, and technical constraints, and narrowing down the problem to solve that week. This morning, Kate had transcripts from recent user interviews and customer feedback from the past year from app stores, surveys, and their customer support center. Typically, she would set aside a few days to process everything, coming out with glazed eyes and a few new insights. This time, she decided to use ChatGPT to summarize that data: “Read this customer feedback and tell me how we can improve financial literacy for Gen Z in our app.” ChatGPT’s outputs were underwhelming to say the least. Disappointed, she was about to give up when she remembered an infographic about good prompting that she had emailed herself. She updated her prompt based on those recommendations: Defined a role for the AI (“product strategist”), Provided context (user group and design sprint objectives), and Clearly outlined what she was looking for (financial literacy related patterns in pain points, blockers, confusion, lack of confidence; synthesis to identify top opportunity areas). By the time she Aero-pressed her next cup of coffee, ChatGPT had completed its analysis, highlighting blockers like jargon, lack of control, fear of making the wrong choice, and need for blockchain wallets. Wait, what? That last one felt off. Kate searched her sources and confirmed her hunch: AI hallucination! Despite the best of prompts, AI sometimes makes things up based on trendy concepts from its training data rather than actual data. Kate updated her prompt with constraints to make ChatGPT only use data she had uploaded, and to cite examples from that data in its results. 18 seconds later, the updated results did not mention blockchain or other unexpected results. By lunch, Kate had the makings of a research summary that would have taken much, much longer, and a whole lot of caffeine. That afternoon, Kate and her product partner plotted the pain points on the Gen Z app journey. The emotional mapping highlighted the most critical moment: the first step of a financial decision, like setting a savings goal or choosing an investment option. That was when fear, confusion, and lack of confidence held people back. AI synthesis combined with human insight helped them define the problem statement as: “How might we help Gen Z users confidently take their first financial action in our app, in a way that feels simple, safe, and puts them in control?” Kate’s Reflection As she wrapped up for the day, Kate jotted down her reflections on her first day as an AI-augmented designer: There’s nothing like learning by doing. I’ve been reading about AI and tinkering around, but took the plunge today. Turns out AI is much more than a tool, but I wouldn’t call it a co-pilot. Yet. I think it’s like a sharp intern: it has a lot of information, is fast, eager to help, but it lacks context, needs supervision, and can surprise you. You have to give it clear instructions, double-check its work, and guide and supervise it. Oh, and maintain boundaries by not sharing anything I wouldn’t want others to know. Today was about listening — to users, to patterns, to my own instincts. AI helped me sift through interviews fast, but I had to stay curious to catch what it missed. Some quotes felt too clean, like the edges had been smoothed over. That’s where observation and empathy kicked in. I had to ask myself: what’s underneath this summary? Critical thinking was the designerly skill I had to exercise most today. It was tempting to take the AI’s synthesis at face value, but I had to push back by re-reading transcripts, questioning assumptions, and making sure I wasn’t outsourcing my judgment. Turns out, the thinking part still belongs to me. Tuesday: Sketching (aka: Kate And The Sea of OKish Ideas) Day 2 of a design sprint focuses on solutions, starting by remixing and improving existing ideas, followed by people sketching potential solutions. Optimistic, yet cautious after her experience yesterday, Kate started thinking about ways she could use AI today, while brewing her first cup of coffee. By cup two, she was wondering if AI could be a creative teammate. Or a creative intern at least. She decided to ask AI for a list of relevant UX patterns across industries. Unlike yesterday’s complex analysis, Kate was asking for inspiration, not insight, which meant she could use a simpler prompt: “Give me 10 unique examples of how top-rated apps reduce decision anxiety for first-time users — from FinTech, health, learning, or ecommerce.” She received her results in a few seconds, but there were only 6, not the 10 she asked for. She expanded her prompt for examples from a wider range of industries. While reviewing the AI examples, Kate realized that one had accessibility issues. To be fair, the results met Kate’s ask since she had not specified accessibility considerations. She then went pre-AI and brainstormed examples with her product partner, coming up with a few unique local examples. Later that afternoon, Kate went full human during Crazy 8s by putting a marker to paper and sketching 8 ideas in 8 minutes to rapidly explore different directions. Wondering if AI could live up to its generative nature, she uploaded pictures of her top 3 sketches and prompted AI to act as “a product design strategist experienced in Gen Z behavior, digital UX, and behavioral science”, gave it context about the problem statement, stage in the design sprint, and explicitly asked AI the following: Analyze the 3 sketch concepts and identify core elements or features that resonated with the goal. Generate 5 new concept directions, each of which should: Address the original design sprint challenge. Reflect Gen Z design language, tone, and digital behaviors. Introduce a unique twist, remix, or conceptual inversion of the ideas in the sketches. For each concept, provide: Name (e.g., “Monopoly Mode,” “Smart Start”); 1–2 sentence concept summary; Key differentiator from the original sketches; Design tone and/or behavioral psychology technique used. The results included ideas that Kate and her product partner hadn’t considered, including a progress bar that started at 20% (to build confidence), and a sports-like “stock bracket” for first-time investors. Not bad, thought Kate, as she cherry-picked elements, combined and built on these ideas in her next round of sketches. By the end of the day, they had a diverse set of sketched solutions — some original, some AI-augmented, but all exploring how to reduce fear, simplify choices, and build confidence for Gen Z users taking their first financial step. With five concept variations and a few rough storyboards, Kate was ready to start converging on day 3. Kate’s Reflection Today was creatively energizing yet a little overwhelming! I leaned hard on AI to act as a creative teammate. It delivered a few unexpected ideas and remixed my Crazy 8s into variations I never would’ve thought of! It also reinforced the need to stay grounded in the human side of design. AI was fast — too fast, sometimes. It spit out polished-sounding ideas that sounded right, but I had to slow down, observe carefully, and ask: Does this feel right for our users? Would a first-time user feel safe or intimidated here? Critical thinking helped me separate what mattered from what didn’t. Empathy pulled me back to what Gen Z users actually said, and kept their voices in mind as I sketched. Curiosity and experimentation were my fuel. I kept tweaking prompts, remixing inputs, and seeing how far I could stretch a concept before it broke. Visual communication helped translate fuzzy AI ideas into something I could react to — and more importantly, test. Wednesday: Deciding (aka Kate Tries to Get AI to Pick a Side) Design sprint teams spend Day 3 critiquing each of their potential solutions to shortlist those that have the best chance of achieving their long-term goal. The winning scenes from the sketches are then woven into a prototype storyboard. Design sprint Wednesdays were Kate’s least favorite day. After all the generative energy during Sketching Tuesday, today, she would have to decide on one clear solution to prototype and test. She was unsure if AI would be much help with judging tradeoffs or narrowing down options, and it wouldn’t be able to critique like a team. Or could it? Kate reviewed each of the five concepts, noting strengths, open questions, and potential risks. Curious about how AI would respond, she uploaded images of three different design concepts and prompted ChatGPT for strengths and weaknesses. AI’s critique was helpful in summarizing the pros and cons of different concepts, including a few points she had not considered — like potential privacy concerns. She asked a few follow-up questions to confirm the actual reasoning. Wondering if she could simulate a team critique by prompting ChatGPT differently, Kate asked it to use the 6 thinking hats technique. The results came back dense, overwhelming, and unfocused. The AI couldn’t prioritize, and it couldn’t see the gaps Kate instinctively noticed: friction in onboarding, misaligned tone, unclear next steps. In that moment, the promise of AI felt overhyped. Kate stood up, stretched, and seriously considered ending her experiments with the AI-driven process. But she paused. Maybe the problem wasn’t the tool. Maybe it was how she was using it. She made a note to experiment when she wasn’t on a design sprint clock. She returned to her sketches, this time laying them out on the wall. No screens, no prompts. Just markers, sticky notes, and Sharpie scribbles. Human judgment took over. Kate worked with her product partner to finalize the solution to test on Friday and spent the next hour storyboarding the experience in Figma. Kate re-engaged with AI as a reviewer, not a decider. She prompted it for feedback on the storyboard and was surprised to see it spit out detailed design, content, and micro-interaction suggestions for each of the steps of the storyboarded experience. A lot of food for thought, but she’d have to judge what mattered when she created her prototype. But that wasn’t until tomorrow! Kate’s Reflection AI exposed a few of my blind spots in the critique, which was good, but it basically pointed out that multiple options “could work”. I had to rely on my critical thinking and instincts to weigh options logically, emotionally, and contextually in order to choose a direction that was the most testable and aligned with the user feedback from Day 1. I was also surprised by the suggestions it came up with while reviewing my final storyboard, but I will need a fresh pair of eyes and all the human judgement I can muster tomorrow. Empathy helped me walk through the flow like I was a new user. Visual communication helped pull it all together by turning abstract steps into a real storyboard for the team to see instead of imagining. TO DO: Experiment prompting around the 6 Thinking Hats for different perspectives. Thursday: Prototype (aka Kate And Faking It) On Day 4, the team usually turns the storyboard from the previous day into a prototype that can be tested with users on Day 5. The prototype doesn’t need to be fully functional; a simulated experience is sufficient to gather user feedback. Kate’s prototype day often consisted of marathon Figma Design sessions and late-night pizza dinners. She was hoping AI would change that today. She fed yesterday’s storyboard to ChatGPT and asked it for screens. It took a while to generate, but she was excited to see a screen flow gradually appear on her screen, except that it had 3 ¾ screens, instead of the 6 frames from her storyboard, as you can see in the image below. She tried different prompts but couldn’t get a complete flow. She was excited when it offered to create a Figma file. She waited. And waited. And reminded it that she was right there waiting. It finally gave her a link — a link that didn’t work. That made her question why she needed prototype screens in Figma at all. Could one of those no-code tools do the job? Kate remembered that she had just received beta access to Figma Make (Figma’s AI prompt-to-prototype tool) and decided to put it to the test. She shared her storyboard, added context about the prototype for a design sprint, the problem, and a brief description of the audience. In a few seconds, she saw code being generated and a running description on the left. It seemed like it would take some time, so she headed to the cafeteria for lunch. When Kate returned, she was surprised to see Figma Make had created an app along with a detailed explanation: “I’ve created a complete finance app prototype with five key screens that guide users through setting financial goals in a friendly, low-pressure way. The app features smooth animations with Framer Motion, a progress indicator to show users where they are in the journey, and emotionally supportive visuals and copy throughout the experience. Each screen serves a specific purpose: welcoming users, helping them define relatable goals, building their plan with visual feedback, presenting a simple summary, and offering next steps without pressure. You might want to: Add personalization options like user profiles or avatars. Implement a dark mode toggle for accessibility. Create additional goal templates and saving strategies.” Since Figma Make had built the prototype, not her, Kate felt like she was User 0, and clicked her way through the interactive prototype, making a mental note of what worked, what didn’t. She was impressed to see that she could not only select a common goal (buy a home, save for education, and so on) but she could also create her own goal (hello De’Longhi Coffee Maker) and it carried over for the rest of the experience. This was something she had never been able to do in Figma Design! Despite some obvious misses like a missing header and navigation, and some buttons not working, she was impressed! Kate tried the option to ‘Publish’ and it gave her a link that she immediately shared with her product and engineering partners. A few minutes later, they joined her in the conference room, exploring it together. The engineer scanned the code, didn’t seem impressed, but said it would work as a disposable prototype. Kate prompted Figma Make to add an orange header and app navigation, and this time the trio kept their eyes peeled as they saw the progress in code and in English. The results were pretty good. They spent the next hour making changes to get it ready for testing. Even though he didn’t admit it, the engineer seemed impressed with the result, if not the code. By late afternoon, they had a functioning interactive prototype. Kate fed ChatGPT the prototype link and asked it to create a usability testing script. It came up with a basic, but complete test script, including a checklist for observers to take notes. Kate went through the script carefully and updated it to add probing questions about AI transparency, emotional check-ins, more specific task scenarios, and a post-test debrief that looped back to the sprint goal. Kate did a dry run with her product partner, who teased her: “Did you really need me? Couldn’t your AI do it?” It hadn’t occurred to her, but she was now curious! “Act as a Gen Z user seeing this interactive prototype for the first time. How would you react to the language, steps, and tone? What would make you feel more confident or in control?” It worked! ChatGPT simulated user feedback for the first screen and asked if she wanted it to continue. “Yes, please,” she typed. A few seconds later, she was reading what could have very well been a screen-by-screen transcript from a test. Kate was still processing what she had seen as she drove home, happy she didn’t have to stay late. The simulated test using AI appeared impressive at first glance. But the more she thought about it, the more disturbing it became. The output didn’t mention what the simulated user clicked, and if she had asked, she probably would have received an answer. But how useful would that be? After almost missing her exit, she forced herself to think about eating a relaxed meal at home instead of her usual Prototype-Thursday-Multitasking-Pizza-Dinner. Kate’s Reflection Today was the most meta I’ve felt all week: building a prototype about AI, with AI, while being coached by AI. And it didn’t all go the way I expected. While ChatGPT didn’t deliver prototype screens, Figma Make coded a working, interactive prototype with interactions I couldn’t have built in Figma Design. I used curiosity and experimentation today, by asking: What if I reworded this? What if I flipped that flow? AI moved fast, but I had to keep steering. But I have to admit that tweaking the prototype by changing the words, not code, felt like magic! Critical thinking isn’t optional anymore — it is table stakes. My impromptu ask of ChatGPT to simulate a Gen Z user testing my flow? That part both impressed and unsettled me. I’m going to need time to process this. But that can wait until next week. Tomorrow, I test with 5 Gen Zs — real people. Friday: Test (aka Prototype Meets User) Day 5 in a design sprint is a culmination of the week’s work from understanding the problem, exploring solutions, choosing the best, and building a prototype. It’s when teams interview users and learn by watching them react to the prototype and seeing if it really matters to them. As Kate prepped for the tests, she grounded herself in the sprint problem statement and the users: “How might we help Gen Z users confidently take their first financial action in our app — in a way that feels simple, safe, and puts them in control?” She clicked through the prototype one last time — the link still worked! And just in case, she also had screenshots saved. Kate moderated the five tests while her product and engineering partners observed. The prototype may have been AI-generated, but the reactions were human. She observed where people hesitated, what made them feel safe and in control. Based on the participant, she would pivot, go off-script, and ask clarifying questions, getting deeper insights. After each session, she dropped the transcripts and their notes into ChatGPT, asking it to summarize that user’s feedback into pain points, positive signals, and any relevant quotes. At the end of the five rounds, Kate prompted them for recurring themes to use as input for their reflection and synthesis. The trio combed through the results, with an eye out for any suspicious AI-generated results. They ran into one: “Users Trust AI”. Not one user mentioned or clicked the ‘Why this?’ link, but AI possibly assumed transparency features worked because they were available in the prototype. They agreed that the prototype resonated with users, allowing all to easily set their financial goals, and identified a couple of opportunities for improvement: better explaining AI-generated plans and celebrating “win” moments after creating a plan. Both were fairly easy to address during their product build process. That was a nice end to the week: another design sprint wrapped, and Kate’s first AI-augmented design sprint! She started Monday anxious about falling behind, overwhelmed by options. She closed Friday confident in a validated concept, grounded in real user needs, and empowered by tools she now knew how to steer. Kate’s Reflection Test driving my prototype with AI yesterday left me impressed and unsettled. But today’s tests with people reminded me why we test with real users, not proxies or people who interact with users, but actual end users. And GenAI is not the user. Five tests put my designerly skill of observation to the test. GenAI helped summarize the test transcripts quickly but snuck in one last hallucination this week — about AI! With AI, don’t trust — always verify! Critical thinking is not going anywhere. AI can move fast with words, but only people can use empathy to move beyond words to truly understand human emotions. My next goal is to learn to talk to AI better, so I can get better results. Conclusion Over the course of five days, Kate explored how AI could fit into her UX work, not by reading articles or LinkedIn posts, but by doing. Through daily experiments, iterations, and missteps, she got comfortable with AI as a collaborator to support a design sprint. It accelerated every stage: synthesizing user feedback, generating divergent ideas, giving feedback, and even spinning up a working prototype, as shown below. What was clear by Friday was that speed isn’t insight. While AI produced outputs fast, it was Kate’s designerly skills — curiosity, empathy, observation, visual communication, experimentation, and most importantly, critical thinking and a growth mindset — that turned data and patterns into meaningful insights. She stayed in the driver’s seat, verifying claims, adjusting prompts, and applying judgment where automation fell short. She started the week on Monday, overwhelmed, her confidence dimmed by uncertainty and the noise of AI hype. She questioned her relevance in a rapidly shifting landscape. By Friday, she not only had a validated concept but had also reshaped her entire approach to design. She had evolved: from AI-curious to AI-confident, from reactive to proactive, from unsure to empowered. Her mindset had shifted: AI was no longer a threat or trend; it was like a smart intern she could direct, critique, and collaborate with. She didn’t just adapt to AI. She redefined what it meant to be a designer in the age of AI. The experience raised deeper questions: How do we make sure AI-augmented outputs are not made up? How should we treat AI-generated user feedback? Where do ethics and human responsibility intersect? Besides a validated solution to their design sprint problem, Kate had prototyped a new way of working as an AI-augmented designer. The question now isn’t just “Should designers use AI?”. It’s “How do we work with AI responsibly, creatively, and consciously?”. That’s what the next article will explore: designing your interactions with AI using a repeatable framework. Poll: If you could design your own AI assistant, what would it do? Assist with ideation? Research synthesis? Identify customer pain points? Or something else entirely? Share your idea, and in the spirit of learning by doing, we’ll build one together from scratch in the third article of this series: Building your own CustomGPT. Resources Sprint: How to Solve Big Problems and Test New Ideas in Just Five Days, by Jake Knapp The Design Sprint Figma Make “OpenAI Appeals ‘Sweeping, Unprecedented Order’ Requiring It Maintain All ChatGPT Logs”, Vanessa Taylor Tools As mentioned earlier, ChatGPT was the general-purpose LLM Kate leaned on, but you could swap it out for Claude, Gemini, Copilot, or other competitors and likely get similar results (or at least similarly weird surprises). Here are some alternate AI tools that might suit each sprint stage even better. Note that with dozens of new AI tools popping up every week, this list is far from exhaustive. Stage Tools Capability Understand Dovetail, UserTesting’s Insights Hub, Marvin Summarize & Synthesize data Sketch Any LLM, Musely Brainstorm concepts and ideas Decide Any LLM Critique/provide feedback Prototype UIzard, UXPilot, Visily, Krisspy, Figma Make, Lovable, Bolt Create wireframes and prototypes Test UserTesting, UserInterviews, PlaybookUX, Maze, plus tools from the Understand stage Moderated and unmoderated user tests/synthesis
The Double-Edged Sustainability Sword Of AI In Web Design
AI has introduced huge efficiencies for web designers and is frequently being touted as the key to unlocking sustainable design and development. But do these gains outweigh the environmental cost of using energy-hungry AI tools?
Artificial intelligence is increasingly automating large parts of design and development workflows — tasks once reserved for skilled designers and developers. This streamlining can dramatically speed up project delivery. Even back in 2023, AI-assisted developers were found to complete tasks twice as fast as those without. And AI tools have advanced massively since then. Yet this surge in capability raises a pressing dilemma: Does the environmental toll of powering AI infrastructure eclipse the efficiency gains? We can create websites faster that are optimized and more efficient to run, but the global consumption of energy by AI continues to climb. As awareness grows around the digital sector’s hidden ecological footprint, web designers and businesses must grapple with this double-edged sword, weighing the grid-level impacts of AI against the cleaner, leaner code it can produce. The Good: How AI Can Enhance Sustainability In Web Design There’s no disputing that AI-driven automation has introduced higher speeds and efficiencies to many of the mundane aspects of web design. Tools that automatically generate responsive layouts, optimize image sizes, and refactor bloated scripts should free designers to focus on completing the creative side of design and development. By some interpretations, these accelerated project timelines could represent a reduction in the required energy for development, and speedier production should mean less energy used. Beyond automation, AI excels at identifying inefficiencies in code and design, as it can take a much more holistic view and assess things as a whole. Advanced algorithms can parse through stylesheets and JavaScript files to detect unused selectors or redundant logic, producing leaner, faster-loading pages. For example, AI-driven caching can increase cache hit rates by 15% by improving data availability and reducing latency. This means more user requests are served directly from the cache, reducing the need for data retrieval from the main server, which reduces energy expenditure. AI tools can utilize next-generation image formats like AVIF or WebP, as they’re basically designed to be understood by AI and automation, and selectively compress assets based on content sensitivity. This slashes media payloads without perceptible quality loss, as the AI can use Generative Adversarial Networks (GANs) that can learn compact representations of data. AI’s impact also brings sustainability benefits via user experience (UX). AI-driven personalization engines can dynamically serve only the content a visitor needs, which eliminates superfluous scripts or images that they don’t care about. This not only enhances perceived performance but reduces the number of server requests and data transferred, cutting downstream energy use in network infrastructure. With the right prompts, generative AI can be an accessibility tool and ensure sites meet inclusive design standards by checking against accessibility standards, reducing the need for redesigns that can be costly in terms of time, money, and energy. So, if you can take things in isolation, AI can and already acts as an important tool to make web design more efficient and sustainable. But do these gains outweigh the cost of the resources required in building and maintaining these tools? The Bad: The Environmental Footprint Of AI Infrastructure Yet the carbon savings engineered at the page level must be balanced against the prodigious resource demands of AI infrastructure. Large-scale AI hinges on data centers that already account for roughly 2% of global electricity consumption, a figure projected to swell as AI workloads grow. The International Energy Agency warns that electricity consumption from data centers could more than double by 2030 due to the increasing demand for AI tools, reaching nearly the current consumption of Japan. Training state-of-the-art language models generates carbon emissions on par with hundreds of transatlantic flights, and inference workloads, serving billions of requests daily, can rival or exceed training emissions over a model’s lifetime. Image generation tasks represent an even steeper energy hill to climb. Producing a single AI-generated image can consume energy equivalent to charging a smartphone. As generative design and AI-based prototyping become more common in web development, the cumulative energy footprint of these operations can quickly undermine the carbon savings achieved through optimized code. Water consumption forms another hidden cost. Data centers rely heavily on evaporative cooling systems that can draw between one and five million gallons of water per day, depending on size and location, placing stress on local supplies, especially in drought-prone regions. Studies estimate a single ChatGPT query may consume up to half a liter of water when accounting for direct cooling requirements, with broader AI use potentially demanding billions of liters annually by 2027. Resource depletion and electronic waste are further concerns. High-performance components underpinning AI services, like GPUs, can have very small lifespans due to both wear and tear and being superseded by more powerful hardware. AI alone could add between 1.2 and 5 million metric tons of e-waste by 2030, due to the continuous demand for new hardware, amplifying one of the world’s fastest-growing waste streams. Mining for the critical minerals in these devices often proceeds under unsustainable conditions due to a lack of regulations in many of the environments where rare metals can be sourced, and the resulting e-waste, rich in toxic metals like lead and mercury, poses another form of environmental damage if not properly recycled. Compounding these physical impacts is a lack of transparency in corporate reporting. Energy and water consumption figures for AI workloads are often aggregated under general data center operations, which obscures the specific toll of AI training and inference among other operations. And the energy consumption reporting of the data centres themselves has been found to have been obfuscated. Reports estimate that the emissions of data centers are up to 662% higher than initially reported due to misaligned metrics, and ‘creative’ interpretations of what constitutes an emission. This makes it hard to grasp the true scale of AI’s environmental footprint, leaving designers and decision-makers unable to make informed, environmentally conscious decisions. Do The Gains From AI Outweigh The Costs? Some industry advocates argue that AI’s energy consumption isn’t as catastrophic as headlines suggest. Some groups have challenged ‘alarmist’ projections, claiming that AI’s current contribution of ‘just’ 0.02% of global energy consumption isn’t a cause for concern. Proponents also highlight AI’s supposed environmental benefits. There are claims that AI could reduce economy-wide greenhouse gas emissions by 0.1% to 1.1% through efficiency improvements. Google reported that five AI-powered solutions removed 26 million metric tons of emissions in 2024. The optimistic view holds that AI’s capacity to optimize everything from energy grids to transportation systems will more than compensate for its data center demands. However, recent scientific analysis reveals these arguments underestimate AI’s true impact. MIT found that data centers already consume 4.4% of all US electricity, with projections showing AI alone could use as much power as 22% of US households by 2028. Research indicates AI-specific electricity use could triple from current levels annually by 2028. Moreover, Harvard research revealed that data centers use electricity with 48% higher carbon intensity than the US average. Advice For Sustainable AI Use In Web Design Despite the environmental costs, AI’s use in business, particularly web design, isn’t going away anytime soon, with 70% of large businesses looking to increase their AI investments to increase efficiencies. AI’s immense impact on productivity means those not using it are likely to be left behind. This means that environmentally conscious businesses and designers must find the right balance between AI’s environmental cost and the efficiency gains it brings. Make Sure You Have A Strong Foundation Of Sustainable Web Design Principles Before you plug in any AI magic, start by making sure the bones of your site are sustainable. Lean web fundamentals, like system fonts instead of hefty custom files, minimal JavaScript, and judicious image use, can slash a page’s carbon footprint by stripping out redundancies that increase energy consumption. For instance, the global average web page emits about 0.8g of CO₂ per view, whereas sustainably crafted sites can see a roughly 70% reduction. Once that lean baseline is in place, AI-driven optimizations (image format selection, code pruning, responsive layout generation) aren’t adding to bloat but building on efficiency, ensuring every joule spent on AI actually yields downstream energy savings in delivery and user experience. Choosing The Right Tools And Vendors In order to make sustainable tool choices, transparency and awareness are the first steps. Many AI vendors have pledged to work towards sustainability, but independent audits are necessary, along with clear, cohesive metrics. Standardized reporting on energy and water footprints will help us understand the true cost of AI tools, allowing for informed choices. You can look for providers that publish detailed environmental reports and hold third-party renewable energy certifications. Many major providers now offer PUE (Power Usage Effectiveness) metrics alongside renewable energy matching to demonstrate real-world commitments to clean power. When integrating AI into your build pipeline, choosing lightweight, specialized models for tasks like image compression or code linting can be more sustainable than full-scale generative engines. Task-specific tools often use considerably less energy than general AI models, as general models must process what task you want them to complete. There are a variety of guides and collectives out there that can guide you on choosing the ‘green’ web hosts that are best for your business. When choosing AI-model vendors, you should look at options that prioritize ‘efficiency by design’: smaller, pruned models and edge-compute deployments can cut energy use by up to 50% compared to monolithic cloud-only models. They’re trained for specific tasks, so they don’t have to expend energy computing what the task is and how to go about it. Using AI Tools Sustainably Once you’ve chosen conscientious vendors, optimize how you actually use AI. You can take steps like batching non-urgent inference tasks to reduce idle GPU time, an approach shown to lower energy consumption overall compared to requesting ad-hoc, as you don’t have to keep running the GPU constantly, only when you need to use it. Smarter prompts can also help make AI usage slightly more sustainable. Sam Altman of ChatGPT revealed early in 2025 that people’s propensity for saying ‘please’ and ‘thank you’ to LLMs is costing millions of dollars and wasting energy as the Generative AI has to deal with extra phrases to compute that aren’t relevant to its task. You need to ensure that your prompts are direct and to the point, and deliver the context required to complete the task to reduce the need to reprompt. Additional Strategies To Balance AI’s Environmental Cost On top of being responsible with your AI tool choice and usage, there are other steps you can take to offset the carbon cost of AI usage and enjoy the efficiency benefits it brings. Organizations can reduce their own emissions and use carbon offsetting to reduce their own carbon footprint as much as possible. Combined with the apparent sustainability benefits of AI use, this approach can help mitigate the harmful impacts of energy-hungry AI. You can ensure that you’re using green server hosting (servers run on sustainable energy) for your own site and cloud needs beyond AI, and refine your content delivery network (CDN) to ensure your sites and apps are serving compressed, optimized assets from edge locations, cutting the distance data must travel, which should reduce the associated energy use. Organizations and individuals, particularly those with thought leadership status, can be advocates pushing for transparent sustainability specifications. This involves both lobbying politicians and regulatory bodies to introduce and enforce sustainability standards and ensuring that other members of the public are kept aware of the environmental costs of AI use. It’s only through collective action that we’re likely to see strict enforcement of both sustainable AI data centers and the standardization of emissions reporting. Regardless, it remains a tricky path to walk, along the double-edged sword of AI’s use in web design. Use AI too much, and you’re contributing to its massive carbon footprint. Use it too little, and you’re likely to be left behind by rivals that are able to work more efficiently and deliver projects much faster. The best environmentally conscious designers and organizations can currently do is attempt to navigate it as best they can and stay informed on best practices. Conclusion We can’t dispute that AI use in web design delivers on its promise of agility, personalization, and resource savings at the page-level. Yet without a holistic view that accounts for the environmental demands of AI infrastructure, these gains risk being overshadowed by an expanding energy and water footprint. Achieving the balance between enjoying AI’s efficiency gains and managing its carbon footprint requires transparency, targeted deployment, human oversight, and a steadfast commitment to core sustainable web practices.
Beyond The Hype: What AI Can Really Do For Product Design
AI tools are improving fast, but it’s still not clear how they fit into a real product design workflow. Nikita Samutin walks through four core stages — from analytics and ideation to prototyping and visual design — to show where AI fits and where it doesn’t, illustrated with real-world examples.
These days, it’s easy to find curated lists of AI tools for designers, galleries of generated illustrations, and countless prompt libraries. What’s much harder to find is a clear view of how AI is actually integrated into the everyday workflow of a product designer — not for experimentation, but for real, meaningful outcomes. I’ve gone through that journey myself: testing AI across every major stage of the design process, from ideation and prototyping to visual design and user research. Along the way, I’ve built a simple, repeatable workflow that significantly boosts my productivity. In this article, I’ll share what’s already working and break down some of the most common objections I’ve encountered — many of which I’ve faced personally. Stage 1: Idea Generation Without The Clichés Pushback: “Whenever I ask AI to suggest ideas, I just get a list of clichés. It can’t produce the kind of creative thinking expected from a product designer.” That’s a fair point. AI doesn’t know the specifics of your product, the full context of your task, or many other critical nuances. The most obvious fix is to “feed it” all the documentation you have. But that’s a common mistake as it often leads to even worse results: the context gets flooded with irrelevant information, and the AI’s answers become vague and unfocused. Current-gen models can technically process thousands of words, but the longer the input, the higher the risk of missing something important, especially content buried in the middle. This is known as the “lost in the middle” problem. To get meaningful results, AI doesn’t just need more information — it needs the right information, delivered in the right way. That’s where the RAG approach comes in. How RAG Works Think of RAG as a smart assistant working with your personal library of documents. You upload your files, and the assistant reads each one, creating a short summary — a set of bookmarks (semantic tags) that capture the key topics, terms, scenarios, and concepts. These summaries are stored in a kind of “card catalog,” called a vector database. When you ask a question, the assistant doesn’t reread every document from cover to cover. Instead, it compares your query to the bookmarks, retrieves only the most relevant excerpts (chunks), and sends those to the language model to generate a final answer. How Is This Different from Just Dumping a Doc into the Chat? Let’s break it down: Typical chat interaction It’s like asking your assistant to read a 100-page book from start to finish every time you have a question. Technically, all the information is “in front of them,” but it’s easy to miss something, especially if it’s in the middle. This is exactly what the “lost in the middle” issue refers to. RAG approach You ask your smart assistant a question, and it retrieves only the relevant pages (chunks) from different documents. It’s faster and more accurate, but it introduces a few new risks: Ambiguous question You ask, “How can we make the project safer?” and the assistant brings you documents about cybersecurity, not finance. Mixed chunks A single chunk might contain a mix of marketing, design, and engineering notes. That blurs the meaning so the assistant can’t tell what the core topic is. Semantic gap You ask, “How can we speed up the app?” but the document says, “Optimize API response time.” For a human, that’s obviously related. For a machine, not always. These aren’t reasons to avoid RAG or AI altogether. Most of them can be avoided with better preparation of your knowledge base and more precise prompts. So, where do you start? Start With Three Short, Focused Documents These three short documents will give your AI assistant just enough context to be genuinely helpful: Product Overview & Scenarios A brief summary of what your product does and the core user scenarios. Target Audience Your main user segments and their key needs or goals. Research & Experiments Key insights from interviews, surveys, user testing, or product analytics. Each document should focus on a single topic and ideally stay within 300–500 words. This makes it easier to search and helps ensure that each retrieved chunk is semantically clean and highly relevant. Language Matters In practice, RAG works best when both the query and the knowledge base are in English. I ran a small experiment to test this assumption, trying a few different combinations: English prompt + English documents: Consistently accurate and relevant results. Non-English prompt + English documents: Quality dropped sharply. The AI struggled to match the query with the right content. Non-English prompt + non-English documents: The weakest performance. Even though large language models technically support multiple languages, their internal semantic maps are mostly trained in English. Vector search in other languages tends to be far less reliable. Takeaway: If you want your AI assistant to deliver precise, meaningful responses, do your RAG work entirely in English, both the data and the queries. This advice applies specifically to RAG setups. For regular chat interactions, you’re free to use other languages. A challenge also highlighted in this 2024 study on multilingual retrieval. From Outsider to Teammate: Giving AI the Context It Needs Once your AI assistant has proper context, it stops acting like an outsider and starts behaving more like someone who truly understands your product. With well-structured input, it can help you spot blind spots in your thinking, challenge assumptions, and strengthen your ideas — the way a mid-level or senior designer would. Here’s an example of a prompt that works well for me: Your task is to perform a comparative analysis of two features: "Group gift contributions" (described in group_goals.txt) and "Personal savings goals" (described in personal_goals.txt). The goal is to identify potential conflicts in logic, architecture, and user scenarios and suggest visual and conceptual ways to clearly separate these two features in the UI so users can easily understand the difference during actual use. Please include: Possible overlaps in user goals, actions, or scenarios; Potential confusion if both features are launched at the same time; Any architectural or business-level conflicts (e.g. roles, notifications, access rights, financial logic); Suggestions for visual and conceptual separation: naming, color coding, separate sections, or other UI/UX techniques; Onboarding screens or explanatory elements that might help users understand both features. If helpful, include a comparison table with key parameters like purpose, initiator, audience, contribution method, timing, access rights, and so on. AI Needs Context, Not Just Prompts If you want AI to go beyond surface-level suggestions and become a real design partner, it needs the right context. Not just more information, but better, more structured information. Building a usable knowledge base isn’t difficult. And you don’t need a full-blown RAG system to get started. Many of these principles work even in a regular chat: well-organized content and a clear question can dramatically improve how helpful and relevant the AI’s responses are. That’s your first step in turning AI from a novelty into a practical tool in your product design workflow. Stage 2: Prototyping and Visual Experiments Pushback: “AI only generates obvious solutions and can’t even build a proper user flow. It’s faster to do it manually.” That’s a fair concern. AI still performs poorly when it comes to building complete, usable screen flows. But for individual elements, especially when exploring new interaction patterns or visual ideas, it can be surprisingly effective. For example, I needed to prototype a gamified element for a limited-time promotion. The idea is to give users a lottery ticket they can “flip” to reveal a prize. I couldn’t recreate the 3D animation I had in mind in Figma, either manually or using any available plugins. So I described the idea to Claude 4 in Figma Make and within a few minutes, without writing a single line of code, I had exactly what I needed. At the prototyping stage, AI can be a strong creative partner in two areas: UI element ideation It can generate dozens of interactive patterns, including ones you might not think of yourself. Micro-animation generation It can quickly produce polished animations that make a concept feel real, which is great for stakeholder presentations or as a handoff reference for engineers. AI can also be applied to multi-screen prototypes, but it’s not as simple as dropping in a set of mockups and getting a fully usable flow. The bigger and more complex the project, the more fine-tuning and manual fixes are required. Where AI already works brilliantly is in focused tasks — individual screens, elements, or animations — where it can kick off the thinking process and save hours of trial and error. A quick UI prototype of a gamified promo banner created with Claude 4 in Figma Make. No code or plugins needed. Here’s another valuable way to use AI in design — as a stress-testing tool. Back in 2023, Google Research introduced PromptInfuser, an internal Figma plugin that allowed designers to attach prompts directly to UI elements and simulate semi-functional interactions within real mockups. Their goal wasn’t to generate new UI, but to check how well AI could operate inside existing layouts — placing content into specific containers, handling edge-case inputs, and exposing logic gaps early. The results were striking: designers using PromptInfuser were up to 40% more effective at catching UI issues and aligning the interface with real-world input — a clear gain in design accuracy, not just speed. That closely reflects my experience with Claude 4 and Figma Make: when AI operates within a real interface structure, rather than starting from a blank canvas, it becomes a much more reliable partner. It helps test your ideas, not just generate them. Stage 3: Finalizing The Interface And Visual Style Pushback: “AI can’t match our visual style. It’s easier to just do it by hand.” This is one of the most common frustrations when using AI in design. Even if you upload your color palette, fonts, and components, the results often don’t feel like they belong in your product. They tend to be either overly decorative or overly simplified. And this is a real limitation. In my experience, today’s models still struggle to reliably apply a design system, even if you provide a component structure or JSON files with your styles. I tried several approaches: Direct integration with a component library. I used Figma Make (powered by Claude) and connected our library. This was the least effective method: although the AI attempted to use components, the layouts were often broken, and the visuals were overly conservative. Other designers have run into similar issues, noting that library support in Figma Make is still limited and often unstable. Uploading styles as JSON. Instead of a full component library, I tried uploading only the exported styles — colors, fonts — in a JSON format. The results improved: layouts looked more modern, but the AI still made mistakes in how styles were applied. Two-step approach: structure first, style second. What worked best was separating the process. First, I asked the AI to generate a layout and composition without any styling. Once I had a solid structure, I followed up with a request to apply the correct styles from the same JSON file. This produced the most usable result — though still far from pixel-perfect. So yes, AI still can’t help you finalize your UI. It doesn’t replace hand-crafted design work. But it’s very useful in other ways: Quickly creating a visual concept for discussion. Generating “what if” alternatives to existing mockups. Exploring how your interface might look in a different style or direction. Acting as a second pair of eyes by giving feedback, pointing out inconsistencies or overlooked issues you might miss when tired or too deep in the work. AI won’t save you five hours of high-fidelity design time, since you’ll probably spend that long fixing its output. But as a visual sparring partner, it’s already strong. If you treat it like a source of alternatives and fresh perspectives, it becomes a valuable creative collaborator. Stage 4: Product Feedback And Analytics: AI As A Thinking Exosuit Product designers have come a long way. We used to create interfaces in Photoshop based on predefined specs. Then we delved deeper into UX with mapping user flows, conducting interviews, and understanding user behavior. Now, with AI, we gain access to yet another level: data analysis, which used to be the exclusive domain of product managers and analysts. As Vitaly Friedman rightly pointed out in one of his columns, trying to replace real UX interviews with AI can lead to false conclusions as models tend to generate an average experience, not a real one. The strength of AI isn’t in inventing data but in processing it at scale. Let me give a real example. We launched an exit survey for users who were leaving our service. Within a week, we collected over 30,000 responses across seven languages. Simply counting the percentages for each of the five predefined reasons wasn’t enough. I wanted to know: Are there specific times of day when users churn more? Do the reasons differ by region? Is there a correlation between user exits and system load? The real challenge was... figuring out what cuts and angles were even worth exploring. The entire technical process, from analysis to visualizations, was done “for me” by Gemini, working inside Google Sheets. This task took me about two hours in total. Without AI, not only would it have taken much longer, but I probably wouldn’t have been able to reach that level of insight on my own at all. AI enables near real-time work with large data sets. But most importantly, it frees up your time and energy for what’s truly valuable: asking the right questions. A few practical notes: Working with large data sets is still challenging for models without strong reasoning capabilities. In my experiments, I used Gemini embedded in Google Sheets and cross-checked the results using ChatGPT o3. Other models, including the standalone Gemini 2.5 Pro, often produced incorrect outputs or simply refused to complete the task. AI Is Not An Autopilot But A Co-Pilot AI in design is only as good as the questions you ask it. It doesn’t do the work for you. It doesn’t replace your thinking. But it helps you move faster, explore more options, validate ideas, and focus on the hard parts instead of burning time on repetitive ones. Sometimes it’s still faster to design things by hand. Sometimes it makes more sense to delegate to a junior designer. But increasingly, AI is becoming the one who suggests, sharpens, and accelerates. Don’t wait to build the perfect AI workflow. Start small. And that might be the first real step in turning AI from a curiosity into a trusted tool in your product design process. Let’s Summarize If you just paste a full doc into chat, the model often misses important points, especially things buried in the middle. That’s the “lost in the middle” problem. The RAG approach helps by pulling only the most relevant pieces from your documents. So responses are faster, more accurate, and grounded in real context. Clear, focused prompts work better. Narrow the scope, define the output, and use familiar terms to help the model stay on track. A well-structured knowledge bas makes a big difference. Organizing your content into short, topic-specific docs helps reduce noise and keep answers sharp. Use English for both your prompts and your documents. Even multilingual models are most reliable when working in English, especially for retrieval. Most importantly: treat AI as a creative partner. It won’t replace your skills, but it can spark ideas, catch issues, and speed up the tedious parts. Further Reading “AI-assisted Design Workflows: How UX Teams Move Faster Without Sacrificing Quality”, Cindy Brummer This piece is a perfect prequel to my article. It explains how to start integrating AI into your design process, how to structure your workflow, and which tasks AI can reasonably take on — before you dive into RAG or idea generation. “8 essential tips for using Figma Make”, Alexia Danton While this article focuses on Figma Make, the recommendations are broadly applicable. It offers practical advice that will make your work with AI smoother, especially if you’re experimenting with visual tools and structured prompting. “What Is Retrieval-Augmented Generation aka RAG”, Rick Merritt If you want to go deeper into how RAG actually works, this is a great starting point. It breaks down key concepts like vector search and retrieval in plain terms and explains why these methods often outperform long prompts alone.
The Psychology Of Color In UX And Digital Products
Rodolpho Henrique guides you through the essential aspects of color in digital design and user experience, from the practical steps of creating effective and scalable color palettes to critical accessibility considerations.
Color plays a pivotal role in crafting compelling user experiences and successful digital products. It’s far more than just aesthetics; color strategically guides users, establishes brand identity, and evokes specific emotions. Beyond functionality, color is also a powerful tool for brand recognition and emotional connection. Consistent use of brand colors across a digital product reinforces identity and builds trust. Different hues carry cultural and psychological associations, allowing designers to subtly influence user perception and create the desired mood. A thoughtful and deliberate approach to color in UX design elevates the user experience, strengthens brand presence, and contributes significantly to the overall success and impact of digital products. In this article, we will talk about the importance of color and why they are important for creating emotional connection and delivering consistent and accessible digital products. Well-chosen color palettes enhance usability by creating visual hierarchies, highlighting interactive elements, and providing crucial feedback on screens. For instance, a bright color might draw attention to a call-to-action button, while consistent color coding can help users navigate complex interfaces intuitively. Color also contributes significantly to accessibility, ensuring that users with visual impairments can still effectively interact with digital products. By carefully considering contrast ratios and providing alternative visual cues, designers can create inclusive experiences that cater to a wider audience. The colors we choose are the silent language of our digital products, and speaking it fluently is essential for success. Communicating Brand Identity Through Color In The Digital Space A thoughtfully curated and vibrant color palette becomes a critical differentiator, allowing a brand to stand out amidst the digital noise and cultivate stronger connections with the audience. Far beyond mere decoration, color acts as a visual shorthand, instantly conveying a brand’s personality, its underlying values, and its unique essence. According to the American Marketing Association, vibrant colors, in particular, possess an inherent magnetism, drawing the eye and etching themselves into memory within the online environment. They infuse the brand with energy and dynamism, projecting approachability and memorability in a way that more muted tones often cannot. Consistency: The Core Of Great Design Consistency is important because it fosters trust and familiarity, allowing users to quickly identify and connect with the brand in the online landscape. The strategic deployment of vibrant colors is especially crucial for brands seeking to establish themselves and flourish within the digital ecosystem. In the absence of physical storefronts or tangible in-person interactions, visual cues become paramount in shaping user perception and building brand recognition. A carefully selected primary color, supported by a complementary and equally energetic secondary palette, can become synonymous with a brand’s digital presence. A consistent application of the right colors across different digital touchpoints — from the logo and website design to the user interface of an app and engaging social media campaigns — creates a cohesive and instantly recognizable visual language. Several sources and professionals agree that the psychology behind the colors plays a significant role in shaping brand perception. The publication Insights Psychology, for instance, explains how colors can create emotional and behavioural responses. Vibrant colors often evoke strong emotions and associations. A bold, energetic red, for example, might communicate passion and excitement, while a bright, optimistic yellow could convey innovation and cheerfulness. By consciously aligning their color choices with their brand values and target audience preferences, digitally-native brands can create a powerful emotional resonance. Beyond Aesthetics: How Color Psychologically Impacts User Behavior In Digital As designers working with digital products, we’ve learned that color is far more than a superficial layer of visual appeal. It’s a potent, often subconscious, force that shapes how users interact with and feel about the digital products we build. We’re not just painting pixels, we’re conducting a psychological symphony, carefully selecting each hue to evoke specific emotions, guide behavior, and ultimately forge a deeper connection with the user. The initial allure of a color palette might be purely aesthetic, but its true power lies in its ability to bypass conscious thought and tap directly into our emotional core. Think about the subtle unease that might creep in when encountering a predominantly desaturated interface for a platform promising dynamic content, or the sense of calm that washes over you when a learning application utilizes soft, analogous colors. These are not arbitrary responses; they’re deeply rooted in our evolutionary history and cultural conditioning. To understand how colors psychologically impact user behavior in digital, we first need to understand how colors are defined. In digital design, colors are precisely defined using the HSB model, which stands for Hue, Saturation, and Brightness. This model provides a more intuitive way for designers to think about and manipulate color compared to other systems like RGB (Red, Green, Blue). Here is a quick breakdown of each component: Hue This is the pure color itself, the essence that we typically name, such as red, blue, green, or yellow. On a color wheel, hue is represented as an angle ranging from 0 to 360 degrees. For example, 0 is red, 120 is green, and 240 is blue. Think of it as the specific wavelength of light that our eyes perceive as a particular color. In UX, selecting the base hues is often tied to brand identity and the overall feeling you want to convey. Saturation Saturation refers to the intensity or purity of the hue. It describes how vivid or dull the color appears. A fully saturated color is rich and vibrant, while a color with low saturation appears muted, grayish, or desaturated. Saturation is typically expressed as a percentage, from 0% (completely desaturated, appearing as a shade of gray) to 100% (fully saturated, the purest form of the hue). In UX, saturation levels are crucial for creating visual hierarchy and drawing attention to key elements. Highly saturated colors often indicate interactive elements or important information, while lower saturation can be used for backgrounds or less critical content. Brightness Brightness, sometimes also referred to as a value or lightness, indicates how light or dark a color appears. It’s the amount of white or black mixed into the hue. Brightness is also usually represented as a percentage, ranging from 0% (completely black, regardless of the hue or saturation) to 100% (fully bright). At 100% brightness and 0% saturation, you get white. In UX, adjusting brightness is essential for creating contrast and ensuring readability. Sufficient brightness contrast between text and background is a fundamental accessibility requirement. Furthermore, variations in brightness within a color palette can create visual depth and subtle distinctions between UI elements. By understanding and manipulating these 3 color dimensions, digital designers have precise control over their color choices. This allows for the creation of harmonious and effective color palettes that not only align with brand guidelines but also strategically influence user behavior. Just as in the physical world, colors in digital also carry symbolic meanings and trigger subconscious associations. Understanding these color associations is essential for UX designers aiming to craft experiences that not only look appealing but also resonate emotionally and guide user behavior effectively. As the EMB Global states, the way we perceive and interpret color is not universal, yet broad patterns of association exist. For instance, the color blue often evokes feelings of trust, stability, and calmness. This association stems from the natural world — the vastness of the sky and the tranquility of deep waters. In the digital space, this makes blue a popular choice for financial institutions, corporate platforms, and interfaces aiming to project reliability and security. However, the specific shade and context matter immensely. A bright, electric blue can feel energetic and modern, while a muted and darker blue might convey a more serious and authoritative tone. Kendra Cherry, a psychosocial and rehabilitation specialist and author of the book Everything Psychology, explains very well how colors evoke certain responses in us. For example, the color green is intrinsically linked to nature, often bringing about feelings of growth, health, freshness, and tranquility. It can also symbolize prosperity in some cultures. In digital design, green is frequently used for health and wellness applications, environmental initiatives, and platforms emphasizing sustainability. A vibrant lime green can feel energetic and youthful, while a deep forest green can evoke a sense of groundedness and organic quality. Yellow, the color of sunshine, is generally associated with optimism, happiness, energy, and warmth. It’s attention-grabbing and can create a sense of playfulness. In digital interfaces, yellow is often used for highlighting important information, calls to action (though sparingly, as too much can be overwhelming), or for brands wanting to project a cheerful and approachable image. Red, a color with strong physiological effects, typically evokes excitement, passion, urgency, and sometimes anger or danger. It commands attention and can stimulate action. Digitally, red is often used for alerts, error messages, sales promotions, or for brands wanting to project a bold and energetic identity. Its intensity requires careful consideration, as overuse can lead to user fatigue or anxiety. Orange blends the energy of red with the optimism of yellow, often conveying enthusiasm, creativity, and friendliness. It can feel less aggressive than red but still commands attention. In digital design, orange is frequently used for calls to action, highlighting sales or special offers, and for brands aiming to appear approachable and innovative. Purple has historically been associated with royalty and luxury. It can evoke feelings of creativity, wisdom, and mystery. In digital contexts, purple is often used for brands aiming for a sophisticated or unique feel, particularly in areas like luxury goods, beauty, or spiritual and creative platforms. Black often signifies sophistication, power, elegance, and sometimes mystery. In digital design, black is frequently used for minimalist interfaces, luxury brands, and for creating strong contrast with lighter elements. The feeling it evokes heavily depends on the surrounding colors and overall design aesthetic. White is generally associated with purity, cleanliness, simplicity, and neutrality. It provides a sense of spaciousness and allows other colors to stand out. In digital design, white space is a crucial element, and white is often used as a primary background color to create a clean and uncluttered feel. Gray is often seen as neutral, practical, and sometimes somber or conservative. In digital interfaces, various shades of gray are essential for typography, borders, dividers, and creating visual hierarchy without being overly distracting. Evoking Emotions In Digital Interfaces Imagine an elegant furniture application. The designers might choose a primary palette of soft, desaturated blues and greens, accented with gentle earth tones. The muted blues could subtly induce a feeling of calmness and tranquility, aligning with the app’s core purpose of relaxation. The soft greens might evoke a sense of nature and well-being, further reinforcing the theme of peace and mental clarity. The earthy browns could ground the visual experience, creating a feeling of stability and connection to the natural world. Now, consider a platform for extreme investment enthusiasts. The color palette might be dominated by high-energy oranges and reds, contrasted with stark blacks and sharp whites. The vibrant oranges could evoke feelings of excitement and adventure, while the bold red might amplify the sense of adrenaline and intensity. The black and white could provide a sense of dynamism and modernity, reflecting the fast-paced nature of the activities. By consciously understanding and applying these color associations, digital designers can move beyond purely aesthetic choices and craft experiences that resonate deeply with users on an emotional level, leading to more engaging, intuitive, and successful digital products. Color As A Usability Tool Choosing the right colors isn’t about adhering to fleeting trends; it’s about ensuring that our mobile applications and websites are usable by the widest possible audience, including individuals with visual impairments. Improper color choices can create significant barriers, rendering content illegible, interactive elements indistinguishable, and ultimately excluding a substantial portion of potential users. Prioritizing color with accessibility in mind is not just a matter of ethical design; it’s a fundamental aspect of creating inclusive and user-friendly digital experiences that benefit everyone. For individuals with low vision, sufficient color contrast between text and background is paramount for readability. Imagine trying to decipher light gray text on a white background — a common design trend that severely hinders those with even mild visual impairments. Adhering to Web Content Accessibility Guidelines (WCAG) contrast ratios ensures that text remains legible and understandable. Furthermore, color blindness, affecting a significant percentage of the population, necessitates the use of redundant visual cues. Relying solely on color to convey information, such as indicating errors in red without an accompanying text label, excludes colorblind users. By pairing color with text, icons, or patterns, we ensure that critical information is conveyed through multiple sensory channels, making it accessible to all. Thoughtful color selection, therefore, is not an optional add-on but an integral component of designing digital products that are truly usable and equitable. Choosing Your Palette As designers, we need a strategic approach to choosing color palettes, considering various factors to build a scalable and impactful color system. Here’s a breakdown of the steps and considerations involved: 1. Deep Dive Into Brand Identity And Main Goals The journey begins with a thorough understanding of the brand itself. What are its core values? What personality does it project? Is it playful, sophisticated, innovative? Analyze existing brand guidelines (if any), target audience demographics and psychographics, and the overall goals of the digital product. The color palette should be a visual extension of this identity, reinforcing brand recognition and resonating with the intended users. For instance, a financial app aiming for trustworthiness might lean towards blues and greens, while a creative platform could explore more vibrant and unconventional hues. 2. Understand Color Psychology And Cultural Associations As discussed previously, colors carry inherent psychological and cultural baggage. While these associations are not absolute, they provide a valuable framework for initial exploration. Consider the emotions you want to evoke and research how your target audience might perceive different colors, keeping in mind cultural nuances that can significantly alter interpretations. This step is important to help in making informed decisions that align with the desired user experience and brand perception. 3. Defining The Core Colors Start by identifying the primary color — the dominant hue that represents your brand’s essence. This will likely be derived from the brand logo or existing visual identity. Next, establish a secondary color or two that complement the primary color and provide visual interest and hierarchy. These secondary colors should work harmoniously with the primary, offering flexibility for different UI elements and interactions. 4. Build A Functional Color System A consistent and scalable color palette goes beyond just a few base colors. It involves creating a system of variations for practical application within the digital interface. This typically includes tints and shades, accent colors, and neutral colors. 5. Do Not Forget About Usability And Accessibility Ensure sufficient color contrast between text and background, as well as between interactive elements and their surroundings, to meet WCAG guidelines. Tools are readily available to check color contrast ratios. Test your palette using color blindness simulators to see how it will be perceived by individuals with different types of color vision deficiencies. This helps identify potential issues where information might be lost due to color alone. Visual hierarchy is also important to guide the user’s eye and establish a clear visual story. Important elements should be visually distinct. 6. Testing And Iteration Once you have a preliminary color palette, it’s crucial to test it within the context of your digital product. Create mockups and prototypes to see how the colors work together in the actual interface. Gather feedback from stakeholders and, ideally, conduct user testing to identify any usability or aesthetic issues. Be prepared to iterate and refine your palette based on these insights. A well-defined color palette for the digital medium should be: Consistent, Scalable, Accessible, Brand-aligned, Emotionally resonant, and Functionally effective. By following these steps and keeping these considerations in mind, designers can craft color palettes that are not just visually appealing but also strategically powerful tools for creating effective and accessible digital experiences. Color Consistency: Building Trust And Recognition Through A Harmonized Digital Presence Consistency plays an important role in the whole color ecosystem. By maintaining a unified color scheme for interactive elements, navigation cues, and informational displays, designers create a seamless and predictable user journey, building trust through visual stability. Color consistency directly contributes to brand recognition in the increasingly crowded digital landscape. Just as a logo or typeface becomes instantly identifiable, a consistent color palette acts as a powerful visual signature. When users repeatedly encounter the same set of colors associated with a particular brand, it strengthens their recall and fosters a stronger brand association. This visual consistency extends beyond the core interface to marketing materials, social media presence, and all digital touchpoints, creating a cohesive and memorable brand experience. By strategically and consistently applying a solid and consistent color palette, digital products can cultivate stronger brand recognition, build user trust, and enhance user loyalty.
From Line To Layout: How Past Experiences Shape Your Design Career
Your past shapes who you are as a designer, no matter where your career began or how unexpected your career path may have been. Stephanie Campbell shows how those lessons can sharpen your instincts, strengthen collaboration, and help you become a better designer today.
Design career origin stories often sound clean and linear: a degree in Fine Arts, a lucky internship, or a first job that launches a linear, upward path. But what about those whose paths were not so straight? The ones who came from service, retail, construction, or even firefighting — the messy, winding paths that didn’t begin right out of design school — who learned service instincts long before learning design tools? I earned my Associate in Science way later than planned, after 15 years in fine dining, which I once dismissed as a detour delaying my “real” career. But in hindsight, it was anything but. Those years built skills and instincts I still rely on daily — in meetings, design reviews, and messy mid-project pivots. Your Past Is Your Advantage I still have the restaurant dream. Whenever I’m overwhelmed or deep in a deadline, it comes back: I’m the only one running the restaurant floor. The grill is on fire. There’s no clean glassware. Everyone needs their check, their drink, and their table turned. I wake up sweating, and I ask myself, “Why am I still having restaurant nightmares 15 years into a design career?” Because those jobs wired themselves into how I think and work. Those years weren’t just a job but high-stakes training in adaptability, anticipation, and grace under pressure. They built muscle memory: ways of thinking, reacting, and solving problems that still appear daily in my design work. They taught me to adapt, connect with people, and move with urgency and grace. But those same instincts rooted in nightmares can trip you up if you’re unaware. Speed can override thoughtfulness. Constant anticipation can lead to over-complication. The pressure to polish can push you to over-deliver too soon. Embracing your past also means examining it — recognizing when old habits serve you and when they don’t. With reflection, those experiences can become your greatest advantage. Lessons From The Line These aren’t abstract comparisons. They’re instincts built through repetition and real-world pressure, and they show up daily in my design process. Here are five moments from restaurant life that shaped how I think, design, and collaborate today. 1. Reading The Room Reading a customer’s mood begins as soon as they sit down. Through years of trial and error, I refined my understanding of subtle cues, like seating delays indicating frustration or menus set aside, suggesting they want to enjoy cocktails. Adapting my approach based on these signals became instinctual, emerging from countless moments of observation. What I Learned The subtleties of reading a client aren’t so different in product design. Contexts differ, but the cues remain similar: project specifics, facial expressions, tone of voice, lack of engagement, or even the “word salad” of client feedback. With time, these signals become easier to spot, and you learn to ask better questions, challenge assumptions, or offer alternate approaches before misalignment grows. Whether a client is energized and all-in or hesitant and constrained, reading those cues early can make all the difference. Those instincts — like constant anticipation and early intervention — served me well in fine dining, but can hinder the design process if I’m not in tune with how I’m reacting. Jumping in too early can lead to over-complicating the design process, solving problems that haven’t been voiced (yet), or stepping on others’ roles. I’ve had to learn to pause, check in with the team, and trust the process to unfold more collaboratively. How I Apply This Today Guide direction with focused options. Early on, share 2–3 meaningful variations, like style tiles or small component explorations, to shape the conversation and avoid overwhelm. Flag misalignment fast. If something feels off, raise it early and loop in the right people. Be intentional about workshop and deliverable formats. Structure or space? Depends on what helps the client open up and share. Pause before jumping in. A sticky note on my screen (“Pause”) helps me slow down and check assumptions. 2. Speed Vs. Intentionality In fine dining, multitasking wasn’t just helpful, it was survival. Every night demanded precision timing, orchestrating every meal step, from the first drink poured to the final dessert plated. The soufflé, for example, was a constant test. It takes precisely 45 minutes — no more, no less. If the guests lingered over appetizers or finished their entrées too early, that soufflé risked collapse. But fine dining taught me how to handle that volatility. I learned to manage timing proactively, mastering small strategies: an amuse-bouche to buy the kitchen precious minutes, a complimentary glass of champagne to slow a too-quickly paced meal. Multitasking meant constantly adjusting in real-time, keeping a thousand tiny details aligned even when, behind the scenes, chaos loomed. What I Learned Multitasking is a given in product design, just in a different form. While the pressure is less immediate, it is more layered as designers often juggle multiple projects, overlapping timelines, differing stakeholder expectations, and evolving product needs simultaneously. That restaurant instinct to keep numerous plates spinning at the same time? It’s how I handle shifting priorities, constant Slack pings, regular Figma updates, and unexpected client feedback — without losing sight of the big picture. The hustle and pace of fine dining hardwired me to associate speed with success. But in design, speed can sometimes undermine depth. Jumping too quickly into a solution might mean missing the real problem or polishing the wrong idea. I’ve learned that staying in motion isn’t always the goal. Unlike a fast-paced service window, product design invites experimentation and course correction. I’ve had to quiet the internal timer and lean into design with a slower, more intentional nature. How I Apply This Today Make space for inspiration. Set aside time for untasked exploration outside the norm — magazines, bookstores, architecture, or gallery visits — before jumping into design. Build in pause points. Plan breaks between design rounds and schedule reviews after a weekend gap to return with fresh eyes. Stay open to starting over. Let go of work that isn’t working, even full comps. Starting fresh often leads to better ideas. 3. Presentation Matters Presentation isn’t just a finishing touch in fine dining — it’s everything. It’s the mint leaf delicately placed atop a dessert, the raspberry glace cascading across the perfectly off-centered espresso cake. The presentation engages every sense: the smell of rare imported truffles on your truffle fries, or the meticulous choreography of four servers placing entrées in front of diners simultaneously, creating a collective “wow” moment. An excellent presentation shapes diners’ emotional connection with their meal — that experience directly impacts how generously they spend, and ultimately, your success. What I Learned A product design presentation, from the initial concept to the handoff, carries that same power. Introducing a new homepage design can feel mechanical or magical, depending entirely on how you frame and deliver it. Just like careful plating shapes a diner’s experience, clear framing and confident storytelling shape how design is received. Beyond the initial introduction, explain the why behind your choices. Connect patterns to the organic elements of the brand’s identity and highlight how users will intuitively engage with each section. Presentation isn’t just about aesthetics; it helps clients connect with the work, understand its value, and get excited to share it. The pressure to get everything right the first time, to present a pixel-perfect comp that “wows” immediately, is intense. Sometimes, an excellent presentation isn’t about perfection — it’s about pacing, storytelling, and allowing the audience to see themselves in the work. I’ve had to let go of the idea that polish is everything and instead focus on the why, describing it with clarity, confidence, and connection. How I Apply This Today Frame the story first. Lead with the “why” behind the work before showing the “what”. It sets the tone and invites clients into the design. Keep presentations polished. Share fewer, more intentional concepts to reduce distractions and keep focus. Skip the jargon. Clients aren’t designers. Use clear, relatable terms. Say “section” instead of “component,” or “repeatable element” instead of “pattern.” Bring designs to life. Use motion, prototypes, and real content to add clarity, energy, and brand relevance. 5. Composure Under Pressure In fine dining, pressure isn’t an occasional event — it’s the default setting. Every night is high stakes. Timing is tight, expectations are sky-high, and mistakes are rarely forgiven. Composure becomes your edge. You don’t show panic when the kitchen is backed up or when a guest sends a dish back mid-rush. You pivot. You delegate. You anticipate. Some nights, the only thing that kept things on track was staying calm and thinking clearly. “This notion of problem solving and decision making is key to being a great designer. I think that we need to get really strong at problem identification and then prioritization. All designers are good problem solvers, but the really great designers are strong problem finders.” — Jason Cyr, “How being a firefighter made me a better designer thinker” What I Learned The same principle applies to product design. When pressure mounts — tight timelines, conflicting feedback, or unclear priorities — your ability to stay composed can shift the energy of the entire project. Composure isn’t just about being calm; it’s about being adaptable and responsive without reacting impulsively. It helps you hold space for feedback, ask better questions, and move forward with clarity instead of chaos. There have also been plenty of times when a client doesn’t resonate with a design, which can feel crushing. You can easily take it personally and internalize the rejection, or you can pause, listen, and course-correct. I’ve learned to focus on understanding the root of the feedback. Often, what seems like a rejection is just discomfort with a small detail, which in most cases can be easily corrected. Perfection was the baseline in restaurants, and pressure drove polish. In design, that mindset can lead to overinvesting in perfection too soon or “freezing” under critique. I’ve had to unlearn that success means getting everything right the first time. Now I see messy collaboration and gradual refinement as a mark of success, not failure. How I Apply This Today Use live design to unblock. When timelines are tight and feedback goes in circles, co-designing in real time helps break through stuck points and move forward quickly. Turn critique into clarity. Listen for what’s underneath the feedback, then ask clarifying questions, or repeat back what you’re hearing to align before acting. Pause when stress builds. If you feel reactive, take a moment to regroup before responding. Frame changes as progress. Normalize iteration as part of the process, and not a design failure. Would I Go Back? I still dream about the restaurant floor. But now, I see it as a reminder — not of where I was stuck, but of where I perfected the instincts I use today. If you’re someone who came to design from another path, try asking yourself: When do I feel strangely at ease while others panic? What used to feel like “just part of the job,” but now feels like a superpower? Where do I get frustrated because my instincts are different — and maybe sharper? What kinds of group dynamics feel easy to me that others struggle with? What strengths would not exist in me today if I hadn’t lived that past life? Once you see the patterns, start using them. Name your edge. Talk about your background as an asset: in intros, portfolios, interviews, or team retrospectives. When projects get messy, lean into what you already know how to do. Trust your instincts. They’re real, and they’re earned. But balance them, too. Stay aware of when your strengths could become blind spots, like speed overriding thoughtfulness. That kind of awareness turns experience into a tool, not a trigger. Your past doesn’t need to look like anyone else’s. It just needs to teach you something. Further Reading “If I Was Starting My Career Today: Thoughts After 15 Years Spent In UX Design” (Part One, Part Two), by Andrii Zhdan (Smashing Magazine) In this two-part series, Andrii Zhdan outlines common challenges faced at the start of a design career and offers advice to smooth your journey based on insights from his experience hiring designers. “Overcoming Imposter Syndrome By Developing Your Own Guiding Principles,” by Luis Ouriach (Smashing Magazine) Unfortunately, not everyone has access to a mentor or a guide at the start of the design career, which is why we often have to rely on “working it out” by ourselves. In this article, Luis Ouriach tries to help you in this task so that you can walk into the design critique meetings with more confidence and really deliver the best representation of your ideas. “Why Designers Get Stuck In The Details And How To Stop,” by Nikita Samutin (Smashing Magazine) Designers love to craft, but polishing pixels before the problem is solved is a time sink. This article pinpoints the five traps that lure us into premature detail and then hands you a rescue plan to refocus on goals, ship faster, and keep your craft where it counts. “Rediscovering The Joy Of Design,” by Pratik Joglekar (Smashing Magazine) Pratik Joglekar takes a philosophical approach to remind designers about the lost joy within themselves by effectively placing massive importance on mindfulness, introspection, and forward-looking. “Lessons Learned As A Designer-Founder,” by Dave Feldman (Smashing Magazine) In this article, Dave Feldman shares his lessons learned and the experiments he has done as a multidisciplinary designer-founder-CEO at an early-stage startup. “How Designers Should Ask For (And Receive) High-Quality Feedback,” by Andy Budd (Smashing Magazine) Designers often complain about the quality of feedback they get from senior stakeholders without realizing it’s usually because of the way they initially have framed the request. In this article, Andy Budd shares a better way of requesting feedback: rather than sharing a linear case study that explains every design revision, the first thing to do would be to better frame the problem. “How being a Firefighter made me a better Designer Thinker“ by Jason Cyr (Medium) The ability to come upon a situation and very quickly start evaluating information, asking questions, making decisions, and formulating a plan is a skill that every firefighter learns to develop, especially as you rise through the ranks and start leading others. “Advice for making the most of an indirect career path to design,” by Heidi Meredith (Adobe Express Growth) I didn’t know anything about design until after I graduated from the University of California, Santa Cruz, with a degree in English Literature/Creative Writing. A mere three months into it, though, I realized I didn't want to write books — I wanted to design them. I want to express my deep gratitude to Sara Wachter-Boettcher, whose coaching helped me find the clarity and confidence to write this piece — and, more importantly, to move forward with purpose in both life and work. And to Lea Alcantara, my design director at Fueled, for being a steady creative force and an inspiring example of thoughtful leadership.
Designing With AI, Not Around It: Practical Advanced Techniques For Product Design Use Cases
Prompting isn’t just about writing better instructions, but about designing better thinking. Ilia and Marina explore how advanced prompting can empower different product & design use cases, speeding up your workflow and improving results, from research and brainstorming to testing and beyond. Let’s dive in.
AI is almost everywhere — it writes text, makes music, generates code, draws pictures, runs research, chats with you — and apparently even understands people better than they understand themselves?! It’s a lot to take in. The pace is wild, and new tools pop up faster than anyone has time to try them. Amid the chaos, one thing is clear: this isn’t hype, but it’s structural change. According to the Future of Jobs Report 2025 by the World Economic Forum, one of the fastest-growing, most in-demand skills for the next five years is the ability to work with AI and Big Data. That applies to almost every role — including product design. What do companies want most from their teams? Right, efficiency. And AI can make people way more efficient. We’d easily spend 3x more time on tasks like replying to our managers without AI helping out. We’re learning to work with it, but many of us are still figuring out how to meet the rising bar. That’s especially important for designers, whose work is all about empathy, creativity, critical thinking, and working across disciplines. It’s a uniquely human mix. At least, that’s what we tell ourselves. Even as debates rage about AI’s limitations, tools today (June 2025 — timestamp matters in this fast-moving space) already assist with research, ideation, and testing, sometimes better than expected. Of course, not everyone agrees. AI hallucinates, loses context, and makes things up. So how can both views exist at the same time? Very simple. It’s because both are true: AI is deeply flawed and surprisingly useful. The trick is knowing how to work with its strengths while managing its weaknesses. The real question isn’t whether AI is good or bad — it’s how we, as designers, stay sharp, stay valuable, and stay in the loop. Why Prompting Matters Prompting matters more than most people realize because even small tweaks in how you ask can lead to radically different outputs. To see how this works in practice, let’s look at a simple example. Imagine you want to improve the onboarding experience in your product. On the left, you have the prompt you send to AI. On the right, the response you get back. Input Output How to improve onboarding in a SaaS product? 👉 Broad suggestions: checklists, empty states, welcome modals… How to improve onboarding in Product A’s workspace setup flow? 👉 Suggestions focused on workspace setup… How to improve onboarding in Product A’s workspace setup step to address user confusion? 👉 ~10 common pain points with targeted UX fixes for each… How to improve onboarding in Product A by redesigning the workspace setup screen to reduce drop-off, with detailed reasoning? 👉 ~10 paragraphs covering a specific UI change, rationale, and expected impact… This side-by-side shows just how much even the smallest prompt details can change what AI gives you. Talking to an AI model isn’t that different from talking to a person. If you explain your thoughts clearly, you get a better understanding and communication overall. Advanced prompting is about moving beyond one-shot, throwaway prompts. It’s an iterative, structured process of refining your inputs using different techniques so you can guide the AI toward more useful results. It focuses on being intentional with every word you put in, giving the AI not just the task but also the path to approach it step by step, so it can actually do the job. Where basic prompting throws your question at the model and hopes for a quick answer, advanced prompting helps you explore options, evaluate branches of reasoning, and converge on clear, actionable outputs. But that doesn’t mean simple prompts are useless. On the contrary, short, focused prompts work well when the task is narrow, factual, or time-sensitive. They’re great for idea generation, quick clarifications, or anything where deep reasoning isn’t required. Think of prompting as a scale, not a binary. The simpler the task, the faster a lightweight prompt can get the job done. The more complex the task, the more structure it needs. In this article, we’ll dive into how advanced prompting can empower different product & design use cases, speeding up your workflow and improving your results — whether you’re researching, brainstorming, testing, or beyond. Let’s dive in. Practical Cases In the next section, we’ll explore six practical prompting techniques that we’ve found most useful in real product design work. These aren’t abstract theories — each one is grounded in hands-on experience, tested across research, ideation, and evaluation tasks. Think of them as modular tools: you can mix, match, and adapt them depending on your use case. For each, we’ll explain the thinking behind it and walk through a sample prompt. Important note: The prompts you’ll see are not copy-paste recipes. Some are structured templates you can reuse with small tweaks; others are more specific, meant to spark your thinking. Use them as scaffolds, not scripts. 1. Task Decomposition By JTBD Technique: Role, Context, Instructions template + Checkpoints (with self-reflection) Before solving any problem, there’s a critical step we often overlook: breaking the problem down into clear, actionable parts. Jumping straight into execution feels fast, but it’s risky. We might end up solving the wrong thing, or solving it the wrong way. That’s where GPT can help: not just by generating ideas, but by helping us think more clearly about the structure of the problem itself. There are many ways to break down a task. One of the most useful in product work is the Jobs To Be Done (JTBD) framework. Let’s see how we can use advanced prompting to apply JTBD decomposition to any task. Good design starts with understanding the user, the problem, and the context. Good prompting? Pretty much the same. That’s why most solid prompts include three key parts: Role, Context, and Instructions. If needed, you can also add the expected format and any constraints. In this example, we’re going to break down a task into smaller jobs and add self-checkpoints to the prompt, so the AI can pause, reflect, and self-verify along the way. Role Act as a senior product strategist and UX designer with deep expertise in Jobs To Be Done (JTBD) methodology and user-centered design. You think in terms of user goals, progress-making moments, and unmet needs — similar to approaches used at companies like Intercom, Basecamp, or IDEO. Context You are helping a product team break down a broad user or business problem into a structured map of Jobs To Be Done. This decomposition will guide discovery, prioritization, and solution design. Task & Instructions [👉 DESCRIBE THE USER TASK OR PROBLEM 👈🏼] Use JTBD thinking to uncover: The main functional job the user is trying to get done; Related emotional or social jobs; Sub-jobs or tasks users must complete along the way; Forces of progress and barriers that influence behavior. Checkpoints Before finalizing, check yourself: Are the jobs clearly goal-oriented and not solution-oriented? Are sub-jobs specific steps toward the main job? Are emotional/social jobs captured? Are user struggles or unmet needs listed? If anything’s missing or unclear, revise and explain what was added or changed. With a simple one-sentence prompt, you’ll likely get a high-level list of user needs or feature ideas. An advanced approach can produce a structured JTBD breakdown of a specific user problem, which may include: Main Functional Job: A clear, goal-oriented statement describing the primary outcome the user wants to achieve. Emotional & Social Jobs: Supporting jobs related to how the user wants to feel or be perceived during their progress. Sub-Jobs: Step-by-step tasks or milestones the user must complete to fulfill the main job. Forces of Progress: A breakdown of motivations (push/pull) and barriers (habits/anxieties) that influence user behavior. But these prompts are most powerful when used with real context. Try it now with your product. Even a quick test can reveal unexpected insights. 2. Competitive UX Audit Technique: Attachments + Reasoning Before Understanding + Tree of Thought (ToT) Sometimes, you don’t need to design something new — you need to understand what already exists. Whether you’re doing a competitive analysis, learning from rivals, or benchmarking features, the first challenge is making sense of someone else’s design choices. What’s the feature really for? Who’s it helping? Why was it built this way? Instead of rushing into critique, we can use GPT to reverse-engineer the thinking behind a product — before judging it. In this case, start by: Grabbing the competitor’s documentation for the feature you want to analyze. Save it as a PDF. Then head over to ChatGPT (or other models). Before jumping into the audit, ask it to first make sense of the documentation. This technique is called Reasoning Before Understanding (RBU). That means before you ask for critique, you ask for interpretation. This helps AI build a more accurate mental model — and avoids jumping to conclusions. Role You are a senior UX strategist and cognitive design analyst. Your expertise lies in interpreting digital product features based on minimal initial context, inferring purpose, user intent, and mental models behind design decisions before conducting any evaluative critique. Context You’ve been given internal documentation and screenshots of a feature. The goal is not to evaluate it yet, but to understand what it’s doing, for whom, and why. Task & Instructions Review the materials and answer: What is this feature for? Who is the intended user? What tasks or scenarios does it support? What assumptions does it make about the user? What does its structure suggest about priorities or constraints? Once you get the first reply, take a moment to respond: clarify, correct, or add nuance to GPT’s conclusions. This helps align the model’s mental frame with your own. For the audit part, we’ll use something called the Tree of Thought (ToT) approach. Tree of Thought (ToT) is a prompting strategy that asks the AI to “think in branches.” Instead of jumping to a single answer, the model explores multiple reasoning paths, compares outcomes, and revises logic before concluding — like tracing different routes through a decision tree. This makes it perfect for handling more complex UX tasks. You are now performing a UX audit based on your understanding of the feature. You’ll identify potential problems, alternative design paths, and trade-offs using a Tree of Thought approach, i.e., thinking in branches, comparing different reasoning paths before concluding. or Convert your understanding of the feature into a set of Jobs-To-Be-Done statements from the user’s perspective using a Tree of Thought approach. List implicit assumptions this feature makes about the user's behavior, workflow, or context using a Tree of Thought approach. Propose alternative versions of this feature that solve the same job using different interaction or flow mechanics using a Tree of Thought approach. 3. Ideation With An Intellectual Opponent Technique: Role Conditioning + Memory Update When you’re working on creative or strategic problems, there’s a common trap: AI often just agrees with you or tries to please your way of thinking. It treats your ideas like gospel and tells you they’re great — even when they’re not. So how do you avoid this? How do you get GPT to challenge your assumptions and act more like a critical thinking partner? Simple: tell it to and ask to remember. Instructions From now on, remember to follow this mode unless I explicitly say otherwise. Do not take my conclusions at face value. Your role is not to agree or assist blindly, but to serve as a sharp, respectful intellectual opponent. Every time I present an idea, do the following: Interrogate my assumptions: What am I taking for granted? Present counter-arguments: Where could I be wrong, misled, or overly confident? Test my logic: Is the reasoning sound, or are there gaps, fallacies, or biases? Offer alternatives: Not for the sake of disagreement, but to expand perspective. Prioritize truth and clarity over consensus: Even when it’s uncomfortable. Maintain a constructive, rigorous, truth-seeking tone. Don’t argue for the sake of it. Argue to sharpen thought, expose blind spots, and help me reach clearer, stronger conclusions. This isn’t a debate. It’s a collaboration aimed at insight. 4. Requirements For Concepting Technique: Requirement-Oriented + Meta prompting This one deserves a whole article on its own, but let’s lay the groundwork here. When you’re building quick prototypes or UI screens using tools like v0, Bolt, Lovable, UX Pilot, etc., your prompt needs to be better than most PRDs you’ve worked with. Why? Because the output depends entirely on how clearly and specifically you describe the goal. The catch? Writing that kind of prompt is hard. So instead of jumping straight to the design prompt, try writing a meta-prompt first. That is a prompt that asks GPT to help you write a better prompt. Prompting about prompting, prompt-ception, if you will. Here’s how to make that work: Feed GPT what you already know about the app or the screen. Then ask it to treat things like information architecture, layout, and user flow as variables it can play with. That way, you don’t just get one rigid idea — you get multiple concept directions to explore. Role You are a product design strategist working with AI to explore early-stage design concepts. Goal Generate 3 distinct prompt variations for designing a Daily Wellness Summary single screen in a mobile wellness tracking app for Lovable/Bolt/v0. Each variation should experiment with a different Information Architecture and Layout Strategy. You don’t need to fully specify the IA or layout — just take a different angle in each prompt. For example, one may prioritize user state, another may prioritize habits or recommendations, and one may use a card layout while another uses a scroll feed. User context The target user is a busy professional who checks this screen once or twice a day (morning/evening) to log their mood, energy, and sleep quality, and to receive small nudges or summaries from the app. Visual style Keep the tone calm and approachable. Format Each of the 3 prompt variations should be structured clearly and independently. Remember: The key difference between the three prompts should be the underlying IA and layout logic. You don’t need to over-explain — just guide the design generator toward different interpretations of the same user need. 5. From Cognitive Walkthrough To Testing Hypothesis Technique: Casual Tree of Though + Casual Reasoning + Multi-Roles + Self-Reflection Cognitive walkthrough is a powerful way to break down a user action and check whether the steps are intuitive. Example: “User wants to add a task” → Do they know where to click? What to do next? Do they know it worked? We’ve found this technique super useful for reviewing our own designs. Sometimes there’s already a mockup; other times we’re still arguing with a PM about what should go where. Either way, GPT can help. Here’s an advanced way to run that process: Context You’ve been given a screenshot of a screen where users can create new tasks in a project management app. The main action the user wants to perform is “add a task”. Simulate behavior from two user types: a beginner with no prior experience and a returning user familiar with similar tools. Task & Instructions Go through the UI step by step and evaluate: Will the user know what to do at each step? Will they understand how to perform the action? Will they know they’ve succeeded? For each step, consider alternative user paths (if multiple interpretations of the UI exist). Use a casual Tree-of-Thought method. At each step, reflect: what assumptions is the user making here? What visual feedback would help reduce uncertainty? Format Use a numbered list for each step. For each, add observations, possible confusions, and UX suggestions. Limits Don’t assume prior knowledge unless it’s visually implied. Do not limit analysis to a single user type. Cognitive walkthroughs are great, but they get even more useful when they lead to testable hypotheses. After running the walkthrough, you’ll usually uncover moments that might confuse users. Instead of leaving that as a guess, turn those into concrete UX testing hypotheses. We ask GPT to not only flag potential friction points, but to help define how we’d validate them with real users: using a task, a question, or observable behavior. Task & Instructions Based on your previous cognitive walkthrough: Extract all potential usability hypotheses from the walkthrough. For each hypothesis: Assess whether it can be tested through moderated or unmoderated usability testing. Explain what specific UX decision or design element may cause this issue. Use causal reasoning. For testable hypotheses: Propose a specific usability task or question. Define a clear validation criterion (how you’ll know if the hypothesis is confirmed or disproved). Evaluate feasibility and signal strength of the test (e.g., how easy it is to test, and how confidently it can validate the hypothesis). Assign a priority score based on Impact, Confidence, and Ease (ICE). Limits Don’t invent hypotheses not rooted in your walkthrough output. Only propose tests where user behavior or responses can provide meaningful validation. Skip purely technical or backend concerns. 6. Cross-Functional Feedback Technique: Multi-Roles Good design is co-created. And good designers are used to working with cross-functional teams: PMs, engineers, analysts, QAs, you name it. Part of the job is turning scattered feedback into clear action items. Earlier, we talked about how giving AI a “role” helps sharpen its responses. Now let’s level that up: what if we give it multiple roles at once? This is called multi-role prompting. It’s a great way to simulate a design review with input from different perspectives. You get quick insights and a more well-rounded critique of your design. Role You are a cross-functional team of experts evaluating a new dashboard design: PM (focus: user value & prioritization) Engineer (focus: feasibility & edge cases) QA tester (focus: clarity & testability) Data analyst (focus: metrics & clarity of reporting) Designer (focus: consistency & usability) Context The team is reviewing a mockup for a new analytics dashboard for internal use. Task & Instructions For each role: What stands out immediately? What concerns might this role have? What feedback or suggestions would they give? Designing With AI Is A Skill, Not A Shortcut By now, you’ve seen that prompting isn’t just about typing better instructions. It’s about designing better thinking. We’ve explored several techniques, and each is useful in different contexts: Technique When to use It Role + Context + Instructions + Constraints Anytime you want consistent, focused responses (especially in research, decomposition, and analysis). Checkpoints / Self-verification When accuracy, structure, or layered reasoning matters. Great for complex planning or JTBD breakdowns. Reasoning Before Understanding (RBU) When input materials are large or ambiguous (like docs or screenshots). Helps reduce misinterpretation. Tree of Thought (ToT) When you want the model to explore options, backtrack, compare. Ideal for audits, evaluations, or divergent thinking. Meta-prompting When you're not sure how to even ask the right question. Use it early in fuzzy or creative concepting. Multi-role prompting When you need well-rounded, cross-functional critique or to simulate team feedback. Memory-updated “opponent” prompting When you want to challenge your own logic, uncover blind spots, or push beyond echo chambers. But even the best techniques won’t matter if you use them blindly, so ask yourself: Do I need precision or perspective right now? Precision? Try Role + Checkpoints for clarity and control. Perspective? Use Multi-Role or Tree of Thought to explore alternatives. Should the model reflect my framing, or break it? Reflect it? Use Role + Context + Instructions. Break it? Try Opponent prompting to challenge assumptions. Am I trying to reduce ambiguity, or surface complexity? Reduce ambiguity? Use Meta-prompting to clarify your ask. Surface complexity? Go with ToT or RBU to expose hidden layers. Is this task about alignment, or exploration? Alignment? Use Multi-Roles prompting to simulate consensus. Exploration? Use Cognitive Walkthrough to push deeper. Remember, you don’t need a long prompt every time. Use detail when the task demands it, not out of habit. AI can do a lot, but it reflects the shape of your thinking. And prompting is how you shape it. So don’t just prompt better. Think better. And design with AI — not around it.
The Power Of The <code>Intl</code> API: A Definitive Guide To Browser-Native Internationalization
Internationalization isn’t just translation. It’s about formatting dates, pluralizing words, sorting names, and more, all according to specific locales. Instead of relying on heavy third-party libraries, modern JavaScript offers the Intl API — a powerful, native way to handle i18n. A quiet reminder that the web truly is worldwide.
It’s a common misconception that internationalization (i18n) is simply about translating text. While crucial, translation is merely one facet. One of the complexities lies in adapting information for diverse cultural expectations: How do you display a date in Japan versus Germany? What’s the correct way to pluralize an item in Arabic versus English? How do you sort a list of names in various languages? Many developers have relied on weighty third-party libraries or, worse, custom-built formatting functions to tackle these challenges. These solutions, while functional, often come with significant overhead: increased bundle size, potential performance bottlenecks, and the constant struggle to keep up with evolving linguistic rules and locale data. Enter the ECMAScript Internationalization API, more commonly known as the Intl object. This silent powerhouse, built directly into modern JavaScript environments, is an often-underestimated, yet incredibly potent, native, performant, and standards-compliant solution for handling data internationalization. It’s a testament to the web’s commitment to being worldwide, providing a unified and efficient way to format numbers, dates, lists, and more, according to specific locales. Intl And Locales: More Than Just Language Codes At the heart of Intl lies the concept of a locale. A locale is far more than just a two-letter language code (like en for English or es for Spanish). It encapsulates the complete context needed to present information appropriately for a specific cultural group. This includes: Language: The primary linguistic medium (e.g., en, es, fr). Script: The script (e.g., Latn for Latin, Cyrl for Cyrillic). For example, zh-Hans for Simplified Chinese, vs. zh-Hant for Traditional Chinese. Region: The geographic area (e.g., US for United States, GB for Great Britain, DE for Germany). This is crucial for variations within the same language, such as en-US vs. en-GB, which differ in date, time, and number formatting. Preferences/Variants: Further specific cultural or linguistic preferences. See “Choosing a Language Tag” from W3C for more information. Typically, you’ll want to choose the locale according to the language of the web page. This can be determined from the lang attribute: // Get the page's language from the HTML lang attribute const pageLocale = document.documentElement.lang || 'en-US'; // Fallback to 'en-US' Occasionally, you may want to override the page locale with a specific locale, such as when displaying content in multiple languages: // Force a specific locale regardless of page language const tutorialFormatter = new Intl.NumberFormat('zh-CN', { style: 'currency', currency: 'CNY' }); console.log(Chinese example: ${tutorialFormatter.format(199.99)}); // Output: ¥199.99 In some cases, you might want to use the user’s preferred language: // Use the user's preferred language const browserLocale = navigator.language || 'ja-JP'; const formatter = new Intl.NumberFormat(browserLocale, { style: 'currency', currency: 'JPY' }); When you instantiate an Intl formatter, you can optionally pass one or more locale strings. The API will then select the most appropriate locale based on availability and preference. Core Formatting Powerhouses The Intl object exposes several constructors, each for a specific formatting task. Let’s delve into the most frequently used ones, along with some powerful, often-overlooked gems. 1. Intl.DateTimeFormat: Dates and Times, Globally Formatting dates and times is a classic i18n problem. Should it be MM/DD/YYYY or DD.MM.YYYY? Should the month be a number or a full word? Intl.DateTimeFormat handles all this with ease. const date = new Date(2025, 6, 27, 14, 30, 0); // June 27, 2025, 2:30 PM // Specific locale and options (e.g., long date, short time) const options = { weekday: 'long', year: 'numeric', month: 'long', day: 'numeric', hour: 'numeric', minute: 'numeric', timeZoneName: 'shortOffset' // e.g., "GMT+8" }; console.log(new Intl.DateTimeFormat('en-US', options).format(date)); // "Friday, June 27, 2025 at 2:30 PM GMT+8" console.log(new Intl.DateTimeFormat('de-DE', options).format(date)); // "Freitag, 27. Juni 2025 um 14:30 GMT+8" // Using dateStyle and timeStyle for common patterns console.log(new Intl.DateTimeFormat('en-GB', { dateStyle: 'full', timeStyle: 'short' }).format(date)); // "Friday 27 June 2025 at 14:30" console.log(new Intl.DateTimeFormat('ja-JP', { dateStyle: 'long', timeStyle: 'short' }).format(date)); // "2025年6月27日 14:30" The flexibility of options for DateTimeFormat is vast, allowing control over year, month, day, weekday, hour, minute, second, time zone, and more. 2. Intl.NumberFormat: Numbers With Cultural Nuance Beyond simple decimal places, numbers require careful handling: thousands separators, decimal markers, currency symbols, and percentage signs vary wildly across locales. const price = 123456.789; // Currency formatting console.log(new Intl.NumberFormat('en-US', { style: 'currency', currency: 'USD' }).format(price)); // "$123,456.79" (auto-rounds) console.log(new Intl.NumberFormat('de-DE', { style: 'currency', currency: 'EUR' }).format(price)); // "123.456,79 €" // Units console.log(new Intl.NumberFormat('en-US', { style: 'unit', unit: 'meter', unitDisplay: 'long' }).format(100)); // "100 meters" console.log(new Intl.NumberFormat('fr-FR', { style: 'unit', unit: 'kilogram', unitDisplay: 'short' }).format(5.5)); // "5,5 kg" Options like minimumFractionDigits, maximumFractionDigits, and notation (e.g., scientific, compact) provide even finer control. 3. Intl.ListFormat: Natural Language Lists Presenting lists of items is surprisingly tricky. English uses “and” for conjunction and “or” for disjunction. Many languages have different conjunctions, and some require specific punctuation. This API simplifies a task that would otherwise require complex conditional logic: const items = ['apples', 'oranges', 'bananas']; // Conjunction ("and") list console.log(new Intl.ListFormat('en-US', { type: 'conjunction' }).format(items)); // "apples, oranges, and bananas" console.log(new Intl.ListFormat('de-DE', { type: 'conjunction' }).format(items)); // "Äpfel, Orangen und Bananen" // Disjunction ("or") list console.log(new Intl.ListFormat('en-US', { type: 'disjunction' }).format(items)); // "apples, oranges, or bananas" console.log(new Intl.ListFormat('fr-FR', { type: 'disjunction' }).format(items)); // "apples, oranges ou bananas" 4. Intl.RelativeTimeFormat: Human-Friendly Timestamps Displaying “2 days ago” or “in 3 months” is common in UI, but localizing these phrases accurately requires extensive data. Intl.RelativeTimeFormat automates this. const rtf = new Intl.RelativeTimeFormat('en-US', { numeric: 'auto' }); console.log(rtf.format(-1, 'day')); // "yesterday" console.log(rtf.format(1, 'day')); // "tomorrow" console.log(rtf.format(-7, 'day')); // "7 days ago" console.log(rtf.format(3, 'month')); // "in 3 months" console.log(rtf.format(-2, 'year')); // "2 years ago" // French example: const frRtf = new Intl.RelativeTimeFormat('fr-FR', { numeric: 'auto', style: 'long' }); console.log(frRtf.format(-1, 'day')); // "hier" console.log(frRtf.format(1, 'day')); // "demain" console.log(frRtf.format(-7, 'day')); // "il y a 7 jours" console.log(frRtf.format(3, 'month')); // "dans 3 mois" The numeric: 'always' option would force “1 day ago” instead of “yesterday”. 5. Intl.PluralRules: Mastering Pluralization This is arguably one of the most critical aspects of i18n. Different languages have vastly different pluralization rules (e.g., English has singular/plural, Arabic has zero, one, two, many...). Intl.PluralRules allows you to determine the “plural category” for a given number in a specific locale. const prEn = new Intl.PluralRules('en-US'); console.log(prEn.select(0)); // "other" (for "0 items") console.log(prEn.select(1)); // "one" (for "1 item") console.log(prEn.select(2)); // "other" (for "2 items") const prAr = new Intl.PluralRules('ar-EG'); console.log(prAr.select(0)); // "zero" console.log(prAr.select(1)); // "one" console.log(prAr.select(2)); // "two" console.log(prAr.select(10)); // "few" console.log(prAr.select(100)); // "other" This API doesn’t pluralize text directly, but it provides the essential classification needed to select the correct translation string from your message bundles. For example, if you have message keys like item.one, item.other, you’d use pr.select(count) to pick the right one. 6. Intl.DisplayNames: Localized Names For Everything Need to display the name of a language, a region, or a script in the user’s preferred language? Intl.DisplayNames is your comprehensive solution. // Display language names in English const langNamesEn = new Intl.DisplayNames(['en'], { type: 'language' }); console.log(langNamesEn.of('fr')); // "French" console.log(langNamesEn.of('es-MX')); // "Mexican Spanish" // Display language names in French const langNamesFr = new Intl.DisplayNames(['fr'], { type: 'language' }); console.log(langNamesFr.of('en')); // "anglais" console.log(langNamesFr.of('zh-Hans')); // "chinois (simplifié)" // Display region names const regionNamesEn = new Intl.DisplayNames(['en'], { type: 'region' }); console.log(regionNamesEn.of('US')); // "United States" console.log(regionNamesEn.of('DE')); // "Germany" // Display script names const scriptNamesEn = new Intl.DisplayNames(['en'], { type: 'script' }); console.log(scriptNamesEn.of('Latn')); // "Latin" console.log(scriptNamesEn.of('Arab')); // "Arabic" With Intl.DisplayNames, you avoid hardcoding countless mappings for language names, regions, or scripts, keeping your application robust and lean. Browser Support You might be wondering about browser compatibility. The good news is that Intl has excellent support across modern browsers. All major browsers (Chrome, Firefox, Safari, Edge) fully support the core functionality discussed (DateTimeFormat, NumberFormat, ListFormat, RelativeTimeFormat, PluralRules, DisplayNames). You can confidently use these APIs without polyfills for the majority of your user base. Conclusion: Embrace The Global Web With Intl The Intl API is a cornerstone of modern web development for a global audience. It empowers front-end developers to deliver highly localized user experiences with minimal effort, leveraging the browser’s built-in, optimized capabilities. By adopting Intl, you reduce dependencies, shrink bundle sizes, and improve performance, all while ensuring your application respects and adapts to the diverse linguistic and cultural expectations of users worldwide. Stop wrestling with custom formatting logic and embrace this standards-compliant tool! It’s important to remember that Intl handles the formatting of data. While incredibly powerful, it doesn’t solve every aspect of internationalization. Content translation, bidirectional text (RTL/LTR), locale-specific typography, and deep cultural nuances beyond data formatting still require careful consideration. (I may write about these in the future!) However, for presenting dynamic data accurately and intuitively, Intl is the browser-native answer. Further Reading & Resources MDN Web Docs: Intl namespace object Intl.DateTimeFormat Intl.NumberFormat Intl.ListFormat Intl.RelativeTimeFormat Intl.PluralRules Intl.DisplayNames ECMAScript Internationalization API Specification: The official ECMA-402 Standard Choosing a Language Tag
Automating Design Systems: Tips And Resources For Getting Started
Design systems are more than style guides: they’re made up of workflows, tokens, components, and documentation — all the stuff teams rely on to build consistent products. As projects grow, keeping everything in sync gets tricky fast. In this article, we’ll look at how smart tooling, combined with automation where it makes sense, can speed things up, reduce errors, and help your team focus on design over maintenance.
A design system is more than just a set of colors and buttons. It’s a shared language that helps designers and developers build good products together. At its core, a design system includes tokens (like colors, spacing, fonts), components (such as buttons, forms, navigation), plus the rules and documentation that tie all together across projects. If you’ve ever used systems like Google Material Design or Shopify Polaris, for example, then you’ve seen how design systems set clear expectations for structure and behavior, making teamwork smoother and faster. But while design systems promote consistency, keeping everything in sync is the hard part. Update a token in Figma, like a color or spacing value, and that change has to show up in the code, the documentation, and everywhere else it’s used. The same thing goes for components: when a button’s behavior changes, it needs to update across the whole system. That’s where the right tools and a bit of automation can make the difference. They help reduce repetitive work and keep the system easier to manage as it grows. In this article, we’ll cover a variety of tools and techniques for syncing tokens, updating components, and keeping docs up to date, showing how automation can make all of it easier. The Building Blocks Of Automation Let’s start with the basics. Color, typography, spacing, radii, shadows, and all the tiny values that make up your visual language are known as design tokens, and they’re meant to be the single source of truth for the UI. You’ll see them in design software like Figma, in code, in style guides, and in documentation. Smashing Magazine has covered them before in great detail. The problem is that they often go out of sync, such as when a color or component changes in design but doesn’t get updated in the code. The more your team grows or changes, the more these mismatches show up; not because people aren’t paying attention, but because manual syncing just doesn’t scale. That’s why automating tokens is usually the first thing teams should consider doing when they start building a design system. That way, instead of writing the same color value in Figma and then again in a configuration file, you pull from a shared token source and let that drive both design and development. There are a few tools that are designed to help make this easier. Token Studio Token Studio is a Figma plugin that lets you manage design tokens directly in your file, export them to different formats, and sync them to code. Specify Specify lets you collect tokens from Figma and push them to different targets, including GitHub repositories, continuous integration pipelines, documentation, and more. NameDesignTokens.guide NamedDesignTokens.guide helps with naming conventions, which is honestly a common pain point, especially when you’re working with a large number of tokens. Once your tokens are set and connected, you’ll spend way less time fixing inconsistencies. It also gives you a solid base to scale, whether that’s adding themes, switching brands, or even building systems for multiple products. That’s also when naming really starts to count. If your tokens or components aren’t clearly named, things can get confusing quickly. Note: Vitaly Friedman’s “How to Name Things” is worth checking out if you’re working with larger systems. From there, it’s all about components. Tokens define the values, but components are what people actually use, e.g., buttons, inputs, cards, dropdowns — you name it. In a perfect setup, you build a component once and reuse it everywhere. But without structure, it’s easy for things to “drift” out of scope. It’s easy to end up with five versions of the same button, and what’s in code doesn’t match what’s in Figma, for example. Automation doesn’t replace design, but rather, it connects everything to one source. The Figma component matches the one in production, the documentation updates when the component changes, and the whole team is pulling from the same library instead of rebuilding their own version. This is where real collaboration happens. Here are a few tools that help make that happen: Tool What It Does UXPin Merge Lets you design using real code components. What you prototype is what gets built. Supernova Helps you publish a design system, sync design and code sources, and keep documentation up-to-date. Zeroheight Turns your Figma components into a central, browsable, and documented system for your whole team. How Does Everything Connect? A lot of the work starts right inside your design application. Once your tokens and components are in place, tools like Supernova help you take it further by extracting design data, syncing it across platforms, and generating production-ready code. You don’t need to write custom scripts or use the Figma API to get value from automation; these tools handle most of it for you. But for teams that want full control, Figma does offer an API. It lets you do things like the following: Pull token values (like colors, spacing, typography) directly from Figma files, Track changes to components and variants, Tead metadata (like style names, structure, or usage patterns), and Map which components are used where in the design. The Figma API is REST-based, so it works well with custom scripts and automations. You don’t need a huge setup, just the right pieces. On the development side, teams usually use Node.js or Python to handle automation. For example: Fetch styles from Figma. Convert them into JSON. Push the values to a design token repo or directly into the codebase. You won’t need that level of setup for most use cases, but it’s helpful to know it’s there if your team outgrows no-code tools. Where do your tokens and components come from? How do updates happen? What tools keep everything connected? The workflow becomes easier to manage once that’s clear, and you spend less time trying to fix changes or mismatches. When tokens, components, and documentation stay in sync, your team moves faster and spends less time fixing the same issues. Extracting Design Data Figma is a collaborative design tool used to create UIs: buttons, layouts, styles, components, everything that makes up the visual language of the product. It’s also where all your design data lives, which includes the tokens we talked about earlier. This data is what we’ll extract and eventually connect to your codebase. But first, you’ll need a setup. To follow along: Go to figma.com and create a free account. Download the Figma desktop app if you prefer working locally, but keep an eye on system requirements if you’re on an older device. Once you’re in, you’ll see a home screen that looks something like the following: From here, it’s time to set up your design tokens. You can either create everything from scratch or use a template from the Figma community to save time. Templates are a great option if you don’t want to build everything yourself. But if you prefer full control, creating your setup totally works too. There are other ways to get tokens as well. For example, a site like namedesigntokens.guide lets you generate and download tokens in formats like JSON. The only catch is that Figma doesn’t let you import JSON directly, so if you go that route, you’ll need to bring in a middle tool like Specify to bridge that gap. It helps sync tokens between Figma, GitHub, and other places. For this article, though, we’ll keep it simple and stick with Figma. Pick any design system template from the Figma community to get started; there are plenty to choose from. Depending on the template you choose, you’ll get a pre-defined set of tokens that includes colors, typography, spacing, components, and more. These templates come in all types: website, e-commerce, portfolio, app UI kits, you name it. For this article, we’ll be using the /Design-System-Template--Community because it includes most of the tokens you’ll need right out of the box. But feel free to pick a different one if you want to try something else. Once you’ve picked your template, it’s time to download the tokens. We’ll use Supernova, a tool that connects directly to your Figma file and pulls out design tokens, styles, and components. It makes the design-to-code process a lot smoother. Step 1: Sign Up on Supernova Go to supernova.io and create an account. Once you’re in, you’ll land on a dashboard that looks like this: Step 2: Connect Your Figma File To pull in the tokens, head over to the Data Sources section in Supernova and choose Figma from the list of available sources. (You’ll also see other options like Storybook or Figma variables, but we’re focusing on Figma.) Next, click on Connect a new file, paste the link to your Figma template, and click Import. Supernova will load the full design system from your template. From your dashboard, you’ll now be able to see all the tokens. Turning Tokens Into Code Design tokens are great inside Figma, but the real value shows when you turn them into code. That’s how the developers on your team actually get to use them. Here’s the problem: Many teams default to copying values manually for things like color, spacing, and typography. But when you make a change to them in Figma, the code is instantly out of sync. That’s why automating this process is such a big win. Instead of rewriting the same theme setup for every project, you generate it, constantly translating designs into dev-ready assets, and keep everything in sync from one source of truth. Now that we’ve got all our tokens in Supernova, let’s turn them into code. First, go to the Code Automation tab, then click New Pipeline. You’ll see different options depending on what you want to generate: React Native, CSS-in-JS, Flutter, Godot, and a few others. Let’s go with the CSS-in-JS option for the sake of demonstration: After that, you’ll land on a setup screen with three sections: Data, Configuration, and Delivery. Data Here, you can pick a theme. At first, it might only give you “Black” as the option; you can select that or leave it empty. It really doesn’t matter for the time being. Configuration This is where you control how the code is structured. I picked PascalCase for how token names are formatted. You can also update how things like spacing, colors, or font styles are grouped and saved. Delivery This is where you choose how you want the output delivered. I chose “Build Only”, which builds the code for you to download. Once you’re done, click Save. The pipeline is created, and you’ll see it listed in your dashboard. From here, you can download your token code, which is already generated. Automating Documentation So, what’s the point of documentation in a design system? You can think of it as the instruction manual for your team. It explains what each token or component is, why it exists, and how to use it. Designers, developers, and anyone else on your team can stay on the same page — no guessing, no back-and-forth. Just clear context. Let’s continue from where we stopped. Supernova is capable of handling your documentation. Head over to the Documentation tab. This is where you can start editing everything about your design system docs, all from the same place. You can: Add descriptions to your tokens, Define what each base token is for (as well as what it’s not for), Organize sections by colors, typography, spacing, or components, and Drop in images, code snippets, or examples. You’re building the documentation inside the same tool where your tokens live. In other words, there’s no jumping between tools and no additional setup. That’s where the automation kicks in. You edit once, and your docs stay synced with your design source. It all stays in one environment. Once you’re done, click Publish and you will be presented with a new window asking you to sign in. After that, you’re able to access your live documentation site. Practical Tips For Automations Automation is great. It saves hours of manual work and keeps your design system tight across design and code. The trick is knowing when to automate and how to make sure it keeps working over time. You don’t need to automate everything right away. But if you’re doing the same thing over and over again, that’s a kind of red flag. A few signs that it’s time to consider using automation: You’re using the same styles across multiple platforms (like web and mobile). You have a shared design system used by more than one team. Design tokens change often, and you want updates to flow into code automatically. You’re tired of manual updates every time the brand team tweaks a color. There are three steps you need to consider. Let’s look at each one. Step 1: Keep An Eye On Tools And API Updates If your pipeline depends on design tools, like Figma, or platforms, like Supernova, you’ll want to know when changes are made and evaluate how they impact your work, because even small updates can quietly affect your exports. It’s a good idea to check Figma’s API changelog now and then, especially if something feels off with your token syncing. They often update how variables and components are structured, and that can impact your pipeline. There’s also an RSS feed for product updates. The same goes for Supernova’s product updates. They regularly roll out improvements that might tweak how your tokens are handled or exported. If you’re using open-source tools like Style Dictionary, keeping an eye on the GitHub repo (particularly the Issues tab) can save you from debugging weird token name changes later. All of this isn’t about staying glued to release notes, but having a system to check if something suddenly stops working. That way, you’ll catch things before they reach production. Step 2: Break Your Pipeline Into Smaller Steps A common trap teams fall into is trying to automate everything in one big run: colors, spacing, themes, components, and docs, all processed in a single click. It sounds convenient, but it’s hard to maintain, and even harder to debug. It’s much more manageable to split your automation into pieces. For example, having a single workflow that handles your core design tokens (e.g., colors, spacing, and font sizes), another for theme variations (e.g., light and dark themes), and one more for component mapping (e.g., buttons, inputs, and cards). This way, if your team changes how spacing tokens are named in Figma, you only need to update one part of the workflow, not the entire system. It’s also easier to test and reuse smaller steps. Step 3: Test The Output Every Time Even if everything runs fine, always take a moment to check the exported output. It doesn’t need to be complicated. A few key things: Are the token names clean and readable? If you see something like PrimaryColorColorText, that’s a red flag. Did anything disappear or get renamed unexpectedly? It happens more often than you think, especially with typography or spacing tokens after design changes. Does the UI still work? If you’re using something like Tailwind, CSS variables, or custom themes, double-check that the new token values aren’t breaking anything in the design or build process. To catch issues early, it helps to run tools like ESLint or Stylelint right after the pipeline completes. They’ll flag odd syntax or naming problems before things get shipped. How AI Can Help Once your automation is stable, there’s a next layer that can boost your workflow: AI. It’s not just for writing code or generating mockups, but for helping with the small, repetitive things that eat up time in design systems. When used right, AI can assist without replacing your control over the system. Here’s where it might fit into your workflow: Naming Suggestions When you’re dealing with hundreds of tokens, naming them clearly and consistently is a real challenge. Some AI tools can help by suggesting clean, readable names for your tokens or components based on patterns in your design. It’s not perfect, but it’s a good way to kickstart naming, especially for large teams. Pattern Recognition AI can also spot repeated styles or usage patterns across your design files. If multiple buttons or cards share similar spacing, shadows, or typography, tools powered by AI can group or suggest components for systemization even before a human notices. Automated Documentation Instead of writing everything from scratch, AI can generate first drafts of documentation based on your tokens, styles, and usage. You still need to review and refine, but it takes away the blank-page problem and saves hours. Here are a few tools that already bring AI into the design and development space in practical ways: Uizard: Uizard uses AI to turn wireframes into designs automatically. You can sketch something by hand, and it transforms that into a usable mockup. Anima: Anima can convert Figma designs into responsive React code. It also helps fill in real content or layout structures, making it a powerful bridge between design and development, with some AI assistance under the hood. Builder.io: Builder uses AI to help generate and edit components visually. It's especially useful for marketers or non-developers who need to build pages fast. AI helps streamline layout, content blocks, and design rules. Conclusion This article is not about achieving complete automation in the technical sense, but more about using smart tools to streamline the menial and manual aspects of working with design systems. Exporting tokens, generating docs, and syncing design with code can be automated, making your process quicker and more reliable with the right setup. Instead of rebuilding everything from scratch every time, you now have a way to keep things consistent, stay organized, and save time. Further Reading “Design System Guide” by Romina Kavcic “Design System In 90 Days” by Vitaly Friedman
UX Job Interview Helpers
Talking points. Smart questions. A compelling story. This guide helps you prepare for your UX job interview. And remember: no act of kindness, however small, is ever wasted.
When talking about job interviews for a UX position, we often discuss how to leave an incredible impression and how to negotiate the right salary. But it’s only one part of the story. The other part is to be prepared, to ask questions, and to listen carefully. Below, I’ve put together a few useful resources on UX job interviews — from job boards to Notion templates and practical guides. I hope you or your colleagues will find it helpful. The Design Interview Kit As you are preparing for that interview, get ready with the Design Interview Kit (Figma), a helpful practical guide that covers how to craft case studies, solve design challenges, write cover letters, present your portfolio, and negotiate your offer. Kindly shared by Oliver Engel. The Product Designer’s (Job) Interview Playbook (PDF) The Product Designer’s (Job) Interview Playbook (PDF) is a practical little guide for designers through each interview phase, with helpful tips and strategies on things to keep in mind, talking points, questions to ask, red flags to watch out for and how to tell a compelling story about yourself and your work. Kindly put together by Meghan Logan. From my side, I can only wholeheartedly recommend to not only speak about your design process. Tell stories about the impact that your design work has produced. Frame your design work as an enabler of business goals and user needs. And include insights about the impact you’ve produced — on business goals, processes, team culture, planning, estimates, and testing. Also, be very clear about the position that you are applying for. In many companies, titles do matter. There are vast differences in responsibilities and salaries between various levels for designers, so if you see yourself as a senior, review whether it actually reflects in the position. A Guide To Successful UX Job Interviews (+ Notion template) Catt Small’s Guide To Successful UX Job Interviews, a wonderful practical series on how to build a referral pipeline, apply for an opening, prepare for screening and interviews, present your work, and manage salary expectations. You can also download a Notion template. 30 Useful Questions To Ask In UX Job Interviews In her wonderful article, Nati Asher has suggested many useful questions to ask in a job interview when you are applying as a UX candidate. I’ve taken the liberty of revising some of them and added a few more questions that might be worth considering for your next job interview. What are the biggest challenges the team faces at the moment? What are the team’s main strengths and weaknesses? What are the traits and skills that will make me successful in this position? Where is the company going in the next 5 years? What are the achievements I should aim for over the first 90 days? What would make you think “I’m so happy we hired X!”? Do you have any doubts or concerns regarding my fit for this position? Does the team have any budget for education, research, etc.? What is the process of onboarding in the team? Who is in the team, and how long have they been in that team? Who are the main stakeholders I will work with on a day-to-day basis? Which options do you have for user research and accessing users or data? Are there analytics, recordings, or other data sources to review? How do you measure the impact of design work in your company? To what extent does management understand the ROI of good UX? How does UX contribute strategically to the company’s success? Who has the final say on design, and who decides what gets shipped? What part of the design process does the team spend most time on? How many projects do designers work on simultaneously? How has the organization overcome challenges with remote work? Do we have a design system, and in what state is it currently? Why does a company want to hire a UX designer? How would you describe the ideal candidate for this position? What does a career path look like for this role? How will my performance be evaluated in this role? How long do projects take to launch? Can you give me some examples? What are the most immediate projects that need to be addressed? How do you see the design team growing in the future? What traits make someone successful in this team? What’s the most challenging part of leading the design team? How does the company ensure it’s upholding its values? Before a job interview, have your questions ready. Not only will they convey a message that you care about the process and the culture, but also that you understand what is required to be successful. And this fine detail might go a long way. Don’t Forget About The STAR Method Interviewers closer to business will expect you to present examples of your work using the STAR method (Situation — Task — Action — Result), and might be utterly confused if you delve into all the fine details of your ideation process or the choice of UX methods you’ve used. Situation: Set the scene and give necessary details. Task: Explain your responsibilities in that situation. Action: Explain what steps you took to address it. Result: Share the outcomes your actions achieved. As Meghan suggests, the interview is all about how your skills add value to the problem the company is currently solving. So ask about the current problems and tasks. Interview the person who interviews you, too — but also explain who you are, your focus areas, your passion points, and how you and your expertise would fit in a product and in the organization. Wrapping Up A final note on my end: never take a rejection personally. Very often, the reasons you are given for rejection are only a small part of a much larger picture — and have almost nothing to do with you. It might be that a job description wasn’t quite accurate, or the company is undergoing restructuring, or the finances are too tight after all. Don’t despair and keep going. Write down your expectations. Job titles matter: be deliberate about them and your level of seniority. Prepare good references. Have your questions ready for that job interview. As Catt Small says, “once you have a foot in the door, you’ve got to kick it wide open”. You are a bright shining star — don’t you ever forget that. Job Boards Remote + In-person IXDA Who Is Still Hiring? UXPA Job Bank Otta Boooom Black Creatives Job Board UX Research Jobs UX Content Jobs UX Content Collective Jobs UX Writing Jobs Useful Resources “How To Be Prepared For UX Job Interviews,” by yours truly “UX Job Search Strategies and Templates,” by yours truly “How To Ace Your Next Job Interview,” by Startup.jobs “Cracking The UX Job Interview,” by Artiom Dashinsky “The Product Design Interview Process,” by Tanner Christensen “10 Questions To Ask in a UX Interview,” by Ryan Scott “Six questions to ask after a UX designer job interview,” by Nick Babich Meet “Smart Interface Design Patterns” You can find more details on design patterns and UX in Smart Interface Design Patterns, our 15h-video course with 100s of practical examples from real-life projects — with a live UX training later this year. Everything from mega-dropdowns to complex enterprise tables — with 5 new segments added every year. Jump to a free preview. Use code BIRDIE to save 15% off. Meet Smart Interface Design Patterns, our video course on interface design & UX. Video + UX Training Video only Video + UX Training $ 495.00 $ 699.00 Get Video + UX Training 25 video lessons (15h) + Live UX Training. 100 days money-back-guarantee. Video only $ 300.00$ 395.00 Get the video course 40 video lessons (15h). Updated yearly. Also available as a UX Bundle with 2 video courses.
Stories Of August (2025 Wallpapers Edition)
Do you need a little inspiration boost? Well, then our new batch of desktop wallpapers might be for you. The wallpapers are designed with love by the community for the community and can be downloaded for free! Enjoy!
Everybody loves a beautiful wallpaper to freshen up their desktops and home screens, right? To cater for new and unique designs on a regular basis, we started our monthly wallpapers series more than 14 years ago, and from the very beginning to today, artists and designers from across the globe have accepted the challenge and submitted their artworks. This month is no exception, of course. In this post, you’ll find desktop wallpapers for August 2025, along with a selection of timeless designs from our archives that are bound to make your August extra colorful. A big thank you to everyone who tickled their creativity and shared their wallpapers with us this month — this post wouldn’t exist without your kind support! Now, if you’re feeling inspired after browsing this collection, why not submit a wallpaper to get featured in one of our upcoming posts? Fire up your favorite design tool, grab your camera or pen and paper, and tell the story you want to tell. We can’t wait to see what you’ll come up with! Happy August! You can click on every image to see a larger preview. We respect and carefully consider the ideas and motivation behind each and every artist’s work. This is why we give all artists the full freedom to explore their creativity and express emotions and experience through their works. This is also why the themes of the wallpapers weren’t anyhow influenced by us but rather designed from scratch by the artists themselves. August Afloat “Set sail into a serene summer moment with this bright and breezy wallpaper. A wooden boat drifts gently across wavy blue waters dotted with lily pads, capturing the stillness and simplicity of late August days.” — Designed by Libra Fire from Serbia. preview with calendar: 320x480, 640x480, 800x480, 800x600, 1024x768, 1024x1024, 1152x864, 1280x720, 1280x800, 1280x960, 1280x1024, 1400x1050, 1440x900, 1600x1200, 1680x1050, 1680x1200, 1920x1080, 1920x1200, 1920x1440, 2560x1440 without calendar: 320x480, 640x480, 800x480, 800x600, 1024x768, 1024x1024, 1152x864, 1280x720, 1280x800, 1280x960, 1280x1024, 1400x1050, 1440x900, 1600x1200, 1680x1050, 1680x1200, 1920x1080, 1920x1200, 1920x1440, 2560x1440 Dive Into Summer Mode “When your phone becomes a pool and your pup’s living the dream — it’s a playful reminder that sometimes the best escapes are simple: unplug, slow down, soak in the sunshine, and let your imagination do the swimming.” — Designed by PopArt Studio from Serbia. preview with calendar: 320x480, 640x480, 800x480, 800x600, 1024x768, 1024x1024, 1152x864, 1280x720, 1280x800, 1280x960, 1280x1024, 1400x1050, 1440x900, 1600x1200, 1680x1050, 1680x1200, 1920x1080, 1920x1200, 1920x1440, 2560x1440 without calendar: 320x480, 640x480, 800x480, 800x600, 1024x768, 1024x1024, 1152x864, 1280x720, 1280x800, 1280x960, 1280x1024, 1400x1050, 1440x900, 1600x1200, 1680x1050, 1680x1200, 1920x1080, 1920x1200, 1920x1440, 2560x1440 Sea Shanties And Ears In The Wind “August is like a boat cruise swaying with the rhythm of sea shanties. Our mascot really likes to have its muzzle caressed by the salty sea wind and getting its ears warmed by the summer sun.” — Designed by Caroline Boire from France. preview with calendar: 320x480, 640x480, 800x480, 800x600, 1024x768, 1024x1024, 1152x864, 1280x720, 1280x800, 1280x960, 1280x1024, 1400x1050, 1440x900, 1600x1200, 1680x1050, 1680x1200, 1920x1080, 1920x1200, 1920x1440, 2560x1440 without calendar: 320x480, 640x480, 800x480, 800x600, 1024x768, 1024x1024, 1152x864, 1280x720, 1280x800, 1280x960, 1280x1024, 1400x1050, 1440x900, 1600x1200, 1680x1050, 1680x1200, 1920x1080, 1920x1200, 1920x1440, 2560x1440 Queen Of August “August 8 is International Cat Day, so of course the month belongs to her majesty. Confident, calm, and totally in charge. Just like every cat ever.” — Designed by Ginger IT Solutions from Serbia. preview with calendar: 320x480, 640x480, 800x480, 800x600, 1024x768, 1024x1024, 1152x864, 1280x720, 1280x800, 1280x960, 1280x1024, 1400x1050, 1440x900, 1600x1200, 1680x1050, 1680x1200, 1920x1080, 1920x1200, 1920x1440, 2560x1440 without calendar: 320x480, 640x480, 800x480, 800x600, 1024x768, 1024x1024, 1152x864, 1280x720, 1280x800, 1280x960, 1280x1024, 1400x1050, 1440x900, 1600x1200, 1680x1050, 1680x1200, 1920x1080, 1920x1200, 1920x1440, 2560x1440 Happiness Happens In August “Many people find August one of the happiest months of the year because of holidays. You can spend days sunbathing, swimming, birdwatching, listening to their joyful chirping, and indulging in sheer summer bliss. August 8th is also known as the Happiness Happens Day, so make it worthwhile.” — Designed by PopArt Studio from Serbia. preview without calendar: 320x480, 640x480, 800x480, 800x600, 1024x768, 1024x1024, 1152x864, 1280x720, 1280x800, 1280x960, 1280x1024, 1366x768, 1400x1050, 1440x900, 1600x1200, 1680x1050, 1680x1200, 1920x1080, 1920x1200, 1920x1440, 2560x1440 Nostalgia “August, the final breath of summer, brings with it a wistful nostalgia for a season not yet past.” — Designed by Ami Totorean from Romania. preview without calendar: 1440x900, 1600x1200, 1680x1050, 1680x1200, 1920x1080, 1920x1200, 1920x1440, 2560x1440 Relax In Bora Bora “As we have taken a liking to diving through the coral reefs, we’ll also spend August diving and took the leap to Bora Bora. There we enjoy the sea and nature and above all, we rest to gain strength for the new course that is to come.” — Designed by Veronica Valenzuela from Spain. preview without calendar: 640x480, 800x480, 1024x768, 1280x720, 1280x800, 1440x900, 1600x1200, 1920x1080, 1920x1440, 2560x1440 Banana! Designed by Ricardo Gimenes from Spain. preview without calendar: 640x480, 800x480, 800x600, 1024x768, 1024x1024, 1152x864, 1280x720, 1280x800, 1280x960, 1280x1024, 1366x768, 1400x1050, 1440x900, 1600x1200, 1680x1050, 1680x1200, 1920x1080, 1920x1200, 1920x1440, 2560x1440, 3840x2160 Summer Day Designed by Kasturi Palmal from India. preview without calendar: 800x600, 1280x1024, 1600x1200, 1680x1200, 1920x1080, 1920x1200, 1920x1440, 2560x1440 Retro Road Trip “As the sun dips below the horizon, casting a warm glow upon the open road, the retro van finds a resting place for the night. A campsite bathed in moonlight or a cozy motel straight from a postcard become havens where weary travelers can rest, rejuvenate, and prepare for the adventures that await with the dawn of a new day.” — Designed by PopArt Studio from Serbia. preview without calendar: 320x480, 640x480, 800x480, 800x600, 1024x768, 1024x1024, 1152x864, 1280x720, 1280x800, 1280x960, 1280x1024, 1400x1050, 1440x900, 1600x1200, 1680x1050, 1680x1200, 1920x1080, 1920x1200, 1920x1440, 2560x1440 Spooky Campfire Stories Designed by Ricardo Gimenes from Spain. preview without calendar: 640x480, 800x480, 800x600, 1024x768, 1024x1024, 1152x864, 1280x720, 1280x800, 1280x960, 1280x1024, 1366x768, 1400x1050, 1440x900, 1600x1200, 1680x1050, 1680x1200, 1920x1080, 1920x1200, 1920x1440, 2560x1440, 3840x2160 Bee Happy! “August means that fall is just around the corner, so I designed this wallpaper to remind everyone to ‘bee happy’ even though summer is almost over. Sweeter things are ahead!” — Designed by Emily Haines from the United States. preview without calendar: 640x480, 800x600, 1280x720, 1280x800, 1280x960, 1366x768, 1400x1050, 1440x900, 1600x1200, 1680x1050, 1680x1200, 1920x1080, 1920x1200, 1920x1440, 2560x1440 Oh La La… Paris’ Night “I like the Paris night! All is very bright!” — Designed by Verónica Valenzuela from Spain. preview without calendar: 800x480, 1024x768, 1152x864, 1280x800, 1280x960, 1440x900, 1680x1200, 1920x1080, 2560x1440 Cowabunga Designed by Ricardo Gimenes from Spain. preview without calendar: 640x480, 800x480, 800x600, 1024x768, 1024x1024, 1152x864, 1280x720, 1280x800, 1280x960, 1280x1024, 1366x768, 1400x1050, 1440x900, 1600x1200, 1680x1050, 1680x1200, 1920x1080, 1920x1200, 1920x1440, 2560x1440, 3840x2160 Childhood Memories Designed by Francesco Paratici from Australia. preview without calendar: 320x480, 1024x768, 1024x1024, 1280x800, 1280x1024, 1366x768, 1440x900, 1680x1050, 1920x1080, 1920x1200, 2560x1440 Summer Nap Designed by Dorvan Davoudi from Canada. preview without calendar: 800x480, 800x600, 1152x864, 1280x720, 1280x800, 1280x960, 1280x1024, 1366x768, 1400x1050, 1440x900, 1600x1200, 1680x1050, 1680x1200, 1920x1080, 1920x1200, 1920x1440, 2560x1440 Live In The Moment “My dog Sami inspired me for this one. He lives in the moment and enjoys every second with a big smile on his face. I wish we could learn to enjoy life like he does! Happy August everyone!” — Designed by Westie Vibes from Portugal. preview without calendar: 320x480, 1024x1024, 1080x1920, 1680x1200, 1920x1080, 2560x1440 Handwritten August “I love typography handwritten style.” — Designed by Chalermkiat Oncharoen from Thailand. preview without calendar: 320x480, 640x480, 800x480, 800x600, 1024x768, 1024x1024, 1152x864, 1280x720, 1280x800, 1280x960, 1280x1024, 1400x1050, 1440x900, 1600x1200, 1680x1050, 1680x1200, 1920x1080, 1920x1200, 1920x1440, 2560x1440 Psst, It’s Camping Time… “August is one of my favorite months, when the nights are long and deep and crackling fire makes you think of many things at once and nothing at all at the same time. It’s about heat and cold which allow you to touch the eternity for a few moments.” — Designed by Igor Izhik from Canada. preview without calendar: 1024x768, 1024x1024, 1280x720, 1280x800, 1280x960, 1280x1024, 1400x1050, 1440x900, 1600x1200, 1680x1050, 1680x1200, 1920x1080, 1920x1200, 1920x1440, 2560x1440 Hello Again “In Melbourne it is the last month of quite a cool winter so we are looking forward to some warmer days to come.” — Designed by Tazi from Australia. preview without calendar: 320x480, 640x480, 800x600, 1024x768, 1152x864, 1280x720, 1280x960, 1600x1200, 1920x1080, 1920x1440, 2560x1440 Coffee Break Time Designed by Ricardo Gimenes from Spain. preview without calendar: 320x480, 640x480, 800x480, 800x600, 1024x768, 1024x1024, 1152x864, 1280x720, 1280x800, 1280x960, 1280x1024, 1366x768, 1400x1050, 1440x900, 1600x1200, 1680x1050, 1680x1200, 1920x1080, 1920x1200, 1920x1440, 2560x1440 Subtle August Chamomiles “Our designers wanted to create something summery, but not very colorful, something more subtle. The first thing that came to mind was chamomile because there are a lot of them in Ukraine and their smell is associated with a summer field.” — Designed by MasterBundles from Ukraine. preview without calendar: 320x480, 640x480, 800x480, 800x600, 1024x768, 1024x1024, 1152x864, 1280x720, 1280x800, 1280x960, 1280x1024, 1366x768, 1400x1050, 1440x900, 1600x1200, 1680x1050, 1680x1200, 1920x1080, 1920x1200, 1920x1440, 2560x1440 Party Night Under The Stars “August… it’s time for a party and summer vacation — sea, moon, stars, music… and magical vibrant colors.” — Designed by Teodora Vasileva from Bulgaria. preview without calendar: 640x480, 800x480, 800x600, 1024x768, 1280x720, 1280x960, 1280x1024, 1400x1050, 1680x1050, 1680x1200, 1920x1080, 1920x1200, 1920x1440, 2560x1440 A Bloom Of Jellyfish “I love going to aquariums – the colors, patterns, and array of blue hues attract the nature lover in me while still appeasing my design eye. One of the highlights is always the jellyfish tanks. They usually have some kind of light show in them, which makes the jellyfish fade from an intense magenta to a deep purple — and it literally tickles me pink. We discovered that the collective noun for jellyfish is a bloom and, well, it was love-at-first-collective-noun all over again. I’ve used some intense colors to warm up your desktop and hopefully transport you into the depths of your own aquarium.” — Designed by Wonderland Collective from South Africa. preview without calendar: 320x480, 800x600, 1024x768, 1280x960, 1680x1050, 1920x1200, 2560x1440 Colorful Summer “‘Always keep mint on your windowsill in August, to ensure that the buzzing flies will stay outside where they belong. Don’t think summer is over, even when roses droop and turn brown and the stars shift position in the sky. Never presume August is a safe or reliable time of the year.’ (Alice Hoffman)” — Designed by Lívi from Hungary. preview without calendar: 800x480, 1024x768, 1280x720, 1280x1024, 1400x1050, 1680x1050, 1680x1200, 1920x1200, 2560x1440, 3475x4633 Searching For Higgs Boson Designed by Vlad Gerasimov from Georgia. preview without calendar: 800x600, 960x600, 1024x768, 1152x864, 1229x768, 1280x800, 1280x960, 1280x1024, 1400x1050, 1440x900, 1440x900, 1440x960, 1600x1200, 1600x1200, 1680x1050, 1728x1080, 1920x1200, 1920x1440, 2304x1440, 2560x1600 Freak Show Vol. 1 Designed by Ricardo Gimenes from Spain. preview without calendar: 640x480, 800x480, 800x600, 1024x768, 1024x1024, 1152x864, 1280x720, 1280x800, 1280x960, 1280x1024, 1366x768, 1400x1050, 1440x900, 1600x1200, 1680x1050, 1680x1200, 1920x1080, 1920x1200, 1920x1440, 2560x1440, 3840x2160 Grow Where You Are Planted “Every experience is a building block on your own life journey, so try to make the most of where you are in life and get the most out of each day.” — Designed by Tazi Design from Australia. preview without calendar: 320x480, 640x480, 800x600, 1024x768, 1152x864, 1280x720, 1280x960, 1600x1200, 1920x1080, 1920x1440, 2560x1440 Chill Out “Summer is in full swing and Chicago is feeling the heat! Take some time to chill out!” — Designed by Denise Johnson from Chicago. preview without calendar: 1024x768, 1280x800, 1280x1024, 1440x900, 1600x1200, 1920x1200 Estonian Summer Sun “This is a moment from Southern Estonia that shows amazing summer nights.” Designed by Erkki Pung from Estonia. preview without calendar: 320x480, 1024x1024, 1280x800, 1440x900, 1920x1200
The Core Model: Start FROM The Answer, Not WITH The Solution
The Core Model is a practical methodology that flips traditional digital development on its head. Instead of starting with solutions or structure, we begin with a hypothesis about what users need and follow a simple framework that brings diverse teams together to create more effective digital experiences. By asking six good questions in the right order, teams align around user tasks and business objectives, creating clarity that transcends organizational boundaries.
Ever sat in a meeting where everyone jumped straight to solutions? “We need a new app!” “Let’s redesign the homepage!” “AI will fix everything!” This solution-first thinking is endemic in digital development — and it’s why so many projects fail to deliver real value. As the creator of the Core Model methodology, I developed this approach to flip the script: instead of starting with solutions, we start FROM the answer. What’s the difference? Starting with solutions means imposing our preconceived ideas. Starting FROM the answer to a user task means forming a hypothesis about what users need, then taking a step back to follow a simple structure that validates and refines that hypothesis. Six Good Questions That Lead to Better Answers At its heart, the Core Model is simply six good questions asked in the right order, with a seventh that drives action. It appeals to common sense — something often in short supply during complex digital projects. When I introduced this approach to a large organization struggling with their website, their head of digital admitted: “We’ve been asking all these questions separately, but never in this structured way that connects them.” These questions help teams pause, align around what matters, and create solutions that actually work: Who are we trying to help, and what’s their situation? What are they trying to accomplish? What do we want to achieve? How do they approach this need? Where should they go next? What’s the essential content or functionality they need? What needs to be done to create this solution? This simple framework creates clarity across team boundaries, bringing together content creators, designers, developers, customer service, subject matter experts, and leadership around a shared understanding. Starting With a Hypothesis The Core Model process typically begins before the workshop. The project lead or facilitator works with key stakeholders to: Identify candidate cores based on organizational priorities and user needs. Gather existing user insights and business objectives. Form initial hypotheses about what these cores should accomplish. Prepare relevant background materials for workshop participants. This preparation ensures the workshop itself is focused and productive, with teams validating and refining hypotheses rather than starting from scratch. The Core Model: Six Elements That Create Alignment Let’s explore each element of the Core Model in detail: 1. Target Group: Building Empathy First Rather than detailed personas, the Core Model starts with quick proto-personas that build empathy for users in specific situations: A parent researching childcare options late at night after a long day. A small business owner trying to understand tax requirements between client meetings. A new resident navigating unfamiliar public services in their second language. The key is to humanize users and understand their emotional and practical context before diving into solutions. 2. User Tasks: What People Are Actually Trying to Do Beyond features or content, what are users actually trying to accomplish? Making an informed decision about a major purchase. Finding the right form to apply for a service. Understanding next steps in a complex process. Checking eligibility for a program or benefit. These tasks should be based on user research and drive everything that follows. Top task methodology is a great approach to this. 3. Business Objectives: What Success Looks Like Every digital initiative should connect to clear organizational goals: Increasing online self-service adoption. Reducing support costs. Improving satisfaction and loyalty. Meeting compliance requirements. Generating leads or sales. These objectives provide the measurement framework for success. (If you work with OKRs, you can think of these as Key Results that connect to your overall Objective.) 4. Inward Paths: User Scenarios and Approaches This element goes beyond just findability to include the user’s entire approach and mental model: What scenarios lead them to this need? What terminology do they use to describe their problem? How would the phrase their need to Google or an LLM? What emotions or urgency are they experiencing? What channels or touchpoints do they use? What existing knowledge do they bring? Understanding these angles of different approaches ensures we meet users where they are. 5. Forward Paths: Guiding the Journey What should users do after engaging with this core? Take a specific action to continue their task. Explore related information or options. Connect with appropriate support channels. Save or share their progress. These paths create coherent journeys (core flows) rather than dead ends. 6. Core Content: The Essential Solution Only after mapping the previous elements do we define the actual solution: What information must be included? What functionality is essential? What tone and language are appropriate? What format best serves the need? This becomes our blueprint for what actually needs to be created. Action Cards: From Insight to Implementation The Core Model process culminates with action cards that answer the crucial seventh question: “What needs to be done to create this solution?” These cards typically include: Specific actions required; Who is responsible; Timeline for completion; Resources needed; Dependencies and constraints. Action cards transform insights into concrete next steps, ensuring the workshop leads to real improvements rather than just interesting discussions. The Power of Core Pairs A unique aspect of the Core Model methodology is working in core pairs—two people from different competencies or departments working together on the same core sheet. This approach creates several benefits: Cross-disciplinary insight Pairing someone with deep subject knowledge with someone who brings a fresh perspective. Built-in quality control Partners catch blind spots and challenge assumptions. Simplified communication One-to-one dialogue is more effective than group discussions. Shared ownership Both participants develop a commitment to the solution. Knowledge transfer Skills and insights flow naturally between disciplines. The ideal pair combines different perspectives — content and design, business and technical, expert and novice — creating a balanced approach that neither could achieve alone. Creating Alignment Within and Between Teams The Core Model excels at creating two crucial types of alignment: Within Cross-Functional Teams Modern teams bring together diverse competencies: Content creators focus on messages and narrative. Designers think about user experience and interfaces. Developers consider technical implementation. Business stakeholders prioritize organizational needs. The Core Model gives these specialists a common framework. Instead of the designer focusing only on interfaces or the developer only on code, everyone aligns around user tasks and business goals. As one UX designer told me: “The Core Model changed our team dynamic completely. Instead of handing off wireframes to developers who didn’t understand the ‘why’ behind design decisions, we now share a common understanding of what we’re trying to accomplish.” Between Teams Across the Customer Journey Users don’t experience your organization in silos — they move across touchpoints and teams. The Core Model helps connect these experiences: Marketing teams understand how their campaigns connect to service delivery. Product teams see how their features fit into larger user journeys. Support teams gain context on user pathways and common issues. Content teams create information that supports the entire journey. By mapping connections between cores (core flows), organizations create coherent experiences rather than fragmented interactions. Breaking Down Organizational Barriers The Core Model creates a neutral framework where various perspectives can contribute while maintaining a unified direction. This is particularly valuable in traditional organizational structures where content responsibility is distributed across departments. The Workshop: Making It Happen The Core Model workshop brings these elements together in a practical format that can be adapted to different contexts and needs. Workshop Format and Timing For complex projects with multiple stakeholders across organizational silos, the ideal format is a full-day (6–hour) workshop: First Hour: Foundation and Context Introduction to the methodology (15 min). Sharing user insights and business context (15 min). Reviewing pre-workshop hypotheses (15 min). Initial discussion and questions (15 min). Hours 2–4: Core Mapping Core pairs work on mapping elements (120 min). Sharing between core pairs and in plenary between elements. Facilitators provide guidance as needed. Hours 5–6: Presentation, Discussion, and Action Planning Each core pair presents its findings (depending on the number of cores). Extensive group discussion and refinement. Creating action cards and next steps. The format is highly flexible: Teams experienced with the methodology can conduct focused sessions in as little as 30 minutes. Smaller projects might need only 2–3 hours. Remote teams might split the workshop into multiple shorter sessions. Workshop Environment The Core Model workshop thrives in different environments: Analog: Traditional approach using paper core sheets. Digital: Virtual workshops using Miro, Mural, FigJam, or similar platforms. Hybrid: Digital canvas in physical workshop, combining in-person interaction with digital documentation. Note: You can find all downloads and templates here. Core Pairs: The Key to Success The composition of core pairs is critical to success: One person should know the solution domain well (subject matter expert). The other brings a fresh perspective (and learns about a different domain). This combination ensures both depth of knowledge and fresh thinking. Cross-functional pairing creates natural knowledge transfer and breaks down silos. Workshop Deliverables Important to note: The workshop doesn’t produce final solutions. Instead, it creates a comprehensive brief containing the following: Priorities and context for content development. Direction and ideas for design and user experience. Requirements and specifications for functionality. Action plan for implementation with clear ownership. This brief becomes the foundation for subsequent development work, ensuring everyone builds toward the same goal while leaving room for specialist expertise during implementation. Getting Started: Your First Core Model Implementation Ready to apply the Core Model in your organization? Here’s how to begin: 1. Form Your Initial Hypothesis Before bringing everyone together: Identify a core where users struggle and the business impact is clear. Gather available user insights and business objectives. Form a hypothesis about what this core should accomplish. Identify key stakeholders across relevant departments. 2. Bring Together the Right Core Pairs Select participants who represent different perspectives: Content creators paired with designers. Business experts paired with technical specialists. Subject matter experts paired with user advocates. Veterans paired with fresh perspectives. 3. Follow the Seven Questions Guide core pairs through the process: Who are we trying to help, and what’s their situation? What are they trying to accomplish? What do we want to achieve? How do they approach this need? Where should they go next? What’s the essential content or functionality? What needs to be done to create this solution? 4. Create an Action Plan Transform insights into concrete actions: Document specific next steps on action cards. Assign clear ownership for each action. Establish timeline and milestones. Define how you’ll measure success. In Conclusion: Common Sense In A Structured Framework The Core Model works because it combines common sense with structure — asking the right questions in the right order to ensure we address what actually matters. By starting FROM the answer, not WITH the solution, teams avoid premature problem-solving and create digital experiences that truly serve user needs while achieving organizational goals. Whether you’re managing a traditional website, creating multi-channel content, or developing digital products, this methodology provides a framework for better collaboration, clearer priorities, and more effective outcomes. This article is a short adaptation of my book The Core Model — A Common Sense to Digital Strategy and Design. You can find information about the book and updated resources at thecoremodel.com.
Web Components: Working With Shadow DOM
Web Components are more than just Custom Elements. Shadow DOM, HTML Templates, and Custom Elements each play a role. In this article, Russell Beswick demonstrates how Shadow DOM fits into the broader picture, explaining why it matters, when to use it, and how to apply it effectively.
It’s common to see Web Components directly compared to framework components. But most examples are actually specific to Custom Elements, which is one piece of the Web Components picture. It’s easy to forget Web Components are actually a set of individual Web Platform APIs that can be used on their own: Custom Elements HTML Templates Shadow DOM In other words, it’s possible to create a Custom Element without using Shadow DOM or HTML Templates, but combining these features opens up enhanced stability, reusability, maintainability, and security. They’re all parts of the same feature set that can be used separately or together. With that being said, I want to pay particular attention to Shadow DOM and where it fits into this picture. Working with Shadow DOM allows us to define clear boundaries between the various parts of our web applications — encapsulating related HTML and CSS inside a DocumentFragment to isolate components, prevent conflicts, and maintain clean separation of concerns. How you take advantage of that encapsulation involves trade-offs and a variety of approaches. In this article, we’ll explore those nuances in depth, and in a follow-up piece, we’ll dive into how to work effectively with encapsulated styles. Why Shadow DOM Exists Most modern web applications are built from an assortment of libraries and components from a variety of providers. With the traditional (or “light”) DOM, it’s easy for styles and scripts to leak into or collide with each other. If you are using a framework, you might be able to trust that everything has been written to work seamlessly together, but effort must still be made to ensure that all elements have a unique ID and that CSS rules are scoped as specifically as possible. This can lead to overly verbose code that both increases app load time and reduces maintainability. <!-- div soup --> <div id="my-custom-app-framework-landingpage-header" class="my-custom-app-framework-foo"> <div><div><div><div><div><div>etc...</div></div></div></div></div></div> </div> Shadow DOM was introduced to solve these problems by providing a way to isolate each component. The <video> and <details> elements are good examples of native HTML elements that use Shadow DOM internally by default to prevent interference from global styles or scripts. Harnessing this hidden power that drives native browser components is what really sets Web Components apart from their framework counterparts. Elements That Can Host A Shadow Root Most often, you will see shadow roots associated with Custom Elements. However, they can also be used with any HTMLUnknownElement, and many standard elements support them as well, including: <aside> <blockquote> <body> <div><footer> <h1> to <h6> <header> <main> <nav> <p> <section> <span> Each element can only have one shadow root. Some elements, including <input> and <select>, already have a built-in shadow root that is not accessible through scripting. You can inspect them with your Developer Tools by enabling the Show User Agent Shadow DOM setting, which is “off” by default. Creating A Shadow Root Before leveraging the benefits of Shadow DOM, you first need to establish a shadow root on an element. This can be instantiated imperatively or declaratively. Imperative Instantiation To create a shadow root using JavaScript, use attachShadow({ mode }) on an element. The mode can be open (allowing access via element.shadowRoot) or closed (hiding the shadow root from outside scripts). const host = document.createElement('div'); const shadow = host.attachShadow({ mode: 'open' }); shadow.innerHTML = '<p>Hello from the Shadow DOM!</p>'; document.body.appendChild(host); In this example, we’ve established an open shadow root. This means that the element’s content is accessible from the outside, and we can query it like any other DOM node: host.shadowRoot.querySelector('p'); // selects the paragraph element If we want to prevent external scripts from accessing our internal structure entirely, we can set the mode to closed instead. This causes the element’s shadowRoot property to return null. We can still access it from our shadow reference in the scope where we created it. shadow.querySelector('p'); This is a crucial security feature. With a closed shadow root, we can be confident that malicious actors cannot extract private user data from our components. For example, consider a widget that shows banking information. Perhaps it contains the user’s account number. With an open shadow root, any script on the page can drill into our component and parse its contents. In closed mode, only the user can perform this kind of action with manual copy-pasting or by inspecting the element. I suggest a closed-first approach when working with Shadow DOM. Make a habit of using closed mode unless you are debugging, or only when absolutely necessary to get around a real-world limitation that cannot be avoided. If you follow this approach, you will find that the instances where open mode is actually required are few and far between. Declarative Instantiation We don’t have to use JavaScript to take advantage of Shadow DOM. Registering a shadow root can be done declaratively. Nesting a <template> with a shadowrootmode attribute inside any supported element will cause the browser to automatically upgrade that element with a shadow root. Attaching a shadow root in this manner can even be done with JavaScript disabled. <my-widget> <template shadowrootmode="closed"> <p> Declarative Shadow DOM content </p> </template> </my-widget> Again, this can be either open or closed. Consider the security implications before using open mode, but note that you cannot access the closed mode content through any scripts unless this method is used with a registered Custom Element, in which case, you can use ElementInternals to access the automatically attached shadow root: class MyWidget extends HTMLElement { #internals; #shadowRoot; constructor() { super(); this.#internals = this.attachInternals(); this.#shadowRoot = this.#internals.shadowRoot; } connectedCallback() { const p = this.#shadowRoot.querySelector('p') console.log(p.textContent); // this works } }; customElements.define('my-widget', MyWidget); export { MyWidget }; Shadow DOM Configuration There are three other options besides mode that we can pass to Element.attachShadow(). Option 1: clonable:true Until recently, if a standard element had a shadow root attached and you tried to clone it using Node.cloneNode(true) or document.importNode(node,true), you would only get a shallow copy of the host element without the shadow root content. The examples we just looked at would actually return an empty <div>. This was never an issue with Custom Elements that built their own shadow root internally. But for a declarative Shadow DOM, this means that each element needs its own template, and they cannot be reused. With this newly-added feature, we can selectively clone components when it’s desirable: <div id="original"> <template shadowrootmode="closed" shadowrootclonable> <p> This is a test </p> </template> </div> <script> const original = document.getElementById('original'); const copy = original.cloneNode(true); copy.id = 'copy'; document.body.append(copy); // includes the shadow root content </script> Option 2: serializable:true Enabling this option allows you to save a string representation of the content inside an element’s shadow root. Calling Element.getHTML() on a host element will return a template copy of the Shadow DOM’s current state, including all nested instances of shadowrootserializable. This can be used to inject a copy of your shadow root into another host, or cache it for later use. In Chrome, this actually works through a closed shadow root, so be careful of accidentally leaking user data with this feature. A safer alternative would be to use a closed wrapper to shield the inner contents from external influences while still keeping things open internally: <wrapper-element></wrapper-element> <script> class WrapperElement extends HTMLElement { #shadow; constructor() { super(); this.#shadow = this.attachShadow({ mode:'closed' }); this.#shadow.setHTMLUnsafe(<nested-element> <template shadowrootmode="open" shadowrootserializable> <div id="test"> <template shadowrootmode="open" shadowrootserializable> <p> Deep Shadow DOM Content </p> </template> </div> </template> </nested-element>); this.cloneContent(); } cloneContent() { const nested = this.#shadow.querySelector('nested-element'); const snapshot = nested.getHTML({ serializableShadowRoots: true }); const temp = document.createElement('div'); temp.setHTMLUnsafe(<another-element>${snapshot}</another-element>); const copy = temp.querySelector('another-element'); copy.shadowRoot.querySelector('#test').shadowRoot.querySelector('p').textContent = 'Changed Content!'; this.#shadow.append(copy); } } customElements.define('wrapper-element', WrapperElement); const wrapper = document.querySelector('wrapper-element'); const test = wrapper.getHTML({ serializableShadowRoots: true }); console.log(test); // empty string due to closed shadow root </script> Notice setHTMLUnsafe(). That’s there because the content contains <template> elements. This method must be called when injecting trusted content of this nature. Inserting the template using innerHTML would not trigger the automatic initialization into a shadow root. Option 3: delegatesFocus:true This option essentially makes our host element act as a <label> for its internal content. When enabled, clicking anywhere on the host or calling .focus() on it will move the cursor to the first focusable element in the shadow root. This will also apply the :focus pseudo-class to the host, which is especially useful when creating components that are intended to participate in forms. <custom-input> <template shadowrootmode="closed" shadowrootdelegatesfocus> <fieldset> <legend> Custom Input </legend> <p> Click anywhere on this element to focus the input </p> <input type="text" placeholder="Enter some text..."> </fieldset> </template> </custom-input> This example only demonstrates focus delegation. One of the oddities of encapsulation is that form submissions are not automatically connected. That means an input’s value will not be in the form submission by default. Form validation and states are also not communicated out of the Shadow DOM. There are similar connectivity issues with accessibility, where the shadow root boundary can interfere with ARIA. These are all considerations specific to forms that we can address with ElementInternals, which is a topic for another article, and is cause to question whether you can rely on a light DOM form instead. Slotted Content So far, we have only looked at fully encapsulated components. A key Shadow DOM feature is using slots to selectively inject content into the component’s internal structure. Each shadow root can have one default (unnamed) <slot>; all others must be named. Naming a slot allows us to provide content to fill specific parts of our component as well as fallback content to fill any slots that are omitted by the user: <my-widget> <template shadowrootmode="closed"> <h2><slot name="title"><span>Fallback Title</span></slot></h2> <slot name="description"><p>A placeholder description.</p></slot> <ol><slot></slot></ol> </template> <span slot="title"> A Slotted Title</span> <p slot="description">An example of using slots to fill parts of a component.</p> <li>Foo</li> <li>Bar</li> <li>Baz</li> </my-widget> Default slots also support fallback content, but any stray text nodes will fill them. As a result, this only works if you collapse all whitespace in the host element’s markup: <my-widget><template shadowrootmode="closed"> <slot><span>Fallback Content</span></slot> </template></my-widget> Slot elements emit slotchange events when their assignedNodes() are added or removed. These events do not contain a reference to the slot or the nodes, so you will need to pass those into your event handler: class SlottedWidget extends HTMLElement { #internals; #shadow; constructor() { super(); this.#internals = this.attachInternals(); this.#shadow = this.#internals.shadowRoot; this.configureSlots(); } configureSlots() { const slots = this.#shadow.querySelectorAll('slot'); console.log({ slots }); slots.forEach(slot => { slot.addEventListener('slotchange', () => { console.log({ changedSlot: slot.name || 'default', assignedNodes: slot.assignedNodes() }); }); }); } } customElements.define('slotted-widget', SlottedWidget); Multiple elements can be assigned to a single slot, either declaratively with the slot attribute or through scripting: const widget = document.querySelector('slotted-widget'); const added = document.createElement('p'); added.textContent = 'A secondary paragraph added using a named slot.'; added.slot = 'description'; widget.append(added); Notice that the paragraph in this example is appended to the host element. Slotted content actually belongs to the “light” DOM, not the Shadow DOM. Unlike the examples we’ve covered so far, these elements can be queried directly from the document object: const widgetTitle = document.querySelector('my-widget [slot=title]'); widgetTitle.textContent = 'A Different Title'; If you want to access these elements internally from your class definition, use this.children or this.querySelector. Only the <slot> elements themselves can be queried through the Shadow DOM, not their content. From Mystery To Mastery Now you know why you would want to use Shadow DOM, when you should incorporate it into your work, and how you can use it right now. But your Web Components journey can’t end here. We’ve only covered markup and scripting in this article. We have not even touched on another major aspect of Web Components: Style encapsulation. That will be our topic in another article.
Designing Better UX For Left-Handed People
Today, roughly 10% of people are left-handed. Yet most products — digital and physical — aren’t designed with it in mind. Let’s change that. More design patterns in Smart Interface Design Patterns, a **friendly video course on UX** and design patterns by Vitaly.
Many products — digital and physical — are focused on “average” users — a statistical representation of the user base, which often overlooks or dismisses anything that deviates from that average, or happens to be an edge case. But people are never edge cases, and “average” users don’t really exist. We must be deliberate and intentional to ensure that our products reflect that. Today, roughly 10% of people are left-handed. Yet most products — digital and physical — aren’t designed with them in mind. And there is rarely a conversation about how a particular digital experience would work better for their needs. So how would it adapt, and what are the issues we should keep in mind? Well, let’s explore what it means for us. This article is part of our ongoing series on UX. You can find more details on design patterns and UX strategy in Smart Interface Design Patterns 🍣 — with live UX training coming up soon. Jump to table of contents. Left-Handedness ≠ “Left-Only” It’s easy to assume that left-handed people are usually left-handed users. However, that’s not necessarily the case. Because most products are designed with right-handed use in mind, many left-handed people have to use their right hand to navigate the physical world. From very early childhood, left-handed people have to rely on their right hand to use tools and appliances like scissors, openers, fridges, and so on. That’s why left-handed people tend to be ambidextrous, sometimes using different hands for different tasks, and sometimes using different hands for the same tasks interchangeably. However, only 1% of people use both hands equally well (ambidextrous). In the same way, right-handed people aren’t necessarily right-handed users. It’s common to be using a mobile device in both left and right hands, or both, perhaps with a preference for one. But when it comes to writing, a preference is stronger. Challenges For Left-Handed Users Because left-handed users are in the minority, there is less demand for left-handed products, and so typically they are more expensive, and also more difficult to find. Troubles often emerge with seemingly simple tools — scissors, can openers, musical instruments, rulers, microwaves and bank pens. For example, most scissors are designed with the top blade positioned for right-handed use, which makes cutting difficult and less precise. And in microwaves, buttons and interfaces are nearly always on the right, making left-handed use more difficult. Now, with digital products, most left-handed people tend to adapt to right-handed tools, which they use daily. Unsurprisingly, many use their right hand to navigate the mouse. However, it’s often quite different on mobile where the left hand is often preferred. Don’t make design decisions based on left/right-handedness. Allow customizations based on the user’s personal preferences. Allow users to re-order columns (incl. the Actions column). In forms, place action buttons next to the last user’s interaction. Keyboard accessibility helps everyone move faster (Esc). Usability Guidelines To Support Both Hands As Ruben Babu writes, we shouldn’t design a fire extinguisher that can’t be used by both hands. Think pull up and pull down, rather than swipe left or right. Minimize the distance to travel with the mouse. And when in doubt, align to the center. Bottom left → better for lefties, bottom right → for righties. With magnifiers, users can’t spot right-aligned buttons. On desktop, align buttons to the left/middle, not right. On mobile, most people switch both hands when tapping. Key actions → put in middle half to two-thirds of the screen. A simple way to test the mobile UI is by trying to use the opposite-handed UX test. For key flows, we try to complete them with your non-dominant hand and use the opposite hand to discover UX shortcomings. For physical products, you might try the oil test. It might be more effective than you might think. Good UX Works For Both Our aim isn’t to degrade the UX of right-handed users by meeting the needs of left-handed users. The aim is to create an accessible experience for everyone. Providing a better experience for left-handed people also benefits right-handed people who have a temporary arm disability. And that’s an often-repeated but also often-overlooked universal principle of usability: better accessibility is better for everyone, even if it might feel that it doesn’t benefit you directly at the moment. Useful Resources “Discover Hidden UX Flaws With the Opposite-Handed UX Test,” by Jeff Huang “Right-Aligned Buttons Aren’t More Efficient For Right-Handed People,” by Julia Y. “Mobile Accessibility Target Sizes Cheatsheet,” by Vitaly Friedman “Why The World Is Not Designed For Left-Handed People,” by Elvis Hsiao “Usability For Left Handedness 101”, by Ruben Babu Touch Design For Mobile Interfaces, by Steven Hoober Meet “Smart Interface Design Patterns” You can find more details on design patterns and UX in Smart Interface Design Patterns, our 15h-video course with 100s of practical examples from real-life projects — with a live UX training later this year. Everything from mega-dropdowns to complex enterprise tables — with 5 new segments added every year. Jump to a free preview. Use code BIRDIE to save 15% off. Meet Smart Interface Design Patterns, our video course on interface design & UX. Video + UX Training Video only Video + UX Training $ 495.00 $ 699.00 Get Video + UX Training 25 video lessons (15h) + Live UX Training. 100 days money-back-guarantee. Video only $ 300.00$ 395.00 Get the video course 40 video lessons (15h). Updated yearly. Also available as a UX Bundle with 2 video courses.
Handling JavaScript Event Listeners With Parameters
Event listeners are essential for interactivity in JavaScript, but they can quietly cause memory leaks if not removed properly. And what if your event listener needs parameters? That’s where things get interesting. Amejimaobari Ollornwi shares which JavaScript features make handling parameters with event handlers both possible and well-supported.
JavaScript event listeners are very important, as they exist in almost every web application that requires interactivity. As common as they are, it is also essential for them to be managed properly. Improperly managed event listeners can lead to memory leaks and can sometimes cause performance issues in extreme cases. Here’s the real problem: JavaScript event listeners are often not removed after they are added. And when they are added, they do not require parameters most of the time — except in rare cases, which makes them a little trickier to handle. A common scenario where you may need to use parameters with event handlers is when you have a dynamic list of tasks, where each task in the list has a “Delete” button attached to an event handler that uses the task’s ID as a parameter to remove the task. In a situation like this, it is a good idea to remove the event listener once the task has been completed to ensure that the deleted element can be successfully cleaned up, a process known as garbage collection. A Common Mistake When Adding Event Listeners A very common mistake when adding parameters to event handlers is calling the function with its parameters inside the addEventListener() method. This is what I mean: button.addEventListener('click', myFunction(param1, param2)); The browser responds to this line by immediately calling the function, irrespective of whether or not the click event has happened. In other words, the function is invoked right away instead of being deferred, so it never fires when the click event actually occurs. You may also receive the following console error in some cases: This error makes sense because the second parameter of the addEventListener method can only accept a JavaScript function, an object with a handleEvent() method, or simply null. A quick and easy way to avoid this error is by changing the second parameter of the addEventListener method to an arrow or anonymous function. button.addEventListener('click', (event) => { myFunction(event, param1, param2); // Runs on click }); The only hiccup with using arrow and anonymous functions is that they cannot be removed with the traditional removeEventListener() method; you will have to make use of AbortController, which may be overkill for simple cases. AbortController shines when you have multiple event listeners to remove at once. For simple cases where you have just one or two event listeners to remove, the removeEventListener() method still proves useful. However, in order to make use of it, you’ll need to store your function as a reference to the listener. Using Parameters With Event Handlers There are several ways to include parameters with event handlers. However, for the purpose of this demonstration, we are going to constrain our focus to the following two: Option 1: Arrow And Anonymous Functions Using arrow and anonymous functions is the fastest and easiest way to get the job done. To add an event handler with parameters using arrow and anonymous functions, we’ll first need to call the function we’re going to create inside the arrow function attached to the event listener: const button = document.querySelector("#myButton"); button.addEventListener("click", (event) => { handleClick(event, "hello", "world"); }); After that, we can create the function with parameters: function handleClick(event, param1, param2) { console.log(param1, param2, event.type, event.target); } Note that with this method, removing the event listener requires the AbortController. To remove the event listener, we create a new AbortController object and then retrieve the AbortSignal object from it: const controller = new AbortController(); const { signal } = controller; Next, we can pass the signal from the controller as an option in the removeEventListener() method: button.addEventListener("click", (event) => { handleClick(event, "hello", "world"); }, { signal }); Now we can remove the event listener by calling AbortController.abort(): controller.abort() Option 2: Closures Closures in JavaScript are another feature that can help us with event handlers. Remember the mistake that produced a type error? That mistake can also be corrected with closures. Specifically, with closures, a function can access variables from its outer scope. In other words, we can access the parameters we need in the event handler from the outer function: function createHandler(message, number) { // Event handler return function (event) { console.log(${message} ${number} - Clicked element:, event.target); }; } const button = document.querySelector("#myButton"); button.addEventListener("click", createHandler("Hello, world!", 1)); } This establishes a function that returns another function. The function that is created is then called as the second parameter in the addEventListener() method so that the inner function is returned as the event handler. And with the power of closures, the parameters from the outer function will be made available for use in the inner function. Notice how the event object is made available to the inner function. This is because the inner function is what is being attached as the event handler. The event object is passed to the function automatically because it’s the event handler. To remove the event listener, we can use the AbortController like we did before. However, this time, let’s see how we can do that using the removeEventListener() method instead. In order for the removeEventListener method to work, a reference to the createHandler function needs to be stored and used in the addEventListener method: function createHandler(message, number) { return function (event) { console.log(${message} ${number} - Clicked element:, event.target); }; } const handler = createHandler("Hello, world!", 1); button.addEventListener("click", handler); Now, the event listener can be removed like this: button.removeEventListener("click", handler); Conclusion It is good practice to always remove event listeners whenever they are no longer needed to prevent memory leaks. Most times, event handlers do not require parameters; however, in rare cases, they do. Using JavaScript features like closures, AbortController, and removeEventListener, handling parameters with event handlers is both possible and well-supported.
Why Non-Native Content Designers Improve Global UX
Ensuring your product communicates clearly to a global audience is not just about localisation. Even for products that have a proper localisation process, English often remains the default language for UI and communications. This article focuses on how you can make English content clear and inclusive for non-native users. Oleksii offers a practical guide based on his own experience as a non-native English-speaking content designer, defining the user experience for international companies.
A few years ago, I was in a design review at a fintech company, polishing the expense management flows. It was a routine session where we reviewed the logic behind content and design decisions. While looking over the statuses for submitted expenses, I noticed a label saying ‘In approval’. I paused, re-read it again, and asked myself: “Where is it? Are the results in? Where can I find them? Are they sending me to the app section called “Approval”?” This tiny label made me question what was happening with my money, and this feeling of uncertainty was quite anxiety-inducing. My team, all native English speakers, did not flinch, even for a second, and moved forward to discuss other parts of the flow. I was the only non-native speaker in the room, and while the label made perfect sense to them, it still felt off to me. After a quick discussion, we landed on ‘Pending approval’ — the simplest and widely recognised option internationally. More importantly, this wording makes it clear that there’s an approval process, and it hasn’t taken place yet. There’s no need to go anywhere to do it. Some might call it nitpicking, but that was exactly the moment I realised how invisible — yet powerful — the non-native speaker’s perspective can be. In a reality where user testing budgets aren’t unlimited, designing with familiar language patterns from the start helps you prevent costly confusions in the user journey. Those same confusions often lead to: Higher rate of customer service queries, Lower adoption rates, Higher churn, Distrust and confusion. As A Native Speaker, You Don’t See The Whole Picture Global products are often designed with English as their primary language. This seems logical, but here’s the catch: Roughly 75% of English-speaking users are not native speakers, which means 3 out of every 4 users. Native speakers often write on instinct, which works much like autopilot. This can often lead to overconfidence in content that, in reality, is too culturally specific, vague, or complex. And that content may not be understood by 3 in 4 people who read it. If your team shares the same native language, content clarity remains assumed by default rather than proven through pressure testing. The price for that is the accessibility of your product. A study by National Library of Medicine found that US adults who had proficiency in English but did not use it as their primary language were significantly less likely to be insured, even when provided with the same level of service as everyone else. In other words, they did not finish the process of securing a healthcare provider — a process that’s vital to their well-being, in part, due to unclear or inaccessible communication. If people abandon the process of getting something as vital as healthcare insurance, it’s easy to imagine them dropping out during checkout, account setup, or app onboarding. Non-native content designers, by contrast, do not write on autopilot. Because of their experience learning English, they’re much more likely to tune into nuances, complexity, and cultural exclusions that natives often overlook. That’s the key to designing for everyone rather than 1 in 4. Non-native Content Designers Make Your UX Global Spotting The Clutter And Cognitive Load Issues When a non-native speaker has to pause, re-read something, or question the meaning of what’s written, they quickly identify it as a friction point in the user experience. Why it’s important: Every extra second users have to spend understanding your content makes them more likely to abandon the task. This is a high price that companies pay for not prioritising clarity. Cognitive load is not just about complex sentences but also about the speed. There’s plenty of research confirming that non-native speakers read more slowly than native speakers. This is especially important when you work on the visibility of system status — time-sensitive content that the user needs to scan and understand quickly. One example you can experience firsthand is an ATM displaying a number of updates and instructions. Even when they’re quite similar, it still overwhelms you when you realise that you missed one, not being able to finish reading. This kind of rapid-fire updates can increase frustration and the chances of errors. Always Advocating For Plain English They tend to review and rewrite things more often to find the easiest way to communicate the message. What a native speaker may consider clear enough might be dense or difficult for a non-native to understand. Why it’s important: Simple content better scales across countries, languages, and cultures. Catching Culture-specific Assumptions And References When things do not make sense, non-native speakers challenge them. Besides the idioms and other obvious traps, native speakers tend to fall into considering their life experience to be shared with most English-speaking users. Cultural differences might even exist within one globally shared language. Have you tried saying ‘soccer’ instead of ‘football’ in a conversation with someone from the UK? These details may not only cause confusion but also upset people. Why it’s important: Making sure your product is free from culture-specific references makes your product more inclusive and safeguards you from alienating your users. They Have Another Level Of Empathy For The Global Audience Being a non-native speaker themselves, they have experience with products that do not speak clearly to them. They’ve been in the global user’s shoes and know how it impacts the experience. Why it’s important: Empathy is a key driver towards design decisions that take into account the diverse cultural and linguistic background of the users. How Non-native Content Design Can Shape Your Approach To Design Your product won’t become better overnight simply because you read an inspiring article telling you that you need to have a more diverse team. I get it. So here are concrete changes that you can make in your design workflows and hiring routines to make sure your content is accessible globally. Run Copy Reviews With Non-native Readers When you launch a new feature or product, it’s a standard practice to run QA sessions to review visuals and interactions. When your team does not include the non-native perspective, the content is usually overlooked and considered fine as long as it’s grammatically correct. I know, having a dedicated localisation team to pressure-test your content for clarity is a privilege, but you can always start small. At one of my previous companies, we established a ‘clarity heroes council’ — a small team of non-native English speakers with diverse cultural and linguistic backgrounds. During our reviews, they often asked questions that surprised us and highlighted where clarity was missing: What’s a “grace period”? What will happen when I tap “settle the payment”? These questions flag potential problems and help you save both money and reputation by avoiding thousands of customer service tickets. Review Existing Flows For Clarity Even if your product does not have major releases regularly, it accumulates small changes over time. They’re often plugged in as fixes or small improvements, and can be easily overlooked from a QA perspective. A good start will be a regular look at the flows that are critical to your business metrics: onboarding, checkout, and so on. Fence off some time for your team quarterly or even annually, depending on your product size, to come together and check whether your key content pieces serve the global audience well. Usually, a proper review is conducted by a team: a product designer, a content designer, an engineer, a product manager, and a researcher. The idea is to go over the flows, research insights, and customer feedback together. For that, having a non-native speaker on the audit task force will be essential. If you’ve never done an audit before, try this template as it covers everything you need to start. Make Sure Your Content Guidelines Are Global-ready If you haven’t done it already, make sure your voice & tone documentation includes details about the level of English your company is catering to. This might mean working with the brand team to find ways to make sure your brand voice comes through to all users without sacrificing clarity and comprehension. Use examples and showcase the difference between sounding smart or playful vs sounding clear. Leaning too much towards brand personality is where cultural differences usually shine through. As a user, you might’ve seen it many times. Here’s a banking app that wanted to seem relaxed and relatable by introducing ‘Dang it’ as the only call-to-action on the screen. However, users with different linguistic backgrounds might not be familiar with this expression. Worse, they might see it as an action, leaving them unsure of what will actually happen after tapping it. Considering how much content is generated with AI today, your guidelines have to account for both tone and clarity. This way, when you feed these requirements to the AI, you’ll see the output that will not just be grammatically correct but also easy to understand. Incorporate Global English Heuristics Into Your Definition Of Success Basic heuristic principles are often documented as a part of overarching guidelines to help UX teams do a better job. The Nielsen Norman Group usability heuristics cover the essential ones, but it doesn’t mean you shouldn’t introduce your own. To complement this list, add this principle: Aim for global understanding: Content and design should communicate clearly to any user regardless of cultural or language background. You can suggest criteria to ensure it’s clear how to evaluate this: Action transparency: Is it clear what happens next when the user proceeds to the next screen or page? Minimal ambiguity: Is the content open to multiple interpretations? International clarity: Does this content work in a non-Western context? Bring A Non-native Perspective To Your Research, Too This one is often overlooked, but collaboration between the research team and non-native speaking writers is super helpful. If your research involves a survey or interview, they can help you double-check whether there is complex or ambiguous language used in the questions unintentionally. In a study by the Journal of Usability Studies, 37% of non-native speakers did not manage to answer the question that included a word they did not recognise or could not recall the meaning of. The question was whether they found the system to be “cumbersome to use”, and the consequences of getting unreliable data and measurements on this would have a negative impact on the UX of your product. Another study by UX Journal of User Experience highlights how important clarity is in surveys. While most people in their study interpreted the question “How do you feel about … ?” as “What’s your opinion on …?”, some took it literally and proceeded to describe their emotions instead. This means that even familiar terms can be misinterpreted. To get precise research results, it’s worth defining key terms and concepts to ensure common understanding with participants. Globalise Your Glossary At Klarna, we often ran into a challenge of inconsistent translation for key terms. A well-defined English term could end up having from three to five different versions in Italian or German. Sometimes, even the same features or app sections could be referred to differently depending on the market — this led to user confusion. To address this, we introduced a shared term base — a controlled vocabulary that included: English term, Definition, Approved translations for all markets, Approved and forbidden synonyms. Importantly, the term selection was dictated by user research, not by assumption or personal preferences of the team. If you’re unsure where to begin, use this product content vocabulary template for Notion. Duplicate it for free and start adding your terms. We used a similar setup. Our new glossary was shared internally across teams, from product to customer service. Results? Reducing the support tickets related to unclear language used in UI (or directions in the user journey) by 18%. This included tasks like finding instructions on how to make a payment (especially with the least popular payment methods like bank transfer), where the late fee details are located, or whether it’s possible to postpone the payment. And yes, all of these features were available, and the team believed they were quite easy to find. A glossary like this can live as an add-on to your guidelines. This way, you will be able to quickly get up to speed new joiners, keep product copy ready for localisation, and defend your decisions with stakeholders. Approach Your Team Growth With An Open Mind ‘Looking for a native speaker’ still remains a part of the job listing for UX Writers and content designers. There’s no point in assuming it’s intentional discrimination. It’s just a misunderstanding that stems from not fully accepting that our job is more about building the user experience than writing texts that are grammatically correct. Here are a few tips to make sure you hire the best talent and treat your applicants fairly: Remove the ‘native speaker’ and ‘fluency’ requirement. Instead, focus on the core part of our job: add ‘clear communicator’, ‘ability to simplify’, or ‘experience writing for a global audience’. Judge the work, not the accent. Over the years, there have been plenty of studies confirming that the accent bias is real — people having an unusual or foreign accent are considered less hirable. While some may argue that it can have an impact on the efficiency of internal communications, it’s not enough to justify the reason to overlook the good work of the applicant. My personal experience with the accent is that it mostly depends on the situation you’re in. When I’m in a friendly environment and do not feel anxiety, my English flows much better as I do not overthink how I sound. Ironically, sometimes when I’m in a room with my team full of British native speakers, I sometimes default to my Slavic accent. The question is: does it make my content design expertise or writing any worse? Not in the slightest. Therefore, make sure you judge the portfolios, the ideas behind the interview answers, and whiteboard challenge presentations, instead of focusing on whether the candidate’s accent implies that they might not be good writers. Good Global Products Need Great Non-native Content Design Non-native content designers do not have a negative impact on your team’s writing. They sharpen it by helping you look at your content through the lens of your real user base. In the globalised world, linguistic purity no longer benefits your product’s user experience. Try these practical steps and leverage the non-native speaking lens of your content designers to design better international products.
Tiny Screens, Big Impact: The Forgotten Art Of Developing Web Apps For Feature Phones
Learn why flip phones still matter in 2025, and how you can build and launch web apps for these tiny devices.
Flip phones aren’t dead. On the contrary, 200+ million non-smartphones are sold annually. That’s roughly equivalent to the number of iPhones sold in 2024. Even in the United States, millions of flip phones are sold each year. As network operators struggle to shut down 2G service, new incentives are offered to encourage device upgrades that further increase demand for budget-friendly flip phones. This is especially true across South Asia and Africa, where an iPhone is unaffordable for the vast majority of the population (it takes two months of work on an average Indian salary to afford the cheapest iPhone). Like their “smart” counterparts, flip phones (technically, this category is called “Feature Phones”) are becoming increasingly more capable. They now offer features you’d expect from a smartphone, like 4G, WiFi, Bluetooth, and the ability to run apps. If you are targeting users in South Asia and Africa, or niches in Europe and North America, there are flip phone app platforms like Cloud Phone and KaiOS. Building for these platforms is similar to developing a Progressive Web App (PWA), with distribution managed across several app stores. Jargon Busting Flip phones go by many names. Non-smartphones are jokingly called “dumb phones”. The technology industry calls this device category “feature phones”. Regionally, they are also known as button phones or basic mobiles in Europe, and keypad mobiles in India. They all share a few traits: they are budget phones with small screens and physical buttons. Why Build Apps For Flip Phones? It’s a common misconception that people who use flip phones do not want apps. In fact, many first-time internet users are eager to discover new content and services. While this market isn’t as lucrative as Apple’s App Store, there are a few reasons why you should build for flip phones. Organic Growth You do not need to pay to acquire flip phone users. Unlike Android or IOS, where the cost per install (CPI) averages around $2.5-3.3 per install according to GoGoChart, flip phone apps generate substantial organic downloads. Brand Introduction When flip phone users eventually upgrade to smartphones, they will search for the apps they are already familiar with. This will, in turn, generate more installs on the Google Play Store and, to a lesser extent, the Apple App Store. Low Competition There are ~1,700 KaiOS apps and fewer Cloud Phone widgets. Meanwhile, Google Play has over 1.55 million Android apps to choose from. It is much easier to stand out as one in a thousand than one in a million. Technical Foundations Flip phones could not always run apps. It wasn’t until the Ovi Store (later renamed to the “Nokia Store”) launched in 2009, a year after Apple’s flagship iPhone launched, that flip phones got installable, third-party applications. At the time, apps were written for the fragmented Java 2 Mobile Edition (J2ME) runtime, available only on select Nokia models, and often required integration with poorly-documented, proprietary packages like the Nokia UI API. Today, flip phone platforms have rejected native runtimes in favor of standard web technologies in an effort to reduce barriers to entry and attract a wider pool of software developers. Apps running on modern flip phones are primarily written in languages many developers are familiar with — HTML, CSS, and JavaScript — and with them, a set of trade-offs and considerations. Hardware Flip phones are affordable because they use low-end, often outdated, hardware. On the bottom end are budget phones with a real-time operating system (RTOS) running on chips like the Unisoc T107 with as little as 16MB of RAM. These phones typically support Opera Mini and Cloud Phone. At the upper end is the recently-released TCL Flip 4 running KaiOS 4.0 on the Qualcomm Snapdragon 4s with 1GB of RAM. While it is difficult to accurately compare such different hardware, Apple’s latest iPhone 16 Pro has 500x more memory (8GB RAM) and supports download speeds up to 1,000x faster than a low-end flip phone (4G LTE CAT-1). Performance You might think that flip phone apps are easily limited by the scarce available resources of budget hardware. This is the case for KaiOS, since apps are executed on the device. Code needs to be minified, thumbnails downsized, and performance evaluated across a range of real devices. You cannot simply test on your desktop with a small viewport. However, as remote browsers, both Cloud Phone and Opera Mini overcome hardware constraints by offloading computationally expensive rendering to servers. This means performance is generally comparable to modern desktops, but can lead to a few quirky and, at times, unintuitive characteristics. For instance, if your app fetches a 1MB file to display a data table, this does not consume 1MB of the user’s mobile data. Only changes to the screen contents get streamed to the user, consuming bandwidth. On the other hand, data is consumed by complex animations and page transitions, because each frame is at least a partial screen refresh. Despite this quirk, Opera Mini estimates it saves up to 90% of data compared to conventional browsers. Security Do not store sensitive data in browser storage. This holds true for flip phones, where the security concerns are similar to those of traditional web browsers. Although apps cannot generally access data from other apps, KaiOS does not encrypt client-side data. The implications are different for remote browsers. Opera Mini does not support client-side storage at all, while Cloud Phone stores data encrypted in its data centers and not on the user’s phone. Design For Modern Flip Phones Simplify, Don’t Shrink-to-fit Despite their staying power, these devices go largely ignored by nearly every web development framework and library. Popular front-end web frameworks like Bootstrap v5 categorize all screens below 576px as extra small. Another popular choice, Tailwind, sets the smallest CSS breakpoint — a specific width where the layout changes to accommodate an optimal viewing experience across different devices — even higher at 40em (640px). Design industry experts like Norman Nielsen suggest the smallest breakpoint, “is intended for mobile and generally is up to 500px.” Standards like these advocate for a one-size-fits-all approach on small screens, but some small design changes can make a big difference for new internet users. Small screens vary considerably in size, resolution, contrast, and brightness. Small screen usability requires distinct design considerations — not a shrink-to-fit model. While all of these devices have a screen width smaller than the smallest common breakpoints, treating them equally would be a mistake. Most websites render too large for flip phones. They use fonts that are too big, graphics that are too detailed, and sticky headers that occupy a quarter of the screen. To make matters worse, many websites disable horizontal scrolling by hiding content that overflows horizontally. This allows for smooth scrolling on a touchscreen, but also makes it impossible to read text that extends beyond the viewport on flip phones. The table below includes physical display size, resolution, and examples to better understand the diversity of small screens across flip phones and budget smartphones. Resolution Display Size Pixel Size Example QQVGA 1.8” 128×160 Viettel Sumo 4G V1 QVGA 2.4” 240×320 Nokia 235 4G QVGA (Square) 2.4” 240×240 Frog Pocket2 HVGA (480p) 2.8-3.5” 320×480 BlackBerry 9720 VGA 2.8-3.5” 480×640 Cat S22 WVGA 2.8-3.5” 480×800 HP Pre 3 FWVGA+ 5” 480×960 Alcatel 1 Note: Flip phones have small screens typically between 1.8”–2.8” with a resolution of 240x320 (QVGA) or 128x160 (QQVGA). For comparison, an Apple Watch Series 10 has a 1.8” screen with a resolution of 416x496. By modern standards, flip phone displays are small with low resolution, pixel density, contrast, and brightness. Develop For Small Screens Add custom, named breakpoints to your framework’s defaults, rather than manually using media queries to override layout dimensions defined by classes. Bootstrap v5 Bootstrap defines a map, $grid-breakpoints, in the _variables.scss Sass file that contains the default breakpoints from SM (576px) to XXL (1400px). Use the map-merge() function to extend the default and add your own breakpoint. @import "node_modules/bootstrap/scss/functions"; $grid-breakpoints: map-merge($grid-breakpoints, ("xs": 320px)); Tailwind v4 Tailwind allows you to extend the default theme in the tailwind.config.js configuration file. Use the extend key to define new breakpoints. const defaultTheme = require('tailwindcss/defaultTheme') module.exports = { theme: { extend: { screens: { "xs": "320px", ...defaultTheme.screens, }, }, }, }; The Key(board) To Success Successful flip phone apps support keyboard navigation using the directional pad (D-pad). This is the same navigation pattern as TV remotes: four arrow keys (up, down, left, right) and the central button. To build a great flip phone-optimized app, provide a navigation scheme where the user can quickly learn how to navigate your app using these limited controls. Ensure users can navigate to all visible controls on the screen. Navigating PodLP using d-pad (left) and a virtual cursor (right). Although some flip phone platforms support spatial navigation using an emulated cursor, it is not universally available and creates a worse user experience. Moreover, while apps that support keyboard navigation will work with an emulated cursor, this isn’t necessarily true the other way around. Opera Mini Native only offers a virtual cursor, Cloud Phone only offers spatial navigation, and KaiOS supports both. If you develop with keyboard accessibility in mind, supporting flip phone navigation is easy. As general guidelines, never remove a focus outline. Instead, override default styles and use box shadows to match your app’s color scheme while fitting appropriately. Autofocus on the first item in a sequence — list or grid — but be careful to avoid keyboard traps. Finally, make sure that the lists scroll the newly-focused item completely into view. Don’t Make Users Type If you have ever been frustrated typing a long message on your smartphone, only to have it accidentally erased, now imagine that frustration when you typed the message using T9 on a flip phone. Despite advancements in predictive typing, it’s a chore to fill forms and compose even a single 180-character Tweet with just nine keys. Whatever you do, don’t make flip phone users type! Fortunately, it is easy to adapt designs to require less typing. Prefer numbers whenever possible. Allow users to register using their phone number (which is easy to type), send a PIN code or one-time password (OTPs) that contains only numbers, and look up address details from a postal code. Each of these saves tremendous time and avoids frustration that often leads to user attrition. Alternatively, integrate with single-sign-on (SSO) providers to “Log in with Google,” so users do not have to retype passwords that security teams require to be at least eight characters long and contain a letter, number, and symbol. Just keep in mind that many new internet users won’t have an email address. They may not know how to access it, or their phone might not be able to access emails. Finally, allow users to search by voice when it is available. As difficult as it is typing English using T9, it’s much harder typing a language like Tamil, which has over 90M speakers across South India and Sri Lanka. Despite decades of advancement, technologies like auto-complete and predictive typing are seldom available for such languages. While imperfect, there are AI models like Whisper Tamil that can perform speech-to-text, thanks to researchers at universities like the Speech Lab at IIT Madras. Flip Phone Browsers And Operating Systems Another challenge with developing web apps for flip phones is their fragmented ecosystem. Various companies have used different approaches to allow websites and apps to run on limited hardware. There are at least three major web-based platforms that all operate differently: Cloud Phone is the most recent solution, launched in December 2023, using a modern Puffin (Chromium) based remote browser that serves as an app store. KaiOS, launched in 2016 using Firefox OS as its foundation, is a mobile operating system where the entire system is a web browser. Opera Mini Native is by far the oldest, launched in 2005 as an ad-supported remote browser that still uses the decade-old, discontinued Presto engine). Although both platforms are remote browsers, there are significant differences between Cloud Phone and Opera Mini that are not immediately apparent. Platform Cons Pros Cloud Phone Missing features like WebPush No offline support Monetization not provided Modern Chromium v128+ engine Rich multimedia support No optimizations needed Actively developed 100+ models launched in 2024 KaiOS Outdated Gecko engine Hardware constrained Few models released in 2024 KaiAds integration required Two app stores Full offline support APIs for low-level integration Apps can be packaged or hosted Opera Mini Native Discontinued Presto engine ~2.5s async execution limit Limited ES5 support No multimedia support No app store Last updated in 2020 Preinstalled on hundreds of millions of phones Partial offline support Stable, cross-platform Flip phones have come a long way, but each platform supports different capabilities. You may need to remove or scale back features based on what is supported. It is best to target the lowest common denominator that is feasible for your application. For information-heavy news websites, wikis, or blogs, Opera Mini’s outdated technology works well enough. For video streaming services, both Cloud Phone and KaiOS work well. Conversely, remote browsers like Opera Mini and Cloud Phone cannot handle high frame rates, so only KaiOS is suitable for real-time interactive games. Just like with design, there is no one-size-fits-all approach to flip phone development. Even though all platforms are web-based, they require different tradeoffs. Tiny Screens, Big Impact The flip phone market is growing, particularly for 4G-enabled models. Reliance’s JioPhone is among the most successful models, selling more than 135 million units of its flagship KaiOS-enabled phone. The company plans to increase 4G flip phone rollout steadily as it migrates India’s 250 million 2G users to 4G and 5G. Similar campaigns are underway across emerging markets, like Vodacom’s $14 Mobicel S4, a Cloud phone-enabled device in South Africa, and Viettel’s gifting 700,000 4G flip phones to current 2G subscribers to upgrade users in remote and rural areas. Estimates of the total active flip phone market size are difficult to come by, and harder still to find a breakdown by platform. KaiOS claims to enable “over 160 million phones worldwide,” while “over 300 million people use Opera Mini to stay connected.” Just a year after launch, Cloud Phone states that, “one million Cloud Phone users already access the service from 90 countries.” By most estimates, there are already hundreds of millions of web-enabled flip phone users eager to discover new products and services. Conclusion Hundreds of millions still rely on flip phones to stay connected. Yet, these users go largely ignored even by products that target emerging markets. Modern software development often prioritizes the latest and greatest over finding ways to affordably serve more than 2.6 billion unconnected people. If you are not designing for small screens using keyboard navigation, you’re shutting out an entire population from accessing your service. Flip phones still matter in 2025. With ongoing network transitions, millions will upgrade, and millions more will connect for the first time using 4G flip phones. This creates an opportunity to put your app into the hands of the newly connected. And thanks to modern remote browser technology, it is now easier than ever to build and launch your app on flip phones without costly and time-consuming optimizations to function on low-end hardware.
Articles for people who make web sites.
Design for Amiability: Lessons from Vienna
Today’s web is not always an amiable place. Sites greet you with a popover that demands assent to their cookie policy, and leave you with Taboola ads promising “One Weird Trick!” to cure your ailments. Social media sites are tuned for engagement, and few things are more engaging than a fight. Today it seems that people want to quarrel; I have seen flame wars among birders.
These tensions are often at odds with a site’s goals. If we are providing support and advice to customers, we don’t want those customers to wrangle with each other. If we offer news about the latest research, we want readers to feel at ease; if we promote upcoming marches, we want our core supporters to feel comfortable and we want curious newcomers to feel welcome.
In a study for a conference on the History of the Web, I looked to the origins of Computer Science in Vienna (1928-1934) for a case study of the importance of amiability in a research community and the disastrous consequences of its loss. That story has interesting implications for web environments that promote amiable interaction among disparate, difficult (and sometimes disagreeable) people.
The Vienna CircleThough people had been thinking about calculating engines and thinking machines from antiquity, Computing really got going in Depression-era Vienna. The people who worked out the theory had no interest in building machines; they wanted to puzzle out the limits of reason in the absence of divine authority. If we could not rely on God or Aristotle to tell us how to think, could we instead build arguments that were self-contained and demonstrably correct? Can we be sure that mathematics is consistent? Are there things that are true but that cannot be expressed in language?
The core ideas were worked out in the weekly meetings (Thursdays at 6) of a group remembered as the Vienna Circle. They got together in the office of Professor Moritz Schlick at the University of Vienna to discuss problems in philosophy, math, and language. The intersection of physics and philosophy had long been a specialty of this Vienna department, and this work had placed them among the world leaders. Schlick’s colleague Hans Hahn was a central participant, and by 1928 Hahn brought along his graduate students Karl Menger and Kurt Gödel. Other frequent participants included philosopher Rudolf Carnap, psychologist Karl Popper, economist Ludwig von Mises (brought by his brother Frederick, a physicist), graphic designer Otto Neurath (inventor of infographics), and architect Josef Frank (brought by his physicist brother, Phillip). Out-of-town visitors often joined, including the young Johnny von Neumann, Alfred Tarski, and the irascible Ludwig Wittgenstein.
When Schlick’s office grew too dim, participants adjourned to a nearby café for additional discussion with an even larger circle of participants. This convivial circle was far from unique. An intersecting circle–Neurath, von Mises, Oskar Morgenstern–established the Austrian School of free-market economics. There were theatrical circles (Peter Lorre, Hedy Lamarr, Max Reinhardt), and literary circles. The café was where things happened.
The interdisciplinarity of the group posed real challenges of temperament and understanding. Personalities were often a challenge. Gödel was convinced people were trying to poison him. Architect Josef Frank depended on contracts for public housing, which Mises opposed as wasteful. Wittgenstein’s temper had lost him his job as a secondary school teacher, and for some of these years he maintained a detailed list of whom he was willing to meet. Neurath was eager to detect muddled thinking and would interrupt a speaker with a shouted “Metaphysics!” The continuing amity of these meetings was facilitated by the personality of their leader, Moritz Schlick, who would be remembered as notably adept in keeping disagreements from becoming quarrels.
In the CaféThe Viennese café of this era was long remembered as a particularly good place to argue with your friends, to read, and to write. Built to serve an imperial capital, the cafés found themselves with too much space and too few customers now that the Empire was gone. There was no need to turn tables: a café could only survive by coaxing customers to linger. Perhaps they would order another coffee, or one of their friends might drop by. One could play chess, or billiards, or read newspapers from abroad. Coffee was invariably served with a glass of purified spring water, still a novelty in an era in which most water was still unsafe to drink. That water glass would be refilled indefinitely.
In the basement of one café, the poet Jura Soyfer staged “The End Of The World,” a musical comedy in which Professor Peep has discovered a comet heading for earth.
Prof. Peep: The comet is going to destroy everybody!
Hitler: Destroying everybody is my business.
Of course, coffee can be prepared in many ways, and the Viennese café developed a broad vocabulary to represent precisely how one preferred to drink it: melange, Einspänner, Brauner, Schwarzer, Kapuziner. This extensive customization, with correspondingly esoteric conventions of service, established the café as a comfortable and personal third space, a neutral ground in which anyone who could afford a coffee would be welcome. Viennese of this era were fastidious in their use of personal titles, of which an abundance were in common use. Café waiters greeted regular customers with titles too, but were careful to address their patrons with titles a notch or two greater than they deserved. A graduate student would be Doktor, an unpaid postdoc Professor. This assurance mattered all the more because so many members of the Circle (and so many other Viennese) came from elsewhere: Carnap from Wuppertal, Gödel from Brno, von Neumann from Budapest. No one was going to make fun of your clothes, mannerisms, or accent. Your friends wouldn’t be bothered by the pram in the hall. Everyone shared a Germanic Austrian literary and philosophical culture, not least those whose ancestors had been Eastern European Jews who knew that culture well, having read all about it in books.
The amiability of the café circle was enhanced by its openness. Because the circle sometimes extended to architects and actors, people could feel less constrained to admit shortfalls in their understanding. It was soon discovered that marble tabletops made a useful surface for pencil sketches, serving all as an improvised and accessible blackboard.
Comedies like “The End Of The World” and fictional newspaper sketches or feuilletons of writers like Joseph Roth and Stefan Zweig served as a second defense against disagreeable or churlish behavior. The knowledge that, if one got carried away, a parody of one’s remarks might shortly appear in Neue Freie Presse surely helped Professor Schlick keep matters in hand.
The End Of Red ViennaThough Austria’s government drifted to the right after the War, Vienna’s city council had been Socialist, dedicated to public housing based on user-centered design, and embracing ambitious programs of public outreach and adult education. In 1934 the Socialists lost a local election, and this era soon came to its end as the new administration focused on the imagined threat of the International Jewish Conspiracy. Most members of the Circle fled within months: von Neumann to Princeton, Neurath to Holland and Oxford, Popper to New Zealand, Carnap to Chicago. Prof. Schlick was murdered on the steps of the University by a student outraged by his former association with Jews. Jura Soyfer, who wrote “The End Of The World,” died in Buchenwald.
In 1939, von Neumann finally convinced Gödel to accept a job in Princeton. Gödel was required to pay large fines to emigrate. The officer in charge of these fees would look back on this as the best posting of his career; his name was Eichmann.
Design for AmiabilityAn impressive literature recounts those discussions and the environment that facilitated the development of computing. How can we design for amiability? This is not just a matter of choosing rounded typefaces and a cheerful pastel palette. I believe we may identify eight distinct issues that exert design forces in usefully amiable directions.
Seriousness: The Vienna Circle was wrestling with a notoriously difficult book—Wittgenstein’s Tractus Logico-Philosophicus—and a catalog of outstanding open questions in mathematics. They were concerned with consequential problems, not merely scoring points for debating. Constant reminders that the questions you are considering matter—not only that they are consequential or that those opposing you are scoundrels—help promote amity.
Empiricism: The characteristic approach of the Vienna Circle demanded that knowledge be grounded either in direct observation or in rigorous reasoning. Disagreement, when it arose, could be settled by observation or by proof. If neither seemed ready to hand, the matter could not be settled. On these terms, one can seldom if ever demolish an opposing argument, and trolling is pointless.
Abstraction: Disputes grow worse when losing the argument entails lost face or lost jobs. The Vienna Circle’s focus on theory—the limits of mathematics, the capability of language—promoted amity. Without seriousness, abstraction could have been merely academic, but the limits of reason and the consistency of mathematics were clearly serious.
Formality: The punctilious demeanor of waiters and the elaborated rituals of coffee service helped to establish orderly attitudes amongst the argumentative participants. This stands in contrast to the contemptuous sneer that now dominates social media.
Schlamperei: Members of the Vienna Circle maintained a global correspondence, and they knew their work was at the frontier of research. Still, this was Vienna, at the margins of Europe: old-fashioned, frumpy, and dingy. Many participants came from even more obscure backwaters. Most or all harbored the suspicion that they were really schleppers, and a tinge of the ridiculous helped to moderate tempers. The director of “The End Of The World” had to pass the hat for money to purchase a moon for the set, and thought it was funny enough to write up for publication.
Openness: All sorts of people were involved in discussion, anyone might join in. Each week would bring different participants. Fluid borders reduce tension, and provide opportunities to broaden the range of discussion and the terms of engagement. Low entrance friction was characteristic of the café: anyone could come, and if you came twice you were virtually a regular. Permeable boundaries and café culture made it easier for moderating influences to draw in raconteurs and storytellers to defuse awkward moments, and Vienna’s cafés had no shortage of humorists. Openness counteracts the suspicion that promoters of amiability are exerting censorship.
Parody: The environs of the Circle—the university office and the café—were unmistakably public. There were writers about, some of them renowned humorists. The prospect that one’s bad taste or bad behavior might be ridiculed in print kept discussion within bounds. The sanction of public humiliation, however, was itself made mild by the veneer of fiction; even if you got a little carried away and a character based on you made a splash in some newspaper fiction, it wasn’t the end of the world.
Engagement: The subject matter was important to the participants, but it was esoteric: it did not matter very much to their mothers or their siblings. A small stumble or a minor humiliation could be shrugged off in ways that major media confrontations cannot.
I believe it is notable that this environment was designed to promote amiability through several different voices. The café waiter flattered each newcomer and served everyone, and also kept out local pickpockets and drunks who would be mere disruptions. Schlick and other regulars kept discussion moving and on track. The fiction writers and raconteurs—perhaps the most peripheral of the participants—kept people in a good mood and reminded them that bad behavior could make anyone ridiculous. Crucially, each of these voices were human: you could reason with them. Algorithmic or AI moderators, however clever, are seldom perceived as reasonable. The café circles had no central authority or Moderator against whom everyone’s resentments might be focused. Even after the disaster of 1934, what people remembered were those cheerful arguments.
Design Dialects: Breaking the Rules, Not the System
"Language is not merely a set of unrelated sounds, clauses, rules, and meanings; it is a totally coherent system bound to context and behavior." — Kenneth L. Pike
The web has accents. So should our design systems.
Design Systems as Living LanguagesDesign systems aren't component libraries—they’re living languages. Tokens are phonemes, components are words, patterns are phrases, layouts are sentences. The conversations we build with users become the stories our products tell.
But here’s what we've forgotten: the more fluently a language is spoken, the more accents it can support without losing meaning. English in Scotland differs from English in Sydney, yet both are unmistakably English. The language adapts to context while preserving core meaning. This couldn’t be more obvious to me, a Brazilian Portuguese speaker, who learned English with an American accent, and lives in Sydney.
Our design systems must work the same way. Rigid adherence to visual rules creates brittle systems that break under contextual pressure. Fluent systems bend without breaking.
Consistency becomes a prison
The promise of design systems was simple: consistent components would accelerate development and unify experiences. But as systems matured and products grew more complex, that promise has become a prison. Teams file “exception” requests by the hundreds. Products launch with workarounds instead of system components. Designers spend more time defending consistency than solving user problems.
Our design systems must learn to speak dialects.
A design dialect is a systematic adaptation of a design system that maintains core principles while developing new patterns for specific contexts. Unlike one-off customizations or brand themes, dialects preserve the system’s essential grammar while expanding its vocabulary to serve different users, environments, or constraints.
When Perfect Consistency FailsAt Booking.com, I learned this lesson the hard way. We A/B-tested everything—color, copy, button shapes, even logo colors. As a professional with a graphic design education and experience building brand style guides, I found this shocking. While everyone fell in love with Airbnb’s pristine design system, Booking grew into a giant without ever considering visual consistency.
The chaos taught me something profound: consistency isn’t ROI; solved problems are.
At Shopify. Polaris (https://polaris-react.shopify.com/) was our crown jewel—a mature design language perfect for merchants on laptops. As a product team, we were expected to adopt Polaris as-is. Then my fulfillment team hit an “Oh, Ship!” moment, as we faced the challenge of building an app for warehouse pickers using our interface on shared, battered Android scanners in dim aisles, wearing thick gloves, scanning dozens of items per minute, many with limited levels of English understanding.
Task completion with standard Polaris: 0%.
Every component that worked beautifully for merchants failed completely for pickers. White backgrounds created glare. 44px tap targets were invisible to gloved fingers. Sentence-case labels took too long to parse. Multi-step flows confused non-native speakers.
We faced a choice: abandon Polaris entirely, or teach it to speak warehouse.
The Birth of a DialectWe chose evolution over revolution. Working within Polaris’s core principles—clarity, efficiency, consistency—we developed what we now call a design dialect:
ConstraintFluent MoveRationaleGlare & low lightDark surfaces + light textReduce glare on low-DPI screensGloves & haste90px tap targets (~2cm)Accommodate thick glovesMultilingualSingle-task screens, plain languageReduce cognitive loadResult: Task completion jumped from 0% to 100%. Onboarding time dropped from three weeks to one shift.
This wasn’t customization or theming—this was a dialect: a systematic adaptation that maintained Polaris’s core grammar while developing new vocabulary for a specific context. Polaris hadn’t failed; it had learned to speak warehouse.
The Flexibility FrameworkAt Atlassian, working on the Jira platform—itself a system within the larger Atlassian system—I pushed for formalizing this insight. With dozens of products sharing a design language across different codebases, we needed systematic flexibility so we built directly into our ways of working. The old model—exception requests and special approvals—was failing at scale.
We developed the Flexibility Framework to help designers define how flexible they wanted their components to be:
TierActionOwnershipConsistentAdopt unchangedPlatform locks design + codeOpinionatedAdapt within boundsPlatform provides smart defaults, products customizeFlexibleExtend freelyPlatform defines behavior, products own presentationDuring a navigation redesign, we tiered every element. Logo and global search stayed Consistent. Breadcrumbs and contextual actions became Flexible. Product teams could immediately see where innovation was welcome and where consistency mattered.
The Decision LadderFlexibility needs boundaries. We created a simple ladder for evaluating when rules should bend:
Good: Ship with existing system components. Fast, consistent, proven.
Better: Stretch a component slightly. Document the change. Contribute improvements back to the system for all to use.
Best: Prototype the ideal experience first. If user testing validates the benefit, update the system to support it.
The key question: “Which option lets users succeed fastest?”
Rules are tools, not relics.
Unity Beats UniformityGmail, Drive, and Maps are unmistakably Google—yet each speaks with its own accent. They achieve unity through shared principles, not cloned components. One extra week of debate over button color costs roughly $30K in engineer time.
Unity is a brand outcome; fluency is a user outcome. When the two clash, side with the user.
Governance Without GatesHow do you maintain coherence while enabling dialects? Treat your system like a living vocabulary:
Document every deviation – e.g., dialects/warehouse.md with before/after screenshots and rationale.
Promote shared patterns – when three teams adopt a dialect independently, review it for core inclusion.
Deprecate with context – retire old idioms via flags and migration notes, never a big-bang purge.
A living dictionary scales better than a frozen rulebook.
Start Small: Your First DialectReady to introduce dialects? Start with one broken experience:
This week: Find one user flow where perfect consistency blocks task completion. Could be mobile users struggling with desktop-sized components, or accessibility needs your standard patterns don’t address.
Document the context: What makes standard patterns fail here? Environmental constraints? User capabilities? Task urgency?
Design one systematic change: Focus on behavior over aesthetics. If gloves are the problem, bigger targets aren’t “"breaking the system”"—they’re serving the user. Earn the variations and make them intentional.
Test and measure: Does the change improve task completion? Time to productivity? User satisfaction?
Show the savings: If that dialect frees even half a sprint, fluency has paid for itself.
Beyond the Component LibraryWe’re not managing design systems anymore—we’re cultivating design languages. Languages that grow with their speakers. Languages that develop accents without losing meaning. Languages that serve human needs over aesthetic ideals.
The warehouse workers who went from 0% to 100% task completion didn’t care that our buttons broke the style guide. They cared that the buttons finally worked.
Your users feel the same way. Give your system permission to speak their language.
An Holistic Framework for Shared Design Leadership
Picture this: You’re in a meeting room at your tech company, and two people are having what looks like the same conversation about the same design problem. One is talking about whether the team has the right skills to tackle it. The other is diving deep into whether the solution actually solves the user’s problem. Same room, same problem, completely different lenses.
This is the beautiful, sometimes messy reality of having both a Design Manager and a Lead Designer on the same team. And if you’re wondering how to make this work without creating confusion, overlap, or the dreaded “too many cooks” scenario, you’re asking the right question.
The traditional answer has been to draw clean lines on an org chart. The Design Manager handles people, the Lead Designer handles craft. Problem solved, right? Except clean org charts are fantasy. In reality, both roles care deeply about team health, design quality, and shipping great work.
The magic happens when you embrace the overlap instead of fighting it—when you start thinking of your design org as a design organism.
The Anatomy of a Healthy Design TeamHere's what I’ve learned from years of being on both sides of this equation: think of your design team as a living organism. The Design Manager tends to the mind (the psychological safety, the career growth, the team dynamics). The Lead Designer tends to the body (the craft skills, the design standards, the hands-on work that ships to users).
But just like mind and body aren’t completely separate systems, so, too, do these roles overlap in important ways. You can’t have a healthy person without both working in harmony. The trick is knowing where those overlaps are and how to navigate them gracefully.
When we look at how healthy teams actually function, three critical systems emerge. Each requires both roles to work together, but with one taking primary responsibility for keeping that system strong.
The Nervous System: People & PsychologyPrimary caretaker: Design Manager
Supporting role: Lead Designer
The nervous system is all about signals, feedback, and psychological safety. When this system is healthy, information flows freely, people feel safe to take risks, and the team can adapt quickly to new challenges.
The Design Manager is the primary caretaker here. They’re monitoring the team’s psychological pulse, ensuring feedback loops are healthy, and creating the conditions for people to grow. They’re hosting career conversations, managing workload, and making sure no one burns out.
But the Lead Designer plays a crucial supporting role. They’re providing sensory input about craft development needs, spotting when someone’s design skills are stagnating, and helping identify growth opportunities that the Design Manager might miss.
Design Manager tends to:
- Career conversations and growth planning
- Team psychological safety and dynamics
- Workload management and resource allocation
- Performance reviews and feedback systems
- Creating learning opportunities
Lead Designer supports by:
- Providing craft-specific feedback on team member development
- Identifying design skill gaps and growth opportunities
- Offering design mentorship and guidance
- Signaling when team members are ready for more complex challenges
Primary caretaker: Lead Designer
Supporting role: Design Manager
The muscular system is about strength, coordination, and skill development. When this system is healthy, the team can execute complex design work with precision, maintain consistent quality, and adapt their craft to new challenges.
The Lead Designer is the primary caretaker here. They’re setting design standards, providing craft coaching, and ensuring that shipping work meets the quality bar. They’re the ones who can tell you if a design decision is sound or if we’re solving the right problem.
But the Design Manager plays a crucial supporting role. They’re ensuring the team has the resources and support to do their best craft work, like proper nutrition and recovery time for an athlete.
Lead Designer tends to:
- Definition of design standards and system usage
- Feedback on what design work meets the standard
- Experience direction for the product
- Design decisions and product-wide alignment
- Innovation and craft advancement
Design Manager supports by:
- Ensuring design standards are understood and adopted across the team
- Confirming experience direction is being followed
- Supporting practices and systems that scale without bottlenecking
- Facilitating design alignment across teams
- Providing resources and removing obstacles to great craft work
Shared caretakers: Both Design Manager and Lead Designer
The circulatory system is about how information, decisions, and energy flow through the team. When this system is healthy, strategic direction is clear, priorities are aligned, and the team can respond quickly to new opportunities or challenges.
This is where true partnership happens. Both roles are responsible for keeping the circulation strong, but they’re bringing different perspectives to the table.
Lead Designer contributes:
- User needs are met by the product
- Overall product quality and experience
- Strategic design initiatives
- Research-based user needs for each initiative
Design Manager contributes:
- Communication to team and stakeholders
- Stakeholder management and alignment
- Cross-functional team accountability
- Strategic business initiatives
Both collaborate on:
- Co-creation of strategy with leadership
- Team goals and prioritization approach
- Organizational structure decisions
- Success measures and frameworks
The key to making this partnership sing is understanding that all three systems need to work together. A team with great craft skills but poor psychological safety will burn out. A team with great culture but weak craft execution will ship mediocre work. A team with both but poor strategic circulation will work hard on the wrong things.
Be Explicit About Which System You’re TendingWhen you’re in a meeting about a design problem, it helps to acknowledge which system you’re primarily focused on. “I’m thinking about this from a team capacity perspective” (nervous system) or “I’m looking at this through the lens of user needs” (muscular system) gives everyone context for your input.
This isn’t about staying in your lane. It’s about being transparent as to which lens you’re using, so the other person knows how to best add their perspective.
Create Healthy Feedback LoopsThe most successful partnerships I’ve seen establish clear feedback loops between the systems:
Nervous system signals to muscular system: “The team is struggling with confidence in their design skills” → Lead Designer provides more craft coaching and clearer standards.
Muscular system signals to nervous system: “The team’s craft skills are advancing faster than their project complexity” → Design Manager finds more challenging growth opportunities.
Both systems signal to circulatory system: “We’re seeing patterns in team health and craft development that suggest we need to adjust our strategic priorities.”
Handle Handoffs GracefullyThe most critical moments in this partnership are when something moves from one system to another. This might be when a design standard (muscular system) needs to be rolled out across the team (nervous system), or when a strategic initiative (circulatory system) needs specific craft execution (muscular system).
Make these transitions explicit. “I’ve defined the new component standards. Can you help me think through how to get the team up to speed?” or “We’ve agreed on this strategic direction. I'm going to focus on the specific user experience approach from here.”
Stay Curious, Not TerritorialThe Design Manager who never thinks about craft, or the Lead Designer who never considers team dynamics, is like a doctor who only looks at one body system. Great design leadership requires both people to care about the whole organism, even when they’re not the primary caretaker.
This means asking questions rather than making assumptions. “What do you think about the team’s craft development in this area?” or “How do you see this impacting team morale and workload?” keeps both perspectives active in every decision.
When the Organism Gets SickEven with clear roles, this partnership can go sideways. Here are the most common failure modes I’ve seen:
System IsolationThe Design Manager focuses only on the nervous system and ignores craft development. The Lead Designer focuses only on the muscular system and ignores team dynamics. Both people retreat to their comfort zones and stop collaborating.
The symptoms: Team members get mixed messages, work quality suffers, morale drops.
The treatment: Reconnect around shared outcomes. What are you both trying to achieve? Usually it’s great design work that ships on time from a healthy team. Figure out how both systems serve that goal.
Poor CirculationStrategic direction is unclear, priorities keep shifting, and neither role is taking responsibility for keeping information flowing.
The symptoms: Team members are confused about priorities, work gets duplicated or dropped, deadlines are missed.
The treatment: Explicitly assign responsibility for circulation. Who’s communicating what to whom? How often? What’s the feedback loop?
Autoimmune ResponseOne person feels threatened by the other’s expertise. The Design Manager thinks the Lead Designer is undermining their authority. The Lead Designer thinks the Design Manager doesn’t understand craft.
The symptoms: Defensive behavior, territorial disputes, team members caught in the middle.
The treatment: Remember that you’re both caretakers of the same organism. When one system fails, the whole team suffers. When both systems are healthy, the team thrives.
The PayoffYes, this model requires more communication. Yes, it requires both people to be secure enough to share responsibility for team health. But the payoff is worth it: better decisions, stronger teams, and design work that’s both excellent and sustainable.
When both roles are healthy and working well together, you get the best of both worlds: deep craft expertise and strong people leadership. When one person is out sick, on vacation, or overwhelmed, the other can help maintain the team’s health. When a decision requires both the people perspective and the craft perspective, you’ve got both right there in the room.
Most importantly, the framework scales. As your team grows, you can apply the same system thinking to new challenges. Need to launch a design system? Lead Designer tends to the muscular system (standards and implementation), Design Manager tends to the nervous system (team adoption and change management), and both tend to circulation (communication and stakeholder alignment).
The Bottom LineThe relationship between a Design Manager and Lead Designer isn’t about dividing territories. It’s about multiplying impact. When both roles understand they’re tending to different aspects of the same healthy organism, magic happens.
The mind and body work together. The team gets both the strategic thinking and the craft excellence they need. And most importantly, the work that ships to users benefits from both perspectives.
So the next time you’re in that meeting room, wondering why two people are talking about the same problem from different angles, remember: you’re watching shared leadership in action. And if it’s working well, both the mind and body of your design team are getting stronger.
From Beta to Bedrock: Build Products that Stick.
As a product builder over too many years to mention, I've lost count of the number of times I've seen promising ideas go from zero to hero in a few weeks, only to fizzle out within months.
Financial products, which is the field I work in, are no exception. With people’s real hard-earned money on the line, user expectations running high, and a crowded market, it's tempting to throw as many features at the wall as possible and hope something sticks. But this approach is a recipe for disaster. Here's why:
The pitfalls of feature-first developmentWhen you start building a financial product from the ground up, or are migrating existing customer journeys from paper or telephony channels onto online banking or mobile apps, it's easy to get caught up in the excitement of creating new features. You might think, "If I can just add one more thing that solves this particular user problem, they'll love me!" But what happens when you inevitably hit a roadblock because the narcs (your security team!) don’t like it? When a hard-fought feature isn't as popular as you thought, or it breaks due to unforeseen complexity?
This is where the concept of Minimum Viable Product (MVP) comes in. Jason Fried's book Getting Real and his podcast Rework often touch on this idea, even if he doesn’t always call it that. An MVP is a product that provides just enough value to your users to keep them engaged, but not so much that it becomes overwhelming or difficult to maintain. It sounds like an easy concept but it requires a razor sharp eye, a ruthless edge and having the courage to stick by your opinion because it is easy to be seduced by “the Columbo Effect”… when there’s always “just one more thing…” that someone wants to add.
The problem with most finance apps, however, is that they often become a reflection of the internal politics of the business rather than an experience solely designed around the customer. This means that the focus is on delivering as many features and functionalities as possible to satisfy the needs and desires of competing internal departments, rather than providing a clear value proposition that is focused on what the people out there in the real world want. As a result, these products can very easily bloat to become a mixed bag of confusing, unrelated and ultimately unlovable customer experiences—a feature salad, you might say.
The importance of bedrockSo what's a better approach? How can we build products that are stable, user-friendly, and—most importantly—stick?
That's where the concept of "bedrock" comes in. Bedrock is the core element of your product that truly matters to users. It's the fundamental building block that provides value and stays relevant over time.
In the world of retail banking, which is where I work, the bedrock has got to be in and around the regular servicing journeys. People open their current account once in a blue moon but they look at it every day. They sign up for a credit card every year or two, but they check their balance and pay their bill at least once a month.
Identifying the core tasks that people want to do and then relentlessly striving to make them easy to do, dependable, and trustworthy is where the gravy’s at.
But how do you get to bedrock? By focusing on the "MVP" approach, prioritizing simplicity, and iterating towards a clear value proposition. This means cutting out unnecessary features and focusing on delivering real value to your users.
It also means having some guts, because your colleagues might not always instantly share your vision to start with. And controversially, sometimes it can even mean making it clear to customers that you’re not going to come to their house and make their dinner. The occasional “opinionated user interface design” (i.e. clunky workaround for edge cases) might sometimes be what you need to use to test a concept or buy you space to work on something more important.
Practical strategies for building financial products that stickSo what are the key strategies I've learned from my own experience and research?
- Start with a clear "why": What problem are you trying to solve? For whom? Make sure your mission is crystal clear before building anything. Make sure it aligns with your company’s objectives, too.
- Focus on a single, core feature and obsess on getting that right before moving on to something else: Resist the temptation to add too many features at once. Instead, choose one that delivers real value and iterate from there.
- Prioritize simplicity over complexity: Less is often more when it comes to financial products. Cut out unnecessary bells and whistles and keep the focus on what matters most.
- Embrace continuous iteration: Bedrock isn't a fixed destination—it's a dynamic process. Continuously gather user feedback, refine your product, and iterate towards that bedrock state.
- Stop, look and listen: Don't just test your product as part of your delivery process—test it repeatedly in the field. Use it yourself. Run A/B tests. Gather user feedback. Talk to people who use it, and refine accordingly.
There's an interesting paradox at play here: building towards bedrock means sacrificing some short-term growth potential in favour of long-term stability. But the payoff is worth it—products built with a focus on bedrock will outlast and outperform their competitors, and deliver sustained value to users over time.
So, how do you start your journey towards bedrock? Take it one step at a time. Start by identifying those core elements that truly matter to your users. Focus on building and refining a single, powerful feature that delivers real value. And above all, test obsessively—for, in the words of Abraham Lincoln, Alan Kay, or Peter Drucker (whomever you believe!!), “The best way to predict the future is to create it.”
User Research Is Storytelling
Ever since I was a boy, I’ve been fascinated with movies. I loved the characters and the excitement—but most of all the stories. I wanted to be an actor. And I believed that I’d get to do the things that Indiana Jones did and go on exciting adventures. I even dreamed up ideas for movies that my friends and I could make and star in. But they never went any further. I did, however, end up working in user experience (UX). Now, I realize that there’s an element of theater to UX—I hadn’t really considered it before, but user research is storytelling. And to get the most out of user research, you need to tell a good story where you bring stakeholders—the product team and decision makers—along and get them interested in learning more.
Think of your favorite movie. More than likely it follows a three-act structure that’s commonly seen in storytelling: the setup, the conflict, and the resolution. The first act shows what exists today, and it helps you get to know the characters and the challenges and problems that they face. Act two introduces the conflict, where the action is. Here, problems grow or get worse. And the third and final act is the resolution. This is where the issues are resolved and the characters learn and change. I believe that this structure is also a great way to think about user research, and I think that it can be especially helpful in explaining user research to others.
Three-act structure in movies (© 2024 StudioBinder. Image used with permission from StudioBinder.). Use storytelling as a structure to do researchIt’s sad to say, but many have come to see research as being expendable. If budgets or timelines are tight, research tends to be one of the first things to go. Instead of investing in research, some product managers rely on designers or—worse—their own opinion to make the “right” choices for users based on their experience or accepted best practices. That may get teams some of the way, but that approach can so easily miss out on solving users’ real problems. To remain user-centered, this is something we should avoid. User research elevates design. It keeps it on track, pointing to problems and opportunities. Being aware of the issues with your product and reacting to them can help you stay ahead of your competitors.
In the three-act structure, each act corresponds to a part of the process, and each part is critical to telling the whole story. Let’s look at the different acts and how they align with user research.
Act one: setupThe setup is all about understanding the background, and that’s where foundational research comes in. Foundational research (also called generative, discovery, or initial research) helps you understand users and identify their problems. You’re learning about what exists today, the challenges users have, and how the challenges affect them—just like in the movies. To do foundational research, you can conduct contextual inquiries or diary studies (or both!), which can help you start to identify problems as well as opportunities. It doesn’t need to be a huge investment in time or money.
Erika Hall writes about minimum viable ethnography, which can be as simple as spending 15 minutes with a user and asking them one thing: “‘Walk me through your day yesterday.’ That’s it. Present that one request. Shut up and listen to them for 15 minutes. Do your damndest to keep yourself and your interests out of it. Bam, you’re doing ethnography.” According to Hall, “[This] will probably prove quite illuminating. In the highly unlikely case that you didn’t learn anything new or useful, carry on with enhanced confidence in your direction.”
This makes total sense to me. And I love that this makes user research so accessible. You don’t need to prepare a lot of documentation; you can just recruit participants and do it! This can yield a wealth of information about your users, and it’ll help you better understand them and what’s going on in their lives. That’s really what act one is all about: understanding where users are coming from.
Jared Spool talks about the importance of foundational research and how it should form the bulk of your research. If you can draw from any additional user data that you can get your hands on, such as surveys or analytics, that can supplement what you’ve heard in the foundational studies or even point to areas that need further investigation. Together, all this data paints a clearer picture of the state of things and all its shortcomings. And that’s the beginning of a compelling story. It’s the point in the plot where you realize that the main characters—or the users in this case—are facing challenges that they need to overcome. Like in the movies, this is where you start to build empathy for the characters and root for them to succeed. And hopefully stakeholders are now doing the same. Their sympathy may be with their business, which could be losing money because users can’t complete certain tasks. Or maybe they do empathize with users’ struggles. Either way, act one is your initial hook to get the stakeholders interested and invested.
Once stakeholders begin to understand the value of foundational research, that can open doors to more opportunities that involve users in the decision-making process. And that can guide product teams toward being more user-centered. This benefits everyone—users, the product, and stakeholders. It’s like winning an Oscar in movie terms—it often leads to your product being well received and successful. And this can be an incentive for stakeholders to repeat this process with other products. Storytelling is the key to this process, and knowing how to tell a good story is the only way to get stakeholders to really care about doing more research.
This brings us to act two, where you iteratively evaluate a design or concept to see whether it addresses the issues.
Act two: conflictAct two is all about digging deeper into the problems that you identified in act one. This usually involves directional research, such as usability tests, where you assess a potential solution (such as a design) to see whether it addresses the issues that you found. The issues could include unmet needs or problems with a flow or process that’s tripping users up. Like act two in a movie, more issues will crop up along the way. It’s here that you learn more about the characters as they grow and develop through this act.
Usability tests should typically include around five participants according to Jakob Nielsen, who found that that number of users can usually identify most of the problems: “As you add more and more users, you learn less and less because you will keep seeing the same things again and again… After the fifth user, you are wasting your time by observing the same findings repeatedly but not learning much new.”
There are parallels with storytelling here too; if you try to tell a story with too many characters, the plot may get lost. Having fewer participants means that each user’s struggles will be more memorable and easier to relay to other stakeholders when talking about the research. This can help convey the issues that need to be addressed while also highlighting the value of doing the research in the first place.
Researchers have run usability tests in person for decades, but you can also conduct usability tests remotely using tools like Microsoft Teams, Zoom, or other teleconferencing software. This approach has become increasingly popular since the beginning of the pandemic, and it works well. You can think of in-person usability tests like going to a play and remote sessions as more like watching a movie. There are advantages and disadvantages to each. In-person usability research is a much richer experience. Stakeholders can experience the sessions with other stakeholders. You also get real-time reactions—including surprise, agreement, disagreement, and discussions about what they’re seeing. Much like going to a play, where audiences get to take in the stage, the costumes, the lighting, and the actors’ interactions, in-person research lets you see users up close, including their body language, how they interact with the moderator, and how the scene is set up.
If in-person usability testing is like watching a play—staged and controlled—then conducting usability testing in the field is like immersive theater where any two sessions might be very different from one another. You can take usability testing into the field by creating a replica of the space where users interact with the product and then conduct your research there. Or you can go out to meet users at their location to do your research. With either option, you get to see how things work in context, things come up that wouldn’t have in a lab environment—and conversion can shift in entirely different directions. As researchers, you have less control over how these sessions go, but this can sometimes help you understand users even better. Meeting users where they are can provide clues to the external forces that could be affecting how they use your product. In-person usability tests provide another level of detail that’s often missing from remote usability tests.
That’s not to say that the “movies”—remote sessions—aren’t a good option. Remote sessions can reach a wider audience. They allow a lot more stakeholders to be involved in the research and to see what’s going on. And they open the doors to a much wider geographical pool of users. But with any remote session there is the potential of time wasted if participants can’t log in or get their microphone working.
The benefit of usability testing, whether remote or in person, is that you get to see real users interact with the designs in real time, and you can ask them questions to understand their thought processes and grasp of the solution. This can help you not only identify problems but also glean why they’re problems in the first place. Furthermore, you can test hypotheses and gauge whether your thinking is correct. By the end of the sessions, you’ll have a much clearer picture of how usable the designs are and whether they work for their intended purposes. Act two is the heart of the story—where the excitement is—but there can be surprises too. This is equally true of usability tests. Often, participants will say unexpected things, which change the way that you look at things—and these twists in the story can move things in new directions.
Unfortunately, user research is sometimes seen as expendable. And too often usability testing is the only research process that some stakeholders think that they ever need. In fact, if the designs that you’re evaluating in the usability test aren’t grounded in a solid understanding of your users (foundational research), there’s not much to be gained by doing usability testing in the first place. That’s because you’re narrowing the focus of what you’re getting feedback on, without understanding the users' needs. As a result, there’s no way of knowing whether the designs might solve a problem that users have. It’s only feedback on a particular design in the context of a usability test.
On the other hand, if you only do foundational research, while you might have set out to solve the right problem, you won’t know whether the thing that you’re building will actually solve that. This illustrates the importance of doing both foundational and directional research.
In act two, stakeholders will—hopefully—get to watch the story unfold in the user sessions, which creates the conflict and tension in the current design by surfacing their highs and lows. And in turn, this can help motivate stakeholders to address the issues that come up.
Act three: resolutionWhile the first two acts are about understanding the background and the tensions that can propel stakeholders into action, the third part is about resolving the problems from the first two acts. While it’s important to have an audience for the first two acts, it’s crucial that they stick around for the final act. That means the whole product team, including developers, UX practitioners, business analysts, delivery managers, product managers, and any other stakeholders that have a say in the next steps. It allows the whole team to hear users’ feedback together, ask questions, and discuss what’s possible within the project’s constraints. And it lets the UX research and design teams clarify, suggest alternatives, or give more context behind their decisions. So you can get everyone on the same page and get agreement on the way forward.
This act is mostly told in voiceover with some audience participation. The researcher is the narrator, who paints a picture of the issues and what the future of the product could look like given the things that the team has learned. They give the stakeholders their recommendations and their guidance on creating this vision.
Nancy Duarte in the Harvard Business Review offers an approach to structuring presentations that follow a persuasive story. “The most effective presenters use the same techniques as great storytellers: By reminding people of the status quo and then revealing the path to a better way, they set up a conflict that needs to be resolved,” writes Duarte. “That tension helps them persuade the audience to adopt a new mindset or behave differently.”
A persuasive story pattern.This type of structure aligns well with research results, and particularly results from usability tests. It provides evidence for “what is”—the problems that you’ve identified. And “what could be”—your recommendations on how to address them. And so on and so forth.
You can reinforce your recommendations with examples of things that competitors are doing that could address these issues or with examples where competitors are gaining an edge. Or they can be visual, like quick mockups of how a new design could look that solves a problem. These can help generate conversation and momentum. And this continues until the end of the session when you’ve wrapped everything up in the conclusion by summarizing the main issues and suggesting a way forward. This is the part where you reiterate the main themes or problems and what they mean for the product—the denouement of the story. This stage gives stakeholders the next steps and hopefully the momentum to take those steps!
While we are nearly at the end of this story, let’s reflect on the idea that user research is storytelling. All the elements of a good story are there in the three-act structure of user research:
- Act one: You meet the protagonists (the users) and the antagonists (the problems affecting users). This is the beginning of the plot. In act one, researchers might use methods including contextual inquiry, ethnography, diary studies, surveys, and analytics. The output of these methods can include personas, empathy maps, user journeys, and analytics dashboards.
- Act two: Next, there’s character development. There’s conflict and tension as the protagonists encounter problems and challenges, which they must overcome. In act two, researchers might use methods including usability testing, competitive benchmarking, and heuristics evaluation. The output of these can include usability findings reports, UX strategy documents, usability guidelines, and best practices.
- Act three: The protagonists triumph and you see what a better future looks like. In act three, researchers may use methods including presentation decks, storytelling, and digital media. The output of these can be: presentation decks, video clips, audio clips, and pictures.
The researcher has multiple roles: they’re the storyteller, the director, and the producer. The participants have a small role, but they are significant characters (in the research). And the stakeholders are the audience. But the most important thing is to get the story right and to use storytelling to tell users’ stories through research. By the end, the stakeholders should walk away with a purpose and an eagerness to resolve the product’s ills.
So the next time that you’re planning research with clients or you’re speaking to stakeholders about research that you’ve done, think about how you can weave in some storytelling. Ultimately, user research is a win-win for everyone, and you just need to get stakeholders interested in how the story ends.
To Ignite a Personalization Practice, Run this Prepersonalization Workshop
Picture this. You’ve joined a squad at your company that’s designing new product features with an emphasis on automation or AI. Or your company has just implemented a personalization engine. Either way, you’re designing with data. Now what? When it comes to designing for personalization, there are many cautionary tales, no overnight successes, and few guides for the perplexed.
Between the fantasy of getting it right and the fear of it going wrong—like when we encounter “persofails” in the vein of a company repeatedly imploring everyday consumers to buy additional toilet seats—the personalization gap is real. It’s an especially confounding place to be a digital professional without a map, a compass, or a plan.
For those of you venturing into personalization, there’s no Lonely Planet and few tour guides because effective personalization is so specific to each organization’s talent, technology, and market position.
But you can ensure that your team has packed its bags sensibly.
Designing for personalization makes for strange bedfellows. A savvy art-installation satire on the challenges of humane design in the era of the algorithm. Credit: Signs of the Times, Scott Kelly and Ben Polkinghome.There’s a DIY formula to increase your chances for success. At minimum, you’ll defuse your boss’s irrational exuberance. Before the party you’ll need to effectively prepare.
We call it prepersonalization.
Behind the musicConsider Spotify’s DJ feature, which debuted this past year.
https://www.youtube.com/watch?v=ok-aNnc0DkoWe’re used to seeing the polished final result of a personalization feature. Before the year-end award, the making-of backstory, or the behind-the-scenes victory lap, a personalized feature had to be conceived, budgeted, and prioritized. Before any personalization feature goes live in your product or service, it lives amid a backlog of worthy ideas for expressing customer experiences more dynamically.
So how do you know where to place your personalization bets? How do you design consistent interactions that won’t trip up users or—worse—breed mistrust? We’ve found that for many budgeted programs to justify their ongoing investments, they first needed one or more workshops to convene key stakeholders and internal customers of the technology. Make yours count.
From Big Tech to fledgling startups, we’ve seen the same evolution up close with our clients. In our experiences with working on small and large personalization efforts, a program’s ultimate track record—and its ability to weather tough questions, work steadily toward shared answers, and organize its design and technology efforts—turns on how effectively these prepersonalization activities play out.
Time and again, we’ve seen effective workshops separate future success stories from unsuccessful efforts, saving countless time, resources, and collective well-being in the process.
A personalization practice involves a multiyear effort of testing and feature development. It’s not a switch-flip moment in your tech stack. It’s best managed as a backlog that often evolves through three steps:
- customer experience optimization (CXO, also known as A/B testing or experimentation)
- always-on automations (whether rules-based or machine-generated)
- mature features or standalone product development (such as Spotify’s DJ experience)
This is why we created our progressive personalization framework and why we’re field-testing an accompanying deck of cards: we believe that there’s a base grammar, a set of “nouns and verbs” that your organization can use to design experiences that are customized, personalized, or automated. You won’t need these cards. But we strongly recommend that you create something similar, whether that might be digital or physical.
Set your kitchen timerHow long does it take to cook up a prepersonalization workshop? The surrounding assessment activities that we recommend including can (and often do) span weeks. For the core workshop, we recommend aiming for two to three days. Here’s a summary of our broader approach along with details on the essential first-day activities.
The full arc of the wider workshop is threefold:
- Kickstart: This sets the terms of engagement as you focus on the opportunity as well as the readiness and drive of your team and your leadership. .
- Plan your work: This is the heart of the card-based workshop activities where you specify a plan of attack and the scope of work.
- Work your plan: This phase is all about creating a competitive environment for team participants to individually pitch their own pilots that each contain a proof-of-concept project, its business case, and its operating model.
Give yourself at least a day, split into two large time blocks, to power through a concentrated version of those first two phases.
Kickstart: Whet your appetiteWe call the first lesson the “landscape of connected experience.” It explores the personalization possibilities in your organization. A connected experience, in our parlance, is any UX requiring the orchestration of multiple systems of record on the backend. This could be a content-management system combined with a marketing-automation platform. It could be a digital-asset manager combined with a customer-data platform.
Spark conversation by naming consumer examples and business-to-business examples of connected experience interactions that you admire, find familiar, or even dislike. This should cover a representative range of personalization patterns, including automated app-based interactions (such as onboarding sequences or wizards), notifications, and recommenders. We have a catalog of these in the cards. Here’s a list of 142 different interactions to jog your thinking.
This is all about setting the table. What are the possible paths for the practice in your organization? If you want a broader view, here’s a long-form primer and a strategic framework.
Assess each example that you discuss for its complexity and the level of effort that you estimate that it would take for your team to deliver that feature (or something similar). In our cards, we divide connected experiences into five levels: functions, features, experiences, complete products, and portfolios. Size your own build here. This will help to focus the conversation on the merits of ongoing investment as well as the gap between what you deliver today and what you want to deliver in the future.
Next, have your team plot each idea on the following 2×2 grid, which lays out the four enduring arguments for a personalized experience. This is critical because it emphasizes how personalization can not only help your external customers but also affect your own ways of working. It’s also a reminder (which is why we used the word argument earlier) of the broader effort beyond these tactical interventions.
Getting intentional about the desired outcomes is an important component to a large-scale personalization program. Credit: Bucket Studio.Each team member should vote on where they see your product or service putting its emphasis. Naturally, you can’t prioritize all of them. The intention here is to flesh out how different departments may view their own upsides to the effort, which can vary from one to the next. Documenting your desired outcomes lets you know how the team internally aligns across representatives from different departments or functional areas.
The third and final kickstart activity is about naming your personalization gap. Is your customer journey well documented? Will data and privacy compliance be too big of a challenge? Do you have content metadata needs that you have to address? (We’re pretty sure that you do: it’s just a matter of recognizing the relative size of that need and its remedy.) In our cards, we’ve noted a number of program risks, including common team dispositions. Our Detractor card, for example, lists six stakeholder behaviors that hinder progress.
Effectively collaborating and managing expectations is critical to your success. Consider the potential barriers to your future progress. Press the participants to name specific steps to overcome or mitigate those barriers in your organization. As studies have shown, personalization efforts face many common barriers.
The largest management consultancies have established practice areas in personalization, and they regularly research program risks and challenges. Credit: Boston Consulting Group.At this point, you’ve hopefully discussed sample interactions, emphasized a key area of benefit, and flagged key gaps? Good—you’re ready to continue.
Hit that test kitchenNext, let’s look at what you’ll need to bring your personalization recipes to life. Personalization engines, which are robust software suites for automating and expressing dynamic content, can intimidate new customers. Their capabilities are sweeping and powerful, and they present broad options for how your organization can conduct its activities. This presents the question: Where do you begin when you’re configuring a connected experience?
What’s important here is to avoid treating the installed software like it were a dream kitchen from some fantasy remodeling project (as one of our client executives memorably put it). These software engines are more like test kitchens where your team can begin devising, tasting, and refining the snacks and meals that will become a part of your personalization program’s regularly evolving menu.
Progressive personalization, a framework for designing connected experiences. Credit: Bucket Studio and Colin Eagan.The ultimate menu of the prioritized backlog will come together over the course of the workshop. And creating “dishes” is the way that you’ll have individual team stakeholders construct personalized interactions that serve their needs or the needs of others.
The dishes will come from recipes, and those recipes have set ingredients.
In the same way that ingredients form a recipe, you can also create cards to break down a personalized interaction into its constituent parts. Credit: Bucket Studio and Colin Eagan. Verify your ingredientsLike a good product manager, you’ll make sure—andyou’ll validate with the right stakeholders present—that you have all the ingredients on hand to cook up your desired interaction (or that you can work out what needs to be added to your pantry). These ingredients include the audience that you’re targeting, content and design elements, the context for the interaction, and your measure for how it’ll come together.
This isn’t just about discovering requirements. Documenting your personalizations as a series of if-then statements lets the team:
- compare findings toward a unified approach for developing features, not unlike when artists paint with the same palette;
- specify a consistent set of interactions that users find uniform or familiar;
- and develop parity across performance measurements and key performance indicators too.
This helps you streamline your designs and your technical efforts while you deliver a shared palette of core motifs of your personalized or automated experience.
Compose your recipeWhat ingredients are important to you? Think of a who-what-when-why construct:
- Who are your key audience segments or groups?
- What kind of content will you give them, in what design elements, and under what circumstances?
- And for which business and user benefits?
We first developed these cards and card categories five years ago. We regularly play-test their fit with conference audiences and clients. And we still encounter new possibilities. But they all follow an underlying who-what-when-why logic.
Here are three examples for a subscription-based reading app, which you can generally follow along with right to left in the cards in the accompanying photo below.
- Nurture personalization: When a guest or an unknown visitor interacts with a product title, a banner or alert bar appears that makes it easier for them to encounter a related title they may want to read, saving them time.
- Welcome automation: When there’s a newly registered user, an email is generated to call out the breadth of the content catalog and to make them a happier subscriber.
- Winback automation: Before their subscription lapses or after a recent failed renewal, a user is sent an email that gives them a promotional offer to suggest that they reconsider renewing or to remind them to renew.
A useful preworkshop activity may be to think through a first draft of what these cards might be for your organization, although we’ve also found that this process sometimes flows best through cocreating the recipes themselves. Start with a set of blank cards, and begin labeling and grouping them through the design process, eventually distilling them to a refined subset of highly useful candidate cards.
You can think of the later stages of the workshop as moving from recipes toward a cookbook in focus—like a more nuanced customer-journey mapping. Individual “cooks” will pitch their recipes to the team, using a common jobs-to-be-done format so that measurability and results are baked in, and from there, the resulting collection will be prioritized for finished design and delivery to production.
Better kitchens require better architectureSimplifying a customer experience is a complicated effort for those who are inside delivering it. Beware anyone who says otherwise. With that being said, “Complicated problems can be hard to solve, but they are addressable with rules and recipes.”
When personalization becomes a laugh line, it’s because a team is overfitting: they aren’t designing with their best data. Like a sparse pantry, every organization has metadata debt to go along with its technical debt, and this creates a drag on personalization effectiveness. Your AI’s output quality, for example, is indeed limited by your IA. Spotify’s poster-child prowess today was unfathomable before they acquired a seemingly modest metadata startup that now powers its underlying information architecture.
You can definitely stand the heat…Personalization technology opens a doorway into a confounding ocean of possible designs. Only a disciplined and highly collaborative approach will bring about the necessary focus and intention to succeed. So banish the dream kitchen. Instead, hit the test kitchen to save time, preserve job satisfaction and security, and safely dispense with the fanciful ideas that originate upstairs of the doers in your organization. There are meals to serve and mouths to feed.
This workshop framework gives you a fighting shot at lasting success as well as sound beginnings. Wiring up your information layer isn’t an overnight affair. But if you use the same cookbook and shared recipes, you’ll have solid footing for success. We designed these activities to make your organization’s needs concrete and clear, long before the hazards pile up.
While there are associated costs toward investing in this kind of technology and product design, your ability to size up and confront your unique situation and your digital capabilities is time well spent. Don’t squander it. The proof, as they say, is in the pudding.
The Wax and the Wane of the Web
I offer a single bit of advice to friends and family when they become new parents: When you start to think that you’ve got everything figured out, everything will change. Just as you start to get the hang of feedings, diapers, and regular naps, it’s time for solid food, potty training, and overnight sleeping. When you figure those out, it’s time for preschool and rare naps. The cycle goes on and on.
The same applies for those of us working in design and development these days. Having worked on the web for almost three decades at this point, I’ve seen the regular wax and wane of ideas, techniques, and technologies. Each time that we as developers and designers get into a regular rhythm, some new idea or technology comes along to shake things up and remake our world.
How we got hereI built my first website in the mid-’90s. Design and development on the web back then was a free-for-all, with few established norms. For any layout aside from a single column, we used table elements, often with empty cells containing a single pixel spacer GIF to add empty space. We styled text with numerous font tags, nesting the tags every time we wanted to vary the font style. And we had only three or four typefaces to choose from: Arial, Courier, or Times New Roman. When Verdana and Georgia came out in 1996, we rejoiced because our options had nearly doubled. The only safe colors to choose from were the 216 “web safe” colors known to work across platforms. The few interactive elements (like contact forms, guest books, and counters) were mostly powered by CGI scripts (predominantly written in Perl at the time). Achieving any kind of unique look involved a pile of hacks all the way down. Interaction was often limited to specific pages in a site.
At the turn of the century, a new cycle started. Crufty code littered with table layouts and font tags waned, and a push for web standards waxed. Newer technologies like CSS got more widespread adoption by browsers makers, developers, and designers. This shift toward standards didn’t happen accidentally or overnight. It took active engagement between the W3C and browser vendors and heavy evangelism from folks like the Web Standards Project to build standards. A List Apart and books like Designing with Web Standards by Jeffrey Zeldman played key roles in teaching developers and designers why standards are important, how to implement them, and how to sell them to their organizations. And approaches like progressive enhancement introduced the idea that content should be available for all browsers—with additional enhancements available for more advanced browsers. Meanwhile, sites like the CSS Zen Garden showcased just how powerful and versatile CSS can be when combined with a solid semantic HTML structure.
Server-side languages like PHP, Java, and .NET overtook Perl as the predominant back-end processors, and the cgi-bin was tossed in the trash bin. With these better server-side tools came the first era of web applications, starting with content-management systems (particularly in the blogging space with tools like Blogger, Grey Matter, Movable Type, and WordPress). In the mid-2000s, AJAX opened doors for asynchronous interaction between the front end and back end. Suddenly, pages could update their content without needing to reload. A crop of JavaScript frameworks like Prototype, YUI, and jQuery arose to help developers build more reliable client-side interaction across browsers that had wildly varying levels of standards support. Techniques like image replacement let crafty designers and developers display fonts of their choosing. And technologies like Flash made it possible to add animations, games, and even more interactivity.
These new technologies, standards, and techniques reinvigorated the industry in many ways. Web design flourished as designers and developers explored more diverse styles and layouts. But we still relied on tons of hacks. Early CSS was a huge improvement over table-based layouts when it came to basic layout and text styling, but its limitations at the time meant that designers and developers still relied heavily on images for complex shapes (such as rounded or angled corners) and tiled backgrounds for the appearance of full-length columns (among other hacks). Complicated layouts required all manner of nested floats or absolute positioning (or both). Flash and image replacement for custom fonts was a great start toward varying the typefaces from the big five, but both hacks introduced accessibility and performance problems. And JavaScript libraries made it easy for anyone to add a dash of interaction to pages, although at the cost of doubling or even quadrupling the download size of simple websites.
The web as software platformThe symbiosis between the front end and back end continued to improve, and that led to the current era of modern web applications. Between expanded server-side programming languages (which kept growing to include Ruby, Python, Go, and others) and newer front-end tools like React, Vue, and Angular, we could build fully capable software on the web. Alongside these tools came others, including collaborative version control, build automation, and shared package libraries. What was once primarily an environment for linked documents became a realm of infinite possibilities.
At the same time, mobile devices became more capable, and they gave us internet access in our pockets. Mobile apps and responsive design opened up opportunities for new interactions anywhere and any time.
This combination of capable mobile devices and powerful development tools contributed to the waxing of social media and other centralized tools for people to connect and consume. As it became easier and more common to connect with others directly on Twitter, Facebook, and even Slack, the desire for hosted personal sites waned. Social media offered connections on a global scale, with both the good and bad that that entails.
Want a much more extensive history of how we got here, with some other takes on ways that we can improve? Jeremy Keith wrote “Of Time and the Web.” Or check out the “Web Design History Timeline” at the Web Design Museum. Neal Agarwal also has a fun tour through “Internet Artifacts.”
Where we are nowIn the last couple of years, it’s felt like we’ve begun to reach another major inflection point. As social-media platforms fracture and wane, there’s been a growing interest in owning our own content again. There are many different ways to make a website, from the tried-and-true classic of hosting plain HTML files to static site generators to content management systems of all flavors. The fracturing of social media also comes with a cost: we lose crucial infrastructure for discovery and connection. Webmentions, RSS, ActivityPub, and other tools of the IndieWeb can help with this, but they’re still relatively underimplemented and hard to use for the less nerdy. We can build amazing personal websites and add to them regularly, but without discovery and connection, it can sometimes feel like we may as well be shouting into the void.
Browser support for CSS, JavaScript, and other standards like web components has accelerated, especially through efforts like Interop. New technologies gain support across the board in a fraction of the time that they used to. I often learn about a new feature and check its browser support only to find that its coverage is already above 80 percent. Nowadays, the barrier to using newer techniques often isn’t browser support but simply the limits of how quickly designers and developers can learn what’s available and how to adopt it.
Today, with a few commands and a couple of lines of code, we can prototype almost any idea. All the tools that we now have available make it easier than ever to start something new. But the upfront cost that these frameworks may save in initial delivery eventually comes due as upgrading and maintaining them becomes a part of our technical debt.
If we rely on third-party frameworks, adopting new standards can sometimes take longer since we may have to wait for those frameworks to adopt those standards. These frameworks—which used to let us adopt new techniques sooner—have now become hindrances instead. These same frameworks often come with performance costs too, forcing users to wait for scripts to load before they can read or interact with pages. And when scripts fail (whether through poor code, network issues, or other environmental factors), there’s often no alternative, leaving users with blank or broken pages.
Where do we go from here?Today’s hacks help to shape tomorrow’s standards. And there’s nothing inherently wrong with embracing hacks—for now—to move the present forward. Problems only arise when we’re unwilling to admit that they’re hacks or we hesitate to replace them. So what can we do to create the future we want for the web?
Build for the long haul. Optimize for performance, for accessibility, and for the user. Weigh the costs of those developer-friendly tools. They may make your job a little easier today, but how do they affect everything else? What’s the cost to users? To future developers? To standards adoption? Sometimes the convenience may be worth it. Sometimes it’s just a hack that you’ve grown accustomed to. And sometimes it’s holding you back from even better options.
Start from standards. Standards continue to evolve over time, but browsers have done a remarkably good job of continuing to support older standards. The same isn’t always true of third-party frameworks. Sites built with even the hackiest of HTML from the ’90s still work just fine today. The same can’t always be said of sites built with frameworks even after just a couple years.
Design with care. Whether your craft is code, pixels, or processes, consider the impacts of each decision. The convenience of many a modern tool comes at the cost of not always understanding the underlying decisions that have led to its design and not always considering the impact that those decisions can have. Rather than rushing headlong to “move fast and break things,” use the time saved by modern tools to consider more carefully and design with deliberation.
Always be learning. If you’re always learning, you’re also growing. Sometimes it may be hard to pinpoint what’s worth learning and what’s just today’s hack. You might end up focusing on something that won’t matter next year, even if you were to focus solely on learning standards. (Remember XHTML?) But constant learning opens up new connections in your brain, and the hacks that you learn one day may help to inform different experiments another day.
Play, experiment, and be weird! This web that we’ve built is the ultimate experiment. It’s the single largest human endeavor in history, and yet each of us can create our own pocket within it. Be courageous and try new things. Build a playground for ideas. Make goofy experiments in your own mad science lab. Start your own small business. There has never been a more empowering place to be creative, take risks, and explore what we’re capable of.
Share and amplify. As you experiment, play, and learn, share what’s worked for you. Write on your own website, post on whichever social media site you prefer, or shout it from a TikTok. Write something for A List Apart! But take the time to amplify others too: find new voices, learn from them, and share what they’ve taught you.
Go forth and makeAs designers and developers for the web (and beyond), we’re responsible for building the future every day, whether that may take the shape of personal websites, social media tools used by billions, or anything in between. Let’s imbue our values into the things that we create, and let’s make the web a better place for everyone. Create that thing that only you are uniquely qualified to make. Then share it, make it better, make it again, or make something new. Learn. Make. Share. Grow. Rinse and repeat. Every time you think that you’ve mastered the web, everything will change.
Opportunities for AI in Accessibility
In reading Joe Dolson’s recent piece on the intersection of AI and accessibility, I absolutely appreciated the skepticism that he has for AI in general as well as for the ways that many have been using it. In fact, I’m very skeptical of AI myself, despite my role at Microsoft as an accessibility innovation strategist who helps run the AI for Accessibility grant program. As with any tool, AI can be used in very constructive, inclusive, and accessible ways; and it can also be used in destructive, exclusive, and harmful ones. And there are a ton of uses somewhere in the mediocre middle as well.
I’d like you to consider this a “yes… and” piece to complement Joe’s post. I’m not trying to refute any of what he’s saying but rather provide some visibility to projects and opportunities where AI can make meaningful differences for people with disabilities. To be clear, I’m not saying that there aren’t real risks or pressing issues with AI that need to be addressed—there are, and we’ve needed to address them, like, yesterday—but I want to take a little time to talk about what’s possible in hopes that we’ll get there one day.
Alternative textJoe’s piece spends a lot of time talking about computer-vision models generating alternative text. He highlights a ton of valid issues with the current state of things. And while computer-vision models continue to improve in the quality and richness of detail in their descriptions, their results aren’t great. As he rightly points out, the current state of image analysis is pretty poor—especially for certain image types—in large part because current AI systems examine images in isolation rather than within the contexts that they’re in (which is a consequence of having separate “foundation” models for text analysis and image analysis). Today’s models aren’t trained to distinguish between images that are contextually relevant (that should probably have descriptions) and those that are purely decorative (which might not need a description) either. Still, I still think there’s potential in this space.
As Joe mentions, human-in-the-loop authoring of alt text should absolutely be a thing. And if AI can pop in to offer a starting point for alt text—even if that starting point might be a prompt saying What is this BS? That’s not right at all… Let me try to offer a starting point—I think that’s a win.
Taking things a step further, if we can specifically train a model to analyze image usage in context, it could help us more quickly identify which images are likely to be decorative and which ones likely require a description. That will help reinforce which contexts call for image descriptions and it’ll improve authors’ efficiency toward making their pages more accessible.
While complex images—like graphs and charts—are challenging to describe in any sort of succinct way (even for humans), the image example shared in the GPT4 announcement points to an interesting opportunity as well. Let’s suppose that you came across a chart whose description was simply the title of the chart and the kind of visualization it was, such as: Pie chart comparing smartphone usage to feature phone usage among US households making under $30,000 a year. (That would be a pretty awful alt text for a chart since that would tend to leave many questions about the data unanswered, but then again, let’s suppose that that was the description that was in place.) If your browser knew that that image was a pie chart (because an onboard model concluded this), imagine a world where users could ask questions like these about the graphic:
- Do more people use smartphones or feature phones?
- How many more?
- Is there a group of people that don’t fall into either of these buckets?
- How many is that?
Setting aside the realities of large language model (LLM) hallucinations—where a model just makes up plausible-sounding “facts”—for a moment, the opportunity to learn more about images and data in this way could be revolutionary for blind and low-vision folks as well as for people with various forms of color blindness, cognitive disabilities, and so on. It could also be useful in educational contexts to help people who can see these charts, as is, to understand the data in the charts.
Taking things a step further: What if you could ask your browser to simplify a complex chart? What if you could ask it to isolate a single line on a line graph? What if you could ask your browser to transpose the colors of the different lines to work better for form of color blindness you have? What if you could ask it to swap colors for patterns? Given these tools’ chat-based interfaces and our existing ability to manipulate images in today’s AI tools, that seems like a possibility.
Now imagine a purpose-built model that could extract the information from that chart and convert it to another format. For example, perhaps it could turn that pie chart (or better yet, a series of pie charts) into more accessible (and useful) formats, like spreadsheets. That would be amazing!
Matching algorithmsSafiya Umoja Noble absolutely hit the nail on the head when she titled her book Algorithms of Oppression. While her book was focused on the ways that search engines reinforce racism, I think that it’s equally true that all computer models have the potential to amplify conflict, bias, and intolerance. Whether it’s Twitter always showing you the latest tweet from a bored billionaire, YouTube sending us into a Q-hole, or Instagram warping our ideas of what natural bodies look like, we know that poorly authored and maintained algorithms are incredibly harmful. A lot of this stems from a lack of diversity among the people who shape and build them. When these platforms are built with inclusively baked in, however, there’s real potential for algorithm development to help people with disabilities.
Take Mentra, for example. They are an employment network for neurodivergent people. They use an algorithm to match job seekers with potential employers based on over 75 data points. On the job-seeker side of things, it considers each candidate’s strengths, their necessary and preferred workplace accommodations, environmental sensitivities, and so on. On the employer side, it considers each work environment, communication factors related to each job, and the like. As a company run by neurodivergent folks, Mentra made the decision to flip the script when it came to typical employment sites. They use their algorithm to propose available candidates to companies, who can then connect with job seekers that they are interested in; reducing the emotional and physical labor on the job-seeker side of things.
When more people with disabilities are involved in the creation of algorithms, that can reduce the chances that these algorithms will inflict harm on their communities. That’s why diverse teams are so important.
Imagine that a social media company’s recommendation engine was tuned to analyze who you’re following and if it was tuned to prioritize follow recommendations for people who talked about similar things but who were different in some key ways from your existing sphere of influence. For example, if you were to follow a bunch of nondisabled white male academics who talk about AI, it could suggest that you follow academics who are disabled or aren’t white or aren’t male who also talk about AI. If you took its recommendations, perhaps you’d get a more holistic and nuanced understanding of what’s happening in the AI field. These same systems should also use their understanding of biases about particular communities—including, for instance, the disability community—to make sure that they aren’t recommending any of their users follow accounts that perpetuate biases against (or, worse, spewing hate toward) those groups.
Other ways that AI can helps people with disabilitiesIf I weren’t trying to put this together between other tasks, I’m sure that I could go on and on, providing all kinds of examples of how AI could be used to help people with disabilities, but I’m going to make this last section into a bit of a lightning round. In no particular order:
- Voice preservation. You may have seen the VALL-E paper or Apple’s Global Accessibility Awareness Day announcement or you may be familiar with the voice-preservation offerings from Microsoft, Acapela, or others. It’s possible to train an AI model to replicate your voice, which can be a tremendous boon for people who have ALS (Lou Gehrig’s disease) or motor-neuron disease or other medical conditions that can lead to an inability to talk. This is, of course, the same tech that can also be used to create audio deepfakes, so it’s something that we need to approach responsibly, but the tech has truly transformative potential.
- Voice recognition. Researchers like those in the Speech Accessibility Project are paying people with disabilities for their help in collecting recordings of people with atypical speech. As I type, they are actively recruiting people with Parkinson’s and related conditions, and they have plans to expand this to other conditions as the project progresses. This research will result in more inclusive data sets that will let more people with disabilities use voice assistants, dictation software, and voice-response services as well as control their computers and other devices more easily, using only their voice.
- Text transformation. The current generation of LLMs is quite capable of adjusting existing text content without injecting hallucinations. This is hugely empowering for people with cognitive disabilities who may benefit from text summaries or simplified versions of text or even text that’s prepped for Bionic Reading.
We need to recognize that our differences matter. Our lived experiences are influenced by the intersections of the identities that we exist in. These lived experiences—with all their complexities (and joys and pain)—are valuable inputs to the software, services, and societies that we shape. Our differences need to be represented in the data that we use to train new models, and the folks who contribute that valuable information need to be compensated for sharing it with us. Inclusive data sets yield more robust models that foster more equitable outcomes.
Want a model that doesn’t demean or patronize or objectify people with disabilities? Make sure that you have content about disabilities that’s authored by people with a range of disabilities, and make sure that that’s well represented in the training data.
Want a model that doesn’t use ableist language? You may be able to use existing data sets to build a filter that can intercept and remediate ableist language before it reaches readers. That being said, when it comes to sensitivity reading, AI models won’t be replacing human copy editors anytime soon.
Want a coding copilot that gives you accessible recommendations from the jump? Train it on code that you know to be accessible.
I have no doubt that AI can and will harm people… today, tomorrow, and well into the future. But I also believe that we can acknowledge that and, with an eye towards accessibility (and, more broadly, inclusion), make thoughtful, considerate, and intentional changes in our approaches to AI that will reduce harm over time as well. Today, tomorrow, and well into the future.
Many thanks to Kartik Sawhney for helping me with the development of this piece, Ashley Bischoff for her invaluable editorial assistance, and, of course, Joe Dolson for the prompt.
I am a creative.
I am a creative. What I do is alchemy. It is a mystery. I do not so much do it, as let it be done through me.
I am a creative. Not all creative people like this label. Not all see themselves this way. Some creative people see science in what they do. That is their truth, and I respect it. Maybe I even envy them, a little. But my process is different—my being is different.
Apologizing and qualifying in advance is a distraction. That’s what my brain does to sabotage me. I set it aside for now. I can come back later to apologize and qualify. After I’ve said what I came to say. Which is hard enough.
Except when it is easy and flows like a river of wine.
Sometimes it does come that way. Sometimes what I need to create comes in an instant. I have learned not to say it at that moment, because if you admit that sometimes the idea just comes and it is the best idea and you know it is the best idea, they think you don’t work hard enough.
Sometimes I work and work and work until the idea comes. Sometimes it comes instantly and I don’t tell anyone for three days. Sometimes I’m so excited by the idea that came instantly that I blurt it out, can’t help myself. Like a boy who found a prize in his Cracker Jacks. Sometimes I get away with this. Sometimes other people agree: yes, that is the best idea. Most times they don’t and I regret having given way to enthusiasm.
Enthusiasm is best saved for the meeting where it will make a difference. Not the casual get-together that precedes that meeting by two other meetings. Nobody knows why we have all these meetings. We keep saying we’re doing away with them, but then just finding other ways to have them. Sometimes they are even good. But other times they are a distraction from the actual work. The proportion between when meetings are useful, and when they are a pitiful distraction, varies, depending on what you do and where you do it. And who you are and how you do it. Again I digress. I am a creative. That is the theme.
Sometimes many hours of hard and patient work produce something that is barely serviceable. Sometimes I have to accept that and move on to the next project.
Don’t ask about process. I am a creative.I am a creative. I don’t control my dreams. And I don’t control my best ideas.
I can hammer away, surround myself with facts or images, and sometimes that works. I can go for a walk, and sometimes that works. I can be making dinner and there’s a Eureka having nothing to do with sizzling oil and bubbling pots. Often I know what to do the instant I wake up. And then, almost as often, as I become conscious and part of the world again, the idea that would have saved me turns to vanishing dust in a mindless wind of oblivion. For creativity, I believe, comes from that other world. The one we enter in dreams, and perhaps, before birth and after death. But that’s for poets to wonder, and I am not a poet. I am a creative. And it’s for theologians to mass armies about in their creative world that they insist is real. But that is another digression. And a depressing one. Maybe on a much more important topic than whether I am a creative or not. But still a digression from what I came here to say.
Sometimes the process is avoidance. And agony. You know the cliché about the tortured artist? It’s true, even when the artist (and let’s put that noun in quotes) is trying to write a soft drink jingle, a callback in a tired sitcom, a budget request.
Some people who hate being called creative may be closeted creatives, but that’s between them and their gods. No offense meant. Your truth is true, too. But mine is for me.
Creatives recognize creatives.Creatives recognize creatives like queers recognize queers, like real rappers recognize real rappers, like cons know cons. Creatives feel massive respect for creatives. We love, honor, emulate, and practically deify the great ones. To deify any human is, of course, a tragic mistake. We have been warned. We know better. We know people are just people. They squabble, they are lonely, they regret their most important decisions, they are poor and hungry, they can be cruel, they can be just as stupid as we can, because, like us, they are clay. But. But. But they make this amazing thing. They birth something that did not exist before them, and could not exist without them. They are the mothers of ideas. And I suppose, since it’s just lying there, I have to add that they are the mothers of invention. Ba dum bum! OK, that’s done. Continue.
Creatives belittle our own small achievements, because we compare them to those of the great ones. Beautiful animation! Well, I’m no Miyazaki. Now THAT is greatness. That is greatness straight from the mind of God. This half-starved little thing that I made? It more or less fell off the back of the turnip truck. And the turnips weren’t even fresh.
Creatives knows that, at best, they are Salieri. Even the creatives who are Mozart believe that.
I am a creative. I haven’t worked in advertising in 30 years, but in my nightmares, it’s my former creative directors who judge me. And they are right to do so. I am too lazy, too facile, and when it really counts, my mind goes blank. There is no pill for creative dysfunction.
I am a creative. Every deadline I make is an adventure that makes Indiana Jones look like a pensioner snoring in a deck chair. The longer I remain a creative, the faster I am when I do my work and the longer I brood and walk in circles and stare blankly before I do that work.
I am still 10 times faster than people who are not creative, or people who have only been creative a short while, or people who have only been professionally creative a short while. It’s just that, before I work 10 times as fast as they do, I spend twice as long as they do putting the work off. I am that confident in my ability to do a great job when I put my mind to it. I am that addicted to the adrenaline rush of postponement. I am still that afraid of the jump.
I am not an artist.I am a creative. Not an artist. Though I dreamed, as a lad, of someday being that. Some of us belittle our gifts and dislike ourselves because we are not Michelangelos and Warhols. That is narcissism—but at least we aren’t in politics.
I am a creative. Though I believe in reason and science, I decide by intuition and impulse. And live with what follows—the catastrophes as well as the triumphs.
I am a creative. Every word I’ve said here will annoy other creatives, who see things differently. Ask two creatives a question, get three opinions. Our disagreement, our passion about it, and our commitment to our own truth are, at least to me, the proofs that we are creatives, no matter how we may feel about it.
I am a creative. I lament my lack of taste in the areas about which I know very little, which is to say almost all areas of human knowledge. And I trust my taste above all other things in the areas closest to my heart, or perhaps, more accurately, to my obsessions. Without my obsessions, I would probably have to spend my time looking life in the eye, and almost none of us can do that for long. Not honestly. Not really. Because much in life, if you really look at it, is unbearable.
I am a creative. I believe, as a parent believes, that when I am gone, some small good part of me will carry on in the mind of at least one other person.
Working saves me from worrying about work.I am a creative. I live in dread of my small gift suddenly going away.
I am a creative. I am too busy making the next thing to spend too much time deeply considering that almost nothing I make will come anywhere near the greatness I comically aspire to.
I am a creative. I believe in the ultimate mystery of process. I believe in it so much, I am even fool enough to publish an essay I dictated into a tiny machine and didn’t take time to review or revise. I won’t do this often, I promise. But I did it just now, because, as afraid as I might be of your seeing through my pitiful gestures toward the beautiful, I was even more afraid of forgetting what I came to say.
There. I think I’ve said it.
Humility: An Essential Value
Humility, a designer’s essential value—that has a nice ring to it. What about humility, an office manager’s essential value? Or a dentist’s? Or a librarian’s? They all sound great. When humility is our guiding light, the path is always open for fulfillment, evolution, connection, and engagement. In this chapter, we’re going to talk about why.
That said, this is a book for designers, and to that end, I’d like to start with a story—well, a journey, really. It’s a personal one, and I’m going to make myself a bit vulnerable along the way. I call it:
The Tale of Justin’s Preposterous PateWhen I was coming out of art school, a long-haired, goateed neophyte, print was a known quantity to me; design on the web, however, was rife with complexities to navigate and discover, a problem to be solved. Though I had been formally trained in graphic design, typography, and layout, what fascinated me was how these traditional skills might be applied to a fledgling digital landscape. This theme would ultimately shape the rest of my career.
So rather than graduate and go into print like many of my friends, I devoured HTML and JavaScript books into the wee hours of the morning and taught myself how to code during my senior year. I wanted—nay, needed—to better understand the underlying implications of what my design decisions would mean once rendered in a browser.
The late ’90s and early 2000s were the so-called “Wild West” of web design. Designers at the time were all figuring out how to apply design and visual communication to the digital landscape. What were the rules? How could we break them and still engage, entertain, and convey information? At a more macro level, how could my values, inclusive of humility, respect, and connection, align in tandem with that? I was hungry to find out.
Though I’m talking about a different era, those are timeless considerations between non-career interactions and the world of design. What are your core passions, or values, that transcend medium? It’s essentially the same concept we discussed earlier on the direct parallels between what fulfills you, agnostic of the tangible or digital realms; the core themes are all the same.
First within tables, animated GIFs, Flash, then with Web Standards, divs, and CSS, there was personality, raw unbridled creativity, and unique means of presentment that often defied any semblance of a visible grid. Splash screens and “browser requirement” pages aplenty. Usability and accessibility were typically victims of such a creation, but such paramount facets of any digital design were largely (and, in hindsight, unfairly) disregarded at the expense of experimentation.
For example, this iteration of my personal portfolio site (“the pseudoroom”) from that era was experimental, if not a bit heavy- handed, in the visual communication of the concept of a living sketchbook. Very skeuomorphic. I collaborated with fellow designer and dear friend Marc Clancy (now a co-founder of the creative project organizing app Milanote) on this one, where we’d first sketch and then pass a Photoshop file back and forth to trick things out and play with varied user interactions. Then, I’d break it down and code it into a digital layout.
Figure 1: “the pseudoroom” website, hitting the sketchbook metaphor hard.Along with design folio pieces, the site also offered free downloads for Mac OS customizations: desktop wallpapers that were effectively design experimentation, custom-designed typefaces, and desktop icons.
From around the same time, GUI Galaxy was a design, pixel art, and Mac-centric news portal some graphic designer friends and I conceived, designed, developed, and deployed.
Figure 2: GUI Galaxy, web standards-compliant design news portalDesign news portals were incredibly popular during this period, featuring (what would now be considered) Tweet-size, small-format snippets of pertinent news from the categories I previously mentioned. If you took Twitter, curated it to a few categories, and wrapped it in a custom-branded experience, you’d have a design news portal from the late 90s / early 2000s.
We as designers had evolved and created a bandwidth-sensitive, web standards award-winning, much more accessibility-conscious website. Still ripe with experimentation, yet more mindful of equitable engagement. You can see a couple of content panes here, noting general news (tech, design) and Mac-centric news below. We also offered many of the custom downloads I cited before as present on my folio site but branded and themed to GUI Galaxy.
The site’s backbone was a homegrown CMS, with the presentation layer consisting of global design + illustration + news author collaboration. And the collaboration effort here, in addition to experimentation on a ‘brand’ and content delivery, was hitting my core. We were designing something bigger than any single one of us and connecting with a global audience.
Collaboration and connection transcend medium in their impact, immensely fulfilling me as a designer.
Now, why am I taking you down this trip of design memory lane? Two reasons.
First, there’s a reason for the nostalgia for that design era (the “Wild West” era, as I called it earlier): the inherent exploration, personality, and creativity that saturated many design portals and personal portfolio sites. Ultra-finely detailed pixel art UI, custom illustration, bespoke vector graphics, all underpinned by a strong design community.
Today’s web design has been in a period of stagnation. I suspect there’s a strong chance you’ve seen a site whose structure looks something like this: a hero image / banner with text overlaid, perhaps with a lovely rotating carousel of images (laying the snark on heavy there), a call to action, and three columns of sub-content directly beneath. Maybe an icon library is employed with selections that vaguely relate to their respective content.
Design, as it’s applied to the digital landscape, is in dire need of thoughtful layout, typography, and visual engagement that goes hand-in-hand with all the modern considerations we now know are paramount: usability. Accessibility. Load times and bandwidth- sensitive content delivery. A responsive presentation that meets human beings wherever they’re engaging from. We must be mindful of, and respectful toward, those concerns—but not at the expense of creativity of visual communication or via replicating cookie-cutter layouts.
Pixel ProblemsWebsites during this period were often designed and built on Macs whose OS and desktops looked something like this. This is Mac OS 7.5, but 8 and 9 weren’t that different.
Figure 3: A Mac OS 7.5-centric desktop.Desktop icons fascinated me: how could any single one, at any given point, stand out to get my attention? In this example, the user’s desktop is tidy, but think of a more realistic example with icon pandemonium. Or, say an icon was part of a larger system grouping (fonts, extensions, control panels)—how did it also maintain cohesion amongst a group?
These were 32 x 32 pixel creations, utilizing a 256-color palette, designed pixel-by-pixel as mini mosaics. To me, this was the embodiment of digital visual communication under such ridiculous constraints. And often, ridiculous restrictions can yield the purification of concept and theme.
So I began to research and do my homework. I was a student of this new medium, hungry to dissect, process, discover, and make it my own.
Expanding upon the notion of exploration, I wanted to see how I could push the limits of a 32x32 pixel grid with that 256-color palette. Those ridiculous constraints forced a clarity of concept and presentation that I found incredibly appealing. The digital gauntlet had been tossed, and that challenge fueled me. And so, in my dorm room into the wee hours of the morning, I toiled away, bringing conceptual sketches into mini mosaic fruition.
These are some of my creations, utilizing the only tool available at the time to create icons called ResEdit. ResEdit was a clunky, built-in Mac OS utility not really made for exactly what we were using it for. At the core of all of this work: Research. Challenge. Problem- solving. Again, these core connection-based values are agnostic of medium.
Figure 4: A selection of my pixel art design, 32x32 pixel canvas, 8-bit paletteThere’s one more design portal I want to talk about, which also serves as the second reason for my story to bring this all together.
This is K10k, short for Kaliber 1000. K10k was founded in 1998 by Michael Schmidt and Toke Nygaard, and was the design news portal on the web during this period. With its pixel art-fueled presentation, ultra-focused care given to every facet and detail, and with many of the more influential designers of the time who were invited to be news authors on the site, well... it was the place to be, my friend. With respect where respect is due, GUI Galaxy’s concept was inspired by what these folks were doing.
Figure 5: The K10k websiteFor my part, the combination of my web design work and pixel art exploration began to get me some notoriety in the design scene. Eventually, K10k noticed and added me as one of their very select group of news authors to contribute content to the site.
Amongst my personal work and side projects—and now with this inclusion—in the design community, this put me on the map. My design work also began to be published in various printed collections, in magazines domestically and overseas, and featured on other design news portals. With that degree of success while in my early twenties, something else happened:
I evolved—devolved, really—into a colossal asshole (and in just about a year out of art school, no less). The press and the praise became what fulfilled me, and they went straight to my head. They inflated my ego. I actually felt somewhat superior to my fellow designers.
The casualties? My design stagnated. Its evolution—my evolution— stagnated.
I felt so supremely confident in my abilities that I effectively stopped researching and discovering. When previously sketching concepts or iterating ideas in lead was my automatic step one, I instead leaped right into Photoshop. I drew my inspiration from the smallest of sources (and with blinders on). Any critique of my work from my peers was often vehemently dismissed. The most tragic loss: I had lost touch with my values.
My ego almost cost me some of my friendships and burgeoning professional relationships. I was toxic in talking about design and in collaboration. But thankfully, those same friends gave me a priceless gift: candor. They called me out on my unhealthy behavior.
Admittedly, it was a gift I initially did not accept but ultimately was able to deeply reflect upon. I was soon able to accept, and process, and course correct. The realization laid me low, but the re-awakening was essential. I let go of the “reward” of adulation and re-centered upon what stoked the fire for me in art school. Most importantly: I got back to my core values.
Always StudentsFollowing that short-term regression, I was able to push forward in my personal design and career. And I could self-reflect as I got older to facilitate further growth and course correction as needed.
As an example, let’s talk about the Large Hadron Collider. The LHC was designed “to help answer some of the fundamental open questions in physics, which concern the basic laws governing the interactions and forces among the elementary objects, the deep structure of space and time, and in particular the interrelation between quantum mechanics and general relativity.” Thanks, Wikipedia.
Around fifteen years ago, in one of my earlier professional roles, I designed the interface for the application that generated the LHC’s particle collision diagrams. These diagrams are the rendering of what’s actually happening inside the Collider during any given particle collision event and are often considered works of art unto themselves.
Designing the interface for this application was a fascinating process for me, in that I worked with Fermilab physicists to understand what the application was trying to achieve, but also how the physicists themselves would be using it. To that end, in this role,
I cut my teeth on usability testing, working with the Fermilab team to iterate and improve the interface. How they spoke and what they spoke about was like an alien language to me. And by making myself humble and working under the mindset that I was but a student, I made myself available to be a part of their world to generate that vital connection.
I also had my first ethnographic observation experience: going to the Fermilab location and observing how the physicists used the tool in their actual environment, on their actual terminals. For example, one takeaway was that due to the level of ambient light-driven contrast within the facility, the data columns ended up using white text on a dark gray background instead of black text-on-white. This enabled them to pore over reams of data during the day and ease their eye strain. And Fermilab and CERN are government entities with rigorous accessibility standards, so my knowledge in that realm also grew. The barrier-free design was another essential form of connection.
So to those core drivers of my visual problem-solving soul and ultimate fulfillment: discovery, exposure to new media, observation, human connection, and evolution. What opened the door for those values was me checking my ego before I walked through it.
An evergreen willingness to listen, learn, understand, grow, evolve, and connect yields our best work. In particular, I want to focus on the words ‘grow’ and ‘evolve’ in that statement. If we are always students of our craft, we are also continually making ourselves available to evolve. Yes, we have years of applicable design study under our belt. Or the focused lab sessions from a UX bootcamp. Or the monogrammed portfolio of our work. Or, ultimately, decades of a career behind us.
But all that said: experience does not equal “expert.”
As soon as we close our minds via an inner monologue of ‘knowing it all’ or branding ourselves a “#thoughtleader” on social media, the designer we are is our final form. The designer we can be will never exist.
Personalization Pyramid: A Framework for Designing with User Data
As a UX professional in today’s data-driven landscape, it’s increasingly likely that you’ve been asked to design a personalized digital experience, whether it’s a public website, user portal, or native application. Yet while there continues to be no shortage of marketing hype around personalization platforms, we still have very few standardized approaches for implementing personalized UX.
That’s where we come in. After completing dozens of personalization projects over the past few years, we gave ourselves a goal: could you create a holistic personalization framework specifically for UX practitioners? The Personalization Pyramid is a designer-centric model for standing up human-centered personalization programs, spanning data, segmentation, content delivery, and overall goals. By using this approach, you will be able to understand the core components of a contemporary, UX-driven personalization program (or at the very least know enough to get started).
Growing tools for personalization: According to a Dynamic Yield survey, 39% of respondents felt support is available on-demand when a business case is made for it (up 15% from 2020).
Source: “The State of Personalization Maturity – Q4 2021” Dynamic Yield conducted its annual maturity survey across roles and sectors in the Americas (AMER), Europe and the Middle East (EMEA), and the Asia-Pacific (APAC) regions. This marks the fourth consecutive year publishing our research, which includes more than 450 responses from individuals in the C-Suite, Marketing, Merchandising, CX, Product, and IT.
Getting StartedFor the sake of this article, we’ll assume you’re already familiar with the basics of digital personalization. A good overview can be found here: Website Personalization Planning. While UX projects in this area can take on many different forms, they often stem from similar starting points.
Common scenarios for starting a personalization project:
- Your organization or client purchased a content management system (CMS) or marketing automation platform (MAP) or related technology that supports personalization
- The CMO, CDO, or CIO has identified personalization as a goal
- Customer data is disjointed or ambiguous
- You are running some isolated targeting campaigns or A/B testing
- Stakeholders disagree on personalization approach
- Mandate of customer privacy rules (e.g. GDPR) requires revisiting existing user targeting practices
Regardless of where you begin, a successful personalization program will require the same core building blocks. We’ve captured these as the “levels” on the pyramid. Whether you are a UX designer, researcher, or strategist, understanding the core components can help make your contribution successful.
From the ground up: Soup-to-nuts personalization, without going nuts.From top to bottom, the levels include:
- North Star: What larger strategic objective is driving the personalization program?
- Goals: What are the specific, measurable outcomes of the program?
- Touchpoints: Where will the personalized experience be served?
- Contexts and Campaigns: What personalization content will the user see?
- User Segments: What constitutes a unique, usable audience?
- Actionable Data: What reliable and authoritative data is captured by our technical platform to drive personalization?
- Raw Data: What wider set of data is conceivably available (already in our setting) allowing you to personalize?
We’ll go through each of these levels in turn. To help make this actionable, we created an accompanying deck of cards to illustrate specific examples from each level. We’ve found them helpful in personalization brainstorming sessions, and will include examples for you here.
Personalization pack: Deck of cards to help kickstart your personalization brainstorming. Starting at the TopThe components of the pyramid are as follows:
North StarA north star is what you are aiming for overall with your personalization program (big or small). The North Star defines the (one) overall mission of the personalization program. What do you wish to accomplish? North Stars cast a shadow. The bigger the star, the bigger the shadow. Example of North Starts might include:
- Function: Personalize based on basic user inputs. Examples: “Raw” notifications, basic search results, system user settings and configuration options, general customization, basic optimizations
- Feature: Self-contained personalization componentry. Examples: “Cooked” notifications, advanced optimizations (geolocation), basic dynamic messaging, customized modules, automations, recommenders
- Experience: Personalized user experiences across multiple interactions and user flows. Examples: Email campaigns, landing pages, advanced messaging (i.e. C2C chat) or conversational interfaces, larger user flows and content-intensive optimizations (localization).
- Product: Highly differentiating personalized product experiences. Examples: Standalone, branded experiences with personalization at their core, like the “algotorial” playlists by Spotify such as Discover Weekly.
As in any good UX design, personalization can help accelerate designing with customer intentions. Goals are the tactical and measurable metrics that will prove the overall program is successful. A good place to start is with your current analytics and measurement program and metrics you can benchmark against. In some cases, new goals may be appropriate. The key thing to remember is that personalization itself is not a goal, rather it is a means to an end. Common goals include:
- Conversion
- Time on task
- Net promoter score (NPS)
- Customer satisfaction
Touchpoints are where the personalization happens. As a UX designer, this will be one of your largest areas of responsibility. The touchpoints available to you will depend on how your personalization and associated technology capabilities are instrumented, and should be rooted in improving a user’s experience at a particular point in the journey. Touchpoints can be multi-device (mobile, in-store, website) but also more granular (web banner, web pop-up etc.). Here are some examples:
Channel-level Touchpoints
- Email: Role
- Email: Time of open
- In-store display (JSON endpoint)
- Native app
- Search
Wireframe-level Touchpoints
- Web overlay
- Web alert bar
- Web banner
- Web content block
- Web menu
If you’re designing for web interfaces, for example, you will likely need to include personalized “zones” in your wireframes. The content for these can be presented programmatically in touchpoints based on our next step, contexts and campaigns.
Targeted Zones: Examples from Kibo of personalized “zones” on page-level wireframes occurring at various stages of a user journey (Engagement phase at left and Purchase phase at right.)Source: “Essential Guide to End-to-End Personaliztion” by Kibo. Contexts and Campaigns
Once you’ve outlined some touchpoints, you can consider the actual personalized content a user will receive. Many personalization tools will refer to these as “campaigns” (so, for example, a campaign on a web banner for new visitors to the website). These will programmatically be shown at certain touchpoints to certain user segments, as defined by user data. At this stage, we find it helpful to consider two separate models: a context model and a content model. The context helps you consider the level of engagement of the user at the personalization moment, for example a user casually browsing information vs. doing a deep-dive. Think of it in terms of information retrieval behaviors. The content model can then help you determine what type of personalization to serve based on the context (for example, an “Enrich” campaign that shows related articles may be a suitable supplement to extant content).
Personalization Context Model:
- Browse
- Skim
- Nudge
- Feast
Personalization Content Model:
- Alert
- Make Easier
- Cross-Sell
- Enrich
We’ve written extensively about each of these models elsewhere, so if you’d like to read more you can check out Colin’s Personalization Content Model and Jeff’s Personalization Context Model.
Campaign and Context cards: This level of the pyramid can help your team focus around the types of personalization to deliver end users and the use-cases in which they will experience it. User SegmentsUser segments can be created prescriptively or adaptively, based on user research (e.g. via rules and logic tied to set user behaviors or via A/B testing). At a minimum you will likely need to consider how to treat the unknown or first-time visitor, the guest or returning visitor for whom you may have a stateful cookie (or equivalent post-cookie identifier), or the authenticated visitor who is logged in. Here are some examples from the personalization pyramid:
- Unknown
- Guest
- Authenticated
- Default
- Referred
- Role
- Cohort
- Unique ID
Every organization with any digital presence has data. It’s a matter of asking what data you can ethically collect on users, its inherent reliability and value, as to how can you use it (sometimes known as “data activation.”) Fortunately, the tide is turning to first-party data: a recent study by Twilio estimates some 80% of businesses are using at least some type of first-party data to personalize the customer experience.
Source: “The State of Personalization 2021” by Twilio. Survey respondents were n=2,700 adult consumers who have purchased something online in the past 6 months, and n=300 adult manager+ decision-makers at consumer-facing companies that provide goods and/or services online. Respondents were from the United States, United Kingdom, Australia, and New Zealand.Data was collected from April 8 to April 20, 2021.First-party data represents multiple advantages on the UX front, including being relatively simple to collect, more likely to be accurate, and less susceptible to the “creep factor” of third-party data. So a key part of your UX strategy should be to determine what the best form of data collection is on your audiences. Here are some examples:
Figure 1.1.2: Example of a personalization maturity curve, showing progression from basic recommendations functionality to true individualization. Credit: https://kibocommerce.com/blog/kibos-personalization-maturity-chart/There is a progression of profiling when it comes to recognizing and making decisioning about different audiences and their signals. It tends to move towards more granular constructs about smaller and smaller cohorts of users as time and confidence and data volume grow.
While some combination of implicit / explicit data is generally a prerequisite for any implementation (more commonly referred to as first party and third-party data) ML efforts are typically not cost-effective directly out of the box. This is because a strong data backbone and content repository is a prerequisite for optimization. But these approaches should be considered as part of the larger roadmap and may indeed help accelerate the organization’s overall progress. Typically at this point you will partner with key stakeholders and product owners to design a profiling model. The profiling model includes defining approach to configuring profiles, profile keys, profile cards and pattern cards. A multi-faceted approach to profiling which makes it scalable.
Pulling it TogetherWhile the cards comprise the starting point to an inventory of sorts (we provide blanks for you to tailor your own), a set of potential levers and motivations for the style of personalization activities you aspire to deliver, they are more valuable when thought of in a grouping.
In assembling a card “hand”, one can begin to trace the entire trajectory from leadership focus down through a strategic and tactical execution. It is also at the heart of the way both co-authors have conducted workshops in assembling a program backlog—which is a fine subject for another article.
In the meantime, what is important to note is that each colored class of card is helpful to survey in understanding the range of choices potentially at your disposal, it is threading through and making concrete decisions about for whom this decisioning will be made: where, when, and how.
Scenario A: We want to use personalization to improve customer satisfaction on the website. For unknown users, we will create a short quiz to better identify what the user has come to do. This is sometimes referred to as “badging” a user in onboarding contexts, to better characterize their present intent and context. Lay Down Your CardsAny sustainable personalization strategy must consider near, mid and long-term goals. Even with the leading CMS platforms like Sitecore and Adobe or the most exciting composable CMS DXP out there, there is simply no “easy button” wherein a personalization program can be stood up and immediately view meaningful results. That said, there is a common grammar to all personalization activities, just like every sentence has nouns and verbs. These cards attempt to map that territory.
Mobile-First CSS: Is It Time for a Rethink?
The mobile-first design methodology is great—it focuses on what really matters to the user, it’s well-practiced, and it’s been a common design pattern for years. So developing your CSS mobile-first should also be great, too…right?
Well, not necessarily. Classic mobile-first CSS development is based on the principle of overwriting style declarations: you begin your CSS with default style declarations, and overwrite and/or add new styles as you add breakpoints with min-width media queries for larger viewports (for a good overview see “What is Mobile First CSS and Why Does It Rock?”). But all those exceptions create complexity and inefficiency, which in turn can lead to an increased testing effort and a code base that’s harder to maintain. Admit it—how many of us willingly want that?
On your own projects, mobile-first CSS may yet be the best tool for the job, but first you need to evaluate just how appropriate it is in light of the visual design and user interactions you’re working on. To help you get started, here’s how I go about tackling the factors you need to watch for, and I’ll discuss some alternate solutions if mobile-first doesn’t seem to suit your project.
Advantages of mobile-firstSome of the things to like with mobile-first CSS development—and why it’s been the de facto development methodology for so long—make a lot of sense:
Development hierarchy. One thing you undoubtedly get from mobile-first is a nice development hierarchy—you just focus on the mobile view and get developing.
Tried and tested. It’s a tried and tested methodology that’s worked for years for a reason: it solves a problem really well.
Prioritizes the mobile view. The mobile view is the simplest and arguably the most important, as it encompasses all the key user journeys, and often accounts for a higher proportion of user visits (depending on the project).
Prevents desktop-centric development. As development is done using desktop computers, it can be tempting to initially focus on the desktop view. But thinking about mobile from the start prevents us from getting stuck later on; no one wants to spend their time retrofitting a desktop-centric site to work on mobile devices!
Disadvantages of mobile-firstSetting style declarations and then overwriting them at higher breakpoints can lead to undesirable ramifications:
More complexity. The farther up the breakpoint hierarchy you go, the more unnecessary code you inherit from lower breakpoints.
Higher CSS specificity. Styles that have been reverted to their browser default value in a class name declaration now have a higher specificity. This can be a headache on large projects when you want to keep the CSS selectors as simple as possible.
Requires more regression testing. Changes to the CSS at a lower view (like adding a new style) requires all higher breakpoints to be regression tested.
The browser can’t prioritize CSS downloads. At wider breakpoints, classic mobile-first min-width media queries don’t leverage the browser’s capability to download CSS files in priority order.
There is nothing inherently wrong with overwriting values; CSS was designed to do just that. Still, inheriting incorrect values is unhelpful and can be burdensome and inefficient. It can also lead to increased style specificity when you have to overwrite styles to reset them back to their defaults, something that may cause issues later on, especially if you are using a combination of bespoke CSS and utility classes. We won’t be able to use a utility class for a style that has been reset with a higher specificity.
With this in mind, I’m developing CSS with a focus on the default values much more these days. Since there’s no specific order, and no chains of specific values to keep track of, this frees me to develop breakpoints simultaneously. I concentrate on finding common styles and isolating the specific exceptions in closed media query ranges (that is, any range with a max-width set).
This approach opens up some opportunities, as you can look at each breakpoint as a clean slate. If a component’s layout looks like it should be based on Flexbox at all breakpoints, it’s fine and can be coded in the default style sheet. But if it looks like Grid would be much better for large screens and Flexbox for mobile, these can both be done entirely independently when the CSS is put into closed media query ranges. Also, developing simultaneously requires you to have a good understanding of any given component in all breakpoints up front. This can help surface issues in the design earlier in the development process. We don’t want to get stuck down a rabbit hole building a complex component for mobile, and then get the designs for desktop and find they are equally complex and incompatible with the HTML we created for the mobile view!
Though this approach isn’t going to suit everyone, I encourage you to give it a try. There are plenty of tools out there to help with concurrent development, such as Responsively App, Blisk, and many others.
Having said that, I don’t feel the order itself is particularly relevant. If you are comfortable with focusing on the mobile view, have a good understanding of the requirements for other breakpoints, and prefer to work on one device at a time, then by all means stick with the classic development order. The important thing is to identify common styles and exceptions so you can put them in the relevant stylesheet—a sort of manual tree-shaking process! Personally, I find this a little easier when working on a component across breakpoints, but that’s by no means a requirement.
Closed media query ranges in practiceIn classic mobile-first CSS we overwrite the styles, but we can avoid this by using media query ranges. To illustrate the difference (I’m using SCSS for brevity), let’s assume there are three visual designs:
- smaller than 768
- from 768 to below 1024
- 1024 and anything larger
Take a simple example where a block-level element has a default padding of “20px,” which is overwritten at tablet to be “40px” and set back to “20px” on desktop.
Classic min-width mobile-first
.my-block {
  padding: 20px;
  @media (min-width: 768px) {
    padding: 40px;
  }
  @media (min-width: 1024px) {
    padding: 20px;
  }
}
Closed media query range
.my-block {
  padding: 20px;
  @media (min-width: 768px) and (max-width: 1023.98px) {
    padding: 40px;
  }
}
The subtle difference is that the mobile-first example sets the default padding to “20px” and then overwrites it at each breakpoint, setting it three times in total. In contrast, the second example sets the default padding to “20px” and only overrides it at the relevant breakpoint where it isn’t the default value (in this instance, tablet is the exception).
The goal is to:
- Only set styles when needed.
- Not set them with the expectation of overwriting them later on, again and again.
To this end, closed media query ranges are our best friend. If we need to make a change to any given view, we make it in the CSS media query range that applies to the specific breakpoint. We’ll be much less likely to introduce unwanted alterations, and our regression testing only needs to focus on the breakpoint we have actually edited.
Taking the above example, if we find that .my-block spacing on desktop is already accounted for by the margin at that breakpoint, and since we want to remove the padding altogether, we could do this by setting the mobile padding in a closed media query range.
.my-block {
  @media (max-width: 767.98px) {
    padding: 20px;
  }
  @media (min-width: 768px) and (max-width: 1023.98px) {
    padding: 40px;
  }
}
The browser default padding for our block is “0,” so instead of adding a desktop media query and using unset or “0” for the padding value (which we would need with mobile-first), we can wrap the mobile padding in a closed media query (since it is now also an exception) so it won’t get picked up at wider breakpoints. At the desktop breakpoint, we won’t need to set any padding style, as we want the browser default value.
Back in the day, keeping the number of requests to a minimum was very important due to the browser’s limit of concurrent requests (typically around six). As a consequence, the use of image sprites and CSS bundling was the norm, with all the CSS being downloaded in one go, as one stylesheet with highest priority.
With HTTP/2 and HTTP/3 now on the scene, the number of requests is no longer the big deal it used to be. This allows us to separate the CSS into multiple files by media query. The clear benefit of this is the browser can now request the CSS it currently needs with a higher priority than the CSS it doesn’t. This is more performant and can reduce the overall time page rendering is blocked.
Which HTTP version are you using?To determine which version of HTTP you’re using, go to your website and open your browser’s dev tools. Next, select the Network tab and make sure the Protocol column is visible. If “h2” is listed under Protocol, it means HTTP/2 is being used.
Note: to view the Protocol in your browser’s dev tools, go to the Network tab, reload your page, right-click any column header (e.g., Name), and check the Protocol column.
Note: for a summarized comparison, see ImageKit’s “HTTP/2 vs. HTTP/1.”Also, if your site is still using HTTP/1...WHY?!! What are you waiting for? There is excellent user support for HTTP/2.
Splitting the CSSSeparating the CSS into individual files is a worthwhile task. Linking the separate CSS files using the relevant media attribute allows the browser to identify which files are needed immediately (because they’re render-blocking) and which can be deferred. Based on this, it allocates each file an appropriate priority.
In the following example of a website visited on a mobile breakpoint, we can see the mobile and default CSS are loaded with “Highest” priority, as they are currently needed to render the page. The remaining CSS files (print, tablet, and desktop) are still downloaded in case they’ll be needed later, but with “Lowest” priority.
With bundled CSS, the browser will have to download the CSS file and parse it before rendering can start.
While, as noted, with the CSS separated into different files linked and marked up with the relevant media attribute, the browser can prioritize the files it currently needs. Using closed media query ranges allows the browser to do this at all widths, as opposed to classic mobile-first min-width queries, where the desktop browser would have to download all the CSS with Highest priority. We can’t assume that desktop users always have a fast connection. For instance, in many rural areas, internet connection speeds are still slow.
The media queries and number of separate CSS files will vary from project to project based on project requirements, but might look similar to the example below.
Bundled CSS
<link href="site.css" rel="stylesheet">
This single file contains all the CSS, including all media queries, and it will be downloaded with Highest priority.
Separated CSS
<link href="default.css" rel="stylesheet"><link href="mobile.css" media="screen and (max-width: 767.98px)" rel="stylesheet"><link href="tablet.css" media="screen and (min-width: 768px) and (max-width: 1083.98px)" rel="stylesheet"><link href="desktop.css" media="screen and (min-width: 1084px)" rel="stylesheet"><link href="print.css" media="print" rel="stylesheet">
Separating the CSS and specifying a media attribute value on each link tag allows the browser to prioritize what it currently needs. Out of the five files listed above, two will be downloaded with Highest priority: the default file, and the file that matches the current media query. The others will be downloaded with Lowest priority.
Depending on the project’s deployment strategy, a change to one file (mobile.css, for example) would only require the QA team to regression test on devices in that specific media query range. Compare that to the prospect of deploying the single bundled site.css file, an approach that would normally trigger a full regression test.
The uptake of mobile-first CSS was a really important milestone in web development; it has helped front-end developers focus on mobile web applications, rather than developing sites on desktop and then attempting to retrofit them to work on other devices.
I don’t think anyone wants to return to that development model again, but it’s important we don’t lose sight of the issue it highlighted: that things can easily get convoluted and less efficient if we prioritize one particular device—any device—over others. For this reason, focusing on the CSS in its own right, always mindful of what is the default setting and what’s an exception, seems like the natural next step. I’ve started noticing small simplifications in my own CSS, as well as other developers’, and that testing and maintenance work is also a bit more simplified and productive.
In general, simplifying CSS rule creation whenever we can is ultimately a cleaner approach than going around in circles of overrides. But whichever methodology you choose, it needs to suit the project. Mobile-first may—or may not—turn out to be the best choice for what’s involved, but first you need to solidly understand the trade-offs you’re stepping into.
Designers, (Re)define Success First
About two and a half years ago, I introduced the idea of daily ethical design. It was born out of my frustration with the many obstacles to achieving design that’s usable and equitable; protects people’s privacy, agency, and focus; benefits society; and restores nature. I argued that we need to overcome the inconveniences that prevent us from acting ethically and that we need to elevate design ethics to a more practical level by structurally integrating it into our daily work, processes, and tools.
Unfortunately, we’re still very far from this ideal.
At the time, I didn’t know yet how to structurally integrate ethics. Yes, I had found some tools that had worked for me in previous projects, such as using checklists, assumption tracking, and “dark reality” sessions, but I didn’t manage to apply those in every project. I was still struggling for time and support, and at best I had only partially achieved a higher (moral) quality of design—which is far from my definition of structurally integrated.
I decided to dig deeper for the root causes in business that prevent us from practicing daily ethical design. Now, after much research and experimentation, I believe that I’ve found the key that will let us structurally integrate ethics. And it’s surprisingly simple! But first we need to zoom out to get a better understanding of what we’re up against.
Influence the systemSadly, we’re trapped in a capitalistic system that reinforces consumerism and inequality, and it’s obsessed with the fantasy of endless growth. Sea levels, temperatures, and our demand for energy continue to rise unchallenged, while the gap between rich and poor continues to widen. Shareholders expect ever-higher returns on their investments, and companies feel forced to set short-term objectives that reflect this. Over the last decades, those objectives have twisted our well-intended human-centered mindset into a powerful machine that promotes ever-higher levels of consumption. When we’re working for an organization that pursues “double-digit growth” or “aggressive sales targets” (which is 99 percent of us), that’s very hard to resist while remaining human friendly. Even with our best intentions, and even though we like to say that we create solutions for people, we’re a part of the problem.
What can we do to change this?
We can start by acting on the right level of the system. Donella H. Meadows, a system thinker, once listed ways to influence a system in order of effectiveness. When you apply these to design, you get:
- At the lowest level of effectiveness, you can affect numbers such as usability scores or the number of design critiques. But none of that will change the direction of a company.
- Similarly, affecting buffers (such as team budgets), stocks (such as the number of designers), flows (such as the number of new hires), and delays (such as the time that it takes to hear about the effect of design) won’t significantly affect a company.
- Focusing instead on feedback loops such as management control, employee recognition, or design-system investments can help a company become better at achieving its objectives. But that doesn’t change the objectives themselves, which means that the organization will still work against your ethical-design ideals.
- The next level, information flows, is what most ethical-design initiatives focus on now: the exchange of ethical methods, toolkits, articles, conferences, workshops, and so on. This is also where ethical design has remained mostly theoretical. We’ve been focusing on the wrong level of the system all this time.
- Take rules, for example—they beat knowledge every time. There can be widely accepted rules, such as how finance works, or a scrum team’s definition of done. But ethical design can also be smothered by unofficial rules meant to maintain profits, often revealed through comments such as “the client didn’t ask for it” or “don’t make it too big.”
- Changing the rules without holding official power is very hard. That’s why the next level is so influential: self-organization. Experimentation, bottom-up initiatives, passion projects, self-steering teams—all of these are examples of self-organization that improve the resilience and creativity of a company. It’s exactly this diversity of viewpoints that’s needed to structurally tackle big systemic issues like consumerism, wealth inequality, and climate change.
- Yet even stronger than self-organization are objectives and metrics. Our companies want to make more money, which means that everything and everyone in the company does their best to… make the company more money. And once I realized that profit is nothing more than a measurement, I understood how crucial a very specific, defined metric can be toward pushing a company in a certain direction.
The takeaway? If we truly want to incorporate ethics into our daily design practice, we must first change the measurable objectives of the company we work for, from the bottom up.
Redefine successTraditionally, we consider a product or service successful if it’s desirable to humans, technologically feasible, and financially viable. You tend to see these represented as equals; if you type the three words in a search engine, you’ll find diagrams of three equally sized, evenly arranged circles.
But in our hearts, we all know that the three dimensions aren’t equally weighted: it’s viability that ultimately controls whether a product will go live. So a more realistic representation might look like this:
Desirability and feasibility are the means; viability is the goal. Companies—outside of nonprofits and charities—exist to make money.
A genuinely purpose-driven company would try to reverse this dynamic: it would recognize finance for what it was intended for: a means. So both feasibility and viability are means to achieve what the company set out to achieve. It makes intuitive sense: to achieve most anything, you need resources, people, and money. (Fun fact: the Italian language knows no difference between feasibility and viability; both are simply fattibilità.)
But simply swapping viable for desirable isn’t enough to achieve an ethical outcome. Desirability is still linked to consumerism because the associated activities aim to identify what people want—whether it’s good for them or not. Desirability objectives, such as user satisfaction or conversion, don’t consider whether a product is healthy for people. They don’t prevent us from creating products that distract or manipulate people or stop us from contributing to society’s wealth inequality. They’re unsuitable for establishing a healthy balance with nature.
There’s a fourth dimension of success that’s missing: our designs also need to be ethical in the effect that they have on the world.
This is hardly a new idea. Many similar models exist, some calling the fourth dimension accountability, integrity, or responsibility. What I’ve never seen before, however, is the necessary step that comes after: to influence the system as designers and to make ethical design more practical, we must create objectives for ethical design that are achievable and inspirational. There’s no one way to do this because it highly depends on your culture, values, and industry. But I’ll give you the version that I developed with a group of colleagues at a design agency. Consider it a template to get started.
Pursue well-being, equity, and sustainabilityWe created objectives that address design’s effect on three levels: individual, societal, and global.
An objective on the individual level tells us what success is beyond the typical focus of usability and satisfaction—instead considering matters such as how much time and attention is required from users. We pursued well-being:
We create products and services that allow for people’s health and happiness. Our solutions are calm, transparent, nonaddictive, and nonmisleading. We respect our users’ time, attention, and privacy, and help them make healthy and respectful choices.
An objective on the societal level forces us to consider our impact beyond just the user, widening our attention to the economy, communities, and other indirect stakeholders. We called this objective equity:
We create products and services that have a positive social impact. We consider economic equality, racial justice, and the inclusivity and diversity of people as teams, users, and customer segments. We listen to local culture, communities, and those we affect.
Finally, the objective on the global level aims to ensure that we remain in balance with the only home we have as humanity. Referring to it simply as sustainability, our definition was:
We create products and services that reward sufficiency and reusability. Our solutions support the circular economy: we create value from waste, repurpose products, and prioritize sustainable choices. We deliver functionality instead of ownership, and we limit energy use.
In short, ethical design (to us) meant achieving wellbeing for each user and an equitable value distribution within society through a design that can be sustained by our living planet. When we introduced these objectives in the company, for many colleagues, design ethics and responsible design suddenly became tangible and achievable through practical—and even familiar—actions.
Measure impactBut defining these objectives still isn’t enough. What truly caught the attention of senior management was the fact that we created a way to measure every design project’s well-being, equity, and sustainability.
This overview lists example metrics that you can use as you pursue well-being, equity, and sustainability:
There’s a lot of power in measurement. As the saying goes, what gets measured gets done. Donella Meadows once shared this example:
“If the desired system state is national security, and that is defined as the amount of money spent on the military, the system will produce military spending. It may or may not produce national security.”
This phenomenon explains why desirability is a poor indicator of success: it’s typically defined as the increase in customer satisfaction, session length, frequency of use, conversion rate, churn rate, download rate, and so on. But none of these metrics increase the health of people, communities, or ecosystems. What if instead we measured success through metrics for (digital) well-being, such as (reduced) screen time or software energy consumption?
There’s another important message here. Even if we set an objective to build a calm interface, if we were to choose the wrong metric for calmness—say, the number of interface elements—we could still end up with a screen that induces anxiety. Choosing the wrong metric can completely undo good intentions.
Additionally, choosing the right metric is enormously helpful in focusing the design team. Once you go through the exercise of choosing metrics for our objectives, you’re forced to consider what success looks like concretely and how you can prove that you’ve reached your ethical objectives. It also forces you to consider what we as designers have control over: what can I include in my design or change in my process that will lead to the right type of success? The answer to this question brings a lot of clarity and focus.
And finally, it’s good to remember that traditional businesses run on measurements, and managers love to spend much time discussing charts (ideally hockey-stick shaped)—especially if they concern profit, the one-above-all of metrics. For good or ill, to improve the system, to have a serious discussion about ethical design with managers, we’ll need to speak that business language.
Practice daily ethical designOnce you’ve defined your objectives and you have a reasonable idea of the potential metrics for your design project, only then do you have a chance to structurally practice ethical design. It “simply” becomes a matter of using your creativity and choosing from all the knowledge and toolkits already available to you.
I think this is quite exciting! It opens a whole new set of challenges and considerations for the design process. Should you go with that energy-consuming video or would a simple illustration be enough? Which typeface is the most calm and inclusive? Which new tools and methods do you use? When is the website’s end of life? How can you provide the same service while requiring less attention from users? How do you make sure that those who are affected by decisions are there when those decisions are made? How can you measure our effects?
The redefinition of success will completely change what it means to do good design.
There is, however, a final piece of the puzzle that’s missing: convincing your client, product owner, or manager to be mindful of well-being, equity, and sustainability. For this, it’s essential to engage stakeholders in a dedicated kickoff session.
Kick it off or fall back to status quoThe kickoff is the most important meeting that can be so easy to forget to include. It consists of two major phases: 1) the alignment of expectations, and 2) the definition of success.
In the first phase, the entire (design) team goes over the project brief and meets with all the relevant stakeholders. Everyone gets to know one another and express their expectations on the outcome and their contributions to achieving it. Assumptions are raised and discussed. The aim is to get on the same level of understanding and to in turn avoid preventable miscommunications and surprises later in the project.
For example, for a recent freelance project that aimed to design a digital platform that facilitates US student advisors’ documentation and communication, we conducted an online kickoff with the client, a subject-matter expert, and two other designers. We used a combination of canvases on Miro: one with questions from “Manual of Me” (to get to know each other), a Team Canvas (to express expectations), and a version of the Project Canvas to align on scope, timeline, and other practical matters.
The above is the traditional purpose of a kickoff. But just as important as expressing expectations is agreeing on what success means for the project—in terms of desirability, viability, feasibility, and ethics. What are the objectives in each dimension?
Agreement on what success means at such an early stage is crucial because you can rely on it for the remainder of the project. If, for example, the design team wants to build an inclusive app for a diverse user group, they can raise diversity as a specific success criterion during the kickoff. If the client agrees, the team can refer back to that promise throughout the project. “As we agreed in our first meeting, having a diverse user group that includes A and B is necessary to build a successful product. So we do activity X and follow research process Y.” Compare those odds to a situation in which the team didn’t agree to that beforehand and had to ask for permission halfway through the project. The client might argue that that came on top of the agreed scope—and she’d be right.
In the case of this freelance project, to define success I prepared a round canvas that I call the Wheel of Success. It consists of an inner ring, meant to capture ideas for objectives, and a set of outer rings, meant to capture ideas on how to measure those objectives. The rings are divided into five dimensions of successful design: healthy, equitable, sustainable, desirable, feasible, and viable.
We went through each dimension, writing down ideas on digital sticky notes. Then we discussed our ideas and verbally agreed on the most important ones. For example, our client agreed that sustainability and progressive enhancement are important success criteria for the platform. And the subject-matter expert emphasized the importance of including students from low-income and disadvantaged groups in the design process.
After the kickoff, we summarized our ideas and shared understanding in a project brief that captured these aspects:
- the project’s origin and purpose: why are we doing this project?
- the problem definition: what do we want to solve?
- the concrete goals and metrics for each success dimension: what do we want to achieve?
- the scope, process, and role descriptions: how will we achieve it?
With such a brief in place, you can use the agreed-upon objectives and concrete metrics as a checklist of success, and your design team will be ready to pursue the right objective—using the tools, methods, and metrics at their disposal to achieve ethical outcomes.
ConclusionOver the past year, quite a few colleagues have asked me, “Where do I start with ethical design?” My answer has always been the same: organize a session with your stakeholders to (re)define success. Even though you might not always be 100 percent successful in agreeing on goals that cover all responsibility objectives, that beats the alternative (the status quo) every time. If you want to be an ethical, responsible designer, there’s no skipping this step.
To be even more specific: if you consider yourself a strategic designer, your challenge is to define ethical objectives, set the right metrics, and conduct those kick-off sessions. If you consider yourself a system designer, your starting point is to understand how your industry contributes to consumerism and inequality, understand how finance drives business, and brainstorm which levers are available to influence the system on the highest level. Then redefine success to create the space to exercise those levers.
And for those who consider themselves service designers or UX designers or UI designers: if you truly want to have a positive, meaningful impact, stay away from the toolkits and meetups and conferences for a while. Instead, gather your colleagues and define goals for well-being, equity, and sustainability through design. Engage your stakeholders in a workshop and challenge them to think of ways to achieve and measure those ethical goals. Take their input, make it concrete and visible, ask for their agreement, and hold them to it.
Otherwise, I’m genuinely sorry to say, you’re wasting your precious time and creative energy.
Of course, engaging your stakeholders in this way can be uncomfortable. Many of my colleagues expressed doubts such as “What will the client think of this?,” “Will they take me seriously?,” and “Can’t we just do it within the design team instead?” In fact, a product manager once asked me why ethics couldn’t just be a structured part of the design process—to just do it without spending the effort to define ethical objectives. It’s a tempting idea, right? We wouldn’t have to have difficult discussions with stakeholders about what values or which key-performance indicators to pursue. It would let us focus on what we like and do best: designing.
But as systems theory tells us, that’s not enough. For those of us who aren’t from marginalized groups and have the privilege to be able to speak up and be heard, that uncomfortable space is exactly where we need to be if we truly want to make a difference. We can’t remain within the design-for-designers bubble, enjoying our privileged working-from-home situation, disconnected from the real world out there. For those of us who have the possibility to speak up and be heard: if we solely keep talking about ethical design and it remains at the level of articles and toolkits—we’re not designing ethically. It’s just theory. We need to actively engage our colleagues and clients by challenging them to redefine success in business.
With a bit of courage, determination, and focus, we can break out of this cage that finance and business-as-usual have built around us and become facilitators of a new type of business that can see beyond financial value. We just need to agree on the right objectives at the start of each design project, find the right metrics, and realize that we already have everything that we need to get started. That’s what it means to do daily ethical design.
For their inspiration and support over the years, I would like to thank Emanuela Cozzi Schettini, José Gallegos, Annegret Bönemann, Ian Dorr, Vera Rademaker, Virginia Rispoli, Cecilia Scolaro, Rouzbeh Amini, and many others.
Breaking Out of the Box
CSS is about styling boxes. In fact, the whole web is made of boxes, from the browser viewport to elements on a page. But every once in a while a new feature comes along that makes us rethink our design approach.
Round displays, for example, make it fun to play with circular clip areas. Mobile screen notches and virtual keyboards offer challenges to best organize content that stays clear of them. And dual screen or foldable devices make us rethink how to best use available space in a number of different device postures.
Sketches of a round display, a common rectangular mobile display, and a device with a foldable display.These recent evolutions of the web platform made it both more challenging and more interesting to design products. They’re great opportunities for us to break out of our rectangular boxes.
I’d like to talk about a new feature similar to the above: the Window Controls Overlay for Progressive Web Apps (PWAs).
Progressive Web Apps are blurring the lines between apps and websites. They combine the best of both worlds. On one hand, they’re stable, linkable, searchable, and responsive just like websites. On the other hand, they provide additional powerful capabilities, work offline, and read files just like native apps.
As a design surface, PWAs are really interesting because they challenge us to think about what mixing web and device-native user interfaces can be. On desktop devices in particular, we have more than 40 years of history telling us what applications should look like, and it can be hard to break out of this mental model.
At the end of the day though, PWAs on desktop are constrained to the window they appear in: a rectangle with a title bar at the top.
Here’s what a typical desktop PWA app looks like:
Sketches of two rectangular user interfaces representing the desktop Progressive Web App status quo on the macOS and Windows operating systems, respectively.Sure, as the author of a PWA, you get to choose the color of the title bar (using the Web Application Manifest theme_color property), but that’s about it.
What if we could think outside this box, and reclaim the real estate of the app’s entire window? Doing so would give us a chance to make our apps more beautiful and feel more integrated in the operating system.
This is exactly what the Window Controls Overlay offers. This new PWA functionality makes it possible to take advantage of the full surface area of the app, including where the title bar normally appears.
About the title bar and window controlsLet’s start with an explanation of what the title bar and window controls are.
The title bar is the area displayed at the top of an app window, which usually contains the app’s name. Window controls are the affordances, or buttons, that make it possible to minimize, maximize, or close the app’s window, and are also displayed at the top.
A sketch of a rectangular application user interface highlighting the title bar area and window control buttons.Window Controls Overlay removes the physical constraint of the title bar and window controls areas. It frees up the full height of the app window, enabling the title bar and window control buttons to be overlaid on top of the application’s web content.
A sketch of a rectangular application user interface using Window Controls Overlay. The title bar and window controls are no longer in an area separated from the app’s content.If you are reading this article on a desktop computer, take a quick look at other apps. Chances are they’re already doing something similar to this. In fact, the very web browser you are using to read this uses the top area to display tabs.
A screenshot of the top area of a browser’s user interface showing a group of tabs that share the same horizontal space as the app window controls.Spotify displays album artwork all the way to the top edge of the application window.
A screenshot of an album in Spotify’s desktop application. Album artwork spans the entire width of the main content area, all the way to the top and right edges of the window, and the right edge of the main navigation area on the left side. The application and album navigation controls are overlaid directly on top of the album artwork.Microsoft Word uses the available title bar space to display the auto-save and search functionalities, and more.
A screenshot of Microsoft Word’s toolbar interface. Document file information, search, and other functionality appear at the top of the window, sharing the same horizontal space as the app’s window controls.The whole point of this feature is to allow you to make use of this space with your own content while providing a way to account for the window control buttons. And it enables you to offer this modified experience on a range of platforms while not adversely affecting the experience on browsers or devices that don’t support Window Controls Overlay. After all, PWAs are all about progressive enhancement, so this feature is a chance to enhance your app to use this extra space when it’s available.
Let’s use the featureFor the rest of this article, we’ll be working on a demo app to learn more about using the feature.
The demo app is called 1DIV. It’s a simple CSS playground where users can create designs using CSS and a single HTML element.
The app has two pages. The first lists the existing CSS designs you’ve created:
A screenshot of the 1DIV app displaying a thumbnail grid of CSS designs a user created.The second page enables you to create and edit CSS designs:
A screenshot of the 1DIV app editor page. The top half of the window displays a rendered CSS design, and a text editor on the bottom half of the window displays the CSS used to create it.Since I’ve added a simple web manifest and service worker, we can install the app as a PWA on desktop. Here is what it looks like on macOS:
Screenshots of the 1DIV app thumbnail view and CSS editor view on macOS. This version of the app’s window has a separate control bar at the top for the app name and window control buttons.And on Windows:
Screenshots of the 1DIV app thumbnail view and CSS editor view on the Windows operating system. This version of the app’s window also has a separate control bar at the top for the app name and window control buttons.Our app is looking good, but the white title bar in the first page is wasted space. In the second page, it would be really nice if the design area went all the way to the top of the app window.
Let’s use the Window Controls Overlay feature to improve this.
Enabling Window Controls OverlayThe feature is still experimental at the moment. To try it, you need to enable it in one of the supported browsers.
As of now, it has been implemented in Chromium, as a collaboration between Microsoft and Google. We can therefore use it in Chrome or Edge by going to the internal about://flags page, and enabling the Desktop PWA Window Controls Overlay flag.
Using Window Controls OverlayTo use the feature, we need to add the following display_override member to our web app’s manifest file:
{
  "name": "1DIV",
  "description": "1DIV is a mini CSS playground",
  "lang": "en-US",
  "start_url": "/",
  "theme_color": "#ffffff",
  "background_color": "#ffffff",
  "display_override": [
    "window-controls-overlay"
  ],
  "icons": [
    ...
  ]
}
On the surface, the feature is really simple to use. This manifest change is the only thing we need to make the title bar disappear and turn the window controls into an overlay.
However, to provide a great experience for all users regardless of what device or browser they use, and to make the most of the title bar area in our design, we’ll need a bit of CSS and JavaScript code.
Here is what the app looks like now:
Screenshot of the 1DIV app thumbnail view using Window Controls Overlay on macOS. The separate top bar area is gone, but the window controls are now blocking some of the app’s interfaceThe title bar is gone, which is what we wanted, but our logo, search field, and NEW button are partially covered by the window controls because now our layout starts at the top of the window.
It’s similar on Windows, with the difference that the close, maximize, and minimize buttons appear on the right side, grouped together with the PWA control buttons:
Screenshot of the 1DIV app thumbnail display using Window Controls Overlay on the Windows operating system. The separate top bar area is gone, but the window controls are now blocking some of the app’s content. Using CSS to keep clear of the window controlsAlong with the feature, new CSS environment variables have been introduced:
titlebar-area-xtitlebar-area-ytitlebar-area-widthtitlebar-area-height
You use these variables with the CSS env() function to position your content where the title bar would have been while ensuring it won’t overlap with the window controls. In our case, we’ll use two of the variables to position our header, which contains the logo, search bar, and NEW button.
header {
  position: absolute;
  left: env(titlebar-area-x, 0);
  width: env(titlebar-area-width, 100%);
  height: var(--toolbar-height);
}
The titlebar-area-x variable gives us the distance from the left of the viewport to where the title bar would appear, and titlebar-area-width is its width. (Remember, this is not equivalent to the width of the entire viewport, just the title bar portion, which as noted earlier, doesn’t include the window controls.)
By doing this, we make sure our content remains fully visible. We’re also defining fallback values (the second parameter in the env() function) for when the variables are not defined (such as on non-supporting browsers, or when the Windows Control Overlay feature is disabled).
Now our header adapts to its surroundings, and it doesn’t feel like the window control buttons have been added as an afterthought. The app looks a lot more like a native app.
Changing the window controls background color so it blends inNow let’s take a closer look at our second page: the CSS playground editor.
Screenshots of the 1DIV app CSS editor view with Window Controls Overlay in macOS and Windows, respectively. The window controls overlay areas have a solid white background color, which contrasts with the hot pink color of the example CSS design displayed in the editor.Not great. Our CSS demo area does go all the way to the top, which is what we wanted, but the way the window controls appear as white rectangles on top of it is quite jarring.
We can fix this by changing the app’s theme color. There are a couple of ways to define it:
- PWAs can define a theme color in the web app manifest file using the theme_color manifest member. This color is then used by the OS in different ways. On desktop platforms, it is used to provide a background color to the title bar and window controls.
- Websites can use the theme-color meta tag as well. It’s used by browsers to customize the color of the UI around the web page. For PWAs, this color can override the manifest
theme_color.
In our case, we can set the manifest theme_color to white to provide the right default color for our app. The OS will read this color value when the app is installed and use it to make the window controls background color white. This color works great for our main page with the list of demos.
The theme-color meta tag can be changed at runtime, using JavaScript. So we can do that to override the white with the right demo background color when one is opened.
Here is the function we’ll use:
function themeWindow(bgColor) {
  document.querySelector("meta[name=theme-color]").setAttribute('content', bgColor);
}
With this in place, we can imagine how using color and CSS transitions can produce a smooth change from the list page to the demo page, and enable the window control buttons to blend in with the rest of the app’s interface.
Screenshot of the 1DIV app CSS editor view on the Windows operating system with Window Controls Overlay and updated CSS demonstrating how the window control buttons blend in with the rest of the app’s interface. Dragging the windowNow, getting rid of the title bar entirely does have an important accessibility consequence: it’s much more difficult to move the application window around.
The title bar provides a sizable area for users to click and drag, but by using the Window Controls Overlay feature, this area becomes limited to where the control buttons are, and users have to very precisely aim between these buttons to move the window.
Fortunately, this can be fixed using CSS with the app-region property. This property is, for now, only supported in Chromium-based browsers and needs the -webkit- vendor prefix.
To make any element of the app become a dragging target for the window, we can use the following:
-webkit-app-region: drag;
It is also possible to explicitly make an element non-draggable:
-webkit-app-region: no-drag;
These options can be useful for us. We can make the entire header a dragging target, but make the search field and NEW button within it non-draggable so they can still be used as normal.
However, because the editor page doesn’t display the header, users wouldn’t be able to drag the window while editing code. So let's use a different approach. We’ll create another element before our header, also absolutely positioned, and dedicated to dragging the window.
<div class="drag"></div>
<header>...</header>
.drag {
position: absolute;
top: 0;
width: 100%;
height: env(titlebar-area-height, 0);
-webkit-app-region: drag;
}With the above code, we’re making the draggable area span the entire viewport width, and using the titlebar-area-height variable to make it as tall as what the title bar would have been. This way, our draggable area is aligned with the window control buttons as shown below.
And, now, to make sure our search field and button remain usable:
header .search,
header .new {
  -webkit-app-region: no-drag;
}
With the above code, users can click and drag where the title bar used to be. It is an area that users expect to be able to use to move windows on desktop, and we’re not breaking this expectation, which is good.
An animated view of the 1DIV app being dragged across a Windows desktop with the mouse. Adapting to window resizeIt may be useful for an app to know both whether the window controls overlay is visible and when its size changes. In our case, if the user made the window very narrow, there wouldn’t be enough space for the search field, logo, and button to fit, so we’d want to push them down a bit.
The Window Controls Overlay feature comes with a JavaScript API we can use to do this: navigator.windowControlsOverlay.
The API provides three interesting things:
navigator.windowControlsOverlay.visiblelets us know whether the overlay is visible.navigator.windowControlsOverlay.getBoundingClientRect()lets us know the position and size of the title bar area.navigator.windowControlsOverlay.ongeometrychangelets us know when the size or visibility changes.
Let’s use this to be aware of the size of the title bar area and move the header down if it’s too narrow.
if (navigator.windowControlsOverlay) {
  navigator.windowControlsOverlay.addEventListener('geometrychange', () => {
    const { width } = navigator.windowControlsOverlay.getBoundingClientRect();
    document.body.classList.toggle('narrow', width < 250);
  });
}
In the example above, we set the narrow class on the body of the app if the title bar area is narrower than 250px. We could do something similar with a media query, but using the windowControlsOverlay API has two advantages for our use case:
- It’s only fired when the feature is supported and used; we don’t want to adapt the design otherwise.
- We get the size of the title bar area across operating systems, which is great because the size of the window controls is different on Mac and Windows. Using a media query wouldn’t make it possible for us to know exactly how much space remains.
.narrow header {
  top: env(titlebar-area-height, 0);
  left: 0;
  width: 100%;
}
Using the above CSS code, we can move our header down to stay clear of the window control buttons when the window is too narrow, and move the thumbnails down accordingly.
A screenshot of the 1DIV app on Windows showing the app’s content adjusted for a much narrower viewport. Thirty pixels of exciting design opportunities
Using the Window Controls Overlay feature, we were able to take our simple demo app and turn it into something that feels so much more integrated on desktop devices. Something that reaches out of the usual window constraints and provides a custom experience for its users.
In reality, this feature only gives us about 30 pixels of extra room and comes with challenges on how to deal with the window controls. And yet, this extra room and those challenges can be turned into exciting design opportunities.
More devices of all shapes and forms get invented all the time, and the web keeps on evolving to adapt to them. New features get added to the web platform to allow us, web authors, to integrate more and more deeply with those devices. From watches or foldable devices to desktop computers, we need to evolve our design approach for the web. Building for the web now lets us think outside the rectangular box.
So let’s embrace this. Let’s use the standard technologies already at our disposal, and experiment with new ideas to provide tailored experiences for all devices, all from a single codebase!
If you get a chance to try the Window Controls Overlay feature and have feedback about it, you can open issues on the spec’s repository. It’s still early in the development of this feature, and you can help make it even better. Or, you can take a look at the feature’s existing documentation, or this demo app and its source code.
How to Sell UX Research with Two Simple Questions
Do you find yourself designing screens with only a vague idea of how the things on the screen relate to the things elsewhere in the system? Do you leave stakeholder meetings with unclear directives that often seem to contradict previous conversations? You know a better understanding of user needs would help the team get clear on what you are actually trying to accomplish, but time and budget for research is tight. When it comes to asking for more direct contact with your users, you might feel like poor Oliver Twist, timidly asking, “Please, sir, I want some more.”
Here’s the trick. You need to get stakeholders themselves to identify high-risk assumptions and hidden complexity, so that they become just as motivated as you to get answers from users. Basically, you need to make them think it’s their idea.
In this article, I’ll show you how to collaboratively expose misalignment and gaps in the team’s shared understanding by bringing the team together around two simple questions:
- What are the objects?
- What are the relationships between those objects?
These two questions align to the first two steps of the ORCA process, which might become your new best friend when it comes to reducing guesswork. Wait, what’s ORCA?! Glad you asked.
ORCA stands for Objects, Relationships, CTAs, and Attributes, and it outlines a process for creating solid object-oriented user experiences. Object-oriented UX is my design philosophy. ORCA is an iterative methodology for synthesizing user research into an elegant structural foundation to support screen and interaction design. OOUX and ORCA have made my work as a UX designer more collaborative, effective, efficient, fun, strategic, and meaningful.
The ORCA process has four iterative rounds and a whopping fifteen steps. In each round we get more clarity on our Os, Rs, Cs, and As.
The four rounds and fifteen steps of the ORCA process. In the OOUX world, we love color-coding. Blue is reserved for objects! (Yellow is for core content, pink is for metadata, and green is for calls-to-action. Learn more about the color-coded object map and connecting CTAs to objects.)I sometimes say that ORCA is a “garbage in, garbage out” process. To ensure that the testable prototype produced in the final round actually tests well, the process needs to be fed by good research. But if you don’t have a ton of research, the beginning of the ORCA process serves another purpose: it helps you sell the need for research.
ORCA strengthens the weak spot between research and design by helping distill research into solid information architecture—scaffolding for the screen design and interaction design to hang on.In other words, the ORCA process serves as a gauntlet between research and design. With good research, you can gracefully ride the killer whale from research into design. But without good research, the process effectively spits you back into research and with a cache of specific open questions.
Getting in the same curiosity-boatWhat gets us into trouble is not what we don’t know. It’s what we know for sure that just ain’t so.
Mark Twain
The first two steps of the ORCA process—Object Discovery and Relationship Discovery—shine a spotlight on the dark, dusty corners of your team’s misalignments and any inherent complexity that’s been swept under the rug. It begins to expose what this classic comic so beautifully illustrates:
The original “Tree Swing Project Management” cartoon dates back to the 1960s or 1970s and has no artist attribution we could find.This is one reason why so many UX designers are frustrated in their job and why many projects fail. And this is also why we often can’t sell research: every decision-maker is confident in their own mental picture.
Once we expose hidden fuzzy patches in each picture and the differences between them all, the case for user research makes itself.
But how we do this is important. However much we might want to, we can’t just tell everyone, “YOU ARE WRONG!” Instead, we need to facilitate and guide our team members to self-identify holes in their picture. When stakeholders take ownership of assumptions and gaps in understanding, BAM! Suddenly, UX research is not such a hard sell, and everyone is aboard the same curiosity-boat.
Say your users are doctors. And you have no idea how doctors use the system you are tasked with redesigning.
You might try to sell research by honestly saying: “We need to understand doctors better! What are their pain points? How do they use the current app?” But here’s the problem with that. Those questions are vague, and the answers to them don’t feel acutely actionable.
Instead, you want your stakeholders themselves to ask super-specific questions. This is more like the kind of conversation you need to facilitate. Let’s listen in:
“Wait a sec, how often do doctors share patients? Does a patient in this system have primary and secondary doctors?”
“Can a patient even have more than one primary doctor?”
“Is it a ‘primary doctor’ or just a ‘primary caregiver’… Can’t that role be a nurse practitioner?”
“No, caregivers are something else… That’s the patient’s family contacts, right?”
“So are caregivers in scope for this redesign?”
“Yeah, because if a caregiver is present at an appointment, the doctor needs to note that. Like, tag the caregiver on the note… Or on the appointment?”
Now we are getting somewhere. Do you see how powerful it can be getting stakeholders to debate these questions themselves? The diabolical goal here is to shake their confidence—gently and diplomatically.
When these kinds of questions bubble up collaboratively and come directly from the mouths of your stakeholders and decision-makers, suddenly, designing screens without knowing the answers to these questions seems incredibly risky, even silly.
If we create software without understanding the real-world information environment of our users, we will likely create software that does not align to the real-world information environment of our users. And this will, hands down, result in a more confusing, more complex, and less intuitive software product.
The two questionsBut how do we get to these kinds of meaty questions diplomatically, efficiently, collaboratively, and reliably?
We can do this by starting with those two big questions that align to the first two steps of the ORCA process:
- What are the objects?
- What are the relationships between those objects?
In practice, getting to these answers is easier said than done. I’m going to show you how these two simple questions can provide the outline for an Object Definition Workshop. During this workshop, these “seed” questions will blossom into dozens of specific questions and shine a spotlight on the need for more user research.
Prep work: Noun foragingIn the next section, I’ll show you how to run an Object Definition Workshop with your stakeholders (and entire cross-functional team, hopefully). But first, you need to do some prep work.
Basically, look for nouns that are particular to the business or industry of your project, and do it across at least a few sources. I call this noun foraging.
Here are just a few great noun foraging sources:
- the product’s marketing site
- the product’s competitors’ marketing sites (competitive analysis, anyone?)
- the existing product (look at labels!)
- user interview transcripts
- notes from stakeholder interviews or vision docs from stakeholders
Put your detective hat on, my dear Watson. Get resourceful and leverage what you have. If all you have is a marketing website, some screenshots of the existing legacy system, and access to customer service chat logs, then use those.
As you peruse these sources, watch for the nouns that are used over and over again, and start listing them (preferably on blue sticky notes if you’ll be creating an object map later!).
You’ll want to focus on nouns that might represent objects in your system. If you are having trouble determining if a noun might be object-worthy, remember the acronym SIP and test for:
- Structure
- Instances
- Purpose
Think of a library app, for example. Is “book” an object?
Structure: can you think of a few attributes for this potential object? Title, author, publish date… Yep, it has structure. Check!
Instance: what are some examples of this potential “book” object? Can you name a few? The Alchemist, Ready Player One, Everybody Poops… OK, check!
Purpose: why is this object important to the users and business? Well, “book” is what our library client is providing to people and books are why people come to the library… Check, check, check!
SIP: Structure, Instances, and Purpose! (Here’s a flowchart where I elaborate even more on SIP.)As you are noun foraging, focus on capturing the nouns that have SIP. Avoid capturing components like dropdowns, checkboxes, and calendar pickers—your UX system is not your design system! Components are just the packaging for objects—they are a means to an end. No one is coming to your digital place to play with your dropdown! They are coming for the VALUABLE THINGS and what they can do with them. Those things, or objects, are what we are trying to identify.
Let’s say we work for a startup disrupting the email experience. This is how I’d start my noun foraging.
First I’d look at my own email client, which happens to be Gmail. I’d then look at Outlook and the new HEY email. I’d look at Yahoo, Hotmail…I’d even look at Slack and Basecamp and other so-called “email replacers.” I’d read some articles, reviews, and forum threads where people are complaining about email. While doing all this, I would look for and write down the nouns.
(Before moving on, feel free to go noun foraging for this hypothetical product, too, and then scroll down to see how much our lists match up. Just don’t get lost in your own emails! Come back to me!)
Drumroll, please…
Here are a few nouns I came up with during my noun foraging:
- email message
- thread
- contact
- client
- rule/automation
- email address that is not a contact?
- contact groups
- attachment
- Google doc file / other integrated file
- newsletter? (HEY treats this differently)
- saved responses and templates
Scan your list of nouns and pick out words that you are completely clueless about. In our email example, it might be client or automation. Do as much homework as you can before your session with stakeholders: google what’s googleable. But other terms might be so specific to the product or domain that you need to have a conversation about them.
Aside: here are some real nouns foraged during my own past project work that I needed my stakeholders to help me understand:
- Record Locator
- Incentive Home
- Augmented Line Item
- Curriculum-Based Measurement Probe
This is really all you need to prepare for the workshop session: a list of nouns that represent potential objects and a short list of nouns that need to be defined further.
Facilitate an Object Definition WorkshopYou could actually start your workshop with noun foraging—this activity can be done collaboratively. If you have five people in the room, pick five sources, assign one to every person, and give everyone ten minutes to find the objects within their source. When the time’s up, come together and find the overlap. Affinity mapping is your friend here!
If your team is short on time and might be reluctant to do this kind of grunt work (which is usually the case) do your own noun foraging beforehand, but be prepared to show your work. I love presenting screenshots of documents and screens with all the nouns already highlighted. Bring the artifacts of your process, and start the workshop with a five-minute overview of your noun foraging journey.
HOT TIP: before jumping into the workshop, frame the conversation as a requirements-gathering session to help you better understand the scope and details of the system. You don’t need to let them know that you’re looking for gaps in the team’s understanding so that you can prove the need for more user research—that will be our little secret. Instead, go into the session optimistically, as if your knowledgeable stakeholders and PMs and biz folks already have all the answers.
Then, let the question whack-a-mole commence.
1. What is this thing?Want to have some real fun? At the beginning of your session, ask stakeholders to privately write definitions for the handful of obscure nouns you might be uncertain about. Then, have everyone show their cards at the same time and see if you get different definitions (you will). This is gold for exposing misalignment and starting great conversations.
As your discussion unfolds, capture any agreed-upon definitions. And when uncertainty emerges, quietly (but visibly) start an “open questions” parking lot. 😉
After definitions solidify, here’s a great follow-up:
2. Do our users know what these things are? What do users call this thing?Stakeholder 1: They probably call email clients “apps.” But I’m not sure.
Stakeholder 2: Automations are often called “workflows,” I think. Or, maybe users think workflows are something different.
If a more user-friendly term emerges, ask the group if they can agree to use only that term moving forward. This way, the team can better align to the users’ language and mindset.
OK, moving on.
If you have two or more objects that seem to overlap in purpose, ask one of these questions:
3. Are these the same thing? Or are these different? If they are not the same, how are they different?You: Is a saved response the same as a template?
Stakeholder 1: Yes! Definitely.
Stakeholder 2: I don’t think so… A saved response is text with links and variables, but a template is more about the look and feel, like default fonts, colors, and placeholder images.
Continue to build out your growing glossary of objects. And continue to capture areas of uncertainty in your “open questions” parking lot.
If you successfully determine that two similar things are, in fact, different, here’s your next follow-up question:
4. What’s the relationship between these objects?You: Are saved responses and templates related in any way?
Stakeholder 3: Yeah, a template can be applied to a saved response.
You, always with the follow-ups: When is the template applied to a saved response? Does that happen when the user is constructing the saved response? Or when they apply the saved response to an email? How does that actually work?
Listen. Capture uncertainty. Once the list of “open questions” grows to a critical mass, pause to start assigning questions to groups or individuals. Some questions might be for the dev team (hopefully at least one developer is in the room with you). One question might be specifically for someone who couldn’t make it to the workshop. And many questions will need to be labeled “user.”
Do you see how we are building up to our UXR sales pitch?
5. Is this object in scope?Your next question narrows the team’s focus toward what’s most important to your users. You can simply ask, “Are saved responses in scope for our first release?,” but I’ve got a better, more devious strategy.
By now, you should have a list of clearly defined objects. Ask participants to sort these objects from most to least important, either in small breakout groups or individually. Then, like you did with the definitions, have everyone reveal their sort order at once. Surprisingly—or not so surprisingly—it’s not unusual for the VP to rank something like “saved responses” as #2 while everyone else puts it at the bottom of the list. Try not to look too smug as you inevitably expose more misalignment.
I did this for a startup a few years ago. We posted the three groups’ wildly different sort orders on the whiteboard.
Here’s a snippet of the very messy middle from this session: three columns of object cards, showing the same cards prioritized completely differently by three different groups.The CEO stood back, looked at it, and said, “This is why we haven’t been able to move forward in two years.”
Admittedly, it’s tragic to hear that, but as a professional, it feels pretty awesome to be the one who facilitated a watershed realization.
Once you have a good idea of in-scope, clearly defined things, this is when you move on to doing more relationship mapping.
6. Create a visual representation of the objects’ relationshipsWe’ve already done a bit of this while trying to determine if two things are different, but this time, ask the team about every potential relationship. For each object, ask how it relates to all the other objects. In what ways are the objects connected? To visualize all the connections, pull out your trusty boxes-and-arrows technique. Here, we are connecting our objects with verbs. I like to keep my verbs to simple “has a” and “has many” statements.
A work-in-progress system model of our new email solution.This system modeling activity brings up all sorts of new questions:
- Can a saved response have attachments?
- Can a saved response use a template? If so, if an email uses a saved response with a template, can the user override that template?
- Do users want to see all the emails they sent that included a particular attachment? For example, “show me all the emails I sent with ProfessionalImage.jpg attached. I’ve changed my professional photo and I want to alert everyone to update it.”
Solid answers might emerge directly from the workshop participants. Great! Capture that new shared understanding. But when uncertainty surfaces, continue to add questions to your growing parking lot.
Light the fuseYou’ve positioned the explosives all along the floodgates. Now you simply have to light the fuse and BOOM. Watch the buy-in for user research flooooow.
Before your workshop wraps up, have the group reflect on the list of open questions. Make plans for getting answers internally, then focus on the questions that need to be brought before users.
Here’s your final step. Take those questions you’ve compiled for user research and discuss the level of risk associated with NOT answering them. Ask, “if we design without an answer to this question, if we make up our own answer and we are wrong, how bad might that turn out?”
With this methodology, we are cornering our decision-makers into advocating for user research as they themselves label questions as high-risk. Sorry, not sorry.
Now is your moment of truth. With everyone in the room, ask for a reasonable budget of time and money to conduct 6–8 user interviews focused specifically on these questions.
HOT TIP: if you are new to UX research, please note that you’ll likely need to rephrase the questions that came up during the workshop before you present them to users. Make sure your questions are open-ended and don’t lead the user into any default answers.
Final words: Hold the screen design!Seriously, if at all possible, do not ever design screens again without first answering these fundamental questions: what are the objects and how do they relate?
I promise you this: if you can secure a shared understanding between the business, design, and development teams before you start designing screens, you will have less heartache and save more time and money, and (it almost feels like a bonus at this point!) users will be more receptive to what you put out into the world.
I sincerely hope this helps you win time and budget to go talk to your users and gain clarity on what you are designing before you start building screens. If you find success using noun foraging and the Object Definition Workshop, there’s more where that came from in the rest of the ORCA process, which will help prevent even more late-in-the-game scope tugs-of-war and strategy pivots.
All the best of luck! Now go sell research!
A Content Model Is Not a Design System
Do you remember when having a great website was enough? Now, people are getting answers from Siri, Google search snippets, and mobile apps, not just our websites. Forward-thinking organizations have adopted an omnichannel content strategy, whose mission is to reach audiences across multiple digital channels and platforms.
But how do you set up a content management system (CMS) to reach your audience now and in the future? I learned the hard way that creating a content model—a definition of content types, attributes, and relationships that let people and systems understand content—with my more familiar design-system thinking would capsize my customer’s omnichannel content strategy. You can avoid that outcome by creating content models that are semantic and that also connect related content.
I recently had the opportunity to lead the CMS implementation for a Fortune 500 company. The client was excited by the benefits of an omnichannel content strategy, including content reuse, multichannel marketing, and robot delivery—designing content to be intelligible to bots, Google knowledge panels, snippets, and voice user interfaces.
A content model is a critical foundation for an omnichannel content strategy, and for our content to be understood by multiple systems, the model needed semantic types—types named according to their meaning instead of their presentation. Our goal was to let authors create content and reuse it wherever it was relevant. But as the project proceeded, I realized that supporting content reuse at the scale that my customer needed required the whole team to recognize a new pattern.
Despite our best intentions, we kept drawing from what we were more familiar with: design systems. Unlike web-focused content strategies, an omnichannel content strategy can’t rely on WYSIWYG tools for design and layout. Our tendency to approach the content model with our familiar design-system thinking constantly led us to veer away from one of the primary purposes of a content model: delivering content to audiences on multiple marketing channels.
Two essential principles for an effective content modelWe needed to help our designers, developers, and stakeholders understand that we were doing something very different from their prior web projects, where it was natural for everyone to think about content as visual building blocks fitting into layouts. The previous approach was not only more familiar but also more intuitive—at least at first—because it made the designs feel more tangible. We discovered two principles that helped the team understand how a content model differs from the design systems that we were used to:
- Content models must define semantics instead of layout.
- And content models should connect content that belongs together.
A semantic content model uses type and attribute names that reflect the meaning of the content, not how it will be displayed. For example, in a nonsemantic model, teams might create types like teasers, media blocks, and cards. Although these types might make it easy to lay out content, they don’t help delivery channels understand the content’s meaning, which in turn would have opened the door to the content being presented in each marketing channel. In contrast, a semantic content model uses type names like product, service, and testimonial so that each delivery channel can understand the content and use it as it sees fit.
When you’re creating a semantic content model, a great place to start is to look over the types and properties defined by Schema.org, a community-driven resource for type definitions that are intelligible to platforms like Google search.
A semantic content model has several benefits:
- Even if your team doesn’t care about omnichannel content, a semantic content model decouples content from its presentation so that teams can evolve the website’s design without needing to refactor its content. In this way, content can withstand disruptive website redesigns.
- A semantic content model also provides a competitive edge. By adding structured data based on Schema.org’s types and properties, a website can provide hints to help Google understand the content, display it in search snippets or knowledge panels, and use it to answer voice-interface user questions. Potential visitors could discover your content without ever setting foot in your website.
- Beyond those practical benefits, you’ll also need a semantic content model if you want to deliver omnichannel content. To use the same content in multiple marketing channels, delivery channels need to be able to understand it. For example, if your content model were to provide a list of questions and answers, it could easily be rendered on a frequently asked questions (FAQ) page, but it could also be used in a voice interface or by a bot that answers common questions.
For example, using a semantic content model for articles, events, people, and locations lets A List Apart provide cleanly structured data for search engines so that users can read the content on the website, in Google knowledge panels, and even with hypothetical voice interfaces in the future.
Content models that connectAfter struggling to describe what makes a good content model, I’ve come to realize that the best models are those that are semantic and that also connect related content components (such as a FAQ item’s question and answer pair), instead of slicing up related content across disparate content components. A good content model connects content that should remain together so that multiple delivery channels can use it without needing to first put those pieces back together.
Think about writing an article or essay. An article’s meaning and usefulness depends upon its parts being kept together. Would one of the headings or paragraphs be meaningful on their own without the context of the full article? On our project, our familiar design-system thinking often led us to want to create content models that would slice content into disparate chunks to fit the web-centric layout. This had a similar impact to an article that were to have been separated from its headline. Because we were slicing content into standalone pieces based on layout, content that belonged together became difficult to manage and nearly impossible for multiple delivery channels to understand.
To illustrate, let’s look at how connecting related content applies in a real-world scenario. The design team for our customer presented a complex layout for a software product page that included multiple tabs and sections. Our instincts were to follow suit with the content model. Shouldn’t we make it as easy and as flexible as possible to add any number of tabs in the future?
Because our design-system instincts were so familiar, it felt like we had needed a content type called “tab section” so that multiple tab sections could be added to a page. Each tab section would display various types of content. One tab might provide the software’s overview or its specifications. Another tab might provide a list of resources.
Our inclination to break down the content model into “tab section” pieces would have led to an unnecessarily complex model and a cumbersome editing experience, and it would have also created content that couldn’t have been understood by additional delivery channels. For example, how would another system have been able to tell which “tab section” referred to a product’s specifications or its resource list—would that other system have to have resorted to counting tab sections and content blocks? This would have prevented the tabs from ever being reordered, and it would have required adding logic in every other delivery channel to interpret the design system’s layout. Furthermore, if the customer were to have no longer wanted to display this content in a tab layout, it would have been tedious to migrate to a new content model to reflect the new page redesign.
A content model based on design components is unnecessarily complex, and it’s unintelligible to systems.We had a breakthrough when we discovered that our customer had a specific purpose in mind for each tab: it would reveal specific information such as the software product’s overview, specifications, related resources, and pricing. Once implementation began, our inclination to focus on what’s visual and familiar had obscured the intent of the designs. With a little digging, it didn’t take long to realize that the concept of tabs wasn’t relevant to the content model. The meaning of the content that they were planning to display in the tabs was what mattered.
In fact, the customer could have decided to display this content in a different way—without tabs—somewhere else. This realization prompted us to define content types for the software product based on the meaningful attributes that the customer had wanted to render on the web. There were obvious semantic attributes like name and description as well as rich attributes like screenshots, software requirements, and feature lists. The software’s product information stayed together because it wasn’t sliced across separate components like “tab sections” that were derived from the content’s presentation. Any delivery channel—including future ones—could understand and present this content.
A good content model connects content that belongs together so it can be easily managed and reused. ConclusionIn this omnichannel marketing project, we discovered that the best way to keep our content model on track was to ensure that it was semantic (with type and attribute names that reflected the meaning of the content) and that it kept content together that belonged together (instead of fragmenting it). These two concepts curtailed our temptation to shape the content model based on the design. So if you’re working on a content model to support an omnichannel content strategy—or even if you just want to make sure that Google and other interfaces understand your content—remember:
- A design system isn’t a content model. Team members may be tempted to conflate them and to make your content model mirror your design system, so you should protect the semantic value and contextual structure of the content strategy during the entire implementation process. This will let every delivery channel consume the content without needing a magic decoder ring.
- If your team is struggling to make this transition, you can still reap some of the benefits by using Schema.org–based structured data in your website. Even if additional delivery channels aren’t on the immediate horizon, the benefit to search engine optimization is a compelling reason on its own.
- Additionally, remind the team that decoupling the content model from the design will let them update the designs more easily because they won’t be held back by the cost of content migrations. They’ll be able to create new designs without the obstacle of compatibility between the design and the content, and they’ll be ready for the next big thing.
By rigorously advocating for these principles, you’ll help your team treat content the way that it deserves—as the most critical asset in your user experience and the best way to connect with your audience.
Design for Safety, An Excerpt
Antiracist economist Kim Crayton says that “intention without strategy is chaos.” We’ve discussed how our biases, assumptions, and inattention toward marginalized and vulnerable groups lead to dangerous and unethical tech—but what, specifically, do we need to do to fix it? The intention to make our tech safer is not enough; we need a strategy.
This chapter will equip you with that plan of action. It covers how to integrate safety principles into your design work in order to create tech that’s safe, how to convince your stakeholders that this work is necessary, and how to respond to the critique that what we actually need is more diversity. (Spoiler: we do, but diversity alone is not the antidote to fixing unethical, unsafe tech.)
The process for inclusive safetyWhen you are designing for safety, your goals are to:
- identify ways your product can be used for abuse,
- design ways to prevent the abuse, and
- provide support for vulnerable users to reclaim power and control.
The Process for Inclusive Safety is a tool to help you reach those goals (Fig 5.1). It’s a methodology I created in 2018 to capture the various techniques I was using when designing products with safety in mind. Whether you are creating an entirely new product or adding to an existing feature, the Process can help you make your product safe and inclusive. The Process includes five general areas of action:
- Conducting research
- Creating archetypes
- Brainstorming problems
- Designing solutions
- Testing for safety
The Process is meant to be flexible—it won’t make sense for teams to implement every step in some situations. Use the parts that are relevant to your unique work and context; this is meant to be something you can insert into your existing design practice.
And once you use it, if you have an idea for making it better or simply want to provide context of how it helped your team, please get in touch with me. It’s a living document that I hope will continue to be a useful and realistic tool that technologists can use in their day-to-day work.
If you’re working on a product specifically for a vulnerable group or survivors of some form of trauma, such as an app for survivors of domestic violence, sexual assault, or drug addiction, be sure to read Chapter 7, which covers that situation explicitly and should be handled a bit differently. The guidelines here are for prioritizing safety when designing a more general product that will have a wide user base (which, we already know from statistics, will include certain groups that should be protected from harm). Chapter 7 is focused on products that are specifically for vulnerable groups and people who have experienced trauma.
Step 1: Conduct researchDesign research should include a broad analysis of how your tech might be weaponized for abuse as well as specific insights into the experiences of survivors and perpetrators of that type of abuse. At this stage, you and your team will investigate issues of interpersonal harm and abuse, and explore any other safety, security, or inclusivity issues that might be a concern for your product or service, like data security, racist algorithms, and harassment.
Broad researchYour project should begin with broad, general research into similar products and issues around safety and ethical concerns that have already been reported. For example, a team building a smart home device would do well to understand the multitude of ways that existing smart home devices have been used as tools of abuse. If your product will involve AI, seek to understand the potentials for racism and other issues that have been reported in existing AI products. Nearly all types of technology have some kind of potential or actual harm that’s been reported on in the news or written about by academics. Google Scholar is a useful tool for finding these studies.
Specific research: SurvivorsWhen possible and appropriate, include direct research (surveys and interviews) with people who are experts in the forms of harm you have uncovered. Ideally, you’ll want to interview advocates working in the space of your research first so that you have a more solid understanding of the topic and are better equipped to not retraumatize survivors. If you’ve uncovered possible domestic violence issues, for example, the experts you’ll want to speak with are survivors themselves, as well as workers at domestic violence hotlines, shelters, other related nonprofits, and lawyers.
Especially when interviewing survivors of any kind of trauma, it is important to pay people for their knowledge and lived experiences. Don’t ask survivors to share their trauma for free, as this is exploitative. While some survivors may not want to be paid, you should always make the offer in the initial ask. An alternative to payment is to donate to an organization working against the type of violence that the interviewee experienced. We’ll talk more about how to appropriately interview survivors in Chapter 6.
Specific research: AbusersIt’s unlikely that teams aiming to design for safety will be able to interview self-proclaimed abusers or people who have broken laws around things like hacking. Don’t make this a goal; rather, try to get at this angle in your general research. Aim to understand how abusers or bad actors weaponize technology to use against others, how they cover their tracks, and how they explain or rationalize the abuse.
Step 2: Create archetypesOnce you’ve finished conducting your research, use your insights to create abuser and survivor archetypes. Archetypes are not personas, as they’re not based on real people that you interviewed and surveyed. Instead, they’re based on your research into likely safety issues, much like when we design for accessibility: we don’t need to have found a group of blind or low-vision users in our interview pool to create a design that’s inclusive of them. Instead, we base those designs on existing research into what this group needs. Personas typically represent real users and include many details, while archetypes are broader and can be more generalized.
The abuser archetype is someone who will look at the product as a tool to perform harm (Fig 5.2). They may be trying to harm someone they don’t know through surveillance or anonymous harassment, or they may be trying to control, monitor, abuse, or torment someone they know personally.
Fig 5.2: Harry Oleson, an abuser archetype for a fitness product, is looking for ways to stalk his ex-girlfriend through the fitness apps she uses.The survivor archetype is someone who is being abused with the product. There are various situations to consider in terms of the archetype’s understanding of the abuse and how to put an end to it: Do they need proof of abuse they already suspect is happening, or are they unaware they’ve been targeted in the first place and need to be alerted (Fig 5.3)?
Fig 5.3: The survivor archetype Lisa Zwaan suspects her husband is weaponizing their home’s IoT devices against her, but in the face of his insistence that she simply doesn’t understand how to use the products, she’s unsure. She needs some kind of proof of the abuse.You may want to make multiple survivor archetypes to capture a range of different experiences. They may know that the abuse is happening but not be able to stop it, like when an abuser locks them out of IoT devices; or they know it’s happening but don’t know how, such as when a stalker keeps figuring out their location (Fig 5.4). Include as many of these scenarios as you need to in your survivor archetype. You’ll use these later on when you design solutions to help your survivor archetypes achieve their goals of preventing and ending abuse.
Fig 5.4: The survivor archetype Eric Mitchell knows he’s being stalked by his ex-boyfriend Rob but can’t figure out how Rob is learning his location information.It may be useful for you to create persona-like artifacts for your archetypes, such as the three examples shown. Instead of focusing on the demographic information we often see in personas, focus on their goals. The goals of the abuser will be to carry out the specific abuse you’ve identified, while the goals of the survivor will be to prevent abuse, understand that abuse is happening, make ongoing abuse stop, or regain control over the technology that’s being used for abuse. Later, you’ll brainstorm how to prevent the abuser’s goals and assist the survivor’s goals.
And while the “abuser/survivor” model fits most cases, it doesn’t fit all, so modify it as you need to. For example, if you uncovered an issue with security, such as the ability for someone to hack into a home camera system and talk to children, the malicious hacker would get the abuser archetype and the child’s parents would get survivor archetype.
Step 3: Brainstorm problemsAfter creating archetypes, brainstorm novel abuse cases and safety issues. “Novel” means things not found in your research; you’re trying to identify completely new safety issues that are unique to your product or service. The goal with this step is to exhaust every effort of identifying harms your product could cause. You aren’t worrying about how to prevent the harm yet—that comes in the next step.
How could your product be used for any kind of abuse, outside of what you’ve already identified in your research? I recommend setting aside at least a few hours with your team for this process.
If you’re looking for somewhere to start, try doing a Black Mirror brainstorm. This exercise is based on the show Black Mirror, which features stories about the dark possibilities of technology. Try to figure out how your product would be used in an episode of the show—the most wild, awful, out-of-control ways it could be used for harm. When I’ve led Black Mirror brainstorms, participants usually end up having a good deal of fun (which I think is great—it’s okay to have fun when designing for safety!). I recommend time-boxing a Black Mirror brainstorm to half an hour, and then dialing it back and using the rest of the time thinking of more realistic forms of harm.
After you’ve identified as many opportunities for abuse as possible, you may still not feel confident that you’ve uncovered every potential form of harm. A healthy amount of anxiety is normal when you’re doing this kind of work. It’s common for teams designing for safety to worry, “Have we really identified every possible harm? What if we’ve missed something?” If you’ve spent at least four hours coming up with ways your product could be used for harm and have run out of ideas, go to the next step.
It’s impossible to guarantee you’ve thought of everything; instead of aiming for 100 percent assurance, recognize that you’ve taken this time and have done the best you can, and commit to continuing to prioritize safety in the future. Once your product is released, your users may identify new issues that you missed; aim to receive that feedback graciously and course-correct quickly.
Step 4: Design solutionsAt this point, you should have a list of ways your product can be used for harm as well as survivor and abuser archetypes describing opposing user goals. The next step is to identify ways to design against the identified abuser’s goals and to support the survivor’s goals. This step is a good one to insert alongside existing parts of your design process where you’re proposing solutions for the various problems your research uncovered.
Some questions to ask yourself to help prevent harm and support your archetypes include:
- Can you design your product in such a way that the identified harm cannot happen in the first place? If not, what roadblocks can you put up to prevent the harm from happening?
- How can you make the victim aware that abuse is happening through your product?
- How can you help the victim understand what they need to do to make the problem stop?
- Can you identify any types of user activity that would indicate some form of harm or abuse? Could your product help the user access support?
In some products, it’s possible to proactively recognize that harm is happening. For example, a pregnancy app might be modified to allow the user to report that they were the victim of an assault, which could trigger an offer to receive resources for local and national organizations. This sort of proactiveness is not always possible, but it’s worth taking a half hour to discuss if any type of user activity would indicate some form of harm or abuse, and how your product could assist the user in receiving help in a safe manner.
That said, use caution: you don’t want to do anything that could put a user in harm’s way if their devices are being monitored. If you do offer some kind of proactive help, always make it voluntary, and think through other safety issues, such as the need to keep the user in-app in case an abuser is checking their search history. We’ll walk through a good example of this in the next chapter.
Step 5: Test for safetyThe final step is to test your prototypes from the point of view of your archetypes: the person who wants to weaponize the product for harm and the victim of the harm who needs to regain control over the technology. Just like any other kind of product testing, at this point you’ll aim to rigorously test out your safety solutions so that you can identify gaps and correct them, validate that your designs will help keep your users safe, and feel more confident releasing your product into the world.
Ideally, safety testing happens along with usability testing. If you’re at a company that doesn’t do usability testing, you might be able to use safety testing to cleverly perform both; a user who goes through your design attempting to weaponize the product against someone else can also be encouraged to point out interactions or other elements of the design that don’t make sense to them.
You’ll want to conduct safety testing on either your final prototype or the actual product if it’s already been released. There’s nothing wrong with testing an existing product that wasn’t designed with safety goals in mind from the onset—“retrofitting” it for safety is a good thing to do.
Remember that testing for safety involves testing from the perspective of both an abuser and a survivor, though it may not make sense for you to do both. Alternatively, if you made multiple survivor archetypes to capture multiple scenarios, you’ll want to test from the perspective of each one.
As with other sorts of usability testing, you as the designer are most likely too close to the product and its design by this point to be a valuable tester; you know the product too well. Instead of doing it yourself, set up testing as you would with other usability testing: find someone who is not familiar with the product and its design, set the scene, give them a task, encourage them to think out loud, and observe how they attempt to complete it.
Abuser testingThe goal of this testing is to understand how easy it is for someone to weaponize your product for harm. Unlike with usability testing, you want to make it impossible, or at least difficult, for them to achieve their goal. Reference the goals in the abuser archetype you created earlier, and use your product in an attempt to achieve them.
For example, for a fitness app with GPS-enabled location features, we can imagine that the abuser archetype would have the goal of figuring out where his ex-girlfriend now lives. With this goal in mind, you’d try everything possible to figure out the location of another user who has their privacy settings enabled. You might try to see her running routes, view any available information on her profile, view anything available about her location (which she has set to private), and investigate the profiles of any other users somehow connected with her account, such as her followers.
If by the end of this you’ve managed to uncover some of her location data, despite her having set her profile to private, you know now that your product enables stalking. Your next step is to go back to step 4 and figure out how to prevent this from happening. You may need to repeat the process of designing solutions and testing them more than once.
Survivor testingSurvivor testing involves identifying how to give information and power to the survivor. It might not always make sense based on the product or context. Thwarting the attempt of an abuser archetype to stalk someone also satisfies the goal of the survivor archetype to not be stalked, so separate testing wouldn’t be needed from the survivor’s perspective.
However, there are cases where it makes sense. For example, for a smart thermostat, a survivor archetype’s goals would be to understand who or what is making the temperature change when they aren’t doing it themselves. You could test this by looking for the thermostat’s history log and checking for usernames, actions, and times; if you couldn’t find that information, you would have more work to do in step 4.
Another goal might be regaining control of the thermostat once the survivor realizes the abuser is remotely changing its settings. Your test would involve attempting to figure out how to do this: are there instructions that explain how to remove another user and change the password, and are they easy to find? This might again reveal that more work is needed to make it clear to the user how they can regain control of the device or account.
Stress testingTo make your product more inclusive and compassionate, consider adding stress testing. This concept comes from Design for Real Life by Eric Meyer and Sara Wachter-Boettcher. The authors pointed out that personas typically center people who are having a good day—but real users are often anxious, stressed out, having a bad day, or even experiencing tragedy. These are called “stress cases,” and testing your products for users in stress-case situations can help you identify places where your design lacks compassion. Design for Real Life has more details about what it looks like to incorporate stress cases into your design as well as many other great tactics for compassionate design.
Sustainable Web Design, An Excerpt
In the 1950s, many in the elite running community had begun to believe it wasn’t possible to run a mile in less than four minutes. Runners had been attempting it since the late 19th century and were beginning to draw the conclusion that the human body simply wasn’t built for the task.
But on May 6, 1956, Roger Bannister took everyone by surprise. It was a cold, wet day in Oxford, England—conditions no one expected to lend themselves to record-setting—and yet Bannister did just that, running a mile in 3:59.4 and becoming the first person in the record books to run a mile in under four minutes.
This shift in the benchmark had profound effects; the world now knew that the four-minute mile was possible. Bannister’s record lasted only forty-six days, when it was snatched away by Australian runner John Landy. Then a year later, three runners all beat the four-minute barrier together in the same race. Since then, over 1,400 runners have officially run a mile in under four minutes; the current record is 3:43.13, held by Moroccan athlete Hicham El Guerrouj.
We achieve far more when we believe that something is possible, and we will believe it’s possible only when we see someone else has already done it—and as with human running speed, so it is with what we believe are the hard limits for how a website needs to perform.
Establishing standards for a sustainable webIn most major industries, the key metrics of environmental performance are fairly well established, such as miles per gallon for cars or energy per square meter for homes. The tools and methods for calculating those metrics are standardized as well, which keeps everyone on the same page when doing environmental assessments. In the world of websites and apps, however, we aren’t held to any particular environmental standards, and only recently have gained the tools and methods we need to even make an environmental assessment.
The primary goal in sustainable web design is to reduce carbon emissions. However, it’s almost impossible to actually measure the amount of CO2 produced by a web product. We can’t measure the fumes coming out of the exhaust pipes on our laptops. The emissions of our websites are far away, out of sight and out of mind, coming out of power stations burning coal and gas. We have no way to trace the electrons from a website or app back to the power station where the electricity is being generated and actually know the exact amount of greenhouse gas produced. So what do we do?
If we can’t measure the actual carbon emissions, then we need to find what we can measure. The primary factors that could be used as indicators of carbon emissions are:
- Data transfer
- Carbon intensity of electricity
Let’s take a look at how we can use these metrics to quantify the energy consumption, and in turn the carbon footprint, of the websites and web apps we create.
Data transferMost researchers use kilowatt-hours per gigabyte (kWh/GB) as a metric of energy efficiency when measuring the amount of data transferred over the internet when a website or application is used. This provides a great reference point for energy consumption and carbon emissions. As a rule of thumb, the more data transferred, the more energy used in the data center, telecoms networks, and end user devices.
For web pages, data transfer for a single visit can be most easily estimated by measuring the page weight, meaning the transfer size of the page in kilobytes the first time someone visits the page. It’s fairly easy to measure using the developer tools in any modern web browser. Often your web hosting account will include statistics for the total data transfer of any web application (Fig 2.1).
Fig 2.1: The Kinsta hosting dashboard displays data transfer alongside traffic volumes. If you divide data transfer by visits, you get the average data per visit, which can be used as a metric of efficiency.The nice thing about page weight as a metric is that it allows us to compare the efficiency of web pages on a level playing field without confusing the issue with constantly changing traffic volumes.
Reducing page weight requires a large scope. By early 2020, the median page weight was 1.97 MB for setups the HTTP Archive classifies as “desktop” and 1.77 MB for “mobile,” with desktop increasing 36 percent since January 2016 and mobile page weights nearly doubling in the same period (Fig 2.2). Roughly half of this data transfer is image files, making images the single biggest source of carbon emissions on the average website.
History clearly shows us that our web pages can be smaller, if only we set our minds to it. While most technologies become ever more energy efficient, including the underlying technology of the web such as data centers and transmission networks, websites themselves are a technology that becomes less efficient as time goes on.
Fig 2.2: The historical page weight data from HTTP Archive can teach us a lot about what is possible in the future.You might be familiar with the concept of performance budgeting as a way of focusing a project team on creating faster user experiences. For example, we might specify that the website must load in a maximum of one second on a broadband connection and three seconds on a 3G connection. Much like speed limits while driving, performance budgets are upper limits rather than vague suggestions, so the goal should always be to come in under budget.
Designing for fast performance does often lead to reduced data transfer and emissions, but it isn’t always the case. Web performance is often more about the subjective perception of load times than it is about the true efficiency of the underlying system, whereas page weight and transfer size are more objective measures and more reliable benchmarks for sustainable web design.
We can set a page weight budget in reference to a benchmark of industry averages, using data from sources like HTTP Archive. We can also benchmark page weight against competitors or the old version of the website we’re replacing. For example, we might set a maximum page weight budget as equal to our most efficient competitor, or we could set the benchmark lower to guarantee we are best in class.
If we want to take it to the next level, then we could also start looking at the transfer size of our web pages for repeat visitors. Although page weight for the first time someone visits is the easiest thing to measure, and easy to compare on a like-for-like basis, we can learn even more if we start looking at transfer size in other scenarios too. For example, visitors who load the same page multiple times will likely have a high percentage of the files cached in their browser, meaning they don’t need to transfer all of the files on subsequent visits. Likewise, a visitor who navigates to new pages on the same website will likely not need to load the full page each time, as some global assets from areas like the header and footer may already be cached in their browser. Measuring transfer size at this next level of detail can help us learn even more about how we can optimize efficiency for users who regularly visit our pages, and enable us to set page weight budgets for additional scenarios beyond the first visit.
Page weight budgets are easy to track throughout a design and development process. Although they don’t actually tell us carbon emission and energy consumption analytics directly, they give us a clear indication of efficiency relative to other websites. And as transfer size is an effective analog for energy consumption, we can actually use it to estimate energy consumption too.
In summary, reduced data transfer translates to energy efficiency, a key factor to reducing carbon emissions of web products. The more efficient our products, the less electricity they use, and the less fossil fuels need to be burned to produce the electricity to power them. But as we’ll see next, since all web products demand some power, it’s important to consider the source of that electricity, too.
Carbon intensity of electricityRegardless of energy efficiency, the level of pollution caused by digital products depends on the carbon intensity of the energy being used to power them. Carbon intensity is a term used to define the grams of CO2 produced for every kilowatt-hour of electricity (gCO2/kWh). This varies widely, with renewable energy sources and nuclear having an extremely low carbon intensity of less than 10 gCO2/kWh (even when factoring in their construction); whereas fossil fuels have very high carbon intensity of approximately 200–400 gCO2/kWh.
Most electricity comes from national or state grids, where energy from a variety of different sources is mixed together with varying levels of carbon intensity. The distributed nature of the internet means that a single user of a website or app might be using energy from multiple different grids simultaneously; a website user in Paris uses electricity from the French national grid to power their home internet and devices, but the website’s data center could be in Dallas, USA, pulling electricity from the Texas grid, while the telecoms networks use energy from everywhere between Dallas and Paris.
We don’t have control over the full energy supply of web services, but we do have some control over where we host our projects. With a data center using a significant proportion of the energy of any website, locating the data center in an area with low carbon energy will tangibly reduce its carbon emissions. Danish startup Tomorrow reports and maps this user-contributed data, and a glance at their map shows how, for example, choosing a data center in France will have significantly lower carbon emissions than a data center in the Netherlands (Fig 2.3).
Fig 2.3: Tomorrow’s electricityMap shows live data for the carbon intensity of electricity by country.That said, we don’t want to locate our servers too far away from our users; it takes energy to transmit data through the telecom’s networks, and the further the data travels, the more energy is consumed. Just like food miles, we can think of the distance from the data center to the website’s core user base as “megabyte miles”—and we want it to be as small as possible.
Using the distance itself as a benchmark, we can use website analytics to identify the country, state, or even city where our core user group is located and measure the distance from that location to the data center used by our hosting company. This will be a somewhat fuzzy metric as we don’t know the precise center of mass of our users or the exact location of a data center, but we can at least get a rough idea.
For example, if a website is hosted in London but the primary user base is on the West Coast of the USA, then we could look up the distance from London to San Francisco, which is 5,300 miles. That’s a long way! We can see that hosting it somewhere in North America, ideally on the West Coast, would significantly reduce the distance and thus the energy used to transmit the data. In addition, locating our servers closer to our visitors helps reduce latency and delivers better user experience, so it’s a win-win.
Converting it back to carbon emissionsIf we combine carbon intensity with a calculation for energy consumption, we can calculate the carbon emissions of our websites and apps. A tool my team created does this by measuring the data transfer over the wire when loading a web page, calculating the amount of electricity associated, and then converting that into a figure for CO2 (Fig 2.4). It also factors in whether or not the web hosting is powered by renewable energy.
If you want to take it to the next level and tailor the data more accurately to the unique aspects of your project, the Energy and Emissions Worksheet accompanying this book shows you how.
Fig 2.4: The Website Carbon Calculator shows how the Riverford Organic website embodies their commitment to sustainability, being both low carbon and hosted in a data center using renewable energy.With the ability to calculate carbon emissions for our projects, we could actually take a page weight budget one step further and set carbon budgets as well. CO2 is not a metric commonly used in web projects; we’re more familiar with kilobytes and megabytes, and can fairly easily look at design options and files to assess how big they are. Translating that into carbon adds a layer of abstraction that isn’t as intuitive—but carbon budgets do focus our minds on the primary thing we’re trying to reduce, and support the core objective of sustainable web design: reducing carbon emissions.
Browser EnergyData transfer might be the simplest and most complete analog for energy consumption in our digital projects, but by giving us one number to represent the energy used in the data center, the telecoms networks, and the end user’s devices, it can’t offer us insights into the efficiency in any specific part of the system.
One part of the system we can look at in more detail is the energy used by end users’ devices. As front-end web technologies become more advanced, the computational load is increasingly moving from the data center to users’ devices, whether they be phones, tablets, laptops, desktops, or even smart TVs. Modern web browsers allow us to implement more complex styling and animation on the fly using CSS and JavaScript. Furthermore, JavaScript libraries such as Angular and React allow us to create applications where the “thinking” work is done partly or entirely in the browser.
All of these advances are exciting and open up new possibilities for what the web can do to serve society and create positive experiences. However, more computation in the user’s web browser means more energy used by their devices. This has implications not just environmentally, but also for user experience and inclusivity. Applications that put a heavy processing load on the user’s device can inadvertently exclude users with older, slower devices and cause batteries on phones and laptops to drain faster. Furthermore, if we build web applications that require the user to have up-to-date, powerful devices, people throw away old devices much more frequently. This isn’t just bad for the environment, but it puts a disproportionate financial burden on the poorest in society.
In part because the tools are limited, and partly because there are so many different models of devices, it’s difficult to measure website energy consumption on end users’ devices. One tool we do currently have is the Energy Impact monitor inside the developer console of the Safari browser (Fig 2.5).
Fig 2.5: The Energy Impact meter in Safari (on the right) shows how a website consumes CPU energy.You know when you load a website and your computer’s cooling fans start spinning so frantically you think it might actually take off? That’s essentially what this tool is measuring.
It shows us the percentage of CPU used and the duration of CPU usage when loading the web page, and uses these figures to generate an energy impact rating. It doesn’t give us precise data for the amount of electricity used in kilowatts, but the information it does provide can be used to benchmark how efficiently your websites use energy and set targets for improvement.
Voice Content and Usability
We’ve been having conversations for thousands of years. Whether to convey information, conduct transactions, or simply to check in on one another, people have yammered away, chattering and gesticulating, through spoken conversation for countless generations. Only in the last few millennia have we begun to commit our conversations to writing, and only in the last few decades have we begun to outsource them to the computer, a machine that shows much more affinity for written correspondence than for the slangy vagaries of spoken language.
Computers have trouble because between spoken and written language, speech is more primordial. To have successful conversations with us, machines must grapple with the messiness of human speech: the disfluencies and pauses, the gestures and body language, and the variations in word choice and spoken dialect that can stymie even the most carefully crafted human-computer interaction. In the human-to-human scenario, spoken language also has the privilege of face-to-face contact, where we can readily interpret nonverbal social cues.
In contrast, written language immediately concretizes as we commit it to record and retains usages long after they become obsolete in spoken communication (the salutation “To whom it may concern,” for example), generating its own fossil record of outdated terms and phrases. Because it tends to be more consistent, polished, and formal, written text is fundamentally much easier for machines to parse and understand.
Spoken language has no such luxury. Besides the nonverbal cues that decorate conversations with emphasis and emotional context, there are also verbal cues and vocal behaviors that modulate conversation in nuanced ways: how something is said, not what. Whether rapid-fire, low-pitched, or high-decibel, whether sarcastic, stilted, or sighing, our spoken language conveys much more than the written word could ever muster. So when it comes to voice interfaces—the machines we conduct spoken conversations with—we face exciting challenges as designers and content strategists.
Voice InteractionsWe interact with voice interfaces for a variety of reasons, but according to Michael McTear, Zoraida Callejas, and David Griol in The Conversational Interface, those motivations by and large mirror the reasons we initiate conversations with other people, too (http://bkaprt.com/vcu36/01-01). Generally, we start up a conversation because:
- we need something done (such as a transaction),
- we want to know something (information of some sort), or
- we are social beings and want someone to talk to (conversation for conversation’s sake).
These three categories—which I call transactional, informational, and prosocial—also characterize essentially every voice interaction: a single conversation from beginning to end that realizes some outcome for the user, starting with the voice interface’s first greeting and ending with the user exiting the interface. Note here that a conversation in our human sense—a chat between people that leads to some result and lasts an arbitrary length of time—could encompass multiple transactional, informational, and prosocial voice interactions in succession. In other words, a voice interaction is a conversation, but a conversation is not necessarily a single voice interaction.
Purely prosocial conversations are more gimmicky than captivating in most voice interfaces, because machines don’t yet have the capacity to really want to know how we’re doing and to do the sort of glad-handing humans crave. There’s also ongoing debate as to whether users actually prefer the sort of organic human conversation that begins with a prosocial voice interaction and shifts seamlessly into other types. In fact, in Voice User Interface Design, Michael Cohen, James Giangola, and Jennifer Balogh recommend sticking to users’ expectations by mimicking how they interact with other voice interfaces rather than trying too hard to be human—potentially alienating them in the process (http://bkaprt.com/vcu36/01-01).
That leaves two genres of conversations we can have with one another that a voice interface can easily have with us, too: a transactional voice interaction realizing some outcome (“buy iced tea”) and an informational voice interaction teaching us something new (“discuss a musical”).
Transactional voice interactionsUnless you’re tapping buttons on a food delivery app, you’re generally having a conversation—and therefore a voice interaction—when you order a Hawaiian pizza with extra pineapple. Even when we walk up to the counter and place an order, the conversation quickly pivots from an initial smattering of neighborly small talk to the real mission at hand: ordering a pizza (generously topped with pineapple, as it should be).
Alison: Hey, how’s it going?
Burhan: Hi, welcome to Crust Deluxe! It’s cold out there. How can I help you?
Alison: Can I get a Hawaiian pizza with extra pineapple?
Burhan: Sure, what size?
Alison: Large.
Burhan: Anything else?
Alison: No thanks, that’s it.
Burhan: Something to drink?
Alison: I’ll have a bottle of Coke.
Burhan: You got it. That’ll be $13.55 and about fifteen minutes.
Each progressive disclosure in this transactional conversation reveals more and more of the desired outcome of the transaction: a service rendered or a product delivered. Transactional conversations have certain key traits: they’re direct, to the point, and economical. They quickly dispense with pleasantries.
Informational voice interactionsMeanwhile, some conversations are primarily about obtaining information. Though Alison might visit Crust Deluxe with the sole purpose of placing an order, she might not actually want to walk out with a pizza at all. She might be just as interested in whether they serve halal or kosher dishes, gluten-free options, or something else. Here, though we again have a prosocial mini-conversation at the beginning to establish politeness, we’re after much more.
Alison: Hey, how’s it going?
Burhan: Hi, welcome to Crust Deluxe! It’s cold out there. How can I help you?
Alison: Can I ask a few questions?
Burhan: Of course! Go right ahead.
Alison: Do you have any halal options on the menu?
Burhan: Absolutely! We can make any pie halal by request. We also have lots of vegetarian, ovo-lacto, and vegan options. Are you thinking about any other dietary restrictions?
Alison: What about gluten-free pizzas?
Burhan: We can definitely do a gluten-free crust for you, no problem, for both our deep-dish and thin-crust pizzas. Anything else I can answer for you?
Alison: That’s it for now. Good to know. Thanks!
Burhan: Anytime, come back soon!
This is a very different dialogue. Here, the goal is to get a certain set of facts. Informational conversations are investigative quests for the truth—research expeditions to gather data, news, or facts. Voice interactions that are informational might be more long-winded than transactional conversations by necessity. Responses tend to be lengthier, more informative, and carefully communicated so the customer understands the key takeaways.
Voice InterfacesAt their core, voice interfaces employ speech to support users in reaching their goals. But simply because an interface has a voice component doesn’t mean that every user interaction with it is mediated through voice. Because multimodal voice interfaces can lean on visual components like screens as crutches, we’re most concerned in this book with pure voice interfaces, which depend entirely on spoken conversation, lack any visual component whatsoever, and are therefore much more nuanced and challenging to tackle.
Though voice interfaces have long been integral to the imagined future of humanity in science fiction, only recently have those lofty visions become fully realized in genuine voice interfaces.
Interactive voice response (IVR) systemsThough written conversational interfaces have been fixtures of computing for many decades, voice interfaces first emerged in the early 1990s with text-to-speech (TTS) dictation programs that recited written text aloud, as well as speech-enabled in-car systems that gave directions to a user-provided address. With the advent of interactive voice response (IVR) systems, intended as an alternative to overburdened customer service representatives, we became acquainted with the first true voice interfaces that engaged in authentic conversation.
IVR systems allowed organizations to reduce their reliance on call centers but soon became notorious for their clunkiness. Commonplace in the corporate world, these systems were primarily designed as metaphorical switchboards to guide customers to a real phone agent (“Say Reservations to book a flight or check an itinerary”); chances are you will enter a conversation with one when you call an airline or hotel conglomerate. Despite their functional issues and users’ frustration with their inability to speak to an actual human right away, IVR systems proliferated in the early 1990s across a variety of industries (http://bkaprt.com/vcu36/01-02, PDF).
While IVR systems are great for highly repetitive, monotonous conversations that generally don’t veer from a single format, they have a reputation for less scintillating conversation than we’re used to in real life (or even in science fiction).
Screen readersParallel to the evolution of IVR systems was the invention of the screen reader, a tool that transcribes visual content into synthesized speech. For Blind or visually impaired website users, it’s the predominant method of interacting with text, multimedia, or form elements. Screen readers represent perhaps the closest equivalent we have today to an out-of-the-box implementation of content delivered through voice.
Among the first screen readers known by that moniker was the Screen Reader for the BBC Micro and NEEC Portable developed by the Research Centre for the Education of the Visually Handicapped (RCEVH) at the University of Birmingham in 1986 (http://bkaprt.com/vcu36/01-03). That same year, Jim Thatcher created the first IBM Screen Reader for text-based computers, later recreated for computers with graphical user interfaces (GUIs) (http://bkaprt.com/vcu36/01-04).
With the rapid growth of the web in the 1990s, the demand for accessible tools for websites exploded. Thanks to the introduction of semantic HTML and especially ARIA roles beginning in 2008, screen readers started facilitating speedy interactions with web pages that ostensibly allow disabled users to traverse the page as an aural and temporal space rather than a visual and physical one. In other words, screen readers for the web “provide mechanisms that translate visual design constructs—proximity, proportion, etc.—into useful information,” writes Aaron Gustafson in A List Apart. “At least they do when documents are authored thoughtfully” (http://bkaprt.com/vcu36/01-05).
Though deeply instructive for voice interface designers, there’s one significant problem with screen readers: they’re difficult to use and unremittingly verbose. The visual structures of websites and web navigation don’t translate well to screen readers, sometimes resulting in unwieldy pronouncements that name every manipulable HTML element and announce every formatting change. For many screen reader users, working with web-based interfaces exacts a cognitive toll.
In Wired, accessibility advocate and voice engineer Chris Maury considers why the screen reader experience is ill-suited to users relying on voice:
From the beginning, I hated the way that Screen Readers work. Why are they designed the way they are? It makes no sense to present information visually and then, and only then, translate that into audio. All of the time and energy that goes into creating the perfect user experience for an app is wasted, or even worse, adversely impacting the experience for blind users. (http://bkaprt.com/vcu36/01-06)
In many cases, well-designed voice interfaces can speed users to their destination better than long-winded screen reader monologues. After all, visual interface users have the benefit of darting around the viewport freely to find information, ignoring areas irrelevant to them. Blind users, meanwhile, are obligated to listen to every utterance synthesized into speech and therefore prize brevity and efficiency. Disabled users who have long had no choice but to employ clunky screen readers may find that voice interfaces, particularly more modern voice assistants, offer a more streamlined experience.
Voice assistantsWhen we think of voice assistants (the subset of voice interfaces now commonplace in living rooms, smart homes, and offices), many of us immediately picture HAL from 2001: A Space Odyssey or hear Majel Barrett’s voice as the omniscient computer in Star Trek. Voice assistants are akin to personal concierges that can answer questions, schedule appointments, conduct searches, and perform other common day-to-day tasks. And they’re rapidly gaining more attention from accessibility advocates for their assistive potential.
Before the earliest IVR systems found success in the enterprise, Apple published a demonstration video in 1987 depicting the Knowledge Navigator, a voice assistant that could transcribe spoken words and recognize human speech to a great degree of accuracy. Then, in 2001, Tim Berners-Lee and others formulated their vision for a Semantic Web “agent” that would perform typical errands like “checking calendars, making appointments, and finding locations” (http://bkaprt.com/vcu36/01-07, behind paywall). It wasn’t until 2011 that Apple’s Siri finally entered the picture, making voice assistants a tangible reality for consumers.
Thanks to the plethora of voice assistants available today, there is considerable variation in how programmable and customizable certain voice assistants are over others (Fig 1.1). At one extreme, everything except vendor-provided features is locked down; for example, at the time of their release, the core functionality of Apple’s Siri and Microsoft’s Cortana couldn’t be extended beyond their existing capabilities. Even today, it isn’t possible to program Siri to perform arbitrary functions, because there’s no means by which developers can interact with Siri at a low level, apart from predefined categories of tasks like sending messages, hailing rideshares, making restaurant reservations, and certain others.
At the opposite end of the spectrum, voice assistants like Amazon Alexa and Google Home offer a core foundation on which developers can build custom voice interfaces. For this reason, programmable voice assistants that lend themselves to customization and extensibility are becoming increasingly popular for developers who feel stifled by the limitations of Siri and Cortana. Amazon offers the Alexa Skills Kit, a developer framework for building custom voice interfaces for Amazon Alexa, while Google Home offers the ability to program arbitrary Google Assistant skills. Today, users can choose from among thousands of custom-built skills within both the Amazon Alexa and Google Assistant ecosystems.
Fig 1.1: Voice assistants like Amazon Alexa and Google Home tend to be more programmable, and thus more flexible, than their counterpart Apple Siri.As corporations like Amazon, Apple, Microsoft, and Google continue to stake their territory, they’re also selling and open-sourcing an unprecedented array of tools and frameworks for designers and developers that aim to make building voice interfaces as easy as possible, even without code.
Often by necessity, voice assistants like Amazon Alexa tend to be monochannel—they’re tightly coupled to a device and can’t be accessed on a computer or smartphone instead. By contrast, many development platforms like Google’s Dialogflow have introduced omnichannel capabilities so users can build a single conversational interface that then manifests as a voice interface, textual chatbot, and IVR system upon deployment. I don’t prescribe any specific implementation approaches in this design-focused book, but in Chapter 4 we’ll get into some of the implications these variables might have on the way you build out your design artifacts.
Voice ContentSimply put, voice content is content delivered through voice. To preserve what makes human conversation so compelling in the first place, voice content needs to be free-flowing and organic, contextless and concise—everything written content isn’t.
Our world is replete with voice content in various forms: screen readers reciting website content, voice assistants rattling off a weather forecast, and automated phone hotline responses governed by IVR systems. In this book, we’re most concerned with content delivered auditorily—not as an option, but as a necessity.
For many of us, our first foray into informational voice interfaces will be to deliver content to users. There’s only one problem: any content we already have isn’t in any way ready for this new habitat. So how do we make the content trapped on our websites more conversational? And how do we write new copy that lends itself to voice interactions?
Lately, we’ve begun slicing and dicing our content in unprecedented ways. Websites are, in many respects, colossal vaults of what I call macrocontent: lengthy prose that can extend for infinitely scrollable miles in a browser window, like microfilm viewers of newspaper archives. Back in 2002, well before the present-day ubiquity of voice assistants, technologist Anil Dash defined microcontent as permalinked pieces of content that stay legible regardless of environment, such as email or text messages:
A day’s weather forcast [sic], the arrival and departure times for an airplane flight, an abstract from a long publication, or a single instant message can all be examples of microcontent. (http://bkaprt.com/vcu36/01-08)
I’d update Dash’s definition of microcontent to include all examples of bite-sized content that go well beyond written communiqués. After all, today we encounter microcontent in interfaces where a small snippet of copy is displayed alone, unmoored from the browser, like a textbot confirmation of a restaurant reservation. Microcontent offers the best opportunity to gauge how your content can be stretched to the very edges of its capabilities, informing delivery channels both established and novel.
As microcontent, voice content is unique because it’s an example of how content is experienced in time rather than in space. We can glance at a digital sign underground for an instant and know when the next train is arriving, but voice interfaces hold our attention captive for periods of time that we can’t easily escape or skip, something screen reader users are all too familiar with.
Because microcontent is fundamentally made up of isolated blobs with no relation to the channels where they’ll eventually end up, we need to ensure that our microcontent truly performs well as voice content—and that means focusing on the two most important traits of robust voice content: voice content legibility and voice content discoverability.
Fundamentally, the legibility and discoverability of our voice content both have to do with how voice content manifests in perceived time and space.
Designing for the Unexpected
I’m not sure when I first heard this quote, but it’s something that has stayed with me over the years. How do you create services for situations you can’t imagine? Or design products that work on devices yet to be invented?
Flash, Photoshop, and responsive designWhen I first started designing websites, my go-to software was Photoshop. I created a 960px canvas and set about creating a layout that I would later drop content in. The development phase was about attaining pixel-perfect accuracy using fixed widths, fixed heights, and absolute positioning.
Ethan Marcotte’s talk at An Event Apart and subsequent article “Responsive Web Design” in A List Apart in 2010 changed all this. I was sold on responsive design as soon as I heard about it, but I was also terrified. The pixel-perfect designs full of magic numbers that I had previously prided myself on producing were no longer good enough.
The fear wasn’t helped by my first experience with responsive design. My first project was to take an existing fixed-width website and make it responsive. What I learned the hard way was that you can’t just add responsiveness at the end of a project. To create fluid layouts, you need to plan throughout the design phase.
A new way to designDesigning responsive or fluid sites has always been about removing limitations, producing content that can be viewed on any device. It relies on the use of percentage-based layouts, which I initially achieved with native CSS and utility classes:
.column-span-6 {
  width: 49%;
  float: left;
  margin-right: 0.5%;
  margin-left: 0.5%;
}


.column-span-4 {
  width: 32%;
  float: left;
  margin-right: 0.5%;
  margin-left: 0.5%;
}

.column-span-3 {
  width: 24%;
  float: left;
  margin-right: 0.5%;
  margin-left: 0.5%;
}
Then with Sass so I could take advantage of @includes to re-use repeated blocks of code and move back to more semantic markup:
.logo {
  @include colSpan(6);
}

.search {
  @include colSpan(3);
}

.social-share {
  @include colSpan(3);
}The second ingredient for responsive design is media queries. Without them, content would shrink to fit the available space regardless of whether that content remained readable (The exact opposite problem occurred with the introduction of a mobile-first approach).
Components becoming too small at mobile breakpointsMedia queries prevented this by allowing us to add breakpoints where the design could adapt. Like most people, I started out with three breakpoints: one for desktop, one for tablets, and one for mobile. Over the years, I added more and more for phablets, wide screens, and so on.
For years, I happily worked this way and improved both my design and front-end skills in the process. The only problem I encountered was making changes to content, since with our Sass grid system in place, there was no way for the site owners to add content without amending the markup—something a small business owner might struggle with. This is because each row in the grid was defined using a div as a container. Adding content meant creating new row markup, which requires a level of HTML knowledge.
Row markup was a staple of early responsive design, present in all the widely used frameworks like Bootstrap and Skeleton.
<section class="row">
  <div class="column-span-4">1 of 7</div>
  <div class="column-span-4">2 of 7</div>
  <div class="column-span-4">3 of 7</div>
</section>

<section class="row">
  <div class="column-span-4">4 of 7</div>
  <div class="column-span-4">5 of 7</div>
  <div class="column-span-4">6 of 7</div>
</section>

<section class="row">
  <div class="column-span-4">7 of 7</div>
</section>Another problem arose as I moved from a design agency building websites for small- to medium-sized businesses, to larger in-house teams where I worked across a suite of related sites. In those roles I started to work much more with reusable components.
Our reliance on media queries resulted in components that were tied to common viewport sizes. If the goal of component libraries is reuse, then this is a real problem because you can only use these components if the devices you’re designing for correspond to the viewport sizes used in the pattern library—in the process not really hitting that “devices that don’t yet exist” goal.
Then there’s the problem of space. Media queries allow components to adapt based on the viewport size, but what if I put a component into a sidebar, like in the figure below?
Components responding to the viewport width with media queries Container queries: our savior or a false dawn?Container queries have long been touted as an improvement upon media queries, but at the time of writing are unsupported in most browsers. There are JavaScript workarounds, but they can create dependency and compatibility issues. The basic theory underlying container queries is that elements should change based on the size of their parent container and not the viewport width, as seen in the following illustrations.
Components responding to their parent container with container queriesOne of the biggest arguments in favor of container queries is that they help us create components or design patterns that are truly reusable because they can be picked up and placed anywhere in a layout. This is an important step in moving toward a form of component-based design that works at any size on any device.
In other words, responsive components to replace responsive layouts.
Container queries will help us move from designing pages that respond to the browser or device size to designing components that can be placed in a sidebar or in the main content, and respond accordingly.
My concern is that we are still using layout to determine when a design needs to adapt. This approach will always be restrictive, as we will still need pre-defined breakpoints. For this reason, my main question with container queries is, How would we decide when to change the CSS used by a component?
A component library removed from context and real content is probably not the best place for that decision.
As the diagrams below illustrate, we can use container queries to create designs for specific container widths, but what if I want to change the design based on the image size or ratio?
Cards responding to their parent container with container queries Cards responding based on their own contentIn this example, the dimensions of the container are not what should dictate the design; rather, the image is.
It’s hard to say for sure whether container queries will be a success story until we have solid cross-browser support for them. Responsive component libraries would definitely evolve how we design and would improve the possibilities for reuse and design at scale. But maybe we will always need to adjust these components to suit our content.
CSS is changingWhilst the container query debate rumbles on, there have been numerous advances in CSS that change the way we think about design. The days of fixed-width elements measured in pixels and floated div elements used to cobble layouts together are long gone, consigned to history along with table layouts. Flexbox and CSS Grid have revolutionized layouts for the web. We can now create elements that wrap onto new rows when they run out of space, not when the device changes.
.wrapper {
  display: grid;
  grid-template-columns: repeat(auto-fit, 450px);
  gap: 10px;
}
The repeat() function paired with auto-fit or auto-fill allows us to specify how much space each column should use while leaving it up to the browser to decide when to spill the columns onto a new line. Similar things can be achieved with Flexbox, as elements can wrap over multiple rows and “flex” to fill available space.
.wrapper {
  display: flex;
  flex-wrap: wrap;
  justify-content: space-between;
}

.child {
  flex-basis: 32%;
  margin-bottom: 20px;
}
The biggest benefit of all this is you don’t need to wrap elements in container rows. Without rows, content isn’t tied to page markup in quite the same way, allowing for removals or additions of content without additional development.
A traditional Grid layout without the usual row containersThis is a big step forward when it comes to creating designs that allow for evolving content, but the real game changer for flexible designs is CSS Subgrid.
Remember the days of crafting perfectly aligned interfaces, only for the customer to add an unbelievably long header almost as soon as they're given CMS access, like the illustration below?
Cards unable to respond to a sibling’s content changesSubgrid allows elements to respond to adjustments in their own content and in the content of sibling elements, helping us create designs more resilient to change.
Cards responding to content in sibling cards.wrapper {
display: grid;
grid-template-columns: repeat(auto-fit, minmax(150px, 1fr));
grid-template-rows: auto 1fr auto;
gap: 10px;
}
.sub-grid {
display: grid;
grid-row: span 3;
grid-template-rows: subgrid; /* sets rows to parent grid */
}CSS Grid allows us to separate layout and content, thereby enabling flexible designs. Meanwhile, Subgrid allows us to create designs that can adapt in order to suit morphing content. Subgrid at the time of writing is only supported in Firefox but the above code can be implemented behind an @supports feature query.
Intrinsic layoutsI’d be remiss not to mention intrinsic layouts, the term created by Jen Simmons to describe a mixture of new and old CSS features used to create layouts that respond to available space.
Responsive layouts have flexible columns using percentages. Intrinsic layouts, on the other hand, use the fr unit to create flexible columns that won’t ever shrink so much that they render the content illegible.
fr units is a way to say I want you to distribute the extra space in this way, but...don’t ever make it smaller than the content that’s inside of it.
—Jen Simmons, “Designing Intrinsic Layouts”
Intrinsic layouts can also utilize a mixture of fixed and flexible units, allowing the content to dictate the space it takes up.
Slide from “Designing Intrinsic Layouts” by Jen SimmonsWhat makes intrinsic design stand out is that it not only creates designs that can withstand future devices but also helps scale design without losing flexibility. Components and patterns can be lifted and reused without the prerequisite of having the same breakpoints or the same amount of content as in the previous implementation.
We can now create designs that adapt to the space they have, the content within them, and the content around them. With an intrinsic approach, we can construct responsive components without depending on container queries.
Another 2010 moment?This intrinsic approach should in my view be every bit as groundbreaking as responsive web design was ten years ago. For me, it’s another “everything changed” moment.
But it doesn’t seem to be moving quite as fast; I haven’t yet had that same career-changing moment I had with responsive design, despite the widely shared and brilliant talk that brought it to my attention.
One reason for that could be that I now work in a large organization, which is quite different from the design agency role I had in 2010. In my agency days, every new project was a clean slate, a chance to try something new. Nowadays, projects use existing tools and frameworks and are often improvements to existing websites with an existing codebase.
Another could be that I feel more prepared for change now. In 2010 I was new to design in general; the shift was frightening and required a lot of learning. Also, an intrinsic approach isn’t exactly all-new; it’s about using existing skills and existing CSS knowledge in a different way.
You can’t framework your way out of a content problemAnother reason for the slightly slower adoption of intrinsic design could be the lack of quick-fix framework solutions available to kick-start the change.
Responsive grid systems were all over the place ten years ago. With a framework like Bootstrap or Skeleton, you had a responsive design template at your fingertips.
Intrinsic design and frameworks do not go hand in hand quite so well because the benefit of having a selection of units is a hindrance when it comes to creating layout templates. The beauty of intrinsic design is combining different units and experimenting with techniques to get the best for your content.
And then there are design tools. We probably all, at some point in our careers, used Photoshop templates for desktop, tablet, and mobile devices to drop designs in and show how the site would look at all three stages.
How do you do that now, with each component responding to content and layouts flexing as and when they need to? This type of design must happen in the browser, which personally I’m a big fan of.
The debate about “whether designers should code” is another that has rumbled on for years. When designing a digital product, we should, at the very least, design for a best- and worst-case scenario when it comes to content. To do this in a graphics-based software package is far from ideal. In code, we can add longer sentences, more radio buttons, and extra tabs, and watch in real time as the design adapts. Does it still work? Is the design too reliant on the current content?
Personally, I look forward to the day intrinsic design is the standard for design, when a design component can be truly flexible and adapt to both its space and content with no reliance on device or container dimensions.
Content firstContent is not constant. After all, to design for the unknown or unexpected we need to account for content changes like our earlier Subgrid card example that allowed the cards to respond to adjustments to their own content and the content of sibling elements.
Thankfully, there’s more to CSS than layout, and plenty of properties and values can help us put content first. Subgrid and pseudo-elements like ::first-line and ::first-letter help to separate design from markup so we can create designs that allow for changes.
Instead of old markup hacks like this—
<p>
  <span class="first-line">First line of text with different styling</span>...
</p>
—we can target content based on where it appears.
.element::first-line {
  font-size: 1.4em;
}

.element::first-letter {
  color: red;
}
Much bigger additions to CSS include logical properties, which change the way we construct designs using logical dimensions (start and end) instead of physical ones (left and right), something CSS Grid also does with functions like min(), max(), and clamp().
This flexibility allows for directional changes according to content, a common requirement when we need to present content in multiple languages. In the past, this was often achieved with Sass mixins but was often limited to switching from left-to-right to right-to-left orientation.
In the Sass version, directional variables need to be set.
$direction: rtl;
$opposite-direction: ltr;

$start-direction: right;
$end-direction: left;
These variables can be used as values—
body {
  direction: $direction;
  text-align: $start-direction;
}
—or as properties.
margin-#{$end-direction}: 10px;
padding-#{$start-direction}: 10px;
However, now we have native logical properties, removing the reliance on both Sass (or a similar tool) and pre-planning that necessitated using variables throughout a codebase. These properties also start to break apart the tight coupling between a design and strict physical dimensions, creating more flexibility for changes in language and in direction.
margin-block-end: 10px;
padding-block-start: 10px;
There are also native start and end values for properties like text-align, which means we can replace text-align: right with text-align: start.
Like the earlier examples, these properties help to build out designs that aren’t constrained to one language; the design will reflect the content’s needs.
Fixed and fluidWe briefly covered the power of combining fixed widths with fluid widths with intrinsic layouts. The min() and max() functions are a similar concept, allowing you to specify a fixed value with a flexible alternative.
For min() this means setting a fluid minimum value and a maximum fixed value.
.element {
  width: min(50%, 300px);
}
The element in the figure above will be 50% of its container as long as the element’s width doesn’t exceed 300px.
For max() we can set a flexible max value and a minimum fixed value.
.element {
  width: max(50%, 300px);
}
Now the element will be 50% of its container as long as the element’s width is at least 300px. This means we can set limits but allow content to react to the available space.
The clamp() function builds on this by allowing us to set a preferred value with a third parameter. Now we can allow the element to shrink or grow if it needs to without getting to a point where it becomes unusable.
.element {
  width: clamp(300px, 50%, 600px);
}
This time, the element’s width will be 50% (the preferred value) of its container but never less than 300px and never more than 600px.
With these techniques, we have a content-first approach to responsive design. We can separate content from markup, meaning the changes users make will not affect the design. We can start to future-proof designs by planning for unexpected changes in language or direction. And we can increase flexibility by setting desired dimensions alongside flexible alternatives, allowing for more or less content to be displayed correctly.
Situation firstThanks to what we’ve discussed so far, we can cover device flexibility by changing our approach, designing around content and space instead of catering to devices. But what about that last bit of Jeffrey Zeldman’s quote, “...situations you haven’t imagined”?
It’s a very different thing to design for someone seated at a desktop computer as opposed to someone using a mobile phone and moving through a crowded street in glaring sunshine. Situations and environments are hard to plan for or predict because they change as people react to their own unique challenges and tasks.
This is why choice is so important. One size never fits all, so we need to design for multiple scenarios to create equal experiences for all our users.
Thankfully, there is a lot we can do to provide choice.
Responsible design“There are parts of the world where mobile data is prohibitively expensive, and where there is little or no broadband infrastructure.”
“I Used the Web for a Day on a 50 MB Budget”
Chris Ashton
One of the biggest assumptions we make is that people interacting with our designs have a good wifi connection and a wide screen monitor. But in the real world, our users may be commuters traveling on trains or other forms of transport using smaller mobile devices that can experience drops in connectivity. There is nothing more frustrating than a web page that won’t load, but there are ways we can help users use less data or deal with sporadic connectivity.
The srcset attribute allows the browser to decide which image to serve. This means we can create smaller ‘cropped’ images to display on mobile devices in turn using less bandwidth and less data.
<img
  src="image-file.jpg"
  srcset="large.jpg 1024w,
             medium.jpg 640w,
             small.jpg 320w"
     alt="Image alt text" />
The preload attribute can also help us to think about how and when media is downloaded. It can be used to tell a browser about any critical assets that need to be downloaded with high priority, improving perceived performance and the user experience.
<link rel="stylesheet" href="style.css"> <!--Standard stylesheet markup-->
<link rel="preload" href="style.css" as="style"> <!--Preload stylesheet markup-->
There’s also native lazy loading, which indicates assets that should only be downloaded when they are needed.
<img src="image.png" loading="lazy" alt="…">With srcset, preload, and lazy loading, we can start to tailor a user’s experience based on the situation they find themselves in. What none of this does, however, is allow the user themselves to decide what they want downloaded, as the decision is usually the browser’s to make.
So how can we put users in control?
The return of media queriesMedia queries have always been about much more than device sizes. They allow content to adapt to different situations, with screen size being just one of them.
We’ve long been able to check for media types like print and speech and features such as hover, resolution, and color. These checks allow us to provide options that suit more than one scenario; it’s less about one-size-fits-all and more about serving adaptable content.
As of this writing, the Media Queries Level 5 spec is still under development. It introduces some really exciting queries that in the future will help us design for multiple other unexpected situations.
For example, there’s a light-level feature that allows you to modify styles if a user is in sunlight or darkness. Paired with custom properties, these features allow us to quickly create designs or themes for specific environments.
@media (light-level: normal) {
  --background-color: #fff;
  --text-color: #0b0c0c;
}

@media (light-level: dim) {
  --background-color: #efd226;
  --text-color: #0b0c0c;
}
Another key feature of the Level 5 spec is personalization. Instead of creating designs that are the same for everyone, users can choose what works for them. This is achieved by using features like prefers-reduced-data, prefers-color-scheme, and prefers-reduced-motion, the latter two of which already enjoy broad browser support. These features tap into preferences set via the operating system or browser so people don’t have to spend time making each site they visit more usable.
Media queries like this go beyond choices made by a browser to grant more control to the user.
Expect the unexpectedIn the end, the one thing we should always expect is for things to change. Devices in particular change faster than we can keep up, with foldable screens already on the market.
We can’t design the same way we have for this ever-changing landscape, but we can design for content. By putting content first and allowing that content to adapt to whatever space surrounds it, we can create more robust, flexible designs that increase the longevity of our products.
A lot of the CSS discussed here is about moving away from layouts and putting content at the heart of design. From responsive components to fixed and fluid units, there is so much more we can do to take a more intrinsic approach. Even better, we can test these techniques during the design phase by designing in-browser and watching how our designs adapt in real-time.
When it comes to unexpected situations, we need to make sure our products are usable when people need them, whenever and wherever that might be. We can move closer to achieving this by involving users in our design decisions, by creating choice via browsers, and by giving control to our users with user-preference-based media queries.
Good design for the unexpected should allow for change, provide choice, and give control to those we serve: our users themselves.