General
Why is that right there? #chickens #layinghens #eggs #ytshorts
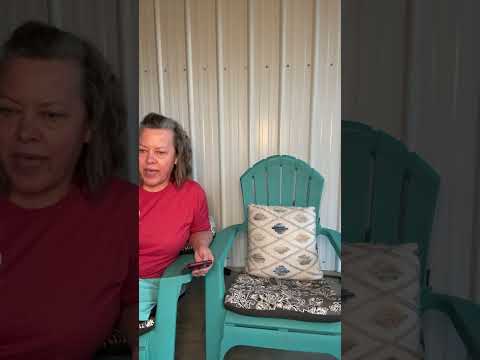
Why did that chicken lay that egg there?

We've got to stop them!
We've got a problem with the pups and we've got to stop it. I also finally made a decision about one of the chickens I thought was a hen. #puppies #chickens #layinghens #homesteading

Playful pups! #puppies #puppyplaying #socute #ytshorts
It's so fun to watch the pups play fighting!

We're going live on 10/26 at 6:00 pm CT.
Join us for some conversations and we'll answer some questions.

Play time with the puppies!
We got something new for the pups and then played with them. We also gave a couple of goats some treats. #puppies #goats #treats #puppyplaytime #homesteading

Live highlight
Join us for some conversations and we'll answer some questions.
Thor is feeling good! #anatolianshepherd #livesockguardiandog #lgd #ytshorts
This cooler weather has got Thor fired up.

A breakfast scrum! #puppies #breakfast #fightingoverthefood #ytshorts
The pups are enjoying breakfast. They just all pile into it!

Trying something new for the pups!
We got something new for the pups and for the chickens. You can also check in on Bert. #puppies #chickens #rooster #bushhogging #homesteading

Bert is just pushing his luck! #chickens #rooster #americanbresse #ytshorts
This crazy rooster keeps going back in there.

A look at the puppies! #puppies #puppylove #ytshorts
Here's a quick look at our adorable puppies!

We're going live on 10/19 at 6:00 pm CT
Join us for some conversations and we'll answer some questions.

The Arkansas State Fair and more work in the woods!
We went to Arkansas State Fair and ate some good food. We also spent a couple of days working in the woods. Come check in on the puppies too. #ArkansasStateFair #fairfood #puppies #deerseason #homesteading

We had two escapees!
It's not unusual for animals to escape sometimes. Just how hard is it to get them back in? Come see some other things going on. #chickens #roosters #goats #puppies #homesteading

What are they staring at? #goats #staringgoats #ytshorts
The goats are trying to figure out what's in that pen.


Real Life Tips for the Modern Housewife
Homemade Gift Baskets for Christmas
- Frugal living
- frugal food
- frugal gifts
- homemade gifts
- last minute gifts
If you have a long Christmas list this year, consider giving the gift of homemade goodies. Your bag, basket, or box can be filled with your special baked goods, candies, and cookies. The nice thing about this basket is that you can make it as frugal as you need it to be. Breads and cupcakes […]
The post Homemade Gift Baskets for Christmas appeared first on The Happy Housewife™.
If you have a long Christmas list this year, consider giving the gift of homemade goodies. Your bag, basket, or box can be filled with your special baked goods, candies, and cookies. The nice thing about this basket is that you can make it as frugal as you need it to be. Breads and cupcakes are less expensive to make than fudge and candies. Find a combination that fits your budget and start baking. I made eight goody boxes this year for the families in our Bible study. I used shirt boxes lined with tissue paper, but in years past I used paper plates, Christmas dishes, tins, and baskets. It usually depends on what I am able to purchase on clearance after Christmas the year before. Our boxes were filled with: Lemon Poppy Seed Bread (mini-loaves) Hershey Kisses Cookies Buckeyes Carmel Corn (so easy, recipe coming next week) Cupcakes Sugar Cookie Cut-outs Plain white shirt boxes work well too. Wrap them or leave them plain and tie a pretty bow around the box. My friend Myra has an awesome tutorial for tying beautiful bows. Your friends will think you spent a million bucks having their gift wrapped! The post Homemade Gift Baskets for Christmas appeared first on The Happy Housewife™.
5 Simple Ways to Menu Plan
- FeedSplice by FeedBlitz
Many people I meet think they are spending too much on groceries every month. Years ago I was in the same position, spending over $800 dollars a month to feed a family of six.
My biggest problem, lack of planning. I would go to the store each week with a small list of essentials- milk, diapers, bread and come home with hundreds of dollars worth of food we didn’t need. This food would then sit in my fridge and pantry for weeks because I didn’t have a plan to use it.
Then one day, when we decided to get serious about our finances, I realized that even though I didn’t have an income, I could help reduce our spending. The first area I examined (after cutting cable) was the grocery budget. I didn’t have any idea how much I was spending each month, but I was sure I could spend less if I just had a plan.
It was then that I learned about menu planning. I started creating weekly meal plans for my family and shopping lists based on the meal plan. I am sure it is no surprise that my monthly grocery budget was drastically reduced, immediately.
Menu planning had another unintended consequence to our family’s budget. We ate out significantly less, thereby saving our family more money and improving our nutrition. Having a meal plan meant less “oh no, it’s 5 o’clock and I don’t know what to make for dinner” moments that resulted in take-out pizza or the drive-thru.
A menu plan meant I was saving money, my family was eating better, and there was less stress at meal times. I sometimes wonder how I went so long without planning. You know what they say,
Those who fail to plan, plan to fail.
If you are struggling in this area, here are 5 Simple Ways to Menu Plan.
Ask Your FamilyIf you want to have a successful plan, ask your family what they like to eat. If no one is eats what you prepare your menu planning will be in vain. Every few months I poll my family and ask them to list their favorite meals. I try to incorporate their favorites into my weekly plan. While I can’t accommodate every person every week, if they know I am considering their preferences in my planning they are better eaters throughout the week.
Make a Meal ListI have about forty meals on my list. One afternoon last year I sat down and made a list based on preferences, nutrition, cost, and convenience. Whenever I am having trouble thinking of a meals I go back to my list. Depending on the budget, or other meals I’ve planned, I choose a few off the list. On weeks that I’m really not motivated, I pick all the meals off the list. This list takes the thinking out of planning.
Make a Weekly OutlineI create a weekly meal outline instead of assigning meals to specific days of the week. This works well for our family due to my husband’s work schedule and the fact that with eight people in a house things are always changing. If a doctor’s appointment comes up, that might be a good night for the crock pot meal or if we are going to be home all day I might make the more involved meal on that evening.
Being flexible with my meal planning has allowed me to be successful with the implementation of these meals.
Create Themed Meal NightsIf you are really struggling with meal planning consider creating themed nights. For example:
- Monday: Pasta
- Tuesday: Ground Beef
- Wednesday: Chicken
- Thursday: Mexican
- Friday: Leftovers
- Saturday: Breakfast for dinner
- Sunday: Meatless meal
This works well for families that have a set schedule as well as for families who need a strict routine. I have child who asks what we are having for dinner before he puts the first bite of breakfast in his mouth. Some children do better when they know what to expect and themed nights can really help with mealtime struggles.
Just Do ItThe hardest part of menu planning…. getting started. Then make a plan. Here is a basic printable menu plan that you can use to get started.
Set aside 30 minutes a week (maybe 45 minutes if this is your first time) to create a menu plan and a shopping list. Sometimes you can create a menu plan just by shopping your freezer and pantry, other times you can create a plan based on your weekly sales flyers.
Menu planning is really quite simple and once you start you’ll wonder why you waited so long to begin.
Get HelpOkay, I realized I said five simple ways, but after years of teaching menu planning classes and talking to hundreds of home managers I realized that sometimes it is cheaper to pay for a low cost menu planning service than to not do it at all.
Here are a few meal planning services and resources I would recommend if you need help getting started.
eMealsI like eMeals because they allow to pick your plan based on family size, grocery store, or dietary needs. The recipes are easy to make and the ingredients are easy to find in the store.
They offer a variety of plans including paleo, clean eating, low calorie, kid friendly, budget friendly, gluten free, vegetarian and more.
Every week you receive your meal plan in your inbox as well as a shopping list. It makes menu planning extremely easy.
They offer a 14 day free trial and monthly fees range from $5-$10 a month.
Sign up for a free 14 day trial here.
Plan to Eat
Plan to Eat is an online menu planner that uses your recipes, scheduled for the days you want them.
It automatically makes your grocery list, organized the way you like to shop, using the recipes you’ve selected. Plan to Eat makes it easier to eat real food, prepared at home, with your family gathered around your own table.
This is a great program if you are on a very specific diet or have picky eaters because you are pulling from your own favorite recipes.
They have a 30 day free trial and the monthly fee is $4.95 a month of $39 for the entire year.
Sign up for your free trial here.
$5 Meal PlanThe $5 Meal Plan is a meal planning service from $5 Dinners. Meal plans include five dinner entrees with sides. Each week they include one freezer friendly, one slow cooker, and one 20-minute meal.
Also included is one lunch and one breakfast, plus a random goodie each week – sometimes it’ll be a dessert, sometimes a beverage, and sometimes it’ll be a snack (sometimes more than one!) – Treat yourself to something fun!
Meals in this meal plan cost less than $2 a person, so this is definitely a budget friendly option.
The $5 meal plan is (you guessed it) $5 a month.
They offer a free four week trial, sign up for your trial here.
The ScrambleThe Scramble is a weekly meal planning subscription service that provides meals, side dishes, and a shopping list. You can customize your weekly meal plan by swapping out recipes with their recipes or your own.
Your shopping list is automatically updated when you swap out recipes.
The price ranges from $4-$10 a month depending on the length of your subscription.
The offer a 14 day free trial, you can sign up here.
Easy Breakfast StationsIf you need a little help in the morning check out this breakfast station idea. The basic idea is that your breakfasts are set up and ready to go so the kids can help themselves to a healthy breakfast. There is a free version, and a paid version that is $3.99.
Save Money. Better Nutrition. Less stress. What’s holding you back from menu planning?
Comments
- Great post! I totally agree with you meal planning has many ... by Sian Breslin
- I planned our families meals for years. Saves money and evening ... by stacey
- I have been surfing online more than 3 hours today, yet I never ... by Alesha Justus
- !@!@!@Hey Webmaster@!@!@! I didn't know the preferred way to ... by Socrates WP Theme
- Why not eat leftovers for lunch and save money there too? ... by Christel C
- Plus 5 more...
- $5 Meal Plan Service on Sale Today Only
- eMeals: 2 Week Free Trial
- New Meal Plan: 21 Freezer Recipes from Costco for $150
The post 5 Simple Ways to Menu Plan appeared first on The Happy Housewife™.
Many people I meet think they are spending too much on groceries every month. Years ago I was in the same position, spending over $800 dollars a month to feed a family of six. My biggest problem, lack of planning. I would go to the store each week with a small list of essentials- milk, diapers, bread and come home with hundreds of dollars worth of food we didn’t need. This food would then sit in my fridge and pantry for weeks because I didn’t have a plan to use it. Then one day, when we decided to get serious about our finances, I realized that even though I didn’t have an income, I could help reduce our spending. The first area I examined (after cutting cable) was the grocery budget. I didn’t have any idea how much I was spending each month, but I was sure I could spend less if I just had a plan. It was then that I learned about menu planning. I started creating weekly meal plans for my family and shopping lists based on the meal plan. I am sure it is no surprise that my monthly grocery budget was drastically reduced, immediately. Menu planning had another unintended consequence to our family’s budget. We ate out significantly less, thereby saving our family more money and improving our nutrition. Having a meal plan meant less “oh no, it’s 5 o’clock and I don’t know what to make for dinner” moments that resulted in take-out pizza or the drive-thru. A menu plan meant I was saving money, my family was eating better, and there was less stress at meal times. I sometimes wonder how I went so long without planning. You know what they say, Those who fail to plan, plan to fail. If you are struggling in this area, here are 5 Simple Ways to Menu Plan. Ask Your Family If you want to have a successful plan, ask your family what they like to eat. If no one is eats what you prepare your menu planning will be in vain. Every few months I poll my family and ask them to list their favorite meals. I try to incorporate their favorites into my weekly plan. While I can’t accommodate every person every week, if they know I am considering their preferences in my planning they are better eaters throughout the week. Make a Meal List I have about forty meals on my list. One afternoon last year I sat down and made a list based on preferences, nutrition, cost, and convenience. Whenever I am having trouble thinking of a meals I go back to my list. Depending on the budget, or other meals I’ve planned, I choose a few off the list. On weeks that I’m really not motivated, I pick all the meals off the list. This list takes the thinking out of planning. Make a Weekly Outline I create a weekly meal outline instead of assigning meals to specific days of the week. This works well for our family due to my husband’s work schedule and the fact that with eight people in a house things are always changing. If a doctor’s appointment comes up, that might be a good night for the crock pot meal or if we are going to be home all day I might make the more involved meal on that evening. Being flexible with my meal planning has allowed me to be successful with the implementation of these meals. Create Themed Meal Nights If you are really struggling with meal planning consider creating themed nights. For example: Monday: Pasta Tuesday: Ground Beef Wednesday: Chicken Thursday: Mexican Friday: Leftovers Saturday: Breakfast for dinner Sunday: Meatless meal This works well for families that have a set schedule as well as for families who need a strict routine. I have child who asks what we are having for dinner before he puts the first bite of breakfast in his mouth. Some children do better when they know what to expect and themed nights can really help with mealtime struggles. Just Do It The hardest part of menu planning…. getting started. Then make a plan. Here is a basic printable menu plan that you can use to get started. Set aside 30 minutes a week (maybe 45 minutes if this is your first time) to create a menu plan and a shopping list. Sometimes you can create a menu plan just by shopping your freezer and pantry, other times you can create a plan based on your weekly sales flyers. Menu planning is really quite simple and once you start you’ll wonder why you waited so long to begin. Get Help Okay, I realized I said five simple ways, but after years of teaching menu planning classes and talking to hundreds of home managers I realized that sometimes it is cheaper to pay for a low cost menu planning service than to not do it at all. Here are a few meal planning services and resources I would recommend if you need help getting started. eMeals I like eMeals because they allow to pick your plan based on family size, grocery store, or dietary needs. The recipes are easy to make and the ingredients are easy to find in the store. They offer a variety of plans including paleo, clean eating, low calorie, kid friendly, budget friendly, gluten free, vegetarian and more. Every week you receive your meal plan in your inbox as well as a shopping list. It makes menu planning extremely easy. They offer a 14 day free trial and monthly fees range from $5-$10 a month. Sign up for a free 14 day trial here. Plan to Eat Plan to Eat is an online menu planner that uses your recipes, scheduled for the days you want them. It automatically makes your grocery list, organized the way you like to shop, using the recipes you’ve selected. Plan to Eat makes it easier to eat real food, prepared at home, with your family gathered around your own table. This is a great program if you are on a very specific diet or have picky eaters because you are pulling from your own favorite recipes. They have a 30 day free trial and the monthly fee is $4.95 a month of $39 for the entire year. Sign up for your free trial here. $5 Meal Plan The $5 Meal Plan is a meal planning service from $5 Dinners. Meal plans include five dinner entrees with sides. Each week they include one freezer friendly, one slow cooker, and one 20-minute meal. Also included is one lunch and one breakfast, plus a random goodie each week – sometimes it’ll be a dessert, sometimes a beverage, and sometimes it’ll be a snack (sometimes more than one!) – Treat yourself to something fun! Meals in this meal plan cost less than $2 a person, so this is definitely a budget friendly option. The $5 meal plan is (you guessed it) $5 a month. They offer a free four week trial, sign up for your trial here. The Scramble The Scramble is a weekly meal planning subscription service that provides meals, side dishes, and a shopping list. You can customize your weekly meal plan by swapping out recipes with their recipes or your own. Your shopping list is automatically updated when you swap out recipes. The price ranges from $4-$10 a month depending on the length of your subscription. The offer a 14 day free trial, you can sign up here. Easy Breakfast Stations If you need a little help in the morning check out this breakfast station idea. The basic idea is that your breakfasts are set up and ready to go so the kids can help themselves to a healthy breakfast. There is a free version, and a paid version that is $3.99. Save Money. Better Nutrition. Less stress. What’s holding you back from menu planning? Related Stories $5 Meal Plan Service on Sale Today Only eMeals: 2 Week Free Trial New Meal Plan: 21 Freezer Recipes from Costco for $150 The post 5 Simple Ways to Menu Plan appeared first on The Happy Housewife™.
Gluten-Free Green Bean Casserole
- FeedSplice by FeedBlitz
By contributing writer Tessa
Green bean casserole was one my very favorites growing up. When our focus on eating turned allergy friendly and real food based, I knew this was a casserole I had to reinvent for our holiday celebrations.
I was shocked at how much better the made from scratch, gluten-free green bean casserole tasted! WOW! It is infinitely tastier and full of real, pronounceable ingredients. Just once, give this homemade version a shot and let your taste buds thank you!
Be warned, you will want to gobble all the crispy onions up, so try and save some for the casserole!
Save Print Gluten-Free Green Bean Casserole Recipe type: Side Dish Serves: 6 Ingredients- 1 pound green beans, trimmed and cut (~ 2 inches)
- 3 tablespoons ghee, allowed butter, or avocado oil
- 8 ounces mushrooms, finely diced
- ½ cup finely diced onion
- 2 cloves garlic, minced
- ½ teaspoon thyme
- ½ teaspoon sea salt
- 2½ tablespoons rice or coconut flour (use slightly less coconut flour)
- 1 cup chicken broth
- ½ cup full fat coconut or nut milk, unsweetened (or regular cream)
- ¼ cup white wine
- Up to 1 tablespoon lemon juice or 3 tablespoons allowed sour cream (optional)
- 1 medium size sweet or yellow onion quartered and thinly sliced. (I use my food processor)
- ½ cup rice flour (or ¼ cup coconut flour + ¼ cup arrowroot starch)
- 1 teaspoon paprika
- ½ teaspoon garlic powder
- ½ teaspoon sea salt
- 2 - 4 tablespoons any milk to get dry mixture just wet, like a batter
- Bring a pot of salted water to a boil. Blanch the beans in the boiling water for about 2-3 minutes. They will continue to cook in the oven, so you want them barely cooked and bright green.
- Drain the beans and immediately rinse under cold water to stop the cooking. Set aside.
- In a large skillet, melt the ghee over medium heat and add the mushrooms and onions. Saute until the onions are soft and the mushrooms are wilted, 5-7 minutes.
- Stir in the garlic, thyme, and salt and saute for about a minute.
- Stir in the flour, dispersing evenly. Stir in chicken broth, milk, and white wine, whisking into the vegetables.
- Bring the mixture to a gentle boil to thicken, and turn off the heat. I like to add a touch of lemon or allowed sour cream for a little tang. Taste and decide for yourself.
- Stir in the blanched beans and pour into a pan of your choosing. Size is not overly important as you are just heating the mixture through.
- Place the pan in a 400 degree oven while you make the crispy onions. Set the timer for 30 minutes.
- Heat a large skillet over medium heat and add your fat for frying.
- Place the sliced onions and all the dry ingredients into a bowl and stir.
- Add the milk, a little at a time just until there is no dry flour left, like a batter.
- When your oil is hot (test a onion and see if it immediately sizzles), add the onions in batches to the skillet. Do not crowd the onions. Flip when golden. Brown up the other side and remove to a paper towel lined plate while you continue with the rest on the onions. Continue to add oil if the pan becomes dry.
- Top the green beans and continue to bake for the remainder of the 30 minutes. Casserole should be hot and bubbly.
- Au Gratin Potatoes
- Baked Zucchini Chips
- Apple & Walnut Stuffed Acorn Squash
- Maple Pecan Sweet Potato Casserole
- More recipes from Tessa
Related Stories
- Mushroom & Parmesan Garlic Stuffing
- Homemade Cranberry Sauce with Walnuts
- Roasted Cherry Tomatoes with Balsamic Reduction
The post Gluten-Free Green Bean Casserole appeared first on The Happy Housewife™.
By contributing writer Tessa Green bean casserole was one my very favorites growing up. When our focus on eating turned allergy friendly and real food based, I knew this was a casserole I had to reinvent for our holiday celebrations. I was shocked at how much better the made from scratch, gluten-free green bean casserole tasted! WOW! It is infinitely tastier and full of real, pronounceable ingredients. Just once, give this homemade version a shot and let your taste buds thank you! Be warned, you will want to gobble all the crispy onions up, so try and save some for the casserole! Gluten-Free Green Bean Casserole Recipe type: Side Dish Serves: 6 Ingredients 1 pound green beans, trimmed and cut (~ 2 inches) For the Mushroom Sauce 3 tablespoons ghee, allowed butter, or avocado oil 8 ounces mushrooms, finely diced ½ cup finely diced onion 2 cloves garlic, minced ½ teaspoon thyme ½ teaspoon sea salt 2½ tablespoons rice or coconut flour (use slightly less coconut flour) 1 cup chicken broth ½ cup full fat coconut or nut milk, unsweetened (or regular cream) ¼ cup white wine Up to 1 tablespoon lemon juice or 3 tablespoons allowed sour cream (optional) For the Crispy Onions 1 medium size sweet or yellow onion quartered and thinly sliced. (I use my food processor) ½ cup rice flour (or ¼ cup coconut flour + ¼ cup arrowroot starch) 1 teaspoon paprika ½ teaspoon garlic powder ½ teaspoon sea salt 2 – 4 tablespoons any milk to get dry mixture just wet, like a batter Instructions Bring a pot of salted water to a boil. Blanch the beans in the boiling water for about 2-3 minutes. They will continue to cook in the oven, so you want them barely cooked and bright green. Drain the beans and immediately rinse under cold water to stop the cooking. Set aside. For the Mushroom Sauce In a large skillet, melt the ghee over medium heat and add the mushrooms and onions. Saute until the onions are soft and the mushrooms are wilted, 5-7 minutes. Stir in the garlic, thyme, and salt and saute for about a minute. Stir in the flour, dispersing evenly. Stir in chicken broth, milk, and white wine, whisking into the vegetables. Bring the mixture to a gentle boil to thicken, and turn off the heat. I like to add a touch of lemon or allowed sour cream for a little tang. Taste and decide for yourself. Stir in the blanched beans and pour into a pan of your choosing. Size is not overly important as you are just heating the mixture through. Place the pan in a 400 degree oven while you make the crispy onions. Set the timer for 30 minutes. For the Crispy Onions Heat a large skillet over medium heat and add your fat for frying. Place the sliced onions and all the dry ingredients into a bowl and stir. Add the milk, a little at a time just until there is no dry flour left, like a batter. When your oil is hot (test a onion and see if it immediately sizzles), add the onions in batches to the skillet. Do not crowd the onions. Flip when golden. Brown up the other side and remove to a paper towel lined plate while you continue with the rest on the onions. Continue to add oil if the pan becomes dry. Top the green beans and continue to bake for the remainder of the 30 minutes. Casserole should be hot and bubbly. Notes This casserole can easily be made a couple of days in advance and then reheated in the oven. Just assemble the whole casserole (including the onions on top), cover and leave in the refrigerator until you are ready to bake. 3.2.2704 You might also like… Au Gratin Potatoes Baked Zucchini Chips Apple & Walnut Stuffed Acorn Squash Maple Pecan Sweet Potato Casserole More recipes from Tessa Related Stories Mushroom & Parmesan Garlic Stuffing Homemade Cranberry Sauce with Walnuts Roasted Cherry Tomatoes with Balsamic Reduction The post Gluten-Free Green Bean Casserole appeared first on The Happy Housewife™.
Soccer Birthday Cake
- FeedSplice by FeedBlitz
- Kitchen Tips
A soccer birthday cake is very easy to make. Even a beginning cake decorator will have this cake finished in under an hour.
If you have a child who loves soccer (and who doesn’t have this year’s USWNT) this cake is perfect for a soccer them...
The post Soccer Birthday Cake appeared first on The Happy Housewife™.
A soccer birthday cake is very easy to make. Even a beginning cake decorator will have this cake finished in under an hour. If you have a child who loves soccer (and who doesn’t have this year’s USWNT) this cake is perfect for a soccer themed birthday. When my children were young, I make many of their cakes using Legos or Playmobil. The “toys” would double as a gift for them and it make decorating the cake so much easier and faster. If your child isn’t a soccer cake fan, you could create a similar cake with hockey, football, basketball or baseball. The most difficult part is the “grass” but would make it a whole lot easier. Soccer Birthday Cake Supplies 1 9×13 cake Green frosting White frosting 1 hard candy (shaped like a ball) or Soccer set I used a 9×13 pan for the soccer birthday cake, but you can also use a sheet cake pan if you need a bigger cake. If making a sheet cake, bake two cakes and stack them on top of each other. Put a layer of frosting between the cakes. Decorate as desired. Use the round candy for the soccer ball. If you want to use a “Whopper” you can draw the soccer ball design on the chocolate with your white frosting. If you don’t have LEGO or Playmobil characters you can use popsicle sticks to create players. Color copy a team photo for your child, cut out each player and glue it to the sticks. It will take a bit more time, but the personalization is really fun. If you are serving the soccer birthday cake for a party the kids will have a fun time finding themselves on the cake! Need more cake baking inspiration. Try these simple cakes. Star Wars Birthday Cake Barbie Birthday Cake Wizard of Oz Cupcakes The post Soccer Birthday Cake appeared first on The Happy Housewife :: Cooking. Comments The cake is so cute. I am too lazy to learn how to use any … by Flora I made a soccer ball cake once by using a round glass casserole … by Kirsten H I don’t know how to make flowers either… by TheHappyHousewife Cute! I’m just about to go decorate a construction cake. I will … by Judy This looks so fun to make (and fun to eat!). The grass tip can … by Food on the Table Great Idea, I have a little soccer player that has a birthday … by Lisa Stice Related Stories How to Keep Food Cool at BBQ’s How to Substitute Applesauce for Oil in Baking The post Soccer Birthday Cake appeared first on The Happy Housewife™.
Cheapest Way to Mail Packages
- FeedSplice by FeedBlitz
- Frugal living
- cheapest way to mail packages
It’s frustrating when it costs more ship a gift than buy a gift. I’m always searching for the cheapest way to mail packages.
The lines at the post office are especially long over the holidays, but did you know the post office will pick up p...
The post Cheapest Way to Mail Packages appeared first on The Happy Housewife™.
It’s frustrating when it costs more ship a gift than buy a gift. I’m always searching for the cheapest way to mail packages. The lines at the post office are especially long over the holidays, but did you know the post office will pick up packages too? You can save time and money shipping packages if you follow some of these tried and true tips. If you are wondering how to ship packages the cheapest way possible, I’ve compiled my best tips below. Cheapest Ways to Mail Packages Free Shipping It is possible to ship your packages for free! If you are fine with shopping online. Almost every online retailer is offers free shipping at some price point. During the holidays, this price point usually drops and even the retailers that don’t offer free shipping normally will include it in their holiday promotions. offers free two-day shipping all year round to its members. You can also receive free shipping if you spend $35 or more on select items, even if you aren’t a Prime member. Rakuten since they often have a coupon code as well as cash back on my purchases. Cheapest Way to Ship Packages via the Post Office Media Mail The post office has several different options for shipping a package. The cheapest is almost always Media Mail, but you must be mailing media (intended for educational materials). This includes items such as books, film, manuscripts, sound recordings, video tapes, and computer readable media- CDs, and DVDs (restrictions apply*). You can mail a 10 pound package for only $7.25 using Media Mail. The problem with media mail is there is no guaranteed delivery date (delivers within 2-8 days). If you are in a hurry, this is not a great option. *Note that video games regardless of how they are packaged and USB drives are not eligible for media mailing. USPS Retail Ground The cheapest way to mail non media via the USPS is Retail Ground. Remember to always check the price. Many times Retail Ground isn’t much cheaper than priority and it is much slower (2-8 business days). retail ground is calculated by weight and location. If you aren’t in a hurry or need to mail an oversized package this is a good shipping option. You can mail a 10 pound box across the country (from Maryland to Washington State) for about $25. You can learn more on the Post Office website. Priority Mail The USPS has introduced Flat Rate Priority Mail boxes. Whatever you can jam in one of their boxes you can ship for one price. If you box weighs five or fifty pounds you pay the same price. The flat rate priority mail boxes are free and are available at your local post office, or you can have them shipped to your door. Prices to ship priority mail in a flat rate box vary from $6.70 to $18.70 depending on box size. If you choose to use your own packaging you can send it priority mail too. Prices are based on weight and location and start at about $6. Priority mail is 2 to 3 day shipping, but it is not guaranteed. What is nice about the priority mail option from the post office is that the box doesn’t have to keep its exact shape. So if you want to use a vacuum back to compress clothing and then stuff the box totally full (so it’s bulging) you can use this service. The flat rate box is usually the cheapest way to ship clothing. Priority Mail Express (Formerly Priority Mail) If you are short on time but not on money, Priority Mail Express is your best option at the USPS. Express mail starts at $24 for an envelope and goes up from there. It is guaranteed overnight delivery to most locations and you get a refund if they don’t deliver it by the guaranteed day. Unfortunately priority mail express is not one-day delivery for some rural addresses. Other USPS Details Insurance is not including when shipping via the USPS, unless you ship priority. You can purchase insurance for your packages, as well as other options such as delivery confirmation, tracking and more. The post office will come pick up your packages as long as they are ready to be shipped. It is a free service as long as you are using an expedited service like Priority Mail, Priority Mail Express, Global Express Guaranteed, or Merchandise Returns services. There is also an on demand service which costs around $18 per pick-up, but allows you to schedule the window of pick up. You can find out more about mailing packages from your home on the pick-up options section of the USPS website. How to Save on Shipping with UPS (and FedEx) I love seeing that big brown truck pull up to my house, don’t you? The UPS has a shipping matrix that rivals most calculus textbooks, but the basic deal is, the heavier the package and the farther away it is going the more you pay. The benefit of shipping via UPS (or FedEx) is that you know when the package is going to arrive, have access to tracking, and insurance is included in the price, up to $100 worth of coverage. Below is an example of what 20 pound package shipped from Maryland to Florida would cost using the different UPS options. Next Day Air = $159.40 2 Day Air = $75.59 3 Day Select = $52.17 Ground = $23.51 To compare, that same box shipped via the post office with 2 day priority mail is $43 at the post office. You can save even more with the priority mail flat rate large box. It costs $18.90 and gets there about the same time as UPS Ground. Use the online tools to find the best deal when shipping heavy packages. While UPS’s shipping matrix is complicated, it is actually very easy to calculate the cost of postage. Visit their website and use the shipping calculator to find out exactly how much it will cost to mail your package. UPS will also pick packages up at your door if you schedule a pick-up. FedEx is similar to UPS and you can find out their shipping rates on the FedEx website. You can also use FedEx Flat Rate (similar to the USPS) which can save on shipping over UPS and USPS priority mail depending on the package. Cheapest way to mail a package The bottom line, it all depends on what you are shipping. If you are sending a large, heavy item, such as a television or grill, buy it on Amazon Prime and get free shipping. It’s even worth signing up for the free trial and canceling your prime membership after 30 days if you need to send large bulky items over the holidays. The USPS Priority Mail flat rate boxes are great for shipping heavier small items like clothes, toys, kitchenware, and any metal items. If your items are light consider using your own packaging and using Retail Ground or first class mail if the item is under 15 ounces. UPS or FedEx is usually the best option for shipping heavier items and provides superior tracking and delivery guarantees. With the new FedEx Flat Rate shipping method you might save more shipping with FedEx. Whatever you chose remember to read the shipping guidelines before you ship that nail polish or perfume. There are many items that you cannot ship and you don’t want to waste the time or money shipping a prohibited item that will be returned. Save on shipping boxes and packaging Remember to save boxes from Amazon and reuse them to ship your own packages. The Post Office, UPS, and FedEx all offer free boxes for their flat rate shipping. Don’t buy tape if you are shipping USPS Priority Mail flat rate box. They have tape at the post office and most boxes are self sealing. Reuse newspaper, bubble wrap, and packing peanuts to avoid having to purchase padding. Use the smallest box/ envelope possible. It’s almost always cheaper to ship using an envelope, so if the item fits, use the smallest package possible. How to get $5 in free postage! Stamps.com is the easiest most convenient way for everyone to manage your mailing needs. It can almost completely eliminate trips to the Post Office! Print USPS-approved postage right from your PC. Use Stamps.com postage to send letters, packages, and even Priority Mail. Stamps.com offer a 4-week no-risk trial for all new customers. Get $5 in free postage when you sign up! Check out all the details for Stamps.com here! Also, check out 5 Free Shipping Options for the Holidays to avoid paying for shipping altogether! The post Cheapest Way to Mail Packages appeared first on The Happy Housewife :: Frugal Living. Comments How current is this information? Great information but i want … by eve Susan Martin – Did you ever get an answer to this? I am … by Scott Scharling Hi there!! My sister and I own a store on Etsy and we ship … by Rusty Nail And Paint Am sending cookies from FL to NYC, what is the cheapest way to … by Ellie I wanna send a package to Cuba, where could i find the cheapest … by Brianna Plus 5 more… Related Stories Simple Ways to Save Money 5 Simple Ways to Not Have a Car Payment Last Minute Gift Ideas The post Cheapest Way to Mail Packages appeared first on The Happy Housewife™.
Life Changing Books I Read This Summer
- Real Life
I truly believe a great book can change your life. However life changing books are useless if you don’t read them. This year I decided to focus on reading more books and scrolling less. Don’t get me wrong, I like reading articles online, but I find that once I start reading them I can’t stop. […]
The post Life Changing Books I Read This Summer appeared first on The Happy Housewife™ :: Real Life.
Related StoriesThe post Life Changing Books I Read This Summer appeared first on The Happy Housewife™.
I truly believe a great book can change your life. However life changing books are useless if you don’t read them. This year I decided to focus on reading more books and scrolling less. Don’t get me wrong, I like reading articles online, but I find that once I start reading them I can’t stop. Then I get sucked into a rabbit hole of articles that aren’t super helpful or educational. This summer we spent two weeks at the beach and instead of scrolling mindlessly through Instagram I decided to read as many books as I could. A few months ago I posted the list on Facebook. I didn’t think any thing of my book list until I started getting texts from friends. “Thanks for recommending this book… it was life changing.” The more I thought about the messages, the more I realized that some of them were truly life changing books. I started recommending some of my favorites to more people. (even buying them for my friends) I found myself referring to them in casual conversation. After doing this for months I realized it was time to share them with as many people as possible, so naturally I’m sharing them here. Finally, I read most of these books on a Kindle Paperwhite. For years I’ve advocated for paper books. Digital books didn’t “feel right” to me. However I realized that I read less because I couldn’t read at night (didn’t want to keep my husband awake with a light) or I needed to find my glasses to read, or I didn’t want to carry around a bag of books. (I tend to read multiple books at the same time) The Kindle Paperwhite changed everything. First it’s waterproof so I can read by the pool, beach, etc and not worry about ruining it. Second it’s super bright so you can read outside and still see all the text. Third I don’t need glasses to read on the paperwhite because you can make the text HUGE . As I mentioned earlier, some of the books I read this summer were truly life changing. Other books I read were interesting and useful and I know they will help me grow as a person. I also read a few bad books (some not mentioned below because I couldn’t get through them) and a few books that were just ok. One important lesson I learned this summer is that it is ok to stop reading a book if you don’t like it. This was actually a very freeing action for me. Before I would slog through books I didn’t like because I thought maybe it would get better. Or I would feel guilty because I had purchased the book. Now I realize my time is more valuable than a bad book. If I’m not loving a book by the 4th chapter I’m done reading it. There are so many amazing books out there and I only have so much time to read them. It’s not worth wasting that time on a book that isn’t right for me. Life Changing Books I Read this Summer Finish I’m almost finished with this book by one of my favorite speakers/ authors Jon Acuff. I’ve known I was a bit of a perfectionist since I was young, however I didn’t realize how much it affected how I operate until I started reading this book. While reading Finish I’ve had multiple “a-ha” and “that’s so me” moments. If you struggle with perfectionism, read this book! The books is also laugh out loud funny so don’t read it at night while someone else is sleeping. Atomic Habits BUY THIS BOOK. So good. One of the best books I’ve read in a long time. I would read bits and pieces of it aloud to anyone who would listen to me last week. If you struggle to get things done, or have goals in your life you can’t seem to hit this book is awesome. I consider myself a fairly disciplined person and I learned a ton from this book. Atomic Habits gives you lots of practical tips and techniques to create systems to be more productive and actually accomplish the things you want to do. Daring Greatly I read this book earlier in the year after a friend recommended it. I haven’t followed Brene’ Brown much, but after reading this book I added several of her other books to my list. From Amazon: Brown explains how vulnerability is both the core of difficult emotions like fear, grief, and disappointment, and the birthplace of love, belonging, joy, empathy, innovation, and creativity. She writes: “When we shut ourselves off from vulnerability, we distance ourselves from the experiences that bring purpose and meaning to our lives.” This book changed my perspective on relationships and helped me to realize that being vulnerable with the right people is healthy. (I tend to keep things to myself) It also helped me realize that not sharing things with people who aren’t in my inner circle is ok too. Everyone doesn’t have to know everything about you. (This can be really hard when you live your life online). This is a powerful book and I highly recommend it. Tiny Hot Dogs This book was recommended to me on Amazon because of other books I had read. Tiny Hot Dogs is part memoir, part lessons learned in building and growing a small business. I’m not sure I’ve ever read a memoir before but it was entertaining. The author is a great story teller and there’s life lessons woven through each chapter plus a recipe. YUM. If you are a small business owner, or trying to start your own business this book is a great source of encouragement, example and humor. Read it! Get ready for several laugh out loud moments in this book, including a hilarious section about the author having a crush on Alec Baldwin (the old and chunky Alec, not the young and dashing Alec) and then meeting him in real life. I had tears rolling down my face during this part I was laughing so hard. The Most Powerful Woman in the Room is You Life changing! I LOVED this book. Well-written and funny, I was sad when it ended. It’s basically about how to sell… anything to anyone. This book impacted me so much I’m reading it again now. The author’s story is powerful and motivating. While the book is about selling, it’s really about being comfortable in your own skin, taking risks, and standing up for yourself. Even if you don’t have a business it’s worth reading. Never Split the Difference Even if you don’t negotiate in your business, you negotiate every day in life. A MUST READ. This book is all about negotiating, and was written by a former FBI negotiator. It was full of interesting stories (I really do like a good story) which he tied back into business, life, and just about everything else. There is story in the book about the author negotiating for a car. That section alone is worth the price of the book if you are planning on buying a big ticket item in the future. A few friends have told me they thought this book started a big slow (I didn’t think so). So if it seems slow, power through the book, it will be worth it. Shoe Dog This is probably the best memoir I’ve ever read. (Well I’ve only read two… but this one is the best) Written by Phil Knight, founder of Nike, I couldn’t put this book down. Even though I know how the story ends (Nike survives and grows in to a massive successful business) this book hooked me from the beginning. In Shoe Dog, Phil details how he built Nike, including all the struggles and hardships that an entrepreneur or business owner faces. I was completely captivated by this book and was actually sad when it ended. This book is a must read. Lean In I’m a little late to the party with this book as I think it was popular a few yers ago. This book is definitely written for women who are in corporate America, however I think any female in business can learn from this book. I love the author’s positive perspective and found the book helpful. Of Mess and Moxie My sister recommended this book to me while she was visiting this summer. I read it in a few nights and loved it! It’s a great mixture of laugh out loud funny and things that make you think a little more about your world view. I found myself reading passages of this book out loud to anyone who would listen. The Essential Habits of 6- Figure Bloggers I expected to not be impressed by this book, but it was free on Kindle Unlimited. Nothing mind blowing, but it did reinforce a few things. A. Always invest in your education (buy courses, read books, go to conferences) B. Join a Mastermind and be held accountable. If you are thinking about starting a blog it might be worth reading. You are a BadA$$ Not sure why I decided to read this book, probably because Amazon put it in my feed every 2-3 hours. I painfully made my way through it. If you need some convincing that you are one, message me and I’ll give you a pep talk. You do not need to read this book. Girl Code This was another book Amazon recommended to me. I’m almost finished with it. It’s one of those books that is filled with interviews of successful entrepreneurs. I’m not a huge fan of books that are primarily short interviews of other people, however I did enjoy learning about other successful business owners. The primary message in this book is for women to stop tearing each other down and start building each other up. Unfortunately this is something I’ve seen far too much of being in the blogging world for all these years. It is a great reminder that there is room at the table for everyone… you don’t have to pull someone down to build yourself up. I’ll be adding to this list as a I finish more books this year. If you aren’t in the habit of reading a new books each year I want to encourage you to start! Most of these books are available for free at your local library. If you don’t love to read many of these books are available on audio. Instead of mindless scrolling in carline, try reading a book. It might be life changing for you as well. In case you missed it Best Books for Boys Best Books for Girls Great Book Series for Kids The post Life Changing Books I Read This Summer appeared first on The Happy Housewife :: Real Life. Related Stories Learn How to Adore Your Wardrobe! The post Life Changing Books I Read This Summer appeared first on The Happy Housewife™.
How to Save on Sherwin Williams Paint
- Deals
- FeedSplice by FeedBlitz
- redirect
I love Sherwin-Williams paint but it is expensive! I do believe it is worth it to pay more for good paint because you end up using less paint, the paint lasts longer, and it has better coverage than cheaper brands.
I use to wait until Sherwin-Williams ...
The post How to Save on Sherwin Williams Paint appeared first on The Happy Housewife™.
I love Sherwin-Williams paint but it is expensive! I do believe it is worth it to pay more for good paint because you end up using less paint, the paint lasts longer, and it has better coverage than cheaper brands. I use to wait until Sherwin-Williams paint went on sale to purchase it, however I’ve learned a few tips to save money on my favorite paint and not always wait for a sale. Typically when Sherwin-Williams paint goes on sale it is 30-40% off the regular price. I prefer shopping at the Sherwin Williams paint store because I like their customer service. Also if you shop at the same paint store, they have all the colors you’ve purchased in their system, which is convenient. But if you can’t wait to paint, here are some ways to save on my favorite, Sherwin-Williams paint. Sign up for their mailing list on the website. Their loyalty program is called Paint Perks and when you sign up you will receive a coupon for $10 off your $50 purchase. You also get special every day pricing and you will be notified of their sales. Take advantage of the military discount. Did you know Sherwin Williams offers a 15% discount for active duty military as well as their spouses, reservists, and retirees? Show your military ID to receive the discount. Unfortunately you cannot combine the military discount with the sales. Buy during the sale, paint later. My awesome sister shared this money saving tip with me. You can buy SW paint during the sale and then have it mixed at a later date when you are ready to paint. If you know you will be doing some painting in the near future but aren’t sure what colors you are going to use, buy the paint when it goes on sale, then take it back to have it mixed when you are ready to paint. Make sure you store the paint in a cool place (like a basement or interior closet). Paint does not store well in the heat. Buy Sherwin-Williams paint at Lowe’s. I cannot tell you how happy I was when I found out that Lowe’s sold Sherwin-Williams paint! Lowe’s offers Showcase, Ovation, Infinity, and Weather Shield Sherwin-Williams paint. You have to shop at the Sherwin-Williams store to purchase Duration, Emerald, Cashmere, Harmony, or Super Paint. Personally, I’ve used Ovation from Lowe’s and Duration from the Sherwin-Williams store and I think they are comparable. Ovation is paint with primer, so it goes on a bit thicker, (which is not my preference). However I feel the coverage of those two paints are comparable. The Sherwin-Williams paint is less expensive at Lowe’s, and you can use a military discount if you have one, but you are limited in the choice of finishes. I LOVE Sherwin-Williams paint. For each of the three houses I’ve owned, every room has been painted with Sherwin-Williams paint. I typically wait for the sales, but when I want to redo a room over a weekend, I purchase my SW paint at Lowe’s. Here are some of my favorite colors. Sherwin-Williams Misty Sherwin-Williams Sea Salt (painting in process, can you believe I painted this room by myself!) Sherwin Williams Sea Salt on the walls, Sealskin on the railing, Pure White on the trim and spindles. Sherwin-Williams Accessible Beige Sherwin-Williams Indulgent (this is a gorgeous purple color for a little girl’s room!) Sherwin Williams Hubbard Squash My current home is primarily gray, Sherwin-Williams Front Porch. More painting tips you need to read before you get started! How to experiment with paint color on your wall. How to remove paint from your carpet. How to store leftover paint. How to paint kitchen cabinets. The post How to Save on Sherwin Williams Paint appeared first on The Happy Housewife :: Deals. Comments Just this year I discovered Sherwin Williams paint and I am SO … by LeaAnne Related Stories Target: Free Shipping and Free Returns Best Money Saving Apps Must Have Black Friday Shopping Apps The post How to Save on Sherwin Williams Paint appeared first on The Happy Housewife™.
How to Get More Done
- FeedSplice by FeedBlitz
- Organize
Do you have a friend who seems to be able to get more done than anyone else you know. That person who is super efficient, always one time, and never seems frazzled?
Either that person has unlimited wealth and no children… or they know how to ge...
The post How to Get More Done appeared first on The Happy Housewife™.
Do you have a friend who seems to be able to get more done than anyone else you know. That person who is super efficient, always one time, and never seems frazzled? Either that person has unlimited wealth and no children… or they know how to get more done because they make lists. I’ll admit I’m a list person, so this comes easy for me. However there have been times when I’ve been super overwhelmed and I thought lists were just one more thing I had to do. I was so wrong! When I don’t write down (or type- it is 2019) the things I need to do each day I simply don’t get as much done. This also goes for food. If I don’t write down what we are eating for the week, what we need to buy at the store, I ALWAYS spend more money at the grocery store and we end up with a few emergency trips to Chick-Fil-A for dinner. But I know there are some of you who hate lists! It’s not that you don’t want to get more done, but you simply don’t like writing things down. If I’m being honest it’s kind of hard to relate to you. ?I love lists so much that I was making them when I was a little kid. Remember when you were a child? You probably made a Christmas or birthday list. Do you know why your parents asked you (or probably didn’t ask you, lol) to make a list? Because there was no way they would remember everything you wanted if it wasn’t written down. The same goes for life. There’s no way you can remember everything you need to get done each day or week if you don’t write it down. If you HATE making lists I’ve come up with some tips to help you. You’ll get more done and save time and money in the process. How to Get More Done (by making a list) Use someone else’s list. If the thought of creating a list is completely overwhelming, use someone else’s list. I’ve done this for years out of convenience. I’m currently using the Ultimate Home Checklist for all our household chores. Why reinvent the wheel? (Right now you can grab it for less than $5 when you use the code HAPPY) I integrate jobs on the checklist with other things I need to get done every day. The nice thing about a chore checklist is that your family can help complete those items on your list. Take your list and cut it in half. Chances are you over schedule yourself and while I feel like I have productivity super powers, I’m often staring at a half finished list at the end of the day. I once heard a daily to-do list called a HIT list (High Impact Tasks). I have long term goals (reorganize all our books) and short term goals (repaint the dining room ceiling where we had a leak) however, the HIT list should be things that have to be done today. Sometimes things from our long term or short term list end up on our HIT list, but not all tasks and definitely not every day. Don’t forget the VIT’s. VIT’s are very important tasks – things that NEED to be done today. These tasks go at the top of your list and are completed before the less important tasks on your list. Schedule some quick wins. Did you ever read your children the Frog and Toad books? In one of the books they make a list. On the list is “get dressed” and “make bed.” My kids always loved thinking getting dressed could be something they could cross off their list. While it might seem silly to write shower or get dressed on your list, being able to cross off things immediately is a great motivator. Start fresh every day. Don’t skip this one. Start every day with a new list. Don’t continue to add new things to the same piece of paper or spreadsheet. If you have to move something to the following day it will help you evaluate how important it is to you. It might not need to be on your list in the first place! Get more done by creating your list first. This means you make your list before you check your texts, messages, or emails. Personally I recommend making a list the night before and here’s why. Who is in charge of your day? You or the people around you? If you start your day checking texts, messages or emails, the things other people need/ want from you start to creep into your list. Sometimes this is fine, but if you are a people pleaser you will end up putting the less important tasks of others in front of the VIT’s of yours. Ideally you make the list and “fit in” the desires of those around you. If you get caught up in email, texts, and messages, chances are they will determine your daily schedule, not you. Add buffer time. Margin, buffer, space, whatever you want to call it, it’s something most people forget about when making a list. It’s always good to schedule an extra thirty minutes to an hour in your daily schedule. This allows for disruptions and also keeps you on track when things take longer than expected. Most of the time when I don’t get through my list (or end up showing up late for something) it’s because I have no buffer time. Also, when I don’t have any margin in my day, simple tasks that take longer than expected end up frustrating me to no end! I’ll find myself super exasperated over dumb things because they are taking too much time. If I have extra time built into my schedule I can deal with the things that don’t go exactly as planned. Eat the frog! Have you ever read this book? (For some reason I’m focused on frogs right now.) If you haven’t read this book and you are feeling stuck – READ IT TODAY! It’s a short book and you should be able to read it in less than a week. If you struggle with getting started, making lists, tackling overwhelming tasks, this book really simplifies it. According to the book, once you’ve figured out your Very Important Tasks, do the thing you’re least looking forward to first. That way, you’ll get it out of the way early and have a great feeling of accomplishment. You can get more done every day! Just last month I was feeling pretty overwhelmed by all the to-do’s spinning around in my head. After talking to a few friends I realized I needed to sit down, make a list, and start getting things done. The next morning I woke up with my list and immediately got to work. Within a few hours I had already completed over half the list. Thank goodness I did because on my way to the grocery store I received a text from my son that our second granddaughter was about to make her appearance into the world! Because I had a list (and had already worked through a big chunk of it) I was able to spend the day at the hospital, while the rest of my family finished my list. That day was a powerful reminder to me about how making a list impacts my ability to get things done on a daily basis. Not only does making lists improve your productivity, it helps you focus on the right things every day. Getting through the things you have to do gives you time for all the things you want to do. And for me, that’s what matters most. The post How to Get More Done appeared first on The Happy Housewife™.
Bath Bombs (Lavender Lemon)
- DIY
- FeedSplice by FeedBlitz
- homemade christmas gifts
- homemade gifts
Instead of spending money on expensive bath bombs you can make them yourself in less than 30 minutes.
I just checked the price of the popular LUSH bath bombs and they are $8 each! How fun would it be to make your own for a fraction of the price?
The...
The post Bath Bombs (Lavender Lemon) appeared first on The Happy Housewife™.
Instead of spending money on expensive bath bombs you can make them yourself in less than 30 minutes. I just checked the price of the popular LUSH bath bombs and they are $8 each! How fun would it be to make your own for a fraction of the price? They are great to give as homemade gifts and you can create your favorite scents for each season. This lavender lemon scented recipe is one of my favorites. However, customize the recipe with a your favorite essential oils. Remember to change the colorant to match your scent. You will need to spend a little money initially for things like soap colorant, citric acid and molds. However the main ingredients are items you probably already have in your pantry. The plastic molds are reusable, so once you make the initial investment you won’t have to replace them for a while. If you use and love essential oils, combine some of your favorite scents to make additional bath bombs. Print Lavender Lemon Bath Bombs How to make your own bath bombs. Prep Time 5 minutes Cook Time 10 minutes Servings 4 bath bombs Cost $5 Ingredients 1/2 cup Citric acid 1 cup Baking soda 3/4 cup Cornstarch Purple soap colorant Lemon essential oil Lavender essential oil 1 tablespoon Dried lavender 1/4 cup Water 1 set Plastic molds Instructions In a large mixing bowl combine your corn starch, baking soda and citric acid and mix well. In a small glass bowl, combine your water, a few drops of purple soap colorant and 5 drops of lemon essential oil and 5 drops of lavender essential oil. Slowly mix your water (with colorant and oils) into your dry ingredients and mix while pouring. Place a 1/2 teaspoon of dried lavender in the bottom of one circle halve and then fill that side up with your bath bomb mixture. Then fill up your second halve with your bath bomb mixture Press your 2 circle halves together. Let the molds set overnight. Place bath bomb in a warm/hot water bath and relax with the fizzing scent of lavender lemon. Notes A few tips to create a better bath bomb. Use the molds. It’s hard to create a nice sphere when molding by hand. Also, let dry for at least 24 hours. I’m one that tends to like to rush EVERYTHING, but you have to let everything harden. If you can wait 48-72 hours that’s even better. Don’t substitute the corn starch. Corn starch keeps the bath bombs from getting lumpy and they won’t crumble as easily. If at first you don’t succeed try again. There is a little bit of science involved with this recipe. Depending on your altitude you may need to adjust the liquid. My girls absolutely love these! In fact, until we remodeled our bathroom this summer, we didn’t have a bath tub in our home. Can we discuss for a minute how a house with four bathrooms does not have a tub?!?! Also let’s talk about the fact that I didn’t notice this until after we moved in?? Not to get totally off subject, but one of our homes did not have a door on the bathroom. When you were in the bedroom you got a view directly to the glass shower. Also, did not notice until after we owned the home. Maybe I need to pay more attention to bathrooms before buying houses in the future? My girls packed the bath fizzies when we stayed in hotels so they could use them in the tub. Now that they have a bathtub they’ve been quickly using up all the bath accessories they’ve been given as gifts over the past several years. Remember, if you have a jacuzzi tub (many new homes have them in their master bathroom) do not use fizzy bath bombs with the jets. They can clog and cause an expensive repair. The post Bath Bombs (Lavender Lemon) appeared first on The Happy Housewife :: Home Management. Related Stories DIY Flag Photo Collage Frame How to Make a Thankful Tree Vanilla Body Butter The post Bath Bombs (Lavender Lemon) appeared first on The Happy Housewife™.
Paleo Chocolate Cupcake
- Desserts
- FeedSplice by FeedBlitz
- Paleo
Love cupcakes but want a paleo, grain free version? This paleo chocolate cupcake is delicious, moist, and grain free! You don’t have to ruin your paleo diet for the next celebration with these cupcakes.
I am always striving to sneak some healthier foods into my kids’ treats. Until now the paleo chocolate cupcake had been a work in progress. As I have gained more experience working with these flours, I learned some of their unique traits and needs. However, I finally figured out how to create a lovely moist crumb that I so adore! Who doesn’t love a crumbly chocolate cupcake?
When I was young, my grandma used to take a box mix of cake, and use a whole can of pears as part of the liquid. I didn’t know why, but that cake was always one of my favorites as it was so deliciously moist! I have since learned that pureed fruits and vegetables can add that moisture into any baked good.
I am not sure why I didn’t think of it before, but I finally decided to use some applesauce as part of the liquid ingredients to create a really moist cake, and it worked beautifully.
I have a hunch that other pureed fruits and vegetables would work too, I just have not tested them.
We have several frostings we rotate though….but you can top these beauties with any favorite frosting. For this simple frosting, I melted some dark chocolate and butter and added a few splashes of milk to thin and sea salt and vanilla for flavor. We also love traditional buttercream, and chocolate avocado frosting as well!
If you are looking for other chocolate paleo treats, consider trying my Chocolate Hemp Zucchini Bread….a crowd favorite!!
Paleo Chocolate CupcakesDeliciously moist and crumbly paleo chocolate cupcake. You won't even know it's grain free!
- 1 cup almond flour
- 1/2 cup sifted cocoa powder
- 1/2 cup tapioca flour
- 2 Tablespoons coconut flour
- 2 teaspoons baking powder
- 1/2 teaspoon sea salt
- 1/2 cup coconut oil or butter (melted)
- 1/2 cup honey
- 1/2 cup palm sugar (or any granulated sugar of choice, may add more to taste as needed)
- 1/2 cup applesauce
- 3 eggs
- 1 tablespoon vanilla extract
- Preheat oven to 350 degrees, prepare a 12 space muffin pan
- In the bowl of a mixer, mix all dry ingredients.
- In a glass measuring cup, mix all the remaining ingredients and pour into the dry mix. Mix well, beating for a couple of minutes.
- Evenly divide the batter, filling about 3/4 full.
- Bake in a preheated oven for 12-15 minutes until just set. DO NOT OVER-BAKE!
- Once cool, top with your desired frosting, or enjoy as is!
Watch these cupcakes carefully in the oven. Do not over bake.
The post Paleo Chocolate Cupcake appeared first on The Happy Housewife™ :: Cooking.
Related StoriesThe post Paleo Chocolate Cupcake appeared first on The Happy Housewife™.